Welcome to the Redis documentation.
This is the multi-page printable view of this section. Click here to print.
Documentation
- 1: Introduction to Redis
- 1.1: Who's using Redis?
- 1.2: Redis open source governance
- 1.3: Redis release cycle
- 1.4: Redis sponsors
- 1.5: Redis license
- 1.6: Redis trademark guidelines
- 2: Getting started with Redis
- 2.1: Installing Redis
- 2.1.1: Install Redis on Linux
- 2.1.2: Install Redis on macOS
- 2.1.3: Install Redis on Windows
- 2.1.4: Install Redis from Source
- 2.2: Redis FAQ
- 3: Clients
- 4: Libraries
- 5: Tools
- 6: Modules
- 7: The Redis manual
- 7.1: Redis administration
- 7.2: Redis CLI
- 7.3: Client-side caching in Redis
- 7.4: Redis configuration
- 7.5: Redis data types
- 7.5.1: Data types tutorial
- 7.5.2: Redis streams
- 7.6: Key eviction
- 7.7: High availability with Redis Sentinel
- 7.8: Redis keyspace notifications
- 7.9: Redis persistence
- 7.10: Redis pipelining
- 7.11: Redis programmability
- 7.11.1: Redis functions
- 7.11.2: Scripting with Lua
- 7.11.3: Redis Lua API reference
- 7.11.4: Debugging Lua scripts in Redis
- 7.12: Redis Pub/Sub
- 7.13: Redis replication
- 7.14: Scaling with Redis Cluster
- 7.15: Redis security
- 7.16: Transactions
- 7.17: Troubleshooting Redis
- 8: Redis reference
- 8.1: ARM support
- 8.2: Redis client handling
- 8.3: Redis cluster specification
- 8.4: Redis command arguments
- 8.5: Command key specifications
- 8.6: Redis command tips
- 8.7: Debugging
- 8.8: Redis and the Gopher protocol
- 8.9: Redis internals
- 8.9.1: Event library
- 8.9.2: String internals
- 8.9.3: Virtual memory (deprecated)
- 8.9.4: Redis design draft #2 (historical)
- 8.10: Redis modules API
- 8.10.1: Modules API reference
- 8.10.2: Redis modules and blocking commands
- 8.10.3: Modules API for native types
- 8.11: Optimizing Redis
- 8.11.1: Redis benchmark
- 8.11.2: Redis CPU profiling
- 8.11.3: Diagnosing latency issues
- 8.11.4: Redis latency monitoring
- 8.11.5: Memory optimization
- 8.12: Redis programming patterns
- 8.12.1: Bulk loading
- 8.12.2: Distributed Locks with Redis
- 8.12.3: Secondary indexing
- 8.12.4: Redis patterns example
- 8.13: RESP protocol spec
- 8.14: Redis signal handling
- 8.15: Sentinel client spec
- 9: Redis Stack
- 9.1: Get started with Redis Stack
- 9.1.1: Install Redis Stack
- 9.1.1.1: Install Redis Stack with binaries
- 9.1.1.2: Run Redis Stack on Docker
- 9.1.1.3: Install Redis Stack on Linux
- 9.1.1.4: Install Redis Stack on macOS
- 9.1.2: Redis Stack clients
- 9.1.3: Redis Stack tutorials
- 9.1.3.1: Redis OM .NET
- 9.1.3.2: Redis OM for Node.js
- 9.1.3.3: Redis OM Python
- 9.1.3.4: Redis OM Spring
- 9.2: RedisInsight
- 9.3: RediSearch
- 9.3.1: Commands
- 9.3.2: Quick start
- 9.3.3: Configuration
- 9.3.4: Developer notes
- 9.3.5: Client Libraries
- 9.3.6: Administration Guide
- 9.3.6.1: General Administration
- 9.3.6.2: Upgrade to 2.0
- 9.3.7: Reference
- 9.3.7.1: Query syntax
- 9.3.7.2: Stop-words
- 9.3.7.3: Aggregations
- 9.3.7.4: Tokenization
- 9.3.7.5: Sorting
- 9.3.7.6: Tags
- 9.3.7.7: Highlighting
- 9.3.7.8: Scoring
- 9.3.7.9: Extensions
- 9.3.7.10: Stemming
- 9.3.7.11: Synonym
- 9.3.7.12: Payload
- 9.3.7.13: Spellchecking
- 9.3.7.14: Phonetic
- 9.3.7.15: Vector similarity
- 9.3.8: Design Documents
- 9.3.8.1: Internal design
- 9.3.8.2: Technical overview
- 9.3.8.3: Garbage collection
- 9.3.8.4: Document Indexing
- 9.3.9: Indexing JSON documents
- 9.3.10: Chinese
- 9.4: RedisJSON
- 9.4.1: Commands
- 9.4.2: Search/Indexing JSON documents
- 9.4.3: Path
- 9.4.4: Client Libraries
- 9.4.5: Performance
- 9.4.6: RedisJSON RAM Usage
- 9.4.7: Developer notes
- 9.5: RedisGraph
- 9.5.1: Commands
- 9.5.2: RedisGraph Client Libraries
- 9.5.3: Run-time Configuration
- 9.5.4: RedisGraph: A High Performance In-Memory Graph Database
- 9.5.4.1: Technical specification for writing RedisGraph client libraries
- 9.5.4.2: RedisGraph Result Set Structure
- 9.5.4.3: Implementation details for the GRAPH.BULK endpoint
- 9.5.5: RedisGraph Data Types
- 9.5.6: Cypher Coverage
- 9.5.7: References
- 9.5.8: Known limitations
- 9.6: RedisTimeSeries
- 9.6.1: Commands
- 9.6.2: Quickstart
- 9.6.3: Configuration
- 9.6.4: Development
- 9.6.5: Clients
- 9.6.6: Reference
- 9.7: RedisBloom
- 9.7.1: Commands
- 9.7.2: Quick start
- 9.7.3: Client Libraries
- 9.7.4: Configuration
- 9.8: Redis Stack License
1 - Introduction to Redis
Learn about the Redis open source project
Redis is an open source (BSD licensed), in-memory data structure store used as a database, cache, message broker, and streaming engine. Redis provides data structures such as strings, hashes, lists, sets, sorted sets with range queries, bitmaps, hyperloglogs, geospatial indexes, and streams. Redis has built-in replication, Lua scripting, LRU eviction, transactions, and different levels of on-disk persistence, and provides high availability via Redis Sentinel and automatic partitioning with Redis Cluster.
You can run atomic operations on these types, like appending to a string; incrementing the value in a hash; pushing an element to a list; computing set intersection, union and difference; or getting the member with highest ranking in a sorted set.
To achieve top performance, Redis works with an in-memory dataset. Depending on your use case, Redis can persist your data either by periodically dumping the dataset to disk or by appending each command to a disk-based log. You can also disable persistence if you just need a feature-rich, networked, in-memory cache.
Redis supports asynchronous replication, with fast non-blocking synchronization and auto-reconnection with partial resynchronization on net split.
Redis also includes:
- Transactions
- Pub/Sub
- Lua scripting
- Keys with a limited time-to-live
- LRU eviction of keys
- Automatic failover
You can use Redis from most programming languages.
Redis is written in ANSI C and works on most POSIX systems like Linux, *BSD, and Mac OS X, without external dependencies. Linux and OS X are the two operating systems where Redis is developed and tested the most, and we recommend using Linux for deployment. Redis may work in Solaris-derived systems like SmartOS, but support is best effort. There is no official support for Windows builds.
1.1 - Who's using Redis?
Select list of organizations running Redis in production
A list of well known companies using Redis:
And many others! techstacks.io maintains a list of popular sites using Redis.
1.2 - Redis open source governance
Governance model for the Redis open source project
From 2009-2020, Salvatore Sanfilippo built, led, and maintained the Redis open source project. During this time, Redis had no formal governance structure, operating primarily as a BDFL-style project.
As Redis grew, matured, and expanded its user base, it became increasingly important to form a sustainable structure for its ongoing development and maintenance. Salvatore and the core Redis contributors wanted to ensure the project’s continuity and reflect its larger community. With this in mind, a new governance structure was adopted.
Current governance structure
Starting on June 30, 2020, Redis adopted a light governance model that matches the current size of the project and minimizes the changes from its earlier model. The governance model is intended to be a meritocracy, aiming to empower individuals who demonstrate a long-term commitment and make significant contributions.
The Redis core team
Salvatore Sanfilippo named two successors to take over and lead the Redis project: Yossi Gottlieb (yossigo) and Oran Agra (oranagra)
With the backing and blessing of Redis Ltd., we took this opportunity to create a more open, scalable, and community-driven “core team” structure to run the project. The core team consists of members selected based on demonstrated, long-term personal involvement and contributions.
The current core team members are:
- Project Lead: Yossi Gottlieb (yossigo) from Redis Ltd.
- Project Lead: Oran Agra (oranagra) from Redis Ltd.
- Community Lead: Itamar Haber (itamarhaber) from Redis Ltd.
- Member: Zhao Zhao (soloestoy) from Alibaba
- Member: Madelyn Olson (madolson) from Amazon Web Services
The Redis core team members serve the Redis open source project and community. They are expected to set a good example of behavior, culture, and tone in accordance with the adopted Code of Conduct. They should also consider and act upon the best interests of the project and the community in a way that is free from foreign or conflicting interests.
The core team will be responsible for the Redis core project, which is the part of Redis that is hosted in the main Redis repository and is BSD licensed. It will also aim to maintain coordination and collaboration with other projects that make up the Redis ecosystem, including Redis clients, satellite projects, major middleware that relies on Redis, etc.
Roles and responsibilities
The core team has the following remit:
- Managing the core Redis code and documentation
- Managing new Redis releases
- Maintaining a high-level technical direction/roadmap
- Providing a fast response, including fixes/patches, to address security vulnerabilities and other major issues
- Project governance decisions and changes
- Coordination of Redis core with the rest of the Redis ecosystem
- Managing the membership of the core team
The core team aims to form and empower a community of contributors by further delegating tasks to individuals who demonstrate commitment, know-how, and skills. In particular, we hope to see greater community involvement in the following areas:
- Support, troubleshooting, and bug fixes of reported issues
- Triage of contributions/pull requests
Decision making
- Normal decisions will be made by core team members based on a lazy consensus approach: each member may vote +1 (positive) or -1 (negative). A negative vote must include thorough reasoning and better yet, an alternative proposal. The core team will always attempt to reach a full consensus rather than a majority. Examples of normal decisions:
- Day-to-day approval of pull requests and closing issues
- Opening new issues for discussion
- Major decisions that have a significant impact on the Redis architecture, design, or philosophy as well as core-team structure or membership changes should preferably be determined by full consensus. If the team is not able to achieve a full consensus, a majority vote is required. Examples of major decisions:
- Fundamental changes to the Redis core
- Adding a new data structure
- Creating a new version of RESP (Redis Serialization Protocol)
- Changes that affect backward compatibility
- Adding or changing core team members
- Project leads have a right to veto major decisions
Core team membership
- The core team is not expected to serve for life, however, long-term participation is desired to provide stability and consistency in the Redis programming style and the community.
- If a core-team member whose work is funded by Redis Ltd. must be replaced, the replacement will be designated by Redis Ltd. after consultation with the remaining core-team members.
- If a core-team member not funded by Redis Ltd. will no longer participate, for whatever reason, the other team members will select a replacement.
Community forums and communications
We want the Redis community to be as welcoming and inclusive as possible. To that end, we have adopted a Code of Conduct that we ask all community members to read and observe.
We encourage that all significant communications will be public, asynchronous, archived, and open for the community to actively participate in using the channels described here. The exception to that is sensitive security issues that require resolution prior to public disclosure.
To contact the core team about sensitive matters, such as misconduct or security issues, please email redis@redis.io.
New Redis repository and commits approval process
The Redis core source repository is hosted under https://github.com/redis/redis. Our target is to eventually host everything (the Redis core source and other ecosystem projects) under the Redis GitHub organization (https://github.com/redis). Commits to the Redis source repository will require code review, approval of at least one core-team member who is not the author of the commit, and no objections.
Project and development updates
Stay connected to the project and the community! For project and community updates, follow the project channels. Development announcements will be made via the Redis mailing list.
Updates to these governance rules
Any substantial changes to these rules will be treated as a major decision. Minor changes or ministerial corrections will be treated as normal decisions.
1.3 - Redis release cycle
How are new versions of Redis released?
Redis is system software and a type of system software that holds user data, so it is among the most critical pieces of a software stack.
For this reason, Redis' release cycle is such that it ensures highly-stable releases, even at the cost of slower cycles.
New releases are published in the Redis GitHub repository and are also available for download. Announcements are sent to the Redis mailing list and by @redisfeed on Twitter.
Release cycle
A given version of Redis can be at three different levels of stability:
- Unstable
- Release Candidate
- Stable
Unstable tree
The unstable version of Redis is located in the unstable branch in the
Redis GitHub repository.
This branch is the source tree where most of the new features are under
development. unstable is not considered production-ready: it may contain
critical bugs, incomplete features, and is potentially unstable.
However, we try hard to make sure that even the unstable branch is usable most of the time in a development environment without significant issues.
Release candidate
New minor and major versions of Redis begin as forks of the unstable branch.
The forked branch's name is the target release
For example, when Redis 6.0 was released as a release candidate, the unstable
branch was forked into the 6.0 branch. The new branch is the release
candidate (RC) for that version.
Bug fixes and new features that can be stabilized during the release's time
frame are committed to the unstable branch and backported to the release
candidate branch. The unstable branch may include additional work that is not
a part of the release candidate and scheduled for future releases.
The first release candidate, or RC1, is released once it can be used for development purposes and for testing the new version. At this stage, most of the new features and changes the new version brings are ready for review, and the release's purpose is collecting the public's feedback.
Subsequent release candidates are released every three weeks or so, primarily for fixing bugs. These may also add new features and introduce changes, but at a decreasing rate and decreasing potential risk towards the final release candidate.
Stable tree
Once development has ended and the frequency of critical bug reports for the release candidate wanes, it is ready for the final release. At this point, the release is marked as stable and is released with "0" as its patch-level version.
Versioning
Stable releases liberally follow the usual major.minor.patch semantic
versioning schema. The primary goal is to provide explicit guarantees regarding
backward compatibility.
Patch-Level versions
Patches primarily consist of bug fixes and very rarely introduce any compatibility issues.
Upgrading from a previous patch-level version is almost always safe and seamless.
New features and configuration directives may be added, or default values changed, as long as these don’t carry significant impacts or introduce operations-related issues.
Minor versions
Minor versions usually deliver maturity and extended functionality.
Upgrading between minor versions does not introduce any application-level compatibility issues.
Minor releases may include new commands and data types that introduce operations-related incompatibilities, including changes in data persistence format and replication protocol.
Major versions
Major versions introduce new capabilities and significant changes.
Ideally, these don't introduce application-level compatibility issues.
Release schedule
A new major version is planned for release once a year.
Generally, every major release is followed by a minor version after six months.
Patches are released as needed to fix high-urgency issues, or once a stable version accumulates enough fixes to justify it.
For contacting the core team on sensitive matters and security issues, please email redis@redis.io.
Support
As a rule, older versions are not supported as we try very hard to make the Redis API mostly backward compatible.
Upgrading to newer versions is the recommended approach and is usually trivial.
The latest stable release is always fully supported and maintained.
Two additional versions receive maintenance only, meaning that only fixes for critical bugs and major security issues are committed and released as patches:
- The previous minor version of the latest stable release.
- The previous stable major release.
For example, consider the following hypothetical versions: 1.2, 2.0, 2.2, 3.0, 3.2.
When version 2.2 is the latest stable release, both 2.0 and 1.2 are maintained.
Once version 3.0.0 replaces 2.2 as the latest stable, versions 2.0 and 2.2 are maintained, whereas version 1.x reaches its end of life.
This process repeats with version 3.2.0, after which only versions 2.2 and 3.0 are maintained.
The above are guidelines rather than rules set in stone and will not replace common sense.
1.4 - Redis sponsors
Current and former Redis sponsors
From 2015 to 2020, Salvatore Sanfilippo's work on Redis was sponsored by Redis Ltd. Since June 2020, Redis Ltd. has sponsored the governance of Redis. Redis Ltd. also sponsors the hosting and maintenance of redis.io.
Past sponsorships:
- The Shuttleworth Foundation has donated 5000 USD to the Redis project in form of a flash grant.
- From May 2013 to June 2015, the work Salvatore Sanfilippo did to develop Redis was sponsored by Pivotal.
- Before May 2013, the project was sponsored by VMware with the work of Salvatore Sanfilippo and Pieter Noordhuis.
- VMware and later Pivotal provided a 24 GB RAM workstation for Salvatore to run the Redis CI test and other long running tests. Later, Salvatore equipped the server with an SSD drive in order to test in the same hardware with rotating and flash drives.
- Linode, in January 2010, provided virtual machines for Redis testing in a virtualized environment.
- Slicehost, January 2010, provided Virtual Machines for Redis testing in a virtualized environment.
- Citrusbyte, in December 2009, contributed part of Virtual Memory implementation.
- Hitmeister, in December 2009, contributed part of Redis Cluster.
- Engine Yard, in December 2009, contributed blocking POP (BLPOP) and part of the Virtual Memory implementation.
Also thanks to the following people or organizations that donated to the Project:
- Emil Vladev
- Brad Jasper
- Mrkris
The Redis community is grateful to Redis Ltd., Pivotal, VMware and to the other companies and people who have donated to the Redis project. Thank you.
redis.io
Citrusbyte sponsored the creation of the official Redis logo (designed by Carlos Prioglio) and transferred its copyright to Salvatore Sanfilippo.
They also sponsored the initial implementation of this site by Damian Janowski and Michel Martens.
The redis.io domain was donated for a few years to the project by I Want My
Name.
1.5 - Redis license
Redis license and trademark information
Redis is open source software released under the terms of the three clause BSD license. Most of the Redis source code was written and is copyrighted by Salvatore Sanfilippo and Pieter Noordhuis. A list of other contributors can be found in the git history.
The Redis trademark and logo are owned by Redis Ltd. and can be used in accordance with the Redis Trademark Guidelines.
Three clause BSD license
Every file in the Redis distribution, with the exceptions of third party files specified in the list below, contain the following license:
Redistribution and use in source and binary forms, with or without modification, are permitted provided that the following conditions are met:
Redistributions of source code must retain the above copyright notice, this list of conditions and the following disclaimer.
Redistributions in binary form must reproduce the above copyright notice, this list of conditions and the following disclaimer in the documentation and/or other materials provided with the distribution.
Neither the name of Redis nor the names of its contributors may be used to endorse or promote products derived from this software without specific prior written permission.
THIS SOFTWARE IS PROVIDED BY THE COPYRIGHT HOLDERS AND CONTRIBUTORS "AS IS" AND ANY EXPRESS OR IMPLIED WARRANTIES, INCLUDING, BUT NOT LIMITED TO, THE IMPLIED WARRANTIES OF MERCHANTABILITY AND FITNESS FOR A PARTICULAR PURPOSE ARE DISCLAIMED. IN NO EVENT SHALL THE COPYRIGHT OWNER OR CONTRIBUTORS BE LIABLE FOR ANY DIRECT, INDIRECT, INCIDENTAL, SPECIAL, EXEMPLARY, OR CONSEQUENTIAL DAMAGES (INCLUDING, BUT NOT LIMITED TO, PROCUREMENT OF SUBSTITUTE GOODS OR SERVICES; LOSS OF USE, DATA, OR PROFITS; OR BUSINESS INTERRUPTION) HOWEVER CAUSED AND ON ANY THEORY OF LIABILITY, WHETHER IN CONTRACT, STRICT LIABILITY, OR TORT (INCLUDING NEGLIGENCE OR OTHERWISE) ARISING IN ANY WAY OUT OF THE USE OF THIS SOFTWARE, EVEN IF ADVISED OF THE POSSIBILITY OF SUCH DAMAGE.
Third-party files and licenses
Redis uses source code from third parties. All this code contains a BSD or BSD-compatible license. The following is a list of third-party files and information about their copyright.
Redis uses the LHF compression library. LibLZF is copyright Marc Alexander Lehmann and is released under the terms of the two-clause BSD license.
Redis uses the
sha1.cfile that is copyright by Steve Reid and released under the public domain. This file is extremely popular and used among open source and proprietary code.When compiled on Linux Redis uses the Jemalloc allocator, that is copyright by Jason Evans, Mozilla Foundation and Facebook, Inc and is released under the two-clause BSD license.
Inside Jemalloc the file
pprofis copyright Google Inc and released under the three-clause BSD license.Inside Jemalloc the files
inttypes.h,stdbool.h,stdint.h,strings.hunder themsvc_compatdirectory are copyright Alexander Chemeris and released under the three-clause BSD license.The libraries hiredis and linenoise also included inside the Redis distribution are copyright Salvatore Sanfilippo and Pieter Noordhuis and released under the terms respectively of the three-clause BSD license and two-clause BSD license.
1.6 - Redis trademark guidelines
How can the Redis trademarks be used?
OPEN SOURCE LICENSE VS. TRADEMARKS. The three-clause BSD license gives you the right to redistribute and use the software in source and binary forms, with or without modification, under certain conditions. However, open source licenses like the three-clause BSD license do not address trademarks. Redis trademarks and brands need to be used in a way consistent with trademark law, and that is why we have prepared this policy – to help you understand what branding is allowed or required when using our software.
PURPOSE. To outline the policy and guidelines for using the Redis trademark (“Mark”) and logo (“Logo”).
WHY IS THIS IMPORTANT? The Mark and Logo are symbols of the quality and community support associated with the open source Redis. Trademarks protect not only its owners, but its users and the entire open source community. Our community members need to know that they can rely on the quality represented by the brand. No one should use the Mark or Logo in any way that misleads anyone, either directly or by omission, or in any way that is likely to confuse or take advantage of the community, or constitutes unfair competition. For example, you cannot say you are distributing Redis software when you are distributing a modified version of Redis open source, because people will be confused when they are not getting the same features and functionality they would get if they downloaded the software directly from Redis, or will think that the modified software is endorsed or sponsored by us or the community. You also cannot use the Mark or Logo on your website or in connection with any services in a way that suggests that your website is an official Redis website or service, or that suggests that we endorse your website or services.
PROPER USE OF THE REDIS TRADEMARKS AND LOGO. You may do any of the following:
- a. When you use an unaltered, unmodified copy of open source Redis downloaded from https://redis.io (the “Software”) as a data source for your application, you may use the Mark and Logo to identify your use. The open source Redis software combined with, or integrated into, any other software program, including but not limited to automation software for offering Redis as a cloud service or orchestration software for offering Redis in containers is considered “modified” Redis software and does not entitle you to use the Mark or the Logo, except in a case of nominative use, as described below. Integrating the Software with other software or service can introduce performance or quality control problems that can devalue the goodwill in the Redis brand and we want to be sure that such problems do not confuse users as to the quality of the product.
- b. The Software is developed by and for the Redis community. If you are engaged in community advocacy, you can use the Mark but not the Logo in the context of showing support for the open source Redis project, provided that:
- i. The Mark is used in a manner consistent with this policy;
- ii. There is no commercial purpose behind the use and you are not offering Redis commercially under the same domain name;
- iii. There is no suggestion that you are the creator or source of Redis, or that your project is approved, sponsored, or affiliated with us or the community; and
- iv. You must include attribution according to section 6.a. below.
- c. Nominative Use: Trademark law permits third parties the use of a mark to identify the trademark holder’s product or service so long as such use is not likely to cause unnecessary consumer or public confusion. This is referred to as a nominative or fair use. When you distribute, or offer an altered, modified or combined copy of the Software, such as in the case of a cloud service or a container service, you may engage in “nominative use” of the Mark, but this does not allow you to use the Logo.
- d. Examples of Nominative Use:
- i. Offering an XYZ software, which is an altered, modified or combined copy of the open source Redis software, including but not limited to offering Redis as a cloud service or as a container service, and while fully complying with the open source Redis API - you may only name it "XYZ for Redis®" or state that "XYZ software is compatible with the Redis® API". No other term or description of your software is allowed.
- ii. Offering an ABC application, which uses an altered, modified or combined copy of the open source Redis software as a data source, including but not limited to using Redis as a cloud service or a container service, and while the modified Redis fully complies with the open source Redis API - you may only state that "ABC application is using XYZ for Redis®", or "ABC application is using a software which is compatible with the Redis® API". No other term or description of your application is allowed.
- iii. If, however, the offered XYZ software, or service based thereof, or application ABC uses an altered, modified or combined copy of the open source Redis software that does not fully comply with the open source Redis API - you may not use the Mark and Logo at all.
- e. In any use (or nominative use) of the Mark or the Logo as per the above, you should comply with all the provisions of Section 6 (General Use).
IMPROPER USE OF THE REDIS TRADEMARKS AND LOGOS. Any use of the Mark or Logo other than as expressly described as permitted herein is not permitted because we believe that it would likely cause impermissible public confusion. Use of the Mark that we will likely consider infringing without permission for use include:
- a. Entity Names. You may not form a company, use a company name, or create a software product or service name that includes the Mark or implies any that such company is the source or sponsor of Redis. If you wish to form an entity for a user or developer group, please contact us and we will be glad to discuss a license for a suitable name;
- b. Class or Quality. You may not imply that you are providing a class or quality of Redis (e.g., "enterprise-class" or "commercial quality" or “fully managed”) in a way that implies Redis is not of that class, grade or quality, nor that other parties are not of that class, grade, or quality;
- c. False or Misleading Statements. You may not make false or misleading statements regarding your use of Redis (e.g., "we wrote the majority of the code" or "we are major contributors" or "we are committers");
- d. Domain Names and Subdomains. You must not use Redis or any confusingly similar phrase in a domain name or subdomain. For instance “www.Redishost.com” is not allowed. If you wish to use such a domain name for a user or developer group, please contact us and we will be glad to discuss a license for a suitable domain name. Because of the many persons who, unfortunately, seek to spoof, swindle or deceive the community by using confusing domain names, we must be very strict about this rule;
- e. Websites. You must not use our Mark or Logo on your website in a way that suggests that your website is an official website or that we endorse your website;
- f. Merchandise. You must not manufacture, sell or give away merchandise items, such as T-shirts and mugs, bearing the Mark or Logo, or create any mascot for Redis. If you wish to use the Mark or Logo for a user or developer group, please contact us and we will be glad to discuss a license to do this;
- g. Variations, takeoffs or abbreviations. You may not use a variation of the Mark for any purpose. For example, the following are not acceptable:
- i. Red;
- ii. MyRedis; and
- iii. RedisHost.
- h. Rebranding. You may not change the Mark or Logo on a redistributed (unmodified) Software to your own brand or logo. You may not hold yourself out as the source of the Redis software, except to the extent you have modified it as allowed under the three-clause BSD license, and you make it clear that you are the source only of the modification;
- i. Combination Marks. Do not use our Mark or Logo in combination with any other marks or logos. For example Foobar Redis, or the name of your company or product typeset to look like the Redis logo; and
- j. Web Tags. Do not use the Mark in a title or metatag of a web page to influence search engine rankings or result listings, rather than for discussion or advocacy of the Redis project.
GENERAL USE INFORMATION.
- a. Attribution. Any permitted use of the Mark or Logo, as indicated above, should comply with the following provisions:
- i. You should add the R mark (®) and an asterisk (
*) to the first mention of the word "Redis" as part of or in connection with a product name; - ii. Whenever "Redis®
*" is shown - add the following legend (with an asterisk) in a noticeable and readable format: "*Redis is a trademark of Redis Ltd. Any rights therein are reserved to Redis Ltd. Any use by<company XYZ>is for referential purposes only and does not indicate any sponsorship, endorsement or affiliation between Redis and<company XYZ>"; and - iii. Sections i. and ii. above apply to any appearance of the word "Redis" in: (a) any web page, gated or un-gated; (b) any marketing collateral, white paper, or other promotional material, whether printed or electronic; and (c) any advertisement, in any format.
- i. You should add the R mark (®) and an asterisk (
- b. Capitalization. Always distinguish the Mark from surrounding text with at least initial capital letters or in all capital letters, (e.g., as Redis or REDIS).
- c. Adjective. Always use the Mark as an adjective modifying a noun, such as “the Redis software.”
- d. Do not make any changes to the Logo. This means you may not add decorative elements, change the colors, change the proportions, distort it, add elements or combine it with other logos.
- a. Attribution. Any permitted use of the Mark or Logo, as indicated above, should comply with the following provisions:
NOTIFY US OF ABUSE. Do not make any changes to the Logo. This means you may not add decorative elements, change the colors, change the proportions, distort it, add elements or combine it with other logos.
MORE QUESTIONS? If you have questions about this policy, or wish to request a license for any uses that are not specifically authorized in this policy, please contact us at legal@redis.com.
2 - Getting started with Redis
How to get up and running with Redis
This is a guide to getting started with Redis. You'll learn how to install, run, and experiment with the Redis server process.
Install Redis
How you install Redis depends on your operating system. See the guide below that best fits your needs:
Once you have Redis up and running, and can connect using redis-cli, you can continue with the steps below.
Exploring Redis with the CLI
External programs talk to Redis using a TCP socket and a Redis specific protocol. This protocol is implemented in the Redis client libraries for the different programming languages. However to make hacking with Redis simpler Redis provides a command line utility that can be used to send commands to Redis. This program is called redis-cli.
The first thing to do in order to check if Redis is working properly is sending a PING command using redis-cli:
$ redis-cli ping
PONG
Running redis-cli followed by a command name and its arguments will send this command to the Redis instance running on localhost at port 6379. You can change the host and port used by redis-cli - just try the --help option to check the usage information.
Another interesting way to run redis-cli is without arguments: the program will start in interactive mode. You can type different commands and see their replies.
$ redis-cli
redis 127.0.0.1:6379> ping
PONG
redis 127.0.0.1:6379> set mykey somevalue
OK
redis 127.0.0.1:6379> get mykey
"somevalue"
At this point you are able to talk with Redis. It is the right time to pause a bit with this tutorial and start the fifteen minutes introduction to Redis data types in order to learn a few Redis commands. Otherwise if you already know a few basic Redis commands you can keep reading.
Securing Redis
By default Redis binds to all the interfaces and has no authentication at all. If you use Redis in a very controlled environment, separated from the external internet and in general from attackers, that's fine. However if an unhardened Redis is exposed to the internet, it is a big security concern. If you are not 100% sure your environment is secured properly, please check the following steps in order to make Redis more secure, which are enlisted in order of increased security.
- Make sure the port Redis uses to listen for connections (by default 6379 and additionally 16379 if you run Redis in cluster mode, plus 26379 for Sentinel) is firewalled, so that it is not possible to contact Redis from the outside world.
- Use a configuration file where the
binddirective is set in order to guarantee that Redis listens on only the network interfaces you are using. For example only the loopback interface (127.0.0.1) if you are accessing Redis just locally from the same computer, and so forth. - Use the
requirepassoption in order to add an additional layer of security so that clients will require to authenticate using theAUTHcommand. - Use spiped or another SSL tunneling software in order to encrypt traffic between Redis servers and Redis clients if your environment requires encryption.
Note that a Redis instance exposed to the internet without any security is very simple to exploit, so make sure you understand the above and apply at least a firewall layer. After the firewall is in place, try to connect with redis-cli from an external host in order to prove yourself the instance is actually not reachable.
Using Redis from your application
Of course using Redis just from the command line interface is not enough as the goal is to use it from your application. In order to do so you need to download and install a Redis client library for your programming language. You'll find a full list of clients for different languages in this page.
For instance if you happen to use the Ruby programming language our best advice is to use the Redis-rb client. You can install it using the command gem install redis.
These instructions are Ruby specific but actually many library clients for popular languages look quite similar: you create a Redis object and execute commands calling methods. A short interactive example using Ruby:
>> require 'rubygems'
=> false
>> require 'redis'
=> true
>> r = Redis.new
=> #<Redis client v4.5.1 for redis://127.0.0.1:6379/0>
>> r.ping
=> "PONG"
>> r.set('foo','bar')
=> "OK"
>> r.get('foo')
=> "bar"
Redis persistence
You can learn how Redis persistence works on this page, however what is important to understand for a quick start is that by default, if you start Redis with the default configuration, Redis will spontaneously save the dataset only from time to time (for instance after at least five minutes if you have at least 100 changes in your data), so if you want your database to persist and be reloaded after a restart make sure to call the SAVE command manually every time you want to force a data set snapshot. Otherwise make sure to shutdown the database using the SHUTDOWN command:
$ redis-cli shutdown
This way Redis will make sure to save the data on disk before quitting. Reading the persistence page is strongly suggested in order to better understand how Redis persistence works.
Installing Redis more properly
Running Redis from the command line is fine just to hack a bit or for development. However, at some point you'll have some actual application to run on a real server. For this kind of usage you have two different choices:
- Run Redis using screen.
- Install Redis in your Linux box in a proper way using an init script, so that after a restart everything will start again properly.
A proper install using an init script is strongly suggested. The following instructions can be used to perform a proper installation using the init script shipped with Redis version 2.4 or higher in a Debian or Ubuntu based distribution.
We assume you already copied redis-server and redis-cli executables under /usr/local/bin.
Create a directory in which to store your Redis config files and your data:
  sudo mkdir /etc/redis
  sudo mkdir /var/redis
Copy the init script that you'll find in the Redis distribution under the utils directory into
/etc/init.d. We suggest calling it with the name of the port where you are running this instance of Redis. For example:sudo cp utils/redis_init_script /etc/init.d/redis_6379Edit the init script.
sudo vi /etc/init.d/redis_6379
Make sure to modify REDISPORT accordingly to the port you are using. Both the pid file path and the configuration file name depend on the port number.
Copy the template configuration file you'll find in the root directory of the Redis distribution into
/etc/redis/using the port number as name, for instance:sudo cp redis.conf /etc/redis/6379.confCreate a directory inside
/var/redisthat will work as data and working directory for this Redis instance:sudo mkdir /var/redis/6379Edit the configuration file, making sure to perform the following changes:
- Set daemonize to yes (by default it is set to no).
- Set the pidfile to
/var/run/redis_6379.pid(modify the port if needed). - Change the port accordingly. In our example it is not needed as the default port is already 6379.
- Set your preferred loglevel.
- Set the logfile to
/var/log/redis_6379.log - Set the dir to
/var/redis/6379(very important step!)
Finally add the new Redis init script to all the default runlevels using the following command:
sudo update-rc.d redis_6379 defaults
You are done! Now you can try running your instance with:
sudo /etc/init.d/redis_6379 start
Make sure that everything is working as expected:
- Try pinging your instance with redis-cli.
- Do a test save with
redis-cli saveand check that the dump file is correctly stored into/var/redis/6379/(you should find a file calleddump.rdb). - Check that your Redis instance is correctly logging in the log file.
- If it's a new machine where you can try it without problems make sure that after a reboot everything is still working.
Note: In the above instructions we skipped many Redis configuration parameters that you would like to change, for instance in order to use AOF persistence instead of RDB persistence, or to setup replication, and so forth.
Make sure to read the example redis.conf file (that is heavily commented) and the other documentation you can find in this web site for more information.
2.1 - Installing Redis
Install Redis on Linux, macOS, and Windows
2.1.1 - Install Redis on Linux
How to install Redis on Ubuntu, RHEL, and CentOS
Most major Linux distributions provide packages for Redis.
Install on Ubuntu
You can install recent stable versions of Redis from the official
packages.redis.io APT repository. Add the repository to the apt index, update it, and then install:
curl -fsSL https://packages.redis.io/gpg | sudo gpg --dearmor -o /usr/share/keyrings/redis-archive-keyring.gpg

echo "deb [signed-by=/usr/share/keyrings/redis-archive-keyring.gpg] https://packages.redis.io/deb $(lsb_release -cs) main" | sudo tee /etc/apt/sources.list.d/redis.list

sudo apt-get update
sudo apt-get install redis
Install from Snapcraft
The Snapcraft store provides Redis installation packages for dozens of Linux distributions. For example, here's how to install Redis on CentOS using Snapcraft:
sudo yum install epel-release
sudo yum install snapd
sudo systemctl enable --now snapd.socket
sudo ln -s /var/lib/snapd/snap /snap
sudo snap install redis
2.1.2 - Install Redis on macOS
Use Homebrew to install and start Redis on macOS
This guide shows you how to install Redis on macOS using Homebrew. Homebrew is the easiest way to install Redis on macOS. If you'd prefer to build Redis from the source files on macOS, see [Installing Redis from Source].
Prerequisites
First, make sure you have Homebrew installed. From the terminal, run:
$ brew --versionIf this command fails, you'll need to follow the Homebrew installation instructions.
Installation
From the terminal, run:
brew install redisThis will install Redis on your system.
Starting and stopping Redis in the foreground
To test your Redis installation, you can run the redis-server executable from the command line:
redis-serverIf successful, you'll see the startup logs for Redis, and Redis will be running in the foreground.
To stop Redis, enter Ctrl-C.
Starting and stopping Redis using launchd
As an alternative to running Redis in the foreground, you can also use launchd to start the process in the background:
brew services start redisThis launch Redis and restart it at login. You can check the status of a launchd managed Redis by running the following:
brew services info redisIf the service is running, you'll see output like the following:
redis (homebrew.mxcl.redis)
Running: ✔
Loaded: ✔
User: miranda
PID: 67975
To stop the service, run:
brew services stop redisConnect to Redis
Once Redis is running, you can test it by running redis-cli:
redis-cliThis will open the Redis REPL. Try running some commands:
127.0.0.1:6379> lpush demos redis-macOS-demo
OK
127.0.0.1:6379> rpop demos
"redis-macOS-demo"
Next steps
Once you have a running Redis instance, you may want to:
- Try the Redis CLI tutorial
- Connect using one of the Redis clients
2.1.3 - Install Redis on Windows
Use Redis on Windows for development
Redis is not officially supported on Windows. However, you can install install Redis on Windows for development by the following the instructions below.
To install Redis on Windows, you'll first need to enable WSL2 (Windows Subsystem for Linux). WSL2 lets you run Linux binaries natively on Windows. For this method to work, you'll need to be running Windows 10 version 2004 and higher or Windows 11.
Install or enable WSL2
Microsoft provides detailed instructions for installing WSL. Follow these instructions, and take note of the default Linux distribution it installs. This guide assumes Ubuntu.
Install Redis
Once you're running Ubuntu on Windows, you can install Redis using apt-get:
sudo apt-add-repository ppa:redislabs/redis
sudo apt-get update
sudo apt-get upgrade
sudo apt-get install redis-server
Then start the Redis server like so:
sudo service redis-server startConnect to Redis
You can test that your Redis server is running by connecting with the Redis CLI:
redis-cli
127.0.0.1:6379> ping
PONG
2.1.4 - Install Redis from Source
Compile and install Redis from source
You can compile and install Redis from source on variety of platforms and operating systems including Linux and macOS. Redis has no dependencies other than a C compiler and libc.
Downloading the source files
The Redis source files are available on [this site's Download page]. You can verify the integrity of these downloads by checking them against the digests in the redis-hashes git repository.
To obtain the source files for the latest stable version of Redis from the Redis downloads site, run:
wget https://download.redis.io/redis-stable.tar.gzCompiling Redis
To compile Redis, first the tarball, change to the root directory, and then run make:
tar -xzvf redis-stable.tar.gz
cd redis-stable
make
If the compile succeeds, you'll find several Redis binaries in the src directory, including:
- redis-server: the Redis Server itself
- redis-cli is the command line interface utility to talk with Redis.
To install these binaries in /usr/local/bin, run:
make installStarting and stopping Redis in the foreground
Once installed, you can start Redis by running
redis-serverIf successful, you'll see the startup logs for Redis, and Redis will be running in the foreground.
To stop Redis, enter Ctrl-C.
2.2 - Redis FAQ
Commonly asked questions when getting started with Redis
How is Redis different from other key-value stores?
- Redis has a different evolution path in the key-value DBs where values can contain more complex data types, with atomic operations defined on those data types. Redis data types are closely related to fundamental data structures and are exposed to the programmer as such, without additional abstraction layers.
- Redis is an in-memory but persistent on disk database, so it represents a different trade off where very high write and read speed is achieved with the limitation of data sets that can't be larger than memory. Another advantage of in-memory databases is that the memory representation of complex data structures is much simpler to manipulate compared to the same data structures on disk, so Redis can do a lot with little internal complexity. At the same time the two on-disk storage formats (RDB and AOF) don't need to be suitable for random access, so they are compact and always generated in an append-only fashion (Even the AOF log rotation is an append-only operation, since the new version is generated from the copy of data in memory). However this design also involves different challenges compared to traditional on-disk stores. Being the main data representation on memory, Redis operations must be carefully handled to make sure there is always an updated version of the data set on disk.
What's the Redis memory footprint?
To give you a few examples (all obtained using 64-bit instances):
- An empty instance uses ~ 3MB of memory.
- 1 Million small Keys -> String Value pairs use ~ 85MB of memory.
- 1 Million Keys -> Hash value, representing an object with 5 fields, use ~ 160 MB of memory.
Testing your use case is trivial. Use the redis-benchmark utility to generate random data sets then check the space used with the INFO memory command.
64-bit systems will use considerably more memory than 32-bit systems to store the same keys, especially if the keys and values are small. This is because pointers take 8 bytes in 64-bit systems. But of course the advantage is that you can have a lot of memory in 64-bit systems, so in order to run large Redis servers a 64-bit system is more or less required. The alternative is sharding.
Why does Redis keep its entire dataset in memory?
In the past the Redis developers experimented with Virtual Memory and other systems in order to allow larger than RAM datasets, but after all we are very happy if we can do one thing well: data served from memory, disk used for storage. So for now there are no plans to create an on disk backend for Redis. Most of what Redis is, after all, a direct result of its current design.
If your real problem is not the total RAM needed, but the fact that you need to split your data set into multiple Redis instances, please read the partitioning page in this documentation for more info.
Redis Ltd., the company sponsoring Redis development, has developed a "Redis on Flash" solution that uses a mixed RAM/flash approach for larger data sets with a biased access pattern. You may check their offering for more information, however this feature is not part of the open source Redis code base.
Can you use Redis with a disk-based database?
Yes, a common design pattern involves taking very write-heavy small data in Redis (and data you need the Redis data structures to model your problem in an efficient way), and big blobs of data into an SQL or eventually consistent on-disk database. Similarly sometimes Redis is used in order to take in memory another copy of a subset of the same data stored in the on-disk database. This may look similar to caching, but actually is a more advanced model since normally the Redis dataset is updated together with the on-disk DB dataset, and not refreshed on cache misses.
How can I reduce Redis' overall memory usage?
If you can, use Redis 32 bit instances. Also make good use of small hashes, lists, sorted sets, and sets of integers, since Redis is able to represent those data types in the special case of a few elements in a much more compact way. There is more info in the Memory Optimization page.
What happens if Redis runs out of memory?
Redis has built-in protections allowing the users to set a max limit on memory
usage, using the maxmemory option in the configuration file to put a limit
to the memory Redis can use. If this limit is reached, Redis will start to reply
with an error to write commands (but will continue to accept read-only
commands).
You can also configure Redis to evict keys when the max memory limit is reached. See the [eviction policy docs] for more information on this.
Background saving fails with a fork() error on Linux?
Short answer: echo 1 > /proc/sys/vm/overcommit_memory :)
And now the long one:
The Redis background saving schema relies on the copy-on-write semantic of the fork system call in
modern operating systems: Redis forks (creates a child process) that is an
exact copy of the parent. The child process dumps the DB on disk and finally
exits. In theory the child should use as much memory as the parent being a
copy, but actually thanks to the copy-on-write semantic implemented by most
modern operating systems the parent and child process will share the common
memory pages. A page will be duplicated only when it changes in the child or in
the parent. Since in theory all the pages may change while the child process is
saving, Linux can't tell in advance how much memory the child will take, so if
the overcommit_memory setting is set to zero the fork will fail unless there is
as much free RAM as required to really duplicate all the parent memory pages.
If you have a Redis dataset of 3 GB and just 2 GB of free
memory it will fail.
Setting overcommit_memory to 1 tells Linux to relax and perform the fork in a
more optimistic allocation fashion, and this is indeed what you want for Redis.
A good source to understand how Linux Virtual Memory works and other
alternatives for overcommit_memory and overcommit_ratio is this classic article
from Red Hat Magazine, "Understanding Virtual Memory".
You can also refer to the proc(5) man page for explanations of the
available values.
Are Redis on-disk snapshots atomic?
Yes, the Redis background saving process is always forked when the server is outside of the execution of a command, so every command reported to be atomic in RAM is also atomic from the point of view of the disk snapshot.
How can Redis use multiple CPUs or cores?
It's not very frequent that CPU becomes your bottleneck with Redis, as usually Redis is either memory or network bound. For instance, when using pipelining a Redis instance running on an average Linux system can deliver 1 million requests per second, so if your application mainly uses O(N) or O(log(N)) commands, it is hardly going to use too much CPU.
However, to maximize CPU usage you can start multiple instances of Redis in the same box and treat them as different servers. At some point a single box may not be enough anyway, so if you want to use multiple CPUs you can start thinking of some way to shard earlier.
You can find more information about using multiple Redis instances in the Partitioning page.
As of version 4.0, Redis has started implementing threaded actions. For now this is limited to deleting objects in the background and blocking commands implemented via Redis modules. For subsequent releases, the plan is to make Redis more and more threaded.
What is the maximum number of keys a single Redis instance can hold? What is the maximum number of elements in a Hash, List, Set, and Sorted Set?
Redis can handle up to 2^32 keys, and was tested in practice to handle at least 250 million keys per instance.
Every hash, list, set, and sorted set, can hold 2^32 elements.
In other words your limit is likely the available memory in your system.
Why does my replica have a different number of keys its master instance?
If you use keys with limited time to live (Redis expires) this is normal behavior. This is what happens:
- The primary generates an RDB file on the first synchronization with the replica.
- The RDB file will not include keys already expired in the primary but which are still in memory.
- These keys are still in the memory of the Redis primary, even if logically expired. They'll be considered non-existent, and their memory will be reclaimed later, either incrementally or explicitly on access. While these keys are not logically part of the dataset, they are accounted for in the
INFOoutput and in theDBSIZEcommand. - When the replica reads the RDB file generated by the primary, this set of keys will not be loaded.
Because of this, it's common for users with many expired keys to see fewer keys in the replicas. However, logically, the primary and replica will have the same content.
Where does the name "Redis" come from?
Redis is an acronym that stands for REmote DIctionary Server.
Why did Salvatore Sanfilippo start the Redis project?
Salvatore originally created Redis to scale LLOOGG, a real-time log analysis tool. But after getting the basic Redis server working, he decided to share the work with other people and turn Redis into an open source project.
How is Redis pronounced?
"Redis" (/ˈrɛd-ɪs/) is pronounced like the word "red" plus the word "kiss" without the "k".
3 - Clients
Redis clients
4 - Libraries
Libraries that use Redis
5 - Tools
A list of tools for Redis
6 - Modules
List of Redis modules
7 - The Redis manual
A developer's guide to Redis
7.1 - Redis administration
Advice for configuring and managing Redis in production
Redis setup hints
We suggest deploying Redis using the Linux operating system. Redis is also tested heavily on OS X, and tested from time to time on FreeBSD and OpenBSD systems. However Linux is where we do all the major stress testing, and where most production deployments are running.
Make sure to set the Linux kernel overcommit memory setting to 1. Add
vm.overcommit_memory = 1to/etc/sysctl.conf. Then reboot or run the commandsysctl vm.overcommit_memory=1for this to take effect immediately.Make sure Redis won't be affected by the Linux kernel feature, transparent huge pages, otherwise it will impact greatly both memory usage and latency in a negative way. This is accomplished with the following command:
echo madvise > /sys/kernel/mm/transparent_hugepage/enabled.Make sure to setup swap in your system (we suggest as much as swap as memory). If Linux does not have swap and your Redis instance accidentally consumes too much memory, either Redis will crash when it is out of memory, or the Linux kernel OOM killer will kill the Redis process. When swapping is enabled Redis will work in poorly, but you'll likely notice the latency spikes and do something before it's too late.
Set an explicit
maxmemoryoption limit in your instance to make sure that it will report errors instead of failing when the system memory limit is near to be reached. Note thatmaxmemoryshould be set by calculating the overhead for Redis, other than data, and the fragmentation overhead. So if you think you have 10 GB of free memory, set it to 8 or 9.+ If you are using Redis in a very write-heavy application, while saving an RDB file on disk or rewriting the AOF log, Redis may use up to 2 times the memory normally used. The additional memory used is proportional to the number of memory pages modified by writes during the saving process, so it is often proportional to the number of keys (or aggregate types items) touched during this time. Make sure to size your memory accordingly.Use
daemonize nowhen running under daemontools.Make sure to setup some non-trivial replication backlog, which must be set in proportion to the amount of memory Redis is using. In a 20 GB instance it does not make sense to have just 1 MB of backlog. The backlog will allow replicas to sync with the master instance much more easily.
If you use replication, Redis will need to perform RDB saves even if you have persistence disabled (this doesn't apply to diskless replication). If you don't have disk usage on the master, make sure to enable diskless replication.
If you are using replication, make sure that either your master has persistence enabled, or that it does not automatically restart on crashes. Replicas will try to maintain an exact copy of the master, so if a master restarts with an empty data set, replicas will be wiped as well.
By default, Redis does not require any authentication and listens to all the network interfaces. This is a big security issue if you leave Redis exposed on the internet or other places where attackers can reach it. See for example this attack to see how dangerous it can be. Please check our security page and the quick start for information about how to secure Redis.
See the
LATENCY DOCTORandMEMORY DOCTORcommands to assist in troubleshooting.
Running Redis on EC2
- Use HVM based instances, not PV based instances.
- Don't use old instances families, for example: use m3.medium with HVM instead of m1.medium with PV.
- The use of Redis persistence with EC2 EBS volumes needs to be handled with care since sometimes EBS volumes have high latency characteristics.
- You may want to try the new diskless replication if you have issues when replicas are synchronizing with the master.
Upgrading or restarting a Redis instance without downtime
Redis is designed to be a very long running process in your server.
Many configuration options can be modified without any kind of restart using the CONFIG SET command.
You can also switch from AOF to RDB snapshots persistence, or the other way around, without restarting Redis. Check the output of the CONFIG GET * command for more information.
However from time to time, a restart is mandatory. For example, in order to upgrade the Redis process to a newer version, or when you need to modify some configuration parameter that is currently not supported by the CONFIG command.
The following steps provide a way that is commonly used to avoid any downtime.
Setup your new Redis instance as a replica for your current Redis instance. In order to do so, you need a different server, or a server that has enough RAM to keep two instances of Redis running at the same time.
If you use a single server, make sure that the replica is started in a different port than the master instance, otherwise the replica will not be able to start at all.
Wait for the replication initial synchronization to complete (check the replica's log file).
Using
INFO, make sure the master and replica have the same number of keys. Useredis-clito make sure the replica is working as you wish and is replying to your commands.Allow writes to the replica using CONFIG SET slave-read-only no.
Configure all your clients to use the new instance (the replica). Note that you may want to use the
CLIENT PAUSEcommand to make sure that no client can write to the old master during the switch.Once you are sure that the master is no longer receiving any query (you can check this with the MONITOR command), elect the replica to master using the REPLICAOF NO ONE command, and then shut down your master.
If you are using Redis Sentinel or Redis Cluster, the simplest way to upgrade to newer versions is to upgrade one replica after the other. Then you can perform a manual failover to promote one of the upgraded replicas to master, and finally promote the last replica.
Note that Redis Cluster 4.0 is not compatible with Redis Cluster 3.2 at cluster bus protocol level, so a mass restart is needed in this case. However Redis 5 cluster bus is backward compatible with Redis 4.
7.2 - Redis CLI
Overview of redis-cli, the Redis command line interface
The redis-cli (Redis command line interface) is a terminal program used to send commands to and read replies from the Redis server. It has two main modes: an interactive REPL (Read Eval Print Loop) mode where the user types Redis commands and receives replies, and a command mode where redis-cli is executed with additional arguments and the reply is printed to the standard output.
In interactive mode, redis-cli has basic line editing capabilities to provide a familiar tyPING experience.
There are several options you can use to launch the program in special modes. You can simulate a replica and print the replication stream it receives from the primary, check the latency of a Redis server and display statistics, or request ASCII-art spectrogram of latency samples and frequencies, among many other things.
This guide will cover the different aspects of redis-cli, starting from the simplest and ending with the more advanced features.
Command line usage
To run a Redis command and receive its reply as standard output to the terminal, include the command to execute as separate arguments of redis-cli:
$ redis-cli INCR mycounter
(integer) 7
The reply of the command is "7". Since Redis replies are typed (strings, arrays, integers, nil, errors, etc.), you see the type of the reply between parentheses. This additional information may not be ideal when the output of redis-cli must be used as input of another command or redirected into a file.
redis-cli only shows additional information for human readibility when it detects the standard output is a tty, or terminal. For all other outputs it will auto-enable the raw output mode, as in the following example:
$ redis-cli INCR mycounter > /tmp/output.txt
$ cat /tmp/output.txt
8
Notice that (integer) was omitted from the output since redis-cli detected
the output was no longer written to the terminal. You can force raw output
even on the terminal with the --raw option:
$ redis-cli --raw INCR mycounter
9
You can force human readable output when writing to a file or in
pipe to other commands by using --no-raw.
Host, port, password and database
By default redis-cli connects to the server at the address 127.0.0.1 with port 6379.
You can change this using several command line options. To specify a different host name or an IP address, use the -h option. In order to set a different port, use -p.
$ redis-cli -h redis15.localnet.org -p 6390 PING
PONG
If your instance is password protected, the -a <password> option will
preform authentication saving the need of explicitly using the AUTH command:
$ redis-cli -a myUnguessablePazzzzzword123 PING
PONG
For safety it is strongly advised to provide the password to redis-cli automatically via the
REDISCLI_AUTH environment variable.
Finally, it's possible to send a command that operates on a database number
other than the default number zero by using the -n <dbnum> option:
$ redis-cli FLUSHALL
OK
$ redis-cli -n 1 INCR a
(integer) 1
$ redis-cli -n 1 INCR a
(integer) 2
$ redis-cli -n 2 INCR a
(integer) 1
Some or all of this information can also be provided by using the -u <uri>
option and the URI pattern redis://user:password@host:port/dbnum:
$ redis-cli -u redis://LJenkins:p%40ssw0rd@redis-16379.hosted.com:16379/0 PING
PONG
SSL/TLS
By default, redis-cli uses a plain TCP connection to connect to Redis.
You may enable SSL/TLS using the --tls option, along with --cacert or
--cacertdir to configure a trusted root certificate bundle or directory.
If the target server requires authentication using a client side certificate,
you can specify a certificate and a corresponding private key using --cert and
--key.
Getting input from other programs
There are two ways you can use redis-cli in order to receive input from other
commands via the standard input. One is to use the target payload as the last argument
from stdin. For example, in order to set the Redis key net_services
to the content of the file /etc/services from a local file system, use the -x
option:
$ redis-cli -x SET net_services < /etc/services
OK
$ redis-cli GETRANGE net_services 0 50
"#\n# Network services, Internet style\n#\n# Note that "
In the first line of the above session, redis-cli was executed with the -x option and a file was redirected to the CLI's
standard input as the value to satisfy the SET net_services command phrase. This is useful for scripting.
A different approach is to feed redis-cli a sequence of commands written in a
text file:
$ cat /tmp/commands.txt
SET item:3374 100
INCR item:3374
APPEND item:3374 xxx
GET item:3374
$ cat /tmp/commands.txt | redis-cli
OK
(integer) 101
(integer) 6
"101xxx"
All the commands in commands.txt are executed consecutively by
redis-cli as if they were typed by the user in interactive mode. Strings can be
quoted inside the file if needed, so that it's possible to have single
arguments with spaces, newlines, or other special characters:
$ cat /tmp/commands.txt
SET arg_example "This is a single argument"
STRLEN arg_example
$ cat /tmp/commands.txt | redis-cli
OK
(integer) 25
Continuously run the same command
It is possible to execute a signle command a specified number of times
with a user-selected pause between executions. This is useful in
different contexts - for example when we want to continuously monitor some
key content or INFO field output, or when we want to simulate some
recurring write event, such as pushing a new item into a list every 5 seconds.
This feature is controlled by two options: -r <count> and -i <delay>.
The -r option states how many times to run a command and -i sets
the delay between the different command calls in seconds (with the ability
to specify values such as 0.1 to represent 100 milliseconds).
By default the interval (or delay) is set to 0, so commands are just executed ASAP:
$ redis-cli -r 5 INCR counter_value
(integer) 1
(integer) 2
(integer) 3
(integer) 4
(integer) 5
To run the same command indefinitely, use -1 as the count value.
To monitor over time the RSS memory size it's possible to use the following command:
$ redis-cli -r -1 -i 1 INFO | grep rss_human
used_memory_rss_human:2.71M
used_memory_rss_human:2.73M
used_memory_rss_human:2.73M
used_memory_rss_human:2.73M
... a new line will be printed each second ...
Mass insertion of data using redis-cli
Mass insertion using redis-cli is covered in a separate page as it is a
worthwhile topic itself. Please refer to our mass insertion guide.
CSV output
A CSV (Comma Separated Values) output feature exists within redis-cli to export data from Redis to an external program.
$ redis-cli LPUSH mylist a b c d
(integer) 4
$ redis-cli --csv LRANGE mylist 0 -1
"d","c","b","a"
Note that the --csv flag will only work on a single command, not the entirety of a DB as an export.
Running Lua scripts
The redis-cli has extensive support for using the debugging facility
of Lua scripting, available with Redis 3.2 onwards. For this feature, refer to the Redis Lua debugger documentation.
Even without using the debugger, redis-cli can be used to
run scripts from a file as an argument:
$ cat /tmp/script.lua
return redis.call('SET',KEYS[1],ARGV[1])
$ redis-cli --eval /tmp/script.lua location:hastings:temp , 23
OK
The Redis EVAL command takes the list of keys the script uses, and the
other non key arguments, as different arrays. When calling EVAL you
provide the number of keys as a number.
When calling redis-cli with the --eval option above, there is no need to specify the number of keys
explicitly. Instead it uses the convention of separating keys and arguments
with a comma. This is why in the above call you see location:hastings:temp , 23 as arguments.
So location:hastings:temp will populate the KEYS array, and 23 the ARGV array.
The --eval option is useful when writing simple scripts. For more
complex work, the Lua debugger is recommended. It is possible to mix the two approaches, since the debugger can also execute scripts from an external file.
Interactive mode
We have explored how to use the Redis CLI as a command line program.
This is useful for scripts and certain types of testing, however most
people will spend the majority of time in redis-cli using its interactive
mode.
In interactive mode the user types Redis commands at the prompt. The command is sent to the server, processed, and the reply is parsed back and rendered into a simpler form to read.
Nothing special is needed for running the redis-cliin interactive mode -
just execute it without any arguments
$ redis-cli
127.0.0.1:6379> PING
PONG
The string 127.0.0.1:6379> is the prompt. It displays the connected Redis server instance's hostname and port.
The prompt updates as the connected server changes or when operating on a database different from the database number zero:
127.0.0.1:6379> SELECT 2
OK
127.0.0.1:6379[2]> DBSIZE
(integer) 1
127.0.0.1:6379[2]> SELECT 0
OK
127.0.0.1:6379> DBSIZE
(integer) 503
Handling connections and reconnections
Using the CONNECT command in interactive mode makes it possible to connect
to a different instance, by specifying the hostname and port we want
to connect to:
127.0.0.1:6379> CONNECT metal 6379
metal:6379> PING
PONG
As you can see the prompt changes accordingly when connecting to a different server instance.
If a connection is attempted to an instance that is unreachable, the redis-cli goes into disconnected
mode and attempts to reconnect with each new command:
127.0.0.1:6379> CONNECT 127.0.0.1 9999
Could not connect to Redis at 127.0.0.1:9999: Connection refused
not connected> PING
Could not connect to Redis at 127.0.0.1:9999: Connection refused
not connected> PING
Could not connect to Redis at 127.0.0.1:9999: Connection refused
Generally after a disconnection is detected, redis-cli always attempts to
reconnect transparently; if the attempt fails, it shows the error and
enters the disconnected state. The following is an example of disconnection
and reconnection:
127.0.0.1:6379> INFO SERVER
Could not connect to Redis at 127.0.0.1:6379: Connection refused
not connected> PING
PONG
127.0.0.1:6379>
(now we are connected again)
When a reconnection is performed, redis-cli automatically re-selects the
last database number selected. However, all other states about the
connection is lost, such as within a MULTI/EXEC transaction:
$ redis-cli
127.0.0.1:6379> MULTI
OK
127.0.0.1:6379> PING
QUEUED

( here the server is manually restarted )

127.0.0.1:6379> EXEC
(error) ERR EXEC without MULTI
This is usually not an issue when using the redis-cli in interactive mode for
testing, but this limitation should be known.
Editing, history, completion and hints
Because redis-cli uses the
linenoise line editing library, it
always has line editing capabilities, without depending on libreadline or
other optional libraries.
Command execution history can be accessed in order to avoid retyping commands by pressing the arrow keys (up and down).
The history is preserved between restarts of the CLI, in a file named
.rediscli_history inside the user home directory, as specified
by the HOME environment variable. It is possible to use a different
history filename by setting the REDISCLI_HISTFILE environment variable,
and disable it by setting it to /dev/null.
The redis-cli is also able to perform command-name completion by pressing the TAB
key, as in the following example:
127.0.0.1:6379> Z<TAB>
127.0.0.1:6379> ZADD<TAB>
127.0.0.1:6379> ZCARD<TAB>
Once Redis command name has been entered at the prompt, the redis-cli will display
syntax hints. Like command history, this behavior can be turned on and off via the redis-cli preferences.
Preferences
There are two ways to customize redis-cli behavior. The file .redisclirc
in the home directory is loaded by the CLI on startup. You can override the
file's default location by setting the REDISCLI_RCFILE environment variable to
an alternative path. Preferences can also be set during a CLI session, in which
case they will last only the duration of the session.
To set preferences, use the special :set command. The following preferences
can be set, either by typing the command in the CLI or adding it to the
.redisclirc file:
:set hints- enables syntax hints:set nohints- disables syntax hints
Running the same command N times
It is possible to run the same command multiple times in interactive mode by prefixing the command name by a number:
127.0.0.1:6379> 5 INCR mycounter
(integer) 1
(integer) 2
(integer) 3
(integer) 4
(integer) 5
Showing help about Redis commands
redis-cli provides online help for most Redis commands, using the HELP command. The command can be used
in two forms:
HELP @<category>shows all the commands about a given category. The categories are:@generic@string@list@set@sorted_set@hash@pubsub@transactions@connection@server@scripting@hyperloglog@cluster@geo@stream
HELP <commandname>shows specific help for the command given as argument.
For example in order to show help for the PFADD command, use:
127.0.0.1:6379> HELP PFADD

PFADD key element [element ...]
summary: Adds the specified elements to the specified HyperLogLog.
since: 2.8.9
Note that HELP supports TAB completion as well.
Clearing the terminal screen
Using the CLEAR command in interactive mode clears the terminal's screen.
Special modes of operation
So far we saw two main modes of redis-cli.
- Command line execution of Redis commands.
- Interactive "REPL" usage.
The CLI performs other auxiliary tasks related to Redis that are explained in the next sections:
- Monitoring tool to show continuous stats about a Redis server.
- Scanning a Redis database for very large keys.
- Key space scanner with pattern matching.
- Acting as a Pub/Sub client to subscribe to channels.
- Monitoring the commands executed into a Redis instance.
- Checking the latency of a Redis server in different ways.
- Checking the scheduler latency of the local computer.
- Transferring RDB backups from a remote Redis server locally.
- Acting as a Redis replica for showing what a replica receives.
- Simulating LRU workloads for showing stats about keys hits.
- A client for the Lua debugger.
Continuous stats mode
Continuous stats mode is probably one of the lesser known yet very useful features of redis-cli to monitor Redis instances in real time. To enable this mode, the --stat option is used.
The output is very clear about the behavior of the CLI in this mode:
$ redis-cli --stat
------- data ------ --------------------- load -------------------- - child -
keys       mem      clients blocked requests            connections
506        1015.00K 1       0       24 (+0)             7
506        1015.00K 1       0       25 (+1)             7
506        3.40M    51      0       60461 (+60436)      57
506        3.40M    51      0       146425 (+85964)     107
507        3.40M    51      0       233844 (+87419)     157
507        3.40M    51      0       321715 (+87871)     207
508        3.40M    51      0       408642 (+86927)     257
508        3.40M    51      0       497038 (+88396)     257
In this mode a new line is printed every second with useful information and differences of request values between old data points. Memory usage, client connection counts, and various other statistics about the connected Redis database can be easily understood with this auxiliary redis-cli tool.
The -i <interval> option in this case works as a modifier in order to
change the frequency at which new lines are emitted. The default is one
second.
Scanning for big keys
In this special mode, redis-cli works as a key space analyzer. It scans the
dataset for big keys, but also provides information about the data types
that the data set consists of. This mode is enabled with the --bigkeys option,
and produces verbose output:
$ redis-cli --bigkeys

# Scanning the entire keyspace to find biggest keys as well as
# average sizes per key type.  You can use -i 0.01 to sleep 0.01 sec
# per SCAN command (not usually needed).

[00.00%] Biggest string found so far 'key-419' with 3 bytes
[05.14%] Biggest list   found so far 'mylist' with 100004 items
[35.77%] Biggest string found so far 'counter:__rand_int__' with 6 bytes
[73.91%] Biggest hash   found so far 'myobject' with 3 fields

-------- summary -------

Sampled 506 keys in the keyspace!
Total key length in bytes is 3452 (avg len 6.82)

Biggest string found 'counter:__rand_int__' has 6 bytes
Biggest   list found 'mylist' has 100004 items
Biggest   hash found 'myobject' has 3 fields

504 strings with 1403 bytes (99.60% of keys, avg size 2.78)
1 lists with 100004 items (00.20% of keys, avg size 100004.00)
0 sets with 0 members (00.00% of keys, avg size 0.00)
1 hashs with 3 fields (00.20% of keys, avg size 3.00)
0 zsets with 0 members (00.00% of keys, avg size 0.00)
In the first part of the output, each new key larger than the previous larger key (of the same type) encountered is reported. The summary section provides general stats about the data inside the Redis instance.
The program uses the SCAN command, so it can be executed against a busy
server without impacting the operations, however the -i option can be
used in order to throttle the scanning process of the specified fraction
of second for each SCAN command.
For example, -i 0.01 will slow down the program execution considerably, but will also reduce the load on the server
to a negligible amount.
Note that the summary also reports in a cleaner form the biggest keys found for each time. The initial output is just to provide some interesting info ASAP if running against a very large data set.
Getting a list of keys
It is also possible to scan the key space, again in a way that does not
block the Redis server (which does happen when you use a command
like KEYS *), and print all the key names, or filter them for specific
patterns. This mode, like the --bigkeys option, uses the SCAN command,
so keys may be reported multiple times if the dataset is changing, but no
key would ever be missing, if that key was present since the start of the
iteration. Because of the command that it uses this option is called --scan.
$ redis-cli --scan | head -10
key-419
key-71
key-236
key-50
key-38
key-458
key-453
key-499
key-446
key-371
Note that head -10 is used in order to print only the first lines of the
output.
Scanning is able to use the underlying pattern matching capability of
the SCAN command with the --pattern option.
$ redis-cli --scan --pattern '*-11*'
key-114
key-117
key-118
key-113
key-115
key-112
key-119
key-11
key-111
key-110
key-116
Piping the output through the wc command can be used to count specific
kind of objects, by key name:
$ redis-cli --scan --pattern 'user:*' | wc -l
3829433
You can use -i 0.01 to add a delay between calls to the SCAN command.
This will make the command slower but will significantly reduce load on the server.
Pub/sub mode
The CLI is able to publish messages in Redis Pub/Sub channels using
the PUBLISH command. Subscribing to channels in order to receive
messages is different - the terminal is blocked and waits for
messages, so this is implemented as a special mode in redis-cli. Unlike
other special modes this mode is not enabled by using a special option,
but simply by using the SUBSCRIBE or PSUBSCRIBE command, which are available in
interactive or command mode:
$ redis-cli PSUBSCRIBE '*'
Reading messages... (press Ctrl-C to quit)
1) "PSUBSCRIBE"
2) "*"
3) (integer) 1
The reading messages message shows that we entered Pub/Sub mode.
When another client publishes some message in some channel, such as with the command redis-cli PUBLISH mychannel mymessage, the CLI in Pub/Sub mode will show something such as:
1) "pmessage"
2) "*"
3) "mychannel"
4) "mymessage"
This is very useful for debugging Pub/Sub issues.
To exit the Pub/Sub mode just process CTRL-C.
Monitoring commands executed in Redis
Similarly to the Pub/Sub mode, the monitoring mode is entered automatically
once you use the MONITOR commnad. All commands received by the active Redis instance will be printed to the standard output:
$ redis-cli MONITOR
OK
1460100081.165665 [0 127.0.0.1:51706] "set" "shipment:8000736522714:status" "sorting"
1460100083.053365 [0 127.0.0.1:51707] "get" "shipment:8000736522714:status"
Note that it is possible to use to pipe the output, so you can monitor
for specific patterns using tools such as grep.
Monitoring the latency of Redis instances
Redis is often used in contexts where latency is very critical. Latency involves multiple moving parts within the application, from the client library to the network stack, to the Redis instance itself.
The redis-cli has multiple facilities for studying the latency of a Redis
instance and understanding the latency's maximum, average and distribution.
The basic latency-checking tool is the --latency option. Using this
option the CLI runs a loop where the PING command is sent to the Redis
instance and the time to receive a reply is measured. This happens 100
times per second, and stats are updated in a real time in the console:
$ redis-cli --latency
min: 0, max: 1, avg: 0.19 (427 samples)
The stats are provided in milliseconds. Usually, the average latency of
a very fast instance tends to be overestimated a bit because of the
latency due to the kernel scheduler of the system running redis-cli
itself, so the average latency of 0.19 above may easily be 0.01 or less.
However this is usually not a big problem, since most developers are interested in
events of a few milliseconds or more.
Sometimes it is useful to study how the maximum and average latencies
evolve during time. The --latency-history option is used for that
purpose: it works exactly like --latency, but every 15 seconds (by
default) a new sampling session is started from scratch:
$ redis-cli --latency-history
min: 0, max: 1, avg: 0.14 (1314 samples) -- 15.01 seconds range
min: 0, max: 1, avg: 0.18 (1299 samples) -- 15.00 seconds range
min: 0, max: 1, avg: 0.20 (113 samples)^C
Sampling sessions' length can be changed with the -i <interval> option.
The most advanced latency study tool, but also the most complex to
interpret for non-experienced users, is the ability to use color terminals
to show a spectrum of latencies. You'll see a colored output that indicates the
different percentages of samples, and different ASCII characters that indicate
different latency figures. This mode is enabled using the --latency-dist
option:
$ redis-cli --latency-dist
(output not displayed, requires a color terminal, try it!)
There is another pretty unusual latency tool implemented inside redis-cli.
It does not check the latency of a Redis instance, but the latency of the
computer running redis-cli. This latency is intrinsic to the kernel scheduler,
the hypervisor in case of virtualized instances, and so forth.
Redis calls it intrinsic latency because it's mostly opaque to the programmer.
If the Redis instance has high latency regardless of all the obvious things
that may be the source cause, it's worth to check what's the best your system
can do by running redis-cli in this special mode directly in the system you
are running Redis servers on.
By measuring the intrinsic latency, you know that this is the baseline,
and Redis cannot outdo your system. In order to run the CLI
in this mode, use the --intrinsic-latency <test-time>. Note that the test time is in seconds and dictates how long the test should run.
$ ./redis-cli --intrinsic-latency 5
Max latency so far: 1 microseconds.
Max latency so far: 7 microseconds.
Max latency so far: 9 microseconds.
Max latency so far: 11 microseconds.
Max latency so far: 13 microseconds.
Max latency so far: 15 microseconds.
Max latency so far: 34 microseconds.
Max latency so far: 82 microseconds.
Max latency so far: 586 microseconds.
Max latency so far: 739 microseconds.

65433042 total runs (avg latency: 0.0764 microseconds / 764.14 nanoseconds per run).
Worst run took 9671x longer than the average latency.
IMPORTANT: this command must be executed on the computer that runs the Redis server instance, not on a different host. It does not connect to a Redis instance and performs the test locally.
In the above case, the system cannot do better than 739 microseconds of worst case latency, so one can expect certain queries to occasionally run less than 1 millisecond.
Remote backups of RDB files
During a Redis replication's first synchronization, the primary and the replica
exchange the whole data set in the form of an RDB file. This feature is exploited
by redis-cli in order to provide a remote backup facility that allows a
transfer of an RDB file from any Redis instance to the local computer running
redis-cli. To use this mode, call the CLI with the --rdb <dest-filename>
option:
$ redis-cli --rdb /tmp/dump.rdb
SYNC sent to master, writing 13256 bytes to '/tmp/dump.rdb'
Transfer finished with success.
This is a simple but effective way to ensure disaster recovery
RDB backups exist of your Redis instance. When using this options in
scripts or cron jobs, make sure to check the return value of the command.
If it is non zero, an error occurred as in the following example:
$ redis-cli --rdb /tmp/dump.rdb
SYNC with master failed: -ERR Can't SYNC while not connected with my master
$ echo $?
1
Replica mode
The replica mode of the CLI is an advanced feature useful for
Redis developers and for debugging operations.
It allows for the inspection of the content a primary sends to its replicas in the replication
stream in order to propagate the writes to its replicas. The option
name is simply --replica. The following is a working example:
$ redis-cli --replica
SYNC with master, discarding 13256 bytes of bulk transfer...
SYNC done. Logging commands from master.
"PING"
"SELECT","0"
"SET","last_name","Enigk"
"PING"
"INCR","mycounter"
The command begins by discarding the RDB file of the first synchronization and then logs each command received in CSV format.
If you think some of the commands are not replicated correctly in your replicas this is a good way to check what's happening, and also useful information in order to improve the bug report.
Performing an LRU simulation
Redis is often used as a cache with LRU eviction.
Depending on the number of keys and the amount of memory allocated for the
cache (specified via the maxmemory directive), the amount of cache hits
and misses will change. Sometimes, simulating the rate of hits is very
useful to correctly provision your cache.
The redis-cli has a special mode where it performs a simulation of GET and SET
operations, using an 80-20% power law distribution in the requests pattern.
This means that 20% of keys will be requested 80% of times, which is a
common distribution in caching scenarios.
Theoretically, given the distribution of the requests and the Redis memory overhead, it should be possible to compute the hit rate analytically with a mathematical formula. However, Redis can be configured with different LRU settings (number of samples) and LRU's implementation, which is approximated in Redis, changes a lot between different versions. Similarly the amount of memory per key may change between versions. That is why this tool was built: its main motivation was for testing the quality of Redis' LRU implementation, but now is also useful for testing how a given version behaves with the settings originally intended for deployment.
To use this mode, specify the amount of keys in the test and configure a sensible maxmemory setting as a first attempt.
IMPORTANT NOTE: Configuring the maxmemory setting in the Redis configuration
is crucial: if there is no cap to the maximum memory usage, the hit will
eventually be 100% since all the keys can be stored in memory. If too many keys are specified with maximum memory, eventually all of the computer RAM will be used. It is also needed to configure an appropriate
maxmemory policy; most of the time allkeys-lru is selected.
In the following example there is a configured a memory limit of 100MB and an LRU simulation using 10 million keys.
WARNING: the test uses pipelining and will stress the server, don't use it with production instances.
$ ./redis-cli --lru-test 10000000
156000 Gets/sec | Hits: 4552 (2.92%) | Misses: 151448 (97.08%)
153750 Gets/sec | Hits: 12906 (8.39%) | Misses: 140844 (91.61%)
159250 Gets/sec | Hits: 21811 (13.70%) | Misses: 137439 (86.30%)
151000 Gets/sec | Hits: 27615 (18.29%) | Misses: 123385 (81.71%)
145000 Gets/sec | Hits: 32791 (22.61%) | Misses: 112209 (77.39%)
157750 Gets/sec | Hits: 42178 (26.74%) | Misses: 115572 (73.26%)
154500 Gets/sec | Hits: 47418 (30.69%) | Misses: 107082 (69.31%)
151250 Gets/sec | Hits: 51636 (34.14%) | Misses: 99614 (65.86%)
The program shows stats every second. In the first seconds the cache starts to be populated. The misses rate later stabilizes into the actual figure that can be expected:
120750 Gets/sec | Hits: 48774 (40.39%) | Misses: 71976 (59.61%)
122500 Gets/sec | Hits: 49052 (40.04%) | Misses: 73448 (59.96%)
127000 Gets/sec | Hits: 50870 (40.06%) | Misses: 76130 (59.94%)
124250 Gets/sec | Hits: 50147 (40.36%) | Misses: 74103 (59.64%)
A miss rate of 59% may not be acceptable for certain use cases therefor 100MB of memory is not enough. Observe an example using a half gigabyte of memory. After several minutes the output stabilizes to the following figures:
140000 Gets/sec | Hits: 135376 (96.70%) | Misses: 4624 (3.30%)
141250 Gets/sec | Hits: 136523 (96.65%) | Misses: 4727 (3.35%)
140250 Gets/sec | Hits: 135457 (96.58%) | Misses: 4793 (3.42%)
140500 Gets/sec | Hits: 135947 (96.76%) | Misses: 4553 (3.24%)
With 500MB there is sufficient space for the key quantity (10 million) and distribution (80-20 style).
7.3 - Client-side caching in Redis
Server-assisted, client-side caching in Redis
Client-side caching is a technique used to create high performance services. It exploits the memory available on application servers, servers that are usually distinct computers compared to the database nodes, to store some subset of the database information directly in the application side.
Normally when data is required, the application servers ask the database about such information, like in the following diagram:
+-------------+                                +----------+
|             | ------- GET user:1234 -------> |          |
| Application |                                | Database |
|             | <---- username = Alice ------- |          |
+-------------+                                +----------+
When client-side caching is used, the application will store the reply of popular queries directly inside the application memory, so that it can reuse such replies later, without contacting the database again:
+-------------+                                +----------+
|             |                                |          |
| Application |       ( No chat needed )       | Database |
|             |                                |          |
+-------------+                                +----------+
| Local cache |
|             |
| user:1234 = |
| username    |
| Alice       |
+-------------+
While the application memory used for the local cache may not be very big, the time needed in order to access the local computer memory is orders of magnitude smaller compared to accessing a networked service like a database. Since often the same small percentage of data are accessed frequently, this pattern can greatly reduce the latency for the application to get data and, at the same time, the load in the database side.
Moreover there are many datasets where items change very infrequently. For instance, most user posts in a social network are either immutable or rarely edited by the user. Adding to this the fact that usually a small percentage of the posts are very popular, either because a small set of users have a lot of followers and/or because recent posts have a lot more visibility, it is clear why such a pattern can be very useful.
Usually the two key advantages of client-side caching are:
- Data is available with a very small latency.
- The database system receives less queries, allowing it to serve the same dataset with a smaller number of nodes.
There are two hard problems in computer science...
A problem with the above pattern is how to invalidate the information that the application is holding, in order to avoid presenting stale data to the user. For example after the application above locally cached the information for user:1234, Alice may update her username to Flora. Yet the application may continue to serve the old username for user:1234.
Sometimes, depending on the exact application we are modeling, this isn't a
big deal, so the client will just use a fixed maximum "time to live" for the
cached information. Once a given amount of time has elapsed, the information
will no longer be considered valid. More complex patterns, when using Redis,
leverage the Pub/Sub system in order to send invalidation messages to
listening clients. This can be made to work but is tricky and costly from
the point of view of the bandwidth used, because often such patterns involve
sending the invalidation messages to every client in the application, even
if certain clients may not have any copy of the invalidated data. Moreover
every application query altering the data requires to use the PUBLISH
command, costing the database more CPU time to process this command.
Regardless of what schema is used, there is a simple fact: many very large applications implement some form of client-side caching, because it is the next logical step to having a fast store or a fast cache server. For this reason Redis 6 implements direct support for client-side caching, in order to make this pattern much simpler to implement, more accessible, reliable, and efficient.
The Redis implementation of client-side caching
The Redis client-side caching support is called Tracking, and has two modes:
- In the default mode, the server remembers what keys a given client accessed, and sends invalidation messages when the same keys are modified. This costs memory in the server side, but sends invalidation messages only for the set of keys that the client might have in memory.
- In the broadcasting mode, the server does not attempt to remember what keys a given client accessed, so this mode costs no memory at all in the server side. Instead clients subscribe to key prefixes such as
object:oruser:, and receive a notification message every time a key matching a subscribed prefix is touched.
To recap, for now let's forget for a moment about the broadcasting mode, to focus on the first mode. We'll describe broadcasting later more in details.
- Clients can enable tracking if they want. Connections start without tracking enabled.
- When tracking is enabled, the server remembers what keys each client requested during the connection lifetime (by sending read commands about such keys).
- When a key is modified by some client, or is evicted because it has an associated expire time, or evicted because of a maxmemory policy, all the clients with tracking enabled that may have the key cached, are notified with an invalidation message.
- When clients receive invalidation messages, they are required to remove the corresponding keys, in order to avoid serving stale data.
This is an example of the protocol:
- Client 1
->Server: CLIENT TRACKING ON - Client 1
->Server: GET foo - (The server remembers that Client 1 may have the key "foo" cached)
- (Client 1 may remember the value of "foo" inside its local memory)
- Client 2
->Server: SET foo SomeOtherValue - Server
->Client 1: INVALIDATE "foo"
This looks great superficially, but if you imagine 10k connected clients all asking for millions of keys over long living connection, the server ends up storing too much information. For this reason Redis uses two key ideas in order to limit the amount of memory used server-side and the CPU cost of handling the data structures implementing the feature:
- The server remembers the list of clients that may have cached a given key in a single global table. This table is called the Invalidation Table. The invalidation table can contain a maximum number of entries. If a new key is inserted, the server may evict an older entry by pretending that such key was modified (even if it was not), and sending an invalidation message to the clients. Doing so, it can reclaim the memory used for this key, even if this will force the clients having a local copy of the key to evict it.
- Inside the invalidation table we don't really need to store pointers to clients' structures, that would force a garbage collection procedure when the client disconnects: instead what we do is just store client IDs (each Redis client has an unique numerical ID). If a client disconnects, the information will be incrementally garbage collected as caching slots are invalidated.
- There is a single keys namespace, not divided by database numbers. So if a client is caching the key
fooin database 2, and some other client changes the value of the keyfooin database 3, an invalidation message will still be sent. This way we can ignore database numbers reducing both the memory usage and the implementation complexity.
Two connections mode
Using the new version of the Redis protocol, RESP3, supported by Redis 6, it is possible to run the data queries and receive the invalidation messages in the same connection. However many client implementations may prefer to implement client-side caching using two separated connections: one for data, and one for invalidation messages. For this reason when a client enables tracking, it can specify to redirect the invalidation messages to another connection by specifying the "client ID" of a different connection. Many data connections can redirect invalidation messages to the same connection, this is useful for clients implementing connection pooling. The two connections model is the only one that is also supported for RESP2 (which lacks the ability to multiplex different kind of information in the same connection).
Here's an example of a complete session using the Redis protocol in the old RESP2 mode involving the following steps: enabling tracking redirecting to another connection, asking for a key, and getting an invalidation message once the key gets modified.
To start, the client opens a first connection that will be used for invalidations, requests the connection ID, and subscribes via Pub/Sub to the special channel that is used to get invalidation messages when in RESP2 modes (remember that RESP2 is the usual Redis protocol, and not the more advanced protocol that you can use, optionally, with Redis 6 using the HELLO command):
(Connection 1 -- used for invalidations)
CLIENT ID
:4
SUBSCRIBE __redis__:invalidate
*3
$9
subscribe
$20
__redis__:invalidate
:1
Now we can enable tracking from the data connection:
(Connection 2 -- data connection)
CLIENT TRACKING on REDIRECT 4
+OK

GET foo
$3
bar
The client may decide to cache "foo" => "bar" in the local memory.
A different client will now modify the value of the "foo" key:
(Some other unrelated connection)
SET foo bar
+OK
As a result, the invalidations connection will receive a message that invalidates the specified key.
(Connection 1 -- used for invalidations)
*3
$7
message
$20
__redis__:invalidate
*1
$3
foo
The client will check if there are cached keys in this caching slot, and will evict the information that is no longer valid.
Note that the third element of the Pub/Sub message is not a single key but
is a Redis array with just a single element. Since we send an array, if there
are groups of keys to invalidate, we can do that in a single message.
In case of a flush (FLUSHALL or FLUSHDB), a null message will be sent.
A very important thing to understand about client-side caching used with
RESP2 and a Pub/Sub connection in order to read the invalidation messages,
is that using Pub/Sub is entirely a trick in order to reuse old client
implementations, but actually the message is not really sent to a channel
and received by all the clients subscribed to it. Only the connection we
specified in the REDIRECT argument of the CLIENT command will actually
receive the Pub/Sub message, making the feature a lot more scalable.
When RESP3 is used instead, invalidation messages are sent (either in the
same connection, or in the secondary connection when redirection is used)
as push messages (read the RESP3 specification for more information).
What tracking tracks
As you can see clients do not need, by default, to tell the server what keys they are caching. Every key that is mentioned in the context of a read-only command is tracked by the server, because it could be cached.
This has the obvious advantage of not requiring the client to tell the server what it is caching. Moreover in many clients implementations, this is what you want, because a good solution could be to just cache everything that is not already cached, using a first-in first-out approach: we may want to cache a fixed number of objects, every new data we retrieve, we could cache it, discarding the oldest cached object. More advanced implementations may instead drop the least used object or alike.
Note that anyway if there is write traffic on the server, caching slots will get invalidated during the course of the time. In general when the server assumes that what we get we also cache, we are making a tradeoff:
- It is more efficient when the client tends to cache many things with a policy that welcomes new objects.
- The server will be forced to retain more data about the client keys.
- The client will receive useless invalidation messages about objects it did not cache.
So there is an alternative described in the next section.
Opt-in caching
Clients implementations may want to cache only selected keys, and communicate explicitly to the server what they'll cache and what they will not. This will require more bandwidth when caching new objects, but at the same time reduces the amount of data that the server has to remember and the amount of invalidation messages received by the client.
In order to do this, tracking must be enabled using the OPTIN option:
CLIENT TRACKING on REDIRECT 1234 OPTIN
In this mode, by default, keys mentioned in read queries are not supposed to be cached, instead when a client wants to cache something, it must send a special command immediately before the actual command to retrieve the data:
CLIENT CACHING YES
+OK
GET foo
"bar"
The CACHING command affects the command executed immediately after it,
however in case the next command is MULTI, all the commands in the
transaction will be tracked. Similarly in case of Lua scripts, all the
commands executed by the script will be tracked.
Broadcasting mode
So far we described the first client-side caching model that Redis implements. There is another one, called broadcasting, that sees the problem from the point of view of a different tradeoff, does not consume any memory on the server side, but instead sends more invalidation messages to clients. In this mode we have the following main behaviors:
- Clients enable client-side caching using the
BCASToption, specifying one or more prefixes using thePREFIXoption. For instance:CLIENT TRACKING on REDIRECT 10 BCAST PREFIX object: PREFIX user:. If no prefix is specified at all, the prefix is assumed to be the empty string, so the client will receive invalidation messages for every key that gets modified. Instead if one or more prefixes are used, only keys matching one of the specified prefixes will be sent in the invalidation messages. - The server does not store anything in the invalidation table. Instead it uses a different Prefixes Table, where each prefix is associated to a list of clients.
- No two prefixes can track overlapping parts of the keyspace. For instance, having the prefix "foo" and "foob" would not be allowed, since they would both trigger an invalidation for the key "foobar". However, just using the prefix "foo" is sufficient.
- Every time a key matching any of the prefixes is modified, all the clients subscribed to that prefix, will receive the invalidation message.
- The server will consume CPU proportional to the number of registered prefixes. If you have just a few, it is hard to see any difference. With a big number of prefixes the CPU cost can become quite large.
- In this mode the server can perform the optimization of creating a single reply for all the clients subscribed to a given prefix, and send the same reply to all. This helps to lower the CPU usage.
The NOLOOP option
By default client-side tracking will send invalidation messages to the client that modified the key. Sometimes clients want this, since they implement very basic logic that does not involve automatically caching writes locally. However, more advanced clients may want to cache even the writes they are doing in the local in-memory table. In such case receiving an invalidation message immediately after the write is a problem, since it will force the client to evict the value it just cached.
In this case it is possible to use the NOLOOP option: it works both
in normal and broadcasting mode. Using this option, clients are able to
tell the server they don't want to receive invalidation messages for keys
that they modified.
Avoiding race conditions
When implementing client-side caching redirecting the invalidation messages to a different connection, you should be aware that there is a possible race condition. See the following example interaction, where we'll call the data connection "D" and the invalidation connection "I":
[D] client -> server: GET foo
[I] server -> client: Invalidate foo (somebody else touched it)
[D] server -> client: "bar" (the reply of "GET foo")
As you can see, because the reply to the GET was slower to reach the client, we received the invalidation message before the actual data that is already no longer valid. So we'll keep serving a stale version of the foo key. To avoid this problem, it is a good idea to populate the cache when we send the command with a placeholder:
Client cache: set the local copy of "foo" to "caching-in-progress"
[D] client-> server: GET foo.
[I] server -> client: Invalidate foo (somebody else touched it)
Client cache: delete "foo" from the local cache.
[D] server -> client: "bar" (the reply of "GET foo")
Client cache: don't set "bar" since the entry for "foo" is missing.
Such a race condition is not possible when using a single connection for both data and invalidation messages, since the order of the messages is always known in that case.
What to do when losing connection with the server
Similarly, if we lost the connection with the socket we use in order to get the invalidation messages, we may end with stale data. In order to avoid this problem, we need to do the following things:
- Make sure that if the connection is lost, the local cache is flushed.
- Both when using RESP2 with Pub/Sub, or RESP3, ping the invalidation channel periodically (you can send PING commands even when the connection is in Pub/Sub mode!). If the connection looks broken and we are not able to receive ping backs, after a maximum amount of time, close the connection and flush the cache.
What to cache
Clients may want to run internal statistics about the number of times a given cached key was actually served in a request, to understand in the future what is good to cache. In general:
- We don't want to cache many keys that change continuously.
- We don't want to cache many keys that are requested very rarely.
- We want to cache keys that are requested often and change at a reasonable rate. For an example of key not changing at a reasonable rate, think of a global counter that is continuously
INCRemented.
However simpler clients may just evict data using some random sampling just remembering the last time a given cached value was served, trying to evict keys that were not served recently.
Other hints for implementing client libraries
- Handling TTLs: make sure you also request the key TTL and set the TTL in the local cache if you want to support caching keys with a TTL.
- Putting a max TTL on every key is a good idea, even if it has no TTL. This protects against bugs or connection issues that would make the client have old data in the local copy.
- Limiting the amount of memory used by clients is absolutely needed. There must be a way to evict old keys when new ones are added.
Limiting the amount of memory used by Redis
Be sure to configure a suitable value for the maximum number of keys remembered by Redis or alternatively use the BCAST mode that consumes no memory at all on the Redis side. Note that the memory consumed by Redis when BCAST is not used, is proportional both to the number of keys tracked and the number of clients requesting such keys.
7.4 - Redis configuration
Overview of redis.conf, the Redis configuration file
Redis is able to start without a configuration file using a built-in default configuration, however this setup is only recommended for testing and development purposes.
The proper way to configure Redis is by providing a Redis configuration file,
usually called redis.conf.
The redis.conf file contains a number of directives that have a very simple
format:
keyword argument1 argument2 ... argumentN
This is an example of a configuration directive:
replicaof 127.0.0.1 6380
It is possible to provide strings containing spaces as arguments using (double or single) quotes, as in the following example:
requirepass "hello world"
Single-quoted string can contain characters escaped by backslashes, and double-quoted strings can additionally include any ASCII symbols encoded using backslashed hexadecimal notation "\xff".
The list of configuration directives, and their meaning and intended usage is available in the self documented example redis.conf shipped into the Redis distribution.
- The self documented redis.conf for Redis 7.0.
- The self documented redis.conf for Redis 6.2.
- The self documented redis.conf for Redis 6.0.
- The self documented redis.conf for Redis 5.0.
- The self documented redis.conf for Redis 4.0.
- The self documented redis.conf for Redis 3.2.
- The self documented redis.conf for Redis 3.0.
- The self documented redis.conf for Redis 2.8.
- The self documented redis.conf for Redis 2.6.
- The self documented redis.conf for Redis 2.4.
Passing arguments via the command line
You can also pass Redis configuration parameters using the command line directly. This is very useful for testing purposes. The following is an example that starts a new Redis instance using port 6380 as a replica of the instance running at 127.0.0.1 port 6379.
./redis-server --port 6380 --replicaof 127.0.0.1 6379
The format of the arguments passed via the command line is exactly the same
as the one used in the redis.conf file, with the exception that the keyword
is prefixed with --.
Note that internally this generates an in-memory temporary config file (possibly concatenating the config file passed by the user if any) where arguments are translated into the format of redis.conf.
Changing Redis configuration while the server is running
It is possible to reconfigure Redis on the fly without stopping and restarting
the service, or querying the current configuration programmatically using the
special commands [CONFIG SET](/commands/config-set) and
[CONFIG GET](/commands/config-get)
Not all of the configuration directives are supported in this way, but most
are supported as expected. Please refer to the
[CONFIG SET](/commands/config-set) and [CONFIG GET](/commands/config-get)
pages for more information.
Note that modifying the configuration on the fly has no effects on the redis.conf file so at the next restart of Redis the old configuration will be used instead.
Make sure to also modify the redis.conf file accordingly to the configuration
you set using [CONFIG SET](/commands/config-set). You can do it manually or you can use [CONFIG REWRITE](/commands/config-rewrite), which will automatically scan your redis.conf file and update the fields which don't match the current configuration value. Fields non existing but set to the default value are not added. Comments inside your configuration file are retained.
Configuring Redis as a cache
If you plan to use Redis as a cache where every key will have an expire set, you may consider using the following configuration instead (assuming a max memory limit of 2 megabytes as an example):
maxmemory 2mb
maxmemory-policy allkeys-lru
In this configuration there is no need for the application to set a
time to live for keys using the EXPIRE command (or equivalent) since
all the keys will be evicted using an approximated LRU algorithm as long
as we hit the 2 megabyte memory limit.
Basically in this configuration Redis acts in a similar way to memcached. We have more extensive documentation about using Redis as an LRU cache here.
7.5 - Redis data types
Overview of the many data types supported by Redis
Strings
Strings are the most basic kind of Redis value. Redis Strings are binary safe, this means that a Redis string can contain any kind of data, for instance a JPEG image or a serialized Ruby object.
A String value can be at max 512 Megabytes in length.
You can do a number of interesting things using strings in Redis, for instance you can:
- Use Strings as atomic counters using commands in the INCR family: INCR, DECR, INCRBY.
- Append to strings with the APPEND command.
- Use Strings as a random access vectors with GETRANGE and SETRANGE.
- Encode a lot of data in little space, or create a Redis backed Bloom Filter using GETBIT and SETBIT.
Check all the available string commands for more information, or read the introduction to Redis data types.
Lists
Redis Lists are simply lists of strings, sorted by insertion order. It is possible to add elements to a Redis List pushing new elements on the head (on the left) or on the tail (on the right) of the list.
The LPUSH command inserts a new element on the head, while RPUSH inserts a new element on the tail. A new list is created when one of this operations is performed against an empty key. Similarly the key is removed from the key space if a list operation will empty the list. These are very handy semantics since all the list commands will behave exactly like they were called with an empty list if called with a non-existing key as argument.
Some example of list operations and resulting lists:
LPUSH mylist a   # now the list is "a"
LPUSH mylist b   # now the list is "b","a"
RPUSH mylist c   # now the list is "b","a","c" (RPUSH was used this time)
The max length of a list is 2^32 - 1 elements (4294967295, more than 4 billion of elements per list).
The main features of Redis Lists from the point of view of time complexity are the support for constant time insertion and deletion of elements near the head and tail, even with many millions of inserted items. Accessing elements is very fast near the extremes of the list but is slow if you try accessing the middle of a very big list, as it is an O(N) operation.
You can do many interesting things with Redis Lists, for instance you can:
- Model a timeline in a social network, using LPUSH in order to add new elements in the user time line, and using LRANGE in order to retrieve a few of recently inserted items.
- You can use LPUSH together with LTRIM to create a list that never exceeds a given number of elements, but just remembers the latest N elements.
- Lists can be used as a message passing primitive, See for instance the well known Resque Ruby library for creating background jobs.
- You can do a lot more with lists, this data type supports a number of commands, including blocking commands like BLPOP.
Please check all the available commands operating on lists for more information, or read the introduction to Redis data types.
Sets
Redis Sets are an unordered collection of Strings. It is possible to add, remove, and test for existence of members in O(1) (constant time regardless of the number of elements contained inside the Set).
Redis Sets have the desirable property of not allowing repeated members. Adding the same element multiple times will result in a set having a single copy of this element. Practically speaking this means that adding a member does not require a check if exists then add operation.
A very interesting thing about Redis Sets is that they support a number of server side commands to compute sets starting from existing sets, so you can do unions, intersections, differences of sets in very short time.
The max number of members in a set is 2^32 - 1 (4294967295, more than 4 billion of members per set).
You can do many interesting things using Redis Sets, for instance you can:
- You can track unique things using Redis Sets. Want to know all the unique IP addresses visiting a given blog post? Simply use SADD every time you process a page view. You are sure repeated IPs will not be inserted.
- Redis Sets are good to represent relations. You can create a tagging system with Redis using a Set to represent every tag. Then you can add all the IDs of all the objects having a given tag into a Set representing this particular tag, using the SADD command. Do you want all the IDs of all the Objects having three different tags at the same time? Just use SINTER.
- You can use Sets to extract elements at random using the SPOP or SRANDMEMBER commands.
As usual, check the full list of Set commands for more information, or read the introduction to Redis data types.
Hashes
Redis Hashes are maps between string fields and string values, so they are the perfect data type to represent objects (e.g. A User with a number of fields like name, surname, age, and so forth):
HMSET user:1000 username antirez password P1pp0 age 34
HGETALL user:1000
HSET user:1000 password 12345
HGETALL user:1000
A hash with a few fields (where few means up to one hundred or so) is stored in a way that takes very little space, so you can store millions of objects in a small Redis instance.
While Hashes are used mainly to represent objects, they are capable of storing many elements, so you can use Hashes for many other tasks as well.
Every hash can store up to 2^32 - 1 field-value pairs (more than 4 billion).
Check the full list of Hash commands for more information, or read the introduction to Redis data types.
Sorted Sets
Redis Sorted Sets are, similarly to Redis Sets, non repeating collections of Strings. The difference is that every member of a Sorted Set is associated with a score, that is used keep the Sorted Set in order, from the smallest to the greatest score. While members are unique, scores may be repeated.
With Sorted Sets you can add, remove, or update elements in a very fast way (in a time proportional to the logarithm of the number of elements). Since elements are stored in order and not ordered afterwards, you can also get ranges by score or by rank (position) in a very fast way. Accessing the middle of a Sorted Set is also very fast, so you can use Sorted Sets as a smart list of non repeating elements where you can quickly access everything you need: elements in order, fast existence test, fast access to elements in the middle!
In short with Sorted Sets you can do a lot of tasks with great performance that are really hard to model in other kind of databases.
With Sorted Sets you can:
- Build a leaderboard in a massive online game, where every time a new score is submitted you update it using ZADD. You can easily retrieve the top users using ZRANGE, you can also, given a user name, return its rank in the listing using ZRANK. Using ZRANK and ZRANGE together you can show users with a score similar to a given user. All very quickly.
- Sorted Sets are often used in order to index data that is stored inside Redis. For instance if you have many hashes representing users, you can use a Sorted Set with members having the age of the user as the score and the ID of the user as the value. So using ZRANGEBYSCORE it will be trivial and fast to retrieve all the users with a given age range.
Sorted Sets are one of the more advanced Redis data types, so take some time to check the full list of Sorted Set commands to discover what you can do with Redis! Also you may want to read the Introduction to Redis Data Types.
Bitmaps and HyperLogLogs
Redis also supports Bitmaps and HyperLogLogs which are actually data types based on the String base type, but having their own semantics.
Please refer to the data types tutorial for information about those types.
Streams
A Redis stream is a data structure that acts like an append-only log. Streams are useful for recording events in the order they occur. See the Redis streams docs for details and usage.
Geospatial indexes
Redis provides geospatial indexes, which are useful for finding locations within a given geographic radius. You can add locations to a geospatial index using the GEOADD command. You then search for locations within a given radius using the GEORADIUS command.
See the complete geospatial index command reference for all of the details.
7.5.1 - Data types tutorial
Learning the basic Redis data types and how to use them
Redis is not a plain key-value store, it is actually a data structures server, supporting different kinds of values. What this means is that, while in traditional key-value stores you associate string keys to string values, in Redis the value is not limited to a simple string, but can also hold more complex data structures. The following is the list of all the data structures supported by Redis, which will be covered separately in this tutorial:
- Binary-safe strings.
- Lists: collections of string elements sorted according to the order of insertion. They are basically linked lists.
- Sets: collections of unique, unsorted string elements.
- Sorted sets, similar to Sets but where every string element is associated to a floating number value, called score. The elements are always taken sorted by their score, so unlike Sets it is possible to retrieve a range of elements (for example you may ask: give me the top 10, or the bottom 10).
- Hashes, which are maps composed of fields associated with values. Both the field and the value are strings. This is very similar to Ruby or Python hashes.
- Bit arrays (or simply bitmaps): it is possible, using special commands, to handle String values like an array of bits: you can set and clear individual bits, count all the bits set to 1, find the first set or unset bit, and so forth.
- HyperLogLogs: this is a probabilistic data structure which is used in order to estimate the cardinality of a set. Don't be scared, it is simpler than it seems... See later in the HyperLogLog section of this tutorial.
- Streams: append-only collections of map-like entries that provide an abstract log data type. They are covered in depth in the Introduction to Redis Streams.
It's not always trivial to grasp how these data types work and what to use in order to solve a given problem from the command reference, so this document is a crash course in Redis data types and their most common patterns.
For all the examples we'll use the redis-cli utility, a simple but
handy command-line utility, to issue commands against the Redis server.
Keys
Redis keys are binary safe, this means that you can use any binary sequence as a key, from a string like "foo" to the content of a JPEG file. The empty string is also a valid key.
A few other rules about keys:
- Very long keys are not a good idea. For instance a key of 1024 bytes is a bad idea not only memory-wise, but also because the lookup of the key in the dataset may require several costly key-comparisons. Even when the task at hand is to match the existence of a large value, hashing it (for example with SHA1) is a better idea, especially from the perspective of memory and bandwidth.
- Very short keys are often not a good idea. There is little point in writing "u1000flw" as a key if you can instead write "user:1000:followers". The latter is more readable and the added space is minor compared to the space used by the key object itself and the value object. While short keys will obviously consume a bit less memory, your job is to find the right balance.
- Try to stick with a schema. For instance "object-type:id" is a good idea, as in "user:1000". Dots or dashes are often used for multi-word fields, as in "comment:1234:reply.to" or "comment:1234:reply-to".
- The maximum allowed key size is 512 MB.
Strings
The Redis String type is the simplest type of value you can associate with a Redis key. It is the only data type in Memcached, so it is also very natural for newcomers to use it in Redis.
Since Redis keys are strings, when we use the string type as a value too, we are mapping a string to another string. The string data type is useful for a number of use cases, like caching HTML fragments or pages.
Let's play a bit with the string type, using redis-cli (all the examples
will be performed via redis-cli in this tutorial).
> set mykey somevalue
OK
> get mykey
"somevalue"
As you can see using the SET and the GET commands are the way we set
and retrieve a string value. Note that SET will replace any existing value
already stored into the key, in the case that the key already exists, even if
the key is associated with a non-string value. So SET performs an assignment.
Values can be strings (including binary data) of every kind, for instance you can store a jpeg image inside a value. A value can't be bigger than 512 MB.
The SET command has interesting options, that are provided as additional
arguments. For example, I may ask SET to fail if the key already exists,
or the opposite, that it only succeed if the key already exists:
> set mykey newval nx
(nil)
> set mykey newval xx
OK
Even if strings are the basic values of Redis, there are interesting operations you can perform with them. For instance, one is atomic increment:
> set counter 100
OK
> incr counter
(integer) 101
> incr counter
(integer) 102
> incrby counter 50
(integer) 152
The INCR command parses the string value as an integer, increments it by one, and finally sets the obtained value as the new value. There are other similar commands like INCRBY, DECR and DECRBY. Internally it's always the same command, acting in a slightly different way.
What does it mean that INCR is atomic? That even multiple clients issuing INCR against the same key will never enter into a race condition. For instance, it will never happen that client 1 reads "10", client 2 reads "10" at the same time, both increment to 11, and set the new value to 11. The final value will always be 12 and the read-increment-set operation is performed while all the other clients are not executing a command at the same time.
There are a number of commands for operating on strings. For example
the GETSET command sets a key to a new value, returning the old value as the
result. You can use this command, for example, if you have a
system that increments a Redis key using INCR
every time your web site receives a new visitor. You may want to collect this
information once every hour, without losing a single increment.
You can GETSET the key, assigning it the new value of "0" and reading the
old value back.
The ability to set or retrieve the value of multiple keys in a single
command is also useful for reduced latency. For this reason there are
the MSET and MGET commands:
> mset a 10 b 20 c 30
OK
> mget a b c
1) "10"
2) "20"
3) "30"
When MGET is used, Redis returns an array of values.
Altering and querying the key space
There are commands that are not defined on particular types, but are useful in order to interact with the space of keys, and thus, can be used with keys of any type.
For example the EXISTS command returns 1 or 0 to signal if a given key
exists or not in the database, while the DEL command deletes a key
and associated value, whatever the value is.
> set mykey hello
OK
> exists mykey
(integer) 1
> del mykey
(integer) 1
> exists mykey
(integer) 0
From the examples you can also see how DEL itself returns 1 or 0 depending on whether
the key was removed (it existed) or not (there was no such key with that
name).
There are many key space related commands, but the above two are the
essential ones together with the TYPE command, which returns the kind
of value stored at the specified key:
> set mykey x
OK
> type mykey
string
> del mykey
(integer) 1
> type mykey
none
Key expiration
Before moving on, we should look at an important Redis feature that works regardless of the type of value you're storing: key expiration. Key expiration lets you set a timeout for a key, also known as a "time to live", or "TTL". When the time to live elapses, the key is automatically destroyed.
A few important notes about key expiration:
- They can be set both using seconds or milliseconds precision.
- However the expire time resolution is always 1 millisecond.
- Information about expires are replicated and persisted on disk, the time virtually passes when your Redis server remains stopped (this means that Redis saves the date at which a key will expire).
Use the EXPIRE command to set a key's expiration:
> set key some-value
OK
> expire key 5
(integer) 1
> get key (immediately)
"some-value"
> get key (after some time)
(nil)
The key vanished between the two GET calls, since the second call was
delayed more than 5 seconds. In the example above we used EXPIRE in
order to set the expire (it can also be used in order to set a different
expire to a key already having one, like PERSIST can be used in order
to remove the expire and make the key persistent forever). However we
can also create keys with expires using other Redis commands. For example
using SET options:
> set key 100 ex 10
OK
> ttl key
(integer) 9
The example above sets a key with the string value 100, having an expire
of ten seconds. Later the TTL command is called in order to check the
remaining time to live for the key.
In order to set and check expires in milliseconds, check the PEXPIRE and
the PTTL commands, and the full list of SET options.
Lists
To explain the List data type it's better to start with a little bit of theory, as the term List is often used in an improper way by information technology folks. For instance "Python Lists" are not what the name may suggest (Linked Lists), but rather Arrays (the same data type is called Array in Ruby actually).
From a very general point of view a List is just a sequence of ordered elements: 10,20,1,2,3 is a list. But the properties of a List implemented using an Array are very different from the properties of a List implemented using a Linked List.
Redis lists are implemented via Linked Lists. This means that even if you have
millions of elements inside a list, the operation of adding a new element in
the head or in the tail of the list is performed in constant time. The speed of adding a
new element with the LPUSH command to the head of a list with ten
elements is the same as adding an element to the head of list with 10
million elements.
What's the downside? Accessing an element by index is very fast in lists implemented with an Array (constant time indexed access) and not so fast in lists implemented by linked lists (where the operation requires an amount of work proportional to the index of the accessed element).
Redis Lists are implemented with linked lists because for a database system it is crucial to be able to add elements to a very long list in a very fast way. Another strong advantage, as you'll see in a moment, is that Redis Lists can be taken at constant length in constant time.
When fast access to the middle of a large collection of elements is important, there is a different data structure that can be used, called sorted sets. Sorted sets will be covered later in this tutorial.
First steps with Redis Lists
The LPUSH command adds a new element into a list, on the
left (at the head), while the RPUSH command adds a new
element into a list, on the right (at the tail). Finally the
LRANGE command extracts ranges of elements from lists:
> rpush mylist A
(integer) 1
> rpush mylist B
(integer) 2
> lpush mylist first
(integer) 3
> lrange mylist 0 -1
1) "first"
2) "A"
3) "B"
Note that LRANGE takes two indexes, the first and the last element of the range to return. Both the indexes can be negative, telling Redis to start counting from the end: so -1 is the last element, -2 is the penultimate element of the list, and so forth.
As you can see RPUSH appended the elements on the right of the list, while
the final LPUSH appended the element on the left.
Both commands are variadic commands, meaning that you are free to push multiple elements into a list in a single call:
> rpush mylist 1 2 3 4 5 "foo bar"
(integer) 9
> lrange mylist 0 -1
1) "first"
2) "A"
3) "B"
4) "1"
5) "2"
6) "3"
7) "4"
8) "5"
9) "foo bar"
An important operation defined on Redis lists is the ability to pop elements. Popping elements is the operation of both retrieving the element from the list, and eliminating it from the list, at the same time. You can pop elements from left and right, similarly to how you can push elements in both sides of the list:
> rpush mylist a b c
(integer) 3
> rpop mylist
"c"
> rpop mylist
"b"
> rpop mylist
"a"
We added three elements and popped three elements, so at the end of this sequence of commands the list is empty and there are no more elements to pop. If we try to pop yet another element, this is the result we get:
> rpop mylist
(nil)
Redis returned a NULL value to signal that there are no elements in the list.
Common use cases for lists
Lists are useful for a number of tasks, two very representative use cases are the following:
- Remember the latest updates posted by users into a social network.
- Communication between processes, using a consumer-producer pattern where the producer pushes items into a list, and a consumer (usually a worker) consumes those items and executed actions. Redis has special list commands to make this use case both more reliable and efficient.
For example both the popular Ruby libraries resque and sidekiq use Redis lists under the hood in order to implement background jobs.
The popular Twitter social network takes the latest tweets posted by users into Redis lists.
To describe a common use case step by step, imagine your home page shows the latest photos published in a photo sharing social network and you want to speedup access.
- Every time a user posts a new photo, we add its ID into a list with
LPUSH. - When users visit the home page, we use
LRANGE 0 9in order to get the latest 10 posted items.
Capped lists
In many use cases we just want to use lists to store the latest items, whatever they are: social network updates, logs, or anything else.
Redis allows us to use lists as a capped collection, only remembering the latest
N items and discarding all the oldest items using the LTRIM command.
The LTRIM command is similar to LRANGE, but instead of displaying the
specified range of elements it sets this range as the new list value. All
the elements outside the given range are removed.
An example will make it more clear:
> rpush mylist 1 2 3 4 5
(integer) 5
> ltrim mylist 0 2
OK
> lrange mylist 0 -1
1) "1"
2) "2"
3) "3"
The above LTRIM command tells Redis to take just list elements from index
0 to 2, everything else will be discarded. This allows for a very simple but
useful pattern: doing a List push operation + a List trim operation together
in order to add a new element and discard elements exceeding a limit:
LPUSH mylist <some element>
LTRIM mylist 0 999
The above combination adds a new element and takes only the 1000
newest elements into the list. With LRANGE you can access the top items
without any need to remember very old data.
Note: while LRANGE is technically an O(N) command, accessing small ranges
towards the head or the tail of the list is a constant time operation.
Blocking operations on lists
Lists have a special feature that make them suitable to implement queues, and in general as a building block for inter process communication systems: blocking operations.
Imagine you want to push items into a list with one process, and use a different process in order to actually do some kind of work with those items. This is the usual producer / consumer setup, and can be implemented in the following simple way:
- To push items into the list, producers call
LPUSH. - To extract / process items from the list, consumers call
RPOP.
However it is possible that sometimes the list is empty and there is nothing
to process, so RPOP just returns NULL. In this case a consumer is forced to wait
some time and retry again with RPOP. This is called polling, and is not
a good idea in this context because it has several drawbacks:
- Forces Redis and clients to process useless commands (all the requests when the list is empty will get no actual work done, they'll just return NULL).
- Adds a delay to the processing of items, since after a worker receives a NULL, it waits some time. To make the delay smaller, we could wait less between calls to
RPOP, with the effect of amplifying problem number 1, i.e. more useless calls to Redis.
So Redis implements commands called BRPOP and BLPOP which are versions
of RPOP and LPOP able to block if the list is empty: they'll return to
the caller only when a new element is added to the list, or when a user-specified
timeout is reached.
This is an example of a BRPOP call we could use in the worker:
> brpop tasks 5
1) "tasks"
2) "do_something"
It means: "wait for elements in the list tasks, but return if after 5 seconds
no element is available".
Note that you can use 0 as timeout to wait for elements forever, and you can also specify multiple lists and not just one, in order to wait on multiple lists at the same time, and get notified when the first list receives an element.
A few things to note about BRPOP:
- Clients are served in an ordered way: the first client that blocked waiting for a list, is served first when an element is pushed by some other client, and so forth.
- The return value is different compared to
RPOP: it is a two-element array since it also includes the name of the key, becauseBRPOPandBLPOPare able to block waiting for elements from multiple lists. - If the timeout is reached, NULL is returned.
There are more things you should know about lists and blocking ops. We suggest that you read more on the following:
- It is possible to build safer queues or rotating queues using
LMOVE. - There is also a blocking variant of the command, called
BLMOVE.
Automatic creation and removal of keys
So far in our examples we never had to create empty lists before pushing
elements, or removing empty lists when they no longer have elements inside.
It is Redis' responsibility to delete keys when lists are left empty, or to create
an empty list if the key does not exist and we are trying to add elements
to it, for example, with LPUSH.
This is not specific to lists, it applies to all the Redis data types composed of multiple elements -- Streams, Sets, Sorted Sets and Hashes.
Basically we can summarize the behavior with three rules:
- When we add an element to an aggregate data type, if the target key does not exist, an empty aggregate data type is created before adding the element.
- When we remove elements from an aggregate data type, if the value remains empty, the key is automatically destroyed. The Stream data type is the only exception to this rule.
- Calling a read-only command such as
LLEN(which returns the length of the list), or a write command removing elements, with an empty key, always produces the same result as if the key is holding an empty aggregate type of the type the command expects to find.
Examples of rule 1:
> del mylist
(integer) 1
> lpush mylist 1 2 3
(integer) 3
However we can't perform operations against the wrong type if the key exists:
> set foo bar
OK
> lpush foo 1 2 3
(error) WRONGTYPE Operation against a key holding the wrong kind of value
> type foo
string
Example of rule 2:
> lpush mylist 1 2 3
(integer) 3
> exists mylist
(integer) 1
> lpop mylist
"3"
> lpop mylist
"2"
> lpop mylist
"1"
> exists mylist
(integer) 0
The key no longer exists after all the elements are popped.
Example of rule 3:
> del mylist
(integer) 0
> llen mylist
(integer) 0
> lpop mylist
(nil)
Hashes
Redis hashes look exactly how one might expect a "hash" to look, with field-value pairs:
> hmset user:1000 username antirez birthyear 1977 verified 1
OK
> hget user:1000 username
"antirez"
> hget user:1000 birthyear
"1977"
> hgetall user:1000
1) "username"
2) "antirez"
3) "birthyear"
4) "1977"
5) "verified"
6) "1"
While hashes are handy to represent objects, actually the number of fields you can put inside a hash has no practical limits (other than available memory), so you can use hashes in many different ways inside your application.
The command HMSET sets multiple fields of the hash, while HGET retrieves
a single field. HMGET is similar to HGET but returns an array of values:
> hmget user:1000 username birthyear no-such-field
1) "antirez"
2) "1977"
3) (nil)
There are commands that are able to perform operations on individual fields
as well, like HINCRBY:
> hincrby user:1000 birthyear 10
(integer) 1987
> hincrby user:1000 birthyear 10
(integer) 1997
You can find the full list of hash commands in the documentation.
It is worth noting that small hashes (i.e., a few elements with small values) are encoded in special way in memory that make them very memory efficient.
Sets
Redis Sets are unordered collections of strings. The
SADD command adds new elements to a set. It's also possible
to do a number of other operations against sets like testing if a given element
already exists, performing the intersection, union or difference between
multiple sets, and so forth.
> sadd myset 1 2 3
(integer) 3
> smembers myset
1. 3
2. 1
3. 2
Here I've added three elements to my set and told Redis to return all the elements. As you can see they are not sorted -- Redis is free to return the elements in any order at every call, since there is no contract with the user about element ordering.
Redis has commands to test for membership. For example, checking if an element exists:
> sismember myset 3
(integer) 1
> sismember myset 30
(integer) 0
"3" is a member of the set, while "30" is not.
Sets are good for expressing relations between objects. For instance we can easily use sets in order to implement tags.
A simple way to model this problem is to have a set for every object we want to tag. The set contains the IDs of the tags associated with the object.
One illustration is tagging news articles. If article ID 1000 is tagged with tags 1, 2, 5 and 77, a set can associate these tag IDs with the news item:
> sadd news:1000:tags 1 2 5 77
(integer) 4
We may also want to have the inverse relation as well: the list of all the news tagged with a given tag:
> sadd tag:1:news 1000
(integer) 1
> sadd tag:2:news 1000
(integer) 1
> sadd tag:5:news 1000
(integer) 1
> sadd tag:77:news 1000
(integer) 1
To get all the tags for a given object is trivial:
> smembers news:1000:tags
1. 5
2. 1
3. 77
4. 2
Note: in the example we assume you have another data structure, for example a Redis hash, which maps tag IDs to tag names.
There are other non trivial operations that are still easy to implement
using the right Redis commands. For instance we may want a list of all the
objects with the tags 1, 2, 10, and 27 together. We can do this using
the SINTER command, which performs the intersection between different
sets. We can use:
> sinter tag:1:news tag:2:news tag:10:news tag:27:news
... results here ...
In addition to intersection you can also perform unions, difference, extract a random element, and so forth.
The command to extract an element is called SPOP, and is handy to model
certain problems. For example in order to implement a web-based poker game,
you may want to represent your deck with a set. Imagine we use a one-char
prefix for (C)lubs, (D)iamonds, (H)earts, (S)pades:
> sadd deck C1 C2 C3 C4 C5 C6 C7 C8 C9 C10 CJ CQ CK
  D1 D2 D3 D4 D5 D6 D7 D8 D9 D10 DJ DQ DK H1 H2 H3
  H4 H5 H6 H7 H8 H9 H10 HJ HQ HK S1 S2 S3 S4 S5 S6
  S7 S8 S9 S10 SJ SQ SK
(integer) 52
Now we want to provide each player with 5 cards. The SPOP command
removes a random element, returning it to the client, so it is the
perfect operation in this case.
However if we call it against our deck directly, in the next play of the
game we'll need to populate the deck of cards again, which may not be
ideal. So to start, we can make a copy of the set stored in the deck key
into the game:1:deck key.
This is accomplished using SUNIONSTORE, which normally performs the
union between multiple sets, and stores the result into another set.
However, since the union of a single set is itself, I can copy my deck
with:
> sunionstore game:1:deck deck
(integer) 52
Now I'm ready to provide the first player with five cards:
> spop game:1:deck
"C6"
> spop game:1:deck
"CQ"
> spop game:1:deck
"D1"
> spop game:1:deck
"CJ"
> spop game:1:deck
"SJ"
One pair of jacks, not great...
This is a good time to introduce the set command that provides the number
of elements inside a set. This is often called the cardinality of a set
in the context of set theory, so the Redis command is called SCARD.
> scard game:1:deck
(integer) 47
The math works: 52 - 5 = 47.
When you need to just get random elements without removing them from the
set, there is the SRANDMEMBER command suitable for the task. It also features
the ability to return both repeating and non-repeating elements.
Sorted sets
Sorted sets are a data type which is similar to a mix between a Set and a Hash. Like sets, sorted sets are composed of unique, non-repeating string elements, so in some sense a sorted set is a set as well.
However while elements inside sets are not ordered, every element in a sorted set is associated with a floating point value, called the score (this is why the type is also similar to a hash, since every element is mapped to a value).
Moreover, elements in a sorted sets are taken in order (so they are not ordered on request, order is a peculiarity of the data structure used to represent sorted sets). They are ordered according to the following rule:
- If A and B are two elements with a different score, then A > B if A.score is > B.score.
- If A and B have exactly the same score, then A > B if the A string is lexicographically greater than the B string. A and B strings can't be equal since sorted sets only have unique elements.
Let's start with a simple example, adding a few selected hackers names as sorted set elements, with their year of birth as "score".
> zadd hackers 1940 "Alan Kay"
(integer) 1
> zadd hackers 1957 "Sophie Wilson"
(integer) 1
> zadd hackers 1953 "Richard Stallman"
(integer) 1
> zadd hackers 1949 "Anita Borg"
(integer) 1
> zadd hackers 1965 "Yukihiro Matsumoto"
(integer) 1
> zadd hackers 1914 "Hedy Lamarr"
(integer) 1
> zadd hackers 1916 "Claude Shannon"
(integer) 1
> zadd hackers 1969 "Linus Torvalds"
(integer) 1
> zadd hackers 1912 "Alan Turing"
(integer) 1
As you can see ZADD is similar to SADD, but takes one additional argument
(placed before the element to be added) which is the score.
ZADD is also variadic, so you are free to specify multiple score-value
pairs, even if this is not used in the example above.
With sorted sets it is trivial to return a list of hackers sorted by their birth year because actually they are already sorted.
Implementation note: Sorted sets are implemented via a dual-ported data structure containing both a skip list and a hash table, so every time we add an element Redis performs an O(log(N)) operation. That's good, but when we ask for sorted elements Redis does not have to do any work at all, it's already all sorted:
> zrange hackers 0 -1
1) "Alan Turing"
2) "Hedy Lamarr"
3) "Claude Shannon"
4) "Alan Kay"
5) "Anita Borg"
6) "Richard Stallman"
7) "Sophie Wilson"
8) "Yukihiro Matsumoto"
9) "Linus Torvalds"
Note: 0 and -1 means from element index 0 to the last element (-1 works
here just as it does in the case of the LRANGE command).
What if I want to order them the opposite way, youngest to oldest? Use ZREVRANGE instead of ZRANGE:
> zrevrange hackers 0 -1
1) "Linus Torvalds"
2) "Yukihiro Matsumoto"
3) "Sophie Wilson"
4) "Richard Stallman"
5) "Anita Borg"
6) "Alan Kay"
7) "Claude Shannon"
8) "Hedy Lamarr"
9) "Alan Turing"
It is possible to return scores as well, using the WITHSCORES argument:
> zrange hackers 0 -1 withscores
1) "Alan Turing"
2) "1912"
3) "Hedy Lamarr"
4) "1914"
5) "Claude Shannon"
6) "1916"
7) "Alan Kay"
8) "1940"
9) "Anita Borg"
10) "1949"
11) "Richard Stallman"
12) "1953"
13) "Sophie Wilson"
14) "1957"
15) "Yukihiro Matsumoto"
16) "1965"
17) "Linus Torvalds"
18) "1969"
Operating on ranges
Sorted sets are more powerful than this. They can operate on ranges.
Let's get all the individuals that were born up to 1950 inclusive. We
use the ZRANGEBYSCORE command to do it:
> zrangebyscore hackers -inf 1950
1) "Alan Turing"
2) "Hedy Lamarr"
3) "Claude Shannon"
4) "Alan Kay"
5) "Anita Borg"
We asked Redis to return all the elements with a score between negative infinity and 1950 (both extremes are included).
It's also possible to remove ranges of elements. Let's remove all the hackers born between 1940 and 1960 from the sorted set:
> zremrangebyscore hackers 1940 1960
(integer) 4
ZREMRANGEBYSCORE is perhaps not the best command name,
but it can be very useful, and returns the number of removed elements.
Another extremely useful operation defined for sorted set elements is the get-rank operation. It is possible to ask what is the position of an element in the set of the ordered elements.
> zrank hackers "Anita Borg"
(integer) 4
The ZREVRANK command is also available in order to get the rank, considering
the elements sorted a descending way.
Lexicographical scores
With recent versions of Redis 2.8, a new feature was introduced that allows
getting ranges lexicographically, assuming elements in a sorted set are all
inserted with the same identical score (elements are compared with the C
memcmp function, so it is guaranteed that there is no collation, and every
Redis instance will reply with the same output).
The main commands to operate with lexicographical ranges are ZRANGEBYLEX,
ZREVRANGEBYLEX, ZREMRANGEBYLEX and ZLEXCOUNT.
For example, let's add again our list of famous hackers, but this time use a score of zero for all the elements:
> zadd hackers 0 "Alan Kay" 0 "Sophie Wilson" 0 "Richard Stallman" 0
  "Anita Borg" 0 "Yukihiro Matsumoto" 0 "Hedy Lamarr" 0 "Claude Shannon"
  0 "Linus Torvalds" 0 "Alan Turing"
Because of the sorted sets ordering rules, they are already sorted lexicographically:
> zrange hackers 0 -1
1) "Alan Kay"
2) "Alan Turing"
3) "Anita Borg"
4) "Claude Shannon"
5) "Hedy Lamarr"
6) "Linus Torvalds"
7) "Richard Stallman"
8) "Sophie Wilson"
9) "Yukihiro Matsumoto"
Using ZRANGEBYLEX we can ask for lexicographical ranges:
> zrangebylex hackers [B [P
1) "Claude Shannon"
2) "Hedy Lamarr"
3) "Linus Torvalds"
Ranges can be inclusive or exclusive (depending on the first character),
also string infinite and minus infinite are specified respectively with
the + and - strings. See the documentation for more information.
This feature is important because it allows us to use sorted sets as a generic index. For example, if you want to index elements by a 128-bit unsigned integer argument, all you need to do is to add elements into a sorted set with the same score (for example 0) but with an 16 byte prefix consisting of the 128 bit number in big endian. Since numbers in big endian, when ordered lexicographically (in raw bytes order) are actually ordered numerically as well, you can ask for ranges in the 128 bit space, and get the element's value discarding the prefix.
If you want to see the feature in the context of a more serious demo, check the Redis autocomplete demo.
Updating the score: leader boards
Just a final note about sorted sets before switching to the next topic.
Sorted sets' scores can be updated at any time. Just calling ZADD against
an element already included in the sorted set will update its score
(and position) with O(log(N)) time complexity. As such, sorted sets are suitable
when there are tons of updates.
Because of this characteristic a common use case is leader boards. The typical application is a Facebook game where you combine the ability to take users sorted by their high score, plus the get-rank operation, in order to show the top-N users, and the user rank in the leader board (e.g., "you are the #4932 best score here").
Bitmaps
Bitmaps are not an actual data type, but a set of bit-oriented operations defined on the String type. Since strings are binary safe blobs and their maximum length is 512 MB, they are suitable to set up to 2^32 different bits.
Bit operations are divided into two groups: constant-time single bit operations, like setting a bit to 1 or 0, or getting its value, and operations on groups of bits, for example counting the number of set bits in a given range of bits (e.g., population counting).
One of the biggest advantages of bitmaps is that they often provide extreme space savings when storing information. For example in a system where different users are represented by incremental user IDs, it is possible to remember a single bit information (for example, knowing whether a user wants to receive a newsletter) of 4 billion of users using just 512 MB of memory.
Bits are set and retrieved using the SETBIT and GETBIT commands:
> setbit key 10 1
(integer) 1
> getbit key 10
(integer) 1
> getbit key 11
(integer) 0
The SETBIT command takes as its first argument the bit number, and as its second
argument the value to set the bit to, which is 1 or 0. The command
automatically enlarges the string if the addressed bit is outside the
current string length.
GETBIT just returns the value of the bit at the specified index.
Out of range bits (addressing a bit that is outside the length of the string
stored into the target key) are always considered to be zero.
There are three commands operating on group of bits:
BITOPperforms bit-wise operations between different strings. The provided operations are AND, OR, XOR and NOT.BITCOUNTperforms population counting, reporting the number of bits set to 1.BITPOSfinds the first bit having the specified value of 0 or 1.
Both BITPOS and BITCOUNT are able to operate with byte ranges of the
string, instead of running for the whole length of the string. The following
is a trivial example of BITCOUNT call:
> setbit key 0 1
(integer) 0
> setbit key 100 1
(integer) 0
> bitcount key
(integer) 2
Common use cases for bitmaps are:
- Real time analytics of all kinds.
- Storing space efficient but high performance boolean information associated with object IDs.
For example imagine you want to know the longest streak of daily visits of
your web site users. You start counting days starting from zero, that is the
day you made your web site public, and set a bit with SETBIT every time
the user visits the web site. As a bit index you simply take the current unix
time, subtract the initial offset, and divide by the number of seconds in a day
(normally, 3600*24).
This way for each user you have a small string containing the visit
information for each day. With BITCOUNT it is possible to easily get
the number of days a given user visited the web site, while with
a few BITPOS calls, or simply fetching and analyzing the bitmap client-side,
it is possible to easily compute the longest streak.
Bitmaps are trivial to split into multiple keys, for example for
the sake of sharding the data set and because in general it is better to
avoid working with huge keys. To split a bitmap across different keys
instead of setting all the bits into a key, a trivial strategy is just
to store M bits per key and obtain the key name with bit-number/M and
the Nth bit to address inside the key with bit-number MOD M.
HyperLogLogs
A HyperLogLog is a probabilistic data structure used in order to count unique things (technically this is referred to estimating the cardinality of a set). Usually counting unique items requires using an amount of memory proportional to the number of items you want to count, because you need to remember the elements you have already seen in the past in order to avoid counting them multiple times. However there is a set of algorithms that trade memory for precision: you end with an estimated measure with a standard error, which in the case of the Redis implementation is less than 1%. The magic of this algorithm is that you no longer need to use an amount of memory proportional to the number of items counted, and instead can use a constant amount of memory! 12k bytes in the worst case, or a lot less if your HyperLogLog (We'll just call them HLL from now) has seen very few elements.
HLLs in Redis, while technically a different data structure, are encoded
as a Redis string, so you can call GET to serialize a HLL, and SET
to deserialize it back to the server.
Conceptually the HLL API is like using Sets to do the same task. You would
SADD every observed element into a set, and would use SCARD to check the
number of elements inside the set, which are unique since SADD will not
re-add an existing element.
While you don't really add items into an HLL, because the data structure only contains a state that does not include actual elements, the API is the same:
Every time you see a new element, you add it to the count with
PFADD.Every time you want to retrieve the current approximation of the unique elements added with
PFADDso far, you use thePFCOUNT.> pfadd hll a b c d (integer) 1 > pfcount hll (integer) 4
An example of use case for this data structure is counting unique queries performed by users in a search form every day.
Redis is also able to perform the union of HLLs, please check the full documentation for more information.
Other notable features
There are other important things in the Redis API that can't be explored in the context of this document, but are worth your attention:
- It is possible to iterate the key space of a large collection incrementally.
- It is possible to run Lua scripts server side to improve latency and bandwidth.
- Redis is also a Pub-Sub server.
Learn more
This tutorial is in no way complete and has covered just the basics of the API. Read the command reference to discover a lot more.
Thanks for reading, and have fun hacking with Redis!
7.5.2 - Redis streams
An introduction to the Redis stream data type
The Stream is a new data type introduced with Redis 5.0, which models a log data structure in a more abstract way. However the essence of a log is still intact: like a log file, often implemented as a file open in append-only mode, Redis Streams are primarily an append-only data structure. At least conceptually, because being an abstract data type represented in memory, Redis Streams implement powerful operations to overcome the limitations of a log file.
What makes Redis streams the most complex type of Redis, despite the data structure itself being quite simple, is the fact that it implements additional, non-mandatory features: a set of blocking operations allowing consumers to wait for new data added to a stream by producers, and in addition to that a concept called Consumer Groups.
Consumer groups were initially introduced by the popular messaging system Kafka (TM). Redis reimplements a similar idea in completely different terms, but the goal is the same: to allow a group of clients to cooperate in consuming a different portion of the same stream of messages.
Streams basics
For the goal of understanding what Redis Streams are and how to use them, we will ignore all the advanced features, and instead focus on the data structure itself, in terms of commands used to manipulate and access it. This is, basically, the part which is common to most of the other Redis data types, like Lists, Sets, Sorted Sets and so forth. However, note that Lists also have an optional more complex blocking API, exported by commands like BLPOP and similar. So Streams are not much different than Lists in this regard, it's just that the additional API is more complex and more powerful.
Because Streams are an append only data structure, the fundamental write command, called XADD, appends a new entry into the specified stream. A stream entry is not just a string, but is instead composed of one or more field-value pairs. This way, each entry of a stream is already structured, like an append only file written in CSV format where multiple separated fields are present in each line.
> XADD mystream * sensor-id 1234 temperature 19.8
1518951480106-0
The above call to the XADD command adds an entry sensor-id: 1234, temperature: 19.8 to the stream at key mystream, using an auto-generated entry ID, which is the one returned by the command, specifically 1518951480106-0. It gets as its first argument the key name mystream, the second argument is the entry ID that identifies every entry inside a stream. However, in this case, we passed * because we want the server to generate a new ID for us. Every new ID will be monotonically increasing, so in more simple terms, every new entry added will have a higher ID compared to all the past entries. Auto-generation of IDs by the server is almost always what you want, and the reasons for specifying an ID explicitly are very rare. We'll talk more about this later. The fact that each Stream entry has an ID is another similarity with log files, where line numbers, or the byte offset inside the file, can be used in order to identify a given entry. Returning back at our XADD example, after the key name and ID, the next arguments are the field-value pairs composing our stream entry.
It is possible to get the number of items inside a Stream just using the XLEN command:
> XLEN mystream
(integer) 1
Entry IDs
The entry ID returned by the XADD command, and identifying univocally each entry inside a given stream, is composed of two parts:
<millisecondsTime>-<sequenceNumber>
The milliseconds time part is actually the local time in the local Redis node generating the stream ID, however if the current milliseconds time happens to be smaller than the previous entry time, then the previous entry time is used instead, so if a clock jumps backward the monotonically incrementing ID property still holds. The sequence number is used for entries created in the same millisecond. Since the sequence number is 64 bit wide, in practical terms there is no limit to the number of entries that can be generated within the same millisecond.
The format of such IDs may look strange at first, and the gentle reader may wonder why the time is part of the ID. The reason is that Redis streams support range queries by ID. Because the ID is related to the time the entry is generated, this gives the ability to query for time ranges basically for free. We will see this soon while covering the XRANGE command.
If for some reason the user needs incremental IDs that are not related to time but are actually associated to another external system ID, as previously mentioned, the XADD command can take an explicit ID instead of the * wildcard ID that triggers auto-generation, like in the following examples:
> XADD somestream 0-1 field value
0-1
> XADD somestream 0-2 foo bar
0-2
Note that in this case, the minimum ID is 0-1 and that the command will not accept an ID equal or smaller than a previous one:
> XADD somestream 0-1 foo bar
(error) ERR The ID specified in XADD is equal or smaller than the target stream top item
It is also possible to use an explicit ID that only consists of the milliseconds part, and have the sequence part be automatically generated for the entry:
> XADD somestream 0-* baz qux
0-3
Getting data from Streams
Now we are finally able to append entries in our stream via XADD. However, while appending data to a stream is quite obvious, the way streams can be queried in order to extract data is not so obvious. If we continue with the analogy of the log file, one obvious way is to mimic what we normally do with the Unix command tail -f, that is, we may start to listen in order to get the new messages that are appended to the stream. Note that unlike the blocking list operations of Redis, where a given element will reach a single client which is blocking in a pop style operation like BLPOP, with streams we want multiple consumers to see the new messages appended to the stream (the same way many tail -f processes can see what is added to a log). Using the traditional terminology we want the streams to be able to fan out messages to multiple clients.
However, this is just one potential access mode. We could also see a stream in quite a different way: not as a messaging system, but as a time series store. In this case, maybe it's also useful to get the new messages appended, but another natural query mode is to get messages by ranges of time, or alternatively to iterate the messages using a cursor to incrementally check all the history. This is definitely another useful access mode.
Finally, if we see a stream from the point of view of consumers, we may want to access the stream in yet another way, that is, as a stream of messages that can be partitioned to multiple consumers that are processing such messages, so that groups of consumers can only see a subset of the messages arriving in a single stream. In this way, it is possible to scale the message processing across different consumers, without single consumers having to process all the messages: each consumer will just get different messages to process. This is basically what Kafka (TM) does with consumer groups. Reading messages via consumer groups is yet another interesting mode of reading from a Redis Stream.
Redis Streams support all three of the query modes described above via different commands. The next sections will show them all, starting from the simplest and most direct to use: range queries.
Querying by range: XRANGE and XREVRANGE
To query the stream by range we are only required to specify two IDs, start and end. The range returned will include the elements having start or end as ID, so the range is inclusive. The two special IDs - and + respectively mean the smallest and the greatest ID possible.
> XRANGE mystream - +
1) 1) 1518951480106-0
   2) 1) "sensor-id"
      2) "1234"
      3) "temperature"
      4) "19.8"
2) 1) 1518951482479-0
   2) 1) "sensor-id"
      2) "9999"
      3) "temperature"
      4) "18.2"
Each entry returned is an array of two items: the ID and the list of field-value pairs. We already said that the entry IDs have a relation with the time, because the part at the left of the - character is the Unix time in milliseconds of the local node that created the stream entry, at the moment the entry was created (however note that streams are replicated with fully specified XADD commands, so the replicas will have identical IDs to the master). This means that I could query a range of time using XRANGE. In order to do so, however, I may want to omit the sequence part of the ID: if omitted, in the start of the range it will be assumed to be 0, while in the end part it will be assumed to be the maximum sequence number available. This way, querying using just two milliseconds Unix times, we get all the entries that were generated in that range of time, in an inclusive way. For instance, if I want to query a two milliseconds period I could use:
> XRANGE mystream 1518951480106 1518951480107
1) 1) 1518951480106-0
   2) 1) "sensor-id"
      2) "1234"
      3) "temperature"
      4) "19.8"
I have only a single entry in this range, however in real data sets, I could query for ranges of hours, or there could be many items in just two milliseconds, and the result returned could be huge. For this reason, XRANGE supports an optional COUNT option at the end. By specifying a count, I can just get the first N items. If I want more, I can get the last ID returned, increment the sequence part by one, and query again. Let's see this in the following example. We start adding 10 items with XADD (I won't show that, lets assume that the stream mystream was populated with 10 items). To start my iteration, getting 2 items per command, I start with the full range, but with a count of 2.
> XRANGE mystream - + COUNT 2
1) 1) 1519073278252-0
   2) 1) "foo"
      2) "value_1"
2) 1) 1519073279157-0
   2) 1) "foo"
      2) "value_2"
In order to continue the iteration with the next two items, I have to pick the last ID returned, that is 1519073279157-0 and add the prefix ( to it. The resulting exclusive range interval, that is (1519073279157-0 in this case, can now be used as the new start argument for the next XRANGE call:
> XRANGE mystream (1519073279157-0 + COUNT 2
1) 1) 1519073280281-0
   2) 1) "foo"
      2) "value_3"
2) 1) 1519073281432-0
   2) 1) "foo"
      2) "value_4"
And so forth. Since XRANGE complexity is O(log(N)) to seek, and then O(M) to return M elements, with a small count the command has a logarithmic time complexity, which means that each step of the iteration is fast. So XRANGE is also the de facto streams iterator and does not require an XSCAN command.
The command XREVRANGE is the equivalent of XRANGE but returning the elements in inverted order, so a practical use for XREVRANGE is to check what is the last item in a Stream:
> XREVRANGE mystream + - COUNT 1
1) 1) 1519073287312-0
   2) 1) "foo"
      2) "value_10"
Note that the XREVRANGE command takes the start and stop arguments in reverse order.
Listening for new items with XREAD
When we do not want to access items by a range in a stream, usually what we want instead is to subscribe to new items arriving to the stream. This concept may appear related to Redis Pub/Sub, where you subscribe to a channel, or to Redis blocking lists, where you wait for a key to get new elements to fetch, but there are fundamental differences in the way you consume a stream:
- A stream can have multiple clients (consumers) waiting for data. Every new item, by default, will be delivered to every consumer that is waiting for data in a given stream. This behavior is different than blocking lists, where each consumer will get a different element. However, the ability to fan out to multiple consumers is similar to Pub/Sub.
- While in Pub/Sub messages are fire and forget and are never stored anyway, and while when using blocking lists, when a message is received by the client it is popped (effectively removed) from the list, streams work in a fundamentally different way. All the messages are appended in the stream indefinitely (unless the user explicitly asks to delete entries): different consumers will know what is a new message from its point of view by remembering the ID of the last message received.
- Streams Consumer Groups provide a level of control that Pub/Sub or blocking lists cannot achieve, with different groups for the same stream, explicit acknowledgment of processed items, ability to inspect the pending items, claiming of unprocessed messages, and coherent history visibility for each single client, that is only able to see its private past history of messages.
The command that provides the ability to listen for new messages arriving into a stream is called XREAD. It's a bit more complex than XRANGE, so we'll start showing simple forms, and later the whole command layout will be provided.
> XREAD COUNT 2 STREAMS mystream 0
1) 1) "mystream"
   2) 1) 1) 1519073278252-0
         2) 1) "foo"
            2) "value_1"
      2) 1) 1519073279157-0
         2) 1) "foo"
            2) "value_2"
The above is the non-blocking form of XREAD. Note that the COUNT option is not mandatory, in fact the only mandatory option of the command is the STREAMS option, that specifies a list of keys together with the corresponding maximum ID already seen for each stream by the calling consumer, so that the command will provide the client only with messages with an ID greater than the one we specified.
In the above command we wrote STREAMS mystream 0 so we want all the messages in the Stream mystream having an ID greater than 0-0. As you can see in the example above, the command returns the key name, because actually it is possible to call this command with more than one key to read from different streams at the same time. I could write, for instance: STREAMS mystream otherstream 0 0. Note how after the STREAMS option we need to provide the key names, and later the IDs. For this reason, the STREAMS option must always be the last one.
Apart from the fact that XREAD can access multiple streams at once, and that we are able to specify the last ID we own to just get newer messages, in this simple form the command is not doing something so different compared to XRANGE. However, the interesting part is that we can turn XREAD into a blocking command easily, by specifying the BLOCK argument:
> XREAD BLOCK 0 STREAMS mystream $
Note that in the example above, other than removing COUNT, I specified the new BLOCK option with a timeout of 0 milliseconds (that means to never timeout). Moreover, instead of passing a normal ID for the stream mystream I passed the special ID $. This special ID means that XREAD should use as last ID the maximum ID already stored in the stream mystream, so that we will receive only new messages, starting from the time we started listening. This is similar to the tail -f Unix command in some way.
Note that when the BLOCK option is used, we do not have to use the special ID $. We can use any valid ID. If the command is able to serve our request immediately without blocking, it will do so, otherwise it will block. Normally if we want to consume the stream starting from new entries, we start with the ID $, and after that we continue using the ID of the last message received to make the next call, and so forth.
The blocking form of XREAD is also able to listen to multiple Streams, just by specifying multiple key names. If the request can be served synchronously because there is at least one stream with elements greater than the corresponding ID we specified, it returns with the results. Otherwise, the command will block and will return the items of the first stream which gets new data (according to the specified ID).
Similarly to blocking list operations, blocking stream reads are fair from the point of view of clients waiting for data, since the semantics is FIFO style. The first client that blocked for a given stream will be the first to be unblocked when new items are available.
XREAD has no other options than COUNT and BLOCK, so it's a pretty basic command with a specific purpose to attach consumers to one or multiple streams. More powerful features to consume streams are available using the consumer groups API, however reading via consumer groups is implemented by a different command called XREADGROUP, covered in the next section of this guide.
Consumer groups
When the task at hand is to consume the same stream from different clients, then XREAD already offers a way to fan-out to N clients, potentially also using replicas in order to provide more read scalability. However in certain problems what we want to do is not to provide the same stream of messages to many clients, but to provide a different subset of messages from the same stream to many clients. An obvious case where this is useful is that of messages which are slow to process: the ability to have N different workers that will receive different parts of the stream allows us to scale message processing, by routing different messages to different workers that are ready to do more work.
In practical terms, if we imagine having three consumers C1, C2, C3, and a stream that contains the messages 1, 2, 3, 4, 5, 6, 7 then what we want is to serve the messages according to the following diagram:
1 -> C1
2 -> C2
3 -> C3
4 -> C1
5 -> C2
6 -> C3
7 -> C1
In order to achieve this, Redis uses a concept called consumer groups. It is very important to understand that Redis consumer groups have nothing to do, from an implementation standpoint, with Kafka (TM) consumer groups. Yet they are similar in functionality, so I decided to keep Kafka's (TM) terminology, as it originally popularized this idea.
A consumer group is like a pseudo consumer that gets data from a stream, and actually serves multiple consumers, providing certain guarantees:
- Each message is served to a different consumer so that it is not possible that the same message will be delivered to multiple consumers.
- Consumers are identified, within a consumer group, by a name, which is a case-sensitive string that the clients implementing consumers must choose. This means that even after a disconnect, the stream consumer group retains all the state, since the client will claim again to be the same consumer. However, this also means that it is up to the client to provide a unique identifier.
- Each consumer group has the concept of the first ID never consumed so that, when a consumer asks for new messages, it can provide just messages that were not previously delivered.
- Consuming a message, however, requires an explicit acknowledgment using a specific command. Redis interprets the acknowledgment as: this message was correctly processed so it can be evicted from the consumer group.
- A consumer group tracks all the messages that are currently pending, that is, messages that were delivered to some consumer of the consumer group, but are yet to be acknowledged as processed. Thanks to this feature, when accessing the message history of a stream, each consumer will only see messages that were delivered to it.
In a way, a consumer group can be imagined as some amount of state about a stream:
+----------------------------------------+
| consumer_group_name: mygroup           |
| consumer_group_stream: somekey         |
| last_delivered_id: 1292309234234-92    |
|                                        |
| consumers:                             |
|    "consumer-1" with pending messages  |
|       1292309234234-4                  |
|       1292309234232-8                  |
|    "consumer-42" with pending messages |
|       ... (and so forth)               |
+----------------------------------------+
If you see this from this point of view, it is very simple to understand what a consumer group can do, how it is able to just provide consumers with their history of pending messages, and how consumers asking for new messages will just be served with message IDs greater than last_delivered_id. At the same time, if you look at the consumer group as an auxiliary data structure for Redis streams, it is obvious that a single stream can have multiple consumer groups, that have a different set of consumers. Actually, it is even possible for the same stream to have clients reading without consumer groups via XREAD, and clients reading via XREADGROUP in different consumer groups.
Now it's time to zoom in to see the fundamental consumer group commands. They are the following:
XGROUPis used in order to create, destroy and manage consumer groups.XREADGROUPis used to read from a stream via a consumer group.XACKis the command that allows a consumer to mark a pending message as correctly processed.
Creating a consumer group
Assuming I have a key mystream of type stream already existing, in order to create a consumer group I just need to do the following:
> XGROUP CREATE mystream mygroup $
OK
As you can see in the command above when creating the consumer group we have to specify an ID, which in the example is just $. This is needed because the consumer group, among the other states, must have an idea about what message to serve next at the first consumer connecting, that is, what was the last message ID when the group was just created. If we provide $ as we did, then only new messages arriving in the stream from now on will be provided to the consumers in the group. If we specify 0 instead the consumer group will consume all the messages in the stream history to start with. Of course, you can specify any other valid ID. What you know is that the consumer group will start delivering messages that are greater than the ID you specify. Because $ means the current greatest ID in the stream, specifying $ will have the effect of consuming only new messages.
XGROUP CREATE also supports creating the stream automatically, if it doesn't exist, using the optional MKSTREAM subcommand as the last argument:
> XGROUP CREATE newstream mygroup $ MKSTREAM
OK
Now that the consumer group is created we can immediately try to read messages via the consumer group using the XREADGROUP command. We'll read from consumers, that we will call Alice and Bob, to see how the system will return different messages to Alice or Bob.
XREADGROUP is very similar to XREAD and provides the same BLOCK option, otherwise it is a synchronous command. However there is a mandatory option that must be always specified, which is GROUP and has two arguments: the name of the consumer group, and the name of the consumer that is attempting to read. The option COUNT is also supported and is identical to the one in XREAD.
Before reading from the stream, let's put some messages inside:
> XADD mystream * message apple
1526569495631-0
> XADD mystream * message orange
1526569498055-0
> XADD mystream * message strawberry
1526569506935-0
> XADD mystream * message apricot
1526569535168-0
> XADD mystream * message banana
1526569544280-0
Note: here message is the field name, and the fruit is the associated value, remember that stream items are small dictionaries.
It is time to try reading something using the consumer group:
> XREADGROUP GROUP mygroup Alice COUNT 1 STREAMS mystream >
1) 1) "mystream"
   2) 1) 1) 1526569495631-0
         2) 1) "message"
            2) "apple"
XREADGROUP replies are just like XREAD replies. Note however the GROUP <group-name> <consumer-name> provided above. It states that I want to read from the stream using the consumer group mygroup and I'm the consumer Alice. Every time a consumer performs an operation with a consumer group, it must specify its name, uniquely identifying this consumer inside the group.
There is another very important detail in the command line above, after the mandatory STREAMS option the ID requested for the key mystream is the special ID >. This special ID is only valid in the context of consumer groups, and it means: messages never delivered to other consumers so far.
This is almost always what you want, however it is also possible to specify a real ID, such as 0 or any other valid ID, in this case, however, what happens is that we request from XREADGROUP to just provide us with the history of pending messages, and in such case, will never see new messages in the group. So basically XREADGROUP has the following behavior based on the ID we specify:
- If the ID is the special ID
>then the command will return only new messages never delivered to other consumers so far, and as a side effect, will update the consumer group's last ID. - If the ID is any other valid numerical ID, then the command will let us access our history of pending messages. That is, the set of messages that were delivered to this specified consumer (identified by the provided name), and never acknowledged so far with
XACK.
We can test this behavior immediately specifying an ID of 0, without any COUNT option: we'll just see the only pending message, that is, the one about apples:
> XREADGROUP GROUP mygroup Alice STREAMS mystream 0
1) 1) "mystream"
   2) 1) 1) 1526569495631-0
         2) 1) "message"
            2) "apple"
However, if we acknowledge the message as processed, it will no longer be part of the pending messages history, so the system will no longer report anything:
> XACK mystream mygroup 1526569495631-0
(integer) 1
> XREADGROUP GROUP mygroup Alice STREAMS mystream 0
1) 1) "mystream"
   2) (empty list or set)
Don't worry if you yet don't know how XACK works, the idea is just that processed messages are no longer part of the history that we can access.
Now it's Bob's turn to read something:
> XREADGROUP GROUP mygroup Bob COUNT 2 STREAMS mystream >
1) 1) "mystream"
   2) 1) 1) 1526569498055-0
         2) 1) "message"
            2) "orange"
      2) 1) 1526569506935-0
         2) 1) "message"
            2) "strawberry"
Bob asked for a maximum of two messages and is reading via the same group mygroup. So what happens is that Redis reports just new messages. As you can see the "apple" message is not delivered, since it was already delivered to Alice, so Bob gets orange and strawberry, and so forth.
This way Alice, Bob, and any other consumer in the group, are able to read different messages from the same stream, to read their history of yet to process messages, or to mark messages as processed. This allows creating different topologies and semantics for consuming messages from a stream.
There are a few things to keep in mind:
- Consumers are auto-created the first time they are mentioned, no need for explicit creation.
- Even with
XREADGROUPyou can read from multiple keys at the same time, however for this to work, you need to create a consumer group with the same name in every stream. This is not a common need, but it is worth mentioning that the feature is technically available. XREADGROUPis a write command because even if it reads from the stream, the consumer group is modified as a side effect of reading, so it can only be called on master instances.
An example of a consumer implementation, using consumer groups, written in the Ruby language could be the following. The Ruby code is aimed to be readable by virtually any experienced programmer, even if they do not know Ruby:
require 'redis'

if ARGV.length == 0
    puts "Please specify a consumer name"
    exit 1
end

ConsumerName = ARGV[0]
GroupName = "mygroup"
r = Redis.new

def process_message(id,msg)
    puts "[#{ConsumerName}] #{id} = #{msg.inspect}"
end

$lastid = '0-0'

puts "Consumer #{ConsumerName} starting..."
check_backlog = true
while true
    # Pick the ID based on the iteration: the first time we want to
    # read our pending messages, in case we crashed and are recovering.
    # Once we consumed our history, we can start getting new messages.
    if check_backlog
        myid = $lastid
    else
        myid = '>'
    end

    items = r.xreadgroup('GROUP',GroupName,ConsumerName,'BLOCK','2000','COUNT','10','STREAMS',:my_stream_key,myid)

    if items == nil
        puts "Timeout!"
        next
    end

    # If we receive an empty reply, it means we were consuming our history
    # and that the history is now empty. Let's start to consume new messages.
    check_backlog = false if items[0][1].length == 0

    items[0][1].each{|i|
        id,fields = i

        # Process the message
        process_message(id,fields)

        # Acknowledge the message as processed
        r.xack(:my_stream_key,GroupName,id)

        $lastid = id
    }
end
As you can see the idea here is to start by consuming the history, that is, our list of pending messages. This is useful because the consumer may have crashed before, so in the event of a restart we want to re-read messages that were delivered to us without getting acknowledged. Note that we might process a message multiple times or one time (at least in the case of consumer failures, but there are also the limits of Redis persistence and replication involved, see the specific section about this topic).
Once the history was consumed, and we get an empty list of messages, we can switch to using the > special ID in order to consume new messages.
Recovering from permanent failures
The example above allows us to write consumers that participate in the same consumer group, each taking a subset of messages to process, and when recovering from failures re-reading the pending messages that were delivered just to them. However in the real world consumers may permanently fail and never recover. What happens to the pending messages of the consumer that never recovers after stopping for any reason?
Redis consumer groups offer a feature that is used in these situations in order to claim the pending messages of a given consumer so that such messages will change ownership and will be re-assigned to a different consumer. The feature is very explicit. A consumer has to inspect the list of pending messages, and will have to claim specific messages using a special command, otherwise the server will leave the messages pending forever and assigned to the old consumer. In this way different applications can choose if to use such a feature or not, and exactly how to use it.
The first step of this process is just a command that provides observability of pending entries in the consumer group and is called XPENDING.
This is a read-only command which is always safe to call and will not change ownership of any message.
In its simplest form, the command is called with two arguments, which are the name of the stream and the name of the consumer group.
> XPENDING mystream mygroup
1) (integer) 2
2) 1526569498055-0
3) 1526569506935-0
4) 1) 1) "Bob"
      2) "2"
When called in this way, the command outputs the total number of pending messages in the consumer group (two in this case), the lower and higher message ID among the pending messages, and finally a list of consumers and the number of pending messages they have.
We have only Bob with two pending messages because the single message that Alice requested was acknowledged using XACK.
We can ask for more information by giving more arguments to XPENDING, because the full command signature is the following:
XPENDING <key> <groupname> [[IDLE <min-idle-time>] <start-id> <end-id> <count> [<consumer-name>]]
By providing a start and end ID (that can be just - and + as in XRANGE) and a count to control the amount of information returned by the command, we are able to know more about the pending messages. The optional final argument, the consumer name, is used if we want to limit the output to just messages pending for a given consumer, but won't use this feature in the following example.
> XPENDING mystream mygroup - + 10
1) 1) 1526569498055-0
   2) "Bob"
   3) (integer) 74170458
   4) (integer) 1
2) 1) 1526569506935-0
   2) "Bob"
   3) (integer) 74170458
   4) (integer) 1
Now we have the details for each message: the ID, the consumer name, the idle time in milliseconds, which is how many milliseconds have passed since the last time the message was delivered to some consumer, and finally the number of times that a given message was delivered. We have two messages from Bob, and they are idle for 74170458 milliseconds, about 20 hours.
Note that nobody prevents us from checking what the first message content was by just using XRANGE.
> XRANGE mystream 1526569498055-0 1526569498055-0
1) 1) 1526569498055-0
   2) 1) "message"
      2) "orange"
We have just to repeat the same ID twice in the arguments. Now that we have some ideas, Alice may decide that after 20 hours of not processing messages, Bob will probably not recover in time, and it's time to claim such messages and resume the processing in place of Bob. To do so, we use the XCLAIM command.
This command is very complex and full of options in its full form, since it is used for replication of consumer groups changes, but we'll use just the arguments that we need normally. In this case it is as simple as:
XCLAIM <key> <group> <consumer> <min-idle-time> <ID-1> <ID-2> ... <ID-N>
Basically we say, for this specific key and group, I want that the message IDs specified will change ownership, and will be assigned to the specified consumer name <consumer>. However, we also provide a minimum idle time, so that the operation will only work if the idle time of the mentioned messages is greater than the specified idle time. This is useful because maybe two clients are retrying to claim a message at the same time:
Client 1: XCLAIM mystream mygroup Alice 3600000 1526569498055-0
Client 2: XCLAIM mystream mygroup Lora 3600000 1526569498055-0
However, as a side effect, claiming a message will reset its idle time and will increment its number of deliveries counter, so the second client will fail claiming it. In this way we avoid trivial re-processing of messages (even if in the general case you cannot obtain exactly once processing).
This is the result of the command execution:
> XCLAIM mystream mygroup Alice 3600000 1526569498055-0
1) 1) 1526569498055-0
   2) 1) "message"
      2) "orange"
The message was successfully claimed by Alice, who can now process the message and acknowledge it, and move things forward even if the original consumer is not recovering.
It is clear from the example above that as a side effect of successfully claiming a given message, the XCLAIM command also returns it. However this is not mandatory. The JUSTID option can be used in order to return just the IDs of the message successfully claimed. This is useful if you want to reduce the bandwidth used between the client and the server (and also the performance of the command) and you are not interested in the message because your consumer is implemented in a way that it will rescan the history of pending messages from time to time.
Claiming may also be implemented by a separate process: one that just checks the list of pending messages, and assigns idle messages to consumers that appear to be active. Active consumers can be obtained using one of the observability features of Redis streams. This is the topic of the next section.
Automatic claiming
The XAUTOCLAIM command, added in Redis 6.2, implements the claiming process that we've described above.
XPENDING and XCLAIM provide the basic building blocks for different types of recovery mechanisms.
This command optimizes the generic process by having Redis manage it and offers a simple solution for most recovery needs.
XAUTOCLAIM identifies idle pending messages and transfers ownership of them to a consumer.
The command's signature looks like this:
XAUTOCLAIM <key> <group> <consumer> <min-idle-time> <start> [COUNT count] [JUSTID]
So, in the example above, I could have used automatic claiming to claim a single message like this:
> XAUTOCLAIM mystream mygroup Alice 3600000 0-0 COUNT 1
1) 1526569498055-0
2) 1) 1526569498055-0
   2) 1) "message"
      2) "orange"
Like XCLAIM, the command replies with an array of the claimed messages, but it also returns a stream ID that allows iterating the pending entries.
The stream ID is a cursor, and I can use it in my next call to continue in claiming idle pending messages:
> XAUTOCLAIM mystream mygroup Lora 3600000 1526569498055-0 COUNT 1
1) 0-0
2) 1) 1526569506935-0
   2) 1) "message"
      2) "strawberry"
When XAUTOCLAIM returns the "0-0" stream ID as a cursor, that means that it reached the end of the consumer group pending entries list.
That doesn't mean that there are no new idle pending messages, so the process continues by calling XAUTOCLAIM from the beginning of the stream.
Claiming and the delivery counter
The counter that you observe in the XPENDING output is the number of deliveries of each message. The counter is incremented in two ways: when a message is successfully claimed via XCLAIM or when an XREADGROUP call is used in order to access the history of pending messages.
When there are failures, it is normal that messages will be delivered multiple times, but eventually they usually get processed and acknowledged. However there might be a problem processing some specific message, because it is corrupted or crafted in a way that triggers a bug in the processing code. In such a case what happens is that consumers will continuously fail to process this particular message. Because we have the counter of the delivery attempts, we can use that counter to detect messages that for some reason are not processable. So once the deliveries counter reaches a given large number that you chose, it is probably wiser to put such messages in another stream and send a notification to the system administrator. This is basically the way that Redis Streams implements the dead letter concept.
Streams observability
Messaging systems that lack observability are very hard to work with. Not knowing who is consuming messages, what messages are pending, the set of consumer groups active in a given stream, makes everything opaque. For this reason, Redis Streams and consumer groups have different ways to observe what is happening. We already covered XPENDING, which allows us to inspect the list of messages that are under processing at a given moment, together with their idle time and number of deliveries.
However we may want to do more than that, and the XINFO command is an observability interface that can be used with sub-commands in order to get information about streams or consumer groups.
This command uses subcommands in order to show different information about the status of the stream and its consumer groups. For instance XINFO STREAM
> XINFO STREAM mystream
 1) "length"
 2) (integer) 2
 3) "radix-tree-keys"
 4) (integer) 1
 5) "radix-tree-nodes"
 6) (integer) 2
 7) "last-generated-id"
 8) "1638125141232-0"
 9) "max-deleted-entryid"
10) "0-0"
11) "entries-added"
12) (integer) 2
13) "groups"
14) (integer) 1
15) "first-entry"
16) 1) "1638125133432-0"
    2) 1) "message"
       2) "apple"
17) "last-entry"
18) 1) "1638125141232-0"
    2) 1) "message"
       2) "banana"
The output shows information about how the stream is encoded internally, and also shows the first and last message in the stream. Another piece of information available is the number of consumer groups associated with this stream. We can dig further asking for more information about the consumer groups.
> XINFO GROUPS mystream
1)  1) "name"
    2) "mygroup"
    3) "consumers"
    4) (integer) 2
    5) "pending"
    6) (integer) 2
    7) "last-delivered-id"
    8) "1638126030001-0"
    9) "entries-read"
   10) (integer) 2
   11) "lag"
   12) (integer) 0
2)  1) "name"
    2) "some-other-group"
    3) "consumers"
    4) (integer) 1
    5) "pending"
    6) (integer) 0
    7) "last-delivered-id"
    8) "1638126028070-0"
    9) "entries-read"
   10) (integer) 1
   11) "lag"
   12) (integer) 1
As you can see in this and in the previous output, the XINFO command outputs a sequence of field-value items. Because it is an observability command this allows the human user to immediately understand what information is reported, and allows the command to report more information in the future by adding more fields without breaking compatibility with older clients. Other commands that must be more bandwidth efficient, like XPENDING, just report the information without the field names.
The output of the example above, where the GROUPS subcommand is used, should be clear observing the field names. We can check in more detail the state of a specific consumer group by checking the consumers that are registered in the group.
> XINFO CONSUMERS mystream mygroup
1) 1) name
   2) "Alice"
   3) pending
   4) (integer) 1
   5) idle
   6) (integer) 9104628
2) 1) name
   2) "Bob"
   3) pending
   4) (integer) 1
   5) idle
   6) (integer) 83841983
In case you do not remember the syntax of the command, just ask the command itself for help:
> XINFO HELP
1) XINFO <subcommand> [<arg> [value] [opt] ...]. Subcommands are:
2) CONSUMERS <key> <groupname>
3)     Show consumers of <groupname>.
4) GROUPS <key>
5)     Show the stream consumer groups.
6) STREAM <key> [FULL [COUNT <count>]
7)     Show information about the stream.
8) HELP
9)     Prints this help.
Differences with Kafka (TM) partitions
Consumer groups in Redis streams may resemble in some way Kafka (TM) partitioning-based consumer groups, however note that Redis streams are, in practical terms, very different. The partitions are only logical and the messages are just put into a single Redis key, so the way the different clients are served is based on who is ready to process new messages, and not from which partition clients are reading. For instance, if the consumer C3 at some point fails permanently, Redis will continue to serve C1 and C2 all the new messages arriving, as if now there are only two logical partitions.
Similarly, if a given consumer is much faster at processing messages than the other consumers, this consumer will receive proportionally more messages in the same unit of time. This is possible since Redis tracks all the unacknowledged messages explicitly, and remembers who received which message and the ID of the first message never delivered to any consumer.
However, this also means that in Redis if you really want to partition messages in the same stream into multiple Redis instances, you have to use multiple keys and some sharding system such as Redis Cluster or some other application-specific sharding system. A single Redis stream is not automatically partitioned to multiple instances.
We could say that schematically the following is true:
- If you use 1 stream -> 1 consumer, you are processing messages in order.
- If you use N streams with N consumers, so that only a given consumer hits a subset of the N streams, you can scale the above model of 1 stream -> 1 consumer.
- If you use 1 stream -> N consumers, you are load balancing to N consumers, however in that case, messages about the same logical item may be consumed out of order, because a given consumer may process message 3 faster than another consumer is processing message 4.
So basically Kafka partitions are more similar to using N different Redis keys, while Redis consumer groups are a server-side load balancing system of messages from a given stream to N different consumers.
Capped Streams
Many applications do not want to collect data into a stream forever. Sometimes it is useful to have at maximum a given number of items inside a stream, other times once a given size is reached, it is useful to move data from Redis to a storage which is not in memory and not as fast but suited to store the history for, potentially, decades to come. Redis streams have some support for this. One is the MAXLEN option of the XADD command. This option is very simple to use:
> XADD mystream MAXLEN 2 * value 1
1526654998691-0
> XADD mystream MAXLEN 2 * value 2
1526654999635-0
> XADD mystream MAXLEN 2 * value 3
1526655000369-0
> XLEN mystream
(integer) 2
> XRANGE mystream - +
1) 1) 1526654999635-0
   2) 1) "value"
      2) "2"
2) 1) 1526655000369-0
   2) 1) "value"
      2) "3"
Using MAXLEN the old entries are automatically evicted when the specified length is reached, so that the stream is left at a constant size. There is currently no option to tell the stream to just retain items that are not older than a given period, because such command, in order to run consistently, would potentially block for a long time in order to evict items. Imagine for example what happens if there is an insertion spike, then a long pause, and another insertion, all with the same maximum time. The stream would block to evict the data that became too old during the pause. So it is up to the user to do some planning and understand what is the maximum stream length desired. Moreover, while the length of the stream is proportional to the memory used, trimming by time is less simple to control and anticipate: it depends on the insertion rate which often changes over time (and when it does not change, then to just trim by size is trivial).
However trimming with MAXLEN can be expensive: streams are represented by macro nodes into a radix tree, in order to be very memory efficient. Altering the single macro node, consisting of a few tens of elements, is not optimal. So it's possible to use the command in the following special form:
XADD mystream MAXLEN ~ 1000 * ... entry fields here ...
The ~ argument between the MAXLEN option and the actual count means, I don't really need this to be exactly 1000 items. It can be 1000 or 1010 or 1030, just make sure to save at least 1000 items. With this argument, the trimming is performed only when we can remove a whole node. This makes it much more efficient, and it is usually what you want.
There is also the XTRIM command, which performs something very similar to what the MAXLEN option does above, except that it can be run by itself:
> XTRIM mystream MAXLEN 10
Or, as for the XADD option:
> XTRIM mystream MAXLEN ~ 10
However, XTRIM is designed to accept different trimming strategies. Another trimming strategy is MINID, that evicts entries with IDs lower than the one specified.
As XTRIM is an explicit command, the user is expected to know about the possible shortcomings of different trimming strategies.
Another useful eviction strategy that may be added to XTRIM in the future, is to remove by a range of IDs to ease use of XRANGE and XTRIM to move data from Redis to other storage systems if needed.
Special IDs in the streams API
You may have noticed that there are several special IDs that can be used in the Redis API. Here is a short recap, so that they can make more sense in the future.
The first two special IDs are - and +, and are used in range queries with the XRANGE command. Those two IDs respectively mean the smallest ID possible (that is basically 0-1) and the greatest ID possible (that is 18446744073709551615-18446744073709551615). As you can see it is a lot cleaner to write - and + instead of those numbers.
Then there are APIs where we want to say, the ID of the item with the greatest ID inside the stream. This is what $ means. So for instance if I want only new entries with XREADGROUP I use this ID to signify I already have all the existing entries, but not the new ones that will be inserted in the future. Similarly when I create or set the ID of a consumer group, I can set the last delivered item to $ in order to just deliver new entries to the consumers in the group.
As you can see $ does not mean +, they are two different things, as + is the greatest ID possible in every possible stream, while $ is the greatest ID in a given stream containing given entries. Moreover APIs will usually only understand + or $, yet it was useful to avoid loading a given symbol with multiple meanings.
Another special ID is >, that is a special meaning only related to consumer groups and only when the XREADGROUP command is used. This special ID means that we want only entries that were never delivered to other consumers so far. So basically the > ID is the last delivered ID of a consumer group.
Finally the special ID *, that can be used only with the XADD command, means to auto select an ID for us for the new entry.
So we have -, +, $, > and *, and all have a different meaning, and most of the time, can be used in different contexts.
Persistence, replication and message safety
A Stream, like any other Redis data structure, is asynchronously replicated to replicas and persisted into AOF and RDB files. However what may not be so obvious is that also the consumer groups full state is propagated to AOF, RDB and replicas, so if a message is pending in the master, also the replica will have the same information. Similarly, after a restart, the AOF will restore the consumer groups' state.
However note that Redis streams and consumer groups are persisted and replicated using the Redis default replication, so:
- AOF must be used with a strong fsync policy if persistence of messages is important in your application.
- By default the asynchronous replication will not guarantee that
XADDcommands or consumer groups state changes are replicated: after a failover something can be missing depending on the ability of replicas to receive the data from the master. - The
WAITcommand may be used in order to force the propagation of the changes to a set of replicas. However note that while this makes it very unlikely that data is lost, the Redis failover process as operated by Sentinel or Redis Cluster performs only a best effort check to failover to the replica which is the most updated, and under certain specific failure conditions may promote a replica that lacks some data.
So when designing an application using Redis streams and consumer groups, make sure to understand the semantical properties your application should have during failures, and configure things accordingly, evaluating whether it is safe enough for your use case.
Removing single items from a stream
Streams also have a special command for removing items from the middle of a stream, just by ID. Normally for an append only data structure this may look like an odd feature, but it is actually useful for applications involving, for instance, privacy regulations. The command is called XDEL and receives the name of the stream followed by the IDs to delete:
> XRANGE mystream - + COUNT 2
1) 1) 1526654999635-0
   2) 1) "value"
      2) "2"
2) 1) 1526655000369-0
   2) 1) "value"
      2) "3"
> XDEL mystream 1526654999635-0
(integer) 1
> XRANGE mystream - + COUNT 2
1) 1) 1526655000369-0
   2) 1) "value"
      2) "3"
However in the current implementation, memory is not really reclaimed until a macro node is completely empty, so you should not abuse this feature.
Zero length streams
A difference between streams and other Redis data structures is that when the other data structures no longer have any elements, as a side effect of calling commands that remove elements, the key itself will be removed. So for instance, a sorted set will be completely removed when a call to ZREM will remove the last element in the sorted set. Streams, on the other hand, are allowed to stay at zero elements, both as a result of using a MAXLEN option with a count of zero (XADD and XTRIM commands), or because XDEL was called.
The reason why such an asymmetry exists is because Streams may have associated consumer groups, and we do not want to lose the state that the consumer groups defined just because there are no longer any items in the stream. Currently the stream is not deleted even when it has no associated consumer groups.
Total latency of consuming a message
Non blocking stream commands like XRANGE and XREAD or XREADGROUP without the BLOCK option are served synchronously like any other Redis command, so to discuss latency of such commands is meaningless: it is more interesting to check the time complexity of the commands in the Redis documentation. It should be enough to say that stream commands are at least as fast as sorted set commands when extracting ranges, and that XADD is very fast and can easily insert from half a million to one million items per second in an average machine if pipelining is used.
However latency becomes an interesting parameter if we want to understand the delay of processing a message, in the context of blocking consumers in a consumer group, from the moment the message is produced via XADD, to the moment the message is obtained by the consumer because XREADGROUP returned with the message.
How serving blocked consumers works
Before providing the results of performed tests, it is interesting to understand what model Redis uses in order to route stream messages (and in general actually how any blocking operation waiting for data is managed).
- The blocked client is referenced in a hash table that maps keys for which there is at least one blocking consumer, to a list of consumers that are waiting for such key. This way, given a key that received data, we can resolve all the clients that are waiting for such data.
- When a write happens, in this case when the
XADDcommand is called, it calls thesignalKeyAsReady()function. This function will put the key into a list of keys that need to be processed, because such keys may have new data for blocked consumers. Note that such ready keys will be processed later, so in the course of the same event loop cycle, it is possible that the key will receive other writes. - Finally, before returning into the event loop, the ready keys are finally processed. For each key the list of clients waiting for data is scanned, and if applicable, such clients will receive the new data that arrived. In the case of streams the data is the messages in the applicable range requested by the consumer.
As you can see, basically, before returning to the event loop both the client calling XADD and the clients blocked to consume messages, will have their reply in the output buffers, so the caller of XADD should receive the reply from Redis at about the same time the consumers will receive the new messages.
This model is push-based, since adding data to the consumers buffers will be performed directly by the action of calling XADD, so the latency tends to be quite predictable.
Latency tests results
In order to check these latency characteristics a test was performed using multiple instances of Ruby programs pushing messages having as an additional field the computer millisecond time, and Ruby programs reading the messages from the consumer group and processing them. The message processing step consisted of comparing the current computer time with the message timestamp, in order to understand the total latency.
Results obtained:
Processed between 0 and 1 ms -> 74.11%
Processed between 1 and 2 ms -> 25.80%
Processed between 2 and 3 ms -> 0.06%
Processed between 3 and 4 ms -> 0.01%
Processed between 4 and 5 ms -> 0.02%
So 99.9% of requests have a latency <= 2 milliseconds, with the outliers that remain still very close to the average.
Adding a few million unacknowledged messages to the stream does not change the gist of the benchmark, with most queries still processed with very short latency.
A few remarks:
- Here we processed up to 10k messages per iteration, this means that the
COUNTparameter ofXREADGROUPwas set to 10000. This adds a lot of latency but is needed in order to allow the slow consumers to be able to keep with the message flow. So you can expect a real world latency that is a lot smaller. - The system used for this benchmark is very slow compared to today's standards.
7.6 - Key eviction
Overview of Redis key eviction policies (LRU, LFU, etc.)
When Redis is used as a cache, it is often convenient to let it automatically evict old data as you add new data. This behavior is well known in the developer community, since it is the default behavior for the popular memcached system.
This page covers the more general topic of the Redis maxmemory directive used to limit the memory usage to a fixed amount. This page it also covers in
depth the LRU eviction algorithm used by Redis, that is actually an approximation of
the exact LRU.
Maxmemory configuration directive
The maxmemory configuration directive configures Redis
to use a specified amount of memory for the data set. You can
set the configuration directive using the redis.conf file, or later using
the CONFIG SET command at runtime.
For example, to configure a memory limit of 100 megabytes, you can use the
following directive inside the redis.conf file:
maxmemory 100mb
Setting maxmemory to zero results into no memory limits. This is the
default behavior for 64 bit systems, while 32 bit systems use an implicit
memory limit of 3GB.
When the specified amount of memory is reached, how eviction policies are configured determines the default behavior. Redis can return errors for commands that could result in more memory being used, or it can evict some old data to return back to the specified limit every time new data is added.
Eviction policies
The exact behavior Redis follows when the maxmemory limit is reached is
configured using the maxmemory-policy configuration directive.
The following policies are available:
- noeviction: New values aren’t saved when memory limit is reached. When a database uses replication, this applies to the primary database
- allkeys-lru: Keeps most recently used keys; removes least recently used (LRU) keys
- allkeys-lfu: Keeps frequently used keys; removes least frequently used (LFU) keys
- volatile-lru: Removes least recently used keys with the
expirefield set totrue. - volatile-lfu: Removes least frequently used keys with the
expirefield set totrue. - allkeys-random: Randomly removes keys to make space for the new data added.
- volatile-random: Randomly removes keys with
expirefield set totrue. - volatile-ttl: Removes least frequently used keys with
expirefield set totrueand the shortest remaining time-to-live (TTL) value.
The policies volatile-lru, volatile-lfu, volatile-random, and volatile-ttl behave like noeviction if there are no keys to evict matching the prerequisites.
Picking the right eviction policy is important depending on the access pattern
of your application, however you can reconfigure the policy at runtime while
the application is running, and monitor the number of cache misses and hits
using the Redis INFO output to tune your setup.
In general as a rule of thumb:
Use the allkeys-lru policy when you expect a power-law distribution in the popularity of your requests. That is, you expect a subset of elements will be accessed far more often than the rest. This is a good pick if you are unsure.
Use the allkeys-random if you have a cyclic access where all the keys are scanned continuously, or when you expect the distribution to be uniform.
Use the volatile-ttl if you want to be able to provide hints to Redis about what are good candidate for expiration by using different TTL values when you create your cache objects.
The volatile-lru and volatile-random policies are mainly useful when you want to use a single instance for both caching and to have a set of persistent keys. However it is usually a better idea to run two Redis instances to solve such a problem.
It is also worth noting that setting an expire value to a key costs memory, so using a policy like allkeys-lru is more memory efficient since there is no need for an expire configuration for the key to be evicted under memory pressure.
How the eviction process works
It is important to understand that the eviction process works like this:
- A client runs a new command, resulting in more data added.
- Redis checks the memory usage, and if it is greater than the
maxmemorylimit , it evicts keys according to the policy. - A new command is executed, and so forth.
So we continuously cross the boundaries of the memory limit, by going over it, and then by evicting keys to return back under the limits.
If a command results in a lot of memory being used (like a big set intersection stored into a new key) for some time, the memory limit can be surpassed by a noticeable amount.
Approximated LRU algorithm
Redis LRU algorithm is not an exact implementation. This means that Redis is not able to pick the best candidate for eviction, that is, the access that was accessed the furthest in the past. Instead it will try to run an approximation of the LRU algorithm, by sampling a small number of keys, and evicting the one that is the best (with the oldest access time) among the sampled keys.
However, since Redis 3.0 the algorithm was improved to also take a pool of good candidates for eviction. This improved the performance of the algorithm, making it able to approximate more closely the behavior of a real LRU algorithm.
What is important about the Redis LRU algorithm is that you are able to tune the precision of the algorithm by changing the number of samples to check for every eviction. This parameter is controlled by the following configuration directive:
maxmemory-samples 5
The reason Redis does not use a true LRU implementation is because it costs more memory. However, the approximation is virtually equivalent for an application using Redis. The following is a graphical comparison of how the LRU approximation used by Redis compares with true LRU.

The test to generate the above graphs filled a Redis server with a given number of keys. The keys were accessed from the first to the last. The first keys are the best candidates for eviction using an LRU algorithm. Later more 50% of keys are added, in order to force half of the old keys to be evicted.
You can see three kind of dots in the graphs, forming three distinct bands.
- The light gray band are objects that were evicted.
- The gray band are objects that were not evicted.
- The green band are objects that were added.
In a theoretical LRU implementation we expect that, among the old keys, the first half will be expired. The Redis LRU algorithm will instead only probabilistically expire the older keys.
As you can see Redis 3.0 does a better job with 5 samples compared to Redis 2.8, however most objects that are among the latest accessed are still retained by Redis 2.8. Using a sample size of 10 in Redis 3.0 the approximation is very close to the theoretical performance of Redis 3.0.
Note that LRU is just a model to predict how likely a given key will be accessed in the future. Moreover, if your data access pattern closely resembles the power law, most of the accesses will be in the set of keys the LRU approximated algorithm can handle well.
In simulations we found that using a power law access pattern, the difference between true LRU and Redis approximation were minimal or non-existent.
However you can raise the sample size to 10 at the cost of some additional CPU usage to closely approximate true LRU, and check if this makes a difference in your cache misses rate.
To experiment in production with different values for the sample size by using
the CONFIG SET maxmemory-samples <count> command, is very simple.
The new LFU mode
Starting with Redis 4.0, the Least Frequently Used eviction mode is available. This mode may work better (provide a better hits/misses ratio) in certain cases. In LFU mode, Redis will try to track the frequency of access of items, so the ones used rarely are evicted. This means the keys used often have an higher chance of remaining in memory.
To configure the LFU mode, the following policies are available:
volatile-lfuEvict using approximated LFU among the keys with an expire set.allkeys-lfuEvict any key using approximated LFU.
LFU is approximated like LRU: it uses a probabilistic counter, called a Morris counter to estimate the object access frequency using just a few bits per object, combined with a decay period so that the counter is reduced over time. At some point we no longer want to consider keys as frequently accessed, even if they were in the past, so that the algorithm can adapt to a shift in the access pattern.
That information is sampled similarly to what happens for LRU (as explained in the previous section of this documentation) to select a candidate for eviction.
However unlike LRU, LFU has certain tunable parameters: for example, how fast should a frequent item lower in rank if it gets no longer accessed? It is also possible to tune the Morris counters range to better adapt the algorithm to specific use cases.
By default Redis is configured to:
- Saturate the counter at, around, one million requests.
- Decay the counter every one minute.
Those should be reasonable values and were tested experimental, but the user may want to play with these configuration settings to pick optimal values.
Instructions about how to tune these parameters can be found inside the example redis.conf file in the source distribution. Briefly, they are:
lfu-log-factor 10
lfu-decay-time 1
The decay time is the obvious one, it is the amount of minutes a counter should be decayed, when sampled and found to be older than that value. A special value of 0 means: always decay the counter every time is scanned, and is rarely useful.
The counter logarithm factor changes how many hits are needed to saturate the frequency counter, which is just in the range 0-255. The higher the factor, the more accesses are needed to reach the maximum. The lower the factor, the better is the resolution of the counter for low accesses, according to the following table:
+--------+------------+------------+------------+------------+------------+
| factor | 100 hits   | 1000 hits  | 100K hits  | 1M hits    | 10M hits   |
+--------+------------+------------+------------+------------+------------+
| 0      | 104        | 255        | 255        | 255        | 255        |
+--------+------------+------------+------------+------------+------------+
| 1      | 18         | 49         | 255        | 255        | 255        |
+--------+------------+------------+------------+------------+------------+
| 10     | 10         | 18         | 142        | 255        | 255        |
+--------+------------+------------+------------+------------+------------+
| 100    | 8          | 11         | 49         | 143        | 255        |
+--------+------------+------------+------------+------------+------------+
So basically the factor is a trade off between better distinguishing items with low accesses VS distinguishing items with high accesses. More information is available in the example redis.conf file.
7.7 - High availability with Redis Sentinel
High availability for non-clustered Redis
Redis Sentinel provides high availability for Redis when not using Redis Cluster.
Redis Sentinel also provides other collateral tasks such as monitoring, notifications and acts as a configuration provider for clients.
This is the full list of Sentinel capabilities at a macroscopic level (i.e. the big picture):
- Monitoring. Sentinel constantly checks if your master and replica instances are working as expected.
- Notification. Sentinel can notify the system administrator, or other computer programs, via an API, that something is wrong with one of the monitored Redis instances.
- Automatic failover. If a master is not working as expected, Sentinel can start a failover process where a replica is promoted to master, the other additional replicas are reconfigured to use the new master, and the applications using the Redis server are informed about the new address to use when connecting.
- Configuration provider. Sentinel acts as a source of authority for clients service discovery: clients connect to Sentinels in order to ask for the address of the current Redis master responsible for a given service. If a failover occurs, Sentinels will report the new address.
Sentinel as a distributed system
Redis Sentinel is a distributed system:
Sentinel itself is designed to run in a configuration where there are multiple Sentinel processes cooperating together. The advantage of having multiple Sentinel processes cooperating are the following:
- Failure detection is performed when multiple Sentinels agree about the fact a given master is no longer available. This lowers the probability of false positives.
- Sentinel works even if not all the Sentinel processes are working, making the system robust against failures. There is no fun in having a failover system which is itself a single point of failure, after all.
The sum of Sentinels, Redis instances (masters and replicas) and clients connecting to Sentinel and Redis, are also a larger distributed system with specific properties. In this document concepts will be introduced gradually starting from basic information needed in order to understand the basic properties of Sentinel, to more complex information (that are optional) in order to understand how exactly Sentinel works.
Sentinel quick start
Obtaining Sentinel
The current version of Sentinel is called Sentinel 2. It is a rewrite of the initial Sentinel implementation using stronger and simpler-to-predict algorithms (that are explained in this documentation).
A stable release of Redis Sentinel is shipped since Redis 2.8.
New developments are performed in the unstable branch, and new features sometimes are back ported into the latest stable branch as soon as they are considered to be stable.
Redis Sentinel version 1, shipped with Redis 2.6, is deprecated and should not be used.
Running Sentinel
If you are using the redis-sentinel executable (or if you have a symbolic
link with that name to the redis-server executable) you can run Sentinel
with the following command line:
redis-sentinel /path/to/sentinel.conf
Otherwise you can use directly the redis-server executable starting it in
Sentinel mode:
redis-server /path/to/sentinel.conf --sentinel
Both ways work the same.
However it is mandatory to use a configuration file when running Sentinel, as this file will be used by the system in order to save the current state that will be reloaded in case of restarts. Sentinel will simply refuse to start if no configuration file is given or if the configuration file path is not writable.
Sentinels by default run listening for connections to TCP port 26379, so for Sentinels to work, port 26379 of your servers must be open to receive connections from the IP addresses of the other Sentinel instances. Otherwise Sentinels can't talk and can't agree about what to do, so failover will never be performed.
Fundamental things to know about Sentinel before deploying
- You need at least three Sentinel instances for a robust deployment.
- The three Sentinel instances should be placed into computers or virtual machines that are believed to fail in an independent way. So for example different physical servers or Virtual Machines executed on different availability zones.
- Sentinel + Redis distributed system does not guarantee that acknowledged writes are retained during failures, since Redis uses asynchronous replication. However there are ways to deploy Sentinel that make the window to lose writes limited to certain moments, while there are other less secure ways to deploy it.
- You need Sentinel support in your clients. Popular client libraries have Sentinel support, but not all.
- There is no HA setup which is safe if you don't test from time to time in development environments, or even better if you can, in production environments, if they work. You may have a misconfiguration that will become apparent only when it's too late (at 3am when your master stops working).
- Sentinel, Docker, or other forms of Network Address Translation or Port Mapping should be mixed with care: Docker performs port remapping, breaking Sentinel auto discovery of other Sentinel processes and the list of replicas for a master. Check the section about Sentinel and Docker later in this document for more information.
Configuring Sentinel
The Redis source distribution contains a file called sentinel.conf
that is a self-documented example configuration file you can use to
configure Sentinel, however a typical minimal configuration file looks like the
following:
sentinel monitor mymaster 127.0.0.1 6379 2
sentinel down-after-milliseconds mymaster 60000
sentinel failover-timeout mymaster 180000
sentinel parallel-syncs mymaster 1

sentinel monitor resque 192.168.1.3 6380 4
sentinel down-after-milliseconds resque 10000
sentinel failover-timeout resque 180000
sentinel parallel-syncs resque 5
You only need to specify the masters to monitor, giving to each separated master (that may have any number of replicas) a different name. There is no need to specify replicas, which are auto-discovered. Sentinel will update the configuration automatically with additional information about replicas (in order to retain the information in case of restart). The configuration is also rewritten every time a replica is promoted to master during a failover and every time a new Sentinel is discovered.
The example configuration above basically monitors two sets of Redis
instances, each composed of a master and an undefined number of replicas.
One set of instances is called mymaster, and the other resque.
The meaning of the arguments of sentinel monitor statements is the following:
sentinel monitor <master-group-name> <ip> <port> <quorum>
For the sake of clarity, let's check line by line what the configuration options mean:
The first line is used to tell Redis to monitor a master called mymaster, that is at address 127.0.0.1 and port 6379, with a quorum of 2. Everything is pretty obvious but the quorum argument:
- The quorum is the number of Sentinels that need to agree about the fact the master is not reachable, in order to really mark the master as failing, and eventually start a failover procedure if possible.
- However the quorum is only used to detect the failure. In order to actually perform a failover, one of the Sentinels need to be elected leader for the failover and be authorized to proceed. This only happens with the vote of the majority of the Sentinel processes.
So for example if you have 5 Sentinel processes, and the quorum for a given master set to the value of 2, this is what happens:
- If two Sentinels agree at the same time about the master being unreachable, one of the two will try to start a failover.
- If there are at least a total of three Sentinels reachable, the failover will be authorized and will actually start.
In practical terms this means during failures Sentinel never starts a failover if the majority of Sentinel processes are unable to talk (aka no failover in the minority partition).
Other Sentinel options
The other options are almost always in the form:
sentinel <option_name> <master_name> <option_value>
And are used for the following purposes:
down-after-millisecondsis the time in milliseconds an instance should not be reachable (either does not reply to our PINGs or it is replying with an error) for a Sentinel starting to think it is down.parallel-syncssets the number of replicas that can be reconfigured to use the new master after a failover at the same time. The lower the number, the more time it will take for the failover process to complete, however if the replicas are configured to serve old data, you may not want all the replicas to re-synchronize with the master at the same time. While the replication process is mostly non blocking for a replica, there is a moment when it stops to load the bulk data from the master. You may want to make sure only one replica at a time is not reachable by setting this option to the value of 1.
Additional options are described in the rest of this document and
documented in the example sentinel.conf file shipped with the Redis
distribution.
Configuration parameters can be modified at runtime:
- Master-specific configuration parameters are modified using
SENTINEL SET. - Global configuration parameters are modified using
SENTINEL CONFIG SET.
See the Reconfiguring Sentinel at runtime section for more information.
Example Sentinel deployments
Now that you know the basic information about Sentinel, you may wonder where you should place your Sentinel processes, how many Sentinel processes you need and so forth. This section shows a few example deployments.
We use ASCII art in order to show you configuration examples in a graphical format, this is what the different symbols means:
+--------------------+
| This is a computer |
| or VM that fails   |
| independently. We  |
| call it a "box"    |
+--------------------+
We write inside the boxes what they are running:
+-------------------+
| Redis master M1   |
| Redis Sentinel S1 |
+-------------------+
Different boxes are connected by lines, to show that they are able to talk:
+-------------+               +-------------+
| Sentinel S1 |---------------| Sentinel S2 |
+-------------+               +-------------+
Network partitions are shown as interrupted lines using slashes:
+-------------+                +-------------+
| Sentinel S1 |------ // ------| Sentinel S2 |
+-------------+                +-------------+
Also note that:
- Masters are called M1, M2, M3, ..., Mn.
- Replicas are called R1, R2, R3, ..., Rn (R stands for replica).
- Sentinels are called S1, S2, S3, ..., Sn.
- Clients are called C1, C2, C3, ..., Cn.
- When an instance changes role because of Sentinel actions, we put it inside square brackets, so [M1] means an instance that is now a master because of Sentinel intervention.
Note that we will never show setups where just two Sentinels are used, since Sentinels always need to talk with the majority in order to start a failover.
Example 1: just two Sentinels, DON'T DO THIS
+----+         +----+
| M1 |---------| R1 |
| S1 |         | S2 |
+----+         +----+

Configuration: quorum = 1
- In this setup, if the master M1 fails, R1 will be promoted since the two Sentinels can reach agreement about the failure (obviously with quorum set to 1) and can also authorize a failover because the majority is two. So apparently it could superficially work, however check the next points to see why this setup is broken.
- If the box where M1 is running stops working, also S1 stops working. The Sentinel running in the other box S2 will not be able to authorize a failover, so the system will become not available.
Note that a majority is needed in order to order different failovers, and later propagate the latest configuration to all the Sentinels. Also note that the ability to failover in a single side of the above setup, without any agreement, would be very dangerous:
+----+           +------+
| M1 |----//-----| [M1] |
| S1 |           | S2   |
+----+           +------+
In the above configuration we created two masters (assuming S2 could failover without authorization) in a perfectly symmetrical way. Clients may write indefinitely to both sides, and there is no way to understand when the partition heals what configuration is the right one, in order to prevent a permanent split brain condition.
So please deploy at least three Sentinels in three different boxes always.
Example 2: basic setup with three boxes
This is a very simple setup, that has the advantage to be simple to tune for additional safety. It is based on three boxes, each box running both a Redis process and a Sentinel process.
       +----+
       | M1 |
       | S1 |
       +----+
          |
+----+    |    +----+
| R2 |----+----| R3 |
| S2 |         | S3 |
+----+         +----+

Configuration: quorum = 2
If the master M1 fails, S2 and S3 will agree about the failure and will be able to authorize a failover, making clients able to continue.
In every Sentinel setup, as Redis uses asynchronous replication, there is always the risk of losing some writes because a given acknowledged write may not be able to reach the replica which is promoted to master. However in the above setup there is a higher risk due to clients being partitioned away with an old master, like in the following picture:
         +----+
         | M1 |
         | S1 | <- C1 (writes will be lost)
         +----+
            |
            /
            /
+------+    |    +----+
| [M2] |----+----| R3 |
| S2   |         | S3 |
+------+         +----+
In this case a network partition isolated the old master M1, so the replica R2 is promoted to master. However clients, like C1, that are in the same partition as the old master, may continue to write data to the old master. This data will be lost forever since when the partition will heal, the master will be reconfigured as a replica of the new master, discarding its data set.
This problem can be mitigated using the following Redis replication feature, that allows to stop accepting writes if a master detects that it is no longer able to transfer its writes to the specified number of replicas.
min-replicas-to-write 1
min-replicas-max-lag 10
With the above configuration (please see the self-commented redis.conf example in the Redis distribution for more information) a Redis instance, when acting as a master, will stop accepting writes if it can't write to at least 1 replica. Since replication is asynchronous not being able to write actually means that the replica is either disconnected, or is not sending us asynchronous acknowledges for more than the specified max-lag number of seconds.
Using this configuration, the old Redis master M1 in the above example, will become unavailable after 10 seconds. When the partition heals, the Sentinel configuration will converge to the new one, the client C1 will be able to fetch a valid configuration and will continue with the new master.
However there is no free lunch. With this refinement, if the two replicas are down, the master will stop accepting writes. It's a trade off.
Example 3: Sentinel in the client boxes
Sometimes we have only two Redis boxes available, one for the master and one for the replica. The configuration in the example 2 is not viable in that case, so we can resort to the following, where Sentinels are placed where clients are:
            +----+         +----+
            | M1 |----+----| R1 |
            |    |    |    |    |
            +----+    |    +----+
                      |
         +------------+------------+
         |            |            |
         |            |            |
      +----+        +----+      +----+
      | C1 |        | C2 |      | C3 |
      | S1 |        | S2 |      | S3 |
      +----+        +----+      +----+

      Configuration: quorum = 2
In this setup, the point of view Sentinels is the same as the clients: if a master is reachable by the majority of the clients, it is fine. C1, C2, C3 here are generic clients, it does not mean that C1 identifies a single client connected to Redis. It is more likely something like an application server, a Rails app, or something like that.
If the box where M1 and S1 are running fails, the failover will happen without issues, however it is easy to see that different network partitions will result in different behaviors. For example Sentinel will not be able to setup if the network between the clients and the Redis servers is disconnected, since the Redis master and replica will both be unavailable.
Note that if C3 gets partitioned with M1 (hardly possible with the network described above, but more likely possible with different layouts, or because of failures at the software layer), we have a similar issue as described in Example 2, with the difference that here we have no way to break the symmetry, since there is just a replica and master, so the master can't stop accepting queries when it is disconnected from its replica, otherwise the master would never be available during replica failures.
So this is a valid setup but the setup in the Example 2 has advantages such as the HA system of Redis running in the same boxes as Redis itself which may be simpler to manage, and the ability to put a bound on the amount of time a master in the minority partition can receive writes.
Example 4: Sentinel client side with less than three clients
The setup described in the Example 3 cannot be used if there are less than three boxes in the client side (for example three web servers). In this case we need to resort to a mixed setup like the following:
            +----+         +----+
            | M1 |----+----| R1 |
            | S1 |    |    | S2 |
            +----+    |    +----+
                      |
               +------+-----+
               |            |
               |            |
            +----+        +----+
            | C1 |        | C2 |
            | S3 |        | S4 |
            +----+        +----+

      Configuration: quorum = 3
This is similar to the setup in Example 3, but here we run four Sentinels in the four boxes we have available. If the master M1 becomes unavailable the other three Sentinels will perform the failover.
In theory this setup works removing the box where C2 and S4 are running, and setting the quorum to 2. However it is unlikely that we want HA in the Redis side without having high availability in our application layer.
Sentinel, Docker, NAT, and possible issues
Docker uses a technique called port mapping: programs running inside Docker containers may be exposed with a different port compared to the one the program believes to be using. This is useful in order to run multiple containers using the same ports, at the same time, in the same server.
Docker is not the only software system where this happens, there are other Network Address Translation setups where ports may be remapped, and sometimes not ports but also IP addresses.
Remapping ports and addresses creates issues with Sentinel in two ways:
- Sentinel auto-discovery of other Sentinels no longer works, since it is based on hello messages where each Sentinel announce at which port and IP address they are listening for connection. However Sentinels have no way to understand that an address or port is remapped, so it is announcing an information that is not correct for other Sentinels to connect.
- Replicas are listed in the
INFOoutput of a Redis master in a similar way: the address is detected by the master checking the remote peer of the TCP connection, while the port is advertised by the replica itself during the handshake, however the port may be wrong for the same reason as exposed in point 1.
Since Sentinels auto detect replicas using masters INFO output information,
the detected replicas will not be reachable, and Sentinel will never be able to
failover the master, since there are no good replicas from the point of view of
the system, so there is currently no way to monitor with Sentinel a set of
master and replica instances deployed with Docker, unless you instruct Docker
to map the port 1:1.
For the first problem, in case you want to run a set of Sentinel instances using Docker with forwarded ports (or any other NAT setup where ports are remapped), you can use the following two Sentinel configuration directives in order to force Sentinel to announce a specific set of IP and port:
sentinel announce-ip <ip>
sentinel announce-port <port>
Note that Docker has the ability to run in host networking mode (check the --net=host option for more information). This should create no issues since ports are not remapped in this setup.
IP Addresses and DNS names
Older versions of Sentinel did not support host names and required IP addresses to be specified everywhere. Starting with version 6.2, Sentinel has optional support for host names.
This capability is disabled by default. If you're going to enable DNS/hostnames support, please note:
- The name resolution configuration on your Redis and Sentinel nodes must be reliable and be able to resolve addresses quickly. Unexpected delays in address resolution may have a negative impact on Sentinel.
- You should use hostnames everywhere and avoid mixing hostnames and IP addresses. To do that, use
replica-announce-ip <hostname>andsentinel announce-ip <hostname>for all Redis and Sentinel instances, respectively.
Enabling the resolve-hostnames global configuration allows Sentinel to accept host names:
- As part of a
sentinel monitorcommand - As a replica address, if the replica uses a host name value for
replica-announce-ip
Sentinel will accept host names as valid inputs and resolve them, but will still refer to IP addresses when announcing an instance, updating configuration files, etc.
Enabling the announce-hostnames global configuration makes Sentinel use host names instead. This affects replies to clients, values written in configuration files, the REPLICAOF command issued to replicas, etc.
This behavior may not be compatible with all Sentinel clients, that may explicitly expect an IP address.
Using host names may be useful when clients use TLS to connect to instances and require a name rather than an IP address in order to perform certificate ASN matching.
A quick tutorial
In the next sections of this document, all the details about Sentinel API, configuration and semantics will be covered incrementally. However for people that want to play with the system ASAP, this section is a tutorial that shows how to configure and interact with 3 Sentinel instances.
Here we assume that the instances are executed at port 5000, 5001, 5002. We also assume that you have a running Redis master at port 6379 with a replica running at port 6380. We will use the IPv4 loopback address 127.0.0.1 everywhere during the tutorial, assuming you are running the simulation on your personal computer.
The three Sentinel configuration files should look like the following:
port 5000
sentinel monitor mymaster 127.0.0.1 6379 2
sentinel down-after-milliseconds mymaster 5000
sentinel failover-timeout mymaster 60000
sentinel parallel-syncs mymaster 1
The other two configuration files will be identical but using 5001 and 5002 as port numbers.
A few things to note about the above configuration:
- The master set is called
mymaster. It identifies the master and its replicas. Since each master set has a different name, Sentinel can monitor different sets of masters and replicas at the same time. - The quorum was set to the value of 2 (last argument of
sentinel monitorconfiguration directive). - The
down-after-millisecondsvalue is 5000 milliseconds, that is 5 seconds, so masters will be detected as failing as soon as we don't receive any reply from our pings within this amount of time.
Once you start the three Sentinels, you'll see a few messages they log, like:
+monitor master mymaster 127.0.0.1 6379 quorum 2
This is a Sentinel event, and you can receive this kind of events via Pub/Sub
if you SUBSCRIBE to the event name as specified later in Pub/Sub Messages section.
Sentinel generates and logs different events during failure detection and failover.
Asking Sentinel about the state of a master
The most obvious thing to do with Sentinel to get started, is check if the master it is monitoring is doing well:
$ redis-cli -p 5000
127.0.0.1:5000> sentinel master mymaster
 1) "name"
 2) "mymaster"
 3) "ip"
 4) "127.0.0.1"
 5) "port"
 6) "6379"
 7) "runid"
 8) "953ae6a589449c13ddefaee3538d356d287f509b"
 9) "flags"
10) "master"
11) "link-pending-commands"
12) "0"
13) "link-refcount"
14) "1"
15) "last-ping-sent"
16) "0"
17) "last-ok-ping-reply"
18) "735"
19) "last-ping-reply"
20) "735"
21) "down-after-milliseconds"
22) "5000"
23) "info-refresh"
24) "126"
25) "role-reported"
26) "master"
27) "role-reported-time"
28) "532439"
29) "config-epoch"
30) "1"
31) "num-slaves"
32) "1"
33) "num-other-sentinels"
34) "2"
35) "quorum"
36) "2"
37) "failover-timeout"
38) "60000"
39) "parallel-syncs"
40) "1"
As you can see, it prints a number of information about the master. There are a few that are of particular interest for us:
num-other-sentinelsis 2, so we know the Sentinel already detected two more Sentinels for this master. If you check the logs you'll see the+sentinelevents generated.flagsis justmaster. If the master was down we could expect to sees_downoro_downflag as well here.num-slavesis correctly set to 1, so Sentinel also detected that there is an attached replica to our master.
In order to explore more about this instance, you may want to try the following two commands:
SENTINEL replicas mymaster
SENTINEL sentinels mymaster
The first will provide similar information about the replicas connected to the master, and the second about the other Sentinels.
Obtaining the address of the current master
As we already specified, Sentinel also acts as a configuration provider for clients that want to connect to a set of master and replicas. Because of possible failovers or reconfigurations, clients have no idea about who is the currently active master for a given set of instances, so Sentinel exports an API to ask this question:
127.0.0.1:5000> SENTINEL get-master-addr-by-name mymaster
1) "127.0.0.1"
2) "6379"
Testing the failover
At this point our toy Sentinel deployment is ready to be tested. We can just kill our master and check if the configuration changes. To do so we can just do:
redis-cli -p 6379 DEBUG sleep 30
This command will make our master no longer reachable, sleeping for 30 seconds. It basically simulates a master hanging for some reason.
If you check the Sentinel logs, you should be able to see a lot of action:
- Each Sentinel detects the master is down with an
+sdownevent. - This event is later escalated to
+odown, which means that multiple Sentinels agree about the fact the master is not reachable. - Sentinels vote a Sentinel that will start the first failover attempt.
- The failover happens.
If you ask again what is the current master address for mymaster, eventually
we should get a different reply this time:
127.0.0.1:5000> SENTINEL get-master-addr-by-name mymaster
1) "127.0.0.1"
2) "6380"
So far so good... At this point you may jump to create your Sentinel deployment or can read more to understand all the Sentinel commands and internals.
Sentinel API
Sentinel provides an API in order to inspect its state, check the health of monitored masters and replicas, subscribe in order to receive specific notifications, and change the Sentinel configuration at run time.
By default Sentinel runs using TCP port 26379 (note that 6379 is the normal
Redis port). Sentinels accept commands using the Redis protocol, so you can
use redis-cli or any other unmodified Redis client in order to talk with
Sentinel.
It is possible to directly query a Sentinel to check what is the state of the monitored Redis instances from its point of view, to see what other Sentinels it knows, and so forth. Alternatively, using Pub/Sub, it is possible to receive push style notifications from Sentinels, every time some event happens, like a failover, or an instance entering an error condition, and so forth.
Sentinel commands
The SENTINEL command is the main API for Sentinel. The following is the list of its subcommands (minimal version is noted for where applicable):
- SENTINEL CONFIG GET
<name>(>= 6.2) Get the current value of a global Sentinel configuration parameter. The specified name may be a wildcard, similar to the RedisCONFIG GETcommand. - SENTINEL CONFIG SET
<name><value>(>= 6.2) Set the value of a global Sentinel configuration parameter. - SENTINEL CKQUORUM
<master name>Check if the current Sentinel configuration is able to reach the quorum needed to failover a master, and the majority needed to authorize the failover. This command should be used in monitoring systems to check if a Sentinel deployment is ok. - SENTINEL FLUSHCONFIG Force Sentinel to rewrite its configuration on disk, including the current Sentinel state. Normally Sentinel rewrites the configuration every time something changes in its state (in the context of the subset of the state which is persisted on disk across restart). However sometimes it is possible that the configuration file is lost because of operation errors, disk failures, package upgrade scripts or configuration managers. In those cases a way to force Sentinel to rewrite the configuration file is handy. This command works even if the previous configuration file is completely missing.
- SENTINEL FAILOVER
<master name>Force a failover as if the master was not reachable, and without asking for agreement to other Sentinels (however a new version of the configuration will be published so that the other Sentinels will update their configurations). - SENTINEL GET-MASTER-ADDR-BY-NAME
<master name>Return the ip and port number of the master with that name. If a failover is in progress or terminated successfully for this master it returns the address and port of the promoted replica. - SENTINEL INFO-CACHE (
>= 3.2) Return cachedINFOoutput from masters and replicas. - SENTINEL IS-MASTER-DOWN-BY-ADDR
- SENTINEL MASTER
<master name>Show the state and info of the specified master. - SENTINEL MASTERS Show a list of monitored masters and their state.
- SENTINEL MONITOR Start Sentinel's monitoring. Refer to the Reconfiguring Sentinel at Runtime section for more information.
- SENTINEL MYID (
>= 6.2) Return the ID of the Sentinel instance. - SENTINEL PENDING-SCRIPTS This command returns information about pending scripts.
- SENTINEL REMOVE Stop Sentinel's monitoring. Refer to the Reconfiguring Sentinel at Runtime section for more information.
- SENTINEL REPLICAS
<master name>(>= 5.0) Show a list of replicas for this master, and their state. - SENTINEL SENTINELS
<master name>Show a list of sentinel instances for this master, and their state. - SENTINEL SET Set Sentinel's monitoring configuration. Refer to the Reconfiguring Sentinel at Runtime section for more information.
- SENTINEL SIMULATE-FAILURE (crash-after-election|crash-after-promotion|help) (
>= 3.2) This command simulates different Sentinel crash scenarios. - SENTINEL RESET
<pattern>This command will reset all the masters with matching name. The pattern argument is a glob-style pattern. The reset process clears any previous state in a master (including a failover in progress), and removes every replica and sentinel already discovered and associated with the master.
For connection management and administration purposes, Sentinel supports the following subset of Redis' commands:
- ACL (
>= 6.2) This command manages the Sentinel Access Control List. For more information refer to the ACL documentation page and the Sentinel Access Control List authentication. - AUTH (
>= 5.0.1) Authenticate a client connection. For more information refer to theAUTHcommand and the Configuring Sentinel instances with authentication section. - CLIENT This command manages client connections. For more information refer to its subcommands' pages.
- COMMAND (
>= 6.2) This command returns information about commands. For more information refer to theCOMMANDcommand and its various subcommands. - HELLO (
>= 6.0) Switch the connection's protocol. For more information refer to theHELLOcommand. - INFO Return information and statistics about the Sentinel server. For more information see the
INFOcommand. - PING This command simply returns PONG.
- ROLE This command returns the string "sentinel" and a list of monitored masters. For more information refer to the
ROLEcommand. - SHUTDOWN Shut down the Sentinel instance.
Lastly, Sentinel also supports the SUBSCRIBE, UNSUBSCRIBE, PSUBSCRIBE and PUNSUBSCRIBE commands. Refer to the Pub/Sub Messages section for more details.
Reconfiguring Sentinel at Runtime
Starting with Redis version 2.8.4, Sentinel provides an API in order to add, remove, or change the configuration of a given master. Note that if you have multiple sentinels you should apply the changes to all to your instances for Redis Sentinel to work properly. This means that changing the configuration of a single Sentinel does not automatically propagate the changes to the other Sentinels in the network.
The following is a list of SENTINEL subcommands used in order to update the configuration of a Sentinel instance.
- SENTINEL MONITOR
<name><ip><port><quorum>This command tells the Sentinel to start monitoring a new master with the specified name, ip, port, and quorum. It is identical to thesentinel monitorconfiguration directive insentinel.confconfiguration file, with the difference that you can't use a hostname in asip, but you need to provide an IPv4 or IPv6 address. - SENTINEL REMOVE
<name>is used in order to remove the specified master: the master will no longer be monitored, and will totally be removed from the internal state of the Sentinel, so it will no longer listed bySENTINEL mastersand so forth. - SENTINEL SET
<name>[<option><value>...] The SET command is very similar to theCONFIG SETcommand of Redis, and is used in order to change configuration parameters of a specific master. Multiple option / value pairs can be specified (or none at all). All the configuration parameters that can be configured viasentinel.confare also configurable using the SET command.
The following is an example of SENTINEL SET command in order to modify the down-after-milliseconds configuration of a master called objects-cache:
SENTINEL SET objects-cache-master down-after-milliseconds 1000
As already stated, SENTINEL SET can be used to set all the configuration parameters that are settable in the startup configuration file. Moreover it is possible to change just the master quorum configuration without removing and re-adding the master with SENTINEL REMOVE followed by SENTINEL MONITOR, but simply using:
SENTINEL SET objects-cache-master quorum 5
Note that there is no equivalent GET command since SENTINEL MASTER provides all the configuration parameters in a simple to parse format (as a field/value pairs array).
Starting with Redis version 6.2, Sentinel also allows getting and setting global configuration parameters which were only supported in the configuration file prior to that.
- SENTINEL CONFIG GET
<name>Get the current value of a global Sentinel configuration parameter. The specified name may be a wildcard, similar to the RedisCONFIG GETcommand. - SENTINEL CONFIG SET
<name><value>Set the value of a global Sentinel configuration parameter.
Global parameters that can be manipulated include:
resolve-hostnames,announce-hostnames. See IP addresses and DNS names.announce-ip,announce-port. See Sentinel, Docker, NAT, and possible issues.sentinel-user,sentinel-pass. See Configuring Sentinel instances with authentication.
Adding or removing Sentinels
Adding a new Sentinel to your deployment is a simple process because of the auto-discover mechanism implemented by Sentinel. All you need to do is to start the new Sentinel configured to monitor the currently active master. Within 10 seconds the Sentinel will acquire the list of other Sentinels and the set of replicas attached to the master.
If you need to add multiple Sentinels at once, it is suggested to add it one after the other, waiting for all the other Sentinels to already know about the first one before adding the next. This is useful in order to still guarantee that majority can be achieved only in one side of a partition, in the chance failures should happen in the process of adding new Sentinels.
This can be easily achieved by adding every new Sentinel with a 30 seconds delay, and during absence of network partitions.
At the end of the process it is possible to use the command
SENTINEL MASTER mastername in order to check if all the Sentinels agree about
the total number of Sentinels monitoring the master.
Removing a Sentinel is a bit more complex: Sentinels never forget already seen Sentinels, even if they are not reachable for a long time, since we don't want to dynamically change the majority needed to authorize a failover and the creation of a new configuration number. So in order to remove a Sentinel the following steps should be performed in absence of network partitions:
- Stop the Sentinel process of the Sentinel you want to remove.
- Send a
SENTINEL RESET *command to all the other Sentinel instances (instead of*you can use the exact master name if you want to reset just a single master). One after the other, waiting at least 30 seconds between instances. - Check that all the Sentinels agree about the number of Sentinels currently active, by inspecting the output of
SENTINEL MASTER masternameof every Sentinel.
Removing the old master or unreachable replicas
Sentinels never forget about replicas of a given master, even when they are unreachable for a long time. This is useful, because Sentinels should be able to correctly reconfigure a returning replica after a network partition or a failure event.
Moreover, after a failover, the failed over master is virtually added as a replica of the new master, this way it will be reconfigured to replicate with the new master as soon as it will be available again.
However sometimes you want to remove a replica (that may be the old master) forever from the list of replicas monitored by Sentinels.
In order to do this, you need to send a SENTINEL RESET mastername command
to all the Sentinels: they'll refresh the list of replicas within the next
10 seconds, only adding the ones listed as correctly replicating from the
current master INFO output.
Pub/Sub messages
A client can use a Sentinel as a Redis-compatible Pub/Sub server
(but you can't use PUBLISH) in order to SUBSCRIBE or PSUBSCRIBE to
channels and get notified about specific events.
The channel name is the same as the name of the event. For instance the
channel named +sdown will receive all the notifications related to instances
entering an SDOWN (SDOWN means the instance is no longer reachable from
the point of view of the Sentinel you are querying) condition.
To get all the messages simply subscribe using PSUBSCRIBE *.
The following is a list of channels and message formats you can receive using this API. The first word is the channel / event name, the rest is the format of the data.
Note: where instance details is specified it means that the following arguments are provided to identify the target instance:
<instance-type> <name> <ip> <port> @ <master-name> <master-ip> <master-port>
The part identifying the master (from the @ argument to the end) is optional and is only specified if the instance is not a master itself.
- +reset-master
<instance details>-- The master was reset. - +slave
<instance details>-- A new replica was detected and attached. - +failover-state-reconf-slaves
<instance details>-- Failover state changed toreconf-slavesstate. - +failover-detected
<instance details>-- A failover started by another Sentinel or any other external entity was detected (An attached replica turned into a master). - +slave-reconf-sent
<instance details>-- The leader sentinel sent theREPLICAOFcommand to this instance in order to reconfigure it for the new replica. - +slave-reconf-inprog
<instance details>-- The replica being reconfigured showed to be a replica of the new master ip:port pair, but the synchronization process is not yet complete. - +slave-reconf-done
<instance details>-- The replica is now synchronized with the new master. - -dup-sentinel
<instance details>-- One or more sentinels for the specified master were removed as duplicated (this happens for instance when a Sentinel instance is restarted). - +sentinel
<instance details>-- A new sentinel for this master was detected and attached. - +sdown
<instance details>-- The specified instance is now in Subjectively Down state. - -sdown
<instance details>-- The specified instance is no longer in Subjectively Down state. - +odown
<instance details>-- The specified instance is now in Objectively Down state. - -odown
<instance details>-- The specified instance is no longer in Objectively Down state. - +new-epoch
<instance details>-- The current epoch was updated. - +try-failover
<instance details>-- New failover in progress, waiting to be elected by the majority. - +elected-leader
<instance details>-- Won the election for the specified epoch, can do the failover. - +failover-state-select-slave
<instance details>-- New failover state isselect-slave: we are trying to find a suitable replica for promotion. - no-good-slave
<instance details>-- There is no good replica to promote. Currently we'll try after some time, but probably this will change and the state machine will abort the failover at all in this case. - selected-slave
<instance details>-- We found the specified good replica to promote. - failover-state-send-slaveof-noone
<instance details>-- We are trying to reconfigure the promoted replica as master, waiting for it to switch. - failover-end-for-timeout
<instance details>-- The failover terminated for timeout, replicas will eventually be configured to replicate with the new master anyway. - failover-end
<instance details>-- The failover terminated with success. All the replicas appears to be reconfigured to replicate with the new master. - switch-master
<master name> <oldip> <oldport> <newip> <newport>-- The master new IP and address is the specified one after a configuration change. This is the message most external users are interested in. - +tilt -- Tilt mode entered.
- -tilt -- Tilt mode exited.
Handling of -BUSY state
The -BUSY error is returned by a Redis instance when a Lua script is running for
more time than the configured Lua script time limit. When this happens before
triggering a fail over Redis Sentinel will try to send a SCRIPT KILL
command, that will only succeed if the script was read-only.
If the instance is still in an error condition after this try, it will eventually be failed over.
Replicas priority
Redis instances have a configuration parameter called replica-priority.
This information is exposed by Redis replica instances in their INFO output,
and Sentinel uses it in order to pick a replica among the ones that can be
used in order to failover a master:
- If the replica priority is set to 0, the replica is never promoted to master.
- Replicas with a lower priority number are preferred by Sentinel.
For example if there is a replica S1 in the same data center of the current master, and another replica S2 in another data center, it is possible to set S1 with a priority of 10 and S2 with a priority of 100, so that if the master fails and both S1 and S2 are available, S1 will be preferred.
For more information about the way replicas are selected, please check the Replica selection and priority section of this documentation.
Sentinel and Redis authentication
When the master is configured to require authentication from clients, as a security measure, replicas need to also be aware of the credentials in order to authenticate with the master and create the master-replica connection used for the asynchronous replication protocol.
Redis Access Control List authentication
Starting with Redis 6, user authentication and permission is managed with the Access Control List (ACL).
In order for Sentinels to connect to Redis server instances when they are configured with ACL, the Sentinel configuration must include the following directives:
sentinel auth-user <master-group-name> <username>
sentinel auth-pass <master-group-name> <password>
Where <username> and <password> are the username and password for accessing the group's instances. These credentials should be provisioned on all of the group's Redis instances with the minimal control permissions. For example:
127.0.0.1:6379> ACL SETUSER sentinel-user ON >somepassword allchannels +multi +slaveof +ping +exec +subscribe +config|rewrite +role +publish +info +client|setname +client|kill +script|kill
Redis password-only authentication
Until Redis 6, authentication is achieved using the following configuration directives:
requirepassin the master, in order to set the authentication password, and to make sure the instance will not process requests for non authenticated clients.masterauthin the replicas in order for the replicas to authenticate with the master in order to correctly replicate data from it.
When Sentinel is used, there is not a single master, since after a failover replicas may play the role of masters, and old masters can be reconfigured in order to act as replicas, so what you want to do is to set the above directives in all your instances, both masters and replicas.
This is also usually a sane setup since you don't want to protect data only in the master, having the same data accessible in the replicas.
However, in the uncommon case where you need a replica that is accessible
without authentication, you can still do it by setting up a replica priority
of zero, to prevent this replica from being promoted to master, and
configuring in this replica only the masterauth directive, without
using the requirepass directive, so that data will be readable by
unauthenticated clients.
In order for Sentinels to connect to Redis server instances when they are
configured with requirepass, the Sentinel configuration must include the
sentinel auth-pass directive, in the format:
sentinel auth-pass <master-group-name> <password>
Configuring Sentinel instances with authentication
Sentinel instances themselves can be secured by requiring clients to authenticate via the AUTH command. Starting with Redis 6.2, the Access Control List (ACL) is available, whereas previous versions (starting with Redis 5.0.1) support password-only authentication.
Note that Sentinel's authentication configuration should be applied to each of the instances in your deployment, and all instances should use the same configuration. Furthermore, ACL and password-only authentication should not be used together.
Sentinel Access Control List authentication
The first step in securing a Sentinel instance with ACL is preventing any unauthorized access to it. To do that, you'll need to disable the default superuser (or at the very least set it up with a strong password) and create a new one and allow it access to Pub/Sub channels:
127.0.0.1:5000> ACL SETUSER admin ON >admin-password allchannels +@all
OK
127.0.0.1:5000> ACL SETUSER default off
OK
The default user is used by Sentinel to connect to other instances. You can provide the credentials of another superuser with the following configuration directives:
sentinel sentinel-user <username>
sentinel sentinel-pass <password>
Where <username> and <password> are the Sentinel's superuser and password, respectively (e.g. admin and admin-password in the example above).
Lastly, for authenticating incoming client connections, you can create a Sentinel restricted user profile such as the following:
127.0.0.1:5000> ACL SETUSER sentinel-user ON >user-password -@all +auth +client|getname +client|id +client|setname +command +hello +ping +role +sentinel|get-master-addr-by-name +sentinel|master +sentinel|myid +sentinel|replicas +sentinel|sentinels
Refer to the documentation of your Sentinel client of choice for further information.
Sentinel password-only authentication
To use Sentinel with password-only authentication, add the requirepass configuration directive to all your Sentinel instances as follows:
requirepass "your_password_here"
When configured this way, Sentinels will do two things:
- A password will be required from clients in order to send commands to Sentinels. This is obvious since this is how such configuration directive works in Redis in general.
- Moreover the same password configured to access the local Sentinel, will be used by this Sentinel instance in order to authenticate to all the other Sentinel instances it connects to.
This means that you will have to configure the same requirepass password in all the Sentinel instances. This way every Sentinel can talk with every other Sentinel without any need to configure for each Sentinel the password to access all the other Sentinels, that would be very impractical.
Before using this configuration, make sure your client library can send the AUTH command to Sentinel instances.
Sentinel clients implementation
Sentinel requires explicit client support, unless the system is configured to execute a script that performs a transparent redirection of all the requests to the new master instance (virtual IP or other similar systems). The topic of client libraries implementation is covered in the document Sentinel clients guidelines.
More advanced concepts
In the following sections we'll cover a few details about how Sentinel works, without resorting to implementation details and algorithms that will be covered in the final part of this document.
SDOWN and ODOWN failure state
Redis Sentinel has two different concepts of being down, one is called
a Subjectively Down condition (SDOWN) and is a down condition that is
local to a given Sentinel instance. Another is called Objectively Down
condition (ODOWN) and is reached when enough Sentinels (at least the
number configured as the quorum parameter of the monitored master) have
an SDOWN condition, and get feedback from other Sentinels using
the SENTINEL is-master-down-by-addr command.
From the point of view of a Sentinel an SDOWN condition is reached when it
does not receive a valid reply to PING requests for the number of seconds
specified in the configuration as is-master-down-after-milliseconds
parameter.
An acceptable reply to PING is one of the following:
- PING replied with +PONG.
- PING replied with -LOADING error.
- PING replied with -MASTERDOWN error.
Any other reply (or no reply at all) is considered non valid. However note that a logical master that advertises itself as a replica in the INFO output is considered to be down.
Note that SDOWN requires that no acceptable reply is received for the whole interval configured, so for instance if the interval is 30000 milliseconds (30 seconds) and we receive an acceptable ping reply every 29 seconds, the instance is considered to be working.
SDOWN is not enough to trigger a failover: it only means a single Sentinel believes a Redis instance is not available. To trigger a failover, the ODOWN state must be reached.
To switch from SDOWN to ODOWN no strong consensus algorithm is used, but just a form of gossip: if a given Sentinel gets reports that a master is not working from enough Sentinels in a given time range, the SDOWN is promoted to ODOWN. If this acknowledge is later missing, the flag is cleared.
A more strict authorization that uses an actual majority is required in order to really start the failover, but no failover can be triggered without reaching the ODOWN state.
The ODOWN condition only applies to masters. For other kind of instances Sentinel doesn't require to act, so the ODOWN state is never reached for replicas and other sentinels, but only SDOWN is.
However SDOWN has also semantic implications. For example a replica in SDOWN state is not selected to be promoted by a Sentinel performing a failover.
Sentinels and replicas auto discovery
Sentinels stay connected with other Sentinels in order to reciprocally check the availability of each other, and to exchange messages. However you don't need to configure a list of other Sentinel addresses in every Sentinel instance you run, as Sentinel uses the Redis instances Pub/Sub capabilities in order to discover the other Sentinels that are monitoring the same masters and replicas.
This feature is implemented by sending hello messages into the channel named
__sentinel__:hello.
Similarly you don't need to configure what is the list of the replicas attached to a master, as Sentinel will auto discover this list querying Redis.
- Every Sentinel publishes a message to every monitored master and replica Pub/Sub channel
__sentinel__:hello, every two seconds, announcing its presence with ip, port, runid. - Every Sentinel is subscribed to the Pub/Sub channel
__sentinel__:helloof every master and replica, looking for unknown sentinels. When new sentinels are detected, they are added as sentinels of this master. - Hello messages also include the full current configuration of the master. If the receiving Sentinel has a configuration for a given master which is older than the one received, it updates to the new configuration immediately.
- Before adding a new sentinel to a master a Sentinel always checks if there is already a sentinel with the same runid or the same address (ip and port pair). In that case all the matching sentinels are removed, and the new added.
Sentinel reconfiguration of instances outside the failover procedure
Even when no failover is in progress, Sentinels will always try to set the current configuration on monitored instances. Specifically:
- Replicas (according to the current configuration) that claim to be masters, will be configured as replicas to replicate with the current master.
- Replicas connected to a wrong master, will be reconfigured to replicate with the right master.
For Sentinels to reconfigure replicas, the wrong configuration must be observed for some time, that is greater than the period used to broadcast new configurations.
This prevents Sentinels with a stale configuration (for example because they just rejoined from a partition) will try to change the replicas configuration before receiving an update.
Also note how the semantics of always trying to impose the current configuration makes the failover more resistant to partitions:
- Masters failed over are reconfigured as replicas when they return available.
- Replicas partitioned away during a partition are reconfigured once reachable.
The important lesson to remember about this section is: Sentinel is a system where each process will always try to impose the last logical configuration to the set of monitored instances.
Replica selection and priority
When a Sentinel instance is ready to perform a failover, since the master
is in ODOWN state and the Sentinel received the authorization to failover
from the majority of the Sentinel instances known, a suitable replica needs
to be selected.
The replica selection process evaluates the following information about replicas:
- Disconnection time from the master.
- Replica priority.
- Replication offset processed.
- Run ID.
A replica that is found to be disconnected from the master for more than ten times the configured master timeout (down-after-milliseconds option), plus the time the master is also not available from the point of view of the Sentinel doing the failover, is considered to be not suitable for the failover and is skipped.
In more rigorous terms, a replica whose the INFO output suggests it has been
disconnected from the master for more than:
(down-after-milliseconds * 10) + milliseconds_since_master_is_in_SDOWN_state
Is considered to be unreliable and is disregarded entirely.
The replica selection only considers the replicas that passed the above test, and sorts it based on the above criteria, in the following order.
- The replicas are sorted by
replica-priorityas configured in theredis.conffile of the Redis instance. A lower priority will be preferred. - If the priority is the same, the replication offset processed by the replica is checked, and the replica that received more data from the master is selected.
- If multiple replicas have the same priority and processed the same data from the master, a further check is performed, selecting the replica with the lexicographically smaller run ID. Having a lower run ID is not a real advantage for a replica, but is useful in order to make the process of replica selection more deterministic, instead of resorting to select a random replica.
In most cases, replica-priority does not need to be set explicitly so all
instances will use the same default value. If there is a particular fail-over
preference, replica-priority must be set on all instances, including masters,
as a master may become a replica at some future point in time - and it will then
need the proper replica-priority settings.
A Redis instance can be configured with a special replica-priority of zero
in order to be never selected by Sentinels as the new master.
However a replica configured in this way will still be reconfigured by
Sentinels in order to replicate with the new master after a failover, the
only difference is that it will never become a master itself.
Algorithms and internals
In the following sections we will explore the details of Sentinel behavior. It is not strictly needed for users to be aware of all the details, but a deep understanding of Sentinel may help to deploy and operate Sentinel in a more effective way.
Quorum
The previous sections showed that every master monitored by Sentinel is associated to a configured quorum. It specifies the number of Sentinel processes that need to agree about the unreachability or error condition of the master in order to trigger a failover.
However, after the failover is triggered, in order for the failover to actually be performed, at least a majority of Sentinels must authorize the Sentinel to failover. Sentinel never performs a failover in the partition where a minority of Sentinels exist.
Let's try to make things a bit more clear:
- Quorum: the number of Sentinel processes that need to detect an error condition in order for a master to be flagged as ODOWN.
- The failover is triggered by the ODOWN state.
- Once the failover is triggered, the Sentinel trying to failover is required to ask for authorization to a majority of Sentinels (or more than the majority if the quorum is set to a number greater than the majority).
The difference may seem subtle but is actually quite simple to understand and use. For example if you have 5 Sentinel instances, and the quorum is set to 2, a failover will be triggered as soon as 2 Sentinels believe that the master is not reachable, however one of the two Sentinels will be able to failover only if it gets authorization at least from 3 Sentinels.
If instead the quorum is configured to 5, all the Sentinels must agree about the master error condition, and the authorization from all Sentinels is required in order to failover.
This means that the quorum can be used to tune Sentinel in two ways:
- If a quorum is set to a value smaller than the majority of Sentinels we deploy, we are basically making Sentinel more sensitive to master failures, triggering a failover as soon as even just a minority of Sentinels is no longer able to talk with the master.
- If a quorum is set to a value greater than the majority of Sentinels, we are making Sentinel able to failover only when there are a very large number (larger than majority) of well connected Sentinels which agree about the master being down.
Configuration epochs
Sentinels require to get authorizations from a majority in order to start a failover for a few important reasons:
When a Sentinel is authorized, it gets a unique configuration epoch for the master it is failing over. This is a number that will be used to version the new configuration after the failover is completed. Because a majority agreed that a given version was assigned to a given Sentinel, no other Sentinel will be able to use it. This means that every configuration of every failover is versioned with a unique version. We'll see why this is so important.
Moreover Sentinels have a rule: if a Sentinel voted another Sentinel for the failover of a given master, it will wait some time to try to failover the same master again. This delay is the 2 * failover-timeout you can configure in sentinel.conf. This means that Sentinels will not try to failover the same master at the same time, the first to ask to be authorized will try, if it fails another will try after some time, and so forth.
Redis Sentinel guarantees the liveness property that if a majority of Sentinels are able to talk, eventually one will be authorized to failover if the master is down.
Redis Sentinel also guarantees the safety property that every Sentinel will failover the same master using a different configuration epoch.
Configuration propagation
Once a Sentinel is able to failover a master successfully, it will start to broadcast the new configuration so that the other Sentinels will update their information about a given master.
For a failover to be considered successful, it requires that the Sentinel was able to send the REPLICAOF NO ONE command to the selected replica, and that the switch to master was later observed in the INFO output of the master.
At this point, even if the reconfiguration of the replicas is in progress, the failover is considered to be successful, and all the Sentinels are required to start reporting the new configuration.
The way a new configuration is propagated is the reason why we need that every Sentinel failover is authorized with a different version number (configuration epoch).
Every Sentinel continuously broadcast its version of the configuration of a master using Redis Pub/Sub messages, both in the master and all the replicas. At the same time all the Sentinels wait for messages to see what is the configuration advertised by the other Sentinels.
Configurations are broadcast in the __sentinel__:hello Pub/Sub channel.
Because every configuration has a different version number, the greater version always wins over smaller versions.
So for example the configuration for the master mymaster start with all the
Sentinels believing the master is at 192.168.1.50:6379. This configuration
has version 1. After some time a Sentinel is authorized to failover with version 2. If the failover is successful, it will start to broadcast a new configuration, let's say 192.168.1.50:9000, with version 2. All the other instances will see this configuration and will update their configuration accordingly, since the new configuration has a greater version.
This means that Sentinel guarantees a second liveness property: a set of Sentinels that are able to communicate will all converge to the same configuration with the higher version number.
Basically if the net is partitioned, every partition will converge to the higher local configuration. In the special case of no partitions, there is a single partition and every Sentinel will agree about the configuration.
Consistency under partitions
Redis Sentinel configurations are eventually consistent, so every partition will converge to the higher configuration available. However in a real-world system using Sentinel there are three different players:
- Redis instances.
- Sentinel instances.
- Clients.
In order to define the behavior of the system we have to consider all three.
The following is a simple network where there are 3 nodes, each running a Redis instance, and a Sentinel instance:
            +-------------+
            | Sentinel 1  |----- Client A
            | Redis 1 (M) |
            +-------------+
                    |
                    |
+-------------+     |          +------------+
| Sentinel 2  |-----+-- // ----| Sentinel 3 |----- Client B
| Redis 2 (S) |                | Redis 3 (M)|
+-------------+                +------------+
In this system the original state was that Redis 3 was the master, while Redis 1 and 2 were replicas. A partition occurred isolating the old master. Sentinels 1 and 2 started a failover promoting Sentinel 1 as the new master.
The Sentinel properties guarantee that Sentinel 1 and 2 now have the new configuration for the master. However Sentinel 3 has still the old configuration since it lives in a different partition.
We know that Sentinel 3 will get its configuration updated when the network partition will heal, however what happens during the partition if there are clients partitioned with the old master?
Clients will be still able to write to Redis 3, the old master. When the partition will rejoin, Redis 3 will be turned into a replica of Redis 1, and all the data written during the partition will be lost.
Depending on your configuration you may want or not that this scenario happens:
- If you are using Redis as a cache, it could be handy that Client B is still able to write to the old master, even if its data will be lost.
- If you are using Redis as a store, this is not good and you need to configure the system in order to partially prevent this problem.
Since Redis is asynchronously replicated, there is no way to totally prevent data loss in this scenario, however you can bound the divergence between Redis 3 and Redis 1 using the following Redis configuration option:
min-replicas-to-write 1
min-replicas-max-lag 10
With the above configuration (please see the self-commented redis.conf example in the Redis distribution for more information) a Redis instance, when acting as a master, will stop accepting writes if it can't write to at least 1 replica. Since replication is asynchronous not being able to write actually means that the replica is either disconnected, or is not sending us asynchronous acknowledges for more than the specified max-lag number of seconds.
Using this configuration the Redis 3 in the above example will become unavailable after 10 seconds. When the partition heals, the Sentinel 3 configuration will converge to the new one, and Client B will be able to fetch a valid configuration and continue.
In general Redis + Sentinel as a whole are an eventually consistent system where the merge function is last failover wins, and the data from old masters are discarded to replicate the data of the current master, so there is always a window for losing acknowledged writes. This is due to Redis asynchronous replication and the discarding nature of the "virtual" merge function of the system. Note that this is not a limitation of Sentinel itself, and if you orchestrate the failover with a strongly consistent replicated state machine, the same properties will still apply. There are only two ways to avoid losing acknowledged writes:
- Use synchronous replication (and a proper consensus algorithm to run a replicated state machine).
- Use an eventually consistent system where different versions of the same object can be merged.
Redis currently is not able to use any of the above systems, and is currently outside the development goals. However there are proxies implementing solution "2" on top of Redis stores such as SoundCloud Roshi, or Netflix Dynomite.
Sentinel persistent state
Sentinel state is persisted in the sentinel configuration file. For example every time a new configuration is received, or created (leader Sentinels), for a master, the configuration is persisted on disk together with the configuration epoch. This means that it is safe to stop and restart Sentinel processes.
TILT mode
Redis Sentinel is heavily dependent on the computer time: for instance in order to understand if an instance is available it remembers the time of the latest successful reply to the PING command, and compares it with the current time to understand how old it is.
However if the computer time changes in an unexpected way, or if the computer is very busy, or the process blocked for some reason, Sentinel may start to behave in an unexpected way.
The TILT mode is a special "protection" mode that a Sentinel can enter when something odd is detected that can lower the reliability of the system. The Sentinel timer interrupt is normally called 10 times per second, so we expect that more or less 100 milliseconds will elapse between two calls to the timer interrupt.
What a Sentinel does is to register the previous time the timer interrupt was called, and compare it with the current call: if the time difference is negative or unexpectedly big (2 seconds or more) the TILT mode is entered (or if it was already entered the exit from the TILT mode postponed).
When in TILT mode the Sentinel will continue to monitor everything, but:
- It stops acting at all.
- It starts to reply negatively to
SENTINEL is-master-down-by-addrrequests as the ability to detect a failure is no longer trusted.
If everything appears to be normal for 30 second, the TILT mode is exited.
In the Sentinel TILT mode, if we send the INFO command, we could get the following response:
$ redis-cli -p 26379
127.0.0.1:26379> info
(Other information from Sentinel server skipped.)

# Sentinel
sentinel_masters:1
sentinel_tilt:0
sentinel_tilt_since_seconds:-1
sentinel_running_scripts:0
sentinel_scripts_queue_length:0
sentinel_simulate_failure_flags:0
master0:name=mymaster,status=ok,address=127.0.0.1:6379,slaves=0,sentinels=1
The field "sentinel_tilt_since_seconds" indicates how many seconds the Sentinel already is in the TILT mode. If it is not in TILT mode, the value will be -1.
Note that in some ways TILT mode could be replaced using the monotonic clock API that many kernels offer. However it is not still clear if this is a good solution since the current system avoids issues in case the process is just suspended or not executed by the scheduler for a long time.
A note about the word slave used in this man page: Starting with Redis 5, if not for backward compatibility, the Redis project no longer uses the word slave. Unfortunately in this command the word slave is part of the protocol, so we'll be able to remove such occurrences only when this API will be naturally deprecated.
7.8 - Redis keyspace notifications
Monitor changes to Redis keys and values in real time
Keyspace notifications allow clients to subscribe to Pub/Sub channels in order to receive events affecting the Redis data set in some way.
Examples of events that can be received are:
- All the commands affecting a given key.
- All the keys receiving an LPUSH operation.
- All the keys expiring in the database 0.
Note: Redis Pub/Sub is fire and forget that is, if your Pub/Sub client disconnects, and reconnects later, all the events delivered during the time the client was disconnected are lost.
Type of events
Keyspace notifications are implemented by sending two distinct types of events
for every operation affecting the Redis data space. For instance a DEL
operation targeting the key named mykey in database 0 will trigger
the delivering of two messages, exactly equivalent to the following two
PUBLISH commands:
PUBLISH __keyspace@0__:mykey del
PUBLISH __keyevent@0__:del mykey
The first channel listens to all the events targeting
the key mykey and the other channel listens only to del operation
events on the key mykey
The first kind of event, with keyspace prefix in the channel is called
a Key-space notification, while the second, with the keyevent prefix,
is called a Key-event notification.
In the previous example a del event was generated for the key mykey resulting
in two messages:
- The Key-space channel receives as message the name of the event.
- The Key-event channel receives as message the name of the key.
It is possible to enable only one kind of notification in order to deliver just the subset of events we are interested in.
Configuration
By default keyspace event notifications are disabled because while not
very sensible the feature uses some CPU power. Notifications are enabled
using the notify-keyspace-events of redis.conf or via the CONFIG SET.
Setting the parameter to the empty string disables notifications. In order to enable the feature a non-empty string is used, composed of multiple characters, where every character has a special meaning according to the following table:
K     Keyspace events, published with __keyspace@<db>__ prefix.
E     Keyevent events, published with __keyevent@<db>__ prefix.
g     Generic commands (non-type specific) like DEL, EXPIRE, RENAME, ...
$     String commands
l     List commands
s     Set commands
h     Hash commands
z     Sorted set commands
t     Stream commands
d     Module key type events
x     Expired events (events generated every time a key expires)
e     Evicted events (events generated when a key is evicted for maxmemory)
m     Key miss events (events generated when a key that doesn't exist is accessed)
n     New key events (Note: not included in the 'A' class)
A     Alias for "g$lshztxed", so that the "AKE" string means all the events except "m".
At least K or E should be present in the string, otherwise no event
will be delivered regardless of the rest of the string.
For instance to enable just Key-space events for lists, the configuration
parameter must be set to Kl, and so forth.
The string KEA can be used to enable every possible event.
Events generated by different commands
Different commands generate different kind of events according to the following list.
DELgenerates adelevent for every deleted key.RENAMEgenerates two events, arename_fromevent for the source key, and arename_toevent for the destination key.MOVEgenerates two events, amove_fromevent for the source key, and amove_toevent for the destination key.COPYgenerates acopy_toevent.MIGRATEgenerates adelevent if the source key is removed.RESTOREgenerates arestoreevent for the key.EXPIREand all its variants (PEXPIRE,EXPIREAT,PEXPIREAT) generate anexpireevent when called with a positive timeout (or a future timestamp). Note that when these commands are called with a negative timeout value or timestamp in the past, the key is deleted and only adelevent is generated instead.SORTgenerates asortstoreevent whenSTOREis used to set a new key. If the resulting list is empty, and theSTOREoption is used, and there was already an existing key with that name, the result is that the key is deleted, so adelevent is generated in this condition.SETand all its variants (SETEX,SETNX,GETSET) generatesetevents. HoweverSETEXwill also generate anexpireevents.MSETgenerates a separatesetevent for every key.SETRANGEgenerates asetrangeevent.INCR,DECR,INCRBY,DECRBYcommands all generateincrbyevents.INCRBYFLOATgenerates anincrbyfloatevents.APPENDgenerates anappendevent.LPUSHandLPUSHXgenerates a singlelpushevent, even in the variadic case.RPUSHandRPUSHXgenerates a singlerpushevent, even in the variadic case.RPOPgenerates anrpopevent. Additionally adelevent is generated if the key is removed because the last element from the list was popped.LPOPgenerates anlpopevent. Additionally adelevent is generated if the key is removed because the last element from the list was popped.LINSERTgenerates anlinsertevent.LSETgenerates anlsetevent.LREMgenerates anlremevent, and additionally adelevent if the resulting list is empty and the key is removed.LTRIMgenerates anltrimevent, and additionally adelevent if the resulting list is empty and the key is removed.RPOPLPUSHandBRPOPLPUSHgenerate anrpopevent and anlpushevent. In both cases the order is guaranteed (thelpushevent will always be delivered after therpopevent). Additionally adelevent will be generated if the resulting list is zero length and the key is removed.LMOVEandBLMOVEgenerate anlpop/rpopevent (depending on the wherefrom argument) and anlpush/rpushevent (depending on the whereto argument). In both cases the order is guaranteed (thelpush/rpushevent will always be delivered after thelpop/rpopevent). Additionally adelevent will be generated if the resulting list is zero length and the key is removed.HSET,HSETNXandHMSETall generate a singlehsetevent.HINCRBYgenerates anhincrbyevent.HINCRBYFLOATgenerates anhincrbyfloatevent.HDELgenerates a singlehdelevent, and an additionaldelevent if the resulting hash is empty and the key is removed.SADDgenerates a singlesaddevent, even in the variadic case.SREMgenerates a singlesremevent, and an additionaldelevent if the resulting set is empty and the key is removed.SMOVEgenerates ansremevent for the source key, and ansaddevent for the destination key.SPOPgenerates anspopevent, and an additionaldelevent if the resulting set is empty and the key is removed.SINTERSTORE,SUNIONSTORE,SDIFFSTOREgeneratesinterstore,sunionstore,sdiffstoreevents respectively. In the special case the resulting set is empty, and the key where the result is stored already exists, adelevent is generated since the key is removed.ZINCRgenerates azincrevent.ZADDgenerates a singlezaddevent even when multiple elements are added.ZREMgenerates a singlezremevent even when multiple elements are deleted. When the resulting sorted set is empty and the key is generated, an additionaldelevent is generated.ZREMBYSCOREgenerates a singlezrembyscoreevent. When the resulting sorted set is empty and the key is generated, an additionaldelevent is generated.ZREMBYRANKgenerates a singlezrembyrankevent. When the resulting sorted set is empty and the key is generated, an additionaldelevent is generated.ZDIFFSTORE,ZINTERSTOREandZUNIONSTORErespectively generatezdiffstore,zinterstoreandzunionstoreevents. In the special case the resulting sorted set is empty, and the key where the result is stored already exists, adelevent is generated since the key is removed.XADDgenerates anxaddevent, possibly followed anxtrimevent when used with theMAXLENsubcommand.XDELgenerates a singlexdelevent even when multiple entries are deleted.XGROUP CREATEgenerates anxgroup-createevent.XGROUP CREATECONSUMERgenerates anxgroup-createconsumerevent.XGROUP DELCONSUMERgenerates anxgroup-delconsumerevent.XGROUP DESTROYgenerates anxgroup-destroyevent.XGROUP SETIDgenerates anxgroup-setidevent.XSETIDgenerates anxsetidevent.XTRIMgenerates anxtrimevent.PERSISTgenerates apersistevent if the expiry time associated with key has been successfully deleted.- Every time a key with a time to live associated is removed from the data set because it expired, an
expiredevent is generated. - Every time a key is evicted from the data set in order to free memory as a result of the
maxmemorypolicy, anevictedevent is generated. - Every time a new key is added to the data set, a
newevent is generated.
IMPORTANT all the commands generate events only if the target key is really modified. For instance an SREM deleting a non-existing element from a Set will not actually change the value of the key, so no event will be generated.
If in doubt about how events are generated for a given command, the simplest thing to do is to watch yourself:
$ redis-cli config set notify-keyspace-events KEA
$ redis-cli --csv psubscribe '__key*__:*'
Reading messages... (press Ctrl-C to quit)
"psubscribe","__key*__:*",1
At this point use redis-cli in another terminal to send commands to the
Redis server and watch the events generated:
"pmessage","__key*__:*","__keyspace@0__:foo","set"
"pmessage","__key*__:*","__keyevent@0__:set","foo"
...
Timing of expired events
Keys with a time to live associated are expired by Redis in two ways:
- When the key is accessed by a command and is found to be expired.
- Via a background system that looks for expired keys in the background, incrementally, in order to be able to also collect keys that are never accessed.
The expired events are generated when a key is accessed and is found to be expired by one of the above systems, as a result there are no guarantees that the Redis server will be able to generate the expired event at the time the key time to live reaches the value of zero.
If no command targets the key constantly, and there are many keys with a TTL associated, there can be a significant delay between the time the key time to live drops to zero, and the time the expired event is generated.
Basically expired events are generated when the Redis server deletes the key and not when the time to live theoretically reaches the value of zero.
Events in a cluster
Every node of a Redis cluster generates events about its own subset of the keyspace as described above. However, unlike regular Pub/Sub communication in a cluster, events' notifications are not broadcasted to all nodes. Put differently, keyspace events are node-specific. This means that to receive all keyspace events of a cluster, clients need to subscribe to each of the nodes.
@history
>= 6.0: Key miss events were added.>= 7.0: Event typenewadded
7.9 - Redis persistence
How Redis writes data to disk (append-only files, snapshots, etc.)
Persistence refers to the writing of data to durable storage, such as a solid-state disk (SSD). Redis itself provides a range of persistence options:
- RDB (Redis Database): The RDB persistence performs point-in-time snapshots of your dataset at specified intervals.
- AOF (Append Only File): The AOF persistence logs every write operation received by the server, that will be played again at server startup, reconstructing the original dataset. Commands are logged using the same format as the Redis protocol itself, in an append-only fashion. Redis is able to rewrite the log in the background when it gets too big.
- No persistence: If you wish, you can disable persistence completely, if you want your data to just exist as long as the server is running.
- RDB + AOF: It is possible to combine both AOF and RDB in the same instance. Notice that, in this case, when Redis restarts the AOF file will be used to reconstruct the original dataset since it is guaranteed to be the most complete.
The most important thing to understand is the different trade-offs between the RDB and AOF persistence.
RDB advantages
- RDB is a very compact single-file point-in-time representation of your Redis data. RDB files are perfect for backups. For instance you may want to archive your RDB files every hour for the latest 24 hours, and to save an RDB snapshot every day for 30 days. This allows you to easily restore different versions of the data set in case of disasters.
- RDB is very good for disaster recovery, being a single compact file that can be transferred to far data centers, or onto Amazon S3 (possibly encrypted).
- RDB maximizes Redis performances since the only work the Redis parent process needs to do in order to persist is forking a child that will do all the rest. The parent process will never perform disk I/O or alike.
- RDB allows faster restarts with big datasets compared to AOF.
- On replicas, RDB supports partial resynchronizations after restarts and failovers.
RDB disadvantages
- RDB is NOT good if you need to minimize the chance of data loss in case Redis stops working (for example after a power outage). You can configure different save points where an RDB is produced (for instance after at least five minutes and 100 writes against the data set, you can have multiple save points). However you'll usually create an RDB snapshot every five minutes or more, so in case of Redis stopping working without a correct shutdown for any reason you should be prepared to lose the latest minutes of data.
- RDB needs to fork() often in order to persist on disk using a child process. fork() can be time consuming if the dataset is big, and may result in Redis stopping serving clients for some milliseconds or even for one second if the dataset is very big and the CPU performance is not great. AOF also needs to fork() but less frequently and you can tune how often you want to rewrite your logs without any trade-off on durability.
AOF advantages
- Using AOF Redis is much more durable: you can have different fsync policies: no fsync at all, fsync every second, fsync at every query. With the default policy of fsync every second, write performance is still great. fsync is performed using a background thread and the main thread will try hard to perform writes when no fsync is in progress, so you can only lose one second worth of writes.
- The AOF log is an append-only log, so there are no seeks, nor corruption problems if there is a power outage. Even if the log ends with an half-written command for some reason (disk full or other reasons) the redis-check-aof tool is able to fix it easily.
- Redis is able to automatically rewrite the AOF in background when it gets too big. The rewrite is completely safe as while Redis continues appending to the old file, a completely new one is produced with the minimal set of operations needed to create the current data set, and once this second file is ready Redis switches the two and starts appending to the new one.
- AOF contains a log of all the operations one after the other in an easy to understand and parse format. You can even easily export an AOF file. For instance even if you've accidentally flushed everything using the
FLUSHALLcommand, as long as no rewrite of the log was performed in the meantime, you can still save your data set just by stopping the server, removing the latest command, and restarting Redis again.
AOF disadvantages
- AOF files are usually bigger than the equivalent RDB files for the same dataset.
- AOF can be slower than RDB depending on the exact fsync policy. In general with fsync set to every second performance is still very high, and with fsync disabled it should be exactly as fast as RDB even under high load. Still RDB is able to provide more guarantees about the maximum latency even in the case of a huge write load.
Redis < 7.0
- AOF can use a lot of memory if there are writes to the database during a rewrite (these are buffered in memory and written to the new AOF at the end).
- All write commands that arrive during rewrite are written to disk twice.
- Redis could freeze writing and fsyncing these write commands to the new AOF file at the end of the rewrite.
Ok, so what should I use?
The general indication you should use both persistence methods is if you want a degree of data safety comparable to what PostgreSQL can provide you.
If you care a lot about your data, but still can live with a few minutes of data loss in case of disasters, you can simply use RDB alone.
There are many users using AOF alone, but we discourage it since to have an RDB snapshot from time to time is a great idea for doing database backups, for faster restarts, and in the event of bugs in the AOF engine.
The following sections will illustrate a few more details about the two persistence models.
Snapshotting
By default Redis saves snapshots of the dataset on disk, in a binary
file called dump.rdb. You can configure Redis to have it save the
dataset every N seconds if there are at least M changes in the dataset,
or you can manually call the SAVE or BGSAVE commands.
For example, this configuration will make Redis automatically dump the dataset to disk every 60 seconds if at least 1000 keys changed:
save 60 1000
This strategy is known as snapshotting.
How it works
Whenever Redis needs to dump the dataset to disk, this is what happens:
Redis forks. We now have a child and a parent process.
The child starts to write the dataset to a temporary RDB file.
When the child is done writing the new RDB file, it replaces the old one.
This method allows Redis to benefit from copy-on-write semantics.
Append-only file
Snapshotting is not very durable. If your computer running Redis stops,
your power line fails, or you accidentally kill -9 your instance, the
latest data written to Redis will be lost. While this may not be a big
deal for some applications, there are use cases for full durability, and
in these cases Redis snapshotting alone is not a viable option.
The append-only file is an alternative, fully-durable strategy for Redis. It became available in version 1.1.
You can turn on the AOF in your configuration file:
appendonly yes
From now on, every time Redis receives a command that changes the
dataset (e.g. SET) it will append it to the AOF. When you restart
Redis it will re-play the AOF to rebuild the state.
Since Redis 7.0.0, Redis uses a multi part AOF mechanism. That is, the original single AOF file is split into base file (at most one) and incremental files (there may be more than one). The base file represents an initial (RDB or AOF format) snapshot of the data present when the AOF is rewritten. The incremental files contains incremental changes since the last base AOF file was created. All these files are put in a separate directory and are tracked by a manifest file.
Log rewriting
The AOF gets bigger and bigger as write operations are performed. For example, if you are incrementing a counter 100 times, you'll end up with a single key in your dataset containing the final value, but 100 entries in your AOF. 99 of those entries are not needed to rebuild the current state.
The rewrite is completely safe. While Redis continues appending to the old file, a completely new one is produced with the minimal set of operations needed to create the current data set, and once this second file is ready Redis switches the two and starts appending to the new one.
So Redis supports an interesting feature: it is able to rebuild the AOF
in the background without interrupting service to clients. Whenever
you issue a BGREWRITEAOF, Redis will write the shortest sequence of
commands needed to rebuild the current dataset in memory. If you're
using the AOF with Redis 2.2 you'll need to run BGREWRITEAOF from time to
time. Since Redis 2.4 is able to trigger log rewriting automatically (see the
example configuration file for more information).
Since Redis 7.0.0, when an AOF rewrite is scheduled, The Redis parent process opens a new incremental AOF file to continue writing. The child process executes the rewrite logic and generates a new base AOF. Redis will use a temporary manifest file to track the newly generated base file and incremental file. When they are ready, Redis will perform an atomic replacement operation to make this temporary manifest file take effect. In order to avoid the problem of creating many incremental files in case of repeated failures and retries of an AOF rewrite, Redis introduces an AOF rewrite limiting mechanism to ensure that failed AOF rewrites are retried at a slower and slower rate.
How durable is the append only file?
You can configure how many times Redis will
fsync data on disk. There are
three options:
appendfsync always:fsyncevery time new commands are appended to the AOF. Very very slow, very safe. Note that the commands are apended to the AOF after a batch of commands from multiple clients or a pipeline are executed, so it means a single write and a single fsync (before sending the replies).appendfsync everysec:fsyncevery second. Fast enough (since version 2.4 likely to be as fast as snapshotting), and you may lose 1 second of data if there is a disaster.appendfsync no: Neverfsync, just put your data in the hands of the Operating System. The faster and less safe method. Normally Linux will flush data every 30 seconds with this configuration, but it's up to the kernel's exact tuning.
The suggested (and default) policy is to fsync every second. It is
both fast and relatively safe. The always policy is very slow in
practice, but it supports group commit, so if there are multiple parallel
writes Redis will try to perform a single fsync operation.
What should I do if my AOF gets truncated?
It is possible the server crashed while writing the AOF file, or the volume where the AOF file is stored was full at the time of writing. When this happens the AOF still contains consistent data representing a given point-in-time version of the dataset (that may be old up to one second with the default AOF fsync policy), but the last command in the AOF could be truncated. The latest major versions of Redis will be able to load the AOF anyway, just discarding the last non well formed command in the file. In this case the server will emit a log like the following:
* Reading RDB preamble from AOF file...
* Reading the remaining AOF tail...
# !!! Warning: short read while loading the AOF file !!!
# !!! Truncating the AOF at offset 439 !!!
# AOF loaded anyway because aof-load-truncated is enabled
You can change the default configuration to force Redis to stop in such cases if you want, but the default configuration is to continue regardless of the fact the last command in the file is not well-formed, in order to guarantee availability after a restart.
Older versions of Redis may not recover, and may require the following steps:
Make a backup copy of your AOF file.
Fix the original file using the
redis-check-aoftool that ships with Redis:$ redis-check-aof --fix <filename>Optionally use
diff -uto check what is the difference between two files.Restart the server with the fixed file.
What should I do if my AOF gets corrupted?
If the AOF file is not just truncated, but corrupted with invalid byte sequences in the middle, things are more complex. Redis will complain at startup and will abort:
* Reading the remaining AOF tail...
# Bad file format reading the append only file: make a backup of your AOF file, then use ./redis-check-aof --fix <filename>
The best thing to do is to run the redis-check-aof utility, initially without
the --fix option, then understand the problem, jump to the given
offset in the file, and see if it is possible to manually repair the file:
The AOF uses the same format of the Redis protocol and is quite simple to fix
manually. Otherwise it is possible to let the utility fix the file for us, but
in that case all the AOF portion from the invalid part to the end of the
file may be discarded, leading to a massive amount of data loss if the
corruption happened to be in the initial part of the file.
How it works
Log rewriting uses the same copy-on-write trick already in use for snapshotting. This is how it works:
Redis >= 7.0
Redis forks, so now we have a child and a parent process.
The child starts writing the new base AOF in a temporary file.
The parent opens a new increments AOF file to continue writing updates. If the rewriting fails, the old base and increment files (if there are any) plus this newly opened increment file represent the complete updated dataset, so we are safe.
When the child is done rewriting the base file, the parent gets a signal, and uses the newly opened increment file and child generated base file to build a temp manifest, and persist it.
Profit! Now Redis does an atomic exchange of the manifest files so that the result of this AOF rewrite takes effect. Redis also cleans up the old base file and any unused increment files.
Redis < 7.0
Redis forks, so now we have a child and a parent process.
The child starts writing the new AOF in a temporary file.
The parent accumulates all the new changes in an in-memory buffer (but at the same time it writes the new changes in the old append-only file, so if the rewriting fails, we are safe).
When the child is done rewriting the file, the parent gets a signal, and appends the in-memory buffer at the end of the file generated by the child.
Now Redis atomically renames the new file into the old one, and starts appending new data into the new file.
How I can switch to AOF, if I'm currently using dump.rdb snapshots?
There is a different procedure to do this in version 2.0 and later versions, as you can guess it's simpler since Redis 2.2 and does not require a restart at all.
Redis >= 2.2
- Make a backup of your latest dump.rdb file.
- Transfer this backup to a safe place.
- Issue the following two commands:
redis-cli config set appendonly yesredis-cli config set save ""- Make sure your database contains the same number of keys it contained.
- Make sure writes are appended to the append only file correctly.
The first CONFIG command enables the Append Only File persistence.
The second CONFIG command is used to turn off snapshotting persistence. This is optional, if you wish you can take both the persistence methods enabled.
IMPORTANT: remember to edit your redis.conf to turn on the AOF, otherwise when you restart the server the configuration changes will be lost and the server will start again with the old configuration.
Redis 2.0
- Make a backup of your latest dump.rdb file.
- Transfer this backup into a safe place.
- Stop all the writes against the database!
- Issue a
redis-cli BGREWRITEAOF. This will create the append only file. - Stop the server when Redis finished generating the AOF dump.
- Edit redis.conf end enable append only file persistence.
- Restart the server.
- Make sure that your database contains the same number of keys it contained before the switch.
- Make sure that writes are appended to the append only file correctly.
Interactions between AOF and RDB persistence
Redis >= 2.4 makes sure to avoid triggering an AOF rewrite when an RDB
snapshotting operation is already in progress, or allowing a BGSAVE while the
AOF rewrite is in progress. This prevents two Redis background processes
from doing heavy disk I/O at the same time.
When snapshotting is in progress and the user explicitly requests a log
rewrite operation using BGREWRITEAOF the server will reply with an OK
status code telling the user the operation is scheduled, and the rewrite
will start once the snapshotting is completed.
In the case both AOF and RDB persistence are enabled and Redis restarts the AOF file will be used to reconstruct the original dataset since it is guaranteed to be the most complete.
Backing up Redis data
Before starting this section, make sure to read the following sentence: Make Sure to Backup Your Database. Disks break, instances in the cloud disappear, and so forth: no backups means huge risk of data disappearing into /dev/null.
Redis is very data backup friendly since you can copy RDB files while the database is running: the RDB is never modified once produced, and while it gets produced it uses a temporary name and is renamed into its final destination atomically using rename(2) only when the new snapshot is complete.
This means that copying the RDB file is completely safe while the server is running. This is what we suggest:
- Create a cron job in your server creating hourly snapshots of the RDB file in one directory, and daily snapshots in a different directory.
- Every time the cron script runs, make sure to call the
findcommand to make sure too old snapshots are deleted: for instance you can take hourly snapshots for the latest 48 hours, and daily snapshots for one or two months. Make sure to name the snapshots with date and time information. - At least one time every day make sure to transfer an RDB snapshot outside your data center or at least outside the physical machine running your Redis instance.
Backing up AOF persistence
If you run a Redis instance with only AOF persistence enabled, you can still perform backups.
Since Redis 7.0.0, AOF files are split into multiple files which reside in a single directory determined by the appenddirname configuration.
During normal operation all you need to do is copy/tar the files in this directory to achieve a backup. However, if this is done during a rewrite, you might end up with an invalid backup.
To work around this you must disable AOF rewrites during the backup:
- Turn off automatic rewrites with
CONFIG SETauto-aof-rewrite-percentage 0
Make sure you don't manually start a rewrite (usingBGREWRITEAOF) during this time. - Check there's no current rewrite in progress using
INFOpersistence
and verifyingaof_rewrite_in_progressis 0. If it's 1, then you'll need to wait for the rewrite to complete. - Now you can safely copy the files in the
appenddirnamedirectory. - Re-enable rewrites when done:
CONFIG SETauto-aof-rewrite-percentage <prev-value>
Note: If you want to minimize the time AOF rewrites are disabled you may create hard links to the files in appenddirname (in step 3 above) and then re-enable rewites (step 4) after the hard links are created.
Now you can copy/tar the hardlinks and delete them when done. This works because Redis guarantees that it
only appends to files in this directory, or completely replaces them if necessary, so the content should be
consistent at any given point in time.
Note: If you want to handle the case of the server being restarted during the backup and make sure no rewrite will automatically start after the restart you can change step 1 above to also persist the updated configuration via CONFIG REWRITE.
Just make sure to re-enable automatic rewrites when done (step 4) and persist it with another CONFIG REWRITE.
Prior to version 7.0.0 backing up the AOF file can be done simply by copying the aof file (like backing up the RDB snapshot). The file may lack the final part but Redis will still be able to load it (see the previous sections about truncated AOF files).
Disaster recovery
Disaster recovery in the context of Redis is basically the same story as backups, plus the ability to transfer those backups in many different external data centers. This way data is secured even in the case of some catastrophic event affecting the main data center where Redis is running and producing its snapshots.
We'll review the most interesting disaster recovery techniques that don't have too high costs.
- Amazon S3 and other similar services are a good way for implementing your disaster recovery system. Simply transfer your daily or hourly RDB snapshot to S3 in an encrypted form. You can encrypt your data using
gpg -c(in symmetric encryption mode). Make sure to store your password in many different safe places (for instance give a copy to the most important people of your organization). It is recommended to use multiple storage services for improved data safety. - Transfer your snapshots using SCP (part of SSH) to far servers. This is a fairly simple and safe route: get a small VPS in a place that is very far from you, install ssh there, and generate an ssh client key without passphrase, then add it in the
authorized_keysfile of your small VPS. You are ready to transfer backups in an automated fashion. Get at least two VPS in two different providers for best results.
It is important to understand that this system can easily fail if not implemented in the right way. At least, make absolutely sure that after the transfer is completed you are able to verify the file size (that should match the one of the file you copied) and possibly the SHA1 digest, if you are using a VPS.
You also need some kind of independent alert system if the transfer of fresh backups is not working for some reason.
7.10 - Redis pipelining
How to optimize round-trip times by batching Redis commands
Redis pipelining is a technique for improving performance by issuing multiple commands at once without waiting for the response to each individual command. Pipelining is supported by most Redis clients. This document describes the problem that pipelining is designed to solve and how pipelining works in Redis.
Request/Response protocols and round-trip time (RTT)
Redis is a TCP server using the client-server model and what is called a Request/Response protocol.
This means that usually a request is accomplished with the following steps:
- The client sends a query to the server, and reads from the socket, usually in a blocking way, for the server response.
- The server processes the command and sends the response back to the client.
So for instance a four commands sequence is something like this:
- Client: INCR X
- Server: 1
- Client: INCR X
- Server: 2
- Client: INCR X
- Server: 3
- Client: INCR X
- Server: 4
Clients and Servers are connected via a network link. Such a link can be very fast (a loopback interface) or very slow (a connection established over the Internet with many hops between the two hosts). Whatever the network latency is, it takes time for the packets to travel from the client to the server, and back from the server to the client to carry the reply.
This time is called RTT (Round Trip Time). It's easy to see how this can affect performance when a client needs to perform many requests in a row (for instance adding many elements to the same list, or populating a database with many keys). For instance if the RTT time is 250 milliseconds (in the case of a very slow link over the Internet), even if the server is able to process 100k requests per second, we'll be able to process at max four requests per second.
If the interface used is a loopback interface, the RTT is much shorter, typically sub-millisecond, but even this will add up to a lot if you need to perform many writes in a row.
Fortunately there is a way to improve this use case.
Redis Pipelining
A Request/Response server can be implemented so that it is able to process new requests even if the client hasn't already read the old responses. This way it is possible to send multiple commands to the server without waiting for the replies at all, and finally read the replies in a single step.
This is called pipelining, and is a technique widely in use for many decades. For instance many POP3 protocol implementations already support this feature, dramatically speeding up the process of downloading new emails from the server.
Redis has supported pipelining since its early days, so whatever version you are running, you can use pipelining with Redis. This is an example using the raw netcat utility:
$ (printf "PING\r\nPING\r\nPING\r\n"; sleep 1) | nc localhost 6379
+PONG
+PONG
+PONG
This time we don't pay the cost of RTT for every call, but just once for the three commands.
To be explicit, with pipelining the order of operations of our very first example will be the following:
- Client: INCR X
- Client: INCR X
- Client: INCR X
- Client: INCR X
- Server: 1
- Server: 2
- Server: 3
- Server: 4
IMPORTANT NOTE: While the client sends commands using pipelining, the server will be forced to queue the replies, using memory. So if you need to send a lot of commands with pipelining, it is better to send them as batches each containing a reasonable number, for instance 10k commands, read the replies, and then send another 10k commands again, and so forth. The speed will be nearly the same, but the additional memory used will be at most the amount needed to queue the replies for these 10k commands.
It's not just a matter of RTT
Pipelining is not just a way to reduce the latency cost associated with the
round trip time, it actually greatly improves the number of operations
you can perform per second in a given Redis server.
This is because without using pipelining, serving each command is very cheap from
the point of view of accessing the data structures and producing the reply,
but it is very costly from the point of view of doing the socket I/O. This
involves calling the read() and write() syscall, that means going from user
land to kernel land.
The context switch is a huge speed penalty.
When pipelining is used, many commands are usually read with a single read()
system call, and multiple replies are delivered with a single write() system
call.
Because of this, the number of total queries performed per second
initially increases almost linearly with longer pipelines, and eventually
reaches 10 times the baseline obtained without pipelining, as you can
see from the following graph:

A real world code example
In the following benchmark we'll use the Redis Ruby client, supporting pipelining, to test the speed improvement due to pipelining:
require 'rubygems'
require 'redis'

def bench(descr)
  start = Time.now
  yield
  puts "#{descr} #{Time.now - start} seconds"
end

def without_pipelining
  r = Redis.new
  10_000.times do
    r.ping
  end
end

def with_pipelining
  r = Redis.new
  r.pipelined do
    10_000.times do
      r.ping
    end
  end
end

bench('without pipelining') do
  without_pipelining
end
bench('with pipelining') do
  with_pipelining
end
Running the above simple script yields the following figures on my Mac OS X system, running over the loopback interface, where pipelining will provide the smallest improvement as the RTT is already pretty low:
without pipelining 1.185238 seconds
with pipelining 0.250783 seconds
As you can see, using pipelining, we improved the transfer by a factor of five.
Pipelining vs Scripting
Using Redis scripting, available since Redis 2.6, a number of use cases for pipelining can be addressed more efficiently using scripts that perform a lot of the work needed at the server side. A big advantage of scripting is that it is able to both read and write data with minimal latency, making operations like read, compute, write very fast (pipelining can't help in this scenario since the client needs the reply of the read command before it can call the write command).
Sometimes the application may also want to send EVAL or EVALSHA commands in a pipeline.
This is entirely possible and Redis explicitly supports it with the SCRIPT LOAD command (it guarantees that EVALSHA can be called without the risk of failing).
Appendix: Why are busy loops slow even on the loopback interface?
Even with all the background covered in this page, you may still wonder why a Redis benchmark like the following (in pseudo code), is slow even when executed in the loopback interface, when the server and the client are running in the same physical machine:
FOR-ONE-SECOND:
    Redis.SET("foo","bar")
END
After all, if both the Redis process and the benchmark are running in the same box, isn't it just copying messages in memory from one place to another without any actual latency or networking involved?
The reason is that processes in a system are not always running, actually it is the kernel scheduler that lets the process run. So, for instance, when the benchmark is allowed to run, it reads the reply from the Redis server (related to the last command executed), and writes a new command. The command is now in the loopback interface buffer, but in order to be read by the server, the kernel should schedule the server process (currently blocked in a system call) to run, and so forth. So in practical terms the loopback interface still involves network-like latency, because of how the kernel scheduler works.
Basically a busy loop benchmark is the silliest thing that can be done when metering performances on a networked server. The wise thing is just avoiding benchmarking in this way.
7.11 - Redis programmability
Extending Redis with Lua and Redis Functions
Redis provides a programming interface that lets you execute custom scripts on the server itself. In Redis 7 and beyond, you can use Redis Functions to manage and run your scripts. In Redis 6.2 and below, you use Lua scripting with the EVAL command to program the server.
Background
Redis is, by definition, a "domain-specific language for abstract data types". The language that Redis speaks consists of its commands. Most the commands specialize at manipulating core data types in different ways. In many cases, these commands provide all the functionality that a developer requires for managing application data in Redis.
The term programmability in Redis means having the ability to execute arbitrary user-defined logic by the server. We refer to such pieces of logic as scripts. In our case, scripts enable processing the data where it lives, a.k.a data locality. Furthermore, the responsible embedding of programmatic workflows in the Redis server can help in reducing network traffic and improving overall performance. Developers can use this capability for implementing robust, application-specific APIs. Such APIs can encapsulate business logic and maintain a data model across multiple keys and different data structures.
User scripts are executed in Redis by an embedded, sandboxed scripting engine. Presently, Redis supports a single scripting engine, the Lua 5.1 interpreter.
Please refer to the Redis Lua API Reference page for complete documentation.
Running scripts
Redis provides two means for running scripts.
Firstly, and ever since Redis 2.6.0, the EVAL command enables running server-side scripts.
Eval scripts provide a quick and straightforward way to have Redis run your scripts ad-hoc.
However, using them means that the scripted logic is a part of your application (not an extension of the Redis server).
Every applicative instance that runs a script must have the script's source code readily available for loading at any time.
That is because scripts are only cached by the server and are volatile.
As your application grows, this approach can become harder to develop and maintain.
Secondly, added in v7.0, Redis Functions are essentially scripts that are first-class database elements. As such, functions decouple scripting from application logic and enable independent development, testing, and deployment of scripts. To use functions, they need to be loaded first, and then they are available for use by all connected clients. In this case, loading a function to the database becomes an administrative deployment task (such as loading a Redis module, for example), which separates the script from the application.
Please refer to the following pages for more information:
When running a script or a function, Redis guarantees its atomic execution. The script's execution blocks all server activities during its entire time, similarly to the semantics of transactions. These semantics mean that all of the script's effects either have yet to happen or had already happened. The blocking semantics of an executed script apply to all connected clients at all times.
Note that the potential downside of this blocking approach is that executing slow scripts is not a good idea. It is not hard to create fast scripts because scripting's overhead is very low. However, if you intend to use a slow script in your application, be aware that all other clients are blocked and can't execute any command while it is running.
Sandboxed script context
Redis places the engine that executes user scripts inside a sandbox. The sandbox attempts to prevent accidental misuse and reduce potential threats from the server's environment.
Scripts should never try to access the Redis server's underlying host systems, such as the file system, network, or attempt to perform any other system call other than those supported by the API.
Scripts should operate solely on data stored in Redis and data provided as arguments to their execution.
Maximum execution time
Scripts are subject to a maximum execution time (set by default to five seconds). This default timeout is enormous since a script usually runs in less than a millisecond. The limit is in place to handle accidental infinite loops created during development.
It is possible to modify the maximum time a script can be executed with millisecond precision,
either via redis.conf or by using the CONFIG SET command.
The configuration parameter affecting max execution time is called busy-reply-threshold.
When a script reaches the timeout threshold, it isn't terminated by Redis automatically. Doing so would violate the contract between Redis and the scripting engine that ensures that scripts are atomic. Interrupting the execution of a script has the potential of leaving the dataset with half-written changes.
Therefore, when a script executes longer than than the configured timeout, the following happens:
- Redis logs that a script is running for too long.
- It starts accepting commands again from other clients but will reply with a BUSY error to all the clients sending normal commands. The only commands allowed in this state are
SCRIPT KILL,FUNCTION KILL, andSHUTDOWN NOSAVE. - It is possible to terminate a script that only executes read-only commands using the
SCRIPT KILLandFUNCTION KILLcommands. These commands do not violate the scripting semantic as no data was written to the dataset by the script yet. - If the script had already performed even a single write operation, the only command allowed is
SHUTDOWN NOSAVEthat stops the server without saving the current data set on disk (basically, the server is aborted).
7.11.1 - Redis functions
Scripting with Redis 7 and beyond
Redis Functions is an API for managing code to be executed on the server. This feature, which became available in Redis 7, supersedes the use of EVAL in prior versions of Redis.
Prologue (or, what's wrong with Eval Scripts?)
Prior versions of Redis made scripting available only via the EVAL command, which allows a Lua script to be sent for execution by the server.
The core use cases for Eval Scripts is executing part of your application logic inside Redis, efficiently and atomically.
Such script can perform conditional updates across multiple keys, possibly combining several different data types.
Using EVAL requires that the application sends the entire script for execution every time.
Because this results in network and script compilation overheads, Redis provides an optimization in the form of the EVALSHA command. By first calling SCRIPT LOAD to obtain the script's SHA1, the application can invoke it repeatedly afterward with its digest alone.
By design, Redis only caches the loaded scripts.
That means that the script cache can become lost at any time, such as after calling SCRIPT FLUSH, after restarting the server, or when failing over to a replica.
The application is responsible for reloading scripts during runtime if any are missing.
The underlying assumption is that scripts are a part of the application and not maintained by the Redis server.
This approach suits many light-weight scripting use cases, but introduces several difficulties once an application becomes complex and relies more heavily on scripting, namely:
- All client application instances must maintain a copy of all scripts. That means having some mechanism that applies script updates to all of the application's instances.
- Calling cached scripts within the context of a transaction increases the probability of the transaction failing because of a missing script. Being more likely to fail makes using cached scripts as building blocks of workflows less attractive.
- SHA1 digests are meaningless, making debugging the system extremely hard (e.g., in a
MONITORsession). - When used naively,
EVALpromotes an anti-pattern in which scripts the client application renders verbatim scripts instead of responsibly using theKEYSandARGVLua APIs. - Because they are ephemeral, a script can't call another script. This makes sharing and reusing code between scripts nearly impossible, short of client-side preprocessing (see the first point).
To address these needs while avoiding breaking changes to already-established and well-liked ephemeral scripts, Redis v7.0 introduces Redis Functions.
What are Redis Functions?
Redis functions are an evolutionary step from ephemeral scripting.
Functions provide the same core functionality as scripts but are first-class software artifacts of the database. Redis manages functions as an integral part of the database and ensures their availability via data persistence and replication. Because functions are part of the database and therefore declared before use, applications aren't required to load them during runtime nor risk aborted transactions. An application that uses functions depends only on their APIs rather than on the embedded script logic in the database.
Whereas ephemeral scripts are considered a part of the application's domain, functions extend the database server itself with user-provided logic. They can be used to expose a richer API composed of core Redis commands, similar to modules, developed once, loaded at startup, and used repeatedly by various applications / clients. Every function has a unique user-defined name, making it much easier to call and trace its execution.
The design of Redis Functions also attempts to demarcate between the programming language used for writing functions and their management by the server. Lua, the only language interpreter that Redis presently support as an embedded execution engine, is meant to be simple and easy to learn. However, the choice of Lua as a language still presents many Redis users with a challenge.
The Redis Functions feature makes no assumptions about the implementation's language. An execution engine that is part of the definition of the function handles running it. An engine can theoretically execute functions in any language as long as it respects several rules (such as the ability to terminate an executing function).
Presently, as noted above, Redis ships with a single embedded Lua 5.1 engine. There are plans to support additional engines in the future. Redis functions can use all of Lua's available capabilities to ephemeral scripts, with the only exception being the Redis Lua scripts debugger.
Functions also simplify development by enabling code sharing. Every function belongs to a single library, and any given library can consist of multiple functions. The library's contents are immutable, and selective updates of its functions aren't allowed. Instead, libraries are updated as a whole with all of their functions together in one operation. This allows calling functions from other functions within the same library, or sharing code between functions by using a common code in library-internal methods, that can also take language native arguments.
Functions are intended to better support the use case of maintaining a consistent view for data entities through a logical schema, as mentioned above. As such, functions are stored alongside the data itself. Functions are also persisted to the AOF file and replicated from master to replicas, so they are as durable as the data itself. When Redis is used as an ephemeral cache, additional mechanisms (described below) are required to make functions more durable.
Like all other operations in Redis, the execution of a function is atomic. A function's execution blocks all server activities during its entire time, similarly to the semantics of transactions. These semantics mean that all of the script's effects either have yet to happen or had already happened. The blocking semantics of an executed function apply to all connected clients at all times. Because running a function blocks the Redis server, functions are meant to finish executing quickly, so you should avoid using long-running functions.
Loading libraries and functions
Let's explore Redis Functions via some tangible examples and Lua snippets.
At this point, if you're unfamiliar with Lua in general and specifically in Redis, you may benefit from reviewing some of the examples in Introduction to Eval Scripts and Lua API pages for a better grasp of the language.
Every Redis function belongs to a single library that's loaded to Redis.
Loading a library to the database is done with the FUNCTION LOAD command.
The command gets the library payload as input,
the library payload must start with Shebang statement that provides a metadata about the library (like the engine to use and the library name).
The Shebang format is:
#!<engine name> name=<library name>
Let's try loading an empty library:
redis> FUNCTION LOAD "#!lua name=mylib\n"
(error) ERR No functions registered
The error is expected, as there are no functions in the loaded library. Every library needs to include at least one registered function to load successfully.
A registered function is named and acts as an entry point to the library.
When the target execution engine handles the FUNCTION LOAD command, it registers the library's functions.
The Lua engine compiles and evaluates the library source code when loaded, and expects functions to be registered by calling the redis.register_function() API.
The following snippet demonstrates a simple library registering a single function named knockknock, returning a string reply:
#!lua name=mylib
redis.register_function(
  'knockknock',
  function() return 'Who\'s there?' end
)
In the example above, we provide two arguments about the function to Lua's redis.register_function() API: its registered name and a callback.
We can load our library and use FCALL to call the registered function:
redis> FUNCTION LOAD "#!lua name=mylib\nredis.register_function('knockknock', function() return 'Who\\'s there?' end)"
mylib
redis> FCALL knockknock 0
"Who's there?"
Notice that the FUNCTION LOAD command returns the name of the loaded library, this name can later be used FUNCTION LIST and FUNCTION DELETE.
We've provided FCALL with two arguments: the function's registered name and the numeric value 0. This numeric value indicates the number of key names that follow it (the same way EVAL and EVALSHA work).
We'll explain immediately how key names and additional arguments are available to the function. As this simple example doesn't involve keys, we simply use 0 for now.
Input keys and regular arguments
Before we move to the following example, it is vital to understand the distinction Redis makes between arguments that are names of keys and those that aren't.
While key names in Redis are just strings, unlike any other string values, these represent keys in the database. The name of a key is a fundamental concept in Redis and is the basis for operating the Redis Cluster.
Important: To ensure the correct execution of Redis Functions, both in standalone and clustered deployments, all names of keys that a function accesses must be explicitly provided as input key arguments.
Any input to the function that isn't the name of a key is a regular input argument.
Now, let's pretend that our application stores some of its data in Redis Hashes.
We want an HSET-like way to set and update fields in said Hashes and store the last modification time in a new field named _last_modified_.
We can implement a function to do all that.
Our function will call TIME to get the server's clock reading and update the target Hash with the new fields' values and the modification's timestamp.
The function we'll implement accepts the following input arguments: the Hash's key name and the field-value pairs to update.
The Lua API for Redis Functions makes these inputs accessible as the first and second arguments to the function's callback. The callback's first argument is a Lua table populated with all key names inputs to the function. Similarly, the callback's second argument consists of all regular arguments.
The following is a possible implementation for our function and its library registration:
#!lua name=mylib

local function my_hset(keys, args)
  local hash = keys[1]
  local time = redis.call('TIME')[1]
  return redis.call('HSET', hash, '_last_modified_', time, unpack(args))
end

redis.register_function('my_hset', my_hset)
If we create a new file named mylib.lua that consists of the library's definition, we can load it like so (without stripping the source code of helpful whitespaces):
$ cat mylib.lua | redis-cli -x FUNCTION LOAD REPLACE
We've added the REPLACE modifier to the call to FUNCTION LOAD to tell Redis that we want to overwrite the existing library definition.
Otherwise, we would have gotten an error from Redis complaining that the library already exists.
Now that the library's updated code is loaded to Redis, we can proceed and call our function:
redis> FCALL my_hset 1 myhash myfield "some value" another_field "another value"
(integer) 3
redis> HGETALL myhash
1) "_last_modified_"
2) "1640772721"
3) "myfield"
4) "some value"
5) "another_field"
6) "another value"
In this case, we had invoked FCALL with 1 as the number of key name arguments.
That means that the function's first input argument is a name of a key (and is therefore included in the callback's keys table).
After that first argument, all following input arguments are considered regular arguments and constitute the args table passed to the callback as its second argument.
Expanding the library
We can add more functions to our library to benefit our application. The additional metadata field we've added to the Hash shouldn't be included in responses when accessing the Hash's data. On the other hand, we do want to provide the means to obtain the modification timestamp for a given Hash key.
We'll add two new functions to our library to accomplish these objectives:
- The
my_hgetallRedis Function will return all fields and their respective values from a given Hash key name, excluding the metadata (i.e., the_last_modified_field). - The
my_hlastmodifiedRedis Function will return the modification timestamp for a given Hash key name.
The library's source code could look something like the following:
#!lua name=mylib

local function my_hset(keys, args)
  local hash = keys[1]
  local time = redis.call('TIME')[1]
  return redis.call('HSET', hash, '_last_modified_', time, unpack(args))
end

local function my_hgetall(keys, args)
  redis.setresp(3)
  local hash = keys[1]
  local res = redis.call('HGETALL', hash)
  res['map']['_last_modified_'] = nil
  return res
end

local function my_hlastmodified(keys, args)
  local hash = keys[1]
  return redis.call('HGET', keys[1], '_last_modified_')
end

redis.register_function('my_hset', my_hset)
redis.register_function('my_hgetall', my_hgetall)
redis.register_function('my_hlastmodified', my_hlastmodified)
While all of the above should be straightforward, note that the my_hgetall also calls redis.setresp(3).
That means that the function expects RESP3 replies after calling redis.call(), which, unlike the default RESP2 protocol, provides dictionary (associative arrays) replies.
Doing so allows the function to delete (or set to nil as is the case with Lua tables) specific fields from the reply, and in our case, the _last_modified_ field.
Assuming you've saved the library's implementation in the mylib.lua file, you can replace it with:
$ cat mylib.lua | redis-cli -x FUNCTION LOAD REPLACE
Once loaded, you can call the library's functions with FCALL:
redis> FCALL my_hgetall 1 myhash
1) "myfield"
2) "some value"
3) "another_field"
4) "another value"
redis> FCALL my_hlastmodified 1 myhash
"1640772721"
You can also get the library's details with the FUNCTION LIST command:
redis> FUNCTION LIST
1) 1) "library_name"
   2) "mylib"
   3) "engine"
   4) "LUA"
   5) "functions"
   6) 1) 1) "name"
         2) "my_hset"
         3) "description"
         4) (nil)
      2) 1) "name"
         2) "my_hgetall"
         3) "description"
         4) (nil)
      3) 1) "name"
         2) "my_hlastmodified"
         3) "description"
         4) (nil)
You can see that it is easy to update our library with new capabilities.
Reusing code in the library
On top of bundling functions together into database-managed software artifacts, libraries also facilitate code sharing.
We can add to our library an error handling helper function called from other functions.
The helper function check_keys() verifies that the input keys table has a single key.
Upon success it returns nil, otherwise it returns an error reply.
The updated library's source code would be:
#!lua name=mylib

local function check_keys(keys)
  local error = nil
  local nkeys = table.getn(keys)
  if nkeys == 0 then
    error = 'Hash key name not provided'
  elseif nkeys > 1 then
    error = 'Only one key name is allowed'
  end

  if error ~= nil then
    redis.log(redis.LOG_WARNING, error);
    return redis.error_reply(error)
  end
  return nil
end

local function my_hset(keys, args)
  local error = check_keys(keys)
  if error ~= nil then
    return error
  end

  local hash = keys[1]
  local time = redis.call('TIME')[1]
  return redis.call('HSET', hash, '_last_modified_', time, unpack(args))
end

local function my_hgetall(keys, args)
  local error = check_keys(keys)
  if error ~= nil then
    return error
  end

  redis.setresp(3)
  local hash = keys[1]
  local res = redis.call('HGETALL', hash)
  res['map']['_last_modified_'] = nil
  return res
end

local function my_hlastmodified(keys, args)
  local error = check_keys(keys)
  if error ~= nil then
    return error
  end

  local hash = keys[1]
  return redis.call('HGET', keys[1], '_last_modified_')
end

redis.register_function('my_hset', my_hset)
redis.register_function('my_hgetall', my_hgetall)
redis.register_function('my_hlastmodified', my_hlastmodified)
After you've replaced the library in Redis with the above, you can immediately try out the new error handling mechanism:
127.0.0.1:6379> FCALL my_hset 0 myhash nope nope
(error) Hash key name not provided
127.0.0.1:6379> FCALL my_hgetall 2 myhash anotherone
(error) Only one key name is allowed
And your Redis log file should have lines in it that are similar to:
...
20075:M 1 Jan 2022 16:53:57.688 # Hash key name not provided
20075:M 1 Jan 2022 16:54:01.309 # Only one key name is allowed
Functions in cluster
As noted above, Redis automatically handles propagation of loaded functions to replicas. In a Redis Cluster, it is also necessary to load functions to all cluster nodes. This is not handled automatically by Redis Cluster, and needs to be handled by the cluster administrator (like module loading, configuration setting, etc.).
As one of the goals of functions is to live separately from the client application, this should not be part of the Redis client library responsibilities. Instead, redis-cli --cluster-only-masters --cluster call host:port FUNCTION LOAD ... can be used to execute the load command on all master nodes.
Also, note that redis-cli --cluster add-node automatically takes care to propagate the loaded functions from one of the existing nodes to the new node.
Functions and ephemeral Redis instances
In some cases there may be a need to start a fresh Redis server with a set of functions pre-loaded. Common reasons for that could be:
- Starting Redis in a new environment
- Re-starting an ephemeral (cache-only) Redis, that uses functions
In such cases, we need to make sure that the pre-loaded functions are available before Redis accepts inbound user connections and commands.
To do that, it is possible to use redis-cli --functions-rdb to extract the functions from an existing server. This generates an RDB file that can be loaded by Redis at startup.
Function flags
Redis needs to have some information about how a function is going to behave when executed, in order to properly enforce resource usage policies and maintain data consistency.
For example, Redis needs to know that a certain function is read-only before permitting it to execute using FCALL_RO on a read-only replica.
By default, Redis assumes that all functions may perform arbitrary read or write operations. Function Flags make it possible to declare more specific function behavior at the time of registration. Let's see how this works.
In our previous example, we defined two functions that only read data. We can try executing them using FCALL_RO against a read-only replica.
redis > FCALL_RO my_hgetall 1 myhash
(error) ERR Can not execute a function with write flag using fcall_ro.
Redis returns this error because a function can, in theory, perform both read and write operations on the database. As a safeguard and by default, Redis assumes that the function does both, so it blocks its execution. The server will reply with this error in the following cases:
- Executing a function with
FCALLagainst a read-only replica. - Using
FCALL_ROto execute a function. - A disk error was detected (Redis is unable to persist so it rejects writes).
In these cases, you can add the no-writes flag to the function's registration, disable the safeguard and allow them to run.
To register a function with flags use the named arguments variant of redis.register_function.
The updated registration code snippet from the library looks like this:
redis.register_function('my_hset', my_hset)
redis.register_function{
  function_name='my_hgetall',
  callback=my_hgetall,
  flags={ 'no-writes' }
}
redis.register_function{
  function_name='my_hlastmodified',
  callback=my_hlastmodified,
  flags={ 'no-writes' }
}
Once we've replaced the library, Redis allows running both my_hgetall and my_hlastmodified with FCALL_RO against a read-only replica:
redis> FCALL_RO my_hgetall 1 myhash
1) "myfield"
2) "some value"
3) "another_field"
4) "another value"
redis> FCALL_RO my_hlastmodified 1 myhash
"1640772721"
For the complete documentation flags, please refer to Script flags.
7.11.2 - Scripting with Lua
Executing Lua in Redis
Redis lets users upload and execute Lua scripts on the server. Scripts can employ programmatic control structures and use most of the commands while executing to access the database. Because scripts execute in the server, reading and writing data from scripts is very efficient.
Redis guarantees the script's atomic execution. While executing the script, all server activities are blocked during its entire runtime. These semantics mean that all of the script's effects either have yet to happen or had already happened.
Scripting offers several properties that can be valuable in many cases. These include:
- Providing locality by executing logic where data lives. Data locality reduces overall latency and saves networking resources.
- Blocking semantics that ensure the script's atomic execution.
- Enabling the composition of simple capabilities that are either missing from Redis or are too niche to a part of it.
Lua lets you run part of your application logic inside Redis. Such scripts can perform conditional updates across multiple keys, possibly combining several different data types atomically.
Scripts are executed in Redis by an embedded execution engine. Presently, Redis supports a single scripting engine, the Lua 5.1 interpreter. Please refer to the Redis Lua API Reference page for complete documentation.
Although the server executes them, Eval scripts are regarded as a part of the client-side application, which is why they're not named, versioned, or persisted. So all scripts may need to be reloaded by the application at any time if missing (after a server restart, fail-over to a replica, etc.). As of version 7.0, Redis Functions offer an alternative approach to programmability which allow the server itself to be extended with additional programmed logic.
Getting started
We'll start scripting with Redis by using the EVAL command.
Here's our first example:
> EVAL "return 'Hello, scripting!'" 0
"Hello, scripting!"
In this example, EVAL takes two arguments.
The first argument is a string that consists of the script's Lua source code.
The script doesn't need to include any definitions of Lua function.
It is just a Lua program that will run in the Redis engine's context.
The second argument is the number of arguments that follow the script's body, starting from the third argument, representing Redis key names. In this example, we used the value 0 because we didn't provide the script with any arguments, whether the names of keys or not.
Script parameterization
It is possible, although highly ill-advised, to have the application dynamically generate script source code per its needs. For example, the application could send these two entirely different, but at the same time perfectly identical scripts:
redis> EVAL "return 'Hello'" 0
"Hello"
redis> EVAL "return 'Scripting!'" 0
"Scripting!"
Although this mode of operation isn't blocked by Redis, it is an anti-pattern due to script cache considerations (more on the topic below). Instead of having your application generate subtle variations of the same scripts, you can parametrize them and pass any arguments needed for to execute them.
The following example demonstrates how to achieve the same effects as above, but via parameterization:
redis> EVAL "return ARGV[1]" 0 Hello
"Hello"
redis> EVAL "return ARGV[1]" 0 Parameterization!
"Parameterization!"
At this point, it is essential to understand the distinction Redis makes between input arguments that are names of keys and those that aren't.
While key names in Redis are just strings, unlike any other string values, these represent keys in the database. The name of a key is a fundamental concept in Redis and is the basis for operating the Redis Cluster.
Important: to ensure the correct execution of scripts, both in standalone and clustered deployments, all names of keys that a script accesses must be explicitly provided as input key arguments. The script should only access keys whose names are given as input arguments. Scripts should never access keys with programmatically-generated names or based on the contents of data structures stored in the database.
Any input to the function that isn't the name of a key is a regular input argument.
In the example above, both Hello and Parameterization! regular input arguments for the script. Because the script doesn't touch any keys, we use the numerical argument 0 to specify there are no key name arguments. The execution context makes arguments available to the script through KEYS and ARGV global runtime variables. The KEYS table is pre-populated with all key name arguments provided to the script before its execution, whereas the ARGV table serves a similar purpose but for regular arguments.
The following attempts to demonstrate the distribution of input arguments between the scripts KEYS and ARGV runtime global variables:
redis> EVAL "return { KEYS[1], KEYS[2], ARGV[1], ARGV[2], ARGV[3] }" 2 key1 key2 arg1 arg2 arg3
1) "key1"
2) "key2"
3) "arg1"
4) "arg2"
5) "arg3"
Note: as can been seen above, Lua's table arrays are returned as RESP2 array replies, so it is likely that your client's library will convert it to the native array data type in your programming language. Please refer to the rules that govern data type conversion for more pertinent information.
Interacting with Redis from a script
It is possible to call Redis commands from a Lua script either via redis.call() or redis.pcall().
The two are nearly identical.
Both execute a Redis command along with its provided arguments, if these represent a well-formed command.
However, the difference between the two functions lies in the manner in which runtime errors (such as syntax errors, for example) are handled.
Errors raised from calling redis.call() function are returned directly to the client that had executed it.
Conversely, errors encountered when calling the redis.pcall() function are returned to the script's execution context instead for possible handling.
For example, consider the following:
> EVAL "return redis.call('SET', KEYS[1], ARGV[1])" 1 foo bar
OK
The above script accepts one key name and one value as its input arguments.
When executed, the script calls the SET command to set the input key, foo, with the string value "bar".
Script cache
Until this point, we've used the EVAL command to run our script.
Whenever we call EVAL, we also include the script's source code with the request.
Repeatedly calling EVAL to execute the same set of parameterized scripts, wastes both network bandwidth and also has some overheads in Redis.
Naturally, saving on network and compute resources is key, so, instead, Redis provides a caching mechanism for scripts.
Every script you execute with EVAL is stored in a dedicated cache that the server keeps.
The cache's contents are organized by the scripts' SHA1 digest sums, so the SHA1 digest sum of a script uniquely identifies it in the cache.
You can verify this behavior by running EVAL and calling INFO afterward.
You'll notice that the used_memory_scripts_eval and number_of_cached_scripts metrics grow with every new script that's executed.
As mentioned above, dynamically-generated scripts are an anti-pattern. Generating scripts during the application's runtime may, and probably will, exhaust the host's memory resources for caching them. Instead, scripts should be as generic as possible and provide customized execution via their arguments.
A script is loaded to the server's cache by calling the SCRIPT LOAD command and providing its source code.
The server doesn't execute the script, but instead just compiles and loads it to the server's cache.
Once loaded, you can execute the cached script with the SHA1 digest returned from the server.
Here's an example of loading and then executing a cached script:
redis> SCRIPT LOAD "return 'Immabe a cached script'"
"c664a3bf70bd1d45c4284ffebb65a6f2299bfc9f"
redis> EVALSHA c664a3bf70bd1d45c4284ffebb65a6f2299bfc9f 0
"Immabe a cached script"
Cache volatility
The Redis script cache is always volatile.
It isn't considered as a part of the database and is not persisted.
The cache may be cleared when the server restarts, during fail-over when a replica assumes the master role, or explicitly by SCRIPT FLUSH.
That means that cached scripts are ephemeral, and the cache's contents can be lost at any time.
Applications that use scripts should always call EVALSHA to execute them.
The server returns an error if the script's SHA1 digest is not in the cache.
For example:
redis> EVALSHA ffffffffffffffffffffffffffffffffffffffff 0
(error) NOSCRIPT No matching script
In this case, the application should first load it with SCRIPT LOAD and then call EVALSHA once more to run the cached script by its SHA1 sum.
Most of Redis' clients already provide utility APIs for doing that automatically.
Please consult your client's documentation regarding the specific details.
EVALSHA in the context of pipelining
Special care should be given executing EVALSHA in the context of a pipelined request.
The commands in a pipelined request run in the order they are sent, but other clients' commands may be interleaved for execution between these.
Because of that, the NOSCRIPT error can return from a pipelined request but can't be handled.
Therefore, a client library's implementation should revert to using plain EVAL of parameterized in the context of a pipeline.
Script cache semantics
During normal operation, an application's scripts are meant to stay indefintely in the cache (that is, until the server is restarted or the cache being flushed). The underlying reasoning is that the script cache contents of a well-written application are unlikely to grow continuously. Even large applications that use hundreds of cached scripts shouldn't be an issue in terms of cache memory usage.
The only way to flush the script cache is by explicitly calling the SCRIPT FLUSH command.
Running the command will completely flush the scripts cache, removing all the scripts executed so far.
Typically, this is only needed when the instance is going to be instantiated for another customer or application in a cloud environment.
Also, as already mentioned, restarting a Redis instance flushes the non-persistent script cache. However, from the point of view of the Redis client, there are only two ways to make sure that a Redis instance was not restarted between two different commands:
- The connection we have with the server is persistent and was never closed so far.
- The client explicitly checks the
runidfield in theINFOcommand to ensure the server was not restarted and is still the same process.
Practically speaking, it is much simpler for the client to assume that in the context of a given connection, cached scripts are guaranteed to be there unless the administrator explicitly invoked the SCRIPT FLUSH command.
The fact that the user can count on Redis to retain cached scripts is semantically helpful in the context of pipelining.
The SCRIPT command
The Redis SCRIPT provides several ways for controlling the scripting subsystem.
These are:
SCRIPT FLUSH: this command is the only way to force Redis to flush the scripts cache. It is most useful in environments where the same Redis instance is reassigned to different uses. It is also helpful for testing client libraries' implementations of the scripting feature.SCRIPT EXISTS: given one or more SHA1 digests as arguments, this command returns an array of 1's and 0's. 1 means the specific SHA1 is recognized as a script already present in the scripting cache. 0's meaning is that a script with this SHA1 wasn't loaded before (or at least never since the latest call toSCRIPT FLUSH).SCRIPT LOAD script: this command registers the specified script in the Redis script cache. It is a useful command in all the contexts where we want to ensure thatEVALSHAdoesn't not fail (for instance, in a pipeline or when called from a [MULTI/EXECtransaction](/topics/transactions)), without the need to execute the script.SCRIPT KILL: this command is the only way to interrupt a long-running script (a.k.a slow script), short of shutting down the server. A script is deemed as slow once its execution's duration exceeds the configured maximum execution time threshold. TheSCRIPT KILLcommand can be used only with scripts that did not modify the dataset during their execution (since stopping a read-only script does not violate the scripting engine's guaranteed atomicity).SCRIPT DEBUG: controls use of the built-in Redis Lua scripts debugger.
Script replication
In standalone deployments, a single Redis instance called master manages the entire database. A clustered deployment has at least three masters managing the sharded database. Redis uses replication to maintain one or more replicas, or exact copies, for any given master.
Because scripts can modify the data, Redis ensures all write operations performed by a script are also sent to replicas to maintain consistency. There are two conceptual approaches when it comes to script replication:
- Verbatim replication: the master sends the script's source code to the replicas. Replicas then execute the script and apply the write effects. This mode can save on replication bandwidth in cases where short scripts generate many commands (for example, a for loop). However, this replication mode means that replicas redo the same work done by the master, which is wasteful. More importantly, it also requires all write scripts to be deterministic.
- Effects replication: only the script's data-modifying commands are replicated. Replicas then run the commands without executing any scripts. While potentially lengthier in terms of network traffic, this replication mode is deterministic by definition and therefore doesn't require special consideration.
Verbatim script replication was the only mode supported until Redis 3.2, in which effects replication was added.
The lua-replicate-commands configuration directive and redis.replicate_commands() Lua API can be used to enable it.
In Redis 5.0, effects replication became the default mode. As of Redis 7.0, verbatim replication is no longer supported.
Replicating commands instead of scripts
Starting with Redis 3.2, it is possible to select an alternative replication method. Instead of replicating whole scripts, we can replicate the write commands generated by the script. We call this script effects replication.
Note: starting with Redis 5.0, script effects replication is the default mode and does not need to be explicitly enabled.
In this replication mode, while Lua scripts are executed, Redis collects all the commands executed by the Lua scripting engine that actually modify the dataset.
When the script execution finishes, the sequence of commands that the script generated are wrapped into a [MULTI/EXEC transaction](/topics/transactions) and are sent to the replicas and AOF.
This is useful in several ways depending on the use case:
- When the script is slow to compute, but the effects can be summarized by a few write commands, it is a shame to re-compute the script on the replicas or when reloading the AOF. In this case, it is much better to replicate just the effects of the script.
- When script effects replication is enabled, the restrictions on non-deterministic functions are removed.
You can, for example, use the
TIMEorSRANDMEMBERcommands inside your scripts freely at any place. - The Lua PRNG in this mode is seeded randomly on every call.
Unless already enabled by the server's configuration or defaults (before Redis 7.0), you need to issue the following Lua command before the script performs a write:
redis.replicate_commands()
The redis.replicate_commands() function returns _true) if script effects replication was enabled;
otherwise, if the function was called after the script already called a write command,
it returns false, and normal whole script replication is used.
This function is deprecated as of Redis 7.0, and while you can still call it, it will always succeed.
Scripts with deterministic writes
Note: Starting with Redis 5.0, script replication is by default effect-based rather than verbatim. In Redis 7.0, verbatim script replication had been removed entirely. The following section only applies to versions lower than Redis 7.0 when not using effect-based script replication.
An important part of scripting is writing scripts that only change the database in a deterministic way. Scripts executed in a Redis instance are, by default until version 5.0, propagated to replicas and to the AOF file by sending the script itself -- not the resulting commands. Since the script will be re-run on the remote host (or when reloading the AOF file), its changes to the database must be reproducible.
The reason for sending the script is that it is often much faster than sending the multiple commands that the script generates. If the client is sending many scripts to the master, converting the scripts into individual commands for the replica / AOF would result in too much bandwidth for the replication link or the Append Only File (and also too much CPU since dispatching a command received via the network is a lot more work for Redis compared to dispatching a command invoked by Lua scripts).
Normally replicating scripts instead of the effects of the scripts makes sense, however not in all the cases. So starting with Redis 3.2, the scripting engine is able to, alternatively, replicate the sequence of write commands resulting from the script execution, instead of replication the script itself.
In this section, we'll assume that scripts are replicated verbatim by sending the whole script. Let's call this replication mode verbatim scripts replication.
The main drawback with the whole scripts replication approach is that scripts are required to have the following property: the script always must execute the same Redis write commands with the same arguments given the same input data set. Operations performed by the script can't depend on any hidden (non-explicit) information or state that may change as the script execution proceeds or between different executions of the script. Nor can it depend on any external input from I/O devices.
Acts such as using the system time, calling Redis commands that return random values (e.g., RANDOMKEY), or using Lua's random number generator, could result in scripts that will not evaluate consistently.
To enforce the deterministic behavior of scripts, Redis does the following:
- Lua does not export commands to access the system time or other external states.
- Redis will block the script with an error if a script calls a Redis command able to alter the data set after a Redis random command like
RANDOMKEY,SRANDMEMBER,TIME. That means that read-only scripts that don't modify the dataset can call those commands. Note that a random command does not necessarily mean a command that uses random numbers: any non-deterministic command is considered as a random command (the best example in this regard is theTIMEcommand). - In Redis version 4.0, commands that may return elements in random order, such as
SMEMBERS(because Redis Sets are unordered), exhibit a different behavior when called from Lua, and undergo a silent lexicographical sorting filter before returning data to Lua scripts. Soredis.call("SMEMBERS",KEYS[1])will always return the Set elements in the same order, while the same command invoked by normal clients may return different results even if the key contains exactly the same elements. However, starting with Redis 5.0, this ordering is no longer performed because replicating effects circumvents this type of non-determinism. In general, even when developing for Redis 4.0, never assume that certain commands in Lua will be ordered, but instead rely on the documentation of the original command you call to see the properties it provides. - Lua's pseudo-random number generation function
math.randomis modified and always uses the same seed for every execution. This means that callingmath.randomwill always generate the same sequence of numbers every time a script is executed (unlessmath.randomseedis used).
All that said, you can still use commands that write and random behavior with a simple trick. Imagine that you want to write a Redis script that will populate a list with N random integers.
The initial implementation in Ruby could look like this:
require 'rubygems'
require 'redis'
r = Redis.new
RandomPushScript = <<EOF
local i = tonumber(ARGV[1])
local res
while (i > 0) do
res = redis.call('LPUSH',KEYS[1],math.random())
i = i-1
end
return res
EOF
r.del(:mylist)
puts r.eval(RandomPushScript,[:mylist],[10,rand(2**32)])
Every time this code runs, the resulting list will have exactly the following elements:
redis> LRANGE mylist 0 -1
1) "0.74509509873814"
2) "0.87390407681181"
3) "0.36876626981831"
4) "0.6921941534114"
5) "0.7857992587545"
6) "0.57730350670279"
7) "0.87046522734243"
8) "0.09637165539729"
9) "0.74990198051087"
10) "0.17082803611217"
To make the script both deterministic and still have it produce different random elements, we can add an extra argument to the script that's the seed to Lua's pseudo-random number generator. The new script is as follows:
RandomPushScript = <<EOF
local i = tonumber(ARGV[1])
local res
math.randomseed(tonumber(ARGV[2]))
while (i > 0) do
res = redis.call('LPUSH',KEYS[1],math.random())
i = i-1
end
return res
EOF
r.del(:mylist)
puts r.eval(RandomPushScript,1,:mylist,10,rand(2**32))
What we are doing here is sending the seed of the PRNG as one of the arguments. The script output will always be the same given the same arguments (our requirement) but we are changing one of the arguments at every invocation, generating the random seed client-side. The seed will be propagated as one of the arguments both in the replication link and in the Append Only File, guaranteeing that the same changes will be generated when the AOF is reloaded or when the replica processes the script.
Note: an important part of this behavior is that the PRNG that Redis implements as math.random and math.randomseed is guaranteed to have the same output regardless of the architecture of the system running Redis.
32-bit, 64-bit, big-endian and little-endian systems will all produce the same output.
Debugging Eval scripts
Starting with Redis 3.2, Redis has support for native Lua debugging.
The Redis Lua debugger is a remote debugger consisting of a server, which is Redis itself, and a client, which is by default redis-cli.
The Lua debugger is described in the Lua scripts debugging section of the Redis documentation.
Execution under low memory conditions
When memory usage in Redis exceeds the maxmemory limit, the first write command encountered in the script that uses additional memory will cause the script to abort (unless redis.pcall was used).
However, an exception to the above is when the script's first write command does not use additional memory, as is the case with (for example, DEL and LREM).
In this case, Redis will allow all commands in the script to run to ensure atomicity.
If subsequent writes in the script consume additional memory, Redis' memory usage can exceed the threshold set by the maxmemory configuration directive.
Another scenario in which a script can cause memory usage to cross the maxmemory threshold is when the execution begins when Redis is slightly below maxmemory, so the script's first write command is allowed.
As the script executes, subsequent write commands consume more memory leading to the server using more RAM than the configured maxmemory directive.
In those scenarios, you should consider setting the maxmemory-policy configuration directive to any values other than noeviction.
In addition, Lua scripts should be as fast as possible so that eviction can kick in between executions.
Note that you can change this behaviour by using flags
Eval flags
Normally, when you run an Eval script, the server does not know how it accesses the database. By default, Redis assumes that all scripts read and write data. However, starting with Redis 7.0, there's a way to declare flags when creating a script in order to tell Redis how it should behave.
The way to do that is by using a Shebang statement on the first line of the script like so:
#!lua flags=no-writes,allow-stale
local x = redis.call('get','x')
return x
Note that as soon as Redis sees the #! comment, it'll treat the script as if it declares flags, even if no flags are defined,
it still has a different set of defaults compared to a script without a #! line.
Another difference is that scripts without #! can run commands that access keys belonging to different cluster hash slots, but ones with #! inherit the default flags, so they cannot.
Please refer to Script flags to learn about the various scripts and the defaults.
7.11.3 - Redis Lua API reference
Executing Lua in Redis
Redis includes an embedded Lua 5.1 interpreter. The interpreter runs user-defined ephemeral scripts and functions. Scripts run in a sandboxed context and can only access specific Lua packages. This page describes the packages and APIs available inside the execution's context.
Sandbox context
The sandboxed Lua context attempts to prevent accidental misuse and reduce potential threats from the server's environment.
Scripts should never try to access the Redis server's underlying host systems. That includes the file system, network, and any other attempt to perform a system call other than those supported by the API.
Scripts should operate solely on data stored in Redis and data provided as arguments to their execution.
Global variables and functions
The sandboxed Lua execution context blocks the declaration of global variables and functions. The blocking of global variables is in place to ensure that scripts and functions don't attempt to maintain any runtime context other than the data stored in Redis. In the (somewhat uncommon) use case that a context needs to be maintain betweem executions, you should store the context in Redis' keyspace.
Redis will return a "Script attempted to create global variable 'my_global_variable" error when trying to execute the following snippet:
my_global_variable = 'some value'
And similarly for the following global function declaration:
function my_global_funcion()
-- Do something amazing
end
You'll also get a similar error when your script attempts to access any global variables that are undefined in the runtime's context:
-- The following will surely raise an error
return an_undefined_global_variable
Instead, all variable and function definitions are required to be declared as local. To do so, you'll need to prepend the local keyword to your declarations. For example, the following snippet will be considered perfectly valid by Redis:
local my_local_variable = 'some value'
local function my_local_function()
-- Do something else, but equally amazing
end
Note: the sandbox attempts to prevent the use of globals. Using Lua's debugging functionality or other approaches such as altering the meta table used for implementing the globals' protection to circumvent the sandbox isn't hard. However, it is difficult to circumvent the protection by accident. If the user messes with the Lua global state, the consistency of AOF and replication can't be guaranteed. In other words, just don't do it.
Imported Lua modules
Using imported Lua modules is not supported inside the sandboxed execution context.
The sandboxed execution context prevents the loading modules by disabling Lua's require function.
The only libraries that Redis ships with and that you can use in scripts are listed under the Runtime libraries section.
Runtime globals
While the sandbox prevents users from declaring globals, the execution context is pre-populated with several of these.
The redis singleton
The redis singleton is an object instance that's accessible from all scripts. It provides the API to interact with Redis from scripts. Its description follows below.
The KEYS global variable
- Since version: 2.6.0
- Available in scripts: yes
- Available in functions: no
Important: to ensure the correct execution of scripts, both in standalone and clustered deployments, all names of keys that a function accesses must be explicitly provided as input key arguments. The script should only access keys whose names are given as input arguments. Scripts should never access keys with programmatically-generated names or based on the contents of data structures stored in the database.
The KEYS global variable is available only for ephemeral scripts. It is pre-populated with all key name input arguments.
The ARGV global variable
- Since version: 2.6.0
- Available in scripts: yes
- Available in functions: no
The ARGV global variable is available only in ephemeral scripts. It is pre-populated with all regular input arguments.
redis object
- Since version: 2.6.0
- Available in scripts: yes
- Available in functions: yes
The Redis Lua execution context always provides a singleton instance of an object named redis. The redis instance enables the script to interact with the Redis server that's running it. Following is the API provided by the redis object instance.
redis.call(command [,arg...])
- Since version: 2.6.0
- Available in scripts: yes
- Available in functions: yes
The redis.call() function calls a given Redis command and returns its reply.
Its inputs are the command and arguments, and once called, it executes the command in Redis and returns the reply.
For example, we can call the ECHO command from a script and return its reply like so:
return redis.call('ECHO', 'Echo, echo... eco... o...')
If and when redis.call() triggers a runtime exception, the raw exception is raised back to the user as an error, automatically.
Therefore, attempting to execute the following ephemeral script will fail and generate a runtime exception because ECHO accepts exactly zero or one argument:
redis> EVAL "return redis.call('ECHO', 'Echo,', 'echo... ', 'eco... ', 'o...')" 0
(error) ERR Error running script (call to b0345693f4b77517a711221050e76d24ae60b7f7): @user_script:1: @user_script: 1: Wrong number of args calling Redis command from script
Note that the call can fail due to various reasons, see Execution under low memory conditions and Script flags
To handle Redis runtime errors use `redis.pcall() instead.
redis.pcall(command [,arg...])
- Since version: 2.6.0
- Available in scripts: yes
- Available in functions: yes
This function enables handling runtime errors raised by the Redis server.
The redis.pcall() function behaves exactly like redis.call(), except that it:
- Always returns a reply.
- Never throws a runtime exeption, and returns in its stead a
redis.error_replyin case that a runtime exception is thrown by the server.
The following demonstrates how to use redis.pcall() to intercept and handle runtime exceptions from within the context of an ephemeral script.
local reply = redis.pcall('ECHO', unpack(ARGV))
if reply['err'] ~= nil then
-- Handle the error sometime, but for now just log it
redis.log(redis.LOG_WARNING, reply['err'])
reply['err'] = 'Something is wrong, but no worries, everything is under control'
end
return reply
Evaluating this script with more than one argument will return:
redis> EVAL "..." 0 hello world
(error) Something is wrong, but no worries, everything is under control
redis.error_reply(x)
- Since version: 2.6.0
- Available in scripts: yes
- Available in functions: yes
This is a helper function that returns an error reply. The helper accepts a single string argument and returns a Lua table with the err field set to that string.
The outcome of the following code is that error1 and error2 are identical for all intents and purposes:
local text = 'My very special error'
local reply1 = { err = text }
local reply2 = redis.error_reply(text)
Therefore, both forms are valid as means for returning an error reply from scripts:
redis> EVAL "return { err = 'My very special table error' }" 0
(error) My very special table error
redis> EVAL "return redis.error_reply('My very special reply error')" 0
(error) My very special reply error
For returing Redis status replies refer to redis.status_reply().
Refer to the Data type conversion for returning other response types.
redis.status_reply(x)
- Since version: 2.6.0
- Available in scripts: yes
- Available in functions: yes
This is a helper function that returns a simple string reply. "OK" is an example of a standard Redis status reply. The Lua API represents status replies as tables with a single field, ok, set with a simple status string.
The outcome of the following code is that status1 and status2 are identical for all intents and purposes:
local text = 'Frosty'
local status1 = { ok = text }
local status2 = redis.status_reply(text)
Therefore, both forms are valid as means for returning status replies from scripts:
redis> EVAL "return { ok = 'TICK' }" 0
TICK
redis> EVAL "return redis.status_reply('TOCK')" 0
TOCK
For returing Redis error replies refer to redis.error_reply().
Refer to the Data type conversion for returning other response types.
redis.sha1hex(x)
- Since version: 2.6.0
- Available in scripts: yes
- Available in functions: yes
This function returns the SHA1 hexadecimal digest of its single string argument.
You can, for example, obtain the empty string's SHA1 digest:
redis> EVAL "return redis.sha1hex('')" 0
"da39a3ee5e6b4b0d3255bfef95601890afd80709"
redis.log(level, message)
- Since version: 2.6.0
- Available in scripts: yes
- Available in functions: yes
This function writes to the Redis server log.
It expects two input arguments: the log level and a message. The message is a string to write to the log file. Log level can be on of these:
redis.LOG_DEBUGredis.LOG_VERBOSEredis.LOG_NOTICEredis.LOG_WARNING
These levels map to the server's log levels.
The log only records messages equal or greater in level than the server's loglevel configuration directive.
The following snippet:
redis.log(redis.LOG_WARNING, 'Something is terribly wrong')
will produce a line similar to the following in your server's log:
[32343] 22 Mar 15:21:39 # Something is terribly wrong
redis.setresp(x)
- Since version: 6.0.0
- Available in scripts: yes
- Available in functions: yes
This function allows the executing script to switch between Redis Serialization Protocol (RESP) versions for the replies returned by redis.call()](#redis.call) and [redis.pall().
It expects a single numerical argument as the protocol's version.
The default protocol version is 2, but it can be switched to version 3.
Here's an example of switching to RESP3 replies:
redis.setresp(3)
Please refer to the Data type conversion for more information about type conversions.
redis.set_repl(x)
- Since version: 3.2.0
- Available in scripts: yes
- Available in functions: no
Note: this feature is only available when script effects replication is employed. Calling it when using verbatim script replication will result in an error. As of Redis version 2.6.0, scripts were replicated verbatim, meaning that the scripts' source code was sent for execution by replicas and stored in the AOF. An alternative replication mode added in version 3.2.0 allows replicating only the scripts' effects. As of Redis version 7.0, script replication is no longer supported, and the only replication mode available is script effects replication.
Warning: this is an advanced feature. Misuse can cause damage by violating the contract that binds the Redis master, its replicas, and AOF contents to hold the same logical content.
This function allows a script to assert control over how its effects are propagated to replicas and the AOF afterward. A script's effects are the Redis write commands that it calls.
By default, all write commands that a script executes are replicated. Sometimes, however, better control over this behavior can be helpful. This can be the case, for example, when storing intermediate values in the master alone.
Consider a script that intersects two sets and stores the result in a temporary key with SUNIONSTORE.
It then picks five random elements (SRANDMEMBER) from the intersection and stores (SADD) them in another set.
Finally, before returning, it deletes the temporary key that stores the intersection of the two source sets.
In this case, only the new set with its five randomly-chosen elements needs to be replicated.
Replicating the SUNIONSTORE command and the `DEL'ition of the temporary key is unnecessary and wasteful.
The redis.set_repl() function instructs the server how to treat subsequent write commands in terms of replication.
It accepts a single input argument that only be one of the following:
redis.REPL_ALL: replicates the effects to the AOF and replicas.redis.REPL_AOF: replicates the effects to the AOF alone.redis.REPL_REPLICA: replicates the effects to the replicas alone.redis.REPL_SLAVE: same asREPL_REPLICA, maintained for backward compatibility.redis.REPL_NONE: disables effect replication entirely.
By default, the scripting engine is initialized to the redis.REPL_ALL setting when a script begins its execution.
You can call the redis.set_repl() function at any time during the script's execution to switch between the different replication modes.
A simple example follows:
redis.replicate_commands() -- Enable effects replication in versions lower than Redis v7.0
redis.call('SET', KEYS[1], ARGV[1])
redis.set_repl(redis.REPL_NONE)
redis.call('SET', KEYS[2], ARGV[2])
redis.set_repl(redis.REPL_ALL)
redis.call('SET', KEYS[3], ARGV[3])
If you run this script by calling EVAL "..." 3 A B C 1 2 3, the result will be that only the keys A and C are created on the replicas and AOF.
redis.replicate_commands()
- Since version: 3.2.0
- Until version: 7.0.0
- Available in scripts: yes
- Available in functions: no
This function switches the script's replication mode from verbatim replication to effects replication. You can use it to override the default verbatim script replication mode used by Redis until version 7.0.
Note:
as of Redis v7.0, verbatim script replication is no longer supported.
The default, and only script replication mode supported, is script effects' replication.
For more information, please refer to Replicating commands instead of scripts
redis.breakpoint()
- Since version: 3.2.0
- Available in scripts: yes
- Available in functions: no
This function triggers a breakpoint when using the Redis Lua debugger](/topics/ldb).
redis.debug(x)
- Since version: 3.2.0
- Available in scripts: yes
- Available in functions: no
This function prints its argument in the Redis Lua debugger console.
redis.acl_check_cmd(command [,arg...])
- Since version: 7.0.0
- Available in scripts: yes
- Available in functions: yes
This function is used for checking if the current user running the script has ACL permissions to execute the given command with the given arguments.
The return value is a boolean true in case the current user has permissions to execute the command (via a call to redis.call or redis.pcall) or false in case they don't.
The function will raise an error if the passed command or its arguments are invalid.
redis.register_function
- Since version: 7.0.0
- Available in scripts: no
- Available in functions: yes
This function is only available from the context of the FUNCTION LOAD command.
When called, it registers a function to the loaded library.
The function can be called either with positional or named arguments.
positional arguments: redis.register_function(name, callback)
The first argument to redis.register_function is a Lua string representing the function name.
The second argument to redis.register_function is a Lua function.
Usage example:
redis> FUNCTION LOAD "#!lua name=mylib\n redis.register_function('noop', function() end)"
Named arguments: redis.register_function{function_name=name, callback=callback, flags={flag1, flag2, ..}, description=description}
The named arguments variant accepts the following arguments:
- function_name: the function's name.
- callback: the function's callback.
- flags: an array of strings, each a function flag (optional).
- description: function's description (optional).
Both function_name and callback are mandatory.
Usage example:
redis> FUNCTION LOAD "#!lua name=mylib\n redis.register_function{function_name='noop', callback=function() end, flags={ 'no-writes' }, description='Does nothing'}"
Script flags
Important: Use script flags with care, which may negatively impact if misused. Note that the default for Eval scripts are different than the default for functions that are mentioned below, see Eval Flags
When you register a function or load an Eval script, the server does not know how it accesses the database. By default, Redis assumes that all scripts read and write data. This results in the following behavior:
- They can read and write data.
- They can run in cluster mode, and are not able to run commands accessing keys of different hash slots.
- Execution against a stale replica is denied to avoid inconsistent reads.
- Execution under low memory is denied to avoid exceeding the configured threshold.
You can use the following flags and instruct the server to treat the scripts' execution differently:
no-writes: this flag indicates that the script only reads data but never writes.By default, Redis will deny the execution of scripts against read-only replicas, as they may attempt to perform writes. Similarly, the server will not allow calling scripts with
FCALL_RO/EVAL_RO. Lastly, when data persistence is at risk due to a disk error, execution is blocked as well.Using this flag allows executing the script:
- With
FCALL_RO/EVAL_ROagainst masters and read-only replicas. - Even if there's a disk error (Redis is unable to persist so it rejects writes).
However, note that the server will return an error if the script attempts to call a write command.
- With
allow-oom: use this flag to allow a script to execute when the server is out of memory (OOM).Unless used, Redis will deny the execution of scripts when in an OOM state, regardless of the
no-writeflag and method of calling. Furthermore, when you use this flag, the script can call any Redis command, including commands that aren't usually allowed in this state.allow-stale: a flag that enables running the script against a stale replica.By default, Redis prevents data consistency problems from using old data by having stale replicas return a runtime error. In cases where the consistency is a lesser concern, this flag allows stale Redis replicas to run the script.
no-cluster: the flag causes the script to return an error in Redis cluster mode.Redis allows scripts to be executed both in standalone and cluster modes. Setting this flag prevents executing the script against nodes in the cluster.
allow-cross-slot-keys: The flag that allows a script to access keys from multiple slots.Redis typically prevents any single command from accessing keys that hash to multiple slots. This flag allows scripts to break this rule and access keys within the script that access multiple slots. Declared keys to the script are still always required to hash to a single slot. Accessing keys from multiple slots is discouraged as applications should be designed to only access keys from a single slot at a time, allowing slots to move between Redis servers.
This flag has no effect when cluster mode is disabled.
Please refer to Function Flags and Eval Flags for a detailed example.
redis.REDIS_VERSION
- Since version: 7.0.0
- Available in scripts: yes
- Available in functions: yes
Returns the current Redis server version as a Lua string.
The reply's format is MM.mm.PP, where:
- MM: is the major version.
- mm: is the minor version.
- PP: is the patch level.
redis.REDIS_VERSION_NUM
- Since version: 7.0.0
- Available in scripts: yes
- Available in functions: yes
Returns the current Redis server version as a number.
The reply is a hexadecimal value structured as 0x00MMmmPP, where:
- MM: is the major version.
- mm: is the minor version.
- PP: is the patch level.
Data type conversion
Unless a runtime exception is raised, redis.call() and redis.pcall() return the reply from the executed command to the Lua script.
Redis' replies from these functions are converted automatically into Lua's native data types.
Similarly, when a Lua script returns a reply with the return keyword,
that reply is automatically converted to Redis' protocol.
Put differently; there's a one-to-one mapping between Redis' replies and Lua's data types and a one-to-one mapping between Lua's data types and the Redis Protocol data types. The underlying design is such that if a Redis type is converted into a Lua type and converted back into a Redis type, the result is the same as the initial value.
Type conversion from Redis protocol replies (i.e., the replies from redis.call() and redis.pcall() to Lua data types depends on the Redis Serialization Protocol version used by the script.
The default protocol version during script executions is RESP2.
The script may switch the replies' protocol versions by calling the redis.setresp() function.
Type conversion from a script's returned Lua data type depends on the user's choice of protocol (see the HELLO command).
The following sections describe the type conversion rules between Lua and Redis per the protocol's version.
RESP2 to Lua type conversion
The following type conversion rules apply to the execution's context by default as well as after calling redis.setresp(2):
- RESP2 integer reply -> Lua number
- RESP2 bulk string reply -> Lua string
- RESP2 array reply -> Lua table (may have other Redis data types nested)
- RESP2 status reply -> Lua table with a single ok field containing the status string
- RESP2 error reply -> Lua table with a single err field containing the error string
- RESP2 null bulk reply and null multi bulk reply -> Lua false boolean type
Lua to RESP2 type conversion
The following type conversion rules apply by default as well as after the user had called HELLO 2:
- Lua number -> RESP2 integer reply (the number is converted into an integer)
- Lua string -> RESP bulk string reply
- Lua table (indexed, non-associative array) -> RESP2 array reply (truncated at the first Lua
nilvalue encountered in the table, if any) - Lua table with a single ok field -> RESP2 status reply
- Lua table with a single err field -> RESP2 error reply
- Lua boolean false -> RESP2 null bulk reply
There is an additional Lua-to-Redis conversion rule that has no corresponding Redis-to-Lua conversion rule:
- Lua Boolean
true-> RESP2 integer reply with value of 1.
There are three additional rules to note about converting Lua to Redis data types:
- Lua has a single numerical type, Lua numbers.
There is no distinction between integers and floats.
So we always convert Lua numbers into integer replies, removing the decimal part of the number, if any.
If you want to return a Lua float, it should be returned as a string,
exactly like Redis itself does (see, for instance, the
ZSCOREcommand). - There's no simple way to have nils inside Lua arrays due
to Lua's table semantics.
Therefore, who;e Redis converts a Lua array to RESP, the conversion stops when it encounters a Lua
nilvalue. - When a Lua table is an associative array that contains keys and their respective values, the converted Redis reply will not include them.
Lua to RESP2 type conversion examples:
redis> EVAL "return 10" 0
(integer) 10
redis> EVAL "return { 1, 2, { 3, 'Hello World!' } }" 0
1) (integer) 1s
2) (integer) 2
3) 1) (integer) 3
1) "Hello World!"
redis> EVAL "return redis.call('get','foo')" 0
"bar"
The last example demonstrates receiving and returning the exact return value of redis.call() (or redis.pcall()) in Lua as it would be returned if the command had been called directly.
The following example shows how floats and arrays that cont nils and keys are handled:
redis> EVAL "return { 1, 2, 3.3333, somekey = 'somevalue', 'foo', nil , 'bar' }" 0
1) (integer) 1
2) (integer) 2
3) (integer) 3
4) "foo"
As you can see, the float value of 3.333 gets converted to an integer 3, the somekey key and its value are omitted, and the string "bar" isn't returned as there is a nil value that precedes it.
RESP3 to Lua type conversion
RESP3 is a newer version of the Redis Serialization Protocol. It is available as an opt-in choice as of Redis v6.0.
An executing script may call the redis.setresp function during its execution and switch the protocol version that's used for returning replies from Redis' commands (that can be invoked via redis.call() or redis.pcall()).
Once Redis' replies are in RESP3 protocol, all of the RESP2 to Lua conversion rules apply, with the following additions:
- RESP3 map reply -> Lua table with a single map field containing a Lua table representing the fields and values of the map.
- RESP set reply -> Lua table with a single set field containing a Lua table representing the elements of the set as fields, each with the Lua Boolean value of
true. - RESP3 null -> Lua
nil. - RESP3 true reply -> Lua true boolean value.
- RESP3 false reply -> Lua false boolean value.
- RESP3 double reply -> Lua table with a single score field containing a Lua number representing the double value.
- RESP3 big number reply -> Lua table with a single big_number field containing a Lua string representing the big number value.
- Redis verbatim string reply -> Lua table with a single verbatim_string field containing a Lua table with two fields, string and format, representing the verbatim string and its format, respectively.
Note: the RESP3 big number and verbatim strings replies are only supported as of Redis v7.0 and greater. Also, presently, RESP3's attributes, streamed strings and streamed aggregate data types are not supported by the Redis Lua API.
Lua to RESP3 type conversion
Regardless of the script's choice of protocol version set for replies with the [redis.setresp() function] when it calls redis.call() or redis.pcall(), the user may opt-in to using RESP3 (with the HELLO 3 command) for the connection.
Although the default protocol for incoming client connections is RESP2, the script should honor the user's preference and return adequately-typed RESP3 replies, so the following rules apply on top of those specified in the Lua to RESP2 type conversion section when that is the case.
- Lua Boolean -> RESP3 Boolean reply (note that this is a change compared to the RESP2, in which returning a Boolean Lua
truereturned the number 1 to the Redis client, and returning afalseused to return anull. - Lua table with a single map field set to an associative Lua table -> RESP3 map reply.
- Lua table with a single _set field set to an associative Lua table -> RESP3 set reply. Values can be set to anything and are discarded anyway.
- Lua table with a single double field to an associative Lua table -> RESP3 double reply.
- Lua nil -> RESP3 null.
However, if the connection is set use the RESP2 protocol, and even if the script replies with RESP3-typed responses, Redis will automatically perform a RESP3 to RESP2 convertion of the reply as is the case for regular commands. That means, for example, that returning the RESP3 map type to a RESP2 connection will result in the repy being converted to a flat RESP2 array that consists of alternating field names and their values, rather than a RESP3 map.
Additional notes about scripting
Using SELECT inside scripts
You can call the SELECT command from your Lua scripts, like you can with any normal client connection.
However, one subtle aspect of the behavior changed between Redis versions 2.8.11 and 2.8.12.
Prior to Redis version 2.8.12, the database selected by the Lua script was set as the current database for the client connection that had called it.
As of Redis version 2.8.12, the database selected by the Lua script only affects the execution context of the script, and does not modify the database that's selected by the client calling the script.
This semantic change between patch level releases was required since the old behavior was inherently incompatible with Redis' replication and introduced bugs.
Runtime libraries
The Redis Lua runtime context always comes with several pre-imported libraries.
The following standard Lua libraries are available to use:
- The String Manipulation (string) library
- The Table Manipulation (table) library
- The Mathematical Functions (math) library
In addition, the following external libraries are loaded and accessible to scripts:
- The struct library
- The cjson library
- The cmsgpack library
- The bitop library
struct library
- Since version: 2.6.0
- Available in scripts: yes
- Available in functions: yes
struct is a library for packing and unpacking C-like structures in Lua. It provides the following functions:
All of struct's functions expect their first argument to be a format string.
struct formats
The following are valid format strings for struct's functions:
>: big endian<: little endian![num]: alignmentx: paddingb/B: signed/unsigned byteh/H: signed/unsigned shortl/L: signed/unsigned longT: size_ti/In: signed/unsigned integer with size n (defaults to the size of int)cn: sequence of n chars (from/to a string); when packing, n == 0 means the whole string; when unpacking, n == 0 means use the previously read number as the string's length.s: zero-terminated stringf: floatd: double(space): ignored
struct.pack(x)
This function returns a struct-encoded string from values. It accepts a struct format string as its first argument, followed by the values that are to be encoded.
Usage example:
redis> EVAL "return struct.pack('HH', 1, 2)" 0
"\x01\x00\x02\x00"
struct.unpack(x)
This function returns the decoded values from a struct. It accepts a struct format string as its first argument, followed by encoded struct's string.
Usage example:
redis> EVAL "return { struct.unpack('HH', ARGV[1]) }" 0 "\x01\x00\x02\x00"
1) (integer) 1
2) (integer) 2
3) (integer) 5
struct.size(x)
This function returns the size, in bytes, of a struct. It accepts a struct format string as its only argument.
Usage example:
redis> EVAL "return struct.size('HH')" 0
(integer) 4
cjson library
- Since version: 2.6.0
- Available in scripts: yes
- Available in functions: yes
The cjson library provides fast JSON encoding and decoding from Lua. It provides these functions.
cjson.encode(x)
This function returns a JSON-encoded string for the Lua data type provided as its argument.
Usage example:
redis> EVAL "return cjson.encode({ ['foo'] = 'bar' })" 0
"{\"foo\":\"bar\"}"
cjson.decode(x)
This function returns a Lua data type from the JSON-encoded string provided as its argument.
Usage example:
redis> EVAL "return cjson.decode(ARGV[1])['foo']" 0 '{"foo":"bar"}'
"bar"
cmsgpack library
- Since version: 2.6.0
- Available in scripts: yes
- Available in functions: yes
The cmsgpack library provides fast MessagePack encoding and decoding from Lua. It provides these functions.
cmsgpack.pack(x)
This function returns the packed string encoding of the Lua data type it is given as an argument.
Usage example:
redis> EVAL "return cmsgpack.pack({'foo', 'bar', 'baz'})" 0
"\x93\xa3foo\xa3bar\xa3baz"
cmsgpack.unpack(x)
This function returns the unpacked values from decocoding its input string argument.
Usage example:
redis> EVAL "return cmsgpack.unpack(ARGV[1])" 0 "\x93\xa3foo\xa3bar\xa3baz"
1) "foo"
2) "bar"
3) "baz"
bit library
- Since version: 2.8.18
- Available in scripts: yes
- Available in functions: yes
The bit library provides bitwise operations on numbers. Its documentation resides at Lua BitOp documentation It provides the following functions.
bit.tobit(x)
Normalizes a number to the numeric range for bit operations and returns it.
Usage example:
redis> EVAL 'return bit.tobit(1)' 0
(integer) 1
bit.tohex(x [,n])
Converts its first argument to a hex string. The number of hex digits is given by the absolute value of the optional second argument.
Usage example:
redis> EVAL 'return bit.tohex(422342)' 0
"000671c6"
bit.bnot(x)
Returns the bitwise not of its argument.
bit.bnot(x) bit.bor(x1 [,x2...]), bit.band(x1 [,x2...]) and bit.bxor(x1 [,x2...])
Returns either the bitwise or, bitwise and, or bitwise xor of all of its arguments. Note that more than two arguments are allowed.
Usage example:
redis> EVAL 'return bit.bor(1,2,4,8,16,32,64,128)' 0
(integer) 255
bit.lshift(x, n), bit.rshift(x, n) and bit.arshift(x, n)
Returns either the bitwise logical left-shift, bitwise logical right-shift, or bitwise arithmetic right-shift of its first argument by the number of bits given by the second argument.
bit.rol(x, n) and bit.ror(x, n)
Returns either the bitwise left rotation, or bitwise right rotation of its first argument by the number of bits given by the second argument. Bits shifted out on one side are shifted back in on the other side.
bit.bswap(x)
Swaps the bytes of its argument and returns it. This can be used to convert little-endian 32-bit numbers to big-endian 32-bit numbers and vice versa.
7.11.4 - Debugging Lua scripts in Redis
How to use the built-in Lua debugger
Starting with version 3.2 Redis includes a complete Lua debugger, that can be used in order to make the task of writing complex Redis scripts much simpler.
The Redis Lua debugger, codenamed LDB, has the following important features:
- It uses a server-client model, so it's a remote debugger.
The Redis server acts as the debugging server, while the default client is
redis-cli. However other clients can be developed by following the simple protocol implemented by the server. - By default every new debugging session is a forked session. It means that while the Redis Lua script is being debugged, the server does not block and is usable for development or in order to execute multiple debugging sessions in parallel. This also means that changes are rolled back after the script debugging session finished, so that's possible to restart a new debugging session again, using exactly the same Redis data set as the previous debugging session.
- An alternative synchronous (non forked) debugging model is available on demand, so that changes to the dataset can be retained. In this mode the server blocks for the time the debugging session is active.
- Support for step by step execution.
- Support for static and dynamic breakpoints.
- Support from logging the debugged script into the debugger console.
- Inspection of Lua variables.
- Tracing of Redis commands executed by the script.
- Pretty printing of Redis and Lua values.
- Infinite loops and long execution detection, which simulates a breakpoint.
Quick start
A simple way to get started with the Lua debugger is to watch this video introduction:
Important Note: please make sure to avoid debugging Lua scripts using your Redis production server. Use a development server instead. Also note that using the synchronous debugging mode (which is NOT the default) results in the Redis server blocking for all the time the debugging session lasts.
To start a new debugging session using redis-cli do the following:
Create your script in some file with your preferred editor. Let's assume you are editing your Redis Lua script located at
/tmp/script.lua.Start a debugging session with:
./redis-cli --ldb --eval /tmp/script.lua
Note that with the --eval option of redis-cli you can pass key names and arguments to the script, separated by a comma, like in the following example:
./redis-cli --ldb --eval /tmp/script.lua mykey somekey , arg1 arg2
You'll enter a special mode where redis-cli no longer accepts its normal
commands, but instead prints a help screen and passes the unmodified debugging
commands directly to Redis.
The only commands which are not passed to the Redis debugger are:
quit-- this will terminate the debugging session. It's like removing all the breakpoints and using thecontinuedebugging command. Moreover the command will exit fromredis-cli.restart-- the debugging session will restart from scratch, reloading the new version of the script from the file. So a normal debugging cycle involves modifying the script after some debugging, and callingrestartin order to start debugging again with the new script changes.help-- this command is passed to the Redis Lua debugger, that will print a list of commands like the following:
lua debugger> help
Redis Lua debugger help:
[h]elp Show this help.
[s]tep Run current line and stop again.
[n]ext Alias for step.
[c]continue Run till next breakpoint.
[l]list List source code around current line.
[l]list [line] List source code around [line].
line = 0 means: current position.
[l]list [line] [ctx] In this form [ctx] specifies how many lines
to show before/after [line].
[w]hole List all source code. Alias for 'list 1 1000000'.
[p]rint Show all the local variables.
[p]rint <var> Show the value of the specified variable.
Can also show global vars KEYS and ARGV.
[b]reak Show all breakpoints.
[b]reak <line> Add a breakpoint to the specified line.
[b]reak -<line> Remove breakpoint from the specified line.
[b]reak 0 Remove all breakpoints.
[t]race Show a backtrace.
[e]eval <code> Execute some Lua code (in a different callframe).
[r]edis <cmd> Execute a Redis command.
[m]axlen [len] Trim logged Redis replies and Lua var dumps to len.
Specifying zero as <len> means unlimited.
[a]abort Stop the execution of the script. In sync
mode dataset changes will be retained.
Debugger functions you can call from Lua scripts:
redis.debug() Produce logs in the debugger console.
redis.breakpoint() Stop execution as if there was a breakpoint in the
next line of code.
Note that when you start the debugger it will start in stepping mode. It will stop at the first line of the script that actually does something before executing it.
From this point you usually call step in order to execute the line and go to the next line.
While you step Redis will show all the commands executed by the server like in the following example:
* Stopped at 1, stop reason = step over
-> 1 redis.call('ping')
lua debugger> step
<redis> ping
<reply> "+PONG"
* Stopped at 2, stop reason = step over
The <redis> and <reply> lines show the command executed by the line just
executed, and the reply from the server. Note that this happens only in stepping mode.
If you use continue in order to execute the script till the next breakpoint, commands will not be dumped on the screen to prevent too much output.
Termination of the debugging session
When the scripts terminates naturally, the debugging session ends and
redis-cli returns in its normal non-debugging mode. You can restart the
session using the restart command as usual.
Another way to stop a debugging session is just interrupting redis-cli
manually by pressing Ctrl+C. Note that also any event breaking the
connection between redis-cli and the redis-server will interrupt the
debugging session.
All the forked debugging sessions are terminated when the server is shut down.
Abbreviating debugging commands
Debugging can be a very repetitive task. For this reason every Redis debugger command starts with a different character, and you can use the single initial character in order to refer to the command.
So for example instead of typing step you can just type s.
Breakpoints
Adding and removing breakpoints is trivial as described in the online help.
Just use b 1 2 3 4 to add a breakpoint in line 1, 2, 3, 4.
The command b 0 removes all the breakpoints. Selected breakpoints can be
removed using as argument the line where the breakpoint we want to remove is, but prefixed by a minus sign.
So for example b -3 removes the breakpoint from line 3.
Note that adding breakpoints to lines that Lua never executes, like declaration of local variables or comments, will not work. The breakpoint will be added but since this part of the script will never be executed, the program will never stop.
Dynamic breakpoints
Using the breakpoint command it is possible to add breakpoints into specific
lines. However sometimes we want to stop the execution of the program only
when something special happens. In order to do so, you can use the
redis.breakpoint() function inside your Lua script. When called it simulates
a breakpoint in the next line that will be executed.
if counter > 10 then redis.breakpoint() end
This feature is extremely useful when debugging, so that we can avoid continuing the script execution manually multiple times until a given condition is encountered.
Synchronous mode
As explained previously, but default LDB uses forked sessions with rollback of all the data changes operated by the script while it has being debugged. Determinism is usually a good thing to have during debugging, so that successive debugging sessions can be started without having to reset the database content to its original state.
However for tracking certain bugs, you may want to retain the changes performed
to the key space by each debugging session. When this is a good idea you
should start the debugger using a special option, ldb-sync-mode, in redis-cli.
./redis-cli --ldb-sync-mode --eval /tmp/script.lua
Note: Redis server will be unreachable during the debugging session in this mode, so use with care.
In this special mode, the abort command can stop the script half-way taking the changes operated to the dataset.
Note that this is different compared to ending the debugging session normally.
If you just interrupt redis-cli the script will be fully executed and then the session terminated.
Instead with abort you can interrupt the script execution in the middle and start a new debugging session if needed.
Logging from scripts
The redis.debug() command is a powerful debugging facility that can be
called inside the Redis Lua script in order to log things into the debug
console:
lua debugger> list
-> 1 local a = {1,2,3}
2 local b = false
3 redis.debug(a,b)
lua debugger> continue
<debug> line 3: {1; 2; 3}, false
If the script is executed outside of a debugging session, redis.debug() has no effects at all.
Note that the function accepts multiple arguments, that are separated by a comma and a space in the output.
Tables and nested tables are displayed correctly in order to make values simple to observe for the programmer debugging the script.
Inspecting the program state with print and eval
While the redis.debug() function can be used in order to print values
directly from within the Lua script, often it is useful to observe the local
variables of a program while stepping or when stopped into a breakpoint.
The print command does just that, and performs lookup in the call frames
starting from the current one back to the previous ones, up to top-level.
This means that even if we are into a nested function inside a Lua script,
we can still use print foo to look at the value of foo in the context
of the calling function. When called without a variable name, print will
print all variables and their respective values.
The eval command executes small pieces of Lua scripts outside the context of the current call frame (evaluating inside the context of the current call frame is not possible with the current Lua internals).
However you can use this command in order to test Lua functions.
lua debugger> e redis.sha1hex('foo')
<retval> "0beec7b5ea3f0fdbc95d0dd47f3c5bc275da8a33"
Debugging clients
LDB uses the client-server model where the Redis server acts as a debugging server that communicates using RESP. While redis-cli is the default debug client, any client can be used for debugging as long as it meets one of the following conditions:
- The client provides a native interface for setting the debug mode and controlling the debug session.
- The client provides an interface for sending arbitrary commands over RESP.
- The client allows sending raw messages to the Redis server.
For example, the Redis plugin for ZeroBrane Studio integrates with LDB using redis-lua. The following Lua code is a simplified example of how the plugin achieves that:
local redis = require 'redis'
-- add LDB's Continue command
redis.commands['ldbcontinue'] = redis.command('C')
-- script to be debugged
local script = [[
local x, y = tonumber(ARGV[1]), tonumber(ARGV[2])
local result = x * y
return result
]]
local client = redis.connect('127.0.0.1', 6379)
client:script("DEBUG", "YES")
print(unpack(client:eval(script, 0, 6, 9)))
client:ldbcontinue()
7.12 - Redis Pub/Sub
How to use pub/sub channels in Redis
SUBSCRIBE, UNSUBSCRIBE and PUBLISH
implement the Publish/Subscribe messaging
paradigm where
(citing Wikipedia) senders (publishers) are not programmed to send
their messages to specific receivers (subscribers). Rather, published
messages are characterized into channels, without knowledge of what (if
any) subscribers there may be. Subscribers express interest in one or
more channels, and only receive messages that are of interest, without
knowledge of what (if any) publishers there are. This decoupling of
publishers and subscribers can allow for greater scalability and a more
dynamic network topology.
For instance in order to subscribe to channels foo and bar the
client issues a SUBSCRIBE providing the names of the channels:
SUBSCRIBE foo bar
Messages sent by other clients to these channels will be pushed by Redis to all the subscribed clients.
A client subscribed to one or more channels should not issue commands,
although it can subscribe and unsubscribe to and from other channels.
The replies to subscription and unsubscribing operations are sent in
the form of messages, so that the client can just read a coherent
stream of messages where the first element indicates the type of
message. The commands that are allowed in the context of a subscribed
client are SUBSCRIBE, SSUBSCRIBE, SUNSUBSCRIBE, PSUBSCRIBE, UNSUBSCRIBE, PUNSUBSCRIBE, PING, RESET, and QUIT.
Please note that redis-cli will not accept any commands once in
subscribed mode and can only quit the mode with Ctrl-C.
Format of pushed messages
A message is a array-reply with three elements.
The first element is the kind of message:
subscribe: means that we successfully subscribed to the channel given as the second element in the reply. The third argument represents the number of channels we are currently subscribed to.unsubscribe: means that we successfully unsubscribed from the channel given as second element in the reply. The third argument represents the number of channels we are currently subscribed to. When the last argument is zero, we are no longer subscribed to any channel, and the client can issue any kind of Redis command as we are outside the Pub/Sub state.message: it is a message received as result of aPUBLISHcommand issued by another client. The second element is the name of the originating channel, and the third argument is the actual message payload.
Database & Scoping
Pub/Sub has no relation to the key space. It was made to not interfere with it on any level, including database numbers.
Publishing on db 10, will be heard by a subscriber on db 1.
If you need scoping of some kind, prefix the channels with the name of the environment (test, staging, production...).
Wire protocol example
SUBSCRIBE first second
*3
$9
subscribe
$5
first
:1
*3
$9
subscribe
$6
second
:2
At this point, from another client we issue a PUBLISH operation
against the channel named second:
> PUBLISH second Hello
This is what the first client receives:
*3
$7
message
$6
second
$5
Hello
Now the client unsubscribes itself from all the channels using the
UNSUBSCRIBE command without additional arguments:
UNSUBSCRIBE
*3
$11
unsubscribe
$6
second
:1
*3
$11
unsubscribe
$5
first
:0
Pattern-matching subscriptions
The Redis Pub/Sub implementation supports pattern matching. Clients may subscribe to glob-style patterns in order to receive all the messages sent to channel names matching a given pattern.
For instance:
PSUBSCRIBE news.*
Will receive all the messages sent to the channel news.art.figurative,
news.music.jazz, etc.
All the glob-style patterns are valid, so multiple wildcards are supported.
PUNSUBSCRIBE news.*
Will then unsubscribe the client from that pattern. No other subscriptions will be affected by this call.
Messages received as a result of pattern matching are sent in a different format:
- The type of the message is
pmessage: it is a message received as result of aPUBLISHcommand issued by another client, matching a pattern-matching subscription. The second element is the original pattern matched, the third element is the name of the originating channel, and the last element the actual message payload.
Similarly to SUBSCRIBE and UNSUBSCRIBE, PSUBSCRIBE and
PUNSUBSCRIBE commands are acknowledged by the system sending a message
of type psubscribe and punsubscribe using the same format as the
subscribe and unsubscribe message format.
Messages matching both a pattern and a channel subscription
A client may receive a single message multiple times if it's subscribed to multiple patterns matching a published message, or if it is subscribed to both patterns and channels matching the message. Like in the following example:
SUBSCRIBE foo
PSUBSCRIBE f*
In the above example, if a message is sent to channel foo, the client
will receive two messages: one of type message and one of type
pmessage.
The meaning of the subscription count with pattern matching
In subscribe, unsubscribe, psubscribe and punsubscribe
message types, the last argument is the count of subscriptions still
active. This number is actually the total number of channels and
patterns the client is still subscribed to. So the client will exit
the Pub/Sub state only when this count drops to zero as a result of
unsubscribing from all the channels and patterns.
Sharded Pub/Sub
From 7.0, sharded Pub/Sub is introduced in which shard channels are assigned to slots by the same algorithm used to assign keys to slots.
A shard message must be sent to a node that own the slot the shard channel is hashed to.
The cluster makes sure the published shard messages are forwarded to all nodes in the shard, so clients can subscribe to a shard channel by connecting to either the master responsible for the slot, or to any of its replicas.
SSUBSCRIBE, SUNSUBSCRIBE and SPUBLISH are used to implement sharded Pub/Sub.
Sharded Pub/Sub helps to scale the usage of Pub/Sub in cluster mode. It restricts the propagation of message to be within the shard of a cluster. Hence, the amount of data passing through the cluster bus is limited in comparison to global Pub/Sub where each message propagates to each node in the cluster. This allows users to horizontally scale the Pub/Sub usage by adding more shards.
Programming example
Pieter Noordhuis provided a great example using EventMachine and Redis to create a multi user high performance web chat.
Client library implementation hints
Because all the messages received contain the original subscription causing the message delivery (the channel in the case of message type, and the original pattern in the case of pmessage type) client libraries may bind the original subscription to callbacks (that can be anonymous functions, blocks, function pointers), using a hash table.
When a message is received an O(1) lookup can be done in order to deliver the message to the registered callback.
7.13 - Redis replication
How Redis supports high availability and failover with replication
At the base of Redis replication (excluding the high availability features provided as an additional layer by Redis Cluster or Redis Sentinel) there is a leader follower (master-replica) replication that is simple to use and configure. It allows replica Redis instances to be exact copies of master instances. The replica will automatically reconnect to the master every time the link breaks, and will attempt to be an exact copy of it regardless of what happens to the master.
This system works using three main mechanisms:
- When a master and a replica instances are well-connected, the master keeps the replica updated by sending a stream of commands to the replica to replicate the effects on the dataset happening in the master side due to: client writes, keys expired or evicted, any other action changing the master dataset.
- When the link between the master and the replica breaks, for network issues or because a timeout is sensed in the master or the replica, the replica reconnects and attempts to proceed with a partial resynchronization: it means that it will try to just obtain the part of the stream of commands it missed during the disconnection.
- When a partial resynchronization is not possible, the replica will ask for a full resynchronization. This will involve a more complex process in which the master needs to create a snapshot of all its data, send it to the replica, and then continue sending the stream of commands as the dataset changes.
Redis uses by default asynchronous replication, which being low latency and high performance, is the natural replication mode for the vast majority of Redis use cases. However, Redis replicas asynchronously acknowledge the amount of data they received periodically with the master. So the master does not wait every time for a command to be processed by the replicas, however it knows, if needed, what replica already processed what command. This allows having optional synchronous replication.
Synchronous replication of certain data can be requested by the clients using
the WAIT command. However WAIT is only able to ensure there are the
specified number of acknowledged copies in the other Redis instances, it does not
turn a set of Redis instances into a CP system with strong consistency: acknowledged
writes can still be lost during a failover, depending on the exact configuration
of the Redis persistence. However with WAIT the probability of losing a write
after a failure event is greatly reduced to certain hard to trigger failure
modes.
You can check the Redis Sentinel or Redis Cluster documentation for more information about high availability and failover. The rest of this document mainly describes the basic characteristics of Redis basic replication.
Important facts about Redis replication
- Redis uses asynchronous replication, with asynchronous replica-to-master acknowledges of the amount of data processed.
- A master can have multiple replicas.
- Replicas are able to accept connections from other replicas. Aside from connecting a number of replicas to the same master, replicas can also be connected to other replicas in a cascading-like structure. Since Redis 4.0, all the sub-replicas will receive exactly the same replication stream from the master.
- Redis replication is non-blocking on the master side. This means that the master will continue to handle queries when one or more replicas perform the initial synchronization or a partial resynchronization.
- Replication is also largely non-blocking on the replica side. While the replica is performing the initial synchronization, it can handle queries using the old version of the dataset, assuming you configured Redis to do so in redis.conf. Otherwise, you can configure Redis replicas to return an error to clients if the replication stream is down. However, after the initial sync, the old dataset must be deleted and the new one must be loaded. The replica will block incoming connections during this brief window (that can be as long as many seconds for very large datasets). Since Redis 4.0 you can configure Redis so that the deletion of the old data set happens in a different thread, however loading the new initial dataset will still happen in the main thread and block the replica.
- Replication can be used both for scalability, to have multiple replicas for read-only queries (for example, slow O(N) operations can be offloaded to replicas), or simply for improving data safety and high availability.
- You can use replication to avoid the cost of having the master writing the full dataset to disk: a typical technique involves configuring your master
redis.confto avoid persisting to disk at all, then connect a replica configured to save from time to time, or with AOF enabled. However, this setup must be handled with care, since a restarting master will start with an empty dataset: if the replica tries to sync with it, the replica will be emptied as well.
Safety of replication when master has persistence turned off
In setups where Redis replication is used, it is strongly advised to have persistence turned on in the master and in the replicas. When this is not possible, for example because of latency concerns due to very slow disks, instances should be configured to avoid restarting automatically after a reboot.
To better understand why masters with persistence turned off configured to auto restart are dangerous, check the following failure mode where data is wiped from the master and all its replicas:
- We have a setup with node A acting as master, with persistence turned down, and nodes B and C replicating from node A.
- Node A crashes, however it has some auto-restart system, that restarts the process. However since persistence is turned off, the node restarts with an empty data set.
- Nodes B and C will replicate from node A, which is empty, so they'll effectively destroy their copy of the data.
When Redis Sentinel is used for high availability, also turning off persistence on the master, together with auto restart of the process, is dangerous. For example the master can restart fast enough for Sentinel to not detect a failure, so that the failure mode described above happens.
Every time data safety is important, and replication is used with master configured without persistence, auto restart of instances should be disabled.
How Redis replication works
Every Redis master has a replication ID: it is a large pseudo random string that marks a given story of the dataset. Each master also takes an offset that increments for every byte of replication stream that it is produced to be sent to replicas, to update the state of the replicas with the new changes modifying the dataset. The replication offset is incremented even if no replica is actually connected, so basically every given pair of:
Replication ID, offset
Identifies an exact version of the dataset of a master.
When replicas connect to masters, they use the PSYNC command to send
their old master replication ID and the offsets they processed so far. This way
the master can send just the incremental part needed. However if there is not
enough backlog in the master buffers, or if the replica is referring to an
history (replication ID) which is no longer known, than a full resynchronization
happens: in this case the replica will get a full copy of the dataset, from scratch.
This is how a full synchronization works in more details:
The master starts a background saving process to produce an RDB file. At the same time it starts to buffer all new write commands received from the clients. When the background saving is complete, the master transfers the database file to the replica, which saves it on disk, and then loads it into memory. The master will then send all buffered commands to the replica. This is done as a stream of commands and is in the same format of the Redis protocol itself.
You can try it yourself via telnet. Connect to the Redis port while the
server is doing some work and issue the SYNC command. You'll see a bulk
transfer and then every command received by the master will be re-issued
in the telnet session. Actually SYNC is an old protocol no longer used by
newer Redis instances, but is still there for backward compatibility: it does
not allow partial resynchronizations, so now PSYNC is used instead.
As already said, replicas are able to automatically reconnect when the master-replica link goes down for some reason. If the master receives multiple concurrent replica synchronization requests, it performs a single background save in to serve all of them.
Replication ID explained
In the previous section we said that if two instances have the same replication ID and replication offset, they have exactly the same data. However it is useful to understand what exactly is the replication ID, and why instances have actually two replication IDs the main ID and the secondary ID.
A replication ID basically marks a given history of the data set. Every time an instance restarts from scratch as a master, or a replica is promoted to master, a new replication ID is generated for this instance. The replicas connected to a master will inherit its replication ID after the handshake. So two instances with the same ID are related by the fact that they hold the same data, but potentially at a different time. It is the offset that works as a logical time to understand, for a given history (replication ID) who holds the most updated data set.
For instance, if two instances A and B have the same replication ID, but one with offset 1000 and one with offset 1023, it means that the first lacks certain commands applied to the data set. It also means that A, by applying just a few commands, may reach exactly the same state of B.
The reason why Redis instances have two replication IDs is because of replicas that are promoted to masters. After a failover, the promoted replica requires to still remember what was its past replication ID, because such replication ID was the one of the former master. In this way, when other replicas will sync with the new master, they will try to perform a partial resynchronization using the old master replication ID. This will work as expected, because when the replica is promoted to master it sets its secondary ID to its main ID, remembering what was the offset when this ID switch happened. Later it will select a new random replication ID, because a new history begins. When handling the new replicas connecting, the master will match their IDs and offsets both with the current ID and the secondary ID (up to a given offset, for safety). In short this means that after a failover, replicas connecting to the newly promoted master don't have to perform a full sync.
In case you wonder why a replica promoted to master needs to change its replication ID after a failover: it is possible that the old master is still working as a master because of some network partition: retaining the same replication ID would violate the fact that the same ID and same offset of any two random instances mean they have the same data set.
Diskless replication
Normally a full resynchronization requires creating an RDB file on disk, then reloading the same RDB from disk to feed the replicas with the data.
With slow disks this can be a very stressing operation for the master. Redis version 2.8.18 is the first version to have support for diskless replication. In this setup the child process directly sends the RDB over the wire to replicas, without using the disk as intermediate storage.
Configuration
To configure basic Redis replication is trivial: just add the following line to the replica configuration file:
replicaof 192.168.1.1 6379
Of course you need to replace 192.168.1.1 6379 with your master IP address (or
hostname) and port. Alternatively, you can call the REPLICAOF command and the
master host will start a sync with the replica.
There are also a few parameters for tuning the replication backlog taken
in memory by the master to perform the partial resynchronization. See the example
redis.conf shipped with the Redis distribution for more information.
Diskless replication can be enabled using the repl-diskless-sync configuration
parameter. The delay to start the transfer to wait for more replicas to
arrive after the first one is controlled by the repl-diskless-sync-delay
parameter. Please refer to the example redis.conf file in the Redis distribution
for more details.
Read-only replica
Since Redis 2.6, replicas support a read-only mode that is enabled by default.
This behavior is controlled by the replica-read-only option in the redis.conf file, and can be enabled and disabled at runtime using CONFIG SET.
Read-only replicas will reject all write commands, so that it is not possible to write to a replica because of a mistake. This does not mean that the feature is intended to expose a replica instance to the internet or more generally to a network where untrusted clients exist, because administrative commands like DEBUG or CONFIG are still enabled. The Security page describes how to secure a Redis instance.
You may wonder why it is possible to revert the read-only setting and have replica instances that can be targeted by write operations. The answer is that writable replicas exist only for historical reasons. Using writable replicas can result in inconsistency between the master and the replica, so it is not recommended to use writable replicas. To understand in which situations this can be a problem, we need to understand how replication works. Changes on the master is replicated by propagating regular Redis commands to the replica. When a key expires on the master, this is propagated as a DEL command. If a key which exists on the master but is deleted, expired or has a different type on the replica compared to the master will react differently to commands like DEL, INCR or RPOP propagated from the master than intended. The propagated command may fail on the replica or result in a different outcome. To minimize the risks (if you insist on using writable replicas) we suggest you follow these recommendations:
Don't write to keys in a writable replica that are also used on the master. (This can be hard to guarantee if you don't have control over all the clients that write to the master.)
Don't configure an instance as a writable replica as an intermediary step when upgrading a set of instances in a running system. In general, don't configure an instance as a writable replica if it can ever be promoted to a master if you want to guarantee data consistency.
Historically, there were some use cases that were consider legitimate for writable replicas. As of version 7.0, these use cases are now all obsolete and the same can be achieved by other means. For example:
Computing slow Set or Sorted set operations and storing the result in temporary local keys using commands like SUNIONSTORE and ZINTERSTORE. Instead, use commands that return the result without storing it, such as SUNION and ZINTER.
Using the SORT command (which is not considered a read-only command because of the optional STORE option and therefore cannot be used on a read-only replica). Instead, use SORT_RO, which is a read-only command.
Using EVAL and EVALSHA are also not considered read-only commands, because the Lua script may call write commands. Instead, use EVAL_RO and EVALSHA_RO where the Lua script can only call read-only commands.
While writes to a replica will be discarded if the replica and the master resync or if the replica is restarted, there is no guarantee that they will sync automatically.
Before version 4.0, writable replicas were incapable of expiring keys with a time to live set.
This means that if you use EXPIRE or other commands that set a maximum TTL for a key, the key will leak, and while you may no longer see it while accessing it with read commands, you will see it in the count of keys and it will still use memory.
Redis 4.0 RC3 and greater versions are able to evict keys with TTL as masters do, with the exceptions of keys written in DB numbers greater than 63 (but by default Redis instances only have 16 databases).
Note though that even in versions greater than 4.0, using EXPIRE on a key that could ever exists on the master can cause inconsistency between the replica and the master.
Also note that since Redis 4.0 replica writes are only local, and are not propagated to sub-replicas attached to the instance. Sub-replicas instead will always receive the replication stream identical to the one sent by the top-level master to the intermediate replicas. So for example in the following setup:
A ---> B ---> C
Even if B is writable, C will not see B writes and will instead have identical dataset as the master instance A.
Setting a replica to authenticate to a master
If your master has a password via requirepass, it's trivial to configure the
replica to use that password in all sync operations.
To do it on a running instance, use redis-cli and type:
config set masterauth <password>
To set it permanently, add this to your config file:
masterauth <password>
Allow writes only with N attached replicas
Starting with Redis 2.8, you can configure a Redis master to accept write queries only if at least N replicas are currently connected to the master.
However, because Redis uses asynchronous replication it is not possible to ensure the replica actually received a given write, so there is always a window for data loss.
This is how the feature works:
- Redis replicas ping the master every second, acknowledging the amount of replication stream processed.
- Redis masters will remember the last time it received a ping from every replica.
- The user can configure a minimum number of replicas that have a lag not greater than a maximum number of seconds.
If there are at least N replicas, with a lag less than M seconds, then the write will be accepted.
You may think of it as a best effort data safety mechanism, where consistency is not ensured for a given write, but at least the time window for data loss is restricted to a given number of seconds. In general bound data loss is better than unbound one.
If the conditions are not met, the master will instead reply with an error and the write will not be accepted.
There are two configuration parameters for this feature:
- min-replicas-to-write
<number of replicas> - min-replicas-max-lag
<number of seconds>
For more information, please check the example redis.conf file shipped with the
Redis source distribution.
How Redis replication deals with expires on keys
Redis expires allow keys to have a limited time to live (TTL). Such a feature depends on the ability of an instance to count the time, however Redis replicas correctly replicate keys with expires, even when such keys are altered using Lua scripts.
To implement such a feature Redis cannot rely on the ability of the master and replica to have syncd clocks, since this is a problem that cannot be solved and would result in race conditions and diverging data sets, so Redis uses three main techniques to make the replication of expired keys able to work:
- Replicas don't expire keys, instead they wait for masters to expire the keys. When a master expires a key (or evict it because of LRU), it synthesizes a
DELcommand which is transmitted to all the replicas. - However because of master-driven expire, sometimes replicas may still have in memory keys that are already logically expired, since the master was not able to provide the
DELcommand in time. In to deal with that the replica uses its logical clock to report that a key does not exist only for read operations that don't violate the consistency of the data set (as new commands from the master will arrive). In this way replicas avoid reporting logically expired keys are still existing. In practical terms, an HTML fragments cache that uses replicas to scale will avoid returning items that are already older than the desired time to live. - During Lua scripts executions no key expiries are performed. As a Lua script runs, conceptually the time in the master is frozen, so that a given key will either exist or not for all the time the script runs. This prevents keys expiring in the middle of a script, and is needed to send the same script to the replica in a way that is guaranteed to have the same effects in the data set.
Once a replica is promoted to a master it will start to expire keys independently, and will not require any help from its old master.
Configuring replication in Docker and NAT
When Docker, or other types of containers using port forwarding, or Network Address Translation is used, Redis replication needs some extra care, especially when using Redis Sentinel or other systems where the master INFO or ROLE commands output is scanned to discover replicas' addresses.
The problem is that the ROLE command, and the replication section of
the INFO output, when issued into a master instance, will show replicas
as having the IP address they use to connect to the master, which, in
environments using NAT may be different compared to the logical address of the
replica instance (the one that clients should use to connect to replicas).
Similarly the replicas will be listed with the listening port configured
into redis.conf, that may be different from the forwarded port in case
the port is remapped.
To fix both issues, it is possible, since Redis 3.2.2, to force a replica to announce an arbitrary pair of IP and port to the master. The two configurations directives to use are:
replica-announce-ip 5.5.5.5
replica-announce-port 1234
And are documented in the example redis.conf of recent Redis distributions.
The INFO and ROLE command
There are two Redis commands that provide a lot of information on the current
replication parameters of master and replica instances. One is INFO. If the
command is called with the replication argument as INFO replication only
information relevant to the replication are displayed. Another more
computer-friendly command is ROLE, that provides the replication status of
masters and replicas together with their replication offsets, list of connected
replicas and so forth.
Partial sync after restarts and failovers
Since Redis 4.0, when an instance is promoted to master after a failover, it will be still able to perform a partial resynchronization with the replicas of the old master. To do so, the replica remembers the old replication ID and offset of its former master, so can provide part of the backlog to the connecting replicas even if they ask for the old replication ID.
However the new replication ID of the promoted replica will be different, since it constitutes a different history of the data set. For example, the master can return available and can continue accepting writes for some time, so using the same replication ID in the promoted replica would violate the rule that a of replication ID and offset pair identifies only a single data set.
Moreover, replicas - when powered off gently and restarted - are able to store
in the RDB file the information needed to resync with their
master. This is useful in case of upgrades. When this is needed, it is better to
use the SHUTDOWN command in order to perform a save & quit operation on the
replica.
It is not possible to partially sync a replica that restarted via the AOF file. However the instance may be turned to RDB persistence before shutting down it, than can be restarted, and finally AOF can be enabled again.
Maxmemory on replicas
By default, a replica will ignore maxmemory (unless it is promoted to master after a failover or manually).
It means that the eviction of keys will be handled by the master, sending the DEL commands to the replica as keys evict in the master side.
This behavior ensures that masters and replicas stay consistent, which is usually what you want. However, if your replica is writable, or you want the replica to have a different memory setting, and you are sure all the writes performed to the replica are idempotent, then you may change this default (but be sure to understand what you are doing).
Note that since the replica by default does not evict, it may end up using more memory than what is set via maxmemory (since there are certain buffers that may be larger on the replica, or data structures may sometimes take more memory and so forth).
Make sure you monitor your replicas, and make sure they have enough memory to never hit a real out-of-memory condition before the master hits the configured maxmemory setting.
To change this behavior, you can allow a replica to not ignore the maxmemory. The configuration directives to use is:
replica-ignore-maxmemory no
7.14 - Scaling with Redis Cluster
Horizontal scaling with Redis Cluster
Redis scales horizontally with a deployment topology called Redis Cluster.
This document is a gentle introduction to Redis Cluster, teaching you how to set up, test, and operate Redis Cluster in production.
This tutorial also described the availability and consistency characteristics of Redis Cluster from the point of view of the end user, stated in a simple-to-understand way.
If you plan to run a production Redis Cluster deployment, or want to better understand how Redis Cluster works internally, consult the Redis Cluster specification.
Redis Cluster 101
Redis Cluster provides a way to run a Redis installation where data is automatically sharded across multiple Redis nodes.
Redis Cluster also provides some degree of availability during partitions, that is in practical terms the ability to continue the operations when some nodes fail or are not able to communicate. However the cluster stops to operate in the event of larger failures (for example when the majority of masters are unavailable).
So in practical terms, what do you get with Redis Cluster?
- The ability to automatically split your dataset among multiple nodes.
- The ability to continue operations when a subset of the nodes are experiencing failures or are unable to communicate with the rest of the cluster.
Redis Cluster TCP ports
Every Redis Cluster node requires two open TCP connections: a Redis
TCP port used to serve clients, e.g., 6379, and second port known as the
cluster bus port. By default, the cluster bus port is set by adding 10000 to the data port (e.g., 16379); however, you can override this in the cluster-port config.
This second port is used for the cluster bus, which is a node-to-node communication channel using a binary protocol. The cluster bus is used by nodes for failure detection, configuration update, failover authorization, and so forth. Clients should never try to communicate with the cluster bus port, but always with the normal Redis command port, however make sure you open both ports in your firewall, otherwise Redis cluster nodes will be unable to communicate.
Note that for a Redis Cluster to work properly you need, for each node:
- The normal client communication port (usually 6379) used to communicate with clients to be open to all the clients that need to reach the cluster, plus all the other cluster nodes (that use the client port for keys migrations).
- The cluster bus port must be reachable from all the other cluster nodes.
If you don't open both TCP ports, your cluster will not work as expected.
The cluster bus uses a different, binary protocol, for node to node data exchange, which is more suited to exchange information between nodes using little bandwidth and processing time.
Redis Cluster and Docker
Currently, Redis Cluster does not support NATted environments and in general environments where IP addresses or TCP ports are remapped.
Docker uses a technique called port mapping: programs running inside Docker containers may be exposed with a different port compared to the one the program believes to be using. This is useful for running multiple containers using the same ports, at the same time, in the same server.
To make Docker compatible with Redis Cluster, you need to use
Docker's host networking mode. Please see the --net=host option
in the Docker documentation for more information.
Redis Cluster data sharding
Redis Cluster does not use consistent hashing, but a different form of sharding where every key is conceptually part of what we call a hash slot.
There are 16384 hash slots in Redis Cluster, and to compute the hash slot for a given key, we simply take the CRC16 of the key modulo 16384.
Every node in a Redis Cluster is responsible for a subset of the hash slots, so, for example, you may have a cluster with 3 nodes, where:
- Node A contains hash slots from 0 to 5500.
- Node B contains hash slots from 5501 to 11000.
- Node C contains hash slots from 11001 to 16383.
This makes it easy to add and remove cluster nodes. For example, if I want to add a new node D, I need to move some hash slots from nodes A, B, C to D. Similarly, if I want to remove node A from the cluster, I can just move the hash slots served by A to B and C. Once node A is empty, I can remove it from the cluster completely.
Moving hash slots from a node to another does not require stopping any operations; therefore, adding and removing nodes, or changing the percentage of hash slots held by a node, requires no downtime.
Redis Cluster supports multiple key operations as long as all of the keys involved in a single command execution (or whole transaction, or Lua script execution) belong to the same hash slot. The user can force multiple keys to be part of the same hash slot by using a feature called hash tags.
Hash tags are documented in the Redis Cluster specification, but the gist is
that if there is a substring between {} brackets in a key, only what is
inside the string is hashed. For example, they keys user:{123}:profile and user:{123}:account are guaranteed to be in the same hash slot because they share the same hash tag. As a result, you can operate on these two keys in the same multi-key operation.
Redis Cluster master-replica model
To remain available when a subset of master nodes are failing or are not able to communicate with the majority of nodes, Redis Cluster uses a master-replica model where every hash slot has from 1 (the master itself) to N replicas (N-1 additional replica nodes).
In our example cluster with nodes A, B, C, if node B fails the cluster is not able to continue, since we no longer have a way to serve hash slots in the range 5501-11000.
However, when the cluster is created (or at a later time), we add a replica node to every master, so that the final cluster is composed of A, B, C that are master nodes, and A1, B1, C1 that are replica nodes. This way, the system can continue if node B fails.
Node B1 replicates B, and B fails, the cluster will promote node B1 as the new master and will continue to operate correctly.
However, note that if nodes B and B1 fail at the same time, Redis Cluster will not be able to continue to operate.
Redis Cluster consistency guarantees
Redis Cluster does not guarantee strong consistency. In practical terms this means that under certain conditions it is possible that Redis Cluster will lose writes that were acknowledged by the system to the client.
The first reason why Redis Cluster can lose writes is because it uses asynchronous replication. This means that during writes the following happens:
- Your client writes to the master B.
- The master B replies OK to your client.
- The master B propagates the write to its replicas B1, B2 and B3.
As you can see, B does not wait for an acknowledgement from B1, B2, B3 before replying to the client, since this would be a prohibitive latency penalty for Redis, so if your client writes something, B acknowledges the write, but crashes before being able to send the write to its replicas, one of the replicas (that did not receive the write) can be promoted to master, losing the write forever.
This is very similar to what happens with most databases that are configured to flush data to disk every second, so it is a scenario you are already able to reason about because of past experiences with traditional database systems not involving distributed systems. Similarly you can improve consistency by forcing the database to flush data to disk before replying to the client, but this usually results in prohibitively low performance. That would be the equivalent of synchronous replication in the case of Redis Cluster.
Basically, there is a trade-off to be made between performance and consistency.
Redis Cluster has support for synchronous writes when absolutely needed,
implemented via the WAIT command. This makes losing writes a lot less
likely. However, note that Redis Cluster does not implement strong consistency
even when synchronous replication is used: it is always possible, under more
complex failure scenarios, that a replica that was not able to receive the write
will be elected as master.
There is another notable scenario where Redis Cluster will lose writes, that happens during a network partition where a client is isolated with a minority of instances including at least a master.
Take as an example our 6 nodes cluster composed of A, B, C, A1, B1, C1, with 3 masters and 3 replicas. There is also a client, that we will call Z1.
After a partition occurs, it is possible that in one side of the partition we have A, C, A1, B1, C1, and in the other side we have B and Z1.
Z1 is still able to write to B, which will accept its writes. If the partition heals in a very short time, the cluster will continue normally. However, if the partition lasts enough time for B1 to be promoted to master on the majority side of the partition, the writes that Z1 has sent to B in the meantime will be lost.
Note that there is a maximum window to the amount of writes Z1 will be able to send to B: if enough time has elapsed for the majority side of the partition to elect a replica as master, every master node in the minority side will have stopped accepting writes.
This amount of time is a very important configuration directive of Redis Cluster, and is called the node timeout.
After node timeout has elapsed, a master node is considered to be failing, and can be replaced by one of its replicas. Similarly, after node timeout has elapsed without a master node to be able to sense the majority of the other master nodes, it enters an error state and stops accepting writes.
Redis Cluster configuration parameters
We are about to create an example cluster deployment. Before we continue,
let's introduce the configuration parameters that Redis Cluster introduces
in the redis.conf file.
- cluster-enabled
<yes/no>: If yes, enables Redis Cluster support in a specific Redis instance. Otherwise the instance starts as a standalone instance as usual. - cluster-config-file
<filename>: Note that despite the name of this option, this is not a user editable configuration file, but the file where a Redis Cluster node automatically persists the cluster configuration (the state, basically) every time there is a change, in order to be able to re-read it at startup. The file lists things like the other nodes in the cluster, their state, persistent variables, and so forth. Often this file is rewritten and flushed on disk as a result of some message reception. - cluster-node-timeout
<milliseconds>: The maximum amount of time a Redis Cluster node can be unavailable, without it being considered as failing. If a master node is not reachable for more than the specified amount of time, it will be failed over by its replicas. This parameter controls other important things in Redis Cluster. Notably, every node that can't reach the majority of master nodes for the specified amount of time, will stop accepting queries. - cluster-slave-validity-factor
<factor>: If set to zero, a replica will always consider itself valid, and will therefore always try to failover a master, regardless of the amount of time the link between the master and the replica remained disconnected. If the value is positive, a maximum disconnection time is calculated as the node timeout value multiplied by the factor provided with this option, and if the node is a replica, it will not try to start a failover if the master link was disconnected for more than the specified amount of time. For example, if the node timeout is set to 5 seconds and the validity factor is set to 10, a replica disconnected from the master for more than 50 seconds will not try to failover its master. Note that any value different than zero may result in Redis Cluster being unavailable after a master failure if there is no replica that is able to failover it. In that case the cluster will return to being available only when the original master rejoins the cluster. - cluster-migration-barrier
<count>: Minimum number of replicas a master will remain connected with, for another replica to migrate to a master which is no longer covered by any replica. See the appropriate section about replica migration in this tutorial for more information. - cluster-require-full-coverage
<yes/no>: If this is set to yes, as it is by default, the cluster stops accepting writes if some percentage of the key space is not covered by any node. If the option is set to no, the cluster will still serve queries even if only requests about a subset of keys can be processed. - cluster-allow-reads-when-down
<yes/no>: If this is set to no, as it is by default, a node in a Redis Cluster will stop serving all traffic when the cluster is marked as failed, either when a node can't reach a quorum of masters or when full coverage is not met. This prevents reading potentially inconsistent data from a node that is unaware of changes in the cluster. This option can be set to yes to allow reads from a node during the fail state, which is useful for applications that want to prioritize read availability but still want to prevent inconsistent writes. It can also be used for when using Redis Cluster with only one or two shards, as it allows the nodes to continue serving writes when a master fails but automatic failover is impossible.
Creating and using a Redis Cluster
To create a cluster, the first thing we need is to have a few empty Redis instances running in cluster mode.
At minimum, you'll see to set the following directives in the redis.conf file:
port 7000
cluster-enabled yes
cluster-config-file nodes.conf
cluster-node-timeout 5000
appendonly yes
Setting the cluster-enabled directive to yes enables cluster mode.
Every instance also contains the path of a file where the
configuration for this node is stored, which by default is nodes.conf.
This file is never touched by humans; it is simply generated at startup
by the Redis Cluster instances, and updated every time it is needed.
Note that the minimal cluster that works as expected must contain at least three master nodes. For deployment, we strongly recommend a six-node cluster, with three masters and three replicas.
You can test this locally by creating the following directories named after the port number of the instance you'll run inside any given directory.
For example:
mkdir cluster-test
cd cluster-test
mkdir 7000 7001 7002 7003 7004 7005
Create a redis.conf file inside each of the directories, from 7000 to 7005.
As a template for your configuration file just use the small example above,
but make sure to replace the port number 7000 with the right port number
according to the directory name.
You can start each instance as follows, each running in a separate terminal tab:
cd 7000
redis-server ./redis.conf
You'll see from the logs that every node assigns itself a new ID:
[82462] 26 Nov 11:56:55.329 * No cluster configuration found, I'm 97a3a64667477371c4479320d683e4c8db5858b1
This ID will be used forever by this specific instance in order for the instance to have a unique name in the context of the cluster. Every node remembers every other node using this IDs, and not by IP or port. IP addresses and ports may change, but the unique node identifier will never change for all the life of the node. We call this identifier simply Node ID.
Initializing the cluster
Now that we have a number of instances running, we need to create our cluster by writing some meaningful configuration to the nodes.
To create the cluster, run:
redis-cli --cluster create 127.0.0.1:7000 127.0.0.1:7001 \
127.0.0.1:7002 127.0.0.1:7003 127.0.0.1:7004 127.0.0.1:7005 \
--cluster-replicas 1
The command used here is create, since we want to create a new cluster.
The option --cluster-replicas 1 means that we want a replica for every master created.
The other arguments are the list of addresses of the instances I want to use to create the new cluster.
redis-cli will propose a configuration. Accept the proposed configuration by typing yes.
The cluster will be configured and joined, which means that instances will be
bootstrapped into talking with each other. Finally, if everything has gone well, you'll see a message like this:
[OK] All 16384 slots covered
This means that there is at least one master instance serving each of the 16384 available slots.
Creating a Redis Cluster using the create-cluster script
If you don't want to create a Redis Cluster by configuring and executing individual instances manually as explained above, there is a much simpler system (but you'll not learn the same amount of operational details).
Find the utils/create-cluster directory in the Redis distribution.
There is a script called create-cluster inside (same name as the directory
it is contained into), it's a simple bash script. In order to start
a 6 nodes cluster with 3 masters and 3 replicas just type the following
commands:
create-cluster startcreate-cluster create
Reply to yes in step 2 when the redis-cli utility wants you to accept
the cluster layout.
You can now interact with the cluster, the first node will start at port 30001 by default. When you are done, stop the cluster with:
create-cluster stop
Please read the README inside this directory for more information on how
to run the script.
Interacting with the cluster
To connect to Redis Cluster, you'll need a cluster-aware Redis client. See the documentation for your client of choice to determine its cluster support.
You can also test your Redis Cluster using the redis-cli command line utility:
$ redis-cli -c -p 7000
redis 127.0.0.1:7000> set foo bar
-> Redirected to slot [12182] located at 127.0.0.1:7002
OK
redis 127.0.0.1:7002> set hello world
-> Redirected to slot [866] located at 127.0.0.1:7000
OK
redis 127.0.0.1:7000> get foo
-> Redirected to slot [12182] located at 127.0.0.1:7002
"bar"
redis 127.0.0.1:7002> get hello
-> Redirected to slot [866] located at 127.0.0.1:7000
"world"
Note: if you created the cluster using the script, your nodes may listen on different ports, starting from 30001 by default.
The redis-cli cluster support is very basic, so it always uses the fact that
Redis Cluster nodes are able to redirect a client to the right node.
A serious client is able to do better than that, and cache the map between
hash slots and nodes addresses, to directly use the right connection to the
right node. The map is refreshed only when something changed in the cluster
configuration, for example after a failover or after the system administrator
changed the cluster layout by adding or removing nodes.
Writing an example app with redis-rb-cluster
Before going forward showing how to operate the Redis Cluster, doing things like a failover, or a resharding, we need to create some example application or at least to be able to understand the semantics of a simple Redis Cluster client interaction.
In this way we can run an example and at the same time try to make nodes failing, or start a resharding, to see how Redis Cluster behaves under real world conditions. It is not very helpful to see what happens while nobody is writing to the cluster.
This section explains some basic usage of
redis-rb-cluster showing two
examples. The first is the following, and is the
example.rb
file inside the redis-rb-cluster distribution:
1 require './cluster'
2
3 if ARGV.length != 2
4 startup_nodes = [
5 {:host => "127.0.0.1", :port => 7000},
6 {:host => "127.0.0.1", :port => 7001}
7 ]
8 else
9 startup_nodes = [
10 {:host => ARGV[0], :port => ARGV[1].to_i}
11 ]
12 end
13
14 rc = RedisCluster.new(startup_nodes,32,:timeout => 0.1)
15
16 last = false
17
18 while not last
19 begin
20 last = rc.get("__last__")
21 last = 0 if !last
22 rescue => e
23 puts "error #{e.to_s}"
24 sleep 1
25 end
26 end
27
28 ((last.to_i+1)..1000000000).each{|x|
29 begin
30 rc.set("foo#{x}",x)
31 puts rc.get("foo#{x}")
32 rc.set("__last__",x)
33 rescue => e
34 puts "error #{e.to_s}"
35 end
36 sleep 0.1
37 }
The application does a very simple thing, it sets keys in the form foo<number> to number, one after the other. So if you run the program the result is the
following stream of commands:
- SET foo0 0
- SET foo1 1
- SET foo2 2
- And so forth...
The program looks more complex than it should usually as it is designed to
show errors on the screen instead of exiting with an exception, so every
operation performed with the cluster is wrapped by begin rescue blocks.
The line 14 is the first interesting line in the program. It creates the Redis Cluster object, using as argument a list of startup nodes, the maximum number of connections this object is allowed to take against different nodes, and finally the timeout after a given operation is considered to be failed.
The startup nodes don't need to be all the nodes of the cluster. The important thing is that at least one node is reachable. Also note that redis-rb-cluster updates this list of startup nodes as soon as it is able to connect with the first node. You should expect such a behavior with any other serious client.
Now that we have the Redis Cluster object instance stored in the rc variable, we are ready to use the object like if it was a normal Redis object instance.
This is exactly what happens in line 18 to 26: when we restart the example
we don't want to start again with foo0, so we store the counter inside
Redis itself. The code above is designed to read this counter, or if the
counter does not exist, to assign it the value of zero.
However note how it is a while loop, as we want to try again and again even if the cluster is down and is returning errors. Normal applications don't need to be so careful.
Lines between 28 and 37 start the main loop where the keys are set or an error is displayed.
Note the sleep call at the end of the loop. In your tests you can remove
the sleep if you want to write to the cluster as fast as possible (relatively
to the fact that this is a busy loop without real parallelism of course, so
you'll get the usually 10k ops/second in the best of the conditions).
Normally writes are slowed down in order for the example application to be easier to follow by humans.
Starting the application produces the following output:
ruby ./example.rb
1
2
3
4
5
6
7
8
9
^C (I stopped the program here)
This is not a very interesting program and we'll use a better one in a moment but we can already see what happens during a resharding when the program is running.
Resharding the cluster
Now we are ready to try a cluster resharding. To do this please
keep the example.rb program running, so that you can see if there is some
impact on the program running. Also you may want to comment the sleep
call in order to have some more serious write load during resharding.
Resharding basically means to move hash slots from a set of nodes to another set of nodes, and like cluster creation it is accomplished using the redis-cli utility.
To start a resharding just type:
redis-cli --cluster reshard 127.0.0.1:7000
You only need to specify a single node, redis-cli will find the other nodes automatically.
Currently redis-cli is only able to reshard with the administrator support, you can't just say move 5% of slots from this node to the other one (but this is pretty trivial to implement). So it starts with questions. The first is how much of a resharding do you want to do:
How many slots do you want to move (from 1 to 16384)?
We can try to reshard 1000 hash slots, that should already contain a non trivial amount of keys if the example is still running without the sleep call.
Then redis-cli needs to know what is the target of the resharding, that is, the node that will receive the hash slots. I'll use the first master node, that is, 127.0.0.1:7000, but I need to specify the Node ID of the instance. This was already printed in a list by redis-cli, but I can always find the ID of a node with the following command if I need:
$ redis-cli -p 7000 cluster nodes | grep myself
97a3a64667477371c4479320d683e4c8db5858b1 :0 myself,master - 0 0 0 connected 0-5460
Ok so my target node is 97a3a64667477371c4479320d683e4c8db5858b1.
Now you'll get asked from what nodes you want to take those keys.
I'll just type all in order to take a bit of hash slots from all the
other master nodes.
After the final confirmation you'll see a message for every slot that redis-cli is going to move from a node to another, and a dot will be printed for every actual key moved from one side to the other.
While the resharding is in progress you should be able to see your example program running unaffected. You can stop and restart it multiple times during the resharding if you want.
At the end of the resharding, you can test the health of the cluster with the following command:
redis-cli --cluster check 127.0.0.1:7000
All the slots will be covered as usual, but this time the master at 127.0.0.1:7000 will have more hash slots, something around 6461.
Scripting a resharding operation
Resharding can be performed automatically without the need to manually enter the parameters in an interactive way. This is possible using a command line like the following:
redis-cli --cluster reshard <host>:<port> --cluster-from <node-id> --cluster-to <node-id> --cluster-slots <number of slots> --cluster-yes
This allows to build some automatism if you are likely to reshard often,
however currently there is no way for redis-cli to automatically
rebalance the cluster checking the distribution of keys across the cluster
nodes and intelligently moving slots as needed. This feature will be added
in the future.
The --cluster-yes option instructs the cluster manager to automatically answer
"yes" to the command's prompts, allowing it to run in a non-interactive mode.
Note that this option can also be activated by setting the
REDISCLI_CLUSTER_YES environment variable.
A more interesting example application
The example application we wrote early is not very good. It writes to the cluster in a simple way without even checking if what was written is the right thing.
From our point of view the cluster receiving the writes could just always
write the key foo to 42 to every operation, and we would not notice at
all.
So in the redis-rb-cluster repository, there is a more interesting application
that is called consistency-test.rb. It uses a set of counters, by default 1000, and sends INCR commands in order to increment the counters.
However instead of just writing, the application does two additional things:
- When a counter is updated using
INCR, the application remembers the write. - It also reads a random counter before every write, and check if the value is what we expected it to be, comparing it with the value it has in memory.
What this means is that this application is a simple consistency checker, and is able to tell you if the cluster lost some write, or if it accepted a write that we did not receive acknowledgment for. In the first case we'll see a counter having a value that is smaller than the one we remember, while in the second case the value will be greater.
Running the consistency-test application produces a line of output every second:
$ ruby consistency-test.rb
925 R (0 err) | 925 W (0 err) |
5030 R (0 err) | 5030 W (0 err) |
9261 R (0 err) | 9261 W (0 err) |
13517 R (0 err) | 13517 W (0 err) |
17780 R (0 err) | 17780 W (0 err) |
22025 R (0 err) | 22025 W (0 err) |
25818 R (0 err) | 25818 W (0 err) |
The line shows the number of Reads and Writes performed, and the number of errors (query not accepted because of errors since the system was not available).
If some inconsistency is found, new lines are added to the output. This is what happens, for example, if I reset a counter manually while the program is running:
$ redis-cli -h 127.0.0.1 -p 7000 set key_217 0
OK
(in the other tab I see...)
94774 R (0 err) | 94774 W (0 err) |
98821 R (0 err) | 98821 W (0 err) |
102886 R (0 err) | 102886 W (0 err) | 114 lost |
107046 R (0 err) | 107046 W (0 err) | 114 lost |
When I set the counter to 0 the real value was 114, so the program reports
114 lost writes (INCR commands that are not remembered by the cluster).
This program is much more interesting as a test case, so we'll use it to test the Redis Cluster failover.
Testing the failover
Note: during this test, you should take a tab open with the consistency test application running.
In order to trigger the failover, the simplest thing we can do (that is also the semantically simplest failure that can occur in a distributed system) is to crash a single process, in our case a single master.
We can identify a master and crash it with the following command:
$ redis-cli -p 7000 cluster nodes | grep master
3e3a6cb0d9a9a87168e266b0a0b24026c0aae3f0 127.0.0.1:7001 master - 0 1385482984082 0 connected 5960-10921
2938205e12de373867bf38f1ca29d31d0ddb3e46 127.0.0.1:7002 master - 0 1385482983582 0 connected 11423-16383
97a3a64667477371c4479320d683e4c8db5858b1 :0 myself,master - 0 0 0 connected 0-5959 10922-11422
Ok, so 7000, 7001, and 7002 are masters. Let's crash node 7002 with the DEBUG SEGFAULT command:
$ redis-cli -p 7002 debug segfault
Error: Server closed the connection
Now we can look at the output of the consistency test to see what it reported.
18849 R (0 err) | 18849 W (0 err) |
23151 R (0 err) | 23151 W (0 err) |
27302 R (0 err) | 27302 W (0 err) |
... many error warnings here ...
29659 R (578 err) | 29660 W (577 err) |
33749 R (578 err) | 33750 W (577 err) |
37918 R (578 err) | 37919 W (577 err) |
42077 R (578 err) | 42078 W (577 err) |
As you can see during the failover the system was not able to accept 578 reads and 577 writes, however no inconsistency was created in the database. This may sound unexpected as in the first part of this tutorial we stated that Redis Cluster can lose writes during the failover because it uses asynchronous replication. What we did not say is that this is not very likely to happen because Redis sends the reply to the client, and the commands to replicate to the replicas, about at the same time, so there is a very small window to lose data. However the fact that it is hard to trigger does not mean that it is impossible, so this does not change the consistency guarantees provided by Redis cluster.
We can now check what is the cluster setup after the failover (note that in the meantime I restarted the crashed instance so that it rejoins the cluster as a replica):
$ redis-cli -p 7000 cluster nodes
3fc783611028b1707fd65345e763befb36454d73 127.0.0.1:7004 slave 3e3a6cb0d9a9a87168e266b0a0b24026c0aae3f0 0 1385503418521 0 connected
a211e242fc6b22a9427fed61285e85892fa04e08 127.0.0.1:7003 slave 97a3a64667477371c4479320d683e4c8db5858b1 0 1385503419023 0 connected
97a3a64667477371c4479320d683e4c8db5858b1 :0 myself,master - 0 0 0 connected 0-5959 10922-11422
3c3a0c74aae0b56170ccb03a76b60cfe7dc1912e 127.0.0.1:7005 master - 0 1385503419023 3 connected 11423-16383
3e3a6cb0d9a9a87168e266b0a0b24026c0aae3f0 127.0.0.1:7001 master - 0 1385503417005 0 connected 5960-10921
2938205e12de373867bf38f1ca29d31d0ddb3e46 127.0.0.1:7002 slave 3c3a0c74aae0b56170ccb03a76b60cfe7dc1912e 0 1385503418016 3 connected
Now the masters are running on ports 7000, 7001 and 7005. What was previously a master, that is the Redis instance running on port 7002, is now a replica of 7005.
The output of the CLUSTER NODES command may look intimidating, but it is actually pretty simple, and is composed of the following tokens:
- Node ID
- ip:port
- flags: master, replica, myself, fail, ...
- if it is a replica, the Node ID of the master
- Time of the last pending PING still waiting for a reply.
- Time of the last PONG received.
- Configuration epoch for this node (see the Cluster specification).
- Status of the link to this node.
- Slots served...
Manual failover
Sometimes it is useful to force a failover without actually causing any problem on a master. For example in order to upgrade the Redis process of one of the master nodes it is a good idea to failover it in order to turn it into a replica with minimal impact on availability.
Manual failovers are supported by Redis Cluster using the CLUSTER FAILOVER
command, that must be executed in one of the replicas of the master you want
to failover.
Manual failovers are special and are safer compared to failovers resulting from actual master failures, since they occur in a way that avoid data loss in the process, by switching clients from the original master to the new master only when the system is sure that the new master processed all the replication stream from the old one.
This is what you see in the replica log when you perform a manual failover:
# Manual failover user request accepted.
# Received replication offset for paused master manual failover: 347540
# All master replication stream processed, manual failover can start.
# Start of election delayed for 0 milliseconds (rank #0, offset 347540).
# Starting a failover election for epoch 7545.
# Failover election won: I'm the new master.
Basically clients connected to the master we are failing over are stopped. At the same time the master sends its replication offset to the replica, that waits to reach the offset on its side. When the replication offset is reached, the failover starts, and the old master is informed about the configuration switch. When the clients are unblocked on the old master, they are redirected to the new master.
Note:
- To promote a replica to master, it must first be known as a replica by a majority of the masters in the cluster.
Otherwise, it cannot win the failover election.
If the replica has just been added to the cluster (see Adding a new node as a replica below), you may need to wait a while before sending the
CLUSTER FAILOVERcommand, to make sure the masters in cluster are aware of the new replica.
Adding a new node
Adding a new node is basically the process of adding an empty node and then moving some data into it, in case it is a new master, or telling it to setup as a replica of a known node, in case it is a replica.
We'll show both, starting with the addition of a new master instance.
In both cases the first step to perform is adding an empty node.
This is as simple as to start a new node in port 7006 (we already used from 7000 to 7005 for our existing 6 nodes) with the same configuration used for the other nodes, except for the port number, so what you should do in order to conform with the setup we used for the previous nodes:
- Create a new tab in your terminal application.
- Enter the
cluster-testdirectory. - Create a directory named
7006. - Create a redis.conf file inside, similar to the one used for the other nodes but using 7006 as port number.
- Finally start the server with
../redis-server ./redis.conf
At this point the server should be running.
Now we can use redis-cli as usual in order to add the node to the existing cluster.
redis-cli --cluster add-node 127.0.0.1:7006 127.0.0.1:7000
As you can see I used the add-node command specifying the address of the new node as first argument, and the address of a random existing node in the cluster as second argument.
In practical terms redis-cli here did very little to help us, it just
sent a CLUSTER MEET message to the node, something that is also possible
to accomplish manually. However redis-cli also checks the state of the
cluster before to operate, so it is a good idea to perform cluster operations
always via redis-cli even when you know how the internals work.
Now we can connect to the new node to see if it really joined the cluster:
redis 127.0.0.1:7006> cluster nodes
3e3a6cb0d9a9a87168e266b0a0b24026c0aae3f0 127.0.0.1:7001 master - 0 1385543178575 0 connected 5960-10921
3fc783611028b1707fd65345e763befb36454d73 127.0.0.1:7004 slave 3e3a6cb0d9a9a87168e266b0a0b24026c0aae3f0 0 1385543179583 0 connected
f093c80dde814da99c5cf72a7dd01590792b783b :0 myself,master - 0 0 0 connected
2938205e12de373867bf38f1ca29d31d0ddb3e46 127.0.0.1:7002 slave 3c3a0c74aae0b56170ccb03a76b60cfe7dc1912e 0 1385543178072 3 connected
a211e242fc6b22a9427fed61285e85892fa04e08 127.0.0.1:7003 slave 97a3a64667477371c4479320d683e4c8db5858b1 0 1385543178575 0 connected
97a3a64667477371c4479320d683e4c8db5858b1 127.0.0.1:7000 master - 0 1385543179080 0 connected 0-5959 10922-11422
3c3a0c74aae0b56170ccb03a76b60cfe7dc1912e 127.0.0.1:7005 master - 0 1385543177568 3 connected 11423-16383
Note that since this node is already connected to the cluster it is already able to redirect client queries correctly and is generally speaking part of the cluster. However it has two peculiarities compared to the other masters:
- It holds no data as it has no assigned hash slots.
- Because it is a master without assigned slots, it does not participate in the election process when a replica wants to become a master.
Now it is possible to assign hash slots to this node using the resharding
feature of redis-cli. It is basically useless to show this as we already
did in a previous section, there is no difference, it is just a resharding
having as a target the empty node.
Adding a new node as a replica
Adding a new Replica can be performed in two ways. The obvious one is to use redis-cli again, but with the --cluster-slave option, like this:
redis-cli --cluster add-node 127.0.0.1:7006 127.0.0.1:7000 --cluster-slave
Note that the command line here is exactly like the one we used to add a new master, so we are not specifying to which master we want to add the replica. In this case what happens is that redis-cli will add the new node as replica of a random master among the masters with fewer replicas.
However you can specify exactly what master you want to target with your new replica with the following command line:
redis-cli --cluster add-node 127.0.0.1:7006 127.0.0.1:7000 --cluster-slave --cluster-master-id 3c3a0c74aae0b56170ccb03a76b60cfe7dc1912e
This way we assign the new replica to a specific master.
A more manual way to add a replica to a specific master is to add the new
node as an empty master, and then turn it into a replica using the
CLUSTER REPLICATE command. This also works if the node was added as a replica
but you want to move it as a replica of a different master.
For example in order to add a replica for the node 127.0.0.1:7005 that is currently serving hash slots in the range 11423-16383, that has a Node ID 3c3a0c74aae0b56170ccb03a76b60cfe7dc1912e, all I need to do is to connect with the new node (already added as empty master) and send the command:
redis 127.0.0.1:7006> cluster replicate 3c3a0c74aae0b56170ccb03a76b60cfe7dc1912e
That's it. Now we have a new replica for this set of hash slots, and all the other nodes in the cluster already know (after a few seconds needed to update their config). We can verify with the following command:
$ redis-cli -p 7000 cluster nodes | grep slave | grep 3c3a0c74aae0b56170ccb03a76b60cfe7dc1912e
f093c80dde814da99c5cf72a7dd01590792b783b 127.0.0.1:7006 slave 3c3a0c74aae0b56170ccb03a76b60cfe7dc1912e 0 1385543617702 3 connected
2938205e12de373867bf38f1ca29d31d0ddb3e46 127.0.0.1:7002 slave 3c3a0c74aae0b56170ccb03a76b60cfe7dc1912e 0 1385543617198 3 connected
The node 3c3a0c... now has two replicas, running on ports 7002 (the existing one) and 7006 (the new one).
Removing a node
To remove a replica node just use the del-node command of redis-cli:
redis-cli --cluster del-node 127.0.0.1:7000 `<node-id>`
The first argument is just a random node in the cluster, the second argument is the ID of the node you want to remove.
You can remove a master node in the same way as well, however in order to remove a master node it must be empty. If the master is not empty you need to reshard data away from it to all the other master nodes before.
An alternative to remove a master node is to perform a manual failover of it over one of its replicas and remove the node after it turned into a replica of the new master. Obviously this does not help when you want to reduce the actual number of masters in your cluster, in that case, a resharding is needed.
Replica migration
In Redis Cluster it is possible to reconfigure a replica to replicate with a different master at any time just using the following command:
CLUSTER REPLICATE <master-node-id>
However there is a special scenario where you want replicas to move from one master to another one automatically, without the help of the system administrator. The automatic reconfiguration of replicas is called replicas migration and is able to improve the reliability of a Redis Cluster.
Note: you can read the details of replicas migration in the Redis Cluster Specification, here we'll only provide some information about the general idea and what you should do in order to benefit from it.
The reason why you may want to let your cluster replicas to move from one master to another under certain condition, is that usually the Redis Cluster is as resistant to failures as the number of replicas attached to a given master.
For example a cluster where every master has a single replica can't continue operations if the master and its replica fail at the same time, simply because there is no other instance to have a copy of the hash slots the master was serving. However while net-splits are likely to isolate a number of nodes at the same time, many other kind of failures, like hardware or software failures local to a single node, are a very notable class of failures that are unlikely to happen at the same time, so it is possible that in your cluster where every master has a replica, the replica is killed at 4am, and the master is killed at 6am. This still will result in a cluster that can no longer operate.
To improve reliability of the system we have the option to add additional replicas to every master, but this is expensive. Replica migration allows to add more replicas to just a few masters. So you have 10 masters with 1 replica each, for a total of 20 instances. However you add, for example, 3 instances more as replicas of some of your masters, so certain masters will have more than a single replica.
With replicas migration what happens is that if a master is left without replicas, a replica from a master that has multiple replicas will migrate to the orphaned master. So after your replica goes down at 4am as in the example we made above, another replica will take its place, and when the master will fail as well at 5am, there is still a replica that can be elected so that the cluster can continue to operate.
So what you should know about replicas migration in short?
- The cluster will try to migrate a replica from the master that has the greatest number of replicas in a given moment.
- To benefit from replica migration you have just to add a few more replicas to a single master in your cluster, it does not matter what master.
- There is a configuration parameter that controls the replica migration feature that is called
cluster-migration-barrier: you can read more about it in the exampleredis.conffile provided with Redis Cluster.
Upgrading nodes in a Redis Cluster
Upgrading replica nodes is easy since you just need to stop the node and restart it with an updated version of Redis. If there are clients scaling reads using replica nodes, they should be able to reconnect to a different replica if a given one is not available.
Upgrading masters is a bit more complex, and the suggested procedure is:
- Use
CLUSTER FAILOVERto trigger a manual failover of the master to one of its replicas. (See the Manual failover section in this document.) - Wait for the master to turn into a replica.
- Finally upgrade the node as you do for replicas.
- If you want the master to be the node you just upgraded, trigger a new manual failover in order to turn back the upgraded node into a master.
Following this procedure you should upgrade one node after the other until all the nodes are upgraded.
Migrating to Redis Cluster
Users willing to migrate to Redis Cluster may have just a single master, or may already using a preexisting sharding setup, where keys are split among N nodes, using some in-house algorithm or a sharding algorithm implemented by their client library or Redis proxy.
In both cases it is possible to migrate to Redis Cluster easily, however what is the most important detail is if multiple-keys operations are used by the application, and how. There are three different cases:
- Multiple keys operations, or transactions, or Lua scripts involving multiple keys, are not used. Keys are accessed independently (even if accessed via transactions or Lua scripts grouping multiple commands, about the same key, together).
- Multiple keys operations, or transactions, or Lua scripts involving multiple keys are used but only with keys having the same hash tag, which means that the keys used together all have a
{...}sub-string that happens to be identical. For example the following multiple keys operation is defined in the context of the same hash tag:SUNION {user:1000}.foo {user:1000}.bar. - Multiple keys operations, or transactions, or Lua scripts involving multiple keys are used with key names not having an explicit, or the same, hash tag.
The third case is not handled by Redis Cluster: the application requires to be modified in order to don't use multi keys operations or only use them in the context of the same hash tag.
Case 1 and 2 are covered, so we'll focus on those two cases, that are handled in the same way, so no distinction will be made in the documentation.
Assuming you have your preexisting data set split into N masters, where N=1 if you have no preexisting sharding, the following steps are needed in order to migrate your data set to Redis Cluster:
- Stop your clients. No automatic live-migration to Redis Cluster is currently possible. You may be able to do it orchestrating a live migration in the context of your application / environment.
- Generate an append only file for all of your N masters using the
BGREWRITEAOFcommand, and waiting for the AOF file to be completely generated. - Save your AOF files from aof-1 to aof-N somewhere. At this point you can stop your old instances if you wish (this is useful since in non-virtualized deployments you often need to reuse the same computers).
- Create a Redis Cluster composed of N masters and zero replicas. You'll add replicas later. Make sure all your nodes are using the append only file for persistence.
- Stop all the cluster nodes, substitute their append only file with your pre-existing append only files, aof-1 for the first node, aof-2 for the second node, up to aof-N.
- Restart your Redis Cluster nodes with the new AOF files. They'll complain that there are keys that should not be there according to their configuration.
- Use
redis-cli --cluster fixcommand in order to fix the cluster so that keys will be migrated according to the hash slots each node is authoritative or not. - Use
redis-cli --cluster checkat the end to make sure your cluster is ok. - Restart your clients modified to use a Redis Cluster aware client library.
There is an alternative way to import data from external instances to a Redis
Cluster, which is to use the redis-cli --cluster import command.
The command moves all the keys of a running instance (deleting the keys from the source instance) to the specified pre-existing Redis Cluster. However note that if you use a Redis 2.8 instance as source instance the operation may be slow since 2.8 does not implement migrate connection caching, so you may want to restart your source instance with a Redis 3.x version before to perform such operation.
A note about the word slave used in this page: Starting with Redis 5, if not for backward compatibility, the Redis project no longer uses the word slave. Unfortunately in this command the word slave is part of the protocol, so we'll be able to remove such occurrences only when this API will be naturally deprecated.
7.15 - Redis security
Security model and features in Redis
This document provides an introduction to the topic of security from the point of view of Redis. It covers the access control provided by Redis, code security concerns, attacks that can be triggered from the outside by selecting malicious inputs, and other similar topics.
For security-related contacts, open an issue on GitHub, or when you feel it is really important to preserve the security of the communication, use the GPG key at the end of this document.
Security model
Redis is designed to be accessed by trusted clients inside trusted environments. This means that usually it is not a good idea to expose the Redis instance directly to the internet or, in general, to an environment where untrusted clients can directly access the Redis TCP port or UNIX socket.
For instance, in the common context of a web application implemented using Redis as a database, cache, or messaging system, the clients inside the front-end (web side) of the application will query Redis to generate pages or to perform operations requested or triggered by the web application user.
In this case, the web application mediates access between Redis and untrusted clients (the user browsers accessing the web application).
In general, untrusted access to Redis should always be mediated by a layer implementing ACLs, validating user input, and deciding what operations to perform against the Redis instance.
Network security
Access to the Redis port should be denied to everybody but trusted clients in the network, so the servers running Redis should be directly accessible only by the computers implementing the application using Redis.
In the common case of a single computer directly exposed to the internet, such as a virtualized Linux instance (Linode, EC2, ...), the Redis port should be firewalled to prevent access from the outside. Clients will still be able to access Redis using the loopback interface.
Note that it is possible to bind Redis to a single interface by adding a line like the following to the redis.conf file:
bind 127.0.0.1
Failing to protect the Redis port from the outside can have a big security
impact because of the nature of Redis. For instance, a single FLUSHALL command can be used by an external attacker to delete the whole data set.
Protected mode
Unfortunately, many users fail to protect Redis instances from being accessed from external networks. Many instances are simply left exposed on the internet with public IPs. Since version 3.2.0, Redis enters a special mode called protected mode when it is executed with the default configuration (binding all the interfaces) and without any password in order to access it. In this mode, Redis only replies to queries from the loopback interfaces, and replies to clients connecting from other addresses with an error that explains the problem and how to configure Redis properly.
We expect protected mode to seriously decrease the security issues caused by unprotected Redis instances executed without proper administration. However, the system administrator can still ignore the error given by Redis and disable protected mode or manually bind all the interfaces.
Authentication
While Redis does not try to implement Access Control, it provides a tiny layer of optional authentication that is turned on by editing the redis.conf file.
When the authorization layer is enabled, Redis will refuse any query by unauthenticated clients. A client can authenticate itself by sending the AUTH command followed by the password.
The password is set by the system administrator in clear text inside the redis.conf file. It should be long enough to prevent brute force attacks for two reasons:
- Redis is very fast at serving queries. Many passwords per second can be tested by an external client.
- The Redis password is stored in the redis.conf file and inside the client configuration. Since the system administrator does not need to remember it, the password can be very long.
The goal of the authentication layer is to optionally provide a layer of redundancy. If firewalling or any other system implemented to protect Redis from external attackers fail, an external client will still not be able to access the Redis instance without knowledge of the authentication password.
Since the AUTH command, like every other Redis command, is sent unencrypted, it does not protect against an attacker that has enough access to the network to perform eavesdropping.
TLS support
Redis has optional support for TLS on all communication channels, including client connections, replication links, and the Redis Cluster bus protocol.
Disallowing specific commands
It is possible to disallow commands in Redis or to rename them as an unguessable name, so that normal clients are limited to a specified set of commands.
For instance, a virtualized server provider may offer a managed Redis instance service. In this context, normal users should probably not be able to call the Redis CONFIG command to alter the configuration of the instance, but the systems that provide and remove instances should be able to do so.
In this case, it is possible to either rename or completely shadow commands from the command table. This feature is available as a statement that can be used inside the redis.conf configuration file. For example:
rename-command CONFIG b840fc02d524045429941cc15f59e41cb7be6c52
In the above example, the CONFIG command was renamed into an unguessable name. It is also possible to completely disallow it (or any other command) by renaming it to the empty string, like in the following example:
rename-command CONFIG ""
Attacks triggered by malicious inputs from external clients
There is a class of attacks that an attacker can trigger from the outside even without external access to the instance. For example, an attacker might insert data into Redis that triggers pathological (worst case) algorithm complexity on data structures implemented inside Redis internals.
An attacker could supply, via a web form, a set of strings that are known to hash to the same bucket in a hash table in order to turn the O(1) expected time (the average time) to the O(N) worst case. This can consume more CPU than expected and ultimately cause a Denial of Service.
To prevent this specific attack, Redis uses a per-execution, pseudo-random seed to the hash function.
Redis implements the SORT command using the qsort algorithm. Currently, the algorithm is not randomized, so it is possible to trigger a quadratic worst-case behavior by carefully selecting the right set of inputs.
String escaping and NoSQL injection
The Redis protocol has no concept of string escaping, so injection is impossible under normal circumstances using a normal client library. The protocol uses prefixed-length strings and is completely binary safe.
Since Lua scripts executed by the EVAL and EVALSHA commands follow the
same rules, those commands are also safe.
While it would be a strange use case, the application should avoid composing the body of the Lua script from strings obtained from untrusted sources.
Code security
In a classical Redis setup, clients are allowed full access to the command set, but accessing the instance should never result in the ability to control the system where Redis is running.
Internally, Redis uses all the well-known practices for writing secure code to prevent buffer overflows, format bugs, and other memory corruption issues. However, the ability to control the server configuration using the CONFIG command allows the client to change the working directory of the program and the name of the dump file. This allows clients to write RDB Redis files to random paths. This is a security issue that may lead to the ability to compromise the system and/or run untrusted code as the same user as Redis is running.
Redis does not require root privileges to run. It is recommended to run it as an unprivileged redis user that is only used for this purpose.
GPG key
-----BEGIN PGP PUBLIC KEY BLOCK-----
mQINBF9FWioBEADfBiOE/iKpj2EF/cJ/KzFX+jSBKa8SKrE/9RE0faVF6OYnqstL
S5ox/o+yT45FdfFiRNDflKenjFbOmCbAdIys9Ta0iq6I9hs4sKfkNfNVlKZWtSVG
W4lI6zO2Zyc2wLZonI+Q32dDiXWNcCEsmajFcddukPevj9vKMTJZtF79P2SylEPq
mUuhMy/jOt7q1ibJCj5srtaureBH9662t4IJMFjsEe+hiZ5v071UiQA6Tp7rxLqZ
O6ZRzuamFP3xfy2Lz5NQ7QwnBH1ROabhJPoBOKCATCbfgFcM1Rj+9AOGfoDCOJKH
7yiEezMqr9VbDrEmYSmCO4KheqwC0T06lOLIQC4nnwKopNO/PN21mirCLHvfo01O
H/NUG1LZifOwAURbiFNF8Z3+L0csdhD8JnO+1nphjDHr0Xn9Vff2Vej030pRI/9C
SJ2s5fZUq8jK4n06sKCbqA4pekpbKyhRy3iuITKv7Nxesl4T/uhkc9ccpAvbuD1E
NczN1IH05jiMUMM3lC1A9TSvxSqflqI46TZU3qWLa9yg45kDC8Ryr39TY37LscQk
9x3WwLLkuHeUurnwAk46fSj7+FCKTGTdPVw8v7XbvNOTDf8vJ3o2PxX1uh2P2BHs
9L+E1P96oMkiEy1ug7gu8V+mKu5PAuD3QFzU3XCB93DpDakgtznRRXCkAQARAQAB
tBtSZWRpcyBMYWJzIDxyZWRpc0ByZWRpcy5pbz6JAk4EEwEKADgWIQR5sNCo1OBf
WO913l22qvOUq0evbgUCX0VaKgIbAwULCQgHAgYVCgkICwIEFgIDAQIeAQIXgAAK
CRC2qvOUq0evbpZaD/4rN7xesDcAG4ec895Fqzk3w74W1/K9lzRKZDwRsAqI+sAz
ZXvQMtWSxLfF2BITxLnHJXK5P+2Y6XlNgrn1GYwC1MsARyM9e1AzwDJHcXFkHU82
2aALIMXGtiZs/ejFh9ZSs5cgRlxBSqot/uxXm9AvKEByhmIeHPZse/Rc6e3qa57v
OhCkVZB4ETx5iZrgA+gdmS8N7MXG0cEu5gJLacG57MHi+2WMOCU9Xfj6+Pqhw3qc
E6lBinKcA/LdgUJ1onK0JCnOG1YVHjuFtaisfPXvEmUBGaSGE6lM4J7lass/OWps
Dd+oHCGI+VOGNx6AiBDZG8mZacu0/7goRnOTdljJ93rKkj31I+6+j4xzkAC0IXW8
LAP9Mmo9TGx0L5CaljykhW6z/RK3qd7dAYE+i7e8J9PuQaGG5pjFzuW4vY45j0V/
9JUMKDaGbU5choGqsCpAVtAMFfIBj3UQ5LCt5zKyescKCUb9uifOLeeQ1vay3R9o
eRSD52YpRBpor0AyYxcLur/pkHB0sSvXEfRZENQTohpY71rHSaFd3q1Hkk7lZl95
m24NRlrJnjFmeSPKP22vqUYIwoGNUF/D38UzvqHD8ltTPgkZc+Y+RRbVNqkQYiwW
GH/DigNB8r2sdkt+1EUu+YkYosxtzxpxxpYGKXYXx0uf+EZmRqRt/OSHKnf2GLkC
DQRfRVoqARAApffsrDNo4JWjX3r6wHJJ8IpwnGEJ2IzGkg8f1Ofk2uKrjkII/oIx
sXC3EeauC1Plhs+m9GP/SPY0LXmZ0OzGD/S1yMpmBeBuXJ0gONDo+xCg1pKGshPs
75XzpbggSOtEYR5S8Z46yCu7TGJRXBMGBhDgCfPVFBBNsnG5B0EeHXM4trqqlN6d
PAcwtLnKPz/Z+lloKR6bFXvYGuN5vjRXjcVYZLLCEwdV9iY5/Opqk9sCluasb3t/
c2gcsLWWFnNz2desvb/Y4ADJzxY+Um848DSR8IcdoArSsqmcCTiYvYC/UU7XPVNk
Jrx/HwgTVYiLGbtMB3u3fUpHW8SabdHc4xG3sx0LeIvl+JwHgx7yVhNYJEyOQfnE
mfS97x6surXgTVLbWVjXKIJhoWnWbLP4NkBc27H4qo8wM/IWH4SSXYNzFLlCDPnw
vQZSel21qxdqAWaSxkKcymfMS4nVDhVj0jhlcTY3aZcHMjqoUB07p5+laJr9CCGv
0Y0j0qT2aUO22A3kbv6H9c1Yjv8EI7eNz07aoH1oYU6ShsiaLfIqPfGYb7LwOFWi
PSl0dCY7WJg2H6UHsV/y2DwRr/3oH0a9hv/cvcMneMi3tpIkRwYFBPXEsIcoD9xr
RI5dp8BBdO/Nt+puoQq9oyialWnQK5+AY7ErW1yxjgie4PQ+XtN+85UAEQEAAYkC
NgQYAQoAIBYhBHmw0KjU4F9Y73XeXbaq85SrR69uBQJfRVoqAhsMAAoJELaq85Sr
R69uoV0QAIvlxAHYTjvH1lt5KbpVGs5gwIAnCMPxmaOXcaZ8V0Z1GEU+/IztwV+N
MYCBv1tYa7OppNs1pn75DhzoNAi+XQOVvU0OZgVJutthZe0fNDFGG9B4i/cxRscI
Ld8TPQQNiZPBZ4ubcxbZyBinE9HsYUM49otHjsyFZ0GqTpyne+zBf1GAQoekxlKo
tWSkkmW0x4qW6eiAmyo5lPS1bBjvaSc67i+6Bv5QkZa0UIkRqAzKN4zVvc2FyILz
+7wVLCzWcXrJt8dOeS6Y/Fjbhb6m7dtapUSETAKu6wJvSd9ndDUjFHD33NQIZ/nL
WaPbn01+e/PHtUDmyZ2W2KbcdlIT9nb2uHrruqdCN04sXkID8E2m2gYMA+TjhC0Q
JBJ9WPmdBeKH91R6wWDq6+HwOpgc/9na+BHZXMG+qyEcvNHB5RJdiu2r1Haf6gHi
Fd6rJ6VzaVwnmKmUSKA2wHUuUJ6oxVJ1nFb7Aaschq8F79TAfee0iaGe9cP+xUHL
zBDKwZ9PtyGfdBp1qNOb94sfEasWPftT26rLgKPFcroCSR2QCK5qHsMNCZL+u71w
NnTtq9YZDRaQ2JAc6VDZCcgu+dLiFxVIi1PFcJQ31rVe16+AQ9zsafiNsxkPdZcY
U9XKndQE028dGZv1E3S5BwpnikrUkWdxcYrVZ4fiNIy5I3My2yCe
=J9BD
-----END PGP PUBLIC KEY BLOCK-----
7.15.1 - ACL
Redis access control list
The Redis ACL, short for Access Control List, is the feature that allows certain connections to be limited in terms of the commands that can be executed and the keys that can be accessed. The way it works is that, after connecting, a client is required to provide a username and a valid password to authenticate. If authentication succeeded, the connection is associated with a given user and the limits the user has. Redis can be configured so that new connections are already authenticated with a "default" user (this is the default configuration). Configuring the default user has, as a side effect, the ability to provide only a specific subset of functionalities to connections that are not explicitly authenticated.
In the default configuration, Redis 6 (the first version to have ACLs) works exactly like older versions of Redis. Every new connection is capable of calling every possible command and accessing every key, so the ACL feature is backward compatible with old clients and applications. Also the old way to configure a password, using the requirepass configuration directive, still works as expected. However, it now sets a password for the default user.
The Redis AUTH command was extended in Redis 6, so now it is possible to
use it in the two-arguments form:
AUTH <username> <password>
Here's an example of the old form:
AUTH <password>
What happens is that the username used to authenticate is "default", so just specifying the password implies that we want to authenticate against the default user. This provides backward compatibility.
When ACLs are useful
Before using ACLs, you may want to ask yourself what's the goal you want to accomplish by implementing this layer of protection. Normally there are two main goals that are well served by ACLs:
- You want to improve security by restricting the access to commands and keys, so that untrusted clients have no access and trusted clients have just the minimum access level to the database in order to perform the work needed. For instance, certain clients may just be able to execute read only commands.
- You want to improve operational safety, so that processes or humans accessing Redis are not allowed to damage the data or the configuration due to software errors or manual mistakes. For instance, there is no reason for a worker that fetches delayed jobs from Redis to be able to call the
FLUSHALLcommand.
Another typical usage of ACLs is related to managed Redis instances. Redis is often provided as a managed service both by internal company teams that handle the Redis infrastructure for the other internal customers they have, or is provided in a software-as-a-service setup by cloud providers. In both setups, we want to be sure that configuration commands are excluded for the customers.
Configure ACLs with the ACL command
ACLs are defined using a DSL (domain specific language) that describes what a given user is allowed to do. Such rules are always implemented from the first to the last, left-to-right, because sometimes the order of the rules is important to understand what the user is really able to do.
By default there is a single user defined, called default. We
can use the ACL LIST command in order to check the currently active ACLs
and verify what the configuration of a freshly started, defaults-configured
Redis instance is:
> ACL LIST
1) "user default on nopass ~* &* +@all"
The command above reports the list of users in the same format that is used in the Redis configuration files, by translating the current ACLs set for the users back into their description.
The first two words in each line are "user" followed by the username. The
next words are ACL rules that describe different things. We'll show how the rules work in detail, but for now it is enough to say that the default
user is configured to be active (on), to require no password (nopass), to
access every possible key (~*) and Pub/Sub channel (&*), and be able to
call every possible command (+@all).
Also, in the special case of the default user, having the nopass rule means
that new connections are automatically authenticated with the default user
without any explicit AUTH call needed.
ACL rules
The following is the list of valid ACL rules. Certain rules are just single words that are used in order to activate or remove a flag, or to perform a given change to the user ACL. Other rules are char prefixes that are concatenated with command or category names, key patterns, and so forth.
Enable and disallow users:
on: Enable the user: it is possible to authenticate as this user.off: Disallow the user: it's no longer possible to authenticate with this user; however, previously authenticated connections will still work. Note that if the default user is flagged as off, new connections will start as not authenticated and will require the user to sendAUTHorHELLOwith the AUTH option in order to authenticate in some way, regardless of the default user configuration.
Allow and disallow commands:
+<command>: Add the command to the list of commands the user can call. Can be used with|for allowing subcommands (e.g "+config|get").-<command>: Remove the command to the list of commands the user can call. Starting Redis 7.0, it can be used with|for blocking subcommands (e.g "-config|set").+@<category>: Add all the commands in such category to be called by the user, with valid categories being like @admin, @set, @sortedset, ... and so forth, see the full list by calling theACL CATcommand. The special category @all means all the commands, both the ones currently present in the server, and the ones that will be loaded in the future via modules.-@<category>: Like+@<category>but removes the commands from the list of commands the client can call.+<command>|first-arg: Allow a specific first argument of an otherwise disabled command. It is only supported on commands with no sub-commands, and is not allowed as negative form like -SELECT|1, only additive starting with "+". This feature is deprecated and may be removed in the future.allcommands: Alias for +@all. Note that it implies the ability to execute all the future commands loaded via the modules system.nocommands: Alias for -@all.
Allow and disallow certain keys and key permissions:
~<pattern>: Add a pattern of keys that can be mentioned as part of commands. For instance~*allows all the keys. The pattern is a glob-style pattern like the one ofKEYS. It is possible to specify multiple patterns.%R~<pattern>: (Available in Redis 7.0 and later) Add the specified read key pattern. This behaves similar to the regular key pattern but only grants permission to read from keys that match the given pattern. See key permissions for more information.%W~<pattern>: (Available in Redis 7.0 and later) Add the specified write key pattern. This behaves similar to the regular key pattern but only grants permission to write to keys that match the given pattern. See key permissions for more information.%RW~<pattern>: (Available in Redis 7.0 and later) Alias for~<pattern>.allkeys: Alias for~*.resetkeys: Flush the list of allowed keys patterns. For instance the ACL~foo:* ~bar:* resetkeys ~objects:*, will only allow the client to access keys that match the patternobjects:*.
Allow and disallow Pub/Sub channels:
&<pattern>: (Available in Redis 6.2 and later) Add a glob style pattern of Pub/Sub channels that can be accessed by the user. It is possible to specify multiple channel patterns. Note that pattern matching is done only for channels mentioned byPUBLISHandSUBSCRIBE, whereasPSUBSCRIBErequires a literal match between its channel patterns and those allowed for user.allchannels: Alias for&*that allows the user to access all Pub/Sub channels.resetchannels: Flush the list of allowed channel patterns and disconnect the user's Pub/Sub clients if these are no longer able to access their respective channels and/or channel patterns.
Configure valid passwords for the user:
><password>: Add this password to the list of valid passwords for the user. For example>mypasswill add "mypass" to the list of valid passwords. This directive clears the nopass flag (see later). Every user can have any number of passwords.<<password>: Remove this password from the list of valid passwords. Emits an error in case the password you are trying to remove is actually not set.#<hash>: Add this SHA-256 hash value to the list of valid passwords for the user. This hash value will be compared to the hash of a password entered for an ACL user. This allows users to store hashes in theacl.conffile rather than storing cleartext passwords. Only SHA-256 hash values are accepted as the password hash must be 64 characters and only contain lowercase hexadecimal characters.!<hash>: Remove this hash value from the list of valid passwords. This is useful when you do not know the password specified by the hash value but would like to remove the password from the user.nopass: All the set passwords of the user are removed, and the user is flagged as requiring no password: it means that every password will work against this user. If this directive is used for the default user, every new connection will be immediately authenticated with the default user without any explicit AUTH command required. Note that the resetpass directive will clear this condition.resetpass: Flushes the list of allowed passwords and removes the nopass status. After resetpass, the user has no associated passwords and there is no way to authenticate without adding some password (or setting it as nopass later).
Note: if a user is not flagged with nopass and has no list of valid passwords, that user is effectively impossible to use because there will be no way to log in as that user.
Configure selectors for the user:
(<rule list>): (Available in Redis 7.0 and later) Create a new selector to match rules against. Selectors are evaluated after the user permissions, and are evaluated according to the order they are defined. If a command matches either the user permissions or any selector, it is allowed. See selectors for more information.clearselectors: (Available in Redis 7.0 and later) Delete all of the selectors attached to the user.
Reset the user:
resetPerforms the following actions: resetpass, resetkeys, resetchannels, off, -@all. The user returns to the same state it had immediately after its creation.
Create and edit user ACLs with the ACL SETUSER command
Users can be created and modified in two main ways:
- Using the ACL command and its
ACL SETUSERsubcommand. - Modifying the server configuration, where users can be defined, and restarting the server. With an external ACL file, just call
ACL LOAD.
In this section we'll learn how to define users using the ACL command.
With such knowledge, it will be trivial to do the same things via the
configuration files. Defining users in the configuration deserves its own
section and will be discussed later separately.
To start, try the simplest ACL SETUSER command call:
> ACL SETUSER alice
OK
The ACL SETUSER command takes the username and a list of ACL rules to apply
to the user. However the above example did not specify any rule at all.
This will just create the user if it did not exist, using the defaults for new
users. If the user already exists, the command above will do nothing at all.
Check the default user status:
> ACL LIST
1) "user alice off &* -@all"
2) "user default on nopass ~* ~& +@all"
The new user "alice" is:
- In the off status, so
AUTHwill not work for the user "alice". - The user also has no passwords set.
- Cannot access any command. Note that the user is created by default without the ability to access any command, so the
-@allin the output above could be omitted; however,ACL LISTattempts to be explicit rather than implicit. - There are no key patterns that the user can access.
- The user can access all Pub/Sub channels.
New users are created with restrictive permissions by default. Starting with Redis 6.2, ACL provides Pub/Sub channels access management as well. To ensure backward compatibility with version 6.0 when upgrading to Redis 6.2, new users are granted the 'allchannels' permission by default. The default can be set to resetchannels via the acl-pubsub-default configuration directive.
From 7.0, The acl-pubsub-default value is set to resetchannels to restrict the channels access by default to provide better security.
The default can be set to allchannels via the acl-pubsub-default configuration directive to be compatible with previous versions.
Such user is completely useless. Let's try to define the user so that
it is active, has a password, and can access with only the GET command
to key names starting with the string "cached:".
> ACL SETUSER alice on >p1pp0 ~cached:* +get
OK
Now the user can do something, but will refuse to do other things:
> AUTH alice p1pp0
OK
> GET foo
(error) NOPERM this user has no permissions to access one of the keys used as arguments
> GET cached:1234
(nil)
> SET cached:1234 zap
(error) NOPERM this user has no permissions to run the 'set' command
Things are working as expected. In order to inspect the configuration of the
user alice (remember that user names are case sensitive), it is possible to
use an alternative to ACL LIST which is designed to be more suitable for
computers to read, while ACL LIST is more human readable.
> ACL GETUSER alice
1) "flags"
2) 1) "on"
2) "allchannels"
3) "passwords"
4) 1) "2d9c75..."
5) "commands"
6) "-@all +get"
7) "keys"
8) "~cached:*"
9) "channels"
10) "&*"
11) "selectors"
12) 1) 1) "commands"
2) "-@all +set"
3) "keys"
4) "~*"
5) "channels"
6) "&*"
The ACL GETUSER returns a field-value array that describes the user in more parsable terms. The output includes the set of flags, a list of key patterns, passwords, and so forth. The output is probably more readable if we use RESP3, so that it is returned as a map reply:
> ACL GETUSER alice
1# "flags" => 1~ "on"
2~ "allchannels"
2# "passwords" => 1) "2d9c75273d72b32df726fb545c8a4edc719f0a95a6fd993950b10c474ad9c927"
3# "commands" => "-@all +get"
4# "keys" => "~cached:*"
5# "channels" => "&*"
6# "selectors" => 1) 1# "commands" => "-@all +set"
2# "keys" => "~*"
3# "channels" => "&*"
Note: from now on, we'll continue using the Redis default protocol, version 2
Using another ACL SETUSER command (from a different user, because alice cannot run the ACL command), we can add multiple patterns to the user:
> ACL SETUSER alice ~objects:* ~items:* ~public:*
OK
> ACL LIST
1) "user alice on >2d9c75... ~cached:* ~objects:* ~items:* ~public:* &* -@all +get"
2) "user default on nopass ~* &* +@all"
The user representation in memory is now as we expect it to be.
Multiple calls to ACL SETUSER
It is very important to understand what happens when ACL SETUSER is called
multiple times. What is critical to know is that every ACL SETUSER call will
NOT reset the user, but will just apply the ACL rules to the existing user.
The user is reset only if it was not known before. In that case, a brand new
user is created with zeroed-ACLs. The user cannot do anything, is
disallowed, has no passwords, and so forth. This is the best default for safety.
However later calls will just modify the user incrementally. For instance, the following sequence:
> ACL SETUSER myuser +set
OK
> ACL SETUSER myuser +get
OK
Will result in myuser being able to call both GET and SET:
> ACL LIST
1) "user default on nopass ~* &* +@all"
2) "user myuser off &* -@all +set +get"
Command categories
Setting user ACLs by specifying all the commands one after the other is really annoying, so instead we do things like this:
> ACL SETUSER antirez on +@all -@dangerous >42a979... ~*
By saying +@all and -@dangerous, we included all the commands and later removed
all the commands that are tagged as dangerous inside the Redis command table.
Note that command categories never include modules commands with
the exception of +@all. If you say +@all, all the commands can be executed by
the user, even future commands loaded via the modules system. However if you
use the ACL rule +@read or any other, the modules commands are always
excluded. This is very important because you should just trust the Redis
internal command table. Modules may expose dangerous things and in
the case of an ACL that is just additive, that is, in the form of +@all -...
You should be absolutely sure that you'll never include what you did not mean
to.
The following is a list of command categories and their meanings:
- admin - Administrative commands. Normal applications will never need to use
these. Includes
REPLICAOF,CONFIG,DEBUG,SAVE,MONITOR,ACL,SHUTDOWN, etc. - bitmap - Data type: bitmaps related.
- blocking - Potentially blocking the connection until released by another command.
- connection - Commands affecting the connection or other connections.
This includes
AUTH,SELECT,COMMAND,CLIENT,ECHO,PING, etc. - dangerous - Potentially dangerous commands (each should be considered with care for
various reasons). This includes
FLUSHALL,MIGRATE,RESTORE,SORT,KEYS,CLIENT,DEBUG,INFO,CONFIG,SAVE,REPLICAOF, etc. - geo - Data type: geospatial indexes related.
- hash - Data type: hashes related.
- hyperloglog - Data type: hyperloglog related.
- fast - Fast O(1) commands. May loop on the number of arguments, but not the number of elements in the key.
- keyspace - Writing or reading from keys, databases, or their metadata
in a type agnostic way. Includes
DEL,RESTORE,DUMP,RENAME,EXISTS,DBSIZE,KEYS,EXPIRE,TTL,FLUSHALL, etc. Commands that may modify the keyspace, key, or metadata will also have thewritecategory. Commands that only read the keyspace, key, or metadata will have thereadcategory. - list - Data type: lists related.
- pubsub - PubSub-related commands.
- read - Reading from keys (values or metadata). Note that commands that don't
interact with keys, will not have either
readorwrite. - scripting - Scripting related.
- set - Data type: sets related.
- sortedset - Data type: sorted sets related.
- slow - All commands that are not
fast. - stream - Data type: streams related.
- string - Data type: strings related.
- transaction -
WATCH/MULTI/EXECrelated commands. - write - Writing to keys (values or metadata).
Redis can also show you a list of all categories and the exact commands each category includes using the Redis ACL command's CAT subcommand. It can be used in two forms:
ACL CAT -- Will just list all the categories available
ACL CAT <category-name> -- Will list all the commands inside the category
Examples:
> ACL CAT
1) "keyspace"
2) "read"
3) "write"
4) "set"
5) "sortedset"
6) "list"
7) "hash"
8) "string"
9) "bitmap"
10) "hyperloglog"
11) "geo"
12) "stream"
13) "pubsub"
14) "admin"
15) "fast"
16) "slow"
17) "blocking"
18) "dangerous"
19) "connection"
20) "transaction"
21) "scripting"
As you can see, so far there are 21 distinct categories. Now let's check what command is part of the geo category:
> ACL CAT geo
1) "geohash"
2) "georadius_ro"
3) "georadiusbymember"
4) "geopos"
5) "geoadd"
6) "georadiusbymember_ro"
7) "geodist"
8) "georadius"
Note that commands may be part of multiple categories. For example, an
ACL rule like +@geo -@read will result in certain geo commands to be
excluded because they are read-only commands.
Allow/block subcommands
Starting from Redis 7.0, subcommands can be allowed/blocked just like other
commands (by using the separator | between the command and subcommand, for
example: +config|get or -config|set)
That is true for all commands except DEBUG. In order to allow/block specific DEBUG subcommands, see the next section.
Allow the first-arg of a blocked command
Note: This feature is deprecated since Redis 7.0 and may be removed in the future.
Sometimes the ability to exclude or include a command or a subcommand as a whole is not enough.
Many deployments may not be happy providing the ability to execute a SELECT for any DB, but may
still want to be able to run SELECT 0.
In such case we could alter the ACL of a user in the following way:
ACL SETUSER myuser -select +select|0
First, remove the SELECT command and then add the allowed
first-arg. Note that it is not possible to do the reverse since first-args
can be only added, not excluded. It is safer to specify all the first-args
that are valid for some user since it is possible that
new first-args may be added in the future.
Another example:
ACL SETUSER myuser -debug +debug|digest
Note that first-arg matching may add some performance penalty; however, it is hard to measure even with synthetic benchmarks. The additional CPU cost is only paid when such commands are called, and not when other commands are called.
It is possible to use this mechanism in order to allow subcommands in Redis versions prior to 7.0 (see above section).
+@all VS -@all
In the previous section, it was observed how it is possible to define command ACLs based on adding/removing single commands.
Selectors
Starting with Redis 7.0, Redis supports adding multiple sets of rules that are evaluated independently of each other. These secondary sets of permissions are called selectors and added by wrapping a set of rules within parentheses. In order to execute a command, either the root permissions (rules defined outside of parenthesis) or any of the selectors (rules defined inside parenthesis) must match the given command. Internally, the root permissions are checked first followed by selectors in the order they were added.
For example, consider a user with the ACL rules +GET ~key1 (+SET ~key2).
This user is able to execute GET key1 and SET key2 hello, but not GET key2 or SET key1 world.
Unlike the user's root permissions, selectors cannot be modified after they are added.
Instead, selectors can be removed with the clearselectors keyword, which removes all of the added selectors.
Note that clearselectors does not remove the root permissions.
Key permissions
Starting with Redis 7.0, key patterns can also be used to define how a command is able to touch a key.
This is achieved through rules that define key permissions.
The key permission rules take the form of %(<permission>)~<pattern>.
Permissions are defined as individual characters that map to the following key permissions:
- W (Write): The data stored within the key may be updated or deleted.
- R (Read): User supplied data from the key is processed, copied or returned. Note that this does not include metadata such as size information (example
STRLEN), type information (exampleTYPE) or information about whether a value exists within a collection (exampleSISMEMBER).
Permissions can be composed together by specifying multiple characters.
Specifying the permission as 'RW' is considered full access and is analogous to just passing in ~<pattern>.
For a concrete example, consider a user with ACL rules +@all ~app1:* (+@readonly ~app2:*).
This user has full access on app1:* and readonly access on app2:*.
However, some commands support reading data from one key, doing some transformation, and storing it into another key.
One such command is the COPY command, which copies the data from the source key into the destination key.
The example set of ACL rules is unable to handle a request copying data from app2:user into app1:user, since neither the root permission or the selector fully matches the command.
However, using key selectors you can define a set of ACL rules that can handle this request +@all ~app1:* %R~app2:*.
The first pattern is able to match app1:user and the second pattern is able to match app2:user.
Which type of permission is required for a command is documented through key specifications.
The type of permission is based off the keys logical operation flags.
The insert, update, and delete flags map to the write key permission.
The access flag maps to the read key permission.
If the key has no logical operation flags, such as EXISTS, the user still needs either key read or key write permissions to execute the command.
Note: Side channels to accessing user data are ignored when it comes to evaluating whether read permissions are required to execute a command. This means that some write commands that return metadata about the modified key only require write permission on the key to execute: For example, consider the following two commands:
LPUSH key1 data: modifies "key1" but only returns metadata about it, the size of the list after the push, so the command only requires write permission on "key1" to execute.LPOP key2: modifies "key2" but also returns data from it, the left most item in the list, so the command requires both read and write permission on "key2" to execute.
If an application needs to make sure no data is accessed from a key, including side channels, it's recommended to not provide any access to the key.
How passwords are stored internally
Redis internally stores passwords hashed with SHA256. If you set a password
and check the output of ACL LIST or ACL GETUSER, you'll see a long hex
string that looks pseudo random. Here is an example, because in the previous
examples, for the sake of brevity, the long hex string was trimmed:
> ACL GETUSER default
1) "flags"
2) 1) "on"
2) "allkeys"
3) "allcommands"
4) "allchannels"
3) "passwords"
4) 1) "2d9c75273d72b32df726fb545c8a4edc719f0a95a6fd993950b10c474ad9c927"
5) "commands"
6) "+@all"
7) "keys"
8) "~*"
9) "channels"
10) "&*"
11) "selectors"
12) (empty array)
Also, starting with Redis 6, the old command CONFIG GET requirepass will
no longer return the clear text password, but instead the hashed password.
Using SHA256 provides the ability to avoid storing the password in clear text
while still allowing for a very fast AUTH command, which is a very important
feature of Redis and is coherent with what clients expect from Redis.
However ACL passwords are not really passwords. They are shared secrets between the server and the client, because the password is not an authentication token used by a human being. For instance:
- There are no length limits, the password will just be memorized in some client software. There is no human that needs to recall a password in this context.
- The ACL password does not protect any other thing. For example, it will never be the password for some email account.
- Often when you are able to access the hashed password itself, by having full access to the Redis commands of a given server, or corrupting the system itself, you already have access to what the password is protecting: the Redis instance stability and the data it contains.
For this reason, slowing down the password authentication, in order to use an
algorithm that uses time and space to make password cracking hard,
is a very poor choice. What we suggest instead is to generate strong
passwords, so that nobody will be able to crack it using a
dictionary or a brute force attack even if they have the hash. To do so, there is a special ACL
command ACL GENPASS that generates passwords using the system cryptographic pseudorandom
generator:
> ACL GENPASS
"dd721260bfe1b3d9601e7fbab36de6d04e2e67b0ef1c53de59d45950db0dd3cc"
The command outputs a 32-byte (256-bit) pseudorandom string converted to a 64-byte alphanumerical string. This is long enough to avoid attacks and short enough to be easy to manage, cut & paste, store, and so forth. This is what you should use in order to generate Redis passwords.
Use an external ACL file
There are two ways to store users inside the Redis configuration:
- Users can be specified directly inside the
redis.conffile. - It is possible to specify an external ACL file.
The two methods are mutually incompatible, so Redis will ask you to use one
or the other. Specifying users inside redis.conf is
good for simple use cases. When there are multiple users to define, in a
complex environment, we recommend you use the ACL file instead.
The format used inside redis.conf and in the external ACL file is exactly
the same, so it is trivial to switch from one to the other, and is
the following:
user <username> ... acl rules ...
For instance:
user worker +@list +@connection ~jobs:* on >ffa9203c493aa99
When you want to use an external ACL file, you are required to specify
the configuration directive called aclfile, like this:
aclfile /etc/redis/users.acl
When you are just specifying a few users directly inside the redis.conf
file, you can use CONFIG REWRITE in order to store the new user configuration
inside the file by rewriting it.
The external ACL file however is more powerful. You can do the following:
- Use
ACL LOADif you modified the ACL file manually and you want Redis to reload the new configuration. Note that this command is able to load the file only if all the users are correctly specified. Otherwise, an error is reported to the user, and the old configuration will remain valid. - Use
ACL SAVEto save the current ACL configuration to the ACL file.
Note that CONFIG REWRITE does not also trigger ACL SAVE. When you use
an ACL file, the configuration and the ACLs are handled separately.
ACL rules for Sentinel and Replicas
In case you don't want to provide Redis replicas and Redis Sentinel instances full access to your Redis instances, the following is the set of commands that must be allowed in order for everything to work correctly.
For Sentinel, allow the user to access the following commands both in the master and replica instances:
- AUTH, CLIENT, SUBSCRIBE, SCRIPT, PUBLISH, PING, INFO, MULTI, SLAVEOF, CONFIG, CLIENT, EXEC.
Sentinel does not need to access any key in the database but does use Pub/Sub, so the ACL rule would be the following (note: AUTH is not needed since it is always allowed):
ACL SETUSER sentinel-user on >somepassword allchannels +multi +slaveof +ping +exec +subscribe +config|rewrite +role +publish +info +client|setname +client|kill +script|kill
Redis replicas require the following commands to be allowed on the master instance:
- PSYNC, REPLCONF, PING
No keys need to be accessed, so this translates to the following rules:
ACL setuser replica-user on >somepassword +psync +replconf +ping
Note that you don't need to configure the replicas to allow the master to be able to execute any set of commands. The master is always authenticated as the root user from the point of view of replicas.
7.15.2 - TLS
Redis TLS support
SSL/TLS is supported by Redis starting with version 6 as an optional feature that needs to be enabled at compile time.
Getting Started
Building
To build with TLS support you'll need OpenSSL development libraries (e.g. libssl-dev on Debian/Ubuntu).
Run make BUILD_TLS=yes.
Tests
To run Redis test suite with TLS, you'll need TLS support for TCL (i.e.
tcl-tls package on Debian/Ubuntu).
Run
./utils/gen-test-certs.shto generate a root CA and a server certificate.Run
./runtest --tlsor./runtest-cluster --tlsto run Redis and Redis Cluster tests in TLS mode.
Running manually
To manually run a Redis server with TLS mode (assuming gen-test-certs.sh was
invoked so sample certificates/keys are available):
./src/redis-server --tls-port 6379 --port 0 \
--tls-cert-file ./tests/tls/redis.crt \
--tls-key-file ./tests/tls/redis.key \
--tls-ca-cert-file ./tests/tls/ca.crt
To connect to this Redis server with redis-cli:
./src/redis-cli --tls \
--cert ./tests/tls/redis.crt \
--key ./tests/tls/redis.key \
--cacert ./tests/tls/ca.crt
Certificate configuration
In order to support TLS, Redis must be configured with a X.509 certificate and a private key. In addition, it is necessary to specify a CA certificate bundle file or path to be used as a trusted root when validating certificates. To support DH based ciphers, a DH params file can also be configured. For example:
tls-cert-file /path/to/redis.crt
tls-key-file /path/to/redis.key
tls-ca-cert-file /path/to/ca.crt
tls-dh-params-file /path/to/redis.dh
TLS listening port
The tls-port configuration directive enables accepting SSL/TLS connections on
the specified port. This is in addition to listening on port for TCP
connections, so it is possible to access Redis on different ports using TLS and
non-TLS connections simultaneously.
You may specify port 0 to disable the non-TLS port completely. To enable only
TLS on the default Redis port, use:
port 0
tls-port 6379
Client certificate authentication
By default, Redis uses mutual TLS and requires clients to authenticate with a
valid certificate (authenticated against trusted root CAs specified by
ca-cert-file or ca-cert-dir).
You may use tls-auth-clients no to disable client authentication.
Replication
A Redis master server handles connecting clients and replica servers in the same
way, so the above tls-port and tls-auth-clients directives apply to
replication links as well.
On the replica server side, it is necessary to specify tls-replication yes to
use TLS for outgoing connections to the master.
Cluster
When Redis Cluster is used, use tls-cluster yes in order to enable TLS for the
cluster bus and cross-node connections.
Sentinel
Sentinel inherits its networking configuration from the common Redis configuration, so all of the above applies to Sentinel as well.
When connecting to master servers, Sentinel will use the tls-replication
directive to determine if a TLS or non-TLS connection is required.
In addition, the very same tls-replication directive will determine whether Sentinel's
port, that accepts connections from other Sentinels, will support TLS as well. That is,
Sentinel will be configured with tls-port if and only if tls-replication is enabled.
Additional configuration
Additional TLS configuration is available to control the choice of TLS protocol
versions, ciphers and cipher suites, etc. Please consult the self documented
redis.conf for more information.
Performance considerations
TLS adds a layer to the communication stack with overheads due to writing/reading to/from an SSL connection, encryption/decryption and integrity checks. Consequently, using TLS results in a decrease of the achievable throughput per Redis instance (for more information refer to this discussion).
Limitations
I/O threading is currently not supported with TLS.
7.16 - Transactions
How transactions work in Redis
Redis Transactions allow the execution of a group of commands
in a single step, they are centered around the commands
MULTI, EXEC, DISCARD and WATCH.
Redis Transactions make two important guarantees:
All the commands in a transaction are serialized and executed sequentially. A request sent by another client will never be served in the middle of the execution of a Redis Transaction. This guarantees that the commands are executed as a single isolated operation.
The
EXECcommand triggers the execution of all the commands in the transaction, so if a client loses the connection to the server in the context of a transaction before calling theEXECcommand none of the operations are performed, instead if theEXECcommand is called, all the operations are performed. When using the append-only file Redis makes sure to use a single write(2) syscall to write the transaction on disk. However if the Redis server crashes or is killed by the system administrator in some hard way it is possible that only a partial number of operations are registered. Redis will detect this condition at restart, and will exit with an error. Using theredis-check-aoftool it is possible to fix the append only file that will remove the partial transaction so that the server can start again.
Starting with version 2.2, Redis allows for an extra guarantee to the above two, in the form of optimistic locking in a way very similar to a check-and-set (CAS) operation. This is documented later on this page.
Usage
A Redis Transaction is entered using the MULTI command. The command
always replies with OK. At this point the user can issue multiple
commands. Instead of executing these commands, Redis will queue
them. All the commands are executed once EXEC is called.
Calling DISCARD instead will flush the transaction queue and will exit
the transaction.
The following example increments keys foo and bar atomically.
> MULTI
OK
> INCR foo
QUEUED
> INCR bar
QUEUED
> EXEC
1) (integer) 1
2) (integer) 1
As is clear from the session above, EXEC returns an
array of replies, where every element is the reply of a single command
in the transaction, in the same order the commands were issued.
When a Redis connection is in the context of a MULTI request,
all commands will reply with the string QUEUED (sent as a Status Reply
from the point of view of the Redis protocol). A queued command is
simply scheduled for execution when EXEC is called.
Errors inside a transaction
During a transaction it is possible to encounter two kind of command errors:
- A command may fail to be queued, so there may be an error before
EXECis called. For instance the command may be syntactically wrong (wrong number of arguments, wrong command name, ...), or there may be some critical condition like an out of memory condition (if the server is configured to have a memory limit using themaxmemorydirective). - A command may fail after
EXECis called, for instance since we performed an operation against a key with the wrong value (like calling a list operation against a string value).
Starting with Redis 2.6.5, the server will detect an error during the accumulation of commands.
It will then refuse to execute the transaction returning an error during EXEC, discarding the transaction.
Note for Redis < 2.6.5: Prior to Redis 2.6.5 clients needed to detect errors occurring prior to
EXECby checking the return value of the queued command: if the command replies with QUEUED it was queued correctly, otherwise Redis returns an error. If there is an error while queueing a command, most clients will abort and discard the transaction. Otherwise, if the client elected to proceed with the transaction theEXECcommand would execute all commands queued successfully regardless of previous errors.
Errors happening after EXEC instead are not handled in a special way:
all the other commands will be executed even if some command fails during the transaction.
This is more clear on the protocol level. In the following example one command will fail when executed even if the syntax is right:
Trying 127.0.0.1...
Connected to localhost.
Escape character is '^]'.
MULTI
+OK
SET a abc
+QUEUED
LPOP a
+QUEUED
EXEC
*2
+OK
-ERR Operation against a key holding the wrong kind of value
EXEC returned two-element bulk string reply where one is an OK code and
the other an -ERR reply. It's up to the client library to find a
sensible way to provide the error to the user.
It's important to note that even when a command fails, all the other commands in the queue are processed – Redis will not stop the processing of commands.
Another example, again using the wire protocol with telnet, shows how
syntax errors are reported ASAP instead:
MULTI
+OK
INCR a b c
-ERR wrong number of arguments for 'incr' command
This time due to the syntax error the bad INCR command is not queued
at all.
What about rollbacks?
Redis does not support rollbacks of transactions since supporting rollbacks would have a significant impact on the simplicity and performance of Redis.
Discarding the command queue
DISCARD can be used in order to abort a transaction. In this case, no
commands are executed and the state of the connection is restored to
normal.
> SET foo 1
OK
> MULTI
OK
> INCR foo
QUEUED
> DISCARD
OK
> GET foo
"1"
Optimistic locking using check-and-set
WATCH is used to provide a check-and-set (CAS) behavior to Redis
transactions.
WATCHed keys are monitored in order to detect changes against them. If
at least one watched key is modified before the EXEC command, the
whole transaction aborts, and EXEC returns a Null reply to notify that
the transaction failed.
For example, imagine we have the need to atomically increment the value
of a key by 1 (let's suppose Redis doesn't have INCR).
The first try may be the following:
val = GET mykey
val = val + 1
SET mykey $val
This will work reliably only if we have a single client performing the
operation in a given time. If multiple clients try to increment the key
at about the same time there will be a race condition. For instance,
client A and B will read the old value, for instance, 10. The value will
be incremented to 11 by both the clients, and finally SET as the value
of the key. So the final value will be 11 instead of 12.
Thanks to WATCH we are able to model the problem very well:
WATCH mykey
val = GET mykey
val = val + 1
MULTI
SET mykey $val
EXEC
Using the above code, if there are race conditions and another client
modifies the result of val in the time between our call to WATCH and
our call to EXEC, the transaction will fail.
We just have to repeat the operation hoping this time we'll not get a new race. This form of locking is called optimistic locking. In many use cases, multiple clients will be accessing different keys, so collisions are unlikely – usually there's no need to repeat the operation.
WATCH explained
So what is WATCH really about? It is a command that will
make the EXEC conditional: we are asking Redis to perform
the transaction only if none of the WATCHed keys were modified. This includes
modifications made by the client, like write commands, and by Redis itself,
like expiration or eviction. If keys were modified between when they were
WATCHed and when the EXEC was received, the entire transaction will be aborted
instead.
NOTE
- In Redis versions before 6.0.9, an expired key would not cause a transaction to be aborted. More on this
- Commands within a transaction wont trigger the
WATCHcondition since they are only queued until theEXECis sent.
WATCH can be called multiple times. Simply all the WATCH calls will
have the effects to watch for changes starting from the call, up to
the moment EXEC is called. You can also send any number of keys to a
single WATCH call.
When EXEC is called, all keys are UNWATCHed, regardless of whether
the transaction was aborted or not. Also when a client connection is
closed, everything gets UNWATCHed.
It is also possible to use the UNWATCH command (without arguments)
in order to flush all the watched keys. Sometimes this is useful as we
optimistically lock a few keys, since possibly we need to perform a
transaction to alter those keys, but after reading the current content
of the keys we don't want to proceed. When this happens we just call
UNWATCH so that the connection can already be used freely for new
transactions.
Using WATCH to implement ZPOP
A good example to illustrate how WATCH can be used to create new
atomic operations otherwise not supported by Redis is to implement ZPOP
(ZPOPMIN, ZPOPMAX and their blocking variants have only been added
in version 5.0), that is a command that pops the element with the lower
score from a sorted set in an atomic way. This is the simplest
implementation:
WATCH zset
element = ZRANGE zset 0 0
MULTI
ZREM zset element
EXEC
If EXEC fails (i.e. returns a Null reply) we just repeat the operation.
Redis scripting and transactions
Something else to consider for transaction like operations in redis are redis scripts which are transactional. Everything you can do with a Redis Transaction, you can also do with a script, and usually the script will be both simpler and faster.
7.17 - Troubleshooting Redis
Problems with Redis? Start here.
This page tries to help you with what to do if you have issues with Redis. Part of the Redis project is helping people that are experiencing problems because we don't like to leave people alone with their issues.
- If you have latency problems with Redis, that in some way appears to be idle for some time, read our Redis latency troubleshooting guide.
- Redis stable releases are usually very reliable, however in the rare event you are experiencing crashes the developers can help a lot more if you provide debugging information. Please read our Debugging Redis guide.
- We have a long history of users experiencing crashes with Redis that actually turned out to be servers with broken RAM. Please test your RAM using redis-server --test-memory in case Redis is not stable in your system. Redis built-in memory test is fast and reasonably reliable, but if you can you should reboot your server and use memtest86.
For every other problem please drop a message to the Redis Google Group. We will be glad to help.
You can also find assistance on the Redis Discord server.
List of known critical bugs in Redis 3.0.x, 2.8.x and 2.6.x
To find a list of critical bugs please refer to the changelogs:
Check the upgrade urgency level in each patch release to more easily spot releases that included important fixes.
List of known Linux related bugs affecting Redis.
- Ubuntu 10.04 and 10.10 have serious bugs (especially 10.10) that cause slow downs if not just instance hangs. Please move away from the default kernels shipped with this distributions. Link to 10.04 bug. Link to 10.10 bug. Both bugs were reported many times in the context of EC2 instances, but other users confirmed that also native servers are affected (at least by one of the two).
- Certain versions of the Xen hypervisor are known to have very bad fork() performances. See the latency page for more information.
8 - Redis reference
Specifications, patterns, internals, and optimization
8.1 - ARM support
Exploring Redis on the ARM CPU Architecture
Redis versions 4.0 and above support the ARM processor in general, and the Raspberry Pi specifically, as a main platform. Every new release of Redis is tested on the Pi environment, and we update this documentation page with information about supported devices and other useful information. While Redis does run on Android, in the future we look forward to extend our testing efforts to Android to also make it an officially supported platform.
We believe that Redis is ideal for IoT and embedded devices for several reasons:
- Redis has a very small memory footprint and CPU requirements. It can run in small devices like the Raspberry Pi Zero without impacting the overall performance, using a small amount of memory while delivering good performance for many use cases.
- The data structures of Redis are often an ideal way to model IoT/embedded use cases. Some examples include accumulating time series data, receiving or queuing commands to execute or respond to send back to the remote servers, and so forth.
- Modeling data inside Redis can be very useful in order to make in-device decisions for appliances that must respond very quickly or when the remote servers are offline.
- Redis can be used as an communication system between the processes running in the device.
- The append-only file storage of Redis is well suited for SSD cards.
- The stream data structure included in Redis versions 5.0 and higher was specifically designed for time series applications and has a very low memory overhead.
Redis /proc/cpu/alignment requirements
Linux on ARM allows to trap unaligned accesses and fix them inside the kernel
in order to continue the execution of the offending program instead of
generating a SIGBUS. Redis 4.0 and greater are fixed in order to avoid any kind
of unaligned access, so there is no need to have a specific value for this
kernel configuration. Even when kernel alignment fixing set as disabled Redis should
run as expected.
Building Redis in the Pi
- Download Redis version 4.0 or higher.
- Use
makeas usual to create the executable.
There is nothing special in the process. The only difference is that by
default, Redis uses the libc allocator instead of defaulting to jemalloc
as it does in other Linux based environments. This is because we believe
that for the small use cases inside embedded devices, memory fragmentation
is unlikely to be a problem. Moreover jemalloc on ARM may not be as tested
as the libc allocator.
Performance
Performance testing of Redis was performed on the Raspberry Pi 3 and Pi 1 model B. The difference between the two Pis in terms of delivered performance is quite big. The benchmarks were performed via the loopback interface, since most use cases will probably use Redis from within the device and not via the network. The following numbers were obtained using Redis 4.0.
Raspberry Pi 3:
- Test 1 : 5 millions writes with 1 million keys (even distribution among keys). No persistence, no pipelining. 28,000 ops/sec.
- Test 2: Like test 1 but with pipelining using groups of 8 operations: 80,000 ops/sec.
- Test 3: Like test 1 but with AOF enabled, fsync 1 sec: 23,000 ops/sec
- Test 4: Like test 3, but with an AOF rewrite in progress: 21,000 ops/sec
Raspberry Pi 1 model B:
- Test 1 : 5 millions writes with 1 million keys (even distribution among keys). No persistence, no pipelining. 2,200 ops/sec.
- Test 2: Like test 1 but with pipelining using groups of 8 operations: 8,500 ops/sec.
- Test 3: Like test 1 but with AOF enabled, fsync 1 sec: 1,820 ops/sec
- Test 4: Like test 3, but with an AOF rewrite in progress: 1,000 ops/sec
The benchmarks above are referring to simple SET/GET operations. The performance is similar for all the Redis fast operations (not running in linear time). However sorted sets may show slightly slower numbers.
8.2 - Redis client handling
How the Redis server manages client connections
This document provides information about how Redis handles clients at the network layer level: connections, timeouts, buffers, and other similar topics are covered here.
The information contained in this document is only applicable to Redis version 2.6 or greater.
Accepting Client Connections
Redis accepts clients connections on the configured TCP port and on the Unix socket if enabled. When a new client connection is accepted the following operations are performed:
- The client socket is put in the non-blocking state since Redis uses multiplexing and non-blocking I/O.
- The
TCP_NODELAYoption is set in order to ensure that there are no delays to the connection. - A readable file event is created so that Redis is able to collect the client queries as soon as new data is available to read on the socket.
After the client is initialized, Redis checks if it is already at the limit
configured for the number of simultaneous clients (configured using the maxclients configuration directive, see the next section of this document for further information).
When Redis can't accept a new client connection because the maximum number of clients has been reached, it tries to send an error to the client in order to make it aware of this condition, closing the connection immediately. The error message will reach the client even if the connection is closed immediately by Redis because the new socket output buffer is usually big enough to contain the error, so the kernel will handle transmission of the error.
What Order are Client Requests Served In?
The order is determined by a combination of the client socket file descriptor number and order in which the kernel reports events, so the order should be considered as unspecified.
However, Redis does the following two things when serving clients:
- It only performs a single
read()system call every time there is something new to read from the client socket. This ensures that if we have multiple clients connected, and a few send queries at a high rate, other clients are not penalized and will not experience latency issues. - However once new data is read from a client, all the queries contained in the current buffers are processed sequentially. This improves locality and does not need iterating a second time to see if there are clients that need some processing time.
Maximum Concurrent Connected Clients
In Redis 2.4 there was a hard-coded limit for the maximum number of clients that could be handled simultaneously.
In Redis 2.6 and newer, this limit is dynamic: by default it is set to 10000 clients, unless
otherwise stated by the maxclients directive in redis.conf.
However, Redis checks with the kernel what the maximum number of file descriptors that we are able to open is (the soft limit is checked). If the limit is less than the maximum number of clients we want to handle, plus 32 (that is the number of file descriptors Redis reserves for internal uses), then the maximum number of clients is updated to match the number of clients it is really able to handle under the current operating system limit.
When maxclients is set to a number greater than Redis can support, a message is logged at startup:
$ ./redis-server --maxclients 100000
[41422] 23 Jan 11:28:33.179 # Unable to set the max number of files limit to 100032 (Invalid argument), setting the max clients configuration to 10112.
When Redis is configured in order to handle a specific number of clients it is a good idea to make sure that the operating system limit for the maximum number of file descriptors per process is also set accordingly.
Under Linux these limits can be set both in the current session and as a system-wide setting with the following commands:
ulimit -Sn 100000 # This will only work if hard limit is big enough.sysctl -w fs.file-max=100000
Output Buffer Limits
Redis needs to handle a variable-length output buffer for every client, since a command can produce a large amount of data that needs to be transferred to the client.
However it is possible that a client sends more commands producing more output to serve at a faster rate than that which Redis can send the existing output to the client. This is especially true with Pub/Sub clients in case a client is not able to process new messages fast enough.
Both conditions will cause the client output buffer to grow and consume more and more memory. For this reason by default Redis sets limits to the output buffer size for different kind of clients. When the limit is reached the client connection is closed and the event logged in the Redis log file.
There are two kind of limits Redis uses:
- The hard limit is a fixed limit that when reached will make Redis close the client connection as soon as possible.
- The soft limit instead is a limit that depends on the time, for instance a soft limit of 32 megabytes per 10 seconds means that if the client has an output buffer bigger than 32 megabytes for, continuously, 10 seconds, the connection gets closed.
Different kind of clients have different default limits:
- Normal clients have a default limit of 0, that means, no limit at all, because most normal clients use blocking implementations sending a single command and waiting for the reply to be completely read before sending the next command, so it is always not desirable to close the connection in case of a normal client.
- Pub/Sub clients have a default hard limit of 32 megabytes and a soft limit of 8 megabytes per 60 seconds.
- Replicas have a default hard limit of 256 megabytes and a soft limit of 64 megabyte per 60 seconds.
It is possible to change the limit at runtime using the CONFIG SET command or in a permanent way using the Redis configuration file redis.conf. See the example redis.conf in the Redis distribution for more information about how to set the limit.
Query Buffer Hard Limit
Every client is also subject to a query buffer limit. This is a non-configurable hard limit that will close the connection when the client query buffer (that is the buffer we use to accumulate commands from the client) reaches 1 GB, and is actually only an extreme limit to avoid a server crash in case of client or server software bugs.
Client Eviction
Redis is built to handle a very large number of client connections. Client connections tend to consume memory, and when there are many of them, the aggregate memory consumption can be extremely high, leading to data eviction or out-of-memory errors. These cases can be mitigated to an extent using output buffer limits, but Redis allows us a more robust configuration to limit the aggregate memory used by all clients' connections.
This mechanism is called client eviction, and it's essentially a safety mechanism that will disconnect clients once the aggregate memory usage of all clients is above a threshold.
The mechanism first attempts to disconnect clients that use the most memory.
It disconnects the minimal number of clients needed to return below the maxmemory-clients threshold.
maxmemory-clients defines the maximum aggregate memory usage of all clients connected to Redis.
The aggregation takes into account all the memory used by the client connections: the query buffer, the output buffer, and other intermediate buffers.
Note that replica and master connections aren't affected by the client eviction mechanism. Therefore, such connections are never evicted.
maxmemory-clients can be set permanently in the configuration file (redis.conf) or via the CONFIG SET command.
This setting can either be 0 (meaning no limit), a size in bytes (possibly with mb/gb suffix),
or a percentage of maxmemory by using the % suffix (e.g. setting it to 10% would mean 10% of the maxmemory configuration).
The default setting is 0, meaning client eviction is turned off by default.
However, for any large production deployment, it is highly recommended to configure some non-zero maxmemory-clients value.
A value 5%, for example, can be a good place to start.
It is possible to flag a specific client connection to be excluded from the client eviction mechanism.
This is useful for control path connections.
If, for example, you have an application that monitors the server via the INFO command and alerts you in case of a problem, you might want to make sure this connection isn't evicted.
You can do so using the following command (from the relevant client's connection):
And you can revert that with:
CLIENT NO-EVICT off
For more information and an example refer to the maxmemory-clients section in the default redis.conf file.
Client eviction is available from Redis 7.0.
Client Timeouts
By default recent versions of Redis don't close the connection with the client if the client is idle for many seconds: the connection will remain open forever.
However if you don't like this behavior, you can configure a timeout, so that if the client is idle for more than the specified number of seconds, the client connection will be closed.
You can configure this limit via redis.conf or simply using CONFIG SET timeout <value>.
Note that the timeout only applies to normal clients and it does not apply to Pub/Sub clients, since a Pub/Sub connection is a push style connection so a client that is idle is the norm.
Even if by default connections are not subject to timeout, there are two conditions when it makes sense to set a timeout:
- Mission critical applications where a bug in the client software may saturate the Redis server with idle connections, causing service disruption.
- As a debugging mechanism in order to be able to connect with the server if a bug in the client software saturates the server with idle connections, making it impossible to interact with the server.
Timeouts are not to be considered very precise: Redis avoids setting timer events or running O(N) algorithms in order to check idle clients, so the check is performed incrementally from time to time. This means that it is possible that while the timeout is set to 10 seconds, the client connection will be closed, for instance, after 12 seconds if many clients are connected at the same time.
The CLIENT Command
The Redis CLIENT command allows you to inspect the state of every connected client, to kill a specific client, and to name connections. It is a very powerful debugging tool if you use Redis at scale.
CLIENT LIST is used in order to obtain a list of connected clients and their state:
redis 127.0.0.1:6379> client list
addr=127.0.0.1:52555 fd=5 name= age=855 idle=0 flags=N db=0 sub=0 psub=0 multi=-1 qbuf=0 qbuf-free=32768 obl=0 oll=0 omem=0 events=r cmd=client
addr=127.0.0.1:52787 fd=6 name= age=6 idle=5 flags=N db=0 sub=0 psub=0 multi=-1 qbuf=0 qbuf-free=0 obl=0 oll=0 omem=0 events=r cmd=ping
In the above example two clients are connected to the Redis server. Let's look at what some of the data returned represents:
- addr: The client address, that is, the client IP and the remote port number it used to connect with the Redis server.
- fd: The client socket file descriptor number.
- name: The client name as set by
CLIENT SETNAME. - age: The number of seconds the connection existed for.
- idle: The number of seconds the connection is idle.
- flags: The kind of client (N means normal client, check the full list of flags).
- omem: The amount of memory used by the client for the output buffer.
- cmd: The last executed command.
See the [CLIENT LIST](https://redis.io/commands/client-list) documentation for the full listing of fields and their purpose.
Once you have the list of clients, you can close a client's connection using the CLIENT KILL command, specifying the client address as its argument.
The commands CLIENT SETNAME and CLIENT GETNAME can be used to set and get the connection name. Starting with Redis 4.0, the client name is shown in the
SLOWLOG output, to help identify clients that create latency issues.
TCP keepalive
From version 3.2 onwards, Redis has TCP keepalive (SO_KEEPALIVE socket option) enabled by default and set to about 300 seconds. This option is useful in order to detect dead peers (clients that cannot be reached even if they look connected). Moreover, if there is network equipment between clients and servers that need to see some traffic in order to take the connection open, the option will prevent unexpected connection closed events.
8.3 - Redis cluster specification
Detailed specification for Redis cluster
Welcome to the Redis Cluster Specification. Here you'll find information about the algorithms and design rationales of Redis Cluster. This document is a work in progress as it is continuously synchronized with the actual implementation of Redis.
Main properties and rationales of the design
Redis Cluster goals
Redis Cluster is a distributed implementation of Redis with the following goals in order of importance in the design:
- High performance and linear scalability up to 1000 nodes. There are no proxies, asynchronous replication is used, and no merge operations are performed on values.
- Acceptable degree of write safety: the system tries (in a best-effort way) to retain all the writes originating from clients connected with the majority of the master nodes. Usually there are small windows where acknowledged writes can be lost. Windows to lose acknowledged writes are larger when clients are in a minority partition.
- Availability: Redis Cluster is able to survive partitions where the majority of the master nodes are reachable and there is at least one reachable replica for every master node that is no longer reachable. Moreover using replicas migration, masters no longer replicated by any replica will receive one from a master which is covered by multiple replicas.
What is described in this document is implemented in Redis 3.0 or greater.
Implemented subset
Redis Cluster implements all the single key commands available in the non-distributed version of Redis. Commands performing complex multi-key operations like set unions and intersections are implemented for cases where all of the keys involved in the operation hash to the same slot.
Redis Cluster implements a concept called hash tags that can be used to force certain keys to be stored in the same hash slot. However, during manual resharding, multi-key operations may become unavailable for some time while single-key operations are always available.
Redis Cluster does not support multiple databases like the standalone version
of Redis. We only support database 0; the SELECT command is not allowed.
Client and Server roles in the Redis cluster protocol
In Redis Cluster, nodes are responsible for holding the data, and taking the state of the cluster, including mapping keys to the right nodes. Cluster nodes are also able to auto-discover other nodes, detect non-working nodes, and promote replica nodes to master when needed in order to continue to operate when a failure occurs.
To perform their tasks all the cluster nodes are connected using a TCP bus and a binary protocol, called the Redis Cluster Bus. Every node is connected to every other node in the cluster using the cluster bus. Nodes use a gossip protocol to propagate information about the cluster in order to discover new nodes, to send ping packets to make sure all the other nodes are working properly, and to send cluster messages needed to signal specific conditions. The cluster bus is also used in order to propagate Pub/Sub messages across the cluster and to orchestrate manual failovers when requested by users (manual failovers are failovers which are not initiated by the Redis Cluster failure detector, but by the system administrator directly).
Since cluster nodes are not able to proxy requests, clients may be redirected
to other nodes using redirection errors -MOVED and -ASK.
The client is in theory free to send requests to all the nodes in the cluster,
getting redirected if needed, so the client is not required to hold the
state of the cluster. However clients that are able to cache the map between
keys and nodes can improve the performance in a sensible way.
Write safety
Redis Cluster uses asynchronous replication between nodes, and last failover wins implicit merge function. This means that the last elected master dataset eventually replaces all the other replicas. There is always a window of time when it is possible to lose writes during partitions. However these windows are very different in the case of a client that is connected to the majority of masters, and a client that is connected to the minority of masters.
Redis Cluster tries harder to retain writes that are performed by clients connected to the majority of masters, compared to writes performed in the minority side. The following are examples of scenarios that lead to loss of acknowledged writes received in the majority partitions during failures:
A write may reach a master, but while the master may be able to reply to the client, the write may not be propagated to replicas via the asynchronous replication used between master and replica nodes. If the master dies without the write reaching the replicas, the write is lost forever if the master is unreachable for a long enough period that one of its replicas is promoted. This is usually hard to observe in the case of a total, sudden failure of a master node since masters try to reply to clients (with the acknowledge of the write) and replicas (propagating the write) at about the same time. However it is a real world failure mode.
Another theoretically possible failure mode where writes are lost is the following:
- A master is unreachable because of a partition.
- It gets failed over by one of its replicas.
- After some time it may be reachable again.
- A client with an out-of-date routing table may write to the old master before it is converted into a replica (of the new master) by the cluster.
The second failure mode is unlikely to happen because master nodes unable to communicate with the majority of the other masters for enough time to be failed over will no longer accept writes, and when the partition is fixed writes are still refused for a small amount of time to allow other nodes to inform about configuration changes. This failure mode also requires that the client's routing table has not yet been updated.
Writes targeting the minority side of a partition have a larger window in which to get lost. For example, Redis Cluster loses a non-trivial number of writes on partitions where there is a minority of masters and at least one or more clients, since all the writes sent to the masters may potentially get lost if the masters are failed over in the majority side.
Specifically, for a master to be failed over it must be unreachable by the majority of masters for at least NODE_TIMEOUT, so if the partition is fixed before that time, no writes are lost. When the partition lasts for more than NODE_TIMEOUT, all the writes performed in the minority side up to that point may be lost. However the minority side of a Redis Cluster will start refusing writes as soon as NODE_TIMEOUT time has elapsed without contact with the majority, so there is a maximum window after which the minority becomes no longer available. Hence, no writes are accepted or lost after that time.
Availability
Redis Cluster is not available in the minority side of the partition. In the majority side of the partition assuming that there are at least the majority of masters and a replica for every unreachable master, the cluster becomes available again after NODE_TIMEOUT time plus a few more seconds required for a replica to get elected and failover its master (failovers are usually executed in a matter of 1 or 2 seconds).
This means that Redis Cluster is designed to survive failures of a few nodes in the cluster, but it is not a suitable solution for applications that require availability in the event of large net splits.
In the example of a cluster composed of N master nodes where every node has a single replica, the majority side of the cluster will remain available as long as a single node is partitioned away, and will remain available with a probability of 1-(1/(N*2-1)) when two nodes are partitioned away (after the first node fails we are left with N*2-1 nodes in total, and the probability of the only master without a replica to fail is 1/(N*2-1)).
For example, in a cluster with 5 nodes and a single replica per node, there is a 1/(5*2-1) = 11.11% probability that after two nodes are partitioned away from the majority, the cluster will no longer be available.
Thanks to a Redis Cluster feature called replicas migration the Cluster availability is improved in many real world scenarios by the fact that replicas migrate to orphaned masters (masters no longer having replicas). So at every successful failure event, the cluster may reconfigure the replicas layout in order to better resist the next failure.
Performance
In Redis Cluster nodes don't proxy commands to the right node in charge for a given key, but instead they redirect clients to the right nodes serving a given portion of the key space.
Eventually clients obtain an up-to-date representation of the cluster and which node serves which subset of keys, so during normal operations clients directly contact the right nodes in order to send a given command.
Because of the use of asynchronous replication, nodes do not wait for other nodes' acknowledgment of writes (if not explicitly requested using the WAIT command).
Also, because multi-key commands are only limited to near keys, data is never moved between nodes except when resharding.
Normal operations are handled exactly as in the case of a single Redis instance. This means that in a Redis Cluster with N master nodes you can expect the same performance as a single Redis instance multiplied by N as the design scales linearly. At the same time the query is usually performed in a single round trip, since clients usually retain persistent connections with the nodes, so latency figures are also the same as the single standalone Redis node case.
Very high performance and scalability while preserving weak but reasonable forms of data safety and availability is the main goal of Redis Cluster.
Why merge operations are avoided
The Redis Cluster design avoids conflicting versions of the same key-value pair in multiple nodes as in the case of the Redis data model this is not always desirable. Values in Redis are often very large; it is common to see lists or sorted sets with millions of elements. Also data types are semantically complex. Transferring and merging these kind of values can be a major bottleneck and/or may require the non-trivial involvement of application-side logic, additional memory to store meta-data, and so forth.
There are no strict technological limits here. CRDTs or synchronously replicated state machines can model complex data types similar to Redis. However, the actual run time behavior of such systems would not be similar to Redis Cluster. Redis Cluster was designed in order to cover the exact use cases of the non-clustered Redis version.
Overview of Redis Cluster main components
Key distribution model
The cluster's key space is split into 16384 slots, effectively setting an upper limit for the cluster size of 16384 master nodes (however, the suggested max size of nodes is on the order of ~ 1000 nodes).
Each master node in a cluster handles a subset of the 16384 hash slots. The cluster is stable when there is no cluster reconfiguration in progress (i.e. where hash slots are being moved from one node to another). When the cluster is stable, a single hash slot will be served by a single node (however the serving node can have one or more replicas that will replace it in the case of net splits or failures, and that can be used in order to scale read operations where reading stale data is acceptable).
The base algorithm used to map keys to hash slots is the following (read the next paragraph for the hash tag exception to this rule):
HASH_SLOT = CRC16(key) mod 16384
The CRC16 is specified as follows:
- Name: XMODEM (also known as ZMODEM or CRC-16/ACORN)
- Width: 16 bit
- Poly: 1021 (That is actually x^16 + x^12 + x^5 + 1)
- Initialization: 0000
- Reflect Input byte: False
- Reflect Output CRC: False
- Xor constant to output CRC: 0000
- Output for "123456789": 31C3
14 out of 16 CRC16 output bits are used (this is why there is a modulo 16384 operation in the formula above).
In our tests CRC16 behaved remarkably well in distributing different kinds of keys evenly across the 16384 slots.
Note: A reference implementation of the CRC16 algorithm used is available in the Appendix A of this document.
Hash tags
There is an exception for the computation of the hash slot that is used in order to implement hash tags. Hash tags are a way to ensure that multiple keys are allocated in the same hash slot. This is used in order to implement multi-key operations in Redis Cluster.
To implement hash tags, the hash slot for a key is computed in a
slightly different way in certain conditions.
If the key contains a "{...}" pattern only the substring between
{ and } is hashed in order to obtain the hash slot. However since it is
possible that there are multiple occurrences of { or } the algorithm is
well specified by the following rules:
- IF the key contains a
{character. - AND IF there is a
}character to the right of{. - AND IF there are one or more characters between the first occurrence of
{and the first occurrence of}.
Then instead of hashing the key, only what is between the first occurrence of { and the following first occurrence of } is hashed.
Examples:
- The two keys
{user1000}.followingand{user1000}.followerswill hash to the same hash slot since only the substringuser1000will be hashed in order to compute the hash slot. - For the key
foo{}{bar}the whole key will be hashed as usually since the first occurrence of{is followed by}on the right without characters in the middle. - For the key
foo{{bar}}zapthe substring{barwill be hashed, because it is the substring between the first occurrence of{and the first occurrence of}on its right. - For the key
foo{bar}{zap}the substringbarwill be hashed, since the algorithm stops at the first valid or invalid (without bytes inside) match of{and}. - What follows from the algorithm is that if the key starts with
{}, it is guaranteed to be hashed as a whole. This is useful when using binary data as key names.
Adding the hash tags exception, the following is an implementation of the HASH_SLOT function in Ruby and C language.
Ruby example code:
def HASH_SLOT(key)
s = key.index "{"
if s
e = key.index "}",s+1
if e && e != s+1
key = key[s+1..e-1]
end
end
crc16(key) % 16384
end
C example code:
unsigned int HASH_SLOT(char *key, int keylen) {
int s, e; /* start-end indexes of { and } */
/* Search the first occurrence of '{'. */
for (s = 0; s < keylen; s++)
if (key[s] == '{') break;
/* No '{' ? Hash the whole key. This is the base case. */
if (s == keylen) return crc16(key,keylen) & 16383;
/* '{' found? Check if we have the corresponding '}'. */
for (e = s+1; e < keylen; e++)
if (key[e] == '}') break;
/* No '}' or nothing between {} ? Hash the whole key. */
if (e == keylen || e == s+1) return crc16(key,keylen) & 16383;
/* If we are here there is both a { and a } on its right. Hash
* what is in the middle between { and }. */
return crc16(key+s+1,e-s-1) & 16383;
}
Cluster node attributes
Every node has a unique name in the cluster. The node name is the
hex representation of a 160 bit random number, obtained the first time a
node is started (usually using /dev/urandom).
The node will save its ID in the node configuration file, and will use the
same ID forever, or at least as long as the node configuration file is not
deleted by the system administrator, or a hard reset is requested
via the CLUSTER RESET command.
The node ID is used to identify every node across the whole cluster. It is possible for a given node to change its IP address without any need to also change the node ID. The cluster is also able to detect the change in IP/port and reconfigure using the gossip protocol running over the cluster bus.
The node ID is not the only information associated with each node, but is the only one that is always globally consistent. Every node has also the following set of information associated. Some information is about the cluster configuration detail of this specific node, and is eventually consistent across the cluster. Some other information, like the last time a node was pinged, is instead local to each node.
Every node maintains the following information about other nodes that it is
aware of in the cluster: The node ID, IP and port of the node, a set of
flags, what is the master of the node if it is flagged as replica, last time
the node was pinged and the last time the pong was received, the current
configuration epoch of the node (explained later in this specification),
the link state and finally the set of hash slots served.
A detailed explanation of all the node fields is described in the CLUSTER NODES documentation.
The CLUSTER NODES command can be sent to any node in the cluster and provides the state of the cluster and the information for each node according to the local view the queried node has of the cluster.
The following is sample output of the CLUSTER NODES command sent to a master
node in a small cluster of three nodes.
$ redis-cli cluster nodes
d1861060fe6a534d42d8a19aeb36600e18785e04 127.0.0.1:6379 myself - 0 1318428930 1 connected 0-1364
3886e65cc906bfd9b1f7e7bde468726a052d1dae 127.0.0.1:6380 master - 1318428930 1318428931 2 connected 1365-2729
d289c575dcbc4bdd2931585fd4339089e461a27d 127.0.0.1:6381 master - 1318428931 1318428931 3 connected 2730-4095
In the above listing the different fields are in order: node id, address:port, flags, last ping sent, last pong received, configuration epoch, link state, slots. Details about the above fields will be covered as soon as we talk of specific parts of Redis Cluster.
The cluster bus
Every Redis Cluster node has an additional TCP port for receiving incoming connections from other Redis Cluster nodes. This port will be derived by adding 10000 to the data port or it can be specified with the cluster-port config.
Example 1:
If a Redis node is listening for client connections on port 6379, and you do not add cluster-port parameter in redis.conf, the Cluster bus port 16379 will be opened.
Example 2:
If a Redis node is listening for client connections on port 6379, and you set cluster-port 20000 in redis.conf, the Cluster bus port 20000 will be opened.
Node-to-node communication happens exclusively using the Cluster bus and
the Cluster bus protocol: a binary protocol composed of frames
of different types and sizes. The Cluster bus binary protocol is not
publicly documented since it is not intended for external software devices
to talk with Redis Cluster nodes using this protocol. However you can
obtain more details about the Cluster bus protocol by reading the
cluster.h and cluster.c files in the Redis Cluster source code.
Cluster topology
Redis Cluster is a full mesh where every node is connected with every other node using a TCP connection.
In a cluster of N nodes, every node has N-1 outgoing TCP connections, and N-1 incoming connections.
These TCP connections are kept alive all the time and are not created on demand. When a node expects a pong reply in response to a ping in the cluster bus, before waiting long enough to mark the node as unreachable, it will try to refresh the connection with the node by reconnecting from scratch.
While Redis Cluster nodes form a full mesh, nodes use a gossip protocol and a configuration update mechanism in order to avoid exchanging too many messages between nodes during normal conditions, so the number of messages exchanged is not exponential.
Node handshake
Nodes always accept connections on the cluster bus port, and even reply to pings when received, even if the pinging node is not trusted. However, all other packets will be discarded by the receiving node if the sending node is not considered part of the cluster.
A node will accept another node as part of the cluster only in two ways:
If a node presents itself with a
MEETmessage (CLUSTER MEETcommand). A meet message is exactly like aPINGmessage, but forces the receiver to accept the node as part of the cluster. Nodes will sendMEETmessages to other nodes only if the system administrator requests this via the following command:CLUSTER MEET ip port
A node will also register another node as part of the cluster if a node that is already trusted will gossip about this other node. So if A knows B, and B knows C, eventually B will send gossip messages to A about C. When this happens, A will register C as part of the network, and will try to connect with C.
This means that as long as we join nodes in any connected graph, they'll eventually form a fully connected graph automatically. This means that the cluster is able to auto-discover other nodes, but only if there is a trusted relationship that was forced by the system administrator.
This mechanism makes the cluster more robust but prevents different Redis clusters from accidentally mixing after change of IP addresses or other network related events.
Redirection and resharding
MOVED Redirection
A Redis client is free to send queries to every node in the cluster, including replica nodes. The node will analyze the query, and if it is acceptable (that is, only a single key is mentioned in the query, or the multiple keys mentioned are all to the same hash slot) it will lookup what node is responsible for the hash slot where the key or keys belong.
If the hash slot is served by the node, the query is simply processed, otherwise the node will check its internal hash slot to node map, and will reply to the client with a MOVED error, like in the following example:
GET x
-MOVED 3999 127.0.0.1:6381
The error includes the hash slot of the key (3999) and the endpoint:port of the instance that can serve the query.
The client needs to reissue the query to the specified node's endpoint address and port.
The endpoint can be either an IP address, a hostname, or it can be empty (e.g. -MOVED 3999 :6380).
An empty endpoint indicates that the server node has an an unknown endpoint, and the client should send the next request to the same endpoint as the current request but with the provided port.
Note that even if the client waits a long time before reissuing the query, and in the meantime the cluster configuration changed, the destination node will reply again with a MOVED error if the hash slot 3999 is now served by another node. The same happens if the contacted node had no updated information.
So while from the point of view of the cluster nodes are identified by IDs we try to simplify our interface with the client just exposing a map between hash slots and Redis nodes identified by endpoint:port pairs.
The client is not required to, but should try to memorize that hash slot 3999 is served by 127.0.0.1:6381. This way once a new command needs to be issued it can compute the hash slot of the target key and have a greater chance of choosing the right node.
An alternative is to just refresh the whole client-side cluster layout
using the CLUSTER SHARDS, or the deprecated CLUSTER SLOTS, command
when a MOVED redirection is received. When a redirection is encountered, it
is likely multiple slots were reconfigured rather than just one, so updating
the client configuration as soon as possible is often the best strategy.
Note that when the Cluster is stable (no ongoing changes in the configuration), eventually all the clients will obtain a map of hash slots -> nodes, making the cluster efficient, with clients directly addressing the right nodes without redirections, proxies or other single point of failure entities.
A client must be also able to handle -ASK redirections that are described later in this document, otherwise it is not a complete Redis Cluster client.
Live reconfiguration
Redis Cluster supports the ability to add and remove nodes while the cluster is running. Adding or removing a node is abstracted into the same operation: moving a hash slot from one node to another. This means that the same basic mechanism can be used in order to rebalance the cluster, add or remove nodes, and so forth.
- To add a new node to the cluster an empty node is added to the cluster and some set of hash slots are moved from existing nodes to the new node.
- To remove a node from the cluster the hash slots assigned to that node are moved to other existing nodes.
- To rebalance the cluster a given set of hash slots are moved between nodes.
The core of the implementation is the ability to move hash slots around. From a practical point of view a hash slot is just a set of keys, so what Redis Cluster really does during resharding is to move keys from an instance to another instance. Moving a hash slot means moving all the keys that happen to hash into this hash slot.
To understand how this works we need to show the CLUSTER subcommands
that are used to manipulate the slots translation table in a Redis Cluster node.
The following subcommands are available (among others not useful in this case):
CLUSTER ADDSLOTSslot1 [slot2] ... [slotN]CLUSTER DELSLOTSslot1 [slot2] ... [slotN]CLUSTER ADDSLOTSRANGEstart-slot1 end-slot1 [start-slot2 end-slot2] ... [start-slotN end-slotN]CLUSTER DELSLOTSRANGEstart-slot1 end-slot1 [start-slot2 end-slot2] ... [start-slotN end-slotN]CLUSTER SETSLOTslot NODE nodeCLUSTER SETSLOTslot MIGRATING nodeCLUSTER SETSLOTslot IMPORTING node
The first four commands, ADDSLOTS, DELSLOTS, ADDSLOTSRANGE and DELSLOTSRANGE, are simply used to assign
(or remove) slots to a Redis node. Assigning a slot means to tell a given
master node that it will be in charge of storing and serving content for
the specified hash slot.
After the hash slots are assigned they will propagate across the cluster using the gossip protocol, as specified later in the configuration propagation section.
The ADDSLOTS and ADDSLOTSRANGE commands are usually used when a new cluster is created
from scratch to assign each master node a subset of all the 16384 hash
slots available.
The DELSLOTS and DELSLOTSRANGE are mainly used for manual modification of a cluster configuration
or for debugging tasks: in practice it is rarely used.
The SETSLOT subcommand is used to assign a slot to a specific node ID if
the SETSLOT <slot> NODE form is used. Otherwise the slot can be set in the
two special states MIGRATING and IMPORTING. Those two special states
are used in order to migrate a hash slot from one node to another.
- When a slot is set as MIGRATING, the node will accept all queries that
are about this hash slot, but only if the key in question
exists, otherwise the query is forwarded using a
-ASKredirection to the node that is target of the migration. - When a slot is set as IMPORTING, the node will accept all queries that
are about this hash slot, but only if the request is
preceded by an
ASKINGcommand. If theASKINGcommand was not given by the client, the query is redirected to the real hash slot owner via a-MOVEDredirection error, as would happen normally.
Let's make this clearer with an example of hash slot migration. Assume that we have two Redis master nodes, called A and B. We want to move hash slot 8 from A to B, so we issue commands like this:
- We send B: CLUSTER SETSLOT 8 IMPORTING A
- We send A: CLUSTER SETSLOT 8 MIGRATING B
All the other nodes will continue to point clients to node "A" every time they are queried with a key that belongs to hash slot 8, so what happens is that:
- All queries about existing keys are processed by "A".
- All queries about non-existing keys in A are processed by "B", because "A" will redirect clients to "B".
This way we no longer create new keys in "A".
In the meantime, redis-cli used during reshardings
and Redis Cluster configuration will migrate existing keys in
hash slot 8 from A to B.
This is performed using the following command:
CLUSTER GETKEYSINSLOT slot count
The above command will return count keys in the specified hash slot.
For keys returned, redis-cli sends node "A" a MIGRATE command, that
will migrate the specified keys from A to B in an atomic way (both instances
are locked for the time (usually very small time) needed to migrate keys so
there are no race conditions). This is how MIGRATE works:
MIGRATE target_host target_port "" target_database id timeout KEYS key1 key2 ...
MIGRATE will connect to the target instance, send a serialized version of
the key, and once an OK code is received, the old key from its own dataset
will be deleted. From the point of view of an external client a key exists
either in A or B at any given time.
In Redis Cluster there is no need to specify a database other than 0, but
MIGRATE is a general command that can be used for other tasks not
involving Redis Cluster.
MIGRATE is optimized to be as fast as possible even when moving complex
keys such as long lists, but in Redis Cluster reconfiguring the
cluster where big keys are present is not considered a wise procedure if
there are latency constraints in the application using the database.
When the migration process is finally finished, the SETSLOT <slot> NODE <node-id> command is sent to the two nodes involved in the migration in order to
set the slots to their normal state again. The same command is usually
sent to all other nodes to avoid waiting for the natural
propagation of the new configuration across the cluster.
ASK redirection
In the previous section, we briefly talked about ASK redirection. Why can't we simply use MOVED redirection? Because while MOVED means that we think the hash slot is permanently served by a different node and the next queries should be tried against the specified node. ASK means to send only the next query to the specified node.
This is needed because the next query about hash slot 8 can be about a key that is still in A, so we always want the client to try A and then B if needed. Since this happens only for one hash slot out of 16384 available, the performance hit on the cluster is acceptable.
We need to force that client behavior, so to make sure that clients will only try node B after A was tried, node B will only accept queries of a slot that is set as IMPORTING if the client sends the ASKING command before sending the query.
Basically the ASKING command sets a one-time flag on the client that forces a node to serve a query about an IMPORTING slot.
The full semantics of ASK redirection from the point of view of the client is as follows:
- If ASK redirection is received, send only the query that was redirected to the specified node but continue sending subsequent queries to the old node.
- Start the redirected query with the ASKING command.
- Don't yet update local client tables to map hash slot 8 to B.
Once hash slot 8 migration is completed, A will send a MOVED message and the client may permanently map hash slot 8 to the new endpoint and port pair. Note that if a buggy client performs the map earlier this is not a problem since it will not send the ASKING command before issuing the query, so B will redirect the client to A using a MOVED redirection error.
Slots migration is explained in similar terms but with different wording
(for the sake of redundancy in the documentation) in the CLUSTER SETSLOT
command documentation.
Client connections and redirection handling
To be efficient, Redis Cluster clients maintain a map of the current slot configuration. However, this configuration is not required to be up to date. When contacting the wrong node results in a redirection, the client can update its internal slot map accordingly.
Clients usually need to fetch a complete list of slots and mapped node addresses in two different situations:
- At startup, to populate the initial slots configuration
- When the client receives a
MOVEDredirection
Note that a client may handle the MOVED redirection by updating just the
moved slot in its table; however this is usually not efficient because often
the configuration of multiple slots will be modified at once. For example, if a
replica is promoted to master, all of the slots served by the old master will
be remapped). It is much simpler to react to a MOVED redirection by
fetching the full map of slots to nodes from scratch.
Client can issue a CLUSTER SLOTS command to retrieve an array of slot
ranges and the associated master and replica nodes serving the specified ranges.
The following is an example of output of CLUSTER SLOTS:
127.0.0.1:7000> cluster slots
1) 1) (integer) 5461
2) (integer) 10922
3) 1) "127.0.0.1"
2) (integer) 7001
4) 1) "127.0.0.1"
2) (integer) 7004
2) 1) (integer) 0
2) (integer) 5460
3) 1) "127.0.0.1"
2) (integer) 7000
4) 1) "127.0.0.1"
2) (integer) 7003
3) 1) (integer) 10923
2) (integer) 16383
3) 1) "127.0.0.1"
2) (integer) 7002
4) 1) "127.0.0.1"
2) (integer) 7005
The first two sub-elements of every element of the returned array are the start and end slots of the range. The additional elements represent address-port pairs. The first address-port pair is the master serving the slot, and the additional address-port pairs are the replicas serving the same slot. Replicas will be listed only when not in an error condition (i.e., when their FAIL flag is not set).
The first element in the output above says that slots from 5461 to 10922 (start and end included) are served by 127.0.0.1:7001, and it is possible to scale read-only load contacting the replica at 127.0.0.1:7004.
CLUSTER SLOTS is not guaranteed to return ranges that cover the full
16384 slots if the cluster is misconfigured, so clients should initialize the
slots configuration map filling the target nodes with NULL objects, and
report an error if the user tries to execute commands about keys
that belong to unassigned slots.
Before returning an error to the caller when a slot is found to be unassigned, the client should try to fetch the slots configuration again to check if the cluster is now configured properly.
Multi-keys operations
Using hash tags, clients are free to use multi-key operations. For example the following operation is valid:
MSET {user:1000}.name Angela {user:1000}.surname White
Multi-key operations may become unavailable when a resharding of the hash slot the keys belong to is in progress.
More specifically, even during a resharding the multi-key operations targeting keys that all exist and all still hash to the same slot (either the source or destination node) are still available.
Operations on keys that don't exist or are - during the resharding - split
between the source and destination nodes, will generate a -TRYAGAIN error.
The client can try the operation after some time, or report back the error.
As soon as migration of the specified hash slot has terminated, all multi-key operations are available again for that hash slot.
Scaling reads using replica nodes
Normally replica nodes will redirect clients to the authoritative master for
the hash slot involved in a given command, however clients can use replicas
in order to scale reads using the READONLY command.
READONLY tells a Redis Cluster replica node that the client is ok reading
possibly stale data and is not interested in running write queries.
When the connection is in readonly mode, the cluster will send a redirection to the client only if the operation involves keys not served by the replica's master node. This may happen because:
- The client sent a command about hash slots never served by the master of this replica.
- The cluster was reconfigured (for example resharded) and the replica is no longer able to serve commands for a given hash slot.
When this happens the client should update its hash slot map as explained in the previous sections.
The readonly state of the connection can be cleared using the READWRITE command.
Fault Tolerance
Heartbeat and gossip messages
Redis Cluster nodes continuously exchange ping and pong packets. Those two kinds of packets have the same structure, and both carry important configuration information. The only actual difference is the message type field. We'll refer to the sum of ping and pong packets as heartbeat packets.
Usually nodes send ping packets that will trigger the receivers to reply with pong packets. However this is not necessarily true. It is possible for nodes to just send pong packets to send information to other nodes about their configuration, without triggering a reply. This is useful, for example, in order to broadcast a new configuration as soon as possible.
Usually a node will ping a few random nodes every second so that the total number of ping packets sent (and pong packets received) by each node is a constant amount regardless of the number of nodes in the cluster.
However every node makes sure to ping every other node that hasn't sent a ping or received a pong for longer than half the NODE_TIMEOUT time. Before NODE_TIMEOUT has elapsed, nodes also try to reconnect the TCP link with another node to make sure nodes are not believed to be unreachable only because there is a problem in the current TCP connection.
The number of messages globally exchanged can be sizable if NODE_TIMEOUT is set to a small figure and the number of nodes (N) is very large, since every node will try to ping every other node for which they don't have fresh information every half the NODE_TIMEOUT time.
For example in a 100 node cluster with a node timeout set to 60 seconds, every node will try to send 99 pings every 30 seconds, with a total amount of pings of 3.3 per second. Multiplied by 100 nodes, this is 330 pings per second in the total cluster.
There are ways to lower the number of messages, however there have been no reported issues with the bandwidth currently used by Redis Cluster failure detection, so for now the obvious and direct design is used. Note that even in the above example, the 330 packets per second exchanged are evenly divided among 100 different nodes, so the traffic each node receives is acceptable.
Heartbeat packet content
Ping and pong packets contain a header that is common to all types of packets (for instance packets to request a failover vote), and a special gossip section that is specific to Ping and Pong packets.
The common header has the following information:
- Node ID, a 160 bit pseudorandom string that is assigned the first time a node is created and remains the same for all the life of a Redis Cluster node.
- The
currentEpochandconfigEpochfields of the sending node that are used to mount the distributed algorithms used by Redis Cluster (this is explained in detail in the next sections). If the node is a replica theconfigEpochis the last knownconfigEpochof its master. - The node flags, indicating if the node is a replica, a master, and other single-bit node information.
- A bitmap of the hash slots served by the sending node, or if the node is a replica, a bitmap of the slots served by its master.
- The sender TCP base port that is the port used by Redis to accept client commands.
- The cluster port that is the port used by Redis for node-to-node communication.
- The state of the cluster from the point of view of the sender (down or ok).
- The master node ID of the sending node, if it is a replica.
Ping and pong packets also contain a gossip section. This section offers to the receiver a view of what the sender node thinks about other nodes in the cluster. The gossip section only contains information about a few random nodes among the set of nodes known to the sender. The number of nodes mentioned in a gossip section is proportional to the cluster size.
For every node added in the gossip section the following fields are reported:
- Node ID.
- IP and port of the node.
- Node flags.
Gossip sections allow receiving nodes to get information about the state of other nodes from the point of view of the sender. This is useful both for failure detection and to discover other nodes in the cluster.
Failure detection
Redis Cluster failure detection is used to recognize when a master or replica node is no longer reachable by the majority of nodes and then respond by promoting a replica to the role of master. When replica promotion is not possible the cluster is put in an error state to stop receiving queries from clients.
As already mentioned, every node takes a list of flags associated with other known nodes. There are two flags that are used for failure detection that are called PFAIL and FAIL. PFAIL means Possible failure, and is a non-acknowledged failure type. FAIL means that a node is failing and that this condition was confirmed by a majority of masters within a fixed amount of time.
PFAIL flag:
A node flags another node with the PFAIL flag when the node is not reachable for more than NODE_TIMEOUT time. Both master and replica nodes can flag another node as PFAIL, regardless of its type.
The concept of non-reachability for a Redis Cluster node is that we have an active ping (a ping that we sent for which we have yet to get a reply) pending for longer than NODE_TIMEOUT. For this mechanism to work the NODE_TIMEOUT must be large compared to the network round trip time. In order to add reliability during normal operations, nodes will try to reconnect with other nodes in the cluster as soon as half of the NODE_TIMEOUT has elapsed without a reply to a ping. This mechanism ensures that connections are kept alive so broken connections usually won't result in false failure reports between nodes.
FAIL flag:
The PFAIL flag alone is just local information every node has about other nodes, but it is not sufficient to trigger a replica promotion. For a node to be considered down the PFAIL condition needs to be escalated to a FAIL condition.
As outlined in the node heartbeats section of this document, every node sends gossip messages to every other node including the state of a few random known nodes. Every node eventually receives a set of node flags for every other node. This way every node has a mechanism to signal other nodes about failure conditions they have detected.
A PFAIL condition is escalated to a FAIL condition when the following set of conditions are met:
- Some node, that we'll call A, has another node B flagged as
PFAIL. - Node A collected, via gossip sections, information about the state of B from the point of view of the majority of masters in the cluster.
- The majority of masters signaled the
PFAILorFAILcondition withinNODE_TIMEOUT * FAIL_REPORT_VALIDITY_MULTtime. (The validity factor is set to 2 in the current implementation, so this is just two times theNODE_TIMEOUTtime).
If all the above conditions are true, Node A will:
- Mark the node as
FAIL. - Send a
FAILmessage (as opposed to aFAILcondition within a heartbeat message) to all the reachable nodes.
The FAIL message will force every receiving node to mark the node in FAIL state, whether or not it already flagged the node in PFAIL state.
Note that the FAIL flag is mostly one way. That is, a node can go from PFAIL to FAIL, but a FAIL flag can only be cleared in the following situations:
- The node is already reachable and is a replica. In this case the
FAILflag can be cleared as replicas are not failed over. - The node is already reachable and is a master not serving any slot. In this case the
FAILflag can be cleared as masters without slots do not really participate in the cluster and are waiting to be configured in order to join the cluster. - The node is already reachable and is a master, but a long time (N times the
NODE_TIMEOUT) has elapsed without any detectable replica promotion. It's better for it to rejoin the cluster and continue in this case.
It is useful to note that while the PFAIL -> FAIL transition uses a form of agreement, the agreement used is weak:
- Nodes collect views of other nodes over some time period, so even if the majority of master nodes need to "agree", actually this is just state that we collected from different nodes at different times and we are not sure, nor we require, that at a given moment the majority of masters agreed. However we discard failure reports which are old, so the failure was signaled by the majority of masters within a window of time.
- While every node detecting the
FAILcondition will force that condition on other nodes in the cluster using theFAILmessage, there is no way to ensure the message will reach all the nodes. For instance a node may detect theFAILcondition and because of a partition will not be able to reach any other node.
However the Redis Cluster failure detection has a liveness requirement: eventually all the nodes should agree about the state of a given node. There are two cases that can originate from split brain conditions. Either some minority of nodes believe the node is in FAIL state, or a minority of nodes believe the node is not in FAIL state. In both the cases eventually the cluster will have a single view of the state of a given node:
Case 1: If a majority of masters have flagged a node as FAIL, because of failure detection and the chain effect it generates, every other node will eventually flag the master as FAIL, since in the specified window of time enough failures will be reported.
Case 2: When only a minority of masters have flagged a node as FAIL, the replica promotion will not happen (as it uses a more formal algorithm that makes sure everybody knows about the promotion eventually) and every node will clear the FAIL state as per the FAIL state clearing rules above (i.e. no promotion after N times the NODE_TIMEOUT has elapsed).
The FAIL flag is only used as a trigger to run the safe part of the algorithm for the replica promotion. In theory a replica may act independently and start a replica promotion when its master is not reachable, and wait for the masters to refuse to provide the acknowledgment if the master is actually reachable by the majority. However the added complexity of the PFAIL -> FAIL state, the weak agreement, and the FAIL message forcing the propagation of the state in the shortest amount of time in the reachable part of the cluster, have practical advantages. Because of these mechanisms, usually all the nodes will stop accepting writes at about the same time if the cluster is in an error state. This is a desirable feature from the point of view of applications using Redis Cluster. Also erroneous election attempts initiated by replicas that can't reach its master due to local problems (the master is otherwise reachable by the majority of other master nodes) are avoided.
Configuration handling, propagation, and failovers
Cluster current epoch
Redis Cluster uses a concept similar to the Raft algorithm "term". In Redis Cluster the term is called epoch instead, and it is used in order to give incremental versioning to events. When multiple nodes provide conflicting information, it becomes possible for another node to understand which state is the most up to date.
The currentEpoch is a 64 bit unsigned number.
At node creation every Redis Cluster node, both replicas and master nodes, set the currentEpoch to 0.
Every time a packet is received from another node, if the epoch of the sender (part of the cluster bus messages header) is greater than the local node epoch, the currentEpoch is updated to the sender epoch.
Because of these semantics, eventually all the nodes will agree to the greatest currentEpoch in the cluster.
This information is used when the state of the cluster is changed and a node seeks agreement in order to perform some action.
Currently this happens only during replica promotion, as described in the next section. Basically the epoch is a logical clock for the cluster and dictates that given information wins over one with a smaller epoch.
Configuration epoch
Every master always advertises its configEpoch in ping and pong packets along with a bitmap advertising the set of slots it serves.
The configEpoch is set to zero in masters when a new node is created.
A new configEpoch is created during replica election. replicas trying to replace
failing masters increment their epoch and try to get authorization from
a majority of masters. When a replica is authorized, a new unique configEpoch
is created and the replica turns into a master using the new configEpoch.
As explained in the next sections the configEpoch helps to resolve conflicts when different nodes claim divergent configurations (a condition that may happen because of network partitions and node failures).
replica nodes also advertise the configEpoch field in ping and pong packets, but in the case of replicas the field represents the configEpoch of its master as of the last time they exchanged packets. This allows other instances to detect when a replica has an old configuration that needs to be updated (master nodes will not grant votes to replicas with an old configuration).
Every time the configEpoch changes for some known node, it is permanently stored in the nodes.conf file by all the nodes that receive this information. The same also happens for the currentEpoch value. These two variables are guaranteed to be saved and fsync-ed to disk when updated before a node continues its operations.
The configEpoch values generated using a simple algorithm during failovers
are guaranteed to be new, incremental, and unique.
Replica election and promotion
Replica election and promotion is handled by replica nodes, with the help of master nodes that vote for the replica to promote.
A replica election happens when a master is in FAIL state from the point of view of at least one of its replicas that has the prerequisites in order to become a master.
In order for a replica to promote itself to master, it needs to start an election and win it. All the replicas for a given master can start an election if the master is in FAIL state, however only one replica will win the election and promote itself to master.
A replica starts an election when the following conditions are met:
- The replica's master is in
FAILstate. - The master was serving a non-zero number of slots.
- The replica replication link was disconnected from the master for no longer than a given amount of time, in order to ensure the promoted replica's data is reasonably fresh. This time is user configurable.
In order to be elected, the first step for a replica is to increment its currentEpoch counter, and request votes from master instances.
Votes are requested by the replica by broadcasting a FAILOVER_AUTH_REQUEST packet to every master node of the cluster. Then it waits for a maximum time of two times the NODE_TIMEOUT for replies to arrive (but always for at least 2 seconds).
Once a master has voted for a given replica, replying positively with a FAILOVER_AUTH_ACK, it can no longer vote for another replica of the same master for a period of NODE_TIMEOUT * 2. In this period it will not be able to reply to other authorization requests for the same master. This is not needed to guarantee safety, but useful for preventing multiple replicas from getting elected (even if with a different configEpoch) at around the same time, which is usually not wanted.
A replica discards any AUTH_ACK replies with an epoch that is less than the currentEpoch at the time the vote request was sent. This ensures it doesn't count votes intended for a previous election.
Once the replica receives ACKs from the majority of masters, it wins the election.
Otherwise if the majority is not reached within the period of two times NODE_TIMEOUT (but always at least 2 seconds), the election is aborted and a new one will be tried again after NODE_TIMEOUT * 4 (and always at least 4 seconds).
Replica rank
As soon as a master is in FAIL state, a replica waits a short period of time before trying to get elected. That delay is computed as follows:
DELAY = 500 milliseconds + random delay between 0 and 500 milliseconds +
REPLICA_RANK * 1000 milliseconds.
The fixed delay ensures that we wait for the FAIL state to propagate across the cluster, otherwise the replica may try to get elected while the masters are still unaware of the FAIL state, refusing to grant their vote.
The random delay is used to desynchronize replicas so they're unlikely to start an election at the same time.
The REPLICA_RANK is the rank of this replica regarding the amount of replication data it has processed from the master.
Replicas exchange messages when the master is failing in order to establish a (best effort) rank:
the replica with the most updated replication offset is at rank 0, the second most updated at rank 1, and so forth.
In this way the most updated replicas try to get elected before others.
Rank order is not strictly enforced; if a replica of higher rank fails to be elected, the others will try shortly.
Once a replica wins the election, it obtains a new unique and incremental configEpoch which is higher than that of any other existing master. It starts advertising itself as master in ping and pong packets, providing the set of served slots with a configEpoch that will win over the past ones.
In order to speedup the reconfiguration of other nodes, a pong packet is broadcast to all the nodes of the cluster. Currently unreachable nodes will eventually be reconfigured when they receive a ping or pong packet from another node or will receive an UPDATE packet from another node if the information it publishes via heartbeat packets are detected to be out of date.
The other nodes will detect that there is a new master serving the same slots served by the old master but with a greater configEpoch, and will upgrade their configuration. Replicas of the old master (or the failed over master if it rejoins the cluster) will not just upgrade the configuration but will also reconfigure to replicate from the new master. How nodes rejoining the cluster are configured is explained in the next sections.
Masters reply to replica vote request
In the previous section, we discussed how replicas try to get elected. This section explains what happens from the point of view of a master that is requested to vote for a given replica.
Masters receive requests for votes in form of FAILOVER_AUTH_REQUEST requests from replicas.
For a vote to be granted the following conditions need to be met:
- A master only votes a single time for a given epoch, and refuses to vote for older epochs: every master has a lastVoteEpoch field and will refuse to vote again as long as the
currentEpochin the auth request packet is not greater than the lastVoteEpoch. When a master replies positively to a vote request, the lastVoteEpoch is updated accordingly, and safely stored on disk. - A master votes for a replica only if the replica's master is flagged as
FAIL. - Auth requests with a
currentEpochthat is less than the mastercurrentEpochare ignored. Because of this the master reply will always have the samecurrentEpochas the auth request. If the same replica asks again to be voted, incrementing thecurrentEpoch, it is guaranteed that an old delayed reply from the master can not be accepted for the new vote.
Example of the issue caused by not using rule number 3:
Master currentEpoch is 5, lastVoteEpoch is 1 (this may happen after a few failed elections)
- Replica
currentEpochis 3. - Replica tries to be elected with epoch 4 (3+1), master replies with an ok with
currentEpoch5, however the reply is delayed. - Replica will try to be elected again, at a later time, with epoch 5 (4+1), the delayed reply reaches the replica with
currentEpoch5, and is accepted as valid.
- Masters don't vote for a replica of the same master before
NODE_TIMEOUT * 2has elapsed if a replica of that master was already voted for. This is not strictly required as it is not possible for two replicas to win the election in the same epoch. However, in practical terms it ensures that when a replica is elected it has plenty of time to inform the other replicas and avoid the possibility that another replica will win a new election, performing an unnecessary second failover. - Masters make no effort to select the best replica in any way. If the replica's master is in
FAILstate and the master did not vote in the current term, a positive vote is granted. The best replica is the most likely to start an election and win it before the other replicas, since it will usually be able to start the voting process earlier because of its higher rank as explained in the previous section. - When a master refuses to vote for a given replica there is no negative response, the request is simply ignored.
- Masters don't vote for replicas sending a
configEpochthat is less than anyconfigEpochin the master table for the slots claimed by the replica. Remember that the replica sends theconfigEpochof its master, and the bitmap of the slots served by its master. This means that the replica requesting the vote must have a configuration for the slots it wants to failover that is newer or equal the one of the master granting the vote.
Practical example of configuration epoch usefulness during partitions
This section illustrates how the epoch concept is used to make the replica promotion process more resistant to partitions.
- A master is no longer reachable indefinitely. The master has three replicas A, B, C.
- Replica A wins the election and is promoted to master.
- A network partition makes A not available for the majority of the cluster.
- Replica B wins the election and is promoted as master.
- A partition makes B not available for the majority of the cluster.
- The previous partition is fixed, and A is available again.
At this point B is down and A is available again with a role of master (actually UPDATE messages would reconfigure it promptly, but here we assume all UPDATE messages were lost). At the same time, replica C will try to get elected in order to fail over B. This is what happens:
- C will try to get elected and will succeed, since for the majority of masters its master is actually down. It will obtain a new incremental
configEpoch. - A will not be able to claim to be the master for its hash slots, because the other nodes already have the same hash slots associated with a higher configuration epoch (the one of B) compared to the one published by A.
- So, all the nodes will upgrade their table to assign the hash slots to C, and the cluster will continue its operations.
As you'll see in the next sections, a stale node rejoining a cluster
will usually get notified as soon as possible about the configuration change
because as soon as it pings any other node, the receiver will detect it
has stale information and will send an UPDATE message.
Hash slots configuration propagation
An important part of Redis Cluster is the mechanism used to propagate the information about which cluster node is serving a given set of hash slots. This is vital to both the startup of a fresh cluster and the ability to upgrade the configuration after a replica was promoted to serve the slots of its failing master.
The same mechanism allows nodes partitioned away for an indefinite amount of time to rejoin the cluster in a sensible way.
There are two ways hash slot configurations are propagated:
- Heartbeat messages. The sender of a ping or pong packet always adds information about the set of hash slots it (or its master, if it is a replica) serves.
UPDATEmessages. Since in every heartbeat packet there is information about the senderconfigEpochand set of hash slots served, if a receiver of a heartbeat packet finds the sender information is stale, it will send a packet with new information, forcing the stale node to update its info.
The receiver of a heartbeat or UPDATE message uses certain simple rules in
order to update its table mapping hash slots to nodes. When a new Redis Cluster node is created, its local hash slot table is simply initialized to NULL entries so that each hash slot is not bound or linked to any node. This looks similar to the following:
0 -> NULL
1 -> NULL
2 -> NULL
...
16383 -> NULL
The first rule followed by a node in order to update its hash slot table is the following:
Rule 1: If a hash slot is unassigned (set to NULL), and a known node claims it, I'll modify my hash slot table and associate the claimed hash slots to it.
So if we receive a heartbeat from node A claiming to serve hash slots 1 and 2 with a configuration epoch value of 3, the table will be modified to:
0 -> NULL
1 -> A [3]
2 -> A [3]
...
16383 -> NULL
When a new cluster is created, a system administrator needs to manually assign (using the CLUSTER ADDSLOTS command, via the redis-cli command line tool, or by any other means) the slots served by each master node only to the node itself, and the information will rapidly propagate across the cluster.
However this rule is not enough. We know that hash slot mapping can change during two events:
- A replica replaces its master during a failover.
- A slot is resharded from a node to a different one.
For now let's focus on failovers. When a replica fails over its master, it obtains a configuration epoch which is guaranteed to be greater than the one of its master (and more generally greater than any other configuration epoch generated previously). For example node B, which is a replica of A, may failover A with configuration epoch of 4. It will start to send heartbeat packets (the first time mass-broadcasting cluster-wide) and because of the following second rule, receivers will update their hash slot tables:
Rule 2: If a hash slot is already assigned, and a known node is advertising it using a configEpoch that is greater than the configEpoch of the master currently associated with the slot, I'll rebind the hash slot to the new node.
So after receiving messages from B that claim to serve hash slots 1 and 2 with configuration epoch of 4, the receivers will update their table in the following way:
0 -> NULL
1 -> B [4]
2 -> B [4]
...
16383 -> NULL
Liveness property: because of the second rule, eventually all nodes in the cluster will agree that the owner of a slot is the one with the greatest configEpoch among the nodes advertising it.
This mechanism in Redis Cluster is called last failover wins.
The same happens during resharding. When a node importing a hash slot completes the import operation, its configuration epoch is incremented to make sure the change will be propagated throughout the cluster.
UPDATE messages, a closer look
With the previous section in mind, it is easier to see how update messages
work. Node A may rejoin the cluster after some time. It will send heartbeat
packets where it claims it serves hash slots 1 and 2 with configuration epoch
of 3. All the receivers with updated information will instead see that
the same hash slots are associated with node B having a higher configuration
epoch. Because of this they'll send an UPDATE message to A with the new
configuration for the slots. A will update its configuration because of the
rule 2 above.
How nodes rejoin the cluster
The same basic mechanism is used when a node rejoins a cluster. Continuing with the example above, node A will be notified that hash slots 1 and 2 are now served by B. Assuming that these two were the only hash slots served by A, the count of hash slots served by A will drop to 0! So A will reconfigure to be a replica of the new master.
The actual rule followed is a bit more complex than this. In general it may happen that A rejoins after a lot of time, in the meantime it may happen that hash slots originally served by A are served by multiple nodes, for example hash slot 1 may be served by B, and hash slot 2 by C.
So the actual Redis Cluster node role switch rule is: A master node will change its configuration to replicate (be a replica of) the node that stole its last hash slot.
During reconfiguration, eventually the number of served hash slots will drop to zero, and the node will reconfigure accordingly. Note that in the base case this just means that the old master will be a replica of the replica that replaced it after a failover. However in the general form the rule covers all possible cases.
Replicas do exactly the same: they reconfigure to replicate the node that stole the last hash slot of its former master.
Replica migration
Redis Cluster implements a concept called replica migration in order to improve the availability of the system. The idea is that in a cluster with a master-replica setup, if the map between replicas and masters is fixed availability is limited over time if multiple independent failures of single nodes happen.
For example in a cluster where every master has a single replica, the cluster can continue operations as long as either the master or the replica fail, but not if both fail the same time. However there is a class of failures that are the independent failures of single nodes caused by hardware or software issues that can accumulate over time. For example:
- Master A has a single replica A1.
- Master A fails. A1 is promoted as new master.
- Three hours later A1 fails in an independent manner (unrelated to the failure of A). No other replica is available for promotion since node A is still down. The cluster cannot continue normal operations.
If the map between masters and replicas is fixed, the only way to make the cluster more resistant to the above scenario is to add replicas to every master, however this is costly as it requires more instances of Redis to be executed, more memory, and so forth.
An alternative is to create an asymmetry in the cluster, and let the cluster layout automatically change over time. For example the cluster may have three masters A, B, C. A and B have a single replica each, A1 and B1. However the master C is different and has two replicas: C1 and C2.
Replica migration is the process of automatic reconfiguration of a replica in order to migrate to a master that has no longer coverage (no working replicas). With replica migration the scenario mentioned above turns into the following:
- Master A fails. A1 is promoted.
- C2 migrates as replica of A1, that is otherwise not backed by any replica.
- Three hours later A1 fails as well.
- C2 is promoted as new master to replace A1.
- The cluster can continue the operations.
Replica migration algorithm
The migration algorithm does not use any form of agreement since the replica layout in a Redis Cluster is not part of the cluster configuration that needs to be consistent and/or versioned with config epochs. Instead it uses an algorithm to avoid mass-migration of replicas when a master is not backed. The algorithm guarantees that eventually (once the cluster configuration is stable) every master will be backed by at least one replica.
This is how the algorithm works. To start we need to define what is a
good replica in this context: a good replica is a replica not in FAIL state
from the point of view of a given node.
The execution of the algorithm is triggered in every replica that detects that there is at least a single master without good replicas. However among all the replicas detecting this condition, only a subset should act. This subset is actually often a single replica unless different replicas have in a given moment a slightly different view of the failure state of other nodes.
The acting replica is the replica among the masters with the maximum number of attached replicas, that is not in FAIL state and has the smallest node ID.
So for example if there are 10 masters with 1 replica each, and 2 masters with 5 replicas each, the replica that will try to migrate is - among the 2 masters having 5 replicas - the one with the lowest node ID. Given that no agreement is used, it is possible that when the cluster configuration is not stable, a race condition occurs where multiple replicas believe themselves to be the non-failing replica with the lower node ID (it is unlikely for this to happen in practice). If this happens, the result is multiple replicas migrating to the same master, which is harmless. If the race happens in a way that will leave the ceding master without replicas, as soon as the cluster is stable again the algorithm will be re-executed again and will migrate a replica back to the original master.
Eventually every master will be backed by at least one replica. However, the normal behavior is that a single replica migrates from a master with multiple replicas to an orphaned master.
The algorithm is controlled by a user-configurable parameter called
cluster-migration-barrier: the number of good replicas a master
must be left with before a replica can migrate away. For example, if this
parameter is set to 2, a replica can try to migrate only if its master remains
with two working replicas.
configEpoch conflicts resolution algorithm
When new configEpoch values are created via replica promotion during
failovers, they are guaranteed to be unique.
However there are two distinct events where new configEpoch values are
created in an unsafe way, just incrementing the local currentEpoch of
the local node and hoping there are no conflicts at the same time.
Both the events are system-administrator triggered:
CLUSTER FAILOVERcommand withTAKEOVERoption is able to manually promote a replica node into a master without the majority of masters being available. This is useful, for example, in multi data center setups.- Migration of slots for cluster rebalancing also generates new configuration epochs inside the local node without agreement for performance reasons.
Specifically, during manual resharding, when a hash slot is migrated from a node A to a node B, the resharding program will force B to upgrade its configuration to an epoch which is the greatest found in the cluster, plus 1 (unless the node is already the one with the greatest configuration epoch), without requiring agreement from other nodes. Usually a real world resharding involves moving several hundred hash slots (especially in small clusters). Requiring an agreement to generate new configuration epochs during resharding, for each hash slot moved, is inefficient. Moreover it requires an fsync in each of the cluster nodes every time in order to store the new configuration. Because of the way it is performed instead, we only need a new config epoch when the first hash slot is moved, making it much more efficient in production environments.
However because of the two cases above, it is possible (though unlikely) to end
with multiple nodes having the same configuration epoch. A resharding operation
performed by the system administrator, and a failover happening at the same
time (plus a lot of bad luck) could cause currentEpoch collisions if
they are not propagated fast enough.
Moreover, software bugs and filesystem corruptions can also contribute to multiple nodes having the same configuration epoch.
When masters serving different hash slots have the same configEpoch, there
are no issues. It is more important that replicas failing over a master have
unique configuration epochs.
That said, manual interventions or resharding may change the cluster
configuration in different ways. The Redis Cluster main liveness property
requires that slot configurations always converge, so under every circumstance
we really want all the master nodes to have a different configEpoch.
In order to enforce this, a conflict resolution algorithm is used in the
event that two nodes end up with the same configEpoch.
- IF a master node detects another master node is advertising itself with
the same
configEpoch. - AND IF the node has a lexicographically smaller Node ID compared to the other node claiming the same
configEpoch. - THEN it increments its
currentEpochby 1, and uses it as the newconfigEpoch.
If there are any set of nodes with the same configEpoch, all the nodes but the one with the greatest Node ID will move forward, guaranteeing that, eventually, every node will pick a unique configEpoch regardless of what happened.
This mechanism also guarantees that after a fresh cluster is created, all
nodes start with a different configEpoch (even if this is not actually
used) since redis-cli makes sure to use CLUSTER SET-CONFIG-EPOCH at startup.
However if for some reason a node is left misconfigured, it will update
its configuration to a different configuration epoch automatically.
Node resets
Nodes can be software reset (without restarting them) in order to be reused in a different role or in a different cluster. This is useful in normal operations, in testing, and in cloud environments where a given node can be reprovisioned to join a different set of nodes to enlarge or create a new cluster.
In Redis Cluster nodes are reset using the CLUSTER RESET command. The
command is provided in two variants:
CLUSTER RESET SOFTCLUSTER RESET HARD
The command must be sent directly to the node to reset. If no reset type is provided, a soft reset is performed.
The following is a list of operations performed by a reset:
- Soft and hard reset: If the node is a replica, it is turned into a master, and its dataset is discarded. If the node is a master and contains keys the reset operation is aborted.
- Soft and hard reset: All the slots are released, and the manual failover state is reset.
- Soft and hard reset: All the other nodes in the nodes table are removed, so the node no longer knows any other node.
- Hard reset only:
currentEpoch,configEpoch, andlastVoteEpochare set to 0. - Hard reset only: the Node ID is changed to a new random ID.
Master nodes with non-empty data sets can't be reset (since normally you want to reshard data to the other nodes). However, under special conditions when this is appropriate (e.g. when a cluster is totally destroyed with the intent of creating a new one), FLUSHALL must be executed before proceeding with the reset.
Removing nodes from a cluster
It is possible to practically remove a node from an existing cluster by resharding all its data to other nodes (if it is a master node) and shutting it down. However, the other nodes will still remember its node ID and address, and will attempt to connect with it.
For this reason, when a node is removed we want to also remove its entry
from all the other nodes tables. This is accomplished by using the
CLUSTER FORGET <node-id> command.
The command does two things:
- It removes the node with the specified node ID from the nodes table.
- It sets a 60 second ban which prevents a node with the same node ID from being re-added.
The second operation is needed because Redis Cluster uses gossip in order to auto-discover nodes, so removing the node X from node A, could result in node B gossiping about node X to A again. Because of the 60 second ban, the Redis Cluster administration tools have 60 seconds in order to remove the node from all the nodes, preventing the re-addition of the node due to auto discovery.
Further information is available in the CLUSTER FORGET documentation.
Publish/Subscribe
In a Redis Cluster, clients can subscribe to every node, and can also publish to every other node. The cluster will make sure that published messages are forwarded as needed.
The clients can send SUBSCRIBE to any node and can also send PUBLISH to any node. It will simply broadcast each published message to all other nodes.
Redis 7.0 and later features sharded pub/sub, in which shard channels are assigned to slots by the same algorithm used to assign keys to slots. A shard message must be sent to a node that owns the slot the shard channel is hashed to. The cluster makes sure the published shard messages are forwarded to all nodes in the shard, so clients can subscribe to a shard channel by connecting to either the master responsible for the slot, or to any of its replicas.
Appendix
Appendix A: CRC16 reference implementation in ANSI C
/*
* Copyright 2001-2010 Georges Menie (www.menie.org)
* Copyright 2010 Salvatore Sanfilippo (adapted to Redis coding style)
* All rights reserved.
* Redistribution and use in source and binary forms, with or without
* modification, are permitted provided that the following conditions are met:
*
* * Redistributions of source code must retain the above copyright
* notice, this list of conditions and the following disclaimer.
* * Redistributions in binary form must reproduce the above copyright
* notice, this list of conditions and the following disclaimer in the
* documentation and/or other materials provided with the distribution.
* * Neither the name of the University of California, Berkeley nor the
* names of its contributors may be used to endorse or promote products
* derived from this software without specific prior written permission.
*
* THIS SOFTWARE IS PROVIDED BY THE REGENTS AND CONTRIBUTORS ``AS IS'' AND ANY
* EXPRESS OR IMPLIED WARRANTIES, INCLUDING, BUT NOT LIMITED TO, THE IMPLIED
* WARRANTIES OF MERCHANTABILITY AND FITNESS FOR A PARTICULAR PURPOSE ARE
* DISCLAIMED. IN NO EVENT SHALL THE REGENTS AND CONTRIBUTORS BE LIABLE FOR ANY
* DIRECT, INDIRECT, INCIDENTAL, SPECIAL, EXEMPLARY, OR CONSEQUENTIAL DAMAGES
* (INCLUDING, BUT NOT LIMITED TO, PROCUREMENT OF SUBSTITUTE GOODS OR SERVICES;
* LOSS OF USE, DATA, OR PROFITS; OR BUSINESS INTERRUPTION) HOWEVER CAUSED AND
* ON ANY THEORY OF LIABILITY, WHETHER IN CONTRACT, STRICT LIABILITY, OR TORT
* (INCLUDING NEGLIGENCE OR OTHERWISE) ARISING IN ANY WAY OUT OF THE USE OF THIS
* SOFTWARE, EVEN IF ADVISED OF THE POSSIBILITY OF SUCH DAMAGE.
*/
/* CRC16 implementation according to CCITT standards.
*
* Note by @antirez: this is actually the XMODEM CRC 16 algorithm, using the
* following parameters:
*
* Name : "XMODEM", also known as "ZMODEM", "CRC-16/ACORN"
* Width : 16 bit
* Poly : 1021 (That is actually x^16 + x^12 + x^5 + 1)
* Initialization : 0000
* Reflect Input byte : False
* Reflect Output CRC : False
* Xor constant to output CRC : 0000
* Output for "123456789" : 31C3
*/
static const uint16_t crc16tab[256]= {
0x0000,0x1021,0x2042,0x3063,0x4084,0x50a5,0x60c6,0x70e7,
0x8108,0x9129,0xa14a,0xb16b,0xc18c,0xd1ad,0xe1ce,0xf1ef,
0x1231,0x0210,0x3273,0x2252,0x52b5,0x4294,0x72f7,0x62d6,
0x9339,0x8318,0xb37b,0xa35a,0xd3bd,0xc39c,0xf3ff,0xe3de,
0x2462,0x3443,0x0420,0x1401,0x64e6,0x74c7,0x44a4,0x5485,
0xa56a,0xb54b,0x8528,0x9509,0xe5ee,0xf5cf,0xc5ac,0xd58d,
0x3653,0x2672,0x1611,0x0630,0x76d7,0x66f6,0x5695,0x46b4,
0xb75b,0xa77a,0x9719,0x8738,0xf7df,0xe7fe,0xd79d,0xc7bc,
0x48c4,0x58e5,0x6886,0x78a7,0x0840,0x1861,0x2802,0x3823,
0xc9cc,0xd9ed,0xe98e,0xf9af,0x8948,0x9969,0xa90a,0xb92b,
0x5af5,0x4ad4,0x7ab7,0x6a96,0x1a71,0x0a50,0x3a33,0x2a12,
0xdbfd,0xcbdc,0xfbbf,0xeb9e,0x9b79,0x8b58,0xbb3b,0xab1a,
0x6ca6,0x7c87,0x4ce4,0x5cc5,0x2c22,0x3c03,0x0c60,0x1c41,
0xedae,0xfd8f,0xcdec,0xddcd,0xad2a,0xbd0b,0x8d68,0x9d49,
0x7e97,0x6eb6,0x5ed5,0x4ef4,0x3e13,0x2e32,0x1e51,0x0e70,
0xff9f,0xefbe,0xdfdd,0xcffc,0xbf1b,0xaf3a,0x9f59,0x8f78,
0x9188,0x81a9,0xb1ca,0xa1eb,0xd10c,0xc12d,0xf14e,0xe16f,
0x1080,0x00a1,0x30c2,0x20e3,0x5004,0x4025,0x7046,0x6067,
0x83b9,0x9398,0xa3fb,0xb3da,0xc33d,0xd31c,0xe37f,0xf35e,
0x02b1,0x1290,0x22f3,0x32d2,0x4235,0x5214,0x6277,0x7256,
0xb5ea,0xa5cb,0x95a8,0x8589,0xf56e,0xe54f,0xd52c,0xc50d,
0x34e2,0x24c3,0x14a0,0x0481,0x7466,0x6447,0x5424,0x4405,
0xa7db,0xb7fa,0x8799,0x97b8,0xe75f,0xf77e,0xc71d,0xd73c,
0x26d3,0x36f2,0x0691,0x16b0,0x6657,0x7676,0x4615,0x5634,
0xd94c,0xc96d,0xf90e,0xe92f,0x99c8,0x89e9,0xb98a,0xa9ab,
0x5844,0x4865,0x7806,0x6827,0x18c0,0x08e1,0x3882,0x28a3,
0xcb7d,0xdb5c,0xeb3f,0xfb1e,0x8bf9,0x9bd8,0xabbb,0xbb9a,
0x4a75,0x5a54,0x6a37,0x7a16,0x0af1,0x1ad0,0x2ab3,0x3a92,
0xfd2e,0xed0f,0xdd6c,0xcd4d,0xbdaa,0xad8b,0x9de8,0x8dc9,
0x7c26,0x6c07,0x5c64,0x4c45,0x3ca2,0x2c83,0x1ce0,0x0cc1,
0xef1f,0xff3e,0xcf5d,0xdf7c,0xaf9b,0xbfba,0x8fd9,0x9ff8,
0x6e17,0x7e36,0x4e55,0x5e74,0x2e93,0x3eb2,0x0ed1,0x1ef0
};
uint16_t crc16(const char *buf, int len) {
int counter;
uint16_t crc = 0;
for (counter = 0; counter < len; counter++)
crc = (crc<<8) ^ crc16tab[((crc>>8) ^ *buf++)&0x00FF];
return crc;
}
8.4 - Redis command arguments
How Redis commands expose their documentation programmatically
The COMMAND DOCS command returns documentation-focused information about available Redis commands.
The map reply that the command returns includes the arguments key.
This key stores an array that describes the command's arguments.
Every element in the arguments array is a map with the following fields:
- name: the argument's name, always present. The name of an argument is given for identification purposes alone. It isn't displayed during the command's syntax rendering.
- type: the argument's type, always present.
An argument must have one of the following types:
- string: a string argument.
- integer: an integer argument.
- double: a double-precision argument.
- key: a string that represents the name of a key.
- pattern: a string that represents a glob-like pattern.
- unix-time: an integer that represents a Unix timestamp.
- pure-token: an argument is a token, meaning a reserved keyword, which may or may not be provided. Not to be confused with free-text user input.
- oneof: the argument is a container for nested arguments.
This type enables choice among several nested arguments (see the
XADDexample below). - block: the argument is a container for nested arguments.
This type enables grouping arguments and applying a property (such as optional) to all (see the
XADDexample below).
- key_spec_index: this value is available for every argument of the key type. It is a 0-based index of the specification in the command's key specifications that corresponds to the argument.
- token: a constant literal that precedes the argument (user input) itself.
- summary: a short description of the argument.
- since: the debut Redis version of the argument (or for module commands, the module version).
- deprecated_since: the Redis version that deprecated the command (or for module commands, the module version).
- flags: an array of argument flags.
Possible flags are:
- optional: denotes that the argument is optional (for example, the GET clause of the
SETcommand). - multiple: denotes that the argument may be repeated (such as the key argument of
DEL). - multiple-token: denotes the possible repetition of the argument with its preceding token (see
SORT'sGET patternclause).
- optional: denotes that the argument is optional (for example, the GET clause of the
- value: the argument's value. For arguments types other than oneof and block, this is a string that describes the value in the command's syntax. For the oneof and block types, this is an array of nested arguments, each being a map as described in this section.
Example
The trimming clause of XADD, i.e., [MAXLEN|MINID [=|~] threshold [LIMIT count]], is represented at the top-level as block-typed argument.
It consists of four nested arguments:
- trimming strategy: this nested argument has a oneof type with two nested arguments. Each of the nested arguments, MAXLEN and MINID, is typed as pure-token.
- trimming operator: this nested argument is an optional oneof type with two nested arguments. Each of the nested arguments, = and ~, is a pure-token.
- threshold: this nested argument is a string.
- count: this nested argument is an optional integer with a token (LIMIT).
Here's XADD's arguments array:
1) 1) "name"
2) "key"
3) "type"
4) "key"
5) "value"
6) "key"
2) 1) "name"
2) "nomkstream"
3) "type"
4) "pure-token"
5) "token"
6) "NOMKSTREAM"
7) "since"
8) "6.2"
9) "flags"
10) 1) optional
3) 1) "name"
2) "trim"
3) "type"
4) "block"
5) "flags"
6) 1) optional
7) "value"
8) 1) 1) "name"
2) "strategy"
3) "type"
4) "oneof"
5) "value"
6) 1) 1) "name"
2) "maxlen"
3) "type"
4) "pure-token"
5) "token"
6) "MAXLEN"
2) 1) "name"
2) "minid"
3) "type"
4) "pure-token"
5) "token"
6) "MINID"
7) "since"
8) "6.2"
2) 1) "name"
2) "operator"
3) "type"
4) "oneof"
5) "flags"
6) 1) optional
7) "value"
8) 1) 1) "name"
2) "equal"
3) "type"
4) "pure-token"
5) "token"
6) "="
2) 1) "name"
2) "approximately"
3) "type"
4) "pure-token"
5) "token"
6) "~"
3) 1) "name"
2) "threshold"
3) "type"
4) "string"
5) "value"
6) "threshold"
4) 1) "name"
2) "count"
3) "type"
4) "integer"
5) "token"
6) "LIMIT"
7) "since"
8) "6.2"
9) "flags"
10) 1) optional
11) "value"
12) "count"
4) 1) "name"
2) "id_or_auto"
3) "type"
4) "oneof"
5) "value"
6) 1) 1) "name"
2) "auto_id"
3) "type"
4) "pure-token"
5) "token"
6) "*"
2) 1) "name"
2) "id"
3) "type"
4) "string"
5) "value"
6) "id"
5) 1) "name"
2) "field_value"
3) "type"
4) "block"
5) "flags"
6) 1) multiple
7) "value"
8) 1) 1) "name"
2) "field"
3) "type"
4) "string"
5) "value"
6) "field"
2) 1) "name"
2) "value"
3) "type"
4) "string"
5) "value"
6) "value"
8.5 - Command key specifications
What are command key specification and how to use them in your client
Many of the commands in Redis accept key names as input arguments.
The 9th element in the reply of COMMAND (and COMMAND INFO) is an array that consists of the command's key specifications.
A key specification describes a rule for extracting the names of one or more keys from the arguments of a given command. Key specifications provide a robust and flexible mechanism, compared to the first key, last key and step scheme employed until Redis 7.0. Before introducing these specifications, Redis clients had no trivial programmatic means to extract key names for all commands.
Cluster-aware Redis clients had to have the keys' extraction logic hard-coded in the cases of commands such as EVAL and ZUNIONSTORE that rely on a numkeys argument or SORT and its many clauses.
Alternatively, the COMMAND GETKEYS can be used to achieve a similar extraction effect but at a higher latency.
A Redis client isn't obligated to support key specifications. It can continue using the legacy first key, last key and step scheme along with the movablekeys flag that remain unchanged.
However, a Redis client that implements key specifications support can consolidate most of its keys' extraction logic.
Even if the client encounters an unfamiliar type of key specification, it can always revert to the COMMAND GETKEYS command.
That said, most cluster-aware clients only require a single key name to perform correct command routing, so it is possible that although a command features one unfamiliar specification, its other specification may still be usable by the client.
Key specifications are maps with three keys:
- begin_search:: the starting index for keys' extraction.
- find_keys: the rule for identifying the keys relative to the BS.
- notes: notes about this key spec, if there are any.
- flags: indicate the type of data access.
begin_search
The begin_search value of a specification informs the client of the extraction's beginning.
The value is a map.
There are three types of begin_search:
- index: key name arguments begin at a constant index.
- keyword: key names start after a specific keyword (token).
- unknown: an unknown type of specification - see the incomplete flag section for more details.
index
The index type of begin_search indicates that input keys appear at a constant index.
It is a map under the spec key with a single key:
- index: the 0-based index from which the client should start extracting key names.
keyword
The keyword type of begin_search means a literal token precedes key name arguments.
It is a map under the spec with two keys:
- keyword: the keyword (token) that marks the beginning of key name arguments.
- startfrom: an index to the arguments array from which the client should begin searching. This can be a negative value, which means the search should start from the end of the arguments' array, in reverse order. For example, -2's meaning is to search reverse from the penultimate argument.
More examples of the keyword search type include:
SEThas abegin_searchspecification of type index with a value of 1.XREADhas abegin_searchspecification of type keyword with the values "STREAMS" and 1 as keyword and startfrom, respectively.MIGRATEhas a start_search specification of type keyword with the values of "KEYS" and -2.
find_keys
The find_keys value of a key specification tells the client how to continue the search for key names.
find_keys has three possible types:
- range: keys stop at a specific index or relative to the last argument.
- keynum: an additional argument specifies the number of input keys.
- unknown: an unknown type of specification - see the incomplete flag section for more details.
range
The range type of find_keys is a map under the spec key with three keys:
- lastkey: the index, relative to
begin_search, of the last key argument. This can be a negative value, in which case it isn't relative. For example, -1 indicates to keep extracting keys until the last argument, -2 until one before the last, and so on. - keystep: the number of arguments that should be skipped, after finding a key, to find the next one.
- limit: if lastkey is has the value of -1, we use the limit to stop the search by a factor. 0 and 1 mean no limit. 2 means half of the remaining arguments, 3 means a third, and so on.
keynum
The keynum type of find_keys is a map under the spec key with three keys:
- keynumidx: the index, relative to
begin_search, of the argument containing the number of keys. - firstkey: the index, relative to
begin_search, of the first key. This is usually the next argument after keynumidx, and its value, in this case, is greater by one. - keystep: Tthe number of arguments that should be skipped, after finding a key, to find the next one.
Examples:
- The
SETcommand has a range of 0, 1 and 0. - The
MSETcommand has a range of -1, 2 and 0. - The
XREADcommand has a range of -1, 1 and 2. - The
ZUNIONcommand has a start_search type index with the value 1, andfind_keysof type keynum with values of 0, 1 and 1. - The
AI.DAGRUNcommand has a start_search of type keyword with values of "LOAD" and 1, andfind_keysof type keynum with values of 0, 1 and 1.
Note: this isn't a perfect solution as the module writers can come up with anything. However, this mechanism should allow the extraction of key name arguments for the vast majority of commands.
notes
Notes about non-obvious key specs considerations, if applicable.
flags
A key specification can have additional flags that provide more details about the key. These flags are divided into three groups, as described below.
Access type flags
The following flags declare the type of access the command uses to a key's value or its metadata. A key's metadata includes LRU/LFU counters, type, and cardinality. These flags do not relate to the reply sent back to the client.
Every key specification has precisely one of the following flags:
- RW: the read-write flag. The command modifies the data stored in the value of the key or its metadata. This flag marks every operation that isn't distinctly a delete, an overwrite, or read-only.
- RO: the read-only flag. The command only reads the value of the key (although it doesn't necessarily return it).
- OW: the overwrite flag. The command overwrites the data stored in the value of the key.
- RM: the remove flag. The command deletes the key.
Logical operation flags
The following flags declare the type of operations performed on the data stored as the key's value and its TTL (if any), not the metadata. These flags describe the logical operation that the command executes on data, driven by the input arguments. The flags do not relate to modifying or returning metadata (such as a key's type, cardinality, or existence).
Every key specification may include the following flag:
- access: the access flag. This flag indicates that the command returns, copies, or somehow uses the user's data that's stored in the key.
In addition, the specification may include precisely one of the following:
- update: the update flag. The command updates the data stored in the key's value. The new value may depend on the old value. This flag marks every operation that isn't distinctly an insert or a delete.
- insert: the insert flag. The command only adds data to the value; existing data isn't modified or deleted.
- delete: the delete flag. The command explicitly deletes data from the value stored at the key.
Miscellaneous flags
Key specifications may have the following flags:
- not_key: this flag indicates that the specified argument isn't a key. This argument is treated the same as a key when computing which slot a command should be assigned to for Redis cluster. For all other purposes this argument should not be considered a key.
- incomplete: this flag is explained below.
- variable_flags: this flag is explained below.
incomplete
Some commands feature exotic approaches when it comes to specifying their keys, which makes extraction difficult.
Consider, for example, what would happen with a call to MIGRATE that includes the literal string "KEYS" as an argument to its AUTH clause.
Our key specifications would miss the mark, and extraction would begin at the wrong index.
Thus, we recognize that key specifications are incomplete and may fail to extract all keys. However, we assure that even incomplete specifications never yield the wrong names of keys, providing that the command is syntactically correct.
In the case of MIGRATE, the search begins at the end (startfrom has the value of -1).
If and when we encounter a key named "KEYS", we'll only extract the subset of the key name arguments after it.
That's why MIGRATE has the incomplete flag in its key specification.
Another case of incompleteness is the SORT command.
Here, the begin_search and find_keys are of type unknown.
The client should revert to calling the COMMAND GETKEYS command to extract key names from the arguments, short of implementing it natively.
The difficulty arises, for example, because the string "STORE" is both a keyword (token) and a valid literal argument for SORT.
Note:
the only commands with incomplete key specifications are SORT and MIGRATE.
We don't expect the addition of such commands in the future.
variable_flags
In some commands, the flags for the same key name argument can depend on other arguments.
For example, consider the SET command and its optional GET argument.
Without the GET argument, SET is write-only, but it becomes a read and write command with it.
When this flag is present, it means that the key specification flags cover all possible options, but the effective flags depend on other arguments.
Examples
SET's key specifications
1) 1) "flags"
2) 1) RW
2) access
3) update
3) "begin_search"
4) 1) "type"
2) "index"
3) "spec"
4) 1) "index"
2) (integer) 1
5) "find_keys"
6) 1) "type"
2) "range"
3) "spec"
4) 1) "lastkey"
2) (integer) 0
3) "keystep"
4) (integer) 1
5) "limit"
6) (integer) 0
ZUNION's key specifications
1) 1) "flags"
2) 1) RO
2) access
3) "begin_search"
4) 1) "type"
2) "index"
3) "spec"
4) 1) "index"
2) (integer) 1
5) "find_keys"
6) 1) "type"
2) "keynum"
3) "spec"
4) 1) "keynumidx"
2) (integer) 0
3) "firstkey"
4) (integer) 1
5) "keystep"
6) (integer) 1
8.6 - Redis command tips
Programm
Command tips are an array of strings. These provide Redis clients with additional information about the command. The information can instruct Redis Cluster clients as to how the command should be executed and its output processed in a clustered deployment.
Unlike the command's flags (see the 3rd element of COMMAND's reply), which are strictly internal to the server's operation, tips don't serve any purpose other than being reported to clients.
Command tips are arbitrary strings. However, the following sections describe proposed tips and demonstrate the conventions they are likely to adhere to.
nondeterministic_output
This tip indicates that the command's output isn't deterministic.
That means that calls to the command may yield different results with the same arguments and data.
That difference could be the result of the command's random nature (e.g., RANDOMKEY and SPOP); the call's timing (e.g. TTL); or generic differences that relate to the server's state (e.g. INFO and CLIENT LIST).
Note: prior to Redis 7.0, this tip was the random command flag.
nondeterministic_output_order
The existence of this tip indicates that the command's output is deterministic, but its ordering is random (e.g. HGETALL and SMEMBERS).
Note: prior to Redis 7.0, this tip was the sort_for_script flag.
request_policy
This tip can help clients determine the shard(s) to send the command in clustering mode. The default behavior a client should implement for commands without the request_policy tip is as follows:
- The command doesn't accept key name arguments: the client can execute the command on an arbitrary shard.
- For commands that accept one or more key name arguments: the client should route the command to a single shard, as determined by the hash slot of the input keys.
In cases where the client should adopt a behavior different than the default, the request_policy tip can be one of:
- all_nodes: the client should execute the command on all nodes - masters and replicas alike.
An example is the
CONFIG SETcommand. This tip is in-use by commands that don't accept key name arguments. The command operates atomically per shard.
- all_shards: the client should execute the command on all master shards (e.g., the
DBSIZEcommand). This tip is in-use by commands that don't accept key name arguments. The command operates atomically per shard.
- multi_shard: the client should execute the command on several shards.
The shards that execute the command are determined by the hash slots of its input key name arguments.
Examples for such commands include
MSET,MGETandDEL. However, note thatSUNIONSTOREisn't considered as multi_shard because all of its keys must belong to the same hash slot. - special: indicates a non-trivial form of the client's request policy, such as the
SCANcommand.
response_policy
This tip can help clients determine the aggregate they need to compute from the replies of multiple shards in a cluster. The default behavior for commands without a request_policy tip only applies to replies with of nested types (i.e., an array, a set, or a map). The client's implementation for the default behavior should be as follows:
- The command doesn't accept key name arguments: the client can aggregate all replies within a single nested data structure.
For example, the array replies we get from calling
KEYSagainst all shards. These should be packed in a single in no particular order. - For commands that accept one or more key name arguments: the client needs to retain the same order of replies as the input key names.
For example,
MGET's aggregated reply.
The response_policy tip is set for commands that reply with scalar data types, or when it's expected that clients implement a non-default aggregate. This tip can be one of:
- one_succeeded: the clients should return success if at least one shard didn't reply with an error.
The client should reply with the first non-error reply it obtains.
If all shards return an error, the client can reply with any one of these.
For example, consider a
SCRIPT KILLcommand that's sent to all shards. Although the script should be loaded in all of the cluster's shards, theSCRIPT KILLwill typically run only on one at a given time. - all_succeeded: the client should return successfully only if there are no error replies.
Even a single error reply should disqualify the aggregate and be returned.
Otherwise, the client should return one of the non-error replies.
As an example, consider the
CONFIG SET,SCRIPT FLUSHandSCRIPT LOADcommands. - agg_logical_and: the client should return the result of a logical AND operation on all replies (only applies to integer replies, usually from commands that return either 0 or 1).
Consider the
SCRIPT EXISTScommand as an example. It returns an array of 0's and 1's that denote the existence of its given SHA1 sums in the script cache. The aggregated response should be 1 only when all shards had reported that a given script SHA1 sum is in their respective cache. - agg_logical_or: the client should return the result of a logical AND operation on all replies (only applies to integer replies, usually from commands that return either 0 or 1).
- agg_min: the client should return the minimal value from the replies (only applies to numerical replies).
The aggregate reply from a cluster-wide
WAITcommand, for example, should be the minimal value (number of synchronized replicas) from all shards. - agg_max: the client should return the maximal value from the replies (only applies to numerical replies).
- agg_sum: the client should return the sum of replies (only applies to numerical replies).
Example:
DBSIZE. - special: this type of tip indicates a non-trivial form of reply policy.
INFOis an excellent example of that.
Example
redis> command info ping
1) 1) "ping"
2) (integer) -1
3) 1) fast
4) (integer) 0
5) (integer) 0
6) (integer) 0
7) 1) @fast
2) @connection
8) 1) "request_policy:all_shards"
2) "response_policy:all_succeeded"
9) (empty array)
10) (empty array)
8.7 - Debugging
A guide to debugging Redis server processes
Redis is developed with an emphasis on stability. We do our best with every release to make sure you'll experience a stable product with no crashes. However, if you ever need to debug the Redis process itself, read on.
When Redis crashes, it produces a detailed report of what happened. However, sometimes looking at the crash report is not enough, nor is it possible for the Redis core team to reproduce the issue independently. In this scenario, we need help from the user who can reproduce the issue.
This guide shows how to use GDB to provide the information the Redis developers will need to track the bug more easily.
What is GDB?
GDB is the Gnu Debugger: a program that is able to inspect the internal state of another program. Usually tracking and fixing a bug is an exercise in gathering more information about the state of the program at the moment the bug happens, so GDB is an extremely useful tool.
GDB can be used in two ways:
- It can attach to a running program and inspect the state of it at runtime.
- It can inspect the state of a program that already terminated using what is called a core file, that is, the image of the memory at the time the program was running.
From the point of view of investigating Redis bugs we need to use both of these
GDB modes. The user able to reproduce the bug attaches GDB to their running Redis
instance, and when the crash happens, they create the core file that in turn
the developer will use to inspect the Redis internals at the time of the crash.
This way the developer can perform all the inspections in his or her computer without the help of the user, and the user is free to restart Redis in their production environment.
Compiling Redis without optimizations
By default Redis is compiled with the -O2 switch, this means that compiler
optimizations are enabled. This makes the Redis executable faster, but at the
same time it makes Redis (like any other program) harder to inspect using GDB.
It is better to attach GDB to Redis compiled without optimizations using the
make noopt command (instead of just using the plain make command). However,
if you have an already running Redis in production there is no need to recompile
and restart it if this is going to create problems on your side. GDB still works
against executables compiled with optimizations.
You should not be overly concerned at the loss of performance from compiling Redis without optimizations. It is unlikely that this will cause problems in your environment as Redis is not very CPU-bound.
Attaching GDB to a running process
If you have an already running Redis server, you can attach GDB to it, so that
if Redis crashes it will be possible to both inspect the internals and generate
a core dump file.
After you attach GDB to the Redis process it will continue running as usual without any loss of performance, so this is not a dangerous procedure.
In order to attach GDB the first thing you need is the process ID of the running
Redis instance (the pid of the process). You can easily obtain it using
redis-cli:
$ redis-cli info | grep process_id
process_id:58414
In the above example the process ID is 58414.
Login into your Redis server.
(Optional but recommended) Start screen or tmux or any other program that will make sure that your GDB session will not be closed if your ssh connection times out. You can learn more about screen in this article.
Attach GDB to the running Redis server by typing:
$ gdb <path-to-redis-executable> <pid>
For example:
$ gdb /usr/local/bin/redis-server 58414
GDB will start and will attach to the running server printing something like the following:
Reading symbols for shared libraries + done
0x00007fff8d4797e6 in epoll_wait ()
(gdb)
At this point GDB is attached but your Redis instance is blocked by GDB. In order to let the Redis instance continue the execution just type continue at the GDB prompt, and press enter.
(gdb) continue
Continuing.
Done! Now your Redis instance has GDB attached. Now you can wait for the next crash. :)
Now it's time to detach your screen/tmux session, if you are running GDB using it, by pressing Ctrl-a a key combination.
After the crash
Redis has a command to simulate a segmentation fault (in other words a bad crash) using
the DEBUG SEGFAULT command (don't use it against a real production instance of course!
So I'll use this command to crash my instance to show what happens in the GDB side:
(gdb) continue
Continuing.
Program received signal EXC_BAD_ACCESS, Could not access memory.
Reason: KERN_INVALID_ADDRESS at address: 0xffffffffffffffff
debugCommand (c=0x7ffc32005000) at debug.c:220
220 *((char*)-1) = 'x';
As you can see GDB detected that Redis crashed, and was even able to show me the file name and line number causing the crash. This is already much better than the Redis crash report back trace (containing just function names and binary offsets).
Obtaining the stack trace
The first thing to do is to obtain a full stack trace with GDB. This is as simple as using the bt command:
(gdb) bt
#0 debugCommand (c=0x7ffc32005000) at debug.c:220
#1 0x000000010d246d63 in call (c=0x7ffc32005000) at redis.c:1163
#2 0x000000010d247290 in processCommand (c=0x7ffc32005000) at redis.c:1305
#3 0x000000010d251660 in processInputBuffer (c=0x7ffc32005000) at networking.c:959
#4 0x000000010d251872 in readQueryFromClient (el=0x0, fd=5, privdata=0x7fff76f1c0b0, mask=220924512) at networking.c:1021
#5 0x000000010d243523 in aeProcessEvents (eventLoop=0x7fff6ce408d0, flags=220829559) at ae.c:352
#6 0x000000010d24373b in aeMain (eventLoop=0x10d429ef0) at ae.c:397
#7 0x000000010d2494ff in main (argc=1, argv=0x10d2b2900) at redis.c:2046
This shows the backtrace, but we also want to dump the processor registers using the info registers command:
(gdb) info registers
rax 0x0 0
rbx 0x7ffc32005000 140721147367424
rcx 0x10d2b0a60 4515891808
rdx 0x7fff76f1c0b0 140735188943024
rsi 0x10d299777 4515796855
rdi 0x0 0
rbp 0x7fff6ce40730 0x7fff6ce40730
rsp 0x7fff6ce40650 0x7fff6ce40650
r8 0x4f26b3f7 1327936503
r9 0x7fff6ce40718 140735020271384
r10 0x81 129
r11 0x10d430398 4517462936
r12 0x4b7c04f8babc0 1327936503000000
r13 0x10d3350a0 4516434080
r14 0x10d42d9f0 4517452272
r15 0x10d430398 4517462936
rip 0x10d26cfd4 0x10d26cfd4 <debugCommand+68>
eflags 0x10246 66118
cs 0x2b 43
ss 0x0 0
ds 0x0 0
es 0x0 0
fs 0x0 0
gs 0x0 0
Please make sure to include both of these outputs in your bug report.
Obtaining the core file
The next step is to generate the core dump, that is the image of the memory of the running Redis process. This is done using the gcore command:
(gdb) gcore
Saved corefile core.58414
Now you have the core dump to send to the Redis developer, but it is important to understand that this happens to contain all the data that was inside the Redis instance at the time of the crash; Redis developers will make sure not to share the content with anyone else, and will delete the file as soon as it is no longer used for debugging purposes, but you are warned that by sending the core file you are sending your data.
What to send to developers
Finally you can send everything to the Redis core team:
- The Redis executable you are using.
- The stack trace produced by the bt command, and the registers dump.
- The core file you generated with gdb.
- Information about the operating system and GCC version, and Redis version you are using.
Thank you
Your help is extremely important! Many issues can only be tracked this way. So thanks!
8.8 - Redis and the Gopher protocol
The Redis Gopher protocol implementation
** Note: Support for Gopher was removed is Redis 7.0 **
Redis contains an implementation of the Gopher protocol, as specified in the RFC 1436.
The Gopher protocol was very popular in the late '90s. It is an alternative to the web, and the implementation both server and client side is so simple that the Redis server has just 100 lines of code in order to implement this support.
What do you do with Gopher nowadays? Well Gopher never really died, and lately there is a movement in order for the Gopher more hierarchical content composed of just plain text documents to be resurrected. Some want a simpler internet, others believe that the mainstream internet became too much controlled, and it's cool to create an alternative space for people that want a bit of fresh air.
Anyway, for the 10th birthday of the Redis, we gave it the Gopher protocol as a gift.
How it works
The Redis Gopher support uses the inline protocol of Redis, and specifically two kind of inline requests that were anyway illegal: an empty request or any request that starts with "/" (there are no Redis commands starting with such a slash). Normal RESP2/RESP3 requests are completely out of the path of the Gopher protocol implementation and are served as usually as well.
If you open a connection to Redis when Gopher is enabled and send it a string like "/foo", if there is a key named "/foo" it is served via the Gopher protocol.
In order to create a real Gopher "hole" (the name of a Gopher site in Gopher talking), you likely need a script such as the one in https://github.com/antirez/gopher2redis.
SECURITY WARNING
If you plan to put Redis on the internet in a publicly accessible address to server Gopher pages make sure to set a password to the instance. Once a password is set:
- The Gopher server (when enabled, not by default) will kill serve content via Gopher.
- However other commands cannot be called before the client will authenticate.
So use the requirepass option to protect your instance.
To enable Gopher support use the following configuration line.
gopher-enabled yes
Accessing keys that are not strings or do not exit will generate an error in Gopher protocol format.
8.9 - Redis internals
Documents describing internals in early Redis implementations
The following Redis documents were written by the creator of Redis, Salvatore Sanfilippo, early in the development of Redis (c. 2010), and do not necessarily reflect the latest Redis implementation.
8.9.1 - Event library
What's an event library, and how was the original Redis event library implemented?
Note: this document was written by the creator of Redis, Salvatore Sanfilippo, early in the development of Redis (c. 2010), and does not necessarily reflect the latest Redis implementation.
Why is an Event Library needed at all?
Let us figure it out through a series of Q&As.
Q: What do you expect a network server to be doing all the time?
A: Watch for inbound connections on the port its listening and accept them.
Q: Calling [accept](http://man.cx/accept%282%29 accept) yields a descriptor. What do I do with it?
A: Save the descriptor and do a non-blocking read/write operation on it.
Q: Why does the read/write have to be non-blocking?
A: If the file operation ( even a socket in Unix is a file ) is blocking how could the server for example accept other connection requests when its blocked in a file I/O operation.
Q: I guess I have to do many such non-blocking operations on the socket to see when it's ready. Am I right?
A: Yes. That is what an event library does for you. Now you get it.
Q: How do Event Libraries do what they do?
A: They use the operating system's polling facility along with timers.
Q: So are there any open source event libraries that do what you just described?
A: Yes. libevent and libev are two such event libraries that I can recall off the top of my head.
Q: Does Redis use such open source event libraries for handling socket I/O?
A: No. For various reasons Redis uses its own event library.
The Redis event library
Redis implements its own event library. The event library is implemented in ae.c.
The best way to understand how the Redis event library works is to understand how Redis uses it.
Event Loop Initialization
initServer function defined in redis.c initializes the numerous fields of the redisServer structure variable. One such field is the Redis event loop el:
aeEventLoop *el
initServer initializes server.el field by calling aeCreateEventLoop defined in ae.c. The definition of aeEventLoop is below:
typedef struct aeEventLoop
{
int maxfd;
long long timeEventNextId;
aeFileEvent events[AE_SETSIZE]; /* Registered events */
aeFiredEvent fired[AE_SETSIZE]; /* Fired events */
aeTimeEvent *timeEventHead;
int stop;
void *apidata; /* This is used for polling API specific data */
aeBeforeSleepProc *beforesleep;
} aeEventLoop;
aeCreateEventLoop
aeCreateEventLoop first mallocs aeEventLoop structure then calls ae_epoll.c:aeApiCreate.
aeApiCreate mallocs aeApiState that has two fields - epfd that holds the epoll file descriptor returned by a call from epoll_create and events that is of type struct epoll_event define by the Linux epoll library. The use of the events field will be described later.
Next is ae.c:aeCreateTimeEvent. But before that initServer call anet.c:anetTcpServer that creates and returns a listening descriptor. The descriptor listens on port 6379 by default. The returned listening descriptor is stored in server.fd field.
aeCreateTimeEvent
aeCreateTimeEvent accepts the following as parameters:
eventLoop: This isserver.elinredis.c- milliseconds: The number of milliseconds from the current time after which the timer expires.
proc: Function pointer. Stores the address of the function that has to be called after the timer expires.clientData: MostlyNULL.finalizerProc: Pointer to the function that has to be called before the timed event is removed from the list of timed events.
initServer calls aeCreateTimeEvent to add a timed event to timeEventHead field of server.el. timeEventHead is a pointer to a list of such timed events. The call to aeCreateTimeEvent from redis.c:initServer function is given below:
aeCreateTimeEvent(server.el /*eventLoop*/, 1 /*milliseconds*/, serverCron /*proc*/, NULL /*clientData*/, NULL /*finalizerProc*/);
redis.c:serverCron performs many operations that helps keep Redis running properly.
aeCreateFileEvent
The essence of aeCreateFileEvent function is to execute epoll_ctl system call which adds a watch for EPOLLIN event on the listening descriptor create by anetTcpServer and associate it with the epoll descriptor created by a call to aeCreateEventLoop.
Following is an explanation of what precisely aeCreateFileEvent does when called from redis.c:initServer.
initServer passes the following arguments to aeCreateFileEvent:
server.el: The event loop created byaeCreateEventLoop. Theepolldescriptor is got fromserver.el.server.fd: The listening descriptor that also serves as an index to access the relevant file event structure from theeventLoop->eventstable and store extra information like the callback function.AE_READABLE: Signifies thatserver.fdhas to be watched forEPOLLINevent.acceptHandler: The function that has to be executed when the event being watched for is ready. This function pointer is stored ineventLoop->events[server.fd]->rfileProc.
This completes the initialization of Redis event loop.
Event Loop Processing
ae.c:aeMain called from redis.c:main does the job of processing the event loop that is initialized in the previous phase.
ae.c:aeMain calls ae.c:aeProcessEvents in a while loop that processes pending time and file events.
aeProcessEvents
ae.c:aeProcessEvents looks for the time event that will be pending in the smallest amount of time by calling ae.c:aeSearchNearestTimer on the event loop. In our case there is only one timer event in the event loop that was created by ae.c:aeCreateTimeEvent.
Remember, that the timer event created by aeCreateTimeEvent has probably elapsed by now because it had an expiry time of one millisecond. Since the timer has already expired, the seconds and microseconds fields of the tvp timeval structure variable is initialized to zero.
The tvp structure variable along with the event loop variable is passed to ae_epoll.c:aeApiPoll.
aeApiPoll functions does an epoll_wait on the epoll descriptor and populates the eventLoop->fired table with the details:
fd: The descriptor that is now ready to do a read/write operation depending on the mask value.mask: The read/write event that can now be performed on the corresponding descriptor.
aeApiPoll returns the number of such file events ready for operation. Now to put things in context, if any client has requested for a connection then aeApiPoll would have noticed it and populated the eventLoop->fired table with an entry of the descriptor being the listening descriptor and mask being AE_READABLE.
Now, aeProcessEvents calls the redis.c:acceptHandler registered as the callback. acceptHandler executes accept on the listening descriptor returning a connected descriptor with the client. redis.c:createClient adds a file event on the connected descriptor through a call to ae.c:aeCreateFileEvent like below:
if (aeCreateFileEvent(server.el, c->fd, AE_READABLE,
readQueryFromClient, c) == AE_ERR) {
freeClient(c);
return NULL;
}
c is the redisClient structure variable and c->fd is the connected descriptor.
Next the ae.c:aeProcessEvent calls ae.c:processTimeEvents
processTimeEvents
ae.processTimeEvents iterates over list of time events starting at eventLoop->timeEventHead.
For every timed event that has elapsed processTimeEvents calls the registered callback. In this case it calls the only timed event callback registered, that is, redis.c:serverCron. The callback returns the time in milliseconds after which the callback must be called again. This change is recorded via a call to ae.c:aeAddMilliSeconds and will be handled on the next iteration of ae.c:aeMain while loop.
That's all.
8.9.2 - String internals
Guide to the original implementation of Redis strings
Note: this document was written by the creator of Redis, Salvatore Sanfilippo, early in the development of Redis (c. 2010). Virtual Memory has been deprecated since Redis 2.6, so this documentation is here only for historical interest.
The implementation of Redis strings is contained in sds.c (sds stands for
Simple Dynamic Strings). The implementation is available as a standalone library
at https://github.com/antirez/sds.
The C structure sdshdr declared in sds.h represents a Redis string:
struct sdshdr {
long len;
long free;
char buf[];
};
The buf character array stores the actual string.
The len field stores the length of buf. This makes obtaining the length
of a Redis string an O(1) operation.
The free field stores the number of additional bytes available for use.
Together the len and free field can be thought of as holding the metadata of the buf character array.
Creating Redis Strings
A new data type named sds is defined in sds.h to be a synonym for a character pointer:
typedef char *sds;
sdsnewlen function defined in sds.c creates a new Redis String:
sds sdsnewlen(const void *init, size_t initlen) {
struct sdshdr *sh;
sh = zmalloc(sizeof(struct sdshdr)+initlen+1);
#ifdef SDS_ABORT_ON_OOM
if (sh == NULL) sdsOomAbort();
#else
if (sh == NULL) return NULL;
#endif
sh->len = initlen;
sh->free = 0;
if (initlen) {
if (init) memcpy(sh->buf, init, initlen);
else memset(sh->buf,0,initlen);
}
sh->buf[initlen] = '\0';
return (char*)sh->buf;
}
Remember a Redis string is a variable of type struct sdshdr. But sdsnewlen returns a character pointer!!
That's a trick and needs some explanation.
Suppose I create a Redis string using sdsnewlen like below:
sdsnewlen("redis", 5);
This creates a new variable of type struct sdshdr allocating memory for len and free
fields as well as for the buf character array.
sh = zmalloc(sizeof(struct sdshdr)+initlen+1); // initlen is length of init argument.
After sdsnewlen successfully creates a Redis string the result is something like:
-----------
|5|0|redis|
-----------
^ ^
sh sh->buf
sdsnewlen returns sh->buf to the caller.
What do you do if you need to free the Redis string pointed by sh?
You want the pointer sh but you only have the pointer sh->buf.
Can you get the pointer sh from sh->buf?
Yes. Pointer arithmetic. Notice from the above ASCII art that if you subtract
the size of two longs from sh->buf you get the pointer sh.
The sizeof two longs happens to be the size of struct sdshdr.
Look at sdslen function and see this trick at work:
size_t sdslen(const sds s) {
struct sdshdr *sh = (void*) (s-(sizeof(struct sdshdr)));
return sh->len;
}
Knowing this trick you could easily go through the rest of the functions in sds.c.
The Redis string implementation is hidden behind an interface that accepts only character pointers. The users of Redis strings need not care about how it's implemented and can treat Redis strings as a character pointer.
8.9.3 - Virtual memory (deprecated)
A description of the Redis virtual memory system that was deprecated in 2.6. This document exists for historial interest.
Note: this document was written by the creator of Redis, Salvatore Sanfilippo, early in the development of Redis (c. 2010). Virtual Memory has been deprecated since Redis 2.6, so this documentation is here only for historical interest.
This document details the internals of the Redis Virtual Memory subsystem prior to Redis 2.6. The intended audience is not the final user but programmers willing to understand or modify the Virtual Memory implementation.
Keys vs Values: what is swapped out?
The goal of the VM subsystem is to free memory transferring Redis Objects from memory to disk. This is a very generic command, but specifically, Redis transfers only objects associated with values. In order to understand better this concept we'll show, using the DEBUG command, how a key holding a value looks from the point of view of the Redis internals:
redis> set foo bar
OK
redis> debug object foo
Key at:0x100101d00 refcount:1, value at:0x100101ce0 refcount:1 encoding:raw serializedlength:4
As you can see from the above output, the Redis top level hash table maps Redis Objects (keys) to other Redis Objects (values). The Virtual Memory is only able to swap values on disk, the objects associated to keys are always taken in memory: this trade off guarantees very good lookup performances, as one of the main design goals of the Redis VM is to have performances similar to Redis with VM disabled when the part of the dataset frequently used fits in RAM.
How does a swapped value looks like internally
When an object is swapped out, this is what happens in the hash table entry:
- The key continues to hold a Redis Object representing the key.
- The value is set to NULL
So you may wonder where we store the information that a given value (associated to a given key) was swapped out. Just in the key object!
This is how the Redis Object structure robj looks like:
/* The actual Redis Object */
typedef struct redisObject {
void *ptr;
unsigned char type;
unsigned char encoding;
unsigned char storage; /* If this object is a key, where is the value?
* REDIS_VM_MEMORY, REDIS_VM_SWAPPED, ... */
unsigned char vtype; /* If this object is a key, and value is swapped out,
* this is the type of the swapped out object. */
int refcount;
/* VM fields, this are only allocated if VM is active, otherwise the
* object allocation function will just allocate
* sizeof(redisObject) minus sizeof(redisObjectVM), so using
* Redis without VM active will not have any overhead. */
struct redisObjectVM vm;
} robj;
As you can see there are a few fields about VM. The most important one is storage, that can be one of this values:
REDIS_VM_MEMORY: the associated value is in memory.REDIS_VM_SWAPPED: the associated values is swapped, and the value entry of the hash table is just set to NULL.REDIS_VM_LOADING: the value is swapped on disk, the entry is NULL, but there is a job to load the object from the swap to the memory (this field is only used when threaded VM is active).REDIS_VM_SWAPPING: the value is in memory, the entry is a pointer to the actual Redis Object, but there is an I/O job in order to transfer this value to the swap file.
If an object is swapped on disk (REDIS_VM_SWAPPED or REDIS_VM_LOADING), how do we know where it is stored, what type it is, and so forth? That's simple: the vtype field is set to the original type of the Redis object swapped, while the vm field (that is a redisObjectVM structure) holds information about the location of the object. This is the definition of this additional structure:
/* The VM object structure */
struct redisObjectVM {
off_t page; /* the page at which the object is stored on disk */
off_t usedpages; /* number of pages used on disk */
time_t atime; /* Last access time */
} vm;
As you can see the structure contains the page at which the object is located in the swap file, the number of pages used, and the last access time of the object (this is very useful for the algorithm that select what object is a good candidate for swapping, as we want to transfer on disk objects that are rarely accessed).
As you can see, while all the other fields are using unused bytes in the old Redis Object structure (we had some free bit due to natural memory alignment concerns), the vm field is new, and indeed uses additional memory. Should we pay such a memory cost even when VM is disabled? No! This is the code to create a new Redis Object:
... some code ...
if (server.vm_enabled) {
pthread_mutex_unlock(&server.obj_freelist_mutex);
o = zmalloc(sizeof(*o));
} else {
o = zmalloc(sizeof(*o)-sizeof(struct redisObjectVM));
}
... some code ...
As you can see if the VM system is not enabled we allocate just sizeof(*o)-sizeof(struct redisObjectVM) of memory. Given that the vm field is the last in the object structure, and that this fields are never accessed if VM is disabled, we are safe and Redis without VM does not pay the memory overhead.
The Swap File
The next step in order to understand how the VM subsystem works is understanding how objects are stored inside the swap file. The good news is that's not some kind of special format, we just use the same format used to store the objects in .rdb files, that are the usual dump files produced by Redis using the SAVE command.
The swap file is composed of a given number of pages, where every page size is a given number of bytes. This parameters can be changed in redis.conf, since different Redis instances may work better with different values: it depends on the actual data you store inside it. The following are the default values:
vm-page-size 32
vm-pages 134217728
Redis takes a "bitmap" (an contiguous array of bits set to zero or one) in memory, every bit represent a page of the swap file on disk: if a given bit is set to 1, it represents a page that is already used (there is some Redis Object stored there), while if the corresponding bit is zero, the page is free.
Taking this bitmap (that will call the page table) in memory is a huge win in terms of performances, and the memory used is small: we just need 1 bit for every page on disk. For instance in the example below 134217728 pages of 32 bytes each (4GB swap file) is using just 16 MB of RAM for the page table.
Transferring objects from memory to swap
In order to transfer an object from memory to disk we need to perform the following steps (assuming non threaded VM, just a simple blocking approach):
- Find how many pages are needed in order to store this object on the swap file. This is trivially accomplished just calling the function
rdbSavedObjectPagesthat returns the number of pages used by an object on disk. Note that this function does not duplicate the .rdb saving code just to understand what will be the length after an object will be saved on disk, we use the trick of opening /dev/null and writing the object there, finally callingftelloin order check the amount of bytes required. What we do basically is to save the object on a virtual very fast file, that is, /dev/null. - Now that we know how many pages are required in the swap file, we need to find this number of contiguous free pages inside the swap file. This task is accomplished by the
vmFindContiguousPagesfunction. As you can guess this function may fail if the swap is full, or so fragmented that we can't easily find the required number of contiguous free pages. When this happens we just abort the swapping of the object, that will continue to live in memory. - Finally we can write the object on disk, at the specified position, just calling the function
vmWriteObjectOnSwap.
As you can guess once the object was correctly written in the swap file, it is freed from memory, the storage field in the associated key is set to REDIS_VM_SWAPPED, and the used pages are marked as used in the page table.
Loading objects back in memory
Loading an object from swap to memory is simpler, as we already know where the object is located and how many pages it is using. We also know the type of the object (the loading functions are required to know this information, as there is no header or any other information about the object type on disk), but this is stored in the vtype field of the associated key as already seen above.
Calling the function vmLoadObject passing the key object associated to the value object we want to load back is enough. The function will also take care of fixing the storage type of the key (that will be REDIS_VM_MEMORY), marking the pages as freed in the page table, and so forth.
The return value of the function is the loaded Redis Object itself, that we'll have to set again as value in the main hash table (instead of the NULL value we put in place of the object pointer when the value was originally swapped out).
How blocking VM works
Now we have all the building blocks in order to describe how the blocking VM works. First of all, an important detail about configuration. In order to enable blocking VM in Redis server.vm_max_threads must be set to zero.
We'll see later how this max number of threads info is used in the threaded VM, for now all it's needed to now is that Redis reverts to fully blocking VM when this is set to zero.
We also need to introduce another important VM parameter, that is, server.vm_max_memory. This parameter is very important as it is used in order to trigger swapping: Redis will try to swap objects only if it is using more memory than the max memory setting, otherwise there is no need to swap as we are matching the user requested memory usage.
Blocking VM swapping
Swapping of object from memory to disk happens in the cron function. This function used to be called every second, while in the recent Redis versions on git it is called every 100 milliseconds (that is, 10 times per second).
If this function detects we are out of memory, that is, the memory used is greater than the vm-max-memory setting, it starts transferring objects from memory to disk in a loop calling the function vmSwapOneObect. This function takes just one argument, if 0 it will swap objects in a blocking way, otherwise if it is 1, I/O threads are used. In the blocking scenario we just call it with zero as argument.
vmSwapOneObject acts performing the following steps:
- The key space in inspected in order to find a good candidate for swapping (we'll see later what a good candidate for swapping is).
- The associated value is transferred to disk, in a blocking way.
- The key storage field is set to
REDIS_VM_SWAPPED, while the vm fields of the object are set to the right values (the page index where the object was swapped, and the number of pages used to swap it). - Finally the value object is freed and the value entry of the hash table is set to NULL.
The function is called again and again until one of the following happens: there is no way to swap more objects because either the swap file is full or nearly all the objects are already transferred on disk, or simply the memory usage is already under the vm-max-memory parameter.
What values to swap when we are out of memory?
Understanding what's a good candidate for swapping is not too hard. A few objects at random are sampled, and for each their swappability is commuted as:
swappability = age*log(size_in_memory)
The age is the number of seconds the key was not requested, while size_in_memory is a fast estimation of the amount of memory (in bytes) used by the object in memory. So we try to swap out objects that are rarely accessed, and we try to swap bigger objects over smaller one, but the latter is a less important factor (because of the logarithmic function used). This is because we don't want bigger objects to be swapped out and in too often as the bigger the object the more I/O and CPU is required in order to transfer it.
Blocking VM loading
What happens if an operation against a key associated with a swapped out object is requested? For instance Redis may just happen to process the following command:
GET foo
If the value object of the foo key is swapped we need to load it back in memory before processing the operation. In Redis the key lookup process is centralized in the lookupKeyRead and lookupKeyWrite functions, this two functions are used in the implementation of all the Redis commands accessing the keyspace, so we have a single point in the code where to handle the loading of the key from the swap file to memory.
So this is what happens:
- The user calls some command having as argument a swapped key
- The command implementation calls the lookup function
- The lookup function search for the key in the top level hash table. If the value associated with the requested key is swapped (we can see that checking the storage field of the key object), we load it back in memory in a blocking way before to return to the user.
This is pretty straightforward, but things will get more interesting with the threads. From the point of view of the blocking VM the only real problem is the saving of the dataset using another process, that is, handling BGSAVE and BGREWRITEAOF commands.
Background saving when VM is active
The default Redis way to persist on disk is to create .rdb files using a child process. Redis calls the fork() system call in order to create a child, that has the exact copy of the in memory dataset, since fork duplicates the whole program memory space (actually thanks to a technique called Copy on Write memory pages are shared between the parent and child process, so the fork() call will not require too much memory).
In the child process we have a copy of the dataset in a given point in the time. Other commands issued by clients will just be served by the parent process and will not modify the child data.
The child process will just store the whole dataset into the dump.rdb file and finally will exit. But what happens when the VM is active? Values can be swapped out so we don't have all the data in memory, and we need to access the swap file in order to retrieve the swapped values. While child process is saving the swap file is shared between the parent and child process, since:
- The parent process needs to access the swap file in order to load values back into memory if an operation against swapped out values are performed.
- The child process needs to access the swap file in order to retrieve the full dataset while saving the data set on disk.
In order to avoid problems while both the processes are accessing the same swap file we do a simple thing, that is, not allowing values to be swapped out in the parent process while a background saving is in progress. This way both the processes will access the swap file in read only. This approach has the problem that while the child process is saving no new values can be transferred on the swap file even if Redis is using more memory than the max memory parameters dictates. This is usually not a problem as the background saving will terminate in a short amount of time and if still needed a percentage of values will be swapped on disk ASAP.
An alternative to this scenario is to enable the Append Only File that will have this problem only when a log rewrite is performed using the BGREWRITEAOF command.
The problem with the blocking VM
The problem of blocking VM is that... it's blocking :) This is not a problem when Redis is used in batch processing activities, but for real-time usage one of the good points of Redis is the low latency. The blocking VM will have bad latency behaviors as when a client is accessing a swapped out value, or when Redis needs to swap out values, no other clients will be served in the meantime.
Swapping out keys should happen in background. Similarly when a client is accessing a swapped out value other clients accessing in memory values should be served mostly as fast as when VM is disabled. Only the clients dealing with swapped out keys should be delayed.
All this limitations called for a non-blocking VM implementation.
Threaded VM
There are basically three main ways to turn the blocking VM into a non blocking one.
- 1: One way is obvious, and in my opinion, not a good idea at all, that is, turning Redis itself into a threaded server: if every request is served by a different thread automatically other clients don't need to wait for blocked ones. Redis is fast, exports atomic operations, has no locks, and is just 10k lines of code, because it is single threaded, so this was not an option for me.
- 2: Using non-blocking I/O against the swap file. After all you can think Redis already event-loop based, why don't just handle disk I/O in a non-blocking fashion? I also discarded this possibility because of two main reasons. One is that non blocking file operations, unlike sockets, are an incompatibility nightmare. It's not just like calling select, you need to use OS-specific things. The other problem is that the I/O is just one part of the time consumed to handle VM, another big part is the CPU used in order to encode/decode data to/from the swap file. This is I picked option three, that is...
- 3: Using I/O threads, that is, a pool of threads handling the swap I/O operations. This is what the Redis VM is using, so let's detail how this works.
I/O Threads
The threaded VM design goals where the following, in order of importance:
- Simple implementation, little room for race conditions, simple locking, VM system more or less completely decoupled from the rest of Redis code.
- Good performances, no locks for clients accessing values in memory.
- Ability to decode/encode objects in the I/O threads.
The above goals resulted in an implementation where the Redis main thread (the one serving actual clients) and the I/O threads communicate using a queue of jobs, with a single mutex.
Basically when main thread requires some work done in the background by some I/O thread, it pushes an I/O job structure in the server.io_newjobs queue (that is, just a linked list). If there are no active I/O threads, one is started. At this point some I/O thread will process the I/O job, and the result of the processing is pushed in the server.io_processed queue. The I/O thread will send a byte using an UNIX pipe to the main thread in order to signal that a new job was processed and the result is ready to be processed.
This is how the iojob structure looks like:
typedef struct iojob {
int type; /* Request type, REDIS_IOJOB_* */
redisDb *db;/* Redis database */
robj *key; /* This I/O request is about swapping this key */
robj *val; /* the value to swap for REDIS_IOREQ_*_SWAP, otherwise this
* field is populated by the I/O thread for REDIS_IOREQ_LOAD. */
off_t page; /* Swap page where to read/write the object */
off_t pages; /* Swap pages needed to save object. PREPARE_SWAP return val */
int canceled; /* True if this command was canceled by blocking side of VM */
pthread_t thread; /* ID of the thread processing this entry */
} iojob;
There are just three type of jobs that an I/O thread can perform (the type is specified by the type field of the structure):
REDIS_IOJOB_LOAD: load the value associated to a given key from swap to memory. The object offset inside the swap file ispage, the object type iskey->vtype. The result of this operation will populate thevalfield of the structure.REDIS_IOJOB_PREPARE_SWAP: compute the number of pages needed in order to save the object pointed byvalinto the swap. The result of this operation will populate thepagesfield.REDIS_IOJOB_DO_SWAP: Transfer the object pointed byvalto the swap file, at page offsetpage.
The main thread delegates just the above three tasks. All the rest is handled by the I/O thread itself, for instance finding a suitable range of free pages in the swap file page table (that is a fast operation), deciding what object to swap, altering the storage field of a Redis object to reflect the current state of a value.
Non blocking VM as probabilistic enhancement of blocking VM
So now we have a way to request background jobs dealing with slow VM operations. How to add this to the mix of the rest of the work done by the main thread? While blocking VM was aware that an object was swapped out just when the object was looked up, this is too late for us: in C it is not trivial to start a background job in the middle of the command, leave the function, and re-enter in the same point the computation when the I/O thread finished what we requested (that is, no co-routines or continuations or alike).
Fortunately there was a much, much simpler way to do this. And we love simple things: basically consider the VM implementation a blocking one, but add an optimization (using non the no blocking VM operations we are able to perform) to make the blocking very unlikely.
This is what we do:
- Every time a client sends us a command, before the command is executed, we examine the argument vector of the command in search for swapped keys. After all we know for every command what arguments are keys, as the Redis command format is pretty simple.
- If we detect that at least a key in the requested command is swapped on disk, we block the client instead of really issuing the command. For every swapped value associated to a requested key, an I/O job is created, in order to bring the values back in memory. The main thread continues the execution of the event loop, without caring about the blocked client.
- In the meanwhile, I/O threads are loading values in memory. Every time an I/O thread finished loading a value, it sends a byte to the main thread using an UNIX pipe. The pipe file descriptor has a readable event associated in the main thread event loop, that is the function
vmThreadedIOCompletedJob. If this function detects that all the values needed for a blocked client were loaded, the client is restarted and the original command called.
So you can think of this as a blocked VM that almost always happen to have the right keys in memory, since we pause clients that are going to issue commands about swapped out values until this values are loaded.
If the function checking what argument is a key fails in some way, there is no problem: the lookup function will see that a given key is associated to a swapped out value and will block loading it. So our non blocking VM reverts to a blocking one when it is not possible to anticipate what keys are touched.
For instance in the case of the SORT command used together with the GET or BY options, it is not trivial to know beforehand what keys will be requested, so at least in the first implementation, SORT BY/GET resorts to the blocking VM implementation.
Blocking clients on swapped keys
How to block clients? To suspend a client in an event-loop based server is pretty trivial. All we do is canceling its read handler. Sometimes we do something different (for instance for BLPOP) that is just marking the client as blocked, but not processing new data (just accumulating the new data into input buffers).
Aborting I/O jobs
There is something hard to solve about the interactions between our blocking and non blocking VM, that is, what happens if a blocking operation starts about a key that is also "interested" by a non blocking operation at the same time?
For instance while SORT BY is executed, a few keys are being loaded in a blocking manner by the sort command. At the same time, another client may request the same keys with a simple GET key command, that will trigger the creation of an I/O job to load the key in background.
The only simple way to deal with this problem is to be able to kill I/O jobs in the main thread, so that if a key that we want to load or swap in a blocking way is in the REDIS_VM_LOADING or REDIS_VM_SWAPPING state (that is, there is an I/O job about this key), we can just kill the I/O job about this key, and go ahead with the blocking operation we want to perform.
This is not as trivial as it is. In a given moment an I/O job can be in one of the following three queues:
- server.io_newjobs: the job was already queued but no thread is handling it.
- server.io_processing: the job is being processed by an I/O thread.
- server.io_processed: the job was already processed.
The function able to kill an I/O job is
vmCancelThreadedIOJob, and this is what it does: - If the job is in the newjobs queue, that's simple, removing the iojob structure from the queue is enough as no thread is still executing any operation.
- If the job is in the processing queue, a thread is messing with our job (and possibly with the associated object!). The only thing we can do is waiting for the item to move to the next queue in a blocking way. Fortunately this condition happens very rarely so it's not a performance problem.
- If the job is in the processed queue, we just mark it as canceled marking setting the
canceledfield to 1 in the iojob structure. The function processing completed jobs will just ignored and free the job instead of really processing it.
Questions?
This document is in no way complete, the only way to get the whole picture is reading the source code, but it should be a good introduction in order to make the code review / understanding a lot simpler.
Something is not clear about this page? Please leave a comment and I'll try to address the issue possibly integrating the answer in this document.
8.9.4 - Redis design draft #2 (historical)
A design for the RDB format written in the early days of Redis
Note: this document was written by the creator of Redis, Salvatore Sanfilippo, early in the development of Redis (c. 2013), as part of a series of design drafts. This is preserved for historical interest.
Redis Design Draft 2 -- RDB version 7 info fields
- Author: Salvatore Sanfilippo
antirez@gmail.com - GitHub issue #1048
History of revisions
1.0, 10 April 2013 - Initial draft.
Overview
The Redis RDB format lacks a simple way to add info fields to an RDB file without causing a backward compatibility issue even if the added meta data is not required in order to load data from the RDB file.
For example thanks to the info fields specified in this document it will be possible to add to RDB information like file creation time, Redis version generating the file, and any other useful information, in a way that not every field is required for an RDB version 7 file to be correctly processed.
Also with minimal changes it will be possible to add RDB version 7 support to Redis 2.6 without actually supporting the additional fields but just skipping them when loading an RDB file.
RDB info fields may have semantic meaning if needed, so that the presence of the field may add information about the data set specified in the RDB file format, however when an info field is required to be correctly decoded in order to understand and load the data set content of the RDB file, the RDB file format must be increased so that previous versions of Redis will not attempt to load it.
However currently the info fields are designed to only hold additional information that are not useful to load the dataset, but can better specify how the RDB file was created.
Info fields representation
The RDB format 6 has the following layout:
- A 9 bytes magic "REDIS0006"
- key-value pairs
- An EOF opcode
- CRC64 checksum
The proposal for RDB format 7 is to add the optional fields immediately after the first 9 bytes magic, so that the new format will be:
- A 9 bytes magic "REDIS0007"
- Info field 1
- Info field 2
- ...
- Info field N
- Info field end-of-fields
- key-value pairs
- An EOF opcode
- CRC64 checksum
Every single info field has the following structure:
- A 16 bit identifier
- A 64 bit data length
- A data section of the exact length as specified
Both the identifier and the data length are stored in little endian byte ordering.
The special identifier 0 means that there are no other info fields, and that the remaining of the RDB file contains the key-value pairs.
Handling of info fields
A program can simply skip every info field it does not understand, as long as the RDB version matches the one that it is capable to load.
Specification of info fields IDs and content.
Info field 0 -- End of info fields
This just means there are no longer info fields to process.
Info field 1 -- Creation date
This field represents the unix time at which the RDB file was created. The format of the unix time is a 64 bit little endian integer representing seconds since 1th January 1970.
Info field 2 -- Redis version
This field represents a null-terminated string containing the Redis version that generated the file, as displayed in the Redis version INFO field.
8.10 - Redis modules API
Introduction to writing Redis modules
The modules documentation is composed of the following pages:
- Introduction to Redis modules (this file). An overview about Redis Modules system and API. It's a good idea to start your reading here.
- Implementing native data types covers the implementation of native data types into modules.
- Blocking operations shows how to write blocking commands that will not reply immediately, but will block the client, without blocking the Redis server, and will provide a reply whenever will be possible.
- Redis modules API reference is generated from module.c top comments of RedisModule functions. It is a good reference in order to understand how each function works.
Redis modules make it possible to extend Redis functionality using external modules, rapidly implementing new Redis commands with features similar to what can be done inside the core itself.
Redis modules are dynamic libraries that can be loaded into Redis at
startup, or using the MODULE LOAD command. Redis exports a C API, in the
form of a single C header file called redismodule.h. Modules are meant
to be written in C, however it will be possible to use C++ or other languages
that have C binding functionalities.
Modules are designed in order to be loaded into different versions of Redis, so a given module does not need to be designed, or recompiled, in order to run with a specific version of Redis. For this reason, the module will register to the Redis core using a specific API version. The current API version is "1".
This document is about an alpha version of Redis modules. API, functionalities and other details may change in the future.
Loading modules
In order to test the module you are developing, you can load the module
using the following redis.conf configuration directive:
loadmodule /path/to/mymodule.so
It is also possible to load a module at runtime using the following command:
MODULE LOAD /path/to/mymodule.so
In order to list all loaded modules, use:
MODULE LIST
Finally, you can unload (and later reload if you wish) a module using the following command:
MODULE UNLOAD mymodule
Note that mymodule above is not the filename without the .so suffix, but
instead, the name the module used to register itself into the Redis core.
The name can be obtained using MODULE LIST. However it is good practice
that the filename of the dynamic library is the same as the name the module
uses to register itself into the Redis core.
The simplest module you can write
In order to show the different parts of a module, here we'll show a very simple module that implements a command that outputs a random number.
#include "redismodule.h"
#include <stdlib.h>
int HelloworldRand_RedisCommand(RedisModuleCtx *ctx, RedisModuleString **argv, int argc) {
RedisModule_ReplyWithLongLong(ctx,rand());
return REDISMODULE_OK;
}
int RedisModule_OnLoad(RedisModuleCtx *ctx, RedisModuleString **argv, int argc) {
if (RedisModule_Init(ctx,"helloworld",1,REDISMODULE_APIVER_1)
== REDISMODULE_ERR) return REDISMODULE_ERR;
if (RedisModule_CreateCommand(ctx,"helloworld.rand",
HelloworldRand_RedisCommand, "fast random",
0, 0, 0) == REDISMODULE_ERR)
return REDISMODULE_ERR;
return REDISMODULE_OK;
}
The example module has two functions. One implements a command called
HELLOWORLD.RAND. This function is specific of that module. However the
other function called RedisModule_OnLoad() must be present in each
Redis module. It is the entry point for the module to be initialized,
register its commands, and potentially other private data structures
it uses.
Note that it is a good idea for modules to call commands with the
name of the module followed by a dot, and finally the command name,
like in the case of HELLOWORLD.RAND. This way it is less likely to
have collisions.
Note that if different modules have colliding commands, they'll not be
able to work in Redis at the same time, since the function
RedisModule_CreateCommand will fail in one of the modules, so the module
loading will abort returning an error condition.
Module initialization
The above example shows the usage of the function RedisModule_Init().
It should be the first function called by the module OnLoad function.
The following is the function prototype:
int RedisModule_Init(RedisModuleCtx *ctx, const char *modulename,
int module_version, int api_version);
The Init function announces the Redis core that the module has a given
name, its version (that is reported by MODULE LIST), and that is willing
to use a specific version of the API.
If the API version is wrong, the name is already taken, or there are other
similar errors, the function will return REDISMODULE_ERR, and the module
OnLoad function should return ASAP with an error.
Before the Init function is called, no other API function can be called,
otherwise the module will segfault and the Redis instance will crash.
The second function called, RedisModule_CreateCommand, is used in order
to register commands into the Redis core. The following is the prototype:
int RedisModule_CreateCommand(RedisModuleCtx *ctx, const char *name,
RedisModuleCmdFunc cmdfunc, const char *strflags,
int firstkey, int lastkey, int keystep);
As you can see, most Redis modules API calls all take as first argument
the context of the module, so that they have a reference to the module
calling it, to the command and client executing a given command, and so forth.
To create a new command, the above function needs the context, the command's name, a pointer to the function implementing the command, the command's flags and the positions of key names in the command's arguments.
The function that implements the command must have the following prototype:
int mycommand(RedisModuleCtx *ctx, RedisModuleString **argv, int argc);
The command function arguments are just the context, that will be passed to all the other API calls, the command argument vector, and total number of arguments, as passed by the user.
As you can see, the arguments are provided as pointers to a specific data
type, the RedisModuleString. This is an opaque data type you have API
functions to access and use, direct access to its fields is never needed.
Zooming into the example command implementation, we can find another call:
int RedisModule_ReplyWithLongLong(RedisModuleCtx *ctx, long long integer);
This function returns an integer to the client that invoked the command,
exactly like other Redis commands do, like for example INCR or SCARD.
Module cleanup
In most cases, there is no need for special cleanup.
When a module is unloaded, Redis will automatically unregister commands and
unsubscribe from notifications.
However in the case where a module contains some persistent memory or
configuration, a module may include an optional RedisModule_OnUnload
function.
If a module provides this function, it will be invoked during the module unload
process.
The following is the function prototype:
int RedisModule_OnUnload(RedisModuleCtx *ctx);
The OnUnload function may prevent module unloading by returning
REDISMODULE_ERR.
Otherwise, REDISMODULE_OK should be returned.
Setup and dependencies of a Redis module
Redis modules don't depend on Redis or some other library, nor they
need to be compiled with a specific redismodule.h file. In order
to create a new module, just copy a recent version of redismodule.h
in your source tree, link all the libraries you want, and create
a dynamic library having the RedisModule_OnLoad() function symbol
exported.
The module will be able to load into different versions of Redis.
A module can be designed to support both newer and older Redis versions where certain API functions are not available in all versions. If an API function is not implemented in the currently running Redis version, the function pointer is set to NULL. This allows the module to check if a function exists before using it:
if (RedisModule_SetCommandInfo != NULL) {
RedisModule_SetCommandInfo(cmd, &info);
}
In recent versions of redismodule.h, a convenience macro RMAPI_FUNC_SUPPORTED(funcname) is defined.
Using the macro or just comparing with NULL is a matter of personal preference.
Passing configuration parameters to Redis modules
When the module is loaded with the MODULE LOAD command, or using the
loadmodule directive in the redis.conf file, the user is able to pass
configuration parameters to the module by adding arguments after the module
file name:
loadmodule mymodule.so foo bar 1234
In the above example the strings foo, bar and 1234 will be passed
to the module OnLoad() function in the argv argument as an array
of RedisModuleString pointers. The number of arguments passed is into argc.
The way you can access those strings will be explained in the rest of this
document. Normally the module will store the module configuration parameters
in some static global variable that can be accessed module wide, so that
the configuration can change the behavior of different commands.
Working with RedisModuleString objects
The command argument vector argv passed to module commands, and the
return value of other module APIs functions, are of type RedisModuleString.
Usually you directly pass module strings to other API calls, however sometimes you may need to directly access the string object.
There are a few functions in order to work with string objects:
const char *RedisModule_StringPtrLen(RedisModuleString *string, size_t *len);
The above function accesses a string by returning its pointer and setting its
length in len.
You should never write to a string object pointer, as you can see from the
const pointer qualifier.
However, if you want, you can create new string objects using the following API:
RedisModuleString *RedisModule_CreateString(RedisModuleCtx *ctx, const char *ptr, size_t len);
The string returned by the above command must be freed using a corresponding
call to RedisModule_FreeString():
void RedisModule_FreeString(RedisModuleString *str);
However if you want to avoid having to free strings, the automatic memory management, covered later in this document, can be a good alternative, by doing it for you.
Note that the strings provided via the argument vector argv never need
to be freed. You only need to free new strings you create, or new strings
returned by other APIs, where it is specified that the returned string must
be freed.
Creating strings from numbers or parsing strings as numbers
Creating a new string from an integer is a very common operation, so there is a function to do this:
RedisModuleString *mystr = RedisModule_CreateStringFromLongLong(ctx,10);
Similarly in order to parse a string as a number:
long long myval;
if (RedisModule_StringToLongLong(ctx,argv[1],&myval) == REDISMODULE_OK) {
/* Do something with 'myval' */
}
Accessing Redis keys from modules
Most Redis modules, in order to be useful, have to interact with the Redis data space (this is not always true, for example an ID generator may never touch Redis keys). Redis modules have two different APIs in order to access the Redis data space, one is a low level API that provides very fast access and a set of functions to manipulate Redis data structures. The other API is more high level, and allows to call Redis commands and fetch the result, similarly to how Lua scripts access Redis.
The high level API is also useful in order to access Redis functionalities that are not available as APIs.
In general modules developers should prefer the low level API, because commands implemented using the low level API run at a speed comparable to the speed of native Redis commands. However there are definitely use cases for the higher level API. For example often the bottleneck could be processing the data and not accessing it.
Also note that sometimes using the low level API is not harder compared to the higher level one.
Calling Redis commands
The high level API to access Redis is the sum of the RedisModule_Call()
function, together with the functions needed in order to access the
reply object returned by Call().
RedisModule_Call uses a special calling convention, with a format specifier
that is used to specify what kind of objects you are passing as arguments
to the function.
Redis commands are invoked just using a command name and a list of arguments.
However when calling commands, the arguments may originate from different
kind of strings: null-terminated C strings, RedisModuleString objects as
received from the argv parameter in the command implementation, binary
safe C buffers with a pointer and a length, and so forth.
For example if I want to call INCRBY using a first argument (the key)
a string received in the argument vector argv, which is an array
of RedisModuleString object pointers, and a C string representing the
number "10" as second argument (the increment), I'll use the following
function call:
RedisModuleCallReply *reply;
reply = RedisModule_Call(ctx,"INCRBY","sc",argv[1],"10");
The first argument is the context, and the second is always a null terminated
C string with the command name. The third argument is the format specifier
where each character corresponds to the type of the arguments that will follow.
In the above case "sc" means a RedisModuleString object, and a null
terminated C string. The other arguments are just the two arguments as
specified. In fact argv[1] is a RedisModuleString and "10" is a null
terminated C string.
This is the full list of format specifiers:
- c -- Null terminated C string pointer.
- b -- C buffer, two arguments needed: C string pointer and
size_tlength. - s -- RedisModuleString as received in
argvor by other Redis module APIs returning a RedisModuleString object. - l -- Long long integer.
- v -- Array of RedisModuleString objects.
- ! -- This modifier just tells the function to replicate the command to replicas and AOF. It is ignored from the point of view of arguments parsing.
- A -- This modifier, when
!is given, tells to suppress AOF propagation: the command will be propagated only to replicas. - R -- This modifier, when
!is given, tells to suppress replicas propagation: the command will be propagated only to the AOF if enabled.
The function returns a RedisModuleCallReply object on success, on
error NULL is returned.
NULL is returned when the command name is invalid, the format specifier uses
characters that are not recognized, or when the command is called with the
wrong number of arguments. In the above cases the errno var is set to EINVAL. NULL is also returned when, in an instance with Cluster enabled, the target
keys are about non local hash slots. In this case errno is set to EPERM.
Working with RedisModuleCallReply objects.
RedisModuleCall returns reply objects that can be accessed using the
RedisModule_CallReply* family of functions.
In order to obtain the type or reply (corresponding to one of the data types
supported by the Redis protocol), the function RedisModule_CallReplyType()
is used:
reply = RedisModule_Call(ctx,"INCRBY","sc",argv[1],"10");
if (RedisModule_CallReplyType(reply) == REDISMODULE_REPLY_INTEGER) {
long long myval = RedisModule_CallReplyInteger(reply);
/* Do something with myval. */
}
Valid reply types are:
REDISMODULE_REPLY_STRINGBulk string or status replies.REDISMODULE_REPLY_ERRORErrors.REDISMODULE_REPLY_INTEGERSigned 64 bit integers.REDISMODULE_REPLY_ARRAYArray of replies.REDISMODULE_REPLY_NULLNULL reply.
Strings, errors and arrays have an associated length. For strings and errors the length corresponds to the length of the string. For arrays the length is the number of elements. To obtain the reply length the following function is used:
size_t reply_len = RedisModule_CallReplyLength(reply);
In order to obtain the value of an integer reply, the following function is used, as already shown in the example above:
long long reply_integer_val = RedisModule_CallReplyInteger(reply);
Called with a reply object of the wrong type, the above function always
returns LLONG_MIN.
Sub elements of array replies are accessed this way:
RedisModuleCallReply *subreply;
subreply = RedisModule_CallReplyArrayElement(reply,idx);
The above function returns NULL if you try to access out of range elements.
Strings and errors (which are like strings but with a different type) can
be accessed using in the following way, making sure to never write to
the resulting pointer (that is returned as as const pointer so that
misusing must be pretty explicit):
size_t len;
char *ptr = RedisModule_CallReplyStringPtr(reply,&len);
If the reply type is not a string or an error, NULL is returned.
RedisCallReply objects are not the same as module string objects (RedisModuleString types). However sometimes you may need to pass replies of type string or integer, to API functions expecting a module string.
When this is the case, you may want to evaluate if using the low level API could be a simpler way to implement your command, or you can use the following function in order to create a new string object from a call reply of type string, error or integer:
RedisModuleString *mystr = RedisModule_CreateStringFromCallReply(myreply);
If the reply is not of the right type, NULL is returned.
The returned string object should be released with RedisModule_FreeString()
as usually, or by enabling automatic memory management (see corresponding
section).
Releasing call reply objects
Reply objects must be freed using RedisModule_FreeCallReply. For arrays,
you need to free only the top level reply, not the nested replies.
Currently the module implementation provides a protection in order to avoid
crashing if you free a nested reply object for error, however this feature
is not guaranteed to be here forever, so should not be considered part
of the API.
If you use automatic memory management (explained later in this document) you don't need to free replies (but you still could if you wish to release memory ASAP).
Returning values from Redis commands
Like normal Redis commands, new commands implemented via modules must be able to return values to the caller. The API exports a set of functions for this goal, in order to return the usual types of the Redis protocol, and arrays of such types as elements. Also errors can be returned with any error string and code (the error code is the initial uppercase letters in the error message, like the "BUSY" string in the "BUSY the sever is busy" error message).
All the functions to send a reply to the client are called
RedisModule_ReplyWith<something>.
To return an error, use:
RedisModule_ReplyWithError(RedisModuleCtx *ctx, const char *err);
There is a predefined error string for key of wrong type errors:
REDISMODULE_ERRORMSG_WRONGTYPE
Example usage:
RedisModule_ReplyWithError(ctx,"ERR invalid arguments");
We already saw how to reply with a long long in the examples above:
RedisModule_ReplyWithLongLong(ctx,12345);
To reply with a simple string, that can't contain binary values or newlines, (so it's suitable to send small words, like "OK") we use:
RedisModule_ReplyWithSimpleString(ctx,"OK");
It's possible to reply with "bulk strings" that are binary safe, using two different functions:
int RedisModule_ReplyWithStringBuffer(RedisModuleCtx *ctx, const char *buf, size_t len);
int RedisModule_ReplyWithString(RedisModuleCtx *ctx, RedisModuleString *str);
The first function gets a C pointer and length. The second a RedisModuleString object. Use one or the other depending on the source type you have at hand.
In order to reply with an array, you just need to use a function to emit the array length, followed by as many calls to the above functions as the number of elements of the array are:
RedisModule_ReplyWithArray(ctx,2);
RedisModule_ReplyWithStringBuffer(ctx,"age",3);
RedisModule_ReplyWithLongLong(ctx,22);
To return nested arrays is easy, your nested array element just uses another
call to RedisModule_ReplyWithArray() followed by the calls to emit the
sub array elements.
Returning arrays with dynamic length
Sometimes it is not possible to know beforehand the number of items of
an array. As an example, think of a Redis module implementing a FACTOR
command that given a number outputs the prime factors. Instead of
factorializing the number, storing the prime factors into an array, and
later produce the command reply, a better solution is to start an array
reply where the length is not known, and set it later. This is accomplished
with a special argument to RedisModule_ReplyWithArray():
RedisModule_ReplyWithArray(ctx, REDISMODULE_POSTPONED_LEN);
The above call starts an array reply so we can use other ReplyWith calls
in order to produce the array items. Finally in order to set the length,
use the following call:
RedisModule_ReplySetArrayLength(ctx, number_of_items);
In the case of the FACTOR command, this translates to some code similar to this:
RedisModule_ReplyWithArray(ctx, REDISMODULE_POSTPONED_LEN);
number_of_factors = 0;
while(still_factors) {
RedisModule_ReplyWithLongLong(ctx, some_factor);
number_of_factors++;
}
RedisModule_ReplySetArrayLength(ctx, number_of_factors);
Another common use case for this feature is iterating over the arrays of some collection and only returning the ones passing some kind of filtering.
It is possible to have multiple nested arrays with postponed reply.
Each call to SetArray() will set the length of the latest corresponding
call to ReplyWithArray():
RedisModule_ReplyWithArray(ctx, REDISMODULE_POSTPONED_LEN);
... generate 100 elements ...
RedisModule_ReplyWithArray(ctx, REDISMODULE_POSTPONED_LEN);
... generate 10 elements ...
RedisModule_ReplySetArrayLength(ctx, 10);
RedisModule_ReplySetArrayLength(ctx, 100);
This creates a 100 items array having as last element a 10 items array.
Arity and type checks
Often commands need to check that the number of arguments and type of the key
is correct. In order to report a wrong arity, there is a specific function
called RedisModule_WrongArity(). The usage is trivial:
if (argc != 2) return RedisModule_WrongArity(ctx);
Checking for the wrong type involves opening the key and checking the type:
RedisModuleKey *key = RedisModule_OpenKey(ctx,argv[1],
REDISMODULE_READ|REDISMODULE_WRITE);
int keytype = RedisModule_KeyType(key);
if (keytype != REDISMODULE_KEYTYPE_STRING &&
keytype != REDISMODULE_KEYTYPE_EMPTY)
{
RedisModule_CloseKey(key);
return RedisModule_ReplyWithError(ctx,REDISMODULE_ERRORMSG_WRONGTYPE);
}
Note that you often want to proceed with a command both if the key is of the expected type, or if it's empty.
Low level access to keys
Low level access to keys allow to perform operations on value objects associated to keys directly, with a speed similar to what Redis uses internally to implement the built-in commands.
Once a key is opened, a key pointer is returned that will be used with all the other low level API calls in order to perform operations on the key or its associated value.
Because the API is meant to be very fast, it cannot do too many run-time checks, so the user must be aware of certain rules to follow:
- Opening the same key multiple times where at least one instance is opened for writing, is undefined and may lead to crashes.
- While a key is open, it should only be accessed via the low level key API. For example opening a key, then calling DEL on the same key using the
RedisModule_Call()API will result into a crash. However it is safe to open a key, perform some operation with the low level API, closing it, then using other APIs to manage the same key, and later opening it again to do some more work.
In order to open a key the RedisModule_OpenKey function is used. It returns
a key pointer, that we'll use with all the next calls to access and modify
the value:
RedisModuleKey *key;
key = RedisModule_OpenKey(ctx,argv[1],REDISMODULE_READ);
The second argument is the key name, that must be a RedisModuleString object.
The third argument is the mode: REDISMODULE_READ or REDISMODULE_WRITE.
It is possible to use | to bitwise OR the two modes to open the key in
both modes. Currently a key opened for writing can also be accessed for reading
but this is to be considered an implementation detail. The right mode should
be used in sane modules.
You can open non existing keys for writing, since the keys will be created
when an attempt to write to the key is performed. However when opening keys
just for reading, RedisModule_OpenKey will return NULL if the key does not
exist.
Once you are done using a key, you can close it with:
RedisModule_CloseKey(key);
Note that if automatic memory management is enabled, you are not forced to close keys. When the module function returns, Redis will take care to close all the keys which are still open.
Getting the key type
In order to obtain the value of a key, use the RedisModule_KeyType() function:
int keytype = RedisModule_KeyType(key);
It returns one of the following values:
REDISMODULE_KEYTYPE_EMPTY
REDISMODULE_KEYTYPE_STRING
REDISMODULE_KEYTYPE_LIST
REDISMODULE_KEYTYPE_HASH
REDISMODULE_KEYTYPE_SET
REDISMODULE_KEYTYPE_ZSET
The above are just the usual Redis key types, with the addition of an empty type, that signals the key pointer is associated with an empty key that does not yet exists.
Creating new keys
To create a new key, open it for writing and then write to it using one of the key writing functions. Example:
RedisModuleKey *key;
key = RedisModule_OpenKey(ctx,argv[1],REDISMODULE_WRITE);
if (RedisModule_KeyType(key) == REDISMODULE_KEYTYPE_EMPTY) {
RedisModule_StringSet(key,argv[2]);
}
Deleting keys
Just use:
RedisModule_DeleteKey(key);
The function returns REDISMODULE_ERR if the key is not open for writing.
Note that after a key gets deleted, it is setup in order to be targeted
by new key commands. For example RedisModule_KeyType() will return it is
an empty key, and writing to it will create a new key, possibly of another
type (depending on the API used).
Managing key expires (TTLs)
To control key expires two functions are provided, that are able to set, modify, get, and unset the time to live associated with a key.
One function is used in order to query the current expire of an open key:
mstime_t RedisModule_GetExpire(RedisModuleKey *key);
The function returns the time to live of the key in milliseconds, or
REDISMODULE_NO_EXPIRE as a special value to signal the key has no associated
expire or does not exist at all (you can differentiate the two cases checking
if the key type is REDISMODULE_KEYTYPE_EMPTY).
In order to change the expire of a key the following function is used instead:
int RedisModule_SetExpire(RedisModuleKey *key, mstime_t expire);
When called on a non existing key, REDISMODULE_ERR is returned, because
the function can only associate expires to existing open keys (non existing
open keys are only useful in order to create new values with data type
specific write operations).
Again the expire time is specified in milliseconds. If the key has currently
no expire, a new expire is set. If the key already have an expire, it is
replaced with the new value.
If the key has an expire, and the special value REDISMODULE_NO_EXPIRE is
used as a new expire, the expire is removed, similarly to the Redis
PERSIST command. In case the key was already persistent, no operation is
performed.
Obtaining the length of values
There is a single function in order to retrieve the length of the value associated to an open key. The returned length is value-specific, and is the string length for strings, and the number of elements for the aggregated data types (how many elements there is in a list, set, sorted set, hash).
size_t len = RedisModule_ValueLength(key);
If the key does not exist, 0 is returned by the function:
String type API
Setting a new string value, like the Redis SET command does, is performed
using:
int RedisModule_StringSet(RedisModuleKey *key, RedisModuleString *str);
The function works exactly like the Redis SET command itself, that is, if
there is a prior value (of any type) it will be deleted.
Accessing existing string values is performed using DMA (direct memory access) for speed. The API will return a pointer and a length, so that's possible to access and, if needed, modify the string directly.
size_t len, j;
char *myptr = RedisModule_StringDMA(key,&len,REDISMODULE_WRITE);
for (j = 0; j < len; j++) myptr[j] = 'A';
In the above example we write directly on the string. Note that if you want
to write, you must be sure to ask for WRITE mode.
DMA pointers are only valid if no other operations are performed with the key before using the pointer, after the DMA call.
Sometimes when we want to manipulate strings directly, we need to change
their size as well. For this scope, the RedisModule_StringTruncate function
is used. Example:
RedisModule_StringTruncate(mykey,1024);
The function truncates, or enlarges the string as needed, padding it with
zero bytes if the previous length is smaller than the new length we request.
If the string does not exist since key is associated to an open empty key,
a string value is created and associated to the key.
Note that every time StringTruncate() is called, we need to re-obtain
the DMA pointer again, since the old may be invalid.
List type API
It's possible to push and pop values from list values:
int RedisModule_ListPush(RedisModuleKey *key, int where, RedisModuleString *ele);
RedisModuleString *RedisModule_ListPop(RedisModuleKey *key, int where);
In both the APIs the where argument specifies if to push or pop from tail
or head, using the following macros:
REDISMODULE_LIST_HEAD
REDISMODULE_LIST_TAIL
Elements returned by RedisModule_ListPop() are like strings created with
RedisModule_CreateString(), they must be released with
RedisModule_FreeString() or by enabling automatic memory management.
Set type API
Work in progress.
Sorted set type API
Documentation missing, please refer to the top comments inside module.c
for the following functions:
RedisModule_ZsetAddRedisModule_ZsetIncrbyRedisModule_ZsetScoreRedisModule_ZsetRem
And for the sorted set iterator:
RedisModule_ZsetRangeStopRedisModule_ZsetFirstInScoreRangeRedisModule_ZsetLastInScoreRangeRedisModule_ZsetFirstInLexRangeRedisModule_ZsetLastInLexRangeRedisModule_ZsetRangeCurrentElementRedisModule_ZsetRangeNextRedisModule_ZsetRangePrevRedisModule_ZsetRangeEndReached
Hash type API
Documentation missing, please refer to the top comments inside module.c
for the following functions:
RedisModule_HashSetRedisModule_HashGet
Iterating aggregated values
Work in progress.
Replicating commands
If you want to use module commands exactly like normal Redis commands, in the context of replicated Redis instances, or using the AOF file for persistence, it is important for module commands to handle their replication in a consistent way.
When using the higher level APIs to invoke commands, replication happens
automatically if you use the "!" modifier in the format string of
RedisModule_Call() as in the following example:
reply = RedisModule_Call(ctx,"INCRBY","!sc",argv[1],"10");
As you can see the format specifier is "!sc". The bang is not parsed as a
format specifier, but it internally flags the command as "must replicate".
If you use the above programming style, there are no problems. However sometimes things are more complex than that, and you use the low level API. In this case, if there are no side effects in the command execution, and it consistently always performs the same work, what is possible to do is to replicate the command verbatim as the user executed it. To do that, you just need to call the following function:
RedisModule_ReplicateVerbatim(ctx);
When you use the above API, you should not use any other replication function since they are not guaranteed to mix well.
However this is not the only option. It's also possible to exactly tell
Redis what commands to replicate as the effect of the command execution, using
an API similar to RedisModule_Call() but that instead of calling the command
sends it to the AOF / replicas stream. Example:
RedisModule_Replicate(ctx,"INCRBY","cl","foo",my_increment);
It's possible to call RedisModule_Replicate multiple times, and each
will emit a command. All the sequence emitted is wrapped between a
MULTI/EXEC transaction, so that the AOF and replication effects are the
same as executing a single command.
Note that Call() replication and Replicate() replication have a rule,
in case you want to mix both forms of replication (not necessarily a good
idea if there are simpler approaches). Commands replicated with Call()
are always the first emitted in the final MULTI/EXEC block, while all
the commands emitted with Replicate() will follow.
Automatic memory management
Normally when writing programs in the C language, programmers need to manage memory manually. This is why the Redis modules API has functions to release strings, close open keys, free replies, and so forth.
However given that commands are executed in a contained environment and with a set of strict APIs, Redis is able to provide automatic memory management to modules, at the cost of some performance (most of the time, a very low cost).
When automatic memory management is enabled:
- You don't need to close open keys.
- You don't need to free replies.
- You don't need to free RedisModuleString objects.
However you can still do it, if you want. For example, automatic memory management may be active, but inside a loop allocating a lot of strings, you may still want to free strings no longer used.
In order to enable automatic memory management, just call the following function at the start of the command implementation:
RedisModule_AutoMemory(ctx);
Automatic memory management is usually the way to go, however experienced C programmers may not use it in order to gain some speed and memory usage benefit.
Allocating memory into modules
Normal C programs use malloc() and free() in order to allocate and
release memory dynamically. While in Redis modules the use of malloc is
not technically forbidden, it is a lot better to use the Redis Modules
specific functions, that are exact replacements for malloc, free,
realloc and strdup. These functions are:
void *RedisModule_Alloc(size_t bytes);
void* RedisModule_Realloc(void *ptr, size_t bytes);
void RedisModule_Free(void *ptr);
void RedisModule_Calloc(size_t nmemb, size_t size);
char *RedisModule_Strdup(const char *str);
They work exactly like their libc equivalent calls, however they use
the same allocator Redis uses, and the memory allocated using these
functions is reported by the INFO command in the memory section, is
accounted when enforcing the maxmemory policy, and in general is
a first citizen of the Redis executable. On the contrary, the method
allocated inside modules with libc malloc() is transparent to Redis.
Another reason to use the modules functions in order to allocate memory
is that, when creating native data types inside modules, the RDB loading
functions can return deserialized strings (from the RDB file) directly
as RedisModule_Alloc() allocations, so they can be used directly to
populate data structures after loading, instead of having to copy them
to the data structure.
Pool allocator
Sometimes in commands implementations, it is required to perform many small allocations that will be not retained at the end of the command execution, but are just functional to execute the command itself.
This work can be more easily accomplished using the Redis pool allocator:
void *RedisModule_PoolAlloc(RedisModuleCtx *ctx, size_t bytes);
It works similarly to malloc(), and returns memory aligned to the
next power of two of greater or equal to bytes (for a maximum alignment
of 8 bytes). However it allocates memory in blocks, so it the overhead
of the allocations is small, and more important, the memory allocated
is automatically released when the command returns.
So in general short living allocations are a good candidates for the pool allocator.
Writing commands compatible with Redis Cluster
Documentation missing, please check the following functions inside module.c:
RedisModule_IsKeysPositionRequest(ctx);
RedisModule_KeyAtPos(ctx,pos);
8.10.1 - Modules API reference
Auto-generated reference for the Redis Modules API
Sections
- Heap allocation raw functions
- Commands API
- Module information and time measurement
- Automatic memory management for modules
- String objects APIs
- Reply APIs
- Commands replication API
- DB and Key APIs – Generic API
- Key API for String type
- Key API for List type
- Key API for Sorted Set type
- Key API for Sorted Set iterator
- Key API for Hash type
- Key API for Stream type
- Calling Redis commands from modules
- Modules data types
- RDB loading and saving functions
- Key digest API (DEBUG DIGEST interface for modules types)
- AOF API for modules data types
- IO context handling
- Logging
- Blocking clients from modules
- Thread Safe Contexts
- Module Keyspace Notifications API
- Modules Cluster API
- Modules Timers API
- Modules EventLoop API
- Modules ACL API
- Modules Dictionary API
- Modules Info fields
- Modules utility APIs
- Modules API exporting / importing
- Module Command Filter API
- Scanning keyspace and hashes
- Module fork API
- Server hooks implementation
- Module Configurations API
- Key eviction API
- Miscellaneous APIs
- Defrag API
- Function index
Heap allocation raw functions
Memory allocated with these functions are taken into account by Redis key eviction algorithms and are reported in Redis memory usage information.
RedisModule_Alloc
void *RedisModule_Alloc(size_t bytes);
Available since: 4.0.0
Use like malloc(). Memory allocated with this function is reported in
Redis INFO memory, used for keys eviction according to maxmemory settings
and in general is taken into account as memory allocated by Redis.
You should avoid using malloc().
This function panics if unable to allocate enough memory.
RedisModule_TryAlloc
void *RedisModule_TryAlloc(size_t bytes);
Available since: 7.0.0
Similar to RedisModule_Alloc, but returns NULL in case of allocation failure, instead
of panicking.
RedisModule_Calloc
void *RedisModule_Calloc(size_t nmemb, size_t size);
Available since: 4.0.0
Use like calloc(). Memory allocated with this function is reported in
Redis INFO memory, used for keys eviction according to maxmemory settings
and in general is taken into account as memory allocated by Redis.
You should avoid using calloc() directly.
RedisModule_Realloc
void* RedisModule_Realloc(void *ptr, size_t bytes);
Available since: 4.0.0
Use like realloc() for memory obtained with RedisModule_Alloc().
RedisModule_Free
void RedisModule_Free(void *ptr);
Available since: 4.0.0
Use like free() for memory obtained by RedisModule_Alloc() and
RedisModule_Realloc(). However you should never try to free with
RedisModule_Free() memory allocated with malloc() inside your module.
RedisModule_Strdup
char *RedisModule_Strdup(const char *str);
Available since: 4.0.0
Like strdup() but returns memory allocated with RedisModule_Alloc().
RedisModule_PoolAlloc
void *RedisModule_PoolAlloc(RedisModuleCtx *ctx, size_t bytes);
Available since: 4.0.0
Return heap allocated memory that will be freed automatically when the module callback function returns. Mostly suitable for small allocations that are short living and must be released when the callback returns anyway. The returned memory is aligned to the architecture word size if at least word size bytes are requested, otherwise it is just aligned to the next power of two, so for example a 3 bytes request is 4 bytes aligned while a 2 bytes request is 2 bytes aligned.
There is no realloc style function since when this is needed to use the pool allocator is not a good idea.
The function returns NULL if bytes is 0.
Commands API
These functions are used to implement custom Redis commands.
For examples, see https://redis.io/topics/modules-intro.
RedisModule_IsKeysPositionRequest
int RedisModule_IsKeysPositionRequest(RedisModuleCtx *ctx);
Available since: 4.0.0
Return non-zero if a module command, that was declared with the flag "getkeys-api", is called in a special way to get the keys positions and not to get executed. Otherwise zero is returned.
RedisModule_KeyAtPosWithFlags
void RedisModule_KeyAtPosWithFlags(RedisModuleCtx *ctx, int pos, int flags);
Available since: 7.0.0
When a module command is called in order to obtain the position of
keys, since it was flagged as "getkeys-api" during the registration,
the command implementation checks for this special call using the
RedisModule_IsKeysPositionRequest() API and uses this function in
order to report keys.
The supported flags are the ones used by RedisModule_SetCommandInfo, see REDISMODULE_CMD_KEY_*.
The following is an example of how it could be used:
if (RedisModule_IsKeysPositionRequest(ctx)) {
RedisModule_KeyAtPosWithFlags(ctx, 2, REDISMODULE_CMD_KEY_RO | REDISMODULE_CMD_KEY_ACCESS);
RedisModule_KeyAtPosWithFlags(ctx, 1, REDISMODULE_CMD_KEY_RW | REDISMODULE_CMD_KEY_UPDATE | REDISMODULE_CMD_KEY_ACCESS);
}
Note: in the example above the get keys API could have been handled by key-specs (preferred). Implementing the getkeys-api is required only when is it not possible to declare key-specs that cover all keys.
RedisModule_KeyAtPos
void RedisModule_KeyAtPos(RedisModuleCtx *ctx, int pos);
Available since: 4.0.0
This API existed before RedisModule_KeyAtPosWithFlags was added, now deprecated and
can be used for compatibility with older versions, before key-specs and flags
were introduced.
RedisModule_IsChannelsPositionRequest
int RedisModule_IsChannelsPositionRequest(RedisModuleCtx *ctx);
Available since: 7.0.0
Return non-zero if a module command, that was declared with the flag "getchannels-api", is called in a special way to get the channel positions and not to get executed. Otherwise zero is returned.
RedisModule_ChannelAtPosWithFlags
void RedisModule_ChannelAtPosWithFlags(RedisModuleCtx *ctx,
int pos,
int flags);
Available since: 7.0.0
When a module command is called in order to obtain the position of
channels, since it was flagged as "getchannels-api" during the
registration, the command implementation checks for this special call
using the RedisModule_IsChannelsPositionRequest() API and uses this
function in order to report the channels.
The supported flags are:
REDISMODULE_CMD_CHANNEL_SUBSCRIBE: This command will subscribe to the channel.REDISMODULE_CMD_CHANNEL_UNSUBSCRIBE: This command will unsubscribe from this channel.REDISMODULE_CMD_CHANNEL_PUBLISH: This command will publish to this channel.REDISMODULE_CMD_CHANNEL_PATTERN: Instead of acting on a specific channel, will act on any channel specified by the pattern. This is the same access used by the PSUBSCRIBE and PUNSUBSCRIBE commands available in Redis. Not intended to be used with PUBLISH permissions.
The following is an example of how it could be used:
if (RedisModule_IsChannelsPositionRequest(ctx)) {
RedisModule_ChannelAtPosWithFlags(ctx, 1, REDISMODULE_CMD_CHANNEL_SUBSCRIBE | REDISMODULE_CMD_CHANNEL_PATTERN);
RedisModule_ChannelAtPosWithFlags(ctx, 1, REDISMODULE_CMD_CHANNEL_PUBLISH);
}
Note: One usage of declaring channels is for evaluating ACL permissions. In this context,
unsubscribing is always allowed, so commands will only be checked against subscribe and
publish permissions. This is preferred over using RedisModule_ACLCheckChannelPermissions, since
it allows the ACLs to be checked before the command is executed.
RedisModule_CreateCommand
int RedisModule_CreateCommand(RedisModuleCtx *ctx,
const char *name,
RedisModuleCmdFunc cmdfunc,
const char *strflags,
int firstkey,
int lastkey,
int keystep);
Available since: 4.0.0
Register a new command in the Redis server, that will be handled by
calling the function pointer 'cmdfunc' using the RedisModule calling
convention. The function returns REDISMODULE_ERR if the specified command
name is already busy or a set of invalid flags were passed, otherwise
REDISMODULE_OK is returned and the new command is registered.
This function must be called during the initialization of the module
inside the RedisModule_OnLoad() function. Calling this function outside
of the initialization function is not defined.
The command function type is the following:
int MyCommand_RedisCommand(RedisModuleCtx *ctx, RedisModuleString **argv, int argc);
And is supposed to always return REDISMODULE_OK.
The set of flags 'strflags' specify the behavior of the command, and should be passed as a C string composed of space separated words, like for example "write deny-oom". The set of flags are:
- "write": The command may modify the data set (it may also read from it).
- "readonly": The command returns data from keys but never writes.
- "admin": The command is an administrative command (may change replication or perform similar tasks).
- "deny-oom": The command may use additional memory and should be denied during out of memory conditions.
- "deny-script": Don't allow this command in Lua scripts.
- "allow-loading": Allow this command while the server is loading data. Only commands not interacting with the data set should be allowed to run in this mode. If not sure don't use this flag.
- "pubsub": The command publishes things on Pub/Sub channels.
- "random": The command may have different outputs even starting from the same input arguments and key values. Starting from Redis 7.0 this flag has been deprecated. Declaring a command as "random" can be done using command tips, see https://redis.io/topics/command-tips.
- "allow-stale": The command is allowed to run on slaves that don't serve stale data. Don't use if you don't know what this means.
- "no-monitor": Don't propagate the command on monitor. Use this if the command has sensitive data among the arguments.
- "no-slowlog": Don't log this command in the slowlog. Use this if the command has sensitive data among the arguments.
- "fast": The command time complexity is not greater than O(log(N)) where N is the size of the collection or anything else representing the normal scalability issue with the command.
- "getkeys-api": The command implements the interface to return the arguments that are keys. Used when start/stop/step is not enough because of the command syntax.
- "no-cluster": The command should not register in Redis Cluster since is not designed to work with it because, for example, is unable to report the position of the keys, programmatically creates key names, or any other reason.
- "no-auth": This command can be run by an un-authenticated client. Normally this is used by a command that is used to authenticate a client.
- "may-replicate": This command may generate replication traffic, even though it's not a write command.
- "no-mandatory-keys": All the keys this command may take are optional
- "blocking": The command has the potential to block the client.
- "allow-busy": Permit the command while the server is blocked either by a script or by a slow module command, see RM_Yield.
- "getchannels-api": The command implements the interface to return the arguments that are channels.
The last three parameters specify which arguments of the new command are Redis keys. See https://redis.io/commands/command for more information.
firstkey: One-based index of the first argument that's a key. Position 0 is always the command name itself. 0 for commands with no keys.lastkey: One-based index of the last argument that's a key. Negative numbers refer to counting backwards from the last argument (-1 means the last argument provided) 0 for commands with no keys.keystep: Step between first and last key indexes. 0 for commands with no keys.
This information is used by ACL, Cluster and the COMMAND command.
NOTE: The scheme described above serves a limited purpose and can
only be used to find keys that exist at constant indices.
For non-trivial key arguments, you may pass 0,0,0 and use
RedisModule_SetCommandInfo to set key specs using a more advanced scheme.
RedisModule_GetCommand
RedisModuleCommand *RedisModule_GetCommand(RedisModuleCtx *ctx,
const char *name);
Available since: 7.0.0
Get an opaque structure, representing a module command, by command name. This structure is used in some of the command-related APIs.
NULL is returned in case of the following errors:
- Command not found
- The command is not a module command
- The command doesn't belong to the calling module
RedisModule_CreateSubcommand
int RedisModule_CreateSubcommand(RedisModuleCommand *parent,
const char *name,
RedisModuleCmdFunc cmdfunc,
const char *strflags,
int firstkey,
int lastkey,
int keystep);
Available since: 7.0.0
Very similar to RedisModule_CreateCommand except that it is used to create
a subcommand, associated with another, container, command.
Example: If a module has a configuration command, MODULE.CONFIG, then
GET and SET should be individual subcommands, while MODULE.CONFIG is
a command, but should not be registered with a valid funcptr:
if (RedisModule_CreateCommand(ctx,"module.config",NULL,"",0,0,0) == REDISMODULE_ERR)
return REDISMODULE_ERR;
RedisModuleCommand *parent = RedisModule_GetCommand(ctx,,"module.config");
if (RedisModule_CreateSubcommand(parent,"set",cmd_config_set,"",0,0,0) == REDISMODULE_ERR)
return REDISMODULE_ERR;
if (RedisModule_CreateSubcommand(parent,"get",cmd_config_get,"",0,0,0) == REDISMODULE_ERR)
return REDISMODULE_ERR;
Returns REDISMODULE_OK on success and REDISMODULE_ERR in case of the following errors:
- Error while parsing
strflags - Command is marked as
no-clusterbut cluster mode is enabled parentis already a subcommand (we do not allow more than one level of command nesting)parentis a command with an implementation (RedisModuleCmdFunc) (A parent command should be a pure container of subcommands)parentalready has a subcommand calledname
RedisModule_SetCommandInfo
int RedisModule_SetCommandInfo(RedisModuleCommand *command,
const RedisModuleCommandInfo *info);
Available since: 7.0.0
Set additional command information.
Affects the output of COMMAND, COMMAND INFO and COMMAND DOCS, Cluster,
ACL and is used to filter commands with the wrong number of arguments before
the call reaches the module code.
This function can be called after creating a command using RedisModule_CreateCommand
and fetching the command pointer using RedisModule_GetCommand. The information can
only be set once for each command and has the following structure:
typedef struct RedisModuleCommandInfo {
const RedisModuleCommandInfoVersion *version;
const char *summary;
const char *complexity;
const char *since;
RedisModuleCommandHistoryEntry *history;
const char *tips;
int arity;
RedisModuleCommandKeySpec *key_specs;
RedisModuleCommandArg *args;
} RedisModuleCommandInfo;
All fields except version are optional. Explanation of the fields:
version: This field enables compatibility with different Redis versions. Always set this field toREDISMODULE_COMMAND_INFO_VERSION.summary: A short description of the command (optional).complexity: Complexity description (optional).since: The version where the command was introduced (optional). Note: The version specified should be the module's, not Redis version.history: An array ofRedisModuleCommandHistoryEntry(optional), which is a struct with the following fields:const char *since; const char *changes;sinceis a version string andchangesis a string describing the changes. The array is terminated by a zeroed entry, i.e. an entry with both strings set to NULL.tips: A string of space-separated tips regarding this command, meant for clients and proxies. See https://redis.io/topics/command-tips.arity: Number of arguments, including the command name itself. A positive number specifies an exact number of arguments and a negative number specifies a minimum number of arguments, so use -N to say >= N. Redis validates a call before passing it to a module, so this can replace an arity check inside the module command implementation. A value of 0 (or an omitted arity field) is equivalent to -2 if the command has sub commands and -1 otherwise.key_specs: An array ofRedisModuleCommandKeySpec, terminated by an element memset to zero. This is a scheme that tries to describe the positions of key arguments better than the oldRedisModule_CreateCommandargumentsfirstkey,lastkey,keystepand is needed if those three are not enough to describe the key positions. There are two steps to retrieve key positions: begin search (BS) in which index should find the first key and find keys (FK) which, relative to the output of BS, describes how can we will which arguments are keys. Additionally, there are key specific flags.Key-specs cause the triplet (firstkey, lastkey, keystep) given in RM_CreateCommand to be recomputed, but it is still useful to provide these three parameters in RM_CreateCommand, to better support old Redis versions where RM_SetCommandInfo is not available.
Note that key-specs don't fully replace the "getkeys-api" (see RM_CreateCommand, RM_IsKeysPositionRequest and RM_KeyAtPosWithFlags) so it may be a good idea to supply both key-specs and implement the getkeys-api.
A key-spec has the following structure:
typedef struct RedisModuleCommandKeySpec { const char *notes; uint64_t flags; RedisModuleKeySpecBeginSearchType begin_search_type; union { struct { int pos; } index; struct { const char *keyword; int startfrom; } keyword; } bs; RedisModuleKeySpecFindKeysType find_keys_type; union { struct { int lastkey; int keystep; int limit; } range; struct { int keynumidx; int firstkey; int keystep; } keynum; } fk; } RedisModuleCommandKeySpec;Explanation of the fields of RedisModuleCommandKeySpec:
notes: Optional notes or clarifications about this key spec.flags: A bitwise or of key-spec flags described below.begin_search_type: This describes how the first key is discovered. There are two ways to determine the first key:REDISMODULE_KSPEC_BS_UNKNOWN: There is no way to tell where the key args start.REDISMODULE_KSPEC_BS_INDEX: Key args start at a constant index.REDISMODULE_KSPEC_BS_KEYWORD: Key args start just after a specific keyword.
bs: This is a union in which theindexorkeywordbranch is used depending on the value of thebegin_search_typefield.bs.index.pos: The index from which we start the search for keys. (REDISMODULE_KSPEC_BS_INDEXonly.)bs.keyword.keyword: The keyword (string) that indicates the beginning of key arguments. (REDISMODULE_KSPEC_BS_KEYWORDonly.)bs.keyword.startfrom: An index in argv from which to start searching. Can be negative, which means start search from the end, in reverse. Example: -2 means to start in reverse from the penultimate argument. (REDISMODULE_KSPEC_BS_KEYWORDonly.)
find_keys_type: After the "begin search", this describes which arguments are keys. The strategies are:REDISMODULE_KSPEC_BS_UNKNOWN: There is no way to tell where the key args are located.REDISMODULE_KSPEC_FK_RANGE: Keys end at a specific index (or relative to the last argument).REDISMODULE_KSPEC_FK_KEYNUM: There's an argument that contains the number of key args somewhere before the keys themselves.
find_keys_typeandfkcan be omitted if this keyspec describes exactly one key.fk: This is a union in which therangeorkeynumbranch is used depending on the value of thefind_keys_typefield.fk.range(forREDISMODULE_KSPEC_FK_RANGE): A struct with the following fields:lastkey: Index of the last key relative to the result of the begin search step. Can be negative, in which case it's not relative. -1 indicates the last argument, -2 one before the last and so on.keystep: How many arguments should we skip after finding a key, in order to find the next one?limit: Iflastkeyis -1, we uselimitto stop the search by a factor. 0 and 1 mean no limit. 2 means 1/2 of the remaining args, 3 means 1/3, and so on.
fk.keynum(forREDISMODULE_KSPEC_FK_KEYNUM): A struct with the following fields:keynumidx: Index of the argument containing the number of keys to come, relative to the result of the begin search step.firstkey: Index of the fist key relative to the result of the begin search step. (Usually it's just afterkeynumidx, in which case it should be set tokeynumidx + 1.)keystep: How many argumentss should we skip after finding a key, in order to find the next one?
Key-spec flags:
The first four refer to what the command actually does with the value or metadata of the key, and not necessarily the user data or how it affects it. Each key-spec may must have exactly one of these. Any operation that's not distinctly deletion, overwrite or read-only would be marked as RW.
REDISMODULE_CMD_KEY_RO: Read-Only. Reads the value of the key, but doesn't necessarily return it.REDISMODULE_CMD_KEY_RW: Read-Write. Modifies the data stored in the value of the key or its metadata.REDISMODULE_CMD_KEY_OW: Overwrite. Overwrites the data stored in the value of the key.REDISMODULE_CMD_KEY_RM: Deletes the key.
The next four refer to user data inside the value of the key, not the metadata like LRU, type, cardinality. It refers to the logical operation on the user's data (actual input strings or TTL), being used/returned/copied/changed. It doesn't refer to modification or returning of metadata (like type, count, presence of data). ACCESS can be combined with one of the write operations INSERT, DELETE or UPDATE. Any write that's not an INSERT or a DELETE would be UPDATE.
REDISMODULE_CMD_KEY_ACCESS: Returns, copies or uses the user data from the value of the key.REDISMODULE_CMD_KEY_UPDATE: Updates data to the value, new value may depend on the old value.REDISMODULE_CMD_KEY_INSERT: Adds data to the value with no chance of modification or deletion of existing data.REDISMODULE_CMD_KEY_DELETE: Explicitly deletes some content from the value of the key.
Other flags:
REDISMODULE_CMD_KEY_NOT_KEY: The key is not actually a key, but should be routed in cluster mode as if it was a key.REDISMODULE_CMD_KEY_INCOMPLETE: The keyspec might not point out all the keys it should cover.REDISMODULE_CMD_KEY_VARIABLE_FLAGS: Some keys might have different flags depending on arguments.
args: An array ofRedisModuleCommandArg, terminated by an element memset to zero.RedisModuleCommandArgis a structure with at the fields described below.typedef struct RedisModuleCommandArg { const char *name; RedisModuleCommandArgType type; int key_spec_index; const char *token; const char *summary; const char *since; int flags; struct RedisModuleCommandArg *subargs; } RedisModuleCommandArg;Explanation of the fields:
name: Name of the argument.type: The type of the argument. See below for details. The typesREDISMODULE_ARG_TYPE_ONEOFandREDISMODULE_ARG_TYPE_BLOCKrequire an argument to have sub-arguments, i.e.subargs.key_spec_index: If thetypeisREDISMODULE_ARG_TYPE_KEYyou must provide the index of the key-spec associated with this argument. Seekey_specsabove. If the argument is not a key, you may specify -1.token: The token preceding the argument (optional). Example: the argumentsecondsinSEThas a tokenEX. If the argument consists of only a token (for exampleNXinSET) the type should beREDISMODULE_ARG_TYPE_PURE_TOKENandvalueshould be NULL.summary: A short description of the argument (optional).since: The first version which included this argument (optional).flags: A bitwise or of the macrosREDISMODULE_CMD_ARG_*. See below.value: The display-value of the argument. This string is what should be displayed when creating the command syntax from the output ofCOMMAND. Iftokenis not NULL, it should also be displayed.
Explanation of
RedisModuleCommandArgType:REDISMODULE_ARG_TYPE_STRING: String argument.REDISMODULE_ARG_TYPE_INTEGER: Integer argument.REDISMODULE_ARG_TYPE_DOUBLE: Double-precision float argument.REDISMODULE_ARG_TYPE_KEY: String argument representing a keyname.REDISMODULE_ARG_TYPE_PATTERN: String, but regex pattern.REDISMODULE_ARG_TYPE_UNIX_TIME: Integer, but Unix timestamp.REDISMODULE_ARG_TYPE_PURE_TOKEN: Argument doesn't have a placeholder. It's just a token without a value. Example: theKEEPTTLoption of theSETcommand.REDISMODULE_ARG_TYPE_ONEOF: Used when the user can choose only one of a few sub-arguments. Requiressubargs. Example: theNXandXXoptions ofSET.REDISMODULE_ARG_TYPE_BLOCK: Used when one wants to group together several sub-arguments, usually to apply something on all of them, like making the entire group "optional". Requiressubargs. Example: theLIMIT offset countparameters inZRANGE.
Explanation of the command argument flags:
REDISMODULE_CMD_ARG_OPTIONAL: The argument is optional (like GET in the SET command).REDISMODULE_CMD_ARG_MULTIPLE: The argument may repeat itself (like key in DEL).REDISMODULE_CMD_ARG_MULTIPLE_TOKEN: The argument may repeat itself, and so does its token (likeGET patternin SORT).
On success REDISMODULE_OK is returned. On error REDISMODULE_ERR is returned
and errno is set to EINVAL if invalid info was provided or EEXIST if info
has already been set. If the info is invalid, a warning is logged explaining
which part of the info is invalid and why.
Module information and time measurement
RedisModule_IsModuleNameBusy
int RedisModule_IsModuleNameBusy(const char *name);
Available since: 4.0.3
Return non-zero if the module name is busy. Otherwise zero is returned.
RedisModule_Milliseconds
long long RedisModule_Milliseconds(void);
Available since: 4.0.0
Return the current UNIX time in milliseconds.
RedisModule_MonotonicMicroseconds
uint64_t RedisModule_MonotonicMicroseconds(void);
Available since: 7.0.0
Return counter of micro-seconds relative to an arbitrary point in time.
RedisModule_BlockedClientMeasureTimeStart
int RedisModule_BlockedClientMeasureTimeStart(RedisModuleBlockedClient *bc);
Available since: 6.2.0
Mark a point in time that will be used as the start time to calculate
the elapsed execution time when RedisModule_BlockedClientMeasureTimeEnd() is called.
Within the same command, you can call multiple times
RedisModule_BlockedClientMeasureTimeStart() and RedisModule_BlockedClientMeasureTimeEnd()
to accumulate independent time intervals to the background duration.
This method always return REDISMODULE_OK.
RedisModule_BlockedClientMeasureTimeEnd
int RedisModule_BlockedClientMeasureTimeEnd(RedisModuleBlockedClient *bc);
Available since: 6.2.0
Mark a point in time that will be used as the end time
to calculate the elapsed execution time.
On success REDISMODULE_OK is returned.
This method only returns REDISMODULE_ERR if no start time was
previously defined ( meaning RedisModule_BlockedClientMeasureTimeStart was not called ).
RedisModule_Yield
void RedisModule_Yield(RedisModuleCtx *ctx, int flags, const char *busy_reply);
Available since: 7.0.0
This API allows modules to let Redis process background tasks, and some commands during long blocking execution of a module command. The module can call this API periodically. The flags is a bit mask of these:
REDISMODULE_YIELD_FLAG_NONE: No special flags, can perform some background operations, but not process client commands.REDISMODULE_YIELD_FLAG_CLIENTS: Redis can also process client commands.
The busy_reply argument is optional, and can be used to control the verbose
error string after the -BUSY error code.
When the REDISMODULE_YIELD_FLAG_CLIENTS is used, Redis will only start
processing client commands after the time defined by the
busy-reply-threshold config, in which case Redis will start rejecting most
commands with -BUSY error, but allow the ones marked with the allow-busy
flag to be executed.
This API can also be used in thread safe context (while locked), and during
loading (in the rdb_load callback, in which case it'll reject commands with
the -LOADING error)
RedisModule_SetModuleOptions
void RedisModule_SetModuleOptions(RedisModuleCtx *ctx, int options);
Available since: 6.0.0
Set flags defining capabilities or behavior bit flags.
REDISMODULE_OPTIONS_HANDLE_IO_ERRORS:
Generally, modules don't need to bother with this, as the process will just
terminate if a read error happens, however, setting this flag would allow
repl-diskless-load to work if enabled.
The module should use RedisModule_IsIOError after reads, before using the
data that was read, and in case of error, propagate it upwards, and also be
able to release the partially populated value and all it's allocations.
REDISMODULE_OPTION_NO_IMPLICIT_SIGNAL_MODIFIED:
See RedisModule_SignalModifiedKey().
REDISMODULE_OPTIONS_HANDLE_REPL_ASYNC_LOAD:
Setting this flag indicates module awareness of diskless async replication (repl-diskless-load=swapdb)
and that redis could be serving reads during replication instead of blocking with LOADING status.
RedisModule_SignalModifiedKey
int RedisModule_SignalModifiedKey(RedisModuleCtx *ctx,
RedisModuleString *keyname);
Available since: 6.0.0
Signals that the key is modified from user's perspective (i.e. invalidate WATCH and client side caching).
This is done automatically when a key opened for writing is closed, unless
the option REDISMODULE_OPTION_NO_IMPLICIT_SIGNAL_MODIFIED has been set using
RedisModule_SetModuleOptions().
Automatic memory management for modules
RedisModule_AutoMemory
void RedisModule_AutoMemory(RedisModuleCtx *ctx);
Available since: 4.0.0
Enable automatic memory management.
The function must be called as the first function of a command implementation that wants to use automatic memory.
When enabled, automatic memory management tracks and automatically frees keys, call replies and Redis string objects once the command returns. In most cases this eliminates the need of calling the following functions:
These functions can still be used with automatic memory management enabled, to optimize loops that make numerous allocations for example.
String objects APIs
RedisModule_CreateString
RedisModuleString *RedisModule_CreateString(RedisModuleCtx *ctx,
const char *ptr,
size_t len);
Available since: 4.0.0
Create a new module string object. The returned string must be freed
with RedisModule_FreeString(), unless automatic memory is enabled.
The string is created by copying the len bytes starting
at ptr. No reference is retained to the passed buffer.
The module context 'ctx' is optional and may be NULL if you want to create a string out of the context scope. However in that case, the automatic memory management will not be available, and the string memory must be managed manually.
RedisModule_CreateStringPrintf
RedisModuleString *RedisModule_CreateStringPrintf(RedisModuleCtx *ctx,
const char *fmt,
...);
Available since: 4.0.0
Create a new module string object from a printf format and arguments.
The returned string must be freed with RedisModule_FreeString(), unless
automatic memory is enabled.
The string is created using the sds formatter function sdscatvprintf().
The passed context 'ctx' may be NULL if necessary, see the
RedisModule_CreateString() documentation for more info.
RedisModule_CreateStringFromLongLong
RedisModuleString *RedisModule_CreateStringFromLongLong(RedisModuleCtx *ctx,
long long ll);
Available since: 4.0.0
Like RedisModule_CreatString(), but creates a string starting from a long long
integer instead of taking a buffer and its length.
The returned string must be released with RedisModule_FreeString() or by
enabling automatic memory management.
The passed context 'ctx' may be NULL if necessary, see the
RedisModule_CreateString() documentation for more info.
RedisModule_CreateStringFromDouble
RedisModuleString *RedisModule_CreateStringFromDouble(RedisModuleCtx *ctx,
double d);
Available since: 6.0.0
Like RedisModule_CreatString(), but creates a string starting from a double
instead of taking a buffer and its length.
The returned string must be released with RedisModule_FreeString() or by
enabling automatic memory management.
RedisModule_CreateStringFromLongDouble
RedisModuleString *RedisModule_CreateStringFromLongDouble(RedisModuleCtx *ctx,
long double ld,
int humanfriendly);
Available since: 6.0.0
Like RedisModule_CreatString(), but creates a string starting from a long
double.
The returned string must be released with RedisModule_FreeString() or by
enabling automatic memory management.
The passed context 'ctx' may be NULL if necessary, see the
RedisModule_CreateString() documentation for more info.
RedisModule_CreateStringFromString
RedisModuleString *RedisModule_CreateStringFromString(RedisModuleCtx *ctx,
const RedisModuleString *str);
Available since: 4.0.0
Like RedisModule_CreatString(), but creates a string starting from another
RedisModuleString.
The returned string must be released with RedisModule_FreeString() or by
enabling automatic memory management.
The passed context 'ctx' may be NULL if necessary, see the
RedisModule_CreateString() documentation for more info.
RedisModule_CreateStringFromStreamID
RedisModuleString *RedisModule_CreateStringFromStreamID(RedisModuleCtx *ctx,
const RedisModuleStreamID *id);
Available since: 6.2.0
Creates a string from a stream ID. The returned string must be released with
RedisModule_FreeString(), unless automatic memory is enabled.
The passed context ctx may be NULL if necessary. See the
RedisModule_CreateString() documentation for more info.
RedisModule_FreeString
void RedisModule_FreeString(RedisModuleCtx *ctx, RedisModuleString *str);
Available since: 4.0.0
Free a module string object obtained with one of the Redis modules API calls that return new string objects.
It is possible to call this function even when automatic memory management is enabled. In that case the string will be released ASAP and removed from the pool of string to release at the end.
If the string was created with a NULL context 'ctx', it is also possible to pass ctx as NULL when releasing the string (but passing a context will not create any issue). Strings created with a context should be freed also passing the context, so if you want to free a string out of context later, make sure to create it using a NULL context.
RedisModule_RetainString
void RedisModule_RetainString(RedisModuleCtx *ctx, RedisModuleString *str);
Available since: 4.0.0
Every call to this function, will make the string 'str' requiring
an additional call to RedisModule_FreeString() in order to really
free the string. Note that the automatic freeing of the string obtained
enabling modules automatic memory management counts for one
RedisModule_FreeString() call (it is just executed automatically).
Normally you want to call this function when, at the same time the following conditions are true:
- You have automatic memory management enabled.
- You want to create string objects.
- Those string objects you create need to live after the callback function(for example a command implementation) creating them returns.
Usually you want this in order to store the created string object into your own data structure, for example when implementing a new data type.
Note that when memory management is turned off, you don't need any call to RetainString() since creating a string will always result into a string that lives after the callback function returns, if no FreeString() call is performed.
It is possible to call this function with a NULL context.
When strings are going to be retained for an extended duration, it is good
practice to also call RedisModule_TrimStringAllocation() in order to
optimize memory usage.
Threaded modules that reference retained strings from other threads must explicitly trim the allocation as soon as the string is retained. Not doing so may result with automatic trimming which is not thread safe.
RedisModule_HoldString
RedisModuleString* RedisModule_HoldString(RedisModuleCtx *ctx,
RedisModuleString *str);
Available since: 6.0.7
This function can be used instead of RedisModule_RetainString().
The main difference between the two is that this function will always
succeed, whereas RedisModule_RetainString() may fail because of an
assertion.
The function returns a pointer to RedisModuleString, which is owned
by the caller. It requires a call to RedisModule_FreeString() to free
the string when automatic memory management is disabled for the context.
When automatic memory management is enabled, you can either call
RedisModule_FreeString() or let the automation free it.
This function is more efficient than RedisModule_CreateStringFromString()
because whenever possible, it avoids copying the underlying
RedisModuleString. The disadvantage of using this function is that it
might not be possible to use RedisModule_StringAppendBuffer() on the
returned RedisModuleString.
It is possible to call this function with a NULL context.
When strings are going to be held for an extended duration, it is good
practice to also call RedisModule_TrimStringAllocation() in order to
optimize memory usage.
Threaded modules that reference held strings from other threads must explicitly trim the allocation as soon as the string is held. Not doing so may result with automatic trimming which is not thread safe.
RedisModule_StringPtrLen
const char *RedisModule_StringPtrLen(const RedisModuleString *str,
size_t *len);
Available since: 4.0.0
Given a string module object, this function returns the string pointer and length of the string. The returned pointer and length should only be used for read only accesses and never modified.
RedisModule_StringToLongLong
int RedisModule_StringToLongLong(const RedisModuleString *str, long long *ll);
Available since: 4.0.0
Convert the string into a long long integer, storing it at *ll.
Returns REDISMODULE_OK on success. If the string can't be parsed
as a valid, strict long long (no spaces before/after), REDISMODULE_ERR
is returned.
RedisModule_StringToDouble
int RedisModule_StringToDouble(const RedisModuleString *str, double *d);
Available since: 4.0.0
Convert the string into a double, storing it at *d.
Returns REDISMODULE_OK on success or REDISMODULE_ERR if the string is
not a valid string representation of a double value.
RedisModule_StringToLongDouble
int RedisModule_StringToLongDouble(const RedisModuleString *str,
long double *ld);
Available since: 6.0.0
Convert the string into a long double, storing it at *ld.
Returns REDISMODULE_OK on success or REDISMODULE_ERR if the string is
not a valid string representation of a double value.
RedisModule_StringToStreamID
int RedisModule_StringToStreamID(const RedisModuleString *str,
RedisModuleStreamID *id);
Available since: 6.2.0
Convert the string into a stream ID, storing it at *id.
Returns REDISMODULE_OK on success and returns REDISMODULE_ERR if the string
is not a valid string representation of a stream ID. The special IDs "+" and
"-" are allowed.
RedisModule_StringCompare
int RedisModule_StringCompare(RedisModuleString *a, RedisModuleString *b);
Available since: 4.0.0
Compare two string objects, returning -1, 0 or 1 respectively if a < b, a == b, a > b. Strings are compared byte by byte as two binary blobs without any encoding care / collation attempt.
RedisModule_StringAppendBuffer
int RedisModule_StringAppendBuffer(RedisModuleCtx *ctx,
RedisModuleString *str,
const char *buf,
size_t len);
Available since: 4.0.0
Append the specified buffer to the string 'str'. The string must be a
string created by the user that is referenced only a single time, otherwise
REDISMODULE_ERR is returned and the operation is not performed.
RedisModule_TrimStringAllocation
void RedisModule_TrimStringAllocation(RedisModuleString *str);
Available since: 7.0.0
Trim possible excess memory allocated for a RedisModuleString.
Sometimes a RedisModuleString may have more memory allocated for
it than required, typically for argv arguments that were constructed
from network buffers. This function optimizes such strings by reallocating
their memory, which is useful for strings that are not short lived but
retained for an extended duration.
This operation is not thread safe and should only be called when no concurrent access to the string is guaranteed. Using it for an argv string in a module command before the string is potentially available to other threads is generally safe.
Currently, Redis may also automatically trim retained strings when a module command returns. However, doing this explicitly should still be a preferred option:
- Future versions of Redis may abandon auto-trimming.
- Auto-trimming as currently implemented is not thread safe. A background thread manipulating a recently retained string may end up in a race condition with the auto-trim, which could result with data corruption.
Reply APIs
These functions are used for sending replies to the client.
Most functions always return REDISMODULE_OK so you can use it with
'return' in order to return from the command implementation with:
if (... some condition ...)
return RedisModule_ReplyWithLongLong(ctx,mycount);
Reply with collection functions
After starting a collection reply, the module must make calls to other
ReplyWith* style functions in order to emit the elements of the collection.
Collection types include: Array, Map, Set and Attribute.
When producing collections with a number of elements that is not known
beforehand, the function can be called with a special flag
REDISMODULE_POSTPONED_LEN (REDISMODULE_POSTPONED_ARRAY_LEN in the past),
and the actual number of elements can be later set with RedisModule_ReplySet*Length()
call (which will set the latest "open" count if there are multiple ones).
RedisModule_WrongArity
int RedisModule_WrongArity(RedisModuleCtx *ctx);
Available since: 4.0.0
Send an error about the number of arguments given to the command,
citing the command name in the error message. Returns REDISMODULE_OK.
Example:
if (argc != 3) return RedisModule_WrongArity(ctx);
RedisModule_ReplyWithLongLong
int RedisModule_ReplyWithLongLong(RedisModuleCtx *ctx, long long ll);
Available since: 4.0.0
Send an integer reply to the client, with the specified long long value.
The function always returns REDISMODULE_OK.
RedisModule_ReplyWithError
int RedisModule_ReplyWithError(RedisModuleCtx *ctx, const char *err);
Available since: 4.0.0
Reply with the error 'err'.
Note that 'err' must contain all the error, including the initial error code. The function only provides the initial "-", so the usage is, for example:
RedisModule_ReplyWithError(ctx,"ERR Wrong Type");
and not just:
RedisModule_ReplyWithError(ctx,"Wrong Type");
The function always returns REDISMODULE_OK.
RedisModule_ReplyWithSimpleString
int RedisModule_ReplyWithSimpleString(RedisModuleCtx *ctx, const char *msg);
Available since: 4.0.0
Reply with a simple string (+... \r\n in RESP protocol). This replies
are suitable only when sending a small non-binary string with small
overhead, like "OK" or similar replies.
The function always returns REDISMODULE_OK.
RedisModule_ReplyWithArray
int RedisModule_ReplyWithArray(RedisModuleCtx *ctx, long len);
Available since: 4.0.0
Reply with an array type of 'len' elements.
After starting an array reply, the module must make len calls to other
ReplyWith* style functions in order to emit the elements of the array.
See Reply APIs section for more details.
Use RedisModule_ReplySetArrayLength() to set deferred length.
The function always returns REDISMODULE_OK.
RedisModule_ReplyWithMap
int RedisModule_ReplyWithMap(RedisModuleCtx *ctx, long len);
Available since: 7.0.0
Reply with a RESP3 Map type of 'len' pairs. Visit https://github.com/antirez/RESP3/blob/master/spec.md for more info about RESP3.
After starting a map reply, the module must make len*2 calls to other
ReplyWith* style functions in order to emit the elements of the map.
See Reply APIs section for more details.
If the connected client is using RESP2, the reply will be converted to a flat array.
Use RedisModule_ReplySetMapLength() to set deferred length.
The function always returns REDISMODULE_OK.
RedisModule_ReplyWithSet
int RedisModule_ReplyWithSet(RedisModuleCtx *ctx, long len);
Available since: 7.0.0
Reply with a RESP3 Set type of 'len' elements. Visit https://github.com/antirez/RESP3/blob/master/spec.md for more info about RESP3.
After starting a set reply, the module must make len calls to other
ReplyWith* style functions in order to emit the elements of the set.
See Reply APIs section for more details.
If the connected client is using RESP2, the reply will be converted to an array type.
Use RedisModule_ReplySetSetLength() to set deferred length.
The function always returns REDISMODULE_OK.
RedisModule_ReplyWithAttribute
int RedisModule_ReplyWithAttribute(RedisModuleCtx *ctx, long len);
Available since: 7.0.0
Add attributes (metadata) to the reply. Should be done before adding the actual reply. see https://github.com/antirez/RESP3/blob/master/spec.md#attribute-type
After starting an attributes reply, the module must make len*2 calls to other
ReplyWith* style functions in order to emit the elements of the attribtute map.
See Reply APIs section for more details.
Use RedisModule_ReplySetAttributeLength() to set deferred length.
Not supported by RESP2 and will return REDISMODULE_ERR, otherwise
the function always returns REDISMODULE_OK.
RedisModule_ReplyWithNullArray
int RedisModule_ReplyWithNullArray(RedisModuleCtx *ctx);
Available since: 6.0.0
Reply to the client with a null array, simply null in RESP3, null array in RESP2.
Note: In RESP3 there's no difference between Null reply and
NullArray reply, so to prevent ambiguity it's better to avoid
using this API and use RedisModule_ReplyWithNull instead.
The function always returns REDISMODULE_OK.
RedisModule_ReplyWithEmptyArray
int RedisModule_ReplyWithEmptyArray(RedisModuleCtx *ctx);
Available since: 6.0.0
Reply to the client with an empty array.
The function always returns REDISMODULE_OK.
RedisModule_ReplySetArrayLength
void RedisModule_ReplySetArrayLength(RedisModuleCtx *ctx, long len);
Available since: 4.0.0
When RedisModule_ReplyWithArray() is used with the argument
REDISMODULE_POSTPONED_LEN, because we don't know beforehand the number
of items we are going to output as elements of the array, this function
will take care to set the array length.
Since it is possible to have multiple array replies pending with unknown length, this function guarantees to always set the latest array length that was created in a postponed way.
For example in order to output an array like [1,[10,20,30]] we could write:
RedisModule_ReplyWithArray(ctx,REDISMODULE_POSTPONED_LEN);
RedisModule_ReplyWithLongLong(ctx,1);
RedisModule_ReplyWithArray(ctx,REDISMODULE_POSTPONED_LEN);
RedisModule_ReplyWithLongLong(ctx,10);
RedisModule_ReplyWithLongLong(ctx,20);
RedisModule_ReplyWithLongLong(ctx,30);
RedisModule_ReplySetArrayLength(ctx,3); // Set len of 10,20,30 array.
RedisModule_ReplySetArrayLength(ctx,2); // Set len of top array
Note that in the above example there is no reason to postpone the array length, since we produce a fixed number of elements, but in the practice the code may use an iterator or other ways of creating the output so that is not easy to calculate in advance the number of elements.
RedisModule_ReplySetMapLength
void RedisModule_ReplySetMapLength(RedisModuleCtx *ctx, long len);
Available since: 7.0.0
Very similar to RedisModule_ReplySetArrayLength except len should
exactly half of the number of ReplyWith* functions called in the
context of the map.
Visit https://github.com/antirez/RESP3/blob/master/spec.md for more info about RESP3.
RedisModule_ReplySetSetLength
void RedisModule_ReplySetSetLength(RedisModuleCtx *ctx, long len);
Available since: 7.0.0
Very similar to RedisModule_ReplySetArrayLength
Visit https://github.com/antirez/RESP3/blob/master/spec.md for more info about RESP3.
RedisModule_ReplySetAttributeLength
void RedisModule_ReplySetAttributeLength(RedisModuleCtx *ctx, long len);
Available since: 7.0.0
Very similar to RedisModule_ReplySetMapLength
Visit https://github.com/antirez/RESP3/blob/master/spec.md for more info about RESP3.
Must not be called if RedisModule_ReplyWithAttribute returned an error.
RedisModule_ReplyWithStringBuffer
int RedisModule_ReplyWithStringBuffer(RedisModuleCtx *ctx,
const char *buf,
size_t len);
Available since: 4.0.0
Reply with a bulk string, taking in input a C buffer pointer and length.
The function always returns REDISMODULE_OK.
RedisModule_ReplyWithCString
int RedisModule_ReplyWithCString(RedisModuleCtx *ctx, const char *buf);
Available since: 5.0.6
Reply with a bulk string, taking in input a C buffer pointer that is assumed to be null-terminated.
The function always returns REDISMODULE_OK.
RedisModule_ReplyWithString
int RedisModule_ReplyWithString(RedisModuleCtx *ctx, RedisModuleString *str);
Available since: 4.0.0
Reply with a bulk string, taking in input a RedisModuleString object.
The function always returns REDISMODULE_OK.
RedisModule_ReplyWithEmptyString
int RedisModule_ReplyWithEmptyString(RedisModuleCtx *ctx);
Available since: 6.0.0
Reply with an empty string.
The function always returns REDISMODULE_OK.
RedisModule_ReplyWithVerbatimStringType
int RedisModule_ReplyWithVerbatimStringType(RedisModuleCtx *ctx,
const char *buf,
size_t len,
const char *ext);
Available since: 7.0.0
Reply with a binary safe string, which should not be escaped or filtered taking in input a C buffer pointer, length and a 3 character type/extension.
The function always returns REDISMODULE_OK.
RedisModule_ReplyWithVerbatimString
int RedisModule_ReplyWithVerbatimString(RedisModuleCtx *ctx,
const char *buf,
size_t len);
Available since: 6.0.0
Reply with a binary safe string, which should not be escaped or filtered taking in input a C buffer pointer and length.
The function always returns REDISMODULE_OK.
RedisModule_ReplyWithNull
int RedisModule_ReplyWithNull(RedisModuleCtx *ctx);
Available since: 4.0.0
Reply to the client with a NULL.
The function always returns REDISMODULE_OK.
RedisModule_ReplyWithBool
int RedisModule_ReplyWithBool(RedisModuleCtx *ctx, int b);
Available since: 7.0.0
Reply with a RESP3 Boolean type. Visit https://github.com/antirez/RESP3/blob/master/spec.md for more info about RESP3.
In RESP3, this is boolean type In RESP2, it's a string response of "1" and "0" for true and false respectively.
The function always returns REDISMODULE_OK.
RedisModule_ReplyWithCallReply
int RedisModule_ReplyWithCallReply(RedisModuleCtx *ctx,
RedisModuleCallReply *reply);
Available since: 4.0.0
Reply exactly what a Redis command returned us with RedisModule_Call().
This function is useful when we use RedisModule_Call() in order to
execute some command, as we want to reply to the client exactly the
same reply we obtained by the command.
Return:
REDISMODULE_OKon success.REDISMODULE_ERRif the given reply is in RESP3 format but the client expects RESP2. In case of an error, it's the module writer responsibility to translate the reply to RESP2 (or handle it differently by returning an error). Notice that for module writer convenience, it is possible to pass0as a parameter to the fmt argument ofRM_Callso that theRedisModuleCallReplywill return in the same protocol (RESP2 or RESP3) as set in the current client's context.
RedisModule_ReplyWithDouble
int RedisModule_ReplyWithDouble(RedisModuleCtx *ctx, double d);
Available since: 4.0.0
Reply with a RESP3 Double type. Visit https://github.com/antirez/RESP3/blob/master/spec.md for more info about RESP3.
Send a string reply obtained converting the double 'd' into a bulk string.
This function is basically equivalent to converting a double into
a string into a C buffer, and then calling the function
RedisModule_ReplyWithStringBuffer() with the buffer and length.
In RESP3 the string is tagged as a double, while in RESP2 it's just a plain string that the user will have to parse.
The function always returns REDISMODULE_OK.
RedisModule_ReplyWithBigNumber
int RedisModule_ReplyWithBigNumber(RedisModuleCtx *ctx,
const char *bignum,
size_t len);
Available since: 7.0.0
Reply with a RESP3 BigNumber type. Visit https://github.com/antirez/RESP3/blob/master/spec.md for more info about RESP3.
In RESP3, this is a string of length len that is tagged as a BigNumber,
however, it's up to the caller to ensure that it's a valid BigNumber.
In RESP2, this is just a plain bulk string response.
The function always returns REDISMODULE_OK.
RedisModule_ReplyWithLongDouble
int RedisModule_ReplyWithLongDouble(RedisModuleCtx *ctx, long double ld);
Available since: 6.0.0
Send a string reply obtained converting the long double 'ld' into a bulk
string. This function is basically equivalent to converting a long double
into a string into a C buffer, and then calling the function
RedisModule_ReplyWithStringBuffer() with the buffer and length.
The double string uses human readable formatting (see
addReplyHumanLongDouble in networking.c).
The function always returns REDISMODULE_OK.
Commands replication API
RedisModule_Replicate
int RedisModule_Replicate(RedisModuleCtx *ctx,
const char *cmdname,
const char *fmt,
...);
Available since: 4.0.0
Replicate the specified command and arguments to slaves and AOF, as effect of execution of the calling command implementation.
The replicated commands are always wrapped into the MULTI/EXEC that
contains all the commands replicated in a given module command
execution. However the commands replicated with RedisModule_Call()
are the first items, the ones replicated with RedisModule_Replicate()
will all follow before the EXEC.
Modules should try to use one interface or the other.
This command follows exactly the same interface of RedisModule_Call(),
so a set of format specifiers must be passed, followed by arguments
matching the provided format specifiers.
Please refer to RedisModule_Call() for more information.
Using the special "A" and "R" modifiers, the caller can exclude either the AOF or the replicas from the propagation of the specified command. Otherwise, by default, the command will be propagated in both channels.
Note about calling this function from a thread safe context:
Normally when you call this function from the callback implementing a module command, or any other callback provided by the Redis Module API, Redis will accumulate all the calls to this function in the context of the callback, and will propagate all the commands wrapped in a MULTI/EXEC transaction. However when calling this function from a threaded safe context that can live an undefined amount of time, and can be locked/unlocked in at will, the behavior is different: MULTI/EXEC wrapper is not emitted and the command specified is inserted in the AOF and replication stream immediately.
Return value
The command returns REDISMODULE_ERR if the format specifiers are invalid
or the command name does not belong to a known command.
RedisModule_ReplicateVerbatim
int RedisModule_ReplicateVerbatim(RedisModuleCtx *ctx);
Available since: 4.0.0
This function will replicate the command exactly as it was invoked by the client. Note that this function will not wrap the command into a MULTI/EXEC stanza, so it should not be mixed with other replication commands.
Basically this form of replication is useful when you want to propagate the command to the slaves and AOF file exactly as it was called, since the command can just be re-executed to deterministically re-create the new state starting from the old one.
The function always returns REDISMODULE_OK.
DB and Key APIs – Generic API
RedisModule_GetClientId
unsigned long long RedisModule_GetClientId(RedisModuleCtx *ctx);
Available since: 4.0.0
Return the ID of the current client calling the currently active module command. The returned ID has a few guarantees:
- The ID is different for each different client, so if the same client executes a module command multiple times, it can be recognized as having the same ID, otherwise the ID will be different.
- The ID increases monotonically. Clients connecting to the server later are guaranteed to get IDs greater than any past ID previously seen.
Valid IDs are from 1 to 2^64 - 1. If 0 is returned it means there is no way to fetch the ID in the context the function was currently called.
After obtaining the ID, it is possible to check if the command execution is actually happening in the context of AOF loading, using this macro:
if (RedisModule_IsAOFClient(RedisModule_GetClientId(ctx)) {
// Handle it differently.
}
RedisModule_GetClientUserNameById
RedisModuleString *RedisModule_GetClientUserNameById(RedisModuleCtx *ctx,
uint64_t id);
Available since: 6.2.1
Return the ACL user name used by the client with the specified client ID.
Client ID can be obtained with RedisModule_GetClientId() API. If the client does not
exist, NULL is returned and errno is set to ENOENT. If the client isn't
using an ACL user, NULL is returned and errno is set to ENOTSUP
RedisModule_GetClientInfoById
int RedisModule_GetClientInfoById(void *ci, uint64_t id);
Available since: 6.0.0
Return information about the client with the specified ID (that was
previously obtained via the RedisModule_GetClientId() API). If the
client exists, REDISMODULE_OK is returned, otherwise REDISMODULE_ERR
is returned.
When the client exist and the ci pointer is not NULL, but points to
a structure of type RedisModuleClientInfo, previously initialized with
the correct REDISMODULE_CLIENTINFO_INITIALIZER, the structure is populated
with the following fields:
uint64_t flags; // REDISMODULE_CLIENTINFO_FLAG_*
uint64_t id; // Client ID
char addr[46]; // IPv4 or IPv6 address.
uint16_t port; // TCP port.
uint16_t db; // Selected DB.
Note: the client ID is useless in the context of this call, since we already know, however the same structure could be used in other contexts where we don't know the client ID, yet the same structure is returned.
With flags having the following meaning:
REDISMODULE_CLIENTINFO_FLAG_SSL Client using SSL connection.
REDISMODULE_CLIENTINFO_FLAG_PUBSUB Client in Pub/Sub mode.
REDISMODULE_CLIENTINFO_FLAG_BLOCKED Client blocked in command.
REDISMODULE_CLIENTINFO_FLAG_TRACKING Client with keys tracking on.
REDISMODULE_CLIENTINFO_FLAG_UNIXSOCKET Client using unix domain socket.
REDISMODULE_CLIENTINFO_FLAG_MULTI Client in MULTI state.
However passing NULL is a way to just check if the client exists in case we are not interested in any additional information.
This is the correct usage when we want the client info structure returned:
RedisModuleClientInfo ci = REDISMODULE_CLIENTINFO_INITIALIZER;
int retval = RedisModule_GetClientInfoById(&ci,client_id);
if (retval == REDISMODULE_OK) {
printf("Address: %s\n", ci.addr);
}
RedisModule_PublishMessage
int RedisModule_PublishMessage(RedisModuleCtx *ctx,
RedisModuleString *channel,
RedisModuleString *message);
Available since: 6.0.0
Publish a message to subscribers (see PUBLISH command).
RedisModule_PublishMessageShard
int RedisModule_PublishMessageShard(RedisModuleCtx *ctx,
RedisModuleString *channel,
RedisModuleString *message);
Available since: 7.0.0
Publish a message to shard-subscribers (see SPUBLISH command).
RedisModule_GetSelectedDb
int RedisModule_GetSelectedDb(RedisModuleCtx *ctx);
Available since: 4.0.0
Return the currently selected DB.
RedisModule_GetContextFlags
int RedisModule_GetContextFlags(RedisModuleCtx *ctx);
Available since: 4.0.3
Return the current context's flags. The flags provide information on the current request context (whether the client is a Lua script or in a MULTI), and about the Redis instance in general, i.e replication and persistence.
It is possible to call this function even with a NULL context, however in this case the following flags will not be reported:
- LUA, MULTI, REPLICATED, DIRTY (see below for more info).
Available flags and their meaning:
REDISMODULE_CTX_FLAGS_LUA: The command is running in a Lua scriptREDISMODULE_CTX_FLAGS_MULTI: The command is running inside a transactionREDISMODULE_CTX_FLAGS_REPLICATED: The command was sent over the replication link by the MASTERREDISMODULE_CTX_FLAGS_MASTER: The Redis instance is a masterREDISMODULE_CTX_FLAGS_SLAVE: The Redis instance is a slaveREDISMODULE_CTX_FLAGS_READONLY: The Redis instance is read-onlyREDISMODULE_CTX_FLAGS_CLUSTER: The Redis instance is in cluster modeREDISMODULE_CTX_FLAGS_AOF: The Redis instance has AOF enabledREDISMODULE_CTX_FLAGS_RDB: The instance has RDB enabledREDISMODULE_CTX_FLAGS_MAXMEMORY: The instance has Maxmemory setREDISMODULE_CTX_FLAGS_EVICT: Maxmemory is set and has an eviction policy that may delete keysREDISMODULE_CTX_FLAGS_OOM: Redis is out of memory according to the maxmemory setting.REDISMODULE_CTX_FLAGS_OOM_WARNING: Less than 25% of memory remains before reaching the maxmemory level.REDISMODULE_CTX_FLAGS_LOADING: Server is loading RDB/AOFREDISMODULE_CTX_FLAGS_REPLICA_IS_STALE: No active link with the master.REDISMODULE_CTX_FLAGS_REPLICA_IS_CONNECTING: The replica is trying to connect with the master.REDISMODULE_CTX_FLAGS_REPLICA_IS_TRANSFERRING: Master -> Replica RDB transfer is in progress.REDISMODULE_CTX_FLAGS_REPLICA_IS_ONLINE: The replica has an active link with its master. This is the contrary of STALE state.REDISMODULE_CTX_FLAGS_ACTIVE_CHILD: There is currently some background process active (RDB, AUX or module).REDISMODULE_CTX_FLAGS_MULTI_DIRTY: The next EXEC will fail due to dirty CAS (touched keys).REDISMODULE_CTX_FLAGS_IS_CHILD: Redis is currently running inside background child process.REDISMODULE_CTX_FLAGS_RESP3: Indicate the that client attached to this context is using RESP3.
RedisModule_AvoidReplicaTraffic
int RedisModule_AvoidReplicaTraffic();
Available since: 6.0.0
Returns true if a client sent the CLIENT PAUSE command to the server or if Redis Cluster does a manual failover, pausing the clients. This is needed when we have a master with replicas, and want to write, without adding further data to the replication channel, that the replicas replication offset, match the one of the master. When this happens, it is safe to failover the master without data loss.
However modules may generate traffic by calling RedisModule_Call() with
the "!" flag, or by calling RedisModule_Replicate(), in a context outside
commands execution, for instance in timeout callbacks, threads safe
contexts, and so forth. When modules will generate too much traffic, it
will be hard for the master and replicas offset to match, because there
is more data to send in the replication channel.
So modules may want to try to avoid very heavy background work that has the effect of creating data to the replication channel, when this function returns true. This is mostly useful for modules that have background garbage collection tasks, or that do writes and replicate such writes periodically in timer callbacks or other periodic callbacks.
RedisModule_SelectDb
int RedisModule_SelectDb(RedisModuleCtx *ctx, int newid);
Available since: 4.0.0
Change the currently selected DB. Returns an error if the id is out of range.
Note that the client will retain the currently selected DB even after the Redis command implemented by the module calling this function returns.
If the module command wishes to change something in a different DB and
returns back to the original one, it should call RedisModule_GetSelectedDb()
before in order to restore the old DB number before returning.
RedisModule_KeyExists
int RedisModule_KeyExists(RedisModuleCtx *ctx, robj *keyname);
Available since: 7.0.0
Check if a key exists, without affecting its last access time.
This is equivalent to calling RedisModule_OpenKey with the mode REDISMODULE_READ |
REDISMODULE_OPEN_KEY_NOTOUCH, then checking if NULL was returned and, if not,
calling RedisModule_CloseKey on the opened key.
RedisModule_OpenKey
RedisModuleKey *RedisModule_OpenKey(RedisModuleCtx *ctx,
robj *keyname,
int mode);
Available since: 4.0.0
Return an handle representing a Redis key, so that it is possible to call other APIs with the key handle as argument to perform operations on the key.
The return value is the handle representing the key, that must be
closed with RedisModule_CloseKey().
If the key does not exist and WRITE mode is requested, the handle
is still returned, since it is possible to perform operations on
a yet not existing key (that will be created, for example, after
a list push operation). If the mode is just READ instead, and the
key does not exist, NULL is returned. However it is still safe to
call RedisModule_CloseKey() and RedisModule_KeyType() on a NULL
value.
RedisModule_CloseKey
void RedisModule_CloseKey(RedisModuleKey *key);
Available since: 4.0.0
Close a key handle.
RedisModule_KeyType
int RedisModule_KeyType(RedisModuleKey *key);
Available since: 4.0.0
Return the type of the key. If the key pointer is NULL then
REDISMODULE_KEYTYPE_EMPTY is returned.
RedisModule_ValueLength
size_t RedisModule_ValueLength(RedisModuleKey *key);
Available since: 4.0.0
Return the length of the value associated with the key. For strings this is the length of the string. For all the other types is the number of elements (just counting keys for hashes).
If the key pointer is NULL or the key is empty, zero is returned.
RedisModule_DeleteKey
int RedisModule_DeleteKey(RedisModuleKey *key);
Available since: 4.0.0
If the key is open for writing, remove it, and setup the key to
accept new writes as an empty key (that will be created on demand).
On success REDISMODULE_OK is returned. If the key is not open for
writing REDISMODULE_ERR is returned.
RedisModule_UnlinkKey
int RedisModule_UnlinkKey(RedisModuleKey *key);
Available since: 4.0.7
If the key is open for writing, unlink it (that is delete it in a
non-blocking way, not reclaiming memory immediately) and setup the key to
accept new writes as an empty key (that will be created on demand).
On success REDISMODULE_OK is returned. If the key is not open for
writing REDISMODULE_ERR is returned.
RedisModule_GetExpire
mstime_t RedisModule_GetExpire(RedisModuleKey *key);
Available since: 4.0.0
Return the key expire value, as milliseconds of remaining TTL.
If no TTL is associated with the key or if the key is empty,
REDISMODULE_NO_EXPIRE is returned.
RedisModule_SetExpire
int RedisModule_SetExpire(RedisModuleKey *key, mstime_t expire);
Available since: 4.0.0
Set a new expire for the key. If the special expire
REDISMODULE_NO_EXPIRE is set, the expire is cancelled if there was
one (the same as the PERSIST command).
Note that the expire must be provided as a positive integer representing the number of milliseconds of TTL the key should have.
The function returns REDISMODULE_OK on success or REDISMODULE_ERR if
the key was not open for writing or is an empty key.
RedisModule_GetAbsExpire
mstime_t RedisModule_GetAbsExpire(RedisModuleKey *key);
Available since: 6.2.2
Return the key expire value, as absolute Unix timestamp.
If no TTL is associated with the key or if the key is empty,
REDISMODULE_NO_EXPIRE is returned.
RedisModule_SetAbsExpire
int RedisModule_SetAbsExpire(RedisModuleKey *key, mstime_t expire);
Available since: 6.2.2
Set a new expire for the key. If the special expire
REDISMODULE_NO_EXPIRE is set, the expire is cancelled if there was
one (the same as the PERSIST command).
Note that the expire must be provided as a positive integer representing the absolute Unix timestamp the key should have.
The function returns REDISMODULE_OK on success or REDISMODULE_ERR if
the key was not open for writing or is an empty key.
RedisModule_ResetDataset
void RedisModule_ResetDataset(int restart_aof, int async);
Available since: 6.0.0
Performs similar operation to FLUSHALL, and optionally start a new AOF file (if enabled)
If restart_aof is true, you must make sure the command that triggered this call is not
propagated to the AOF file.
When async is set to true, db contents will be freed by a background thread.
RedisModule_DbSize
unsigned long long RedisModule_DbSize(RedisModuleCtx *ctx);
Available since: 6.0.0
Returns the number of keys in the current db.
RedisModule_RandomKey
RedisModuleString *RedisModule_RandomKey(RedisModuleCtx *ctx);
Available since: 6.0.0
Returns a name of a random key, or NULL if current db is empty.
RedisModule_GetKeyNameFromOptCtx
const RedisModuleString *RedisModule_GetKeyNameFromOptCtx(RedisModuleKeyOptCtx *ctx);
Available since: 7.0.0
Returns the name of the key currently being processed.
RedisModule_GetToKeyNameFromOptCtx
const RedisModuleString *RedisModule_GetToKeyNameFromOptCtx(RedisModuleKeyOptCtx *ctx);
Available since: 7.0.0
Returns the name of the target key currently being processed.
RedisModule_GetDbIdFromOptCtx
int RedisModule_GetDbIdFromOptCtx(RedisModuleKeyOptCtx *ctx);
Available since: 7.0.0
Returns the dbid currently being processed.
RedisModule_GetToDbIdFromOptCtx
int RedisModule_GetToDbIdFromOptCtx(RedisModuleKeyOptCtx *ctx);
Available since: 7.0.0
Returns the target dbid currently being processed.
Key API for String type
See also RedisModule_ValueLength(), which returns the length of a string.
RedisModule_StringSet
int RedisModule_StringSet(RedisModuleKey *key, RedisModuleString *str);
Available since: 4.0.0
If the key is open for writing, set the specified string 'str' as the
value of the key, deleting the old value if any.
On success REDISMODULE_OK is returned. If the key is not open for
writing or there is an active iterator, REDISMODULE_ERR is returned.
RedisModule_StringDMA
char *RedisModule_StringDMA(RedisModuleKey *key, size_t *len, int mode);
Available since: 4.0.0
Prepare the key associated string value for DMA access, and returns a pointer and size (by reference), that the user can use to read or modify the string in-place accessing it directly via pointer.
The 'mode' is composed by bitwise OR-ing the following flags:
REDISMODULE_READ -- Read access
REDISMODULE_WRITE -- Write access
If the DMA is not requested for writing, the pointer returned should only be accessed in a read-only fashion.
On error (wrong type) NULL is returned.
DMA access rules:
No other key writing function should be called since the moment the pointer is obtained, for all the time we want to use DMA access to read or modify the string.
Each time
RedisModule_StringTruncate()is called, to continue with the DMA access,RedisModule_StringDMA()should be called again to re-obtain a new pointer and length.If the returned pointer is not NULL, but the length is zero, no byte can be touched (the string is empty, or the key itself is empty) so a
RedisModule_StringTruncate()call should be used if there is to enlarge the string, and later call StringDMA() again to get the pointer.
RedisModule_StringTruncate
int RedisModule_StringTruncate(RedisModuleKey *key, size_t newlen);
Available since: 4.0.0
If the key is open for writing and is of string type, resize it, padding with zero bytes if the new length is greater than the old one.
After this call, RedisModule_StringDMA() must be called again to continue
DMA access with the new pointer.
The function returns REDISMODULE_OK on success, and REDISMODULE_ERR on
error, that is, the key is not open for writing, is not a string
or resizing for more than 512 MB is requested.
If the key is empty, a string key is created with the new string value unless the new length value requested is zero.
Key API for List type
Many of the list functions access elements by index. Since a list is in essence a doubly-linked list, accessing elements by index is generally an O(N) operation. However, if elements are accessed sequentially or with indices close together, the functions are optimized to seek the index from the previous index, rather than seeking from the ends of the list.
This enables iteration to be done efficiently using a simple for loop:
long n = RM_ValueLength(key);
for (long i = 0; i < n; i++) {
RedisModuleString *elem = RedisModule_ListGet(key, i);
// Do stuff...
}
Note that after modifying a list using RedisModule_ListPop, RedisModule_ListSet or
RedisModule_ListInsert, the internal iterator is invalidated so the next operation
will require a linear seek.
Modifying a list in any another way, for examle using RedisModule_Call(), while a key
is open will confuse the internal iterator and may cause trouble if the key
is used after such modifications. The key must be reopened in this case.
See also RedisModule_ValueLength(), which returns the length of a list.
RedisModule_ListPush
int RedisModule_ListPush(RedisModuleKey *key,
int where,
RedisModuleString *ele);
Available since: 4.0.0
Push an element into a list, on head or tail depending on 'where' argument
(REDISMODULE_LIST_HEAD or REDISMODULE_LIST_TAIL). If the key refers to an
empty key opened for writing, the key is created. On success, REDISMODULE_OK
is returned. On failure, REDISMODULE_ERR is returned and errno is set as
follows:
- EINVAL if key or ele is NULL.
- ENOTSUP if the key is of another type than list.
- EBADF if the key is not opened for writing.
Note: Before Redis 7.0, errno was not set by this function.
RedisModule_ListPop
RedisModuleString *RedisModule_ListPop(RedisModuleKey *key, int where);
Available since: 4.0.0
Pop an element from the list, and returns it as a module string object
that the user should be free with RedisModule_FreeString() or by enabling
automatic memory. The where argument specifies if the element should be
popped from the beginning or the end of the list (REDISMODULE_LIST_HEAD or
REDISMODULE_LIST_TAIL). On failure, the command returns NULL and sets
errno as follows:
- EINVAL if key is NULL.
- ENOTSUP if the key is empty or of another type than list.
- EBADF if the key is not opened for writing.
Note: Before Redis 7.0, errno was not set by this function.
RedisModule_ListGet
RedisModuleString *RedisModule_ListGet(RedisModuleKey *key, long index);
Available since: 7.0.0
Returns the element at index index in the list stored at key, like the
LINDEX command. The element should be free'd using RedisModule_FreeString() or using
automatic memory management.
The index is zero-based, so 0 means the first element, 1 the second element and so on. Negative indices can be used to designate elements starting at the tail of the list. Here, -1 means the last element, -2 means the penultimate and so forth.
When no value is found at the given key and index, NULL is returned and
errno is set as follows:
- EINVAL if key is NULL.
- ENOTSUP if the key is not a list.
- EBADF if the key is not opened for reading.
- EDOM if the index is not a valid index in the list.
RedisModule_ListSet
int RedisModule_ListSet(RedisModuleKey *key,
long index,
RedisModuleString *value);
Available since: 7.0.0
Replaces the element at index index in the list stored at key.
The index is zero-based, so 0 means the first element, 1 the second element and so on. Negative indices can be used to designate elements starting at the tail of the list. Here, -1 means the last element, -2 means the penultimate and so forth.
On success, REDISMODULE_OK is returned. On failure, REDISMODULE_ERR is
returned and errno is set as follows:
- EINVAL if key or value is NULL.
- ENOTSUP if the key is not a list.
- EBADF if the key is not opened for writing.
- EDOM if the index is not a valid index in the list.
RedisModule_ListInsert
int RedisModule_ListInsert(RedisModuleKey *key,
long index,
RedisModuleString *value);
Available since: 7.0.0
Inserts an element at the given index.
The index is zero-based, so 0 means the first element, 1 the second element and so on. Negative indices can be used to designate elements starting at the tail of the list. Here, -1 means the last element, -2 means the penultimate and so forth. The index is the element's index after inserting it.
On success, REDISMODULE_OK is returned. On failure, REDISMODULE_ERR is
returned and errno is set as follows:
- EINVAL if key or value is NULL.
- ENOTSUP if the key of another type than list.
- EBADF if the key is not opened for writing.
- EDOM if the index is not a valid index in the list.
RedisModule_ListDelete
int RedisModule_ListDelete(RedisModuleKey *key, long index);
Available since: 7.0.0
Removes an element at the given index. The index is 0-based. A negative index can also be used, counting from the end of the list.
On success, REDISMODULE_OK is returned. On failure, REDISMODULE_ERR is
returned and errno is set as follows:
- EINVAL if key or value is NULL.
- ENOTSUP if the key is not a list.
- EBADF if the key is not opened for writing.
- EDOM if the index is not a valid index in the list.
Key API for Sorted Set type
See also RedisModule_ValueLength(), which returns the length of a sorted set.
RedisModule_ZsetAdd
int RedisModule_ZsetAdd(RedisModuleKey *key,
double score,
RedisModuleString *ele,
int *flagsptr);
Available since: 4.0.0
Add a new element into a sorted set, with the specified 'score'. If the element already exists, the score is updated.
A new sorted set is created at value if the key is an empty open key setup for writing.
Additional flags can be passed to the function via a pointer, the flags are both used to receive input and to communicate state when the function returns. 'flagsptr' can be NULL if no special flags are used.
The input flags are:
REDISMODULE_ZADD_XX: Element must already exist. Do nothing otherwise.
REDISMODULE_ZADD_NX: Element must not exist. Do nothing otherwise.
REDISMODULE_ZADD_GT: If element exists, new score must be greater than the current score.
Do nothing otherwise. Can optionally be combined with XX.
REDISMODULE_ZADD_LT: If element exists, new score must be less than the current score.
Do nothing otherwise. Can optionally be combined with XX.
The output flags are:
REDISMODULE_ZADD_ADDED: The new element was added to the sorted set.
REDISMODULE_ZADD_UPDATED: The score of the element was updated.
REDISMODULE_ZADD_NOP: No operation was performed because XX or NX flags.
On success the function returns REDISMODULE_OK. On the following errors
REDISMODULE_ERR is returned:
- The key was not opened for writing.
- The key is of the wrong type.
- 'score' double value is not a number (NaN).
RedisModule_ZsetIncrby
int RedisModule_ZsetIncrby(RedisModuleKey *key,
double score,
RedisModuleString *ele,
int *flagsptr,
double *newscore);
Available since: 4.0.0
This function works exactly like RedisModule_ZsetAdd(), but instead of setting
a new score, the score of the existing element is incremented, or if the
element does not already exist, it is added assuming the old score was
zero.
The input and output flags, and the return value, have the same exact
meaning, with the only difference that this function will return
REDISMODULE_ERR even when 'score' is a valid double number, but adding it
to the existing score results into a NaN (not a number) condition.
This function has an additional field 'newscore', if not NULL is filled with the new score of the element after the increment, if no error is returned.
RedisModule_ZsetRem
int RedisModule_ZsetRem(RedisModuleKey *key,
RedisModuleString *ele,
int *deleted);
Available since: 4.0.0
Remove the specified element from the sorted set.
The function returns REDISMODULE_OK on success, and REDISMODULE_ERR
on one of the following conditions:
- The key was not opened for writing.
- The key is of the wrong type.
The return value does NOT indicate the fact the element was really removed (since it existed) or not, just if the function was executed with success.
In order to know if the element was removed, the additional argument 'deleted' must be passed, that populates the integer by reference setting it to 1 or 0 depending on the outcome of the operation. The 'deleted' argument can be NULL if the caller is not interested to know if the element was really removed.
Empty keys will be handled correctly by doing nothing.
RedisModule_ZsetScore
int RedisModule_ZsetScore(RedisModuleKey *key,
RedisModuleString *ele,
double *score);
Available since: 4.0.0
On success retrieve the double score associated at the sorted set element
'ele' and returns REDISMODULE_OK. Otherwise REDISMODULE_ERR is returned
to signal one of the following conditions:
- There is no such element 'ele' in the sorted set.
- The key is not a sorted set.
- The key is an open empty key.
Key API for Sorted Set iterator
RedisModule_ZsetRangeStop
void RedisModule_ZsetRangeStop(RedisModuleKey *key);
Available since: 4.0.0
Stop a sorted set iteration.
RedisModule_ZsetRangeEndReached
int RedisModule_ZsetRangeEndReached(RedisModuleKey *key);
Available since: 4.0.0
Return the "End of range" flag value to signal the end of the iteration.
RedisModule_ZsetFirstInScoreRange
int RedisModule_ZsetFirstInScoreRange(RedisModuleKey *key,
double min,
double max,
int minex,
int maxex);
Available since: 4.0.0
Setup a sorted set iterator seeking the first element in the specified
range. Returns REDISMODULE_OK if the iterator was correctly initialized
otherwise REDISMODULE_ERR is returned in the following conditions:
- The value stored at key is not a sorted set or the key is empty.
The range is specified according to the two double values 'min' and 'max'. Both can be infinite using the following two macros:
REDISMODULE_POSITIVE_INFINITEfor positive infinite valueREDISMODULE_NEGATIVE_INFINITEfor negative infinite value
'minex' and 'maxex' parameters, if true, respectively setup a range where the min and max value are exclusive (not included) instead of inclusive.
RedisModule_ZsetLastInScoreRange
int RedisModule_ZsetLastInScoreRange(RedisModuleKey *key,
double min,
double max,
int minex,
int maxex);
Available since: 4.0.0
Exactly like RedisModule_ZsetFirstInScoreRange() but the last element of
the range is selected for the start of the iteration instead.
RedisModule_ZsetFirstInLexRange
int RedisModule_ZsetFirstInLexRange(RedisModuleKey *key,
RedisModuleString *min,
RedisModuleString *max);
Available since: 4.0.0
Setup a sorted set iterator seeking the first element in the specified
lexicographical range. Returns REDISMODULE_OK if the iterator was correctly
initialized otherwise REDISMODULE_ERR is returned in the
following conditions:
- The value stored at key is not a sorted set or the key is empty.
- The lexicographical range 'min' and 'max' format is invalid.
'min' and 'max' should be provided as two RedisModuleString objects
in the same format as the parameters passed to the ZRANGEBYLEX command.
The function does not take ownership of the objects, so they can be released
ASAP after the iterator is setup.
RedisModule_ZsetLastInLexRange
int RedisModule_ZsetLastInLexRange(RedisModuleKey *key,
RedisModuleString *min,
RedisModuleString *max);
Available since: 4.0.0
Exactly like RedisModule_ZsetFirstInLexRange() but the last element of
the range is selected for the start of the iteration instead.
RedisModule_ZsetRangeCurrentElement
RedisModuleString *RedisModule_ZsetRangeCurrentElement(RedisModuleKey *key,
double *score);
Available since: 4.0.0
Return the current sorted set element of an active sorted set iterator or NULL if the range specified in the iterator does not include any element.
RedisModule_ZsetRangeNext
int RedisModule_ZsetRangeNext(RedisModuleKey *key);
Available since: 4.0.0
Go to the next element of the sorted set iterator. Returns 1 if there was a next element, 0 if we are already at the latest element or the range does not include any item at all.
RedisModule_ZsetRangePrev
int RedisModule_ZsetRangePrev(RedisModuleKey *key);
Available since: 4.0.0
Go to the previous element of the sorted set iterator. Returns 1 if there was a previous element, 0 if we are already at the first element or the range does not include any item at all.
Key API for Hash type
See also RedisModule_ValueLength(), which returns the number of fields in a hash.
RedisModule_HashSet
int RedisModule_HashSet(RedisModuleKey *key, int flags, ...);
Available since: 4.0.0
Set the field of the specified hash field to the specified value. If the key is an empty key open for writing, it is created with an empty hash value, in order to set the specified field.
The function is variadic and the user must specify pairs of field
names and values, both as RedisModuleString pointers (unless the
CFIELD option is set, see later). At the end of the field/value-ptr pairs,
NULL must be specified as last argument to signal the end of the arguments
in the variadic function.
Example to set the hash argv[1] to the value argv[2]:
RedisModule_HashSet(key,REDISMODULE_HASH_NONE,argv[1],argv[2],NULL);
The function can also be used in order to delete fields (if they exist)
by setting them to the specified value of REDISMODULE_HASH_DELETE:
RedisModule_HashSet(key,REDISMODULE_HASH_NONE,argv[1],
REDISMODULE_HASH_DELETE,NULL);
The behavior of the command changes with the specified flags, that can be
set to REDISMODULE_HASH_NONE if no special behavior is needed.
REDISMODULE_HASH_NX: The operation is performed only if the field was not
already existing in the hash.
REDISMODULE_HASH_XX: The operation is performed only if the field was
already existing, so that a new value could be
associated to an existing filed, but no new fields
are created.
REDISMODULE_HASH_CFIELDS: The field names passed are null terminated C
strings instead of RedisModuleString objects.
REDISMODULE_HASH_COUNT_ALL: Include the number of inserted fields in the
returned number, in addition to the number of
updated and deleted fields. (Added in Redis
6.2.)
Unless NX is specified, the command overwrites the old field value with the new one.
When using REDISMODULE_HASH_CFIELDS, field names are reported using
normal C strings, so for example to delete the field "foo" the following
code can be used:
RedisModule_HashSet(key,REDISMODULE_HASH_CFIELDS,"foo",
REDISMODULE_HASH_DELETE,NULL);
Return value:
The number of fields existing in the hash prior to the call, which have been
updated (its old value has been replaced by a new value) or deleted. If the
flag REDISMODULE_HASH_COUNT_ALL is set, inserted fields not previously
existing in the hash are also counted.
If the return value is zero, errno is set (since Redis 6.2) as follows:
- EINVAL if any unknown flags are set or if key is NULL.
- ENOTSUP if the key is associated with a non Hash value.
- EBADF if the key was not opened for writing.
- ENOENT if no fields were counted as described under Return value above.
This is not actually an error. The return value can be zero if all fields
were just created and the
COUNT_ALLflag was unset, or if changes were held back due to the NX and XX flags.
NOTICE: The return value semantics of this function are very different between Redis 6.2 and older versions. Modules that use it should determine the Redis version and handle it accordingly.
RedisModule_HashGet
int RedisModule_HashGet(RedisModuleKey *key, int flags, ...);
Available since: 4.0.0
Get fields from an hash value. This function is called using a variable
number of arguments, alternating a field name (as a RedisModuleString
pointer) with a pointer to a RedisModuleString pointer, that is set to the
value of the field if the field exists, or NULL if the field does not exist.
At the end of the field/value-ptr pairs, NULL must be specified as last
argument to signal the end of the arguments in the variadic function.
This is an example usage:
RedisModuleString *first, *second;
RedisModule_HashGet(mykey,REDISMODULE_HASH_NONE,argv[1],&first,
argv[2],&second,NULL);
As with RedisModule_HashSet() the behavior of the command can be specified
passing flags different than REDISMODULE_HASH_NONE:
REDISMODULE_HASH_CFIELDS: field names as null terminated C strings.
REDISMODULE_HASH_EXISTS: instead of setting the value of the field
expecting a RedisModuleString pointer to pointer, the function just
reports if the field exists or not and expects an integer pointer
as the second element of each pair.
Example of REDISMODULE_HASH_CFIELDS:
RedisModuleString *username, *hashedpass;
RedisModule_HashGet(mykey,REDISMODULE_HASH_CFIELDS,"username",&username,"hp",&hashedpass, NULL);
Example of REDISMODULE_HASH_EXISTS:
int exists;
RedisModule_HashGet(mykey,REDISMODULE_HASH_EXISTS,argv[1],&exists,NULL);
The function returns REDISMODULE_OK on success and REDISMODULE_ERR if
the key is not an hash value.
Memory management:
The returned RedisModuleString objects should be released with
RedisModule_FreeString(), or by enabling automatic memory management.
Key API for Stream type
For an introduction to streams, see https://redis.io/topics/streams-intro.
The type RedisModuleStreamID, which is used in stream functions, is a struct
with two 64-bit fields and is defined as
typedef struct RedisModuleStreamID {
uint64_t ms;
uint64_t seq;
} RedisModuleStreamID;
See also RedisModule_ValueLength(), which returns the length of a stream, and the
conversion functions RedisModule_StringToStreamID() and RedisModule_CreateStringFromStreamID().
RedisModule_StreamAdd
int RedisModule_StreamAdd(RedisModuleKey *key,
int flags,
RedisModuleStreamID *id,
RedisModuleString **argv,
long numfields);
Available since: 6.2.0
Adds an entry to a stream. Like XADD without trimming.
key: The key where the stream is (or will be) storedflags: A bit field ofREDISMODULE_STREAM_ADD_AUTOID: Assign a stream ID automatically, like*in the XADD command.
id: If theAUTOIDflag is set, this is where the assigned ID is returned. Can be NULL ifAUTOIDis set, if you don't care to receive the ID. IfAUTOIDis not set, this is the requested ID.argv: A pointer to an array of sizenumfields * 2containing the fields and values.numfields: The number of field-value pairs inargv.
Returns REDISMODULE_OK if an entry has been added. On failure,
REDISMODULE_ERR is returned and errno is set as follows:
- EINVAL if called with invalid arguments
- ENOTSUP if the key refers to a value of a type other than stream
- EBADF if the key was not opened for writing
- EDOM if the given ID was 0-0 or not greater than all other IDs in the stream (only if the AUTOID flag is unset)
- EFBIG if the stream has reached the last possible ID
- ERANGE if the elements are too large to be stored.
RedisModule_StreamDelete
int RedisModule_StreamDelete(RedisModuleKey *key, RedisModuleStreamID *id);
Available since: 6.2.0
Deletes an entry from a stream.
key: A key opened for writing, with no stream iterator started.id: The stream ID of the entry to delete.
Returns REDISMODULE_OK on success. On failure, REDISMODULE_ERR is returned
and errno is set as follows:
- EINVAL if called with invalid arguments
- ENOTSUP if the key refers to a value of a type other than stream or if the key is empty
- EBADF if the key was not opened for writing or if a stream iterator is associated with the key
- ENOENT if no entry with the given stream ID exists
See also RedisModule_StreamIteratorDelete() for deleting the current entry while
iterating using a stream iterator.
RedisModule_StreamIteratorStart
int RedisModule_StreamIteratorStart(RedisModuleKey *key,
int flags,
RedisModuleStreamID *start,
RedisModuleStreamID *end);
Available since: 6.2.0
Sets up a stream iterator.
key: The stream key opened for reading usingRedisModule_OpenKey().flags:REDISMODULE_STREAM_ITERATOR_EXCLUSIVE: Don't includestartandendin the iterated range.REDISMODULE_STREAM_ITERATOR_REVERSE: Iterate in reverse order, starting from theendof the range.
start: The lower bound of the range. Use NULL for the beginning of the stream.end: The upper bound of the range. Use NULL for the end of the stream.
Returns REDISMODULE_OK on success. On failure, REDISMODULE_ERR is returned
and errno is set as follows:
- EINVAL if called with invalid arguments
- ENOTSUP if the key refers to a value of a type other than stream or if the key is empty
- EBADF if the key was not opened for writing or if a stream iterator is already associated with the key
- EDOM if
startorendis outside the valid range
Returns REDISMODULE_OK on success and REDISMODULE_ERR if the key doesn't
refer to a stream or if invalid arguments were given.
The stream IDs are retrieved using RedisModule_StreamIteratorNextID() and
for each stream ID, the fields and values are retrieved using
RedisModule_StreamIteratorNextField(). The iterator is freed by calling
RedisModule_StreamIteratorStop().
Example (error handling omitted):
RedisModule_StreamIteratorStart(key, 0, startid_ptr, endid_ptr);
RedisModuleStreamID id;
long numfields;
while (RedisModule_StreamIteratorNextID(key, &id, &numfields) ==
REDISMODULE_OK) {
RedisModuleString *field, *value;
while (RedisModule_StreamIteratorNextField(key, &field, &value) ==
REDISMODULE_OK) {
//
// ... Do stuff ...
//
RedisModule_FreeString(ctx, field);
RedisModule_FreeString(ctx, value);
}
}
RedisModule_StreamIteratorStop(key);
RedisModule_StreamIteratorStop
int RedisModule_StreamIteratorStop(RedisModuleKey *key);
Available since: 6.2.0
Stops a stream iterator created using RedisModule_StreamIteratorStart() and
reclaims its memory.
Returns REDISMODULE_OK on success. On failure, REDISMODULE_ERR is returned
and errno is set as follows:
- EINVAL if called with a NULL key
- ENOTSUP if the key refers to a value of a type other than stream or if the key is empty
- EBADF if the key was not opened for writing or if no stream iterator is associated with the key
RedisModule_StreamIteratorNextID
int RedisModule_StreamIteratorNextID(RedisModuleKey *key,
RedisModuleStreamID *id,
long *numfields);
Available since: 6.2.0
Finds the next stream entry and returns its stream ID and the number of fields.
key: Key for which a stream iterator has been started usingRedisModule_StreamIteratorStart().id: The stream ID returned. NULL if you don't care.numfields: The number of fields in the found stream entry. NULL if you don't care.
Returns REDISMODULE_OK and sets *id and *numfields if an entry was found.
On failure, REDISMODULE_ERR is returned and errno is set as follows:
- EINVAL if called with a NULL key
- ENOTSUP if the key refers to a value of a type other than stream or if the key is empty
- EBADF if no stream iterator is associated with the key
- ENOENT if there are no more entries in the range of the iterator
In practice, if RedisModule_StreamIteratorNextID() is called after a successful call
to RedisModule_StreamIteratorStart() and with the same key, it is safe to assume that
an REDISMODULE_ERR return value means that there are no more entries.
Use RedisModule_StreamIteratorNextField() to retrieve the fields and values.
See the example at RedisModule_StreamIteratorStart().
RedisModule_StreamIteratorNextField
int RedisModule_StreamIteratorNextField(RedisModuleKey *key,
RedisModuleString **field_ptr,
RedisModuleString **value_ptr);
Available since: 6.2.0
Retrieves the next field of the current stream ID and its corresponding value
in a stream iteration. This function should be called repeatedly after calling
RedisModule_StreamIteratorNextID() to fetch each field-value pair.
key: Key where a stream iterator has been started.field_ptr: This is where the field is returned.value_ptr: This is where the value is returned.
Returns REDISMODULE_OK and points *field_ptr and *value_ptr to freshly
allocated RedisModuleString objects. The string objects are freed
automatically when the callback finishes if automatic memory is enabled. On
failure, REDISMODULE_ERR is returned and errno is set as follows:
- EINVAL if called with a NULL key
- ENOTSUP if the key refers to a value of a type other than stream or if the key is empty
- EBADF if no stream iterator is associated with the key
- ENOENT if there are no more fields in the current stream entry
In practice, if RedisModule_StreamIteratorNextField() is called after a successful
call to RedisModule_StreamIteratorNextID() and with the same key, it is safe to assume
that an REDISMODULE_ERR return value means that there are no more fields.
See the example at RedisModule_StreamIteratorStart().
RedisModule_StreamIteratorDelete
int RedisModule_StreamIteratorDelete(RedisModuleKey *key);
Available since: 6.2.0
Deletes the current stream entry while iterating.
This function can be called after RedisModule_StreamIteratorNextID() or after any
calls to RedisModule_StreamIteratorNextField().
Returns REDISMODULE_OK on success. On failure, REDISMODULE_ERR is returned
and errno is set as follows:
- EINVAL if key is NULL
- ENOTSUP if the key is empty or is of another type than stream
- EBADF if the key is not opened for writing, if no iterator has been started
- ENOENT if the iterator has no current stream entry
RedisModule_StreamTrimByLength
long long RedisModule_StreamTrimByLength(RedisModuleKey *key,
int flags,
long long length);
Available since: 6.2.0
Trim a stream by length, similar to XTRIM with MAXLEN.
key: Key opened for writing.flags: A bitfield ofREDISMODULE_STREAM_TRIM_APPROX: Trim less if it improves performance, like XTRIM with~.
length: The number of stream entries to keep after trimming.
Returns the number of entries deleted. On failure, a negative value is
returned and errno is set as follows:
- EINVAL if called with invalid arguments
- ENOTSUP if the key is empty or of a type other than stream
- EBADF if the key is not opened for writing
RedisModule_StreamTrimByID
long long RedisModule_StreamTrimByID(RedisModuleKey *key,
int flags,
RedisModuleStreamID *id);
Available since: 6.2.0
Trim a stream by ID, similar to XTRIM with MINID.
key: Key opened for writing.flags: A bitfield ofREDISMODULE_STREAM_TRIM_APPROX: Trim less if it improves performance, like XTRIM with~.
id: The smallest stream ID to keep after trimming.
Returns the number of entries deleted. On failure, a negative value is
returned and errno is set as follows:
- EINVAL if called with invalid arguments
- ENOTSUP if the key is empty or of a type other than stream
- EBADF if the key is not opened for writing
Calling Redis commands from modules
RedisModule_Call() sends a command to Redis. The remaining functions handle the reply.
RedisModule_FreeCallReply
void RedisModule_FreeCallReply(RedisModuleCallReply *reply);
Available since: 4.0.0
Free a Call reply and all the nested replies it contains if it's an array.
RedisModule_CallReplyType
int RedisModule_CallReplyType(RedisModuleCallReply *reply);
Available since: 4.0.0
Return the reply type as one of the following:
REDISMODULE_REPLY_UNKNOWNREDISMODULE_REPLY_STRINGREDISMODULE_REPLY_ERRORREDISMODULE_REPLY_INTEGERREDISMODULE_REPLY_ARRAYREDISMODULE_REPLY_NULLREDISMODULE_REPLY_MAPREDISMODULE_REPLY_SETREDISMODULE_REPLY_BOOLREDISMODULE_REPLY_DOUBLEREDISMODULE_REPLY_BIG_NUMBERREDISMODULE_REPLY_VERBATIM_STRINGREDISMODULE_REPLY_ATTRIBUTE
RedisModule_CallReplyLength
size_t RedisModule_CallReplyLength(RedisModuleCallReply *reply);
Available since: 4.0.0
Return the reply type length, where applicable.
RedisModule_CallReplyArrayElement
RedisModuleCallReply *RedisModule_CallReplyArrayElement(RedisModuleCallReply *reply,
size_t idx);
Available since: 4.0.0
Return the 'idx'-th nested call reply element of an array reply, or NULL if the reply type is wrong or the index is out of range.
RedisModule_CallReplyInteger
long long RedisModule_CallReplyInteger(RedisModuleCallReply *reply);
Available since: 4.0.0
Return the long long of an integer reply.
RedisModule_CallReplyDouble
double RedisModule_CallReplyDouble(RedisModuleCallReply *reply);
Available since: 7.0.0
Return the double value of a double reply.
RedisModule_CallReplyBigNumber
const char *RedisModule_CallReplyBigNumber(RedisModuleCallReply *reply,
size_t *len);
Available since: 7.0.0
Return the big number value of a big number reply.
RedisModule_CallReplyVerbatim
const char *RedisModule_CallReplyVerbatim(RedisModuleCallReply *reply,
size_t *len,
const char **format);
Available since: 7.0.0
Return the value of an verbatim string reply, An optional output argument can be given to get verbatim reply format.
RedisModule_CallReplyBool
int RedisModule_CallReplyBool(RedisModuleCallReply *reply);
Available since: 7.0.0
Return the Boolean value of a Boolean reply.
RedisModule_CallReplySetElement
RedisModuleCallReply *RedisModule_CallReplySetElement(RedisModuleCallReply *reply,
size_t idx);
Available since: 7.0.0
Return the 'idx'-th nested call reply element of a set reply, or NULL if the reply type is wrong or the index is out of range.
RedisModule_CallReplyMapElement
int RedisModule_CallReplyMapElement(RedisModuleCallReply *reply,
size_t idx,
RedisModuleCallReply **key,
RedisModuleCallReply **val);
Available since: 7.0.0
Retrieve the 'idx'-th key and value of a map reply.
Returns:
REDISMODULE_OKon success.REDISMODULE_ERRif idx out of range or if the reply type is wrong.
The key and value arguments are used to return by reference, and may be
NULL if not required.
RedisModule_CallReplyAttribute
RedisModuleCallReply *RedisModule_CallReplyAttribute(RedisModuleCallReply *reply);
Available since: 7.0.0
Return the attribute of the given reply, or NULL if no attribute exists.
RedisModule_CallReplyAttributeElement
int RedisModule_CallReplyAttributeElement(RedisModuleCallReply *reply,
size_t idx,
RedisModuleCallReply **key,
RedisModuleCallReply **val);
Available since: 7.0.0
Retrieve the 'idx'-th key and value of a attribute reply.
Returns:
REDISMODULE_OKon success.REDISMODULE_ERRif idx out of range or if the reply type is wrong.
The key and value arguments are used to return by reference, and may be
NULL if not required.
RedisModule_CallReplyStringPtr
const char *RedisModule_CallReplyStringPtr(RedisModuleCallReply *reply,
size_t *len);
Available since: 4.0.0
Return the pointer and length of a string or error reply.
RedisModule_CreateStringFromCallReply
RedisModuleString *RedisModule_CreateStringFromCallReply(RedisModuleCallReply *reply);
Available since: 4.0.0
Return a new string object from a call reply of type string, error or integer. Otherwise (wrong reply type) return NULL.
RedisModule_Call
RedisModuleCallReply *RedisModule_Call(RedisModuleCtx *ctx,
const char *cmdname,
const char *fmt,
...);
Available since: 4.0.0
Exported API to call any Redis command from modules.
cmdname: The Redis command to call.
fmt: A format specifier string for the command's arguments. Each of the arguments should be specified by a valid type specification. The format specifier can also contain the modifiers
!,A,3andRwhich don't have a corresponding argument.b-- The argument is a buffer and is immediately followed by another argument that is the buffer's length.c-- The argument is a pointer to a plain C string (null-terminated).l-- The argument is long long integer.s-- The argument is a RedisModuleString.v-- The argument(s) is a vector of RedisModuleString.!-- Sends the Redis command and its arguments to replicas and AOF.A-- Suppress AOF propagation, send only to replicas (requires!).R-- Suppress replicas propagation, send only to AOF (requires!).3-- Return a RESP3 reply. This will change the command reply. e.g., HGETALL returns a map instead of a flat array.0-- Return the reply in auto mode, i.e. the reply format will be the same as the client attached to the given RedisModuleCtx. This will probably used when you want to pass the reply directly to the client.C-- Check if command can be executed according to ACL rules.- 'S' -- Run the command in a script mode, this means that it will raise
an error if a command which are not allowed inside a script
(flagged with the
deny-scriptflag) is invoked (like SHUTDOWN). In addition, on script mode, write commands are not allowed if there are not enough good replicas (as configured withmin-replicas-to-write) or when the server is unable to persist to the disk. - 'W' -- Do not allow to run any write command (flagged with the
writeflag). - 'E' -- Return error as RedisModuleCallReply. If there is an error before invoking the command, the error is returned using errno mechanism. This flag allows to get the error also as an error CallReply with relevant error message.
...: The actual arguments to the Redis command.
On success a RedisModuleCallReply object is returned, otherwise
NULL is returned and errno is set to the following values:
- EBADF: wrong format specifier.
- EINVAL: wrong command arity.
- ENOENT: command does not exist.
- EPERM: operation in Cluster instance with key in non local slot.
- EROFS: operation in Cluster instance when a write command is sent in a readonly state.
- ENETDOWN: operation in Cluster instance when cluster is down.
- ENOTSUP: No ACL user for the specified module context
- EACCES: Command cannot be executed, according to ACL rules
- ENOSPC: Write command is not allowed
- ESPIPE: Command not allowed on script mode
Example code fragment:
reply = RedisModule_Call(ctx,"INCRBY","sc",argv[1],"10");
if (RedisModule_CallReplyType(reply) == REDISMODULE_REPLY_INTEGER) {
long long myval = RedisModule_CallReplyInteger(reply);
// Do something with myval.
}
This API is documented here: https://redis.io/topics/modules-intro
RedisModule_CallReplyProto
const char *RedisModule_CallReplyProto(RedisModuleCallReply *reply,
size_t *len);
Available since: 4.0.0
Return a pointer, and a length, to the protocol returned by the command that returned the reply object.
Modules data types
When String DMA or using existing data structures is not enough, it is possible to create new data types from scratch and export them to Redis. The module must provide a set of callbacks for handling the new values exported (for example in order to provide RDB saving/loading, AOF rewrite, and so forth). In this section we define this API.
RedisModule_CreateDataType
moduleType *RedisModule_CreateDataType(RedisModuleCtx *ctx,
const char *name,
int encver,
void *typemethods_ptr);
Available since: 4.0.0
Register a new data type exported by the module. The parameters are the following. Please for in depth documentation check the modules API documentation, especially https://redis.io/topics/modules-native-types.
name: A 9 characters data type name that MUST be unique in the Redis Modules ecosystem. Be creative... and there will be no collisions. Use the charset A-Z a-z 9-0, plus the two "-_" characters. A good idea is to use, for example
<typename>-<vendor>. For example "tree-AntZ" may mean "Tree data structure by @antirez". To use both lower case and upper case letters helps in order to prevent collisions.encver: Encoding version, which is, the version of the serialization that a module used in order to persist data. As long as the "name" matches, the RDB loading will be dispatched to the type callbacks whatever 'encver' is used, however the module can understand if the encoding it must load are of an older version of the module. For example the module "tree-AntZ" initially used encver=0. Later after an upgrade, it started to serialize data in a different format and to register the type with encver=1. However this module may still load old data produced by an older version if the
rdb_loadcallback is able to check the encver value and act accordingly. The encver must be a positive value between 0 and 1023.typemethods_ptr is a pointer to a
RedisModuleTypeMethodsstructure that should be populated with the methods callbacks and structure version, like in the following example:RedisModuleTypeMethods tm = { .version = REDISMODULE_TYPE_METHOD_VERSION, .rdb_load = myType_RDBLoadCallBack, .rdb_save = myType_RDBSaveCallBack, .aof_rewrite = myType_AOFRewriteCallBack, .free = myType_FreeCallBack, // Optional fields .digest = myType_DigestCallBack, .mem_usage = myType_MemUsageCallBack, .aux_load = myType_AuxRDBLoadCallBack, .aux_save = myType_AuxRDBSaveCallBack, .free_effort = myType_FreeEffortCallBack, .unlink = myType_UnlinkCallBack, .copy = myType_CopyCallback, .defrag = myType_DefragCallback // Enhanced optional fields .mem_usage2 = myType_MemUsageCallBack2, .free_effort2 = myType_FreeEffortCallBack2, .unlink2 = myType_UnlinkCallBack2, .copy2 = myType_CopyCallback2, }rdb_load: A callback function pointer that loads data from RDB files.
rdb_save: A callback function pointer that saves data to RDB files.
aof_rewrite: A callback function pointer that rewrites data as commands.
digest: A callback function pointer that is used for
DEBUG DIGEST.free: A callback function pointer that can free a type value.
aux_save: A callback function pointer that saves out of keyspace data to RDB files. 'when' argument is either
REDISMODULE_AUX_BEFORE_RDBorREDISMODULE_AUX_AFTER_RDB.aux_load: A callback function pointer that loads out of keyspace data from RDB files. Similar to
aux_save, returnsREDISMODULE_OKon success, and ERR otherwise.free_effort: A callback function pointer that used to determine whether the module's memory needs to be lazy reclaimed. The module should return the complexity involved by freeing the value. for example: how many pointers are gonna be freed. Note that if it returns 0, we'll always do an async free.
unlink: A callback function pointer that used to notifies the module that the key has been removed from the DB by redis, and may soon be freed by a background thread. Note that it won't be called on FLUSHALL/FLUSHDB (both sync and async), and the module can use the
RedisModuleEvent_FlushDBto hook into that.copy: A callback function pointer that is used to make a copy of the specified key. The module is expected to perform a deep copy of the specified value and return it. In addition, hints about the names of the source and destination keys is provided. A NULL return value is considered an error and the copy operation fails. Note: if the target key exists and is being overwritten, the copy callback will be called first, followed by a free callback to the value that is being replaced.
defrag: A callback function pointer that is used to request the module to defrag a key. The module should then iterate pointers and call the relevant
RedisModule_Defrag*()functions to defragment pointers or complex types. The module should continue iterating as long asRedisModule_DefragShouldStop()returns a zero value, and return a zero value if finished or non-zero value if more work is left to be done. If more work needs to be done,RedisModule_DefragCursorSet()andRedisModule_DefragCursorGet()can be used to track this work across different calls. Normally, the defrag mechanism invokes the callback without a time limit, soRedisModule_DefragShouldStop()always returns zero. The "late defrag" mechanism which has a time limit and provides cursor support is used only for keys that are determined to have significant internal complexity. To determine this, the defrag mechanism uses thefree_effortcallback and the 'active-defrag-max-scan-fields' config directive. NOTE: The value is passed as avoid**and the function is expected to update the pointer if the top-level value pointer is defragmented and consequently changes.mem_usage2: Similar to
mem_usage, but provides theRedisModuleKeyOptCtxparameter so that meta information such as key name and db id can be obtained, and thesample_sizefor size estimation (see MEMORY USAGE command).free_effort2: Similar to
free_effort, but provides theRedisModuleKeyOptCtxparameter so that meta information such as key name and db id can be obtained.unlink2: Similar to
unlink, but provides theRedisModuleKeyOptCtxparameter so that meta information such as key name and db id can be obtained.copy2: Similar to
copy, but provides theRedisModuleKeyOptCtxparameter so that meta information such as key names and db ids can be obtained.
Note: the module name "AAAAAAAAA" is reserved and produces an error, it happens to be pretty lame as well.
If there is already a module registering a type with the same name,
and if the module name or encver is invalid, NULL is returned.
Otherwise the new type is registered into Redis, and a reference of
type RedisModuleType is returned: the caller of the function should store
this reference into a global variable to make future use of it in the
modules type API, since a single module may register multiple types.
Example code fragment:
static RedisModuleType *BalancedTreeType;
int RedisModule_OnLoad(RedisModuleCtx *ctx) {
// some code here ...
BalancedTreeType = RM_CreateDataType(...);
}
RedisModule_ModuleTypeSetValue
int RedisModule_ModuleTypeSetValue(RedisModuleKey *key,
moduleType *mt,
void *value);
Available since: 4.0.0
If the key is open for writing, set the specified module type object
as the value of the key, deleting the old value if any.
On success REDISMODULE_OK is returned. If the key is not open for
writing or there is an active iterator, REDISMODULE_ERR is returned.
RedisModule_ModuleTypeGetType
moduleType *RedisModule_ModuleTypeGetType(RedisModuleKey *key);
Available since: 4.0.0
Assuming RedisModule_KeyType() returned REDISMODULE_KEYTYPE_MODULE on
the key, returns the module type pointer of the value stored at key.
If the key is NULL, is not associated with a module type, or is empty, then NULL is returned instead.
RedisModule_ModuleTypeGetValue
void *RedisModule_ModuleTypeGetValue(RedisModuleKey *key);
Available since: 4.0.0
Assuming RedisModule_KeyType() returned REDISMODULE_KEYTYPE_MODULE on
the key, returns the module type low-level value stored at key, as
it was set by the user via RedisModule_ModuleTypeSetValue().
If the key is NULL, is not associated with a module type, or is empty, then NULL is returned instead.
RDB loading and saving functions
RedisModule_IsIOError
int RedisModule_IsIOError(RedisModuleIO *io);
Available since: 6.0.0
Returns true if any previous IO API failed.
for Load* APIs the REDISMODULE_OPTIONS_HANDLE_IO_ERRORS flag must be set with
RedisModule_SetModuleOptions first.
RedisModule_SaveUnsigned
void RedisModule_SaveUnsigned(RedisModuleIO *io, uint64_t value);
Available since: 4.0.0
Save an unsigned 64 bit value into the RDB file. This function should only
be called in the context of the rdb_save method of modules implementing new
data types.
RedisModule_LoadUnsigned
uint64_t RedisModule_LoadUnsigned(RedisModuleIO *io);
Available since: 4.0.0
Load an unsigned 64 bit value from the RDB file. This function should only
be called in the context of the rdb_load method of modules implementing
new data types.
RedisModule_SaveSigned
void RedisModule_SaveSigned(RedisModuleIO *io, int64_t value);
Available since: 4.0.0
Like RedisModule_SaveUnsigned() but for signed 64 bit values.
RedisModule_LoadSigned
int64_t RedisModule_LoadSigned(RedisModuleIO *io);
Available since: 4.0.0
Like RedisModule_LoadUnsigned() but for signed 64 bit values.
RedisModule_SaveString
void RedisModule_SaveString(RedisModuleIO *io, RedisModuleString *s);
Available since: 4.0.0
In the context of the rdb_save method of a module type, saves a
string into the RDB file taking as input a RedisModuleString.
The string can be later loaded with RedisModule_LoadString() or
other Load family functions expecting a serialized string inside
the RDB file.
RedisModule_SaveStringBuffer
void RedisModule_SaveStringBuffer(RedisModuleIO *io,
const char *str,
size_t len);
Available since: 4.0.0
Like RedisModule_SaveString() but takes a raw C pointer and length
as input.
RedisModule_LoadString
RedisModuleString *RedisModule_LoadString(RedisModuleIO *io);
Available since: 4.0.0
In the context of the rdb_load method of a module data type, loads a string
from the RDB file, that was previously saved with RedisModule_SaveString()
functions family.
The returned string is a newly allocated RedisModuleString object, and
the user should at some point free it with a call to RedisModule_FreeString().
If the data structure does not store strings as RedisModuleString objects,
the similar function RedisModule_LoadStringBuffer() could be used instead.
RedisModule_LoadStringBuffer
char *RedisModule_LoadStringBuffer(RedisModuleIO *io, size_t *lenptr);
Available since: 4.0.0
Like RedisModule_LoadString() but returns an heap allocated string that
was allocated with RedisModule_Alloc(), and can be resized or freed with
RedisModule_Realloc() or RedisModule_Free().
The size of the string is stored at '*lenptr' if not NULL. The returned string is not automatically NULL terminated, it is loaded exactly as it was stored inside the RDB file.
RedisModule_SaveDouble
void RedisModule_SaveDouble(RedisModuleIO *io, double value);
Available since: 4.0.0
In the context of the rdb_save method of a module data type, saves a double
value to the RDB file. The double can be a valid number, a NaN or infinity.
It is possible to load back the value with RedisModule_LoadDouble().
RedisModule_LoadDouble
double RedisModule_LoadDouble(RedisModuleIO *io);
Available since: 4.0.0
In the context of the rdb_save method of a module data type, loads back the
double value saved by RedisModule_SaveDouble().
RedisModule_SaveFloat
void RedisModule_SaveFloat(RedisModuleIO *io, float value);
Available since: 4.0.0
In the context of the rdb_save method of a module data type, saves a float
value to the RDB file. The float can be a valid number, a NaN or infinity.
It is possible to load back the value with RedisModule_LoadFloat().
RedisModule_LoadFloat
float RedisModule_LoadFloat(RedisModuleIO *io);
Available since: 4.0.0
In the context of the rdb_save method of a module data type, loads back the
float value saved by RedisModule_SaveFloat().
RedisModule_SaveLongDouble
void RedisModule_SaveLongDouble(RedisModuleIO *io, long double value);
Available since: 6.0.0
In the context of the rdb_save method of a module data type, saves a long double
value to the RDB file. The double can be a valid number, a NaN or infinity.
It is possible to load back the value with RedisModule_LoadLongDouble().
RedisModule_LoadLongDouble
long double RedisModule_LoadLongDouble(RedisModuleIO *io);
Available since: 6.0.0
In the context of the rdb_save method of a module data type, loads back the
long double value saved by RedisModule_SaveLongDouble().
Key digest API (DEBUG DIGEST interface for modules types)
RedisModule_DigestAddStringBuffer
void RedisModule_DigestAddStringBuffer(RedisModuleDigest *md,
const char *ele,
size_t len);
Available since: 4.0.0
Add a new element to the digest. This function can be called multiple times
one element after the other, for all the elements that constitute a given
data structure. The function call must be followed by the call to
RedisModule_DigestEndSequence eventually, when all the elements that are
always in a given order are added. See the Redis Modules data types
documentation for more info. However this is a quick example that uses Redis
data types as an example.
To add a sequence of unordered elements (for example in the case of a Redis Set), the pattern to use is:
foreach element {
AddElement(element);
EndSequence();
}
Because Sets are not ordered, so every element added has a position that does not depend from the other. However if instead our elements are ordered in pairs, like field-value pairs of an Hash, then one should use:
foreach key,value {
AddElement(key);
AddElement(value);
EndSequence();
}
Because the key and value will be always in the above order, while instead the single key-value pairs, can appear in any position into a Redis hash.
A list of ordered elements would be implemented with:
foreach element {
AddElement(element);
}
EndSequence();
RedisModule_DigestAddLongLong
void RedisModule_DigestAddLongLong(RedisModuleDigest *md, long long ll);
Available since: 4.0.0
Like RedisModule_DigestAddStringBuffer() but takes a long long as input
that gets converted into a string before adding it to the digest.
RedisModule_DigestEndSequence
void RedisModule_DigestEndSequence(RedisModuleDigest *md);
Available since: 4.0.0
See the documentation for RedisModule_DigestAddElement().
RedisModule_LoadDataTypeFromStringEncver
void *RedisModule_LoadDataTypeFromStringEncver(const RedisModuleString *str,
const moduleType *mt,
int encver);
Available since: 7.0.0
Decode a serialized representation of a module data type 'mt', in a specific encoding version 'encver' from string 'str' and return a newly allocated value, or NULL if decoding failed.
This call basically reuses the 'rdb_load' callback which module data types
implement in order to allow a module to arbitrarily serialize/de-serialize
keys, similar to how the Redis 'DUMP' and 'RESTORE' commands are implemented.
Modules should generally use the REDISMODULE_OPTIONS_HANDLE_IO_ERRORS flag and
make sure the de-serialization code properly checks and handles IO errors
(freeing allocated buffers and returning a NULL).
If this is NOT done, Redis will handle corrupted (or just truncated) serialized data by producing an error message and terminating the process.
RedisModule_LoadDataTypeFromString
void *RedisModule_LoadDataTypeFromString(const RedisModuleString *str,
const moduleType *mt);
Available since: 6.0.0
Similar to RedisModule_LoadDataTypeFromStringEncver, original version of the API, kept
for backward compatibility.
RedisModule_SaveDataTypeToString
RedisModuleString *RedisModule_SaveDataTypeToString(RedisModuleCtx *ctx,
void *data,
const moduleType *mt);
Available since: 6.0.0
Encode a module data type 'mt' value 'data' into serialized form, and return it
as a newly allocated RedisModuleString.
This call basically reuses the 'rdb_save' callback which module data types
implement in order to allow a module to arbitrarily serialize/de-serialize
keys, similar to how the Redis 'DUMP' and 'RESTORE' commands are implemented.
RedisModule_GetKeyNameFromDigest
const RedisModuleString *RedisModule_GetKeyNameFromDigest(RedisModuleDigest *dig);
Available since: 7.0.0
Returns the name of the key currently being processed.
RedisModule_GetDbIdFromDigest
int RedisModule_GetDbIdFromDigest(RedisModuleDigest *dig);
Available since: 7.0.0
Returns the database id of the key currently being processed.
AOF API for modules data types
RedisModule_EmitAOF
void RedisModule_EmitAOF(RedisModuleIO *io,
const char *cmdname,
const char *fmt,
...);
Available since: 4.0.0
Emits a command into the AOF during the AOF rewriting process. This function
is only called in the context of the aof_rewrite method of data types exported
by a module. The command works exactly like RedisModule_Call() in the way
the parameters are passed, but it does not return anything as the error
handling is performed by Redis itself.
IO context handling
RedisModule_GetKeyNameFromIO
const RedisModuleString *RedisModule_GetKeyNameFromIO(RedisModuleIO *io);
Available since: 5.0.5
Returns the name of the key currently being processed. There is no guarantee that the key name is always available, so this may return NULL.
RedisModule_GetKeyNameFromModuleKey
const RedisModuleString *RedisModule_GetKeyNameFromModuleKey(RedisModuleKey *key);
Available since: 6.0.0
Returns a RedisModuleString with the name of the key from RedisModuleKey.
RedisModule_GetDbIdFromModuleKey
int RedisModule_GetDbIdFromModuleKey(RedisModuleKey *key);
Available since: 7.0.0
Returns a database id of the key from RedisModuleKey.
RedisModule_GetDbIdFromIO
int RedisModule_GetDbIdFromIO(RedisModuleIO *io);
Available since: 7.0.0
Returns the database id of the key currently being processed. There is no guarantee that this info is always available, so this may return -1.
Logging
RedisModule_Log
void RedisModule_Log(RedisModuleCtx *ctx,
const char *levelstr,
const char *fmt,
...);
Available since: 4.0.0
Produces a log message to the standard Redis log, the format accepts printf-alike specifiers, while level is a string describing the log level to use when emitting the log, and must be one of the following:
- "debug" (
REDISMODULE_LOGLEVEL_DEBUG) - "verbose" (
REDISMODULE_LOGLEVEL_VERBOSE) - "notice" (
REDISMODULE_LOGLEVEL_NOTICE) - "warning" (
REDISMODULE_LOGLEVEL_WARNING)
If the specified log level is invalid, verbose is used by default. There is a fixed limit to the length of the log line this function is able to emit, this limit is not specified but is guaranteed to be more than a few lines of text.
The ctx argument may be NULL if cannot be provided in the context of the caller for instance threads or callbacks, in which case a generic "module" will be used instead of the module name.
RedisModule_LogIOError
void RedisModule_LogIOError(RedisModuleIO *io,
const char *levelstr,
const char *fmt,
...);
Available since: 4.0.0
Log errors from RDB / AOF serialization callbacks.
This function should be used when a callback is returning a critical error to the caller since cannot load or save the data for some critical reason.
RedisModule__Assert
void RedisModule__Assert(const char *estr, const char *file, int line);
Available since: 6.0.0
Redis-like assert function.
The macro RedisModule_Assert(expression) is recommended, rather than
calling this function directly.
A failed assertion will shut down the server and produce logging information that looks identical to information generated by Redis itself.
RedisModule_LatencyAddSample
void RedisModule_LatencyAddSample(const char *event, mstime_t latency);
Available since: 6.0.0
Allows adding event to the latency monitor to be observed by the LATENCY command. The call is skipped if the latency is smaller than the configured latency-monitor-threshold.
Blocking clients from modules
For a guide about blocking commands in modules, see https://redis.io/topics/modules-blocking-ops.
RedisModule_BlockClient
RedisModuleBlockedClient *RedisModule_BlockClient(RedisModuleCtx *ctx,
RedisModuleCmdFunc reply_callback,
RedisModuleCmdFunc timeout_callback,
void (*free_privdata)(RedisModuleCtx*, void*),
long long timeout_ms);
Available since: 4.0.0
Block a client in the context of a blocking command, returning an handle
which will be used, later, in order to unblock the client with a call to
RedisModule_UnblockClient(). The arguments specify callback functions
and a timeout after which the client is unblocked.
The callbacks are called in the following contexts:
reply_callback: called after a successful RedisModule_UnblockClient()
call in order to reply to the client and unblock it.
timeout_callback: called when the timeout is reached or if [`CLIENT UNBLOCK`](/commands/client-unblock)
is invoked, in order to send an error to the client.
free_privdata: called in order to free the private data that is passed
by RedisModule_UnblockClient() call.
Note: RedisModule_UnblockClient should be called for every blocked client,
even if client was killed, timed-out or disconnected. Failing to do so
will result in memory leaks.
There are some cases where RedisModule_BlockClient() cannot be used:
- If the client is a Lua script.
- If the client is executing a MULTI block.
In these cases, a call to RedisModule_BlockClient() will not block the
client, but instead produce a specific error reply.
A module that registers a timeout_callback function can also be unblocked
using the CLIENT UNBLOCK command, which will trigger the timeout callback.
If a callback function is not registered, then the blocked client will be
treated as if it is not in a blocked state and CLIENT UNBLOCK will return
a zero value.
Measuring background time: By default the time spent in the blocked command
is not account for the total command duration. To include such time you should
use RedisModule_BlockedClientMeasureTimeStart() and RedisModule_BlockedClientMeasureTimeEnd() one,
or multiple times within the blocking command background work.
RedisModule_BlockClientOnKeys
RedisModuleBlockedClient *RedisModule_BlockClientOnKeys(RedisModuleCtx *ctx,
RedisModuleCmdFunc reply_callback,
RedisModuleCmdFunc timeout_callback,
void (*free_privdata)(RedisModuleCtx*, void*),
long long timeout_ms,
RedisModuleString **keys,
int numkeys,
void *privdata);
Available since: 6.0.0
This call is similar to RedisModule_BlockClient(), however in this case we
don't just block the client, but also ask Redis to unblock it automatically
once certain keys become "ready", that is, contain more data.
Basically this is similar to what a typical Redis command usually does, like BLPOP or BZPOPMAX: the client blocks if it cannot be served ASAP, and later when the key receives new data (a list push for instance), the client is unblocked and served.
However in the case of this module API, when the client is unblocked?
- If you block on a key of a type that has blocking operations associated, like a list, a sorted set, a stream, and so forth, the client may be unblocked once the relevant key is targeted by an operation that normally unblocks the native blocking operations for that type. So if we block on a list key, an RPUSH command may unblock our client and so forth.
- If you are implementing your native data type, or if you want to add new
unblocking conditions in addition to "1", you can call the modules API
RedisModule_SignalKeyAsReady().
Anyway we can't be sure if the client should be unblocked just because the
key is signaled as ready: for instance a successive operation may change the
key, or a client in queue before this one can be served, modifying the key
as well and making it empty again. So when a client is blocked with
RedisModule_BlockClientOnKeys() the reply callback is not called after
RedisModule_UnblockClient() is called, but every time a key is signaled as ready:
if the reply callback can serve the client, it returns REDISMODULE_OK
and the client is unblocked, otherwise it will return REDISMODULE_ERR
and we'll try again later.
The reply callback can access the key that was signaled as ready by
calling the API RedisModule_GetBlockedClientReadyKey(), that returns
just the string name of the key as a RedisModuleString object.
Thanks to this system we can setup complex blocking scenarios, like unblocking a client only if a list contains at least 5 items or other more fancy logics.
Note that another difference with RedisModule_BlockClient(), is that here
we pass the private data directly when blocking the client: it will
be accessible later in the reply callback. Normally when blocking with
RedisModule_BlockClient() the private data to reply to the client is
passed when calling RedisModule_UnblockClient() but here the unblocking
is performed by Redis itself, so we need to have some private data before
hand. The private data is used to store any information about the specific
unblocking operation that you are implementing. Such information will be
freed using the free_privdata callback provided by the user.
However the reply callback will be able to access the argument vector of the command, so the private data is often not needed.
Note: Under normal circumstances RedisModule_UnblockClient should not be
called for clients that are blocked on keys (Either the key will
become ready or a timeout will occur). If for some reason you do want
to call RedisModule_UnblockClient it is possible: Client will be
handled as if it were timed-out (You must implement the timeout
callback in that case).
RedisModule_SignalKeyAsReady
void RedisModule_SignalKeyAsReady(RedisModuleCtx *ctx, RedisModuleString *key);
Available since: 6.0.0
This function is used in order to potentially unblock a client blocked
on keys with RedisModule_BlockClientOnKeys(). When this function is called,
all the clients blocked for this key will get their reply_callback called.
Note: The function has no effect if the signaled key doesn't exist.
RedisModule_UnblockClient
int RedisModule_UnblockClient(RedisModuleBlockedClient *bc, void *privdata);
Available since: 4.0.0
Unblock a client blocked by RedisModule_BlockedClient. This will trigger
the reply callbacks to be called in order to reply to the client.
The 'privdata' argument will be accessible by the reply callback, so
the caller of this function can pass any value that is needed in order to
actually reply to the client.
A common usage for 'privdata' is a thread that computes something that needs to be passed to the client, included but not limited some slow to compute reply or some reply obtained via networking.
Note 1: this function can be called from threads spawned by the module.
Note 2: when we unblock a client that is blocked for keys using the API
RedisModule_BlockClientOnKeys(), the privdata argument here is not used.
Unblocking a client that was blocked for keys using this API will still
require the client to get some reply, so the function will use the
"timeout" handler in order to do so (The privdata provided in
RedisModule_BlockClientOnKeys() is accessible from the timeout
callback via RedisModule_GetBlockedClientPrivateData).
RedisModule_AbortBlock
int RedisModule_AbortBlock(RedisModuleBlockedClient *bc);
Available since: 4.0.0
Abort a blocked client blocking operation: the client will be unblocked without firing any callback.
RedisModule_SetDisconnectCallback
void RedisModule_SetDisconnectCallback(RedisModuleBlockedClient *bc,
RedisModuleDisconnectFunc callback);
Available since: 5.0.0
Set a callback that will be called if a blocked client disconnects
before the module has a chance to call RedisModule_UnblockClient()
Usually what you want to do there, is to cleanup your module state
so that you can call RedisModule_UnblockClient() safely, otherwise
the client will remain blocked forever if the timeout is large.
Notes:
It is not safe to call Reply* family functions here, it is also useless since the client is gone.
This callback is not called if the client disconnects because of a timeout. In such a case, the client is unblocked automatically and the timeout callback is called.
RedisModule_IsBlockedReplyRequest
int RedisModule_IsBlockedReplyRequest(RedisModuleCtx *ctx);
Available since: 4.0.0
Return non-zero if a module command was called in order to fill the reply for a blocked client.
RedisModule_IsBlockedTimeoutRequest
int RedisModule_IsBlockedTimeoutRequest(RedisModuleCtx *ctx);
Available since: 4.0.0
Return non-zero if a module command was called in order to fill the reply for a blocked client that timed out.
RedisModule_GetBlockedClientPrivateData
void *RedisModule_GetBlockedClientPrivateData(RedisModuleCtx *ctx);
Available since: 4.0.0
Get the private data set by RedisModule_UnblockClient()
RedisModule_GetBlockedClientReadyKey
RedisModuleString *RedisModule_GetBlockedClientReadyKey(RedisModuleCtx *ctx);
Available since: 6.0.0
Get the key that is ready when the reply callback is called in the context
of a client blocked by RedisModule_BlockClientOnKeys().
RedisModule_GetBlockedClientHandle
RedisModuleBlockedClient *RedisModule_GetBlockedClientHandle(RedisModuleCtx *ctx);
Available since: 5.0.0
Get the blocked client associated with a given context. This is useful in the reply and timeout callbacks of blocked clients, before sometimes the module has the blocked client handle references around, and wants to cleanup it.
RedisModule_BlockedClientDisconnected
int RedisModule_BlockedClientDisconnected(RedisModuleCtx *ctx);
Available since: 5.0.0
Return true if when the free callback of a blocked client is called, the reason for the client to be unblocked is that it disconnected while it was blocked.
Thread Safe Contexts
RedisModule_GetThreadSafeContext
RedisModuleCtx *RedisModule_GetThreadSafeContext(RedisModuleBlockedClient *bc);
Available since: 4.0.0
Return a context which can be used inside threads to make Redis context
calls with certain modules APIs. If 'bc' is not NULL then the module will
be bound to a blocked client, and it will be possible to use the
RedisModule_Reply* family of functions to accumulate a reply for when the
client will be unblocked. Otherwise the thread safe context will be
detached by a specific client.
To call non-reply APIs, the thread safe context must be prepared with:
RedisModule_ThreadSafeContextLock(ctx);
... make your call here ...
RedisModule_ThreadSafeContextUnlock(ctx);
This is not needed when using RedisModule_Reply* functions, assuming
that a blocked client was used when the context was created, otherwise
no RedisModule_Reply* call should be made at all.
NOTE: If you're creating a detached thread safe context (bc is NULL),
consider using RM_GetDetachedThreadSafeContext which will also retain
the module ID and thus be more useful for logging.
RedisModule_GetDetachedThreadSafeContext
RedisModuleCtx *RedisModule_GetDetachedThreadSafeContext(RedisModuleCtx *ctx);
Available since: 6.0.9
Return a detached thread safe context that is not associated with any specific blocked client, but is associated with the module's context.
This is useful for modules that wish to hold a global context over a long term, for purposes such as logging.
RedisModule_FreeThreadSafeContext
void RedisModule_FreeThreadSafeContext(RedisModuleCtx *ctx);
Available since: 4.0.0
Release a thread safe context.
RedisModule_ThreadSafeContextLock
void RedisModule_ThreadSafeContextLock(RedisModuleCtx *ctx);
Available since: 4.0.0
Acquire the server lock before executing a thread safe API call.
This is not needed for RedisModule_Reply* calls when there is
a blocked client connected to the thread safe context.
RedisModule_ThreadSafeContextTryLock
int RedisModule_ThreadSafeContextTryLock(RedisModuleCtx *ctx);
Available since: 6.0.8
Similar to RedisModule_ThreadSafeContextLock but this function
would not block if the server lock is already acquired.
If successful (lock acquired) REDISMODULE_OK is returned,
otherwise REDISMODULE_ERR is returned and errno is set
accordingly.
RedisModule_ThreadSafeContextUnlock
void RedisModule_ThreadSafeContextUnlock(RedisModuleCtx *ctx);
Available since: 4.0.0
Release the server lock after a thread safe API call was executed.
Module Keyspace Notifications API
RedisModule_SubscribeToKeyspaceEvents
int RedisModule_SubscribeToKeyspaceEvents(RedisModuleCtx *ctx,
int types,
RedisModuleNotificationFunc callback);
Available since: 4.0.9
Subscribe to keyspace notifications. This is a low-level version of the keyspace-notifications API. A module can register callbacks to be notified when keyspace events occur.
Notification events are filtered by their type (string events, set events, etc), and the subscriber callback receives only events that match a specific mask of event types.
When subscribing to notifications with RedisModule_SubscribeToKeyspaceEvents
the module must provide an event type-mask, denoting the events the subscriber
is interested in. This can be an ORed mask of any of the following flags:
REDISMODULE_NOTIFY_GENERIC: Generic commands like DEL, EXPIRE, RENAMEREDISMODULE_NOTIFY_STRING: String eventsREDISMODULE_NOTIFY_LIST: List eventsREDISMODULE_NOTIFY_SET: Set eventsREDISMODULE_NOTIFY_HASH: Hash eventsREDISMODULE_NOTIFY_ZSET: Sorted Set eventsREDISMODULE_NOTIFY_EXPIRED: Expiration eventsREDISMODULE_NOTIFY_EVICTED: Eviction eventsREDISMODULE_NOTIFY_STREAM: Stream eventsREDISMODULE_NOTIFY_MODULE: Module types eventsREDISMODULE_NOTIFY_KEYMISS: Key-miss eventsREDISMODULE_NOTIFY_ALL: All events (ExcludingREDISMODULE_NOTIFY_KEYMISS)REDISMODULE_NOTIFY_LOADED: A special notification available only for modules, indicates that the key was loaded from persistence. Notice, when this event fires, the given key can not be retained, use RM_CreateStringFromString instead.
We do not distinguish between key events and keyspace events, and it is up to the module to filter the actions taken based on the key.
The subscriber signature is:
int (*RedisModuleNotificationFunc) (RedisModuleCtx *ctx, int type,
const char *event,
RedisModuleString *key);
type is the event type bit, that must match the mask given at registration
time. The event string is the actual command being executed, and key is the
relevant Redis key.
Notification callback gets executed with a redis context that can not be used to send anything to the client, and has the db number where the event occurred as its selected db number.
Notice that it is not necessary to enable notifications in redis.conf for module notifications to work.
Warning: the notification callbacks are performed in a synchronous manner, so notification callbacks must to be fast, or they would slow Redis down. If you need to take long actions, use threads to offload them.
See https://redis.io/topics/notifications for more information.
RedisModule_GetNotifyKeyspaceEvents
int RedisModule_GetNotifyKeyspaceEvents();
Available since: 6.0.0
Get the configured bitmap of notify-keyspace-events (Could be used
for additional filtering in RedisModuleNotificationFunc)
RedisModule_NotifyKeyspaceEvent
int RedisModule_NotifyKeyspaceEvent(RedisModuleCtx *ctx,
int type,
const char *event,
RedisModuleString *key);
Available since: 6.0.0
Expose notifyKeyspaceEvent to modules
Modules Cluster API
RedisModule_RegisterClusterMessageReceiver
void RedisModule_RegisterClusterMessageReceiver(RedisModuleCtx *ctx,
uint8_t type,
RedisModuleClusterMessageReceiver callback);
Available since: 5.0.0
Register a callback receiver for cluster messages of type 'type'. If there was already a registered callback, this will replace the callback function with the one provided, otherwise if the callback is set to NULL and there is already a callback for this function, the callback is unregistered (so this API call is also used in order to delete the receiver).
RedisModule_SendClusterMessage
int RedisModule_SendClusterMessage(RedisModuleCtx *ctx,
const char *target_id,
uint8_t type,
const char *msg,
uint32_t len);
Available since: 5.0.0
Send a message to all the nodes in the cluster if target is NULL, otherwise
at the specified target, which is a REDISMODULE_NODE_ID_LEN bytes node ID, as
returned by the receiver callback or by the nodes iteration functions.
The function returns REDISMODULE_OK if the message was successfully sent,
otherwise if the node is not connected or such node ID does not map to any
known cluster node, REDISMODULE_ERR is returned.
RedisModule_GetClusterNodesList
char **RedisModule_GetClusterNodesList(RedisModuleCtx *ctx, size_t *numnodes);
Available since: 5.0.0
Return an array of string pointers, each string pointer points to a cluster
node ID of exactly REDISMODULE_NODE_ID_LEN bytes (without any null term).
The number of returned node IDs is stored into *numnodes.
However if this function is called by a module not running an a Redis
instance with Redis Cluster enabled, NULL is returned instead.
The IDs returned can be used with RedisModule_GetClusterNodeInfo() in order
to get more information about single node.
The array returned by this function must be freed using the function
RedisModule_FreeClusterNodesList().
Example:
size_t count, j;
char **ids = RedisModule_GetClusterNodesList(ctx,&count);
for (j = 0; j < count; j++) {
RedisModule_Log(ctx,"notice","Node %.*s",
REDISMODULE_NODE_ID_LEN,ids[j]);
}
RedisModule_FreeClusterNodesList(ids);
RedisModule_FreeClusterNodesList
void RedisModule_FreeClusterNodesList(char **ids);
Available since: 5.0.0
Free the node list obtained with RedisModule_GetClusterNodesList.
RedisModule_GetMyClusterID
const char *RedisModule_GetMyClusterID(void);
Available since: 5.0.0
Return this node ID (REDISMODULE_CLUSTER_ID_LEN bytes) or NULL if the cluster
is disabled.
RedisModule_GetClusterSize
size_t RedisModule_GetClusterSize(void);
Available since: 5.0.0
Return the number of nodes in the cluster, regardless of their state (handshake, noaddress, ...) so that the number of active nodes may actually be smaller, but not greater than this number. If the instance is not in cluster mode, zero is returned.
RedisModule_GetClusterNodeInfo
int RedisModule_GetClusterNodeInfo(RedisModuleCtx *ctx,
const char *id,
char *ip,
char *master_id,
int *port,
int *flags);
Available since: 5.0.0
Populate the specified info for the node having as ID the specified 'id',
then returns REDISMODULE_OK. Otherwise if the format of node ID is invalid
or the node ID does not exist from the POV of this local node, REDISMODULE_ERR
is returned.
The arguments ip, master_id, port and flags can be NULL in case we don't
need to populate back certain info. If an ip and master_id (only populated
if the instance is a slave) are specified, they point to buffers holding
at least REDISMODULE_NODE_ID_LEN bytes. The strings written back as ip
and master_id are not null terminated.
The list of flags reported is the following:
REDISMODULE_NODE_MYSELF: This nodeREDISMODULE_NODE_MASTER: The node is a masterREDISMODULE_NODE_SLAVE: The node is a replicaREDISMODULE_NODE_PFAIL: We see the node as failingREDISMODULE_NODE_FAIL: The cluster agrees the node is failingREDISMODULE_NODE_NOFAILOVER: The slave is configured to never failover
RedisModule_SetClusterFlags
void RedisModule_SetClusterFlags(RedisModuleCtx *ctx, uint64_t flags);
Available since: 5.0.0
Set Redis Cluster flags in order to change the normal behavior of Redis Cluster, especially with the goal of disabling certain functions. This is useful for modules that use the Cluster API in order to create a different distributed system, but still want to use the Redis Cluster message bus. Flags that can be set:
CLUSTER_MODULE_FLAG_NO_FAILOVERCLUSTER_MODULE_FLAG_NO_REDIRECTION
With the following effects:
NO_FAILOVER: prevent Redis Cluster slaves from failing over a dead master. Also disables the replica migration feature.NO_REDIRECTION: Every node will accept any key, without trying to perform partitioning according to the Redis Cluster algorithm. Slots information will still be propagated across the cluster, but without effect.
Modules Timers API
Module timers are an high precision "green timers" abstraction where every module can register even millions of timers without problems, even if the actual event loop will just have a single timer that is used to awake the module timers subsystem in order to process the next event.
All the timers are stored into a radix tree, ordered by expire time, when the main Redis event loop timer callback is called, we try to process all the timers already expired one after the other. Then we re-enter the event loop registering a timer that will expire when the next to process module timer will expire.
Every time the list of active timers drops to zero, we unregister the main event loop timer, so that there is no overhead when such feature is not used.
RedisModule_CreateTimer
RedisModuleTimerID RedisModule_CreateTimer(RedisModuleCtx *ctx,
mstime_t period,
RedisModuleTimerProc callback,
void *data);
Available since: 5.0.0
Create a new timer that will fire after period milliseconds, and will call
the specified function using data as argument. The returned timer ID can be
used to get information from the timer or to stop it before it fires.
Note that for the common use case of a repeating timer (Re-registration
of the timer inside the RedisModuleTimerProc callback) it matters when
this API is called:
If it is called at the beginning of 'callback' it means
the event will triggered every 'period'.
If it is called at the end of 'callback' it means
there will 'period' milliseconds gaps between events.
(If the time it takes to execute 'callback' is negligible the two
statements above mean the same)
RedisModule_StopTimer
int RedisModule_StopTimer(RedisModuleCtx *ctx,
RedisModuleTimerID id,
void **data);
Available since: 5.0.0
Stop a timer, returns REDISMODULE_OK if the timer was found, belonged to the
calling module, and was stopped, otherwise REDISMODULE_ERR is returned.
If not NULL, the data pointer is set to the value of the data argument when
the timer was created.
RedisModule_GetTimerInfo
int RedisModule_GetTimerInfo(RedisModuleCtx *ctx,
RedisModuleTimerID id,
uint64_t *remaining,
void **data);
Available since: 5.0.0
Obtain information about a timer: its remaining time before firing
(in milliseconds), and the private data pointer associated with the timer.
If the timer specified does not exist or belongs to a different module
no information is returned and the function returns REDISMODULE_ERR, otherwise
REDISMODULE_OK is returned. The arguments remaining or data can be NULL if
the caller does not need certain information.
Modules EventLoop API
RedisModule_EventLoopAdd
int RedisModule_EventLoopAdd(int fd,
int mask,
RedisModuleEventLoopFunc func,
void *user_data);
Available since: 7.0.0
Add a pipe / socket event to the event loop.
maskmust be one of the following values:REDISMODULE_EVENTLOOP_READABLEREDISMODULE_EVENTLOOP_WRITABLEREDISMODULE_EVENTLOOP_READABLE | REDISMODULE_EVENTLOOP_WRITABLE
On success REDISMODULE_OK is returned, otherwise
REDISMODULE_ERR is returned and errno is set to the following values:
- ERANGE:
fdis negative or higher thanmaxclientsRedis config. - EINVAL:
callbackis NULL ormaskvalue is invalid.
errno might take other values in case of an internal error.
Example:
void onReadable(int fd, void *user_data, int mask) {
char buf[32];
int bytes = read(fd,buf,sizeof(buf));
printf("Read %d bytes \n", bytes);
}
RM_EventLoopAdd(fd, REDISMODULE_EVENTLOOP_READABLE, onReadable, NULL);
RedisModule_EventLoopDel
int RedisModule_EventLoopDel(int fd, int mask);
Available since: 7.0.0
Delete a pipe / socket event from the event loop.
maskmust be one of the following values:REDISMODULE_EVENTLOOP_READABLEREDISMODULE_EVENTLOOP_WRITABLEREDISMODULE_EVENTLOOP_READABLE | REDISMODULE_EVENTLOOP_WRITABLE
On success REDISMODULE_OK is returned, otherwise
REDISMODULE_ERR is returned and errno is set to the following values:
- ERANGE:
fdis negative or higher thanmaxclientsRedis config. - EINVAL:
maskvalue is invalid.
RedisModule_EventLoopAddOneShot
int RedisModule_EventLoopAddOneShot(RedisModuleEventLoopOneShotFunc func,
void *user_data);
Available since: 7.0.0
This function can be called from other threads to trigger callback on Redis
main thread. On success REDISMODULE_OK is returned. If func is NULL
REDISMODULE_ERR is returned and errno is set to EINVAL.
Modules ACL API
Implements a hook into the authentication and authorization within Redis.
RedisModule_CreateModuleUser
RedisModuleUser *RedisModule_CreateModuleUser(const char *name);
Available since: 6.0.0
Creates a Redis ACL user that the module can use to authenticate a client.
After obtaining the user, the module should set what such user can do
using the RedisModule_SetUserACL() function. Once configured, the user
can be used in order to authenticate a connection, with the specified
ACL rules, using the RedisModule_AuthClientWithUser() function.
Note that:
- Users created here are not listed by the ACL command.
- Users created here are not checked for duplicated name, so it's up to the module calling this function to take care of not creating users with the same name.
- The created user can be used to authenticate multiple Redis connections.
The caller can later free the user using the function
RedisModule_FreeModuleUser(). When this function is called, if there are
still clients authenticated with this user, they are disconnected.
The function to free the user should only be used when the caller really
wants to invalidate the user to define a new one with different
capabilities.
RedisModule_FreeModuleUser
int RedisModule_FreeModuleUser(RedisModuleUser *user);
Available since: 6.0.0
Frees a given user and disconnects all of the clients that have been
authenticated with it. See RedisModule_CreateModuleUser for detailed usage.
RedisModule_SetModuleUserACL
int RedisModule_SetModuleUserACL(RedisModuleUser *user, const char* acl);
Available since: 6.0.0
Sets the permissions of a user created through the redis module
interface. The syntax is the same as ACL SETUSER, so refer to the
documentation in acl.c for more information. See RedisModule_CreateModuleUser
for detailed usage.
Returns REDISMODULE_OK on success and REDISMODULE_ERR on failure
and will set an errno describing why the operation failed.
RedisModule_GetCurrentUserName
RedisModuleString *RedisModule_GetCurrentUserName(RedisModuleCtx *ctx);
Available since: 7.0.0
Retrieve the user name of the client connection behind the current context.
The user name can be used later, in order to get a RedisModuleUser.
See more information in RedisModule_GetModuleUserFromUserName.
The returned string must be released with RedisModule_FreeString() or by
enabling automatic memory management.
RedisModule_GetModuleUserFromUserName
RedisModuleUser *RedisModule_GetModuleUserFromUserName(RedisModuleString *name);
Available since: 7.0.0
A RedisModuleUser can be used to check if command, key or channel can be executed or
accessed according to the ACLs rules associated with that user.
When a Module wants to do ACL checks on a general ACL user (not created by RedisModule_CreateModuleUser),
it can get the RedisModuleUser from this API, based on the user name retrieved by RedisModule_GetCurrentUserName.
Since a general ACL user can be deleted at any time, this RedisModuleUser should be used only in the context
where this function was called. In order to do ACL checks out of that context, the Module can store the user name,
and call this API at any other context.
Returns NULL if the user is disabled or the user does not exist.
The caller should later free the user using the function RedisModule_FreeModuleUser().
RedisModule_ACLCheckCommandPermissions
int RedisModule_ACLCheckCommandPermissions(RedisModuleUser *user,
RedisModuleString **argv,
int argc);
Available since: 7.0.0
Checks if the command can be executed by the user, according to the ACLs associated with it.
On success a REDISMODULE_OK is returned, otherwise
REDISMODULE_ERR is returned and errno is set to the following values:
- ENOENT: Specified command does not exist.
- EACCES: Command cannot be executed, according to ACL rules
RedisModule_ACLCheckKeyPermissions
int RedisModule_ACLCheckKeyPermissions(RedisModuleUser *user,
RedisModuleString *key,
int flags);
Available since: 7.0.0
Check if the key can be accessed by the user according to the ACLs attached to the user
and the flags representing the key access. The flags are the same that are used in the
keyspec for logical operations. These flags are documented in RedisModule_SetCommandInfo as
the REDISMODULE_CMD_KEY_ACCESS, REDISMODULE_CMD_KEY_UPDATE, REDISMODULE_CMD_KEY_INSERT,
and REDISMODULE_CMD_KEY_DELETE flags.
If no flags are supplied, the user is still required to have some access to the key for this command to return successfully.
If the user is able to access the key then REDISMODULE_OK is returned, otherwise
REDISMODULE_ERR is returned and errno is set to one of the following values:
- EINVAL: The provided flags are invalid.
- EACCESS: The user does not have permission to access the key.
RedisModule_ACLCheckChannelPermissions
int RedisModule_ACLCheckChannelPermissions(RedisModuleUser *user,
RedisModuleString *ch,
int flags);
Available since: 7.0.0
Check if the pubsub channel can be accessed by the user based off of the given
access flags. See RedisModule_ChannelAtPosWithFlags for more information about the
possible flags that can be passed in.
If the user is able to acecss the pubsub channel then REDISMODULE_OK is returned, otherwise
REDISMODULE_ERR is returned and errno is set to one of the following values:
- EINVAL: The provided flags are invalid.
- EACCESS: The user does not have permission to access the pubsub channel.
RedisModule_ACLAddLogEntry
int RedisModule_ACLAddLogEntry(RedisModuleCtx *ctx,
RedisModuleUser *user,
RedisModuleString *object,
RedisModuleACLLogEntryReason reason);
Available since: 7.0.0
Adds a new entry in the ACL log.
Returns REDISMODULE_OK on success and REDISMODULE_ERR on error.
For more information about ACL log, please refer to https://redis.io/commands/acl-log
RedisModule_AuthenticateClientWithUser
int RedisModule_AuthenticateClientWithUser(RedisModuleCtx *ctx,
RedisModuleUser *module_user,
RedisModuleUserChangedFunc callback,
void *privdata,
uint64_t *client_id);
Available since: 6.0.0
Authenticate the current context's user with the provided redis acl user.
Returns REDISMODULE_ERR if the user is disabled.
See authenticateClientWithUser for information about callback, client_id,
and general usage for authentication.
RedisModule_AuthenticateClientWithACLUser
int RedisModule_AuthenticateClientWithACLUser(RedisModuleCtx *ctx,
const char *name,
size_t len,
RedisModuleUserChangedFunc callback,
void *privdata,
uint64_t *client_id);
Available since: 6.0.0
Authenticate the current context's user with the provided redis acl user.
Returns REDISMODULE_ERR if the user is disabled or the user does not exist.
See authenticateClientWithUser for information about callback, client_id,
and general usage for authentication.
RedisModule_DeauthenticateAndCloseClient
int RedisModule_DeauthenticateAndCloseClient(RedisModuleCtx *ctx,
uint64_t client_id);
Available since: 6.0.0
Deauthenticate and close the client. The client resources will not be
be immediately freed, but will be cleaned up in a background job. This is
the recommended way to deauthenticate a client since most clients can't
handle users becoming deauthenticated. Returns REDISMODULE_ERR when the
client doesn't exist and REDISMODULE_OK when the operation was successful.
The client ID is returned from the RedisModule_AuthenticateClientWithUser and
RedisModule_AuthenticateClientWithACLUser APIs, but can be obtained through
the CLIENT api or through server events.
This function is not thread safe, and must be executed within the context of a command or thread safe context.
RedisModule_RedactClientCommandArgument
int RedisModule_RedactClientCommandArgument(RedisModuleCtx *ctx, int pos);
Available since: 7.0.0
Redact the client command argument specified at the given position. Redacted arguments are obfuscated in user facing commands such as SLOWLOG or MONITOR, as well as never being written to server logs. This command may be called multiple times on the same position.
Note that the command name, position 0, can not be redacted.
Returns REDISMODULE_OK if the argument was redacted and REDISMODULE_ERR if there
was an invalid parameter passed in or the position is outside the client
argument range.
RedisModule_GetClientCertificate
RedisModuleString *RedisModule_GetClientCertificate(RedisModuleCtx *ctx,
uint64_t client_id);
Available since: 6.0.9
Return the X.509 client-side certificate used by the client to authenticate this connection.
The return value is an allocated RedisModuleString that is a X.509 certificate
encoded in PEM (Base64) format. It should be freed (or auto-freed) by the caller.
A NULL value is returned in the following conditions:
- Connection ID does not exist
- Connection is not a TLS connection
- Connection is a TLS connection but no client certificate was used
Modules Dictionary API
Implements a sorted dictionary (actually backed by a radix tree) with the usual get / set / del / num-items API, together with an iterator capable of going back and forth.
RedisModule_CreateDict
RedisModuleDict *RedisModule_CreateDict(RedisModuleCtx *ctx);
Available since: 5.0.0
Create a new dictionary. The 'ctx' pointer can be the current module context or NULL, depending on what you want. Please follow the following rules:
- Use a NULL context if you plan to retain a reference to this dictionary that will survive the time of the module callback where you created it.
- Use a NULL context if no context is available at the time you are creating the dictionary (of course...).
- However use the current callback context as 'ctx' argument if the dictionary time to live is just limited to the callback scope. In this case, if enabled, you can enjoy the automatic memory management that will reclaim the dictionary memory, as well as the strings returned by the Next / Prev dictionary iterator calls.
RedisModule_FreeDict
void RedisModule_FreeDict(RedisModuleCtx *ctx, RedisModuleDict *d);
Available since: 5.0.0
Free a dictionary created with RedisModule_CreateDict(). You need to pass the
context pointer 'ctx' only if the dictionary was created using the
context instead of passing NULL.
RedisModule_DictSize
uint64_t RedisModule_DictSize(RedisModuleDict *d);
Available since: 5.0.0
Return the size of the dictionary (number of keys).
RedisModule_DictSetC
int RedisModule_DictSetC(RedisModuleDict *d,
void *key,
size_t keylen,
void *ptr);
Available since: 5.0.0
Store the specified key into the dictionary, setting its value to the
pointer 'ptr'. If the key was added with success, since it did not
already exist, REDISMODULE_OK is returned. Otherwise if the key already
exists the function returns REDISMODULE_ERR.
RedisModule_DictReplaceC
int RedisModule_DictReplaceC(RedisModuleDict *d,
void *key,
size_t keylen,
void *ptr);
Available since: 5.0.0
Like RedisModule_DictSetC() but will replace the key with the new
value if the key already exists.
RedisModule_DictSet
int RedisModule_DictSet(RedisModuleDict *d, RedisModuleString *key, void *ptr);
Available since: 5.0.0
Like RedisModule_DictSetC() but takes the key as a RedisModuleString.
RedisModule_DictReplace
int RedisModule_DictReplace(RedisModuleDict *d,
RedisModuleString *key,
void *ptr);
Available since: 5.0.0
Like RedisModule_DictReplaceC() but takes the key as a RedisModuleString.
RedisModule_DictGetC
void *RedisModule_DictGetC(RedisModuleDict *d,
void *key,
size_t keylen,
int *nokey);
Available since: 5.0.0
Return the value stored at the specified key. The function returns NULL both in the case the key does not exist, or if you actually stored NULL at key. So, optionally, if the 'nokey' pointer is not NULL, it will be set by reference to 1 if the key does not exist, or to 0 if the key exists.
RedisModule_DictGet
void *RedisModule_DictGet(RedisModuleDict *d,
RedisModuleString *key,
int *nokey);
Available since: 5.0.0
Like RedisModule_DictGetC() but takes the key as a RedisModuleString.
RedisModule_DictDelC
int RedisModule_DictDelC(RedisModuleDict *d,
void *key,
size_t keylen,
void *oldval);
Available since: 5.0.0
Remove the specified key from the dictionary, returning REDISMODULE_OK if
the key was found and deleted, or REDISMODULE_ERR if instead there was
no such key in the dictionary. When the operation is successful, if
'oldval' is not NULL, then '*oldval' is set to the value stored at the
key before it was deleted. Using this feature it is possible to get
a pointer to the value (for instance in order to release it), without
having to call RedisModule_DictGet() before deleting the key.
RedisModule_DictDel
int RedisModule_DictDel(RedisModuleDict *d,
RedisModuleString *key,
void *oldval);
Available since: 5.0.0
Like RedisModule_DictDelC() but gets the key as a RedisModuleString.
RedisModule_DictIteratorStartC
RedisModuleDictIter *RedisModule_DictIteratorStartC(RedisModuleDict *d,
const char *op,
void *key,
size_t keylen);
Available since: 5.0.0
Return an iterator, setup in order to start iterating from the specified key by applying the operator 'op', which is just a string specifying the comparison operator to use in order to seek the first element. The operators available are:
^– Seek the first (lexicographically smaller) key.$– Seek the last (lexicographically bigger) key.>– Seek the first element greater than the specified key.>=– Seek the first element greater or equal than the specified key.<– Seek the first element smaller than the specified key.<=– Seek the first element smaller or equal than the specified key.==– Seek the first element matching exactly the specified key.
Note that for ^ and $ the passed key is not used, and the user may
just pass NULL with a length of 0.
If the element to start the iteration cannot be seeked based on the
key and operator passed, RedisModule_DictNext() / Prev() will just return
REDISMODULE_ERR at the first call, otherwise they'll produce elements.
RedisModule_DictIteratorStart
RedisModuleDictIter *RedisModule_DictIteratorStart(RedisModuleDict *d,
const char *op,
RedisModuleString *key);
Available since: 5.0.0
Exactly like RedisModule_DictIteratorStartC, but the key is passed as a
RedisModuleString.
RedisModule_DictIteratorStop
void RedisModule_DictIteratorStop(RedisModuleDictIter *di);
Available since: 5.0.0
Release the iterator created with RedisModule_DictIteratorStart(). This call
is mandatory otherwise a memory leak is introduced in the module.
RedisModule_DictIteratorReseekC
int RedisModule_DictIteratorReseekC(RedisModuleDictIter *di,
const char *op,
void *key,
size_t keylen);
Available since: 5.0.0
After its creation with RedisModule_DictIteratorStart(), it is possible to
change the currently selected element of the iterator by using this
API call. The result based on the operator and key is exactly like
the function RedisModule_DictIteratorStart(), however in this case the
return value is just REDISMODULE_OK in case the seeked element was found,
or REDISMODULE_ERR in case it was not possible to seek the specified
element. It is possible to reseek an iterator as many times as you want.
RedisModule_DictIteratorReseek
int RedisModule_DictIteratorReseek(RedisModuleDictIter *di,
const char *op,
RedisModuleString *key);
Available since: 5.0.0
Like RedisModule_DictIteratorReseekC() but takes the key as as a
RedisModuleString.
RedisModule_DictNextC
void *RedisModule_DictNextC(RedisModuleDictIter *di,
size_t *keylen,
void **dataptr);
Available since: 5.0.0
Return the current item of the dictionary iterator di and steps to the
next element. If the iterator already yield the last element and there
are no other elements to return, NULL is returned, otherwise a pointer
to a string representing the key is provided, and the *keylen length
is set by reference (if keylen is not NULL). The *dataptr, if not NULL
is set to the value of the pointer stored at the returned key as auxiliary
data (as set by the RedisModule_DictSet API).
Usage example:
... create the iterator here ...
char *key;
void *data;
while((key = RedisModule_DictNextC(iter,&keylen,&data)) != NULL) {
printf("%.*s %p\n", (int)keylen, key, data);
}
The returned pointer is of type void because sometimes it makes sense
to cast it to a char* sometimes to an unsigned char* depending on the
fact it contains or not binary data, so this API ends being more
comfortable to use.
The validity of the returned pointer is until the next call to the next/prev iterator step. Also the pointer is no longer valid once the iterator is released.
RedisModule_DictPrevC
void *RedisModule_DictPrevC(RedisModuleDictIter *di,
size_t *keylen,
void **dataptr);
Available since: 5.0.0
This function is exactly like RedisModule_DictNext() but after returning
the currently selected element in the iterator, it selects the previous
element (lexicographically smaller) instead of the next one.
RedisModule_DictNext
RedisModuleString *RedisModule_DictNext(RedisModuleCtx *ctx,
RedisModuleDictIter *di,
void **dataptr);
Available since: 5.0.0
Like RedisModuleNextC(), but instead of returning an internally allocated
buffer and key length, it returns directly a module string object allocated
in the specified context 'ctx' (that may be NULL exactly like for the main
API RedisModule_CreateString).
The returned string object should be deallocated after use, either manually or by using a context that has automatic memory management active.
RedisModule_DictPrev
RedisModuleString *RedisModule_DictPrev(RedisModuleCtx *ctx,
RedisModuleDictIter *di,
void **dataptr);
Available since: 5.0.0
Like RedisModule_DictNext() but after returning the currently selected
element in the iterator, it selects the previous element (lexicographically
smaller) instead of the next one.
RedisModule_DictCompareC
int RedisModule_DictCompareC(RedisModuleDictIter *di,
const char *op,
void *key,
size_t keylen);
Available since: 5.0.0
Compare the element currently pointed by the iterator to the specified
element given by key/keylen, according to the operator 'op' (the set of
valid operators are the same valid for RedisModule_DictIteratorStart).
If the comparison is successful the command returns REDISMODULE_OK
otherwise REDISMODULE_ERR is returned.
This is useful when we want to just emit a lexicographical range, so in the loop, as we iterate elements, we can also check if we are still on range.
The function return REDISMODULE_ERR if the iterator reached the
end of elements condition as well.
RedisModule_DictCompare
int RedisModule_DictCompare(RedisModuleDictIter *di,
const char *op,
RedisModuleString *key);
Available since: 5.0.0
Like RedisModule_DictCompareC but gets the key to compare with the current
iterator key as a RedisModuleString.
Modules Info fields
RedisModule_InfoAddSection
int RedisModule_InfoAddSection(RedisModuleInfoCtx *ctx, const char *name);
Available since: 6.0.0
Used to start a new section, before adding any fields. the section name will
be prefixed by <modulename>_ and must only include A-Z,a-z,0-9.
NULL or empty string indicates the default section (only <modulename>) is used.
When return value is REDISMODULE_ERR, the section should and will be skipped.
RedisModule_InfoBeginDictField
int RedisModule_InfoBeginDictField(RedisModuleInfoCtx *ctx, const char *name);
Available since: 6.0.0
Starts a dict field, similar to the ones in INFO KEYSPACE. Use normal
RedisModule_InfoAddField* functions to add the items to this field, and
terminate with RedisModule_InfoEndDictField.
RedisModule_InfoEndDictField
int RedisModule_InfoEndDictField(RedisModuleInfoCtx *ctx);
Available since: 6.0.0
Ends a dict field, see RedisModule_InfoBeginDictField
RedisModule_InfoAddFieldString
int RedisModule_InfoAddFieldString(RedisModuleInfoCtx *ctx,
const char *field,
RedisModuleString *value);
Available since: 6.0.0
Used by RedisModuleInfoFunc to add info fields.
Each field will be automatically prefixed by <modulename>_.
Field names or values must not include \r\n or :.
RedisModule_InfoAddFieldCString
int RedisModule_InfoAddFieldCString(RedisModuleInfoCtx *ctx,
const char *field,
const char *value);
Available since: 6.0.0
See RedisModule_InfoAddFieldString().
RedisModule_InfoAddFieldDouble
int RedisModule_InfoAddFieldDouble(RedisModuleInfoCtx *ctx,
const char *field,
double value);
Available since: 6.0.0
See RedisModule_InfoAddFieldString().
RedisModule_InfoAddFieldLongLong
int RedisModule_InfoAddFieldLongLong(RedisModuleInfoCtx *ctx,
const char *field,
long long value);
Available since: 6.0.0
See RedisModule_InfoAddFieldString().
RedisModule_InfoAddFieldULongLong
int RedisModule_InfoAddFieldULongLong(RedisModuleInfoCtx *ctx,
const char *field,
unsigned long long value);
Available since: 6.0.0
See RedisModule_InfoAddFieldString().
RedisModule_RegisterInfoFunc
int RedisModule_RegisterInfoFunc(RedisModuleCtx *ctx, RedisModuleInfoFunc cb);
Available since: 6.0.0
Registers callback for the INFO command. The callback should add INFO fields
by calling the RedisModule_InfoAddField*() functions.
RedisModule_GetServerInfo
RedisModuleServerInfoData *RedisModule_GetServerInfo(RedisModuleCtx *ctx,
const char *section);
Available since: 6.0.0
Get information about the server similar to the one that returns from the
INFO command. This function takes an optional 'section' argument that may
be NULL. The return value holds the output and can be used with
RedisModule_ServerInfoGetField and alike to get the individual fields.
When done, it needs to be freed with RedisModule_FreeServerInfo or with the
automatic memory management mechanism if enabled.
RedisModule_FreeServerInfo
void RedisModule_FreeServerInfo(RedisModuleCtx *ctx,
RedisModuleServerInfoData *data);
Available since: 6.0.0
Free data created with RedisModule_GetServerInfo(). You need to pass the
context pointer 'ctx' only if the dictionary was created using the
context instead of passing NULL.
RedisModule_ServerInfoGetField
RedisModuleString *RedisModule_ServerInfoGetField(RedisModuleCtx *ctx,
RedisModuleServerInfoData *data,
const char* field);
Available since: 6.0.0
Get the value of a field from data collected with RedisModule_GetServerInfo(). You
need to pass the context pointer 'ctx' only if you want to use auto memory
mechanism to release the returned string. Return value will be NULL if the
field was not found.
RedisModule_ServerInfoGetFieldC
const char *RedisModule_ServerInfoGetFieldC(RedisModuleServerInfoData *data,
const char* field);
Available since: 6.0.0
Similar to RedisModule_ServerInfoGetField, but returns a char* which should not be freed but the caller.
RedisModule_ServerInfoGetFieldSigned
long long RedisModule_ServerInfoGetFieldSigned(RedisModuleServerInfoData *data,
const char* field,
int *out_err);
Available since: 6.0.0
Get the value of a field from data collected with RedisModule_GetServerInfo(). If the
field is not found, or is not numerical or out of range, return value will be
0, and the optional out_err argument will be set to REDISMODULE_ERR.
RedisModule_ServerInfoGetFieldUnsigned
unsigned long long RedisModule_ServerInfoGetFieldUnsigned(RedisModuleServerInfoData *data,
const char* field,
int *out_err);
Available since: 6.0.0
Get the value of a field from data collected with RedisModule_GetServerInfo(). If the
field is not found, or is not numerical or out of range, return value will be
0, and the optional out_err argument will be set to REDISMODULE_ERR.
RedisModule_ServerInfoGetFieldDouble
double RedisModule_ServerInfoGetFieldDouble(RedisModuleServerInfoData *data,
const char* field,
int *out_err);
Available since: 6.0.0
Get the value of a field from data collected with RedisModule_GetServerInfo(). If the
field is not found, or is not a double, return value will be 0, and the
optional out_err argument will be set to REDISMODULE_ERR.
Modules utility APIs
RedisModule_GetRandomBytes
void RedisModule_GetRandomBytes(unsigned char *dst, size_t len);
Available since: 5.0.0
Return random bytes using SHA1 in counter mode with a /dev/urandom initialized seed. This function is fast so can be used to generate many bytes without any effect on the operating system entropy pool. Currently this function is not thread safe.
RedisModule_GetRandomHexChars
void RedisModule_GetRandomHexChars(char *dst, size_t len);
Available since: 5.0.0
Like RedisModule_GetRandomBytes() but instead of setting the string to
random bytes the string is set to random characters in the in the
hex charset [0-9a-f].
Modules API exporting / importing
RedisModule_ExportSharedAPI
int RedisModule_ExportSharedAPI(RedisModuleCtx *ctx,
const char *apiname,
void *func);
Available since: 5.0.4
This function is called by a module in order to export some API with a
given name. Other modules will be able to use this API by calling the
symmetrical function RedisModule_GetSharedAPI() and casting the return value to
the right function pointer.
The function will return REDISMODULE_OK if the name is not already taken,
otherwise REDISMODULE_ERR will be returned and no operation will be
performed.
IMPORTANT: the apiname argument should be a string literal with static lifetime. The API relies on the fact that it will always be valid in the future.
RedisModule_GetSharedAPI
void *RedisModule_GetSharedAPI(RedisModuleCtx *ctx, const char *apiname);
Available since: 5.0.4
Request an exported API pointer. The return value is just a void pointer that the caller of this function will be required to cast to the right function pointer, so this is a private contract between modules.
If the requested API is not available then NULL is returned. Because modules can be loaded at different times with different order, this function calls should be put inside some module generic API registering step, that is called every time a module attempts to execute a command that requires external APIs: if some API cannot be resolved, the command should return an error.
Here is an example:
int ... myCommandImplementation() {
if (getExternalAPIs() == 0) {
reply with an error here if we cannot have the APIs
}
// Use the API:
myFunctionPointer(foo);
}
And the function registerAPI() is:
int getExternalAPIs(void) {
static int api_loaded = 0;
if (api_loaded != 0) return 1; // APIs already resolved.
myFunctionPointer = RedisModule_GetOtherModuleAPI("...");
if (myFunctionPointer == NULL) return 0;
return 1;
}
Module Command Filter API
RedisModule_RegisterCommandFilter
RedisModuleCommandFilter *RedisModule_RegisterCommandFilter(RedisModuleCtx *ctx,
RedisModuleCommandFilterFunc callback,
int flags);
Available since: 5.0.5
Register a new command filter function.
Command filtering makes it possible for modules to extend Redis by plugging into the execution flow of all commands.
A registered filter gets called before Redis executes any command. This includes both core Redis commands and commands registered by any module. The filter applies in all execution paths including:
- Invocation by a client.
- Invocation through
RedisModule_Call()by any module. - Invocation through Lua 'redis.`call()``.
- Replication of a command from a master.
The filter executes in a special filter context, which is different and more
limited than a RedisModuleCtx. Because the filter affects any command, it
must be implemented in a very efficient way to reduce the performance impact
on Redis. All Redis Module API calls that require a valid context (such as
RedisModule_Call(), RedisModule_OpenKey(), etc.) are not supported in a
filter context.
The RedisModuleCommandFilterCtx can be used to inspect or modify the
executed command and its arguments. As the filter executes before Redis
begins processing the command, any change will affect the way the command is
processed. For example, a module can override Redis commands this way:
- Register a
MODULE.SETcommand which implements an extended version of the RedisSETcommand. - Register a command filter which detects invocation of
SETon a specific pattern of keys. Once detected, the filter will replace the first argument fromSETtoMODULE.SET. - When filter execution is complete, Redis considers the new command name and therefore executes the module's own command.
Note that in the above use case, if MODULE.SET itself uses
RedisModule_Call() the filter will be applied on that call as well. If
that is not desired, the REDISMODULE_CMDFILTER_NOSELF flag can be set when
registering the filter.
The REDISMODULE_CMDFILTER_NOSELF flag prevents execution flows that
originate from the module's own RM_Call() from reaching the filter. This
flag is effective for all execution flows, including nested ones, as long as
the execution begins from the module's command context or a thread-safe
context that is associated with a blocking command.
Detached thread-safe contexts are not associated with the module and cannot be protected by this flag.
If multiple filters are registered (by the same or different modules), they are executed in the order of registration.
RedisModule_UnregisterCommandFilter
int RedisModule_UnregisterCommandFilter(RedisModuleCtx *ctx,
RedisModuleCommandFilter *filter);
Available since: 5.0.5
Unregister a command filter.
RedisModule_CommandFilterArgsCount
int RedisModule_CommandFilterArgsCount(RedisModuleCommandFilterCtx *fctx);
Available since: 5.0.5
Return the number of arguments a filtered command has. The number of arguments include the command itself.
RedisModule_CommandFilterArgGet
RedisModuleString *RedisModule_CommandFilterArgGet(RedisModuleCommandFilterCtx *fctx,
int pos);
Available since: 5.0.5
Return the specified command argument. The first argument (position 0) is the command itself, and the rest are user-provided args.
RedisModule_CommandFilterArgInsert
int RedisModule_CommandFilterArgInsert(RedisModuleCommandFilterCtx *fctx,
int pos,
RedisModuleString *arg);
Available since: 5.0.5
Modify the filtered command by inserting a new argument at the specified
position. The specified RedisModuleString argument may be used by Redis
after the filter context is destroyed, so it must not be auto-memory
allocated, freed or used elsewhere.
RedisModule_CommandFilterArgReplace
int RedisModule_CommandFilterArgReplace(RedisModuleCommandFilterCtx *fctx,
int pos,
RedisModuleString *arg);
Available since: 5.0.5
Modify the filtered command by replacing an existing argument with a new one.
The specified RedisModuleString argument may be used by Redis after the
filter context is destroyed, so it must not be auto-memory allocated, freed
or used elsewhere.
RedisModule_CommandFilterArgDelete
int RedisModule_CommandFilterArgDelete(RedisModuleCommandFilterCtx *fctx,
int pos);
Available since: 5.0.5
Modify the filtered command by deleting an argument at the specified position.
RedisModule_MallocSize
size_t RedisModule_MallocSize(void* ptr);
Available since: 6.0.0
For a given pointer allocated via RedisModule_Alloc() or
RedisModule_Realloc(), return the amount of memory allocated for it.
Note that this may be different (larger) than the memory we allocated
with the allocation calls, since sometimes the underlying allocator
will allocate more memory.
RedisModule_MallocSizeString
size_t RedisModule_MallocSizeString(RedisModuleString* str);
Available since: 7.0.0
Same as RedisModule_MallocSize, except it works on RedisModuleString pointers.
RedisModule_MallocSizeDict
size_t RedisModule_MallocSizeDict(RedisModuleDict* dict);
Available since: 7.0.0
Same as RedisModule_MallocSize, except it works on RedisModuleDict pointers.
Note that the returned value is only the overhead of the underlying structures,
it does not include the allocation size of the keys and values.
RedisModule_GetUsedMemoryRatio
float RedisModule_GetUsedMemoryRatio();
Available since: 6.0.0
Return the a number between 0 to 1 indicating the amount of memory currently used, relative to the Redis "maxmemory" configuration.
- 0 - No memory limit configured.
- Between 0 and 1 - The percentage of the memory used normalized in 0-1 range.
- Exactly 1 - Memory limit reached.
- Greater 1 - More memory used than the configured limit.
Scanning keyspace and hashes
RedisModule_ScanCursorCreate
RedisModuleScanCursor *RedisModule_ScanCursorCreate();
Available since: 6.0.0
Create a new cursor to be used with RedisModule_Scan
RedisModule_ScanCursorRestart
void RedisModule_ScanCursorRestart(RedisModuleScanCursor *cursor);
Available since: 6.0.0
Restart an existing cursor. The keys will be rescanned.
RedisModule_ScanCursorDestroy
void RedisModule_ScanCursorDestroy(RedisModuleScanCursor *cursor);
Available since: 6.0.0
Destroy the cursor struct.
RedisModule_Scan
int RedisModule_Scan(RedisModuleCtx *ctx,
RedisModuleScanCursor *cursor,
RedisModuleScanCB fn,
void *privdata);
Available since: 6.0.0
Scan API that allows a module to scan all the keys and value in the selected db.
Callback for scan implementation.
void scan_callback(RedisModuleCtx *ctx, RedisModuleString *keyname,
RedisModuleKey *key, void *privdata);
ctx: the redis module context provided to for the scan.keyname: owned by the caller and need to be retained if used after this function.key: holds info on the key and value, it is provided as best effort, in some cases it might be NULL, in which case the user should (can) useRedisModule_OpenKey()(and CloseKey too). when it is provided, it is owned by the caller and will be free when the callback returns.privdata: the user data provided toRedisModule_Scan().
The way it should be used:
RedisModuleCursor *c = RedisModule_ScanCursorCreate();
while(RedisModule_Scan(ctx, c, callback, privateData));
RedisModule_ScanCursorDestroy(c);
It is also possible to use this API from another thread while the lock
is acquired during the actual call to RedisModule_Scan:
RedisModuleCursor *c = RedisModule_ScanCursorCreate();
RedisModule_ThreadSafeContextLock(ctx);
while(RedisModule_Scan(ctx, c, callback, privateData)){
RedisModule_ThreadSafeContextUnlock(ctx);
// do some background job
RedisModule_ThreadSafeContextLock(ctx);
}
RedisModule_ScanCursorDestroy(c);
The function will return 1 if there are more elements to scan and 0 otherwise, possibly setting errno if the call failed.
It is also possible to restart an existing cursor using RedisModule_ScanCursorRestart.
IMPORTANT: This API is very similar to the Redis SCAN command from the point of view of the guarantees it provides. This means that the API may report duplicated keys, but guarantees to report at least one time every key that was there from the start to the end of the scanning process.
NOTE: If you do database changes within the callback, you should be aware that the internal state of the database may change. For instance it is safe to delete or modify the current key, but may not be safe to delete any other key. Moreover playing with the Redis keyspace while iterating may have the effect of returning more duplicates. A safe pattern is to store the keys names you want to modify elsewhere, and perform the actions on the keys later when the iteration is complete. However this can cost a lot of memory, so it may make sense to just operate on the current key when possible during the iteration, given that this is safe.
RedisModule_ScanKey
int RedisModule_ScanKey(RedisModuleKey *key,
RedisModuleScanCursor *cursor,
RedisModuleScanKeyCB fn,
void *privdata);
Available since: 6.0.0
Scan api that allows a module to scan the elements in a hash, set or sorted set key
Callback for scan implementation.
void scan_callback(RedisModuleKey *key, RedisModuleString* field, RedisModuleString* value, void *privdata);
- key - the redis key context provided to for the scan.
- field - field name, owned by the caller and need to be retained if used after this function.
- value - value string or NULL for set type, owned by the caller and need to be retained if used after this function.
- privdata - the user data provided to
RedisModule_ScanKey.
The way it should be used:
RedisModuleCursor *c = RedisModule_ScanCursorCreate();
RedisModuleKey *key = RedisModule_OpenKey(...)
while(RedisModule_ScanKey(key, c, callback, privateData));
RedisModule_CloseKey(key);
RedisModule_ScanCursorDestroy(c);
It is also possible to use this API from another thread while the lock is acquired during
the actual call to RedisModule_ScanKey, and re-opening the key each time:
RedisModuleCursor *c = RedisModule_ScanCursorCreate();
RedisModule_ThreadSafeContextLock(ctx);
RedisModuleKey *key = RedisModule_OpenKey(...)
while(RedisModule_ScanKey(ctx, c, callback, privateData)){
RedisModule_CloseKey(key);
RedisModule_ThreadSafeContextUnlock(ctx);
// do some background job
RedisModule_ThreadSafeContextLock(ctx);
RedisModuleKey *key = RedisModule_OpenKey(...)
}
RedisModule_CloseKey(key);
RedisModule_ScanCursorDestroy(c);
The function will return 1 if there are more elements to scan and 0 otherwise,
possibly setting errno if the call failed.
It is also possible to restart an existing cursor using RedisModule_ScanCursorRestart.
NOTE: Certain operations are unsafe while iterating the object. For instance while the API guarantees to return at least one time all the elements that are present in the data structure consistently from the start to the end of the iteration (see HSCAN and similar commands documentation), the more you play with the elements, the more duplicates you may get. In general deleting the current element of the data structure is safe, while removing the key you are iterating is not safe.
Module fork API
RedisModule_Fork
int RedisModule_Fork(RedisModuleForkDoneHandler cb, void *user_data);
Available since: 6.0.0
Create a background child process with the current frozen snapshot of the
main process where you can do some processing in the background without
affecting / freezing the traffic and no need for threads and GIL locking.
Note that Redis allows for only one concurrent fork.
When the child wants to exit, it should call RedisModule_ExitFromChild.
If the parent wants to kill the child it should call RedisModule_KillForkChild
The done handler callback will be executed on the parent process when the
child existed (but not when killed)
Return: -1 on failure, on success the parent process will get a positive PID
of the child, and the child process will get 0.
RedisModule_SendChildHeartbeat
void RedisModule_SendChildHeartbeat(double progress);
Available since: 6.2.0
The module is advised to call this function from the fork child once in a while,
so that it can report progress and COW memory to the parent which will be
reported in INFO.
The progress argument should between 0 and 1, or -1 when not available.
RedisModule_ExitFromChild
int RedisModule_ExitFromChild(int retcode);
Available since: 6.0.0
Call from the child process when you want to terminate it. retcode will be provided to the done handler executed on the parent process.
RedisModule_KillForkChild
int RedisModule_KillForkChild(int child_pid);
Available since: 6.0.0
Can be used to kill the forked child process from the parent process.
child_pid would be the return value of RedisModule_Fork.
Server hooks implementation
RedisModule_SubscribeToServerEvent
int RedisModule_SubscribeToServerEvent(RedisModuleCtx *ctx,
RedisModuleEvent event,
RedisModuleEventCallback callback);
Available since: 6.0.0
Register to be notified, via a callback, when the specified server event happens. The callback is called with the event as argument, and an additional argument which is a void pointer and should be cased to a specific type that is event-specific (but many events will just use NULL since they do not have additional information to pass to the callback).
If the callback is NULL and there was a previous subscription, the module will be unsubscribed. If there was a previous subscription and the callback is not null, the old callback will be replaced with the new one.
The callback must be of this type:
int (*RedisModuleEventCallback)(RedisModuleCtx *ctx,
RedisModuleEvent eid,
uint64_t subevent,
void *data);
The 'ctx' is a normal Redis module context that the callback can use in order to call other modules APIs. The 'eid' is the event itself, this is only useful in the case the module subscribed to multiple events: using the 'id' field of this structure it is possible to check if the event is one of the events we registered with this callback. The 'subevent' field depends on the event that fired.
Finally the 'data' pointer may be populated, only for certain events, with more relevant data.
Here is a list of events you can use as 'eid' and related sub events:
RedisModuleEvent_ReplicationRoleChanged:This event is called when the instance switches from master to replica or the other way around, however the event is also called when the replica remains a replica but starts to replicate with a different master.
The following sub events are available:
REDISMODULE_SUBEVENT_REPLROLECHANGED_NOW_MASTERREDISMODULE_SUBEVENT_REPLROLECHANGED_NOW_REPLICA
The 'data' field can be casted by the callback to a
RedisModuleReplicationInfostructure with the following fields:int master; // true if master, false if replica char *masterhost; // master instance hostname for NOW_REPLICA int masterport; // master instance port for NOW_REPLICA char *replid1; // Main replication ID char *replid2; // Secondary replication ID uint64_t repl1_offset; // Main replication offset uint64_t repl2_offset; // Offset of replid2 validityRedisModuleEvent_PersistenceThis event is called when RDB saving or AOF rewriting starts and ends. The following sub events are available:
REDISMODULE_SUBEVENT_PERSISTENCE_RDB_STARTREDISMODULE_SUBEVENT_PERSISTENCE_AOF_STARTREDISMODULE_SUBEVENT_PERSISTENCE_SYNC_RDB_STARTREDISMODULE_SUBEVENT_PERSISTENCE_SYNC_AOF_STARTREDISMODULE_SUBEVENT_PERSISTENCE_ENDEDREDISMODULE_SUBEVENT_PERSISTENCE_FAILED
The above events are triggered not just when the user calls the relevant commands like BGSAVE, but also when a saving operation or AOF rewriting occurs because of internal server triggers. The SYNC_RDB_START sub events are happening in the foreground due to SAVE command, FLUSHALL, or server shutdown, and the other RDB and AOF sub events are executed in a background fork child, so any action the module takes can only affect the generated AOF or RDB, but will not be reflected in the parent process and affect connected clients and commands. Also note that the AOF_START sub event may end up saving RDB content in case of an AOF with rdb-preamble.
RedisModuleEvent_FlushDBThe FLUSHALL, FLUSHDB or an internal flush (for instance because of replication, after the replica synchronization) happened. The following sub events are available:
REDISMODULE_SUBEVENT_FLUSHDB_STARTREDISMODULE_SUBEVENT_FLUSHDB_END
The data pointer can be casted to a RedisModuleFlushInfo structure with the following fields:
int32_t async; // True if the flush is done in a thread. // See for instance FLUSHALL ASYNC. // In this case the END callback is invoked // immediately after the database is put // in the free list of the thread. int32_t dbnum; // Flushed database number, -1 for all the DBs // in the case of the FLUSHALL operation.The start event is called before the operation is initiated, thus allowing the callback to call DBSIZE or other operation on the yet-to-free keyspace.
RedisModuleEvent_LoadingCalled on loading operations: at startup when the server is started, but also after a first synchronization when the replica is loading the RDB file from the master. The following sub events are available:
REDISMODULE_SUBEVENT_LOADING_RDB_STARTREDISMODULE_SUBEVENT_LOADING_AOF_STARTREDISMODULE_SUBEVENT_LOADING_REPL_STARTREDISMODULE_SUBEVENT_LOADING_ENDEDREDISMODULE_SUBEVENT_LOADING_FAILED
Note that AOF loading may start with an RDB data in case of rdb-preamble, in which case you'll only receive an AOF_START event.
RedisModuleEvent_ClientChangeCalled when a client connects or disconnects. The data pointer can be casted to a RedisModuleClientInfo structure, documented in RedisModule_GetClientInfoById(). The following sub events are available:
REDISMODULE_SUBEVENT_CLIENT_CHANGE_CONNECTEDREDISMODULE_SUBEVENT_CLIENT_CHANGE_DISCONNECTED
RedisModuleEvent_ShutdownThe server is shutting down. No subevents are available.
RedisModuleEvent_ReplicaChangeThis event is called when the instance (that can be both a master or a replica) get a new online replica, or lose a replica since it gets disconnected. The following sub events are available:
REDISMODULE_SUBEVENT_REPLICA_CHANGE_ONLINEREDISMODULE_SUBEVENT_REPLICA_CHANGE_OFFLINE
No additional information is available so far: future versions of Redis will have an API in order to enumerate the replicas connected and their state.
RedisModuleEvent_CronLoopThis event is called every time Redis calls the serverCron() function in order to do certain bookkeeping. Modules that are required to do operations from time to time may use this callback. Normally Redis calls this function 10 times per second, but this changes depending on the "hz" configuration. No sub events are available.
The data pointer can be casted to a RedisModuleCronLoop structure with the following fields:
int32_t hz; // Approximate number of events per second.RedisModuleEvent_MasterLinkChangeThis is called for replicas in order to notify when the replication link becomes functional (up) with our master, or when it goes down. Note that the link is not considered up when we just connected to the master, but only if the replication is happening correctly. The following sub events are available:
REDISMODULE_SUBEVENT_MASTER_LINK_UPREDISMODULE_SUBEVENT_MASTER_LINK_DOWN
RedisModuleEvent_ModuleChangeThis event is called when a new module is loaded or one is unloaded. The following sub events are available:
REDISMODULE_SUBEVENT_MODULE_LOADEDREDISMODULE_SUBEVENT_MODULE_UNLOADED
The data pointer can be casted to a RedisModuleModuleChange structure with the following fields:
const char* module_name; // Name of module loaded or unloaded. int32_t module_version; // Module version.RedisModuleEvent_LoadingProgressThis event is called repeatedly called while an RDB or AOF file is being loaded. The following sub events are available:
REDISMODULE_SUBEVENT_LOADING_PROGRESS_RDBREDISMODULE_SUBEVENT_LOADING_PROGRESS_AOF
The data pointer can be casted to a RedisModuleLoadingProgress structure with the following fields:
int32_t hz; // Approximate number of events per second. int32_t progress; // Approximate progress between 0 and 1024, // or -1 if unknown.RedisModuleEvent_SwapDBThis event is called when a SWAPDB command has been successfully Executed. For this event call currently there is no subevents available.
The data pointer can be casted to a RedisModuleSwapDbInfo structure with the following fields:
int32_t dbnum_first; // Swap Db first dbnum int32_t dbnum_second; // Swap Db second dbnumRedisModuleEvent_ReplBackupWARNING: Replication Backup events are deprecated since Redis 7.0 and are never fired. See RedisModuleEvent_ReplAsyncLoad for understanding how Async Replication Loading events are now triggered when repl-diskless-load is set to swapdb.
Called when repl-diskless-load config is set to swapdb, And redis needs to backup the current database for the possibility to be restored later. A module with global data and maybe with aux_load and aux_save callbacks may need to use this notification to backup / restore / discard its globals. The following sub events are available:
REDISMODULE_SUBEVENT_REPL_BACKUP_CREATEREDISMODULE_SUBEVENT_REPL_BACKUP_RESTOREREDISMODULE_SUBEVENT_REPL_BACKUP_DISCARD
RedisModuleEvent_ReplAsyncLoadCalled when repl-diskless-load config is set to swapdb and a replication with a master of same data set history (matching replication ID) occurs. In which case redis serves current data set while loading new database in memory from socket. Modules must have declared they support this mechanism in order to activate it, through REDISMODULE_OPTIONS_HANDLE_REPL_ASYNC_LOAD flag. The following sub events are available:
REDISMODULE_SUBEVENT_REPL_ASYNC_LOAD_STARTEDREDISMODULE_SUBEVENT_REPL_ASYNC_LOAD_ABORTEDREDISMODULE_SUBEVENT_REPL_ASYNC_LOAD_COMPLETED
RedisModuleEvent_ForkChildCalled when a fork child (AOFRW, RDBSAVE, module fork...) is born/dies The following sub events are available:
REDISMODULE_SUBEVENT_FORK_CHILD_BORNREDISMODULE_SUBEVENT_FORK_CHILD_DIED
RedisModuleEvent_EventLoopCalled on each event loop iteration, once just before the event loop goes to sleep or just after it wakes up. The following sub events are available:
REDISMODULE_SUBEVENT_EVENTLOOP_BEFORE_SLEEPREDISMODULE_SUBEVENT_EVENTLOOP_AFTER_SLEEP
RedisModule_Event_ConfigCalled when a configuration event happens The following sub events are available:
REDISMODULE_SUBEVENT_CONFIG_CHANGE
The data pointer can be casted to a RedisModuleConfigChange structure with the following fields:
const char **config_names; // An array of C string pointers containing the // name of each modified configuration item uint32_t num_changes; // The number of elements in the config_names array
The function returns REDISMODULE_OK if the module was successfully subscribed
for the specified event. If the API is called from a wrong context or unsupported event
is given then REDISMODULE_ERR is returned.
RedisModule_IsSubEventSupported
int RedisModule_IsSubEventSupported(RedisModuleEvent event, int64_t subevent);
Available since: 6.0.9
For a given server event and subevent, return zero if the subevent is not supported and non-zero otherwise.
Module Configurations API
RedisModule_RegisterStringConfig
int RedisModule_RegisterStringConfig(RedisModuleCtx *ctx,
const char *name,
const char *default_val,
unsigned int flags,
RedisModuleConfigGetStringFunc getfn,
RedisModuleConfigSetStringFunc setfn,
RedisModuleConfigApplyFunc applyfn,
void *privdata);
Available since: 7.0.0
Create a string config that Redis users can interact with via the Redis config file,
CONFIG SET, CONFIG GET, and CONFIG REWRITE commands.
The actual config value is owned by the module, and the getfn, setfn and optional
applyfn callbacks that are provided to Redis in order to access or manipulate the
value. The getfn callback retrieves the value from the module, while the setfn
callback provides a value to be stored into the module config.
The optional applyfn callback is called after a CONFIG SET command modified one or
more configs using the setfn callback and can be used to atomically apply a config
after several configs were changed together.
If there are multiple configs with applyfn callbacks set by a single CONFIG SET
command, they will be deduplicated if their applyfn function and privdata pointers
are identical, and the callback will only be run once.
Both the setfn and applyfn can return an error if the provided value is invalid or
cannot be used.
The config also declares a type for the value that is validated by Redis and
provided to the module. The config system provides the following types:
- Redis String: Binary safe string data.
- Enum: One of a finite number of string tokens, provided during registration.
- Numeric: 64 bit signed integer, which also supports min and max values.
- Bool: Yes or no value.
The setfn callback is expected to return REDISMODULE_OK when the value is successfully
applied. It can also return REDISMODULE_ERR if the value can't be applied, and the
*err pointer can be set with a RedisModuleString error message to provide to the client.
This RedisModuleString will be freed by redis after returning from the set callback.
All configs are registered with a name, a type, a default value, private data that is made available in the callbacks, as well as several flags that modify the behavior of the config. The name must only contain alphanumeric characters or dashes. The supported flags are:
REDISMODULE_CONFIG_DEFAULT: The default flags for a config. This creates a config that can be modified after startup.REDISMODULE_CONFIG_IMMUTABLE: This config can only be provided loading time.REDISMODULE_CONFIG_SENSITIVE: The value stored in this config is redacted from all logging.REDISMODULE_CONFIG_HIDDEN: The name is hidden fromCONFIG GETwith pattern matching.REDISMODULE_CONFIG_PROTECTED: This config will be only be modifiable based off the value of enable-protected-configs.REDISMODULE_CONFIG_DENY_LOADING: This config is not modifiable while the server is loading data.REDISMODULE_CONFIG_MEMORY: For numeric configs, this config will convert data unit notations into their byte equivalent.REDISMODULE_CONFIG_BITFLAGS: For enum configs, this config will allow multiple entries to be combined as bit flags.
Default values are used on startup to set the value if it is not provided via the config file or command line. Default values are also used to compare to on a config rewrite.
Notes:
- On string config sets that the string passed to the set callback will be freed after execution and the module must retain it.
- On string config gets the string will not be consumed and will be valid after execution.
Example implementation:
RedisModuleString *strval;
int adjustable = 1;
RedisModuleString *getStringConfigCommand(const char *name, void *privdata) {
return strval;
}
int setStringConfigCommand(const char *name, RedisModuleString *new, void *privdata, RedisModuleString **err) {
if (adjustable) {
RedisModule_Free(strval);
RedisModule_RetainString(NULL, new);
strval = new;
return REDISMODULE_OK;
}
*err = RedisModule_CreateString(NULL, "Not adjustable.", 15);
return REDISMODULE_ERR;
}
...
RedisModule_RegisterStringConfig(ctx, "string", NULL, REDISMODULE_CONFIG_DEFAULT, getStringConfigCommand, setStringConfigCommand, NULL, NULL);
If the registration fails, REDISMODULE_ERR is returned and one of the following
errno is set:
- EINVAL: The provided flags are invalid for the registration or the name of the config contains invalid characters.
- EALREADY: The provided configuration name is already used.
RedisModule_RegisterBoolConfig
int RedisModule_RegisterBoolConfig(RedisModuleCtx *ctx,
const char *name,
int default_val,
unsigned int flags,
RedisModuleConfigGetBoolFunc getfn,
RedisModuleConfigSetBoolFunc setfn,
RedisModuleConfigApplyFunc applyfn,
void *privdata);
Available since: 7.0.0
Create a bool config that server clients can interact with via the
CONFIG SET, CONFIG GET, and CONFIG REWRITE commands. See
RedisModule_RegisterStringConfig for detailed information about configs.
RedisModule_RegisterEnumConfig
int RedisModule_RegisterEnumConfig(RedisModuleCtx *ctx,
const char *name,
int default_val,
unsigned int flags,
const char **enum_values,
const int *int_values,
int num_enum_vals,
RedisModuleConfigGetEnumFunc getfn,
RedisModuleConfigSetEnumFunc setfn,
RedisModuleConfigApplyFunc applyfn,
void *privdata);
Available since: 7.0.0
Create an enum config that server clients can interact with via the
CONFIG SET, CONFIG GET, and CONFIG REWRITE commands.
Enum configs are a set of string tokens to corresponding integer values, where
the string value is exposed to Redis clients but the value passed Redis and the
module is the integer value. These values are defined in enum_values, an array
of null-terminated c strings, and int_vals, an array of enum values who has an
index partner in enum_values.
Example Implementation:
const char *enum_vals[3] = {"first", "second", "third"};
const int int_vals[3] = {0, 2, 4};
int enum_val = 0;
int getEnumConfigCommand(const char *name, void *privdata) {
return enum_val;
}
int setEnumConfigCommand(const char *name, int val, void *privdata, const char **err) {
enum_val = val;
return REDISMODULE_OK;
}
...
RedisModule_RegisterEnumConfig(ctx, "enum", 0, REDISMODULE_CONFIG_DEFAULT, enum_vals, int_vals, 3, getEnumConfigCommand, setEnumConfigCommand, NULL, NULL);
See RedisModule_RegisterStringConfig for detailed general information about configs.
RedisModule_RegisterNumericConfig
int RedisModule_RegisterNumericConfig(RedisModuleCtx *ctx,
const char *name,
long long default_val,
unsigned int flags,
long long min,
long long max,
RedisModuleConfigGetNumericFunc getfn,
RedisModuleConfigSetNumericFunc setfn,
RedisModuleConfigApplyFunc applyfn,
void *privdata);
Available since: 7.0.0
Create an integer config that server clients can interact with via the
CONFIG SET, CONFIG GET, and CONFIG REWRITE commands. See
RedisModule_RegisterStringConfig for detailed information about configs.
RedisModule_LoadConfigs
int RedisModule_LoadConfigs(RedisModuleCtx *ctx);
Available since: 7.0.0
Applies all pending configurations on the module load. This should be called
after all of the configurations have been registered for the module inside of RedisModule_OnLoad.
This API needs to be called when configurations are provided in either MODULE LOADEX
or provided as startup arguments.
Key eviction API
RedisModule_SetLRU
int RedisModule_SetLRU(RedisModuleKey *key, mstime_t lru_idle);
Available since: 6.0.0
Set the key last access time for LRU based eviction. not relevant if the
servers's maxmemory policy is LFU based. Value is idle time in milliseconds.
returns REDISMODULE_OK if the LRU was updated, REDISMODULE_ERR otherwise.
RedisModule_GetLRU
int RedisModule_GetLRU(RedisModuleKey *key, mstime_t *lru_idle);
Available since: 6.0.0
Gets the key last access time.
Value is idletime in milliseconds or -1 if the server's eviction policy is
LFU based.
returns REDISMODULE_OK if when key is valid.
RedisModule_SetLFU
int RedisModule_SetLFU(RedisModuleKey *key, long long lfu_freq);
Available since: 6.0.0
Set the key access frequency. only relevant if the server's maxmemory policy
is LFU based.
The frequency is a logarithmic counter that provides an indication of
the access frequencyonly (must be <= 255).
returns REDISMODULE_OK if the LFU was updated, REDISMODULE_ERR otherwise.
RedisModule_GetLFU
int RedisModule_GetLFU(RedisModuleKey *key, long long *lfu_freq);
Available since: 6.0.0
Gets the key access frequency or -1 if the server's eviction policy is not
LFU based.
returns REDISMODULE_OK if when key is valid.
Miscellaneous APIs
RedisModule_GetContextFlagsAll
int RedisModule_GetContextFlagsAll();
Available since: 6.0.9
Returns the full ContextFlags mask, using the return value the module can check if a certain set of flags are supported by the redis server version in use. Example:
int supportedFlags = RM_GetContextFlagsAll();
if (supportedFlags & REDISMODULE_CTX_FLAGS_MULTI) {
// REDISMODULE_CTX_FLAGS_MULTI is supported
} else{
// REDISMODULE_CTX_FLAGS_MULTI is not supported
}
RedisModule_GetKeyspaceNotificationFlagsAll
int RedisModule_GetKeyspaceNotificationFlagsAll();
Available since: 6.0.9
Returns the full KeyspaceNotification mask, using the return value the module can check if a certain set of flags are supported by the redis server version in use. Example:
int supportedFlags = RM_GetKeyspaceNotificationFlagsAll();
if (supportedFlags & REDISMODULE_NOTIFY_LOADED) {
// REDISMODULE_NOTIFY_LOADED is supported
} else{
// REDISMODULE_NOTIFY_LOADED is not supported
}
RedisModule_GetServerVersion
int RedisModule_GetServerVersion();
Available since: 6.0.9
Return the redis version in format of 0x00MMmmpp. Example for 6.0.7 the return value will be 0x00060007.
RedisModule_GetTypeMethodVersion
int RedisModule_GetTypeMethodVersion();
Available since: 6.2.0
Return the current redis-server runtime value of REDISMODULE_TYPE_METHOD_VERSION.
You can use that when calling RedisModule_CreateDataType to know which fields of
RedisModuleTypeMethods are gonna be supported and which will be ignored.
RedisModule_ModuleTypeReplaceValue
int RedisModule_ModuleTypeReplaceValue(RedisModuleKey *key,
moduleType *mt,
void *new_value,
void **old_value);
Available since: 6.0.0
Replace the value assigned to a module type.
The key must be open for writing, have an existing value, and have a moduleType that matches the one specified by the caller.
Unlike RedisModule_ModuleTypeSetValue() which will free the old value, this function
simply swaps the old value with the new value.
The function returns REDISMODULE_OK on success, REDISMODULE_ERR on errors
such as:
- Key is not opened for writing.
- Key is not a module data type key.
- Key is a module datatype other than 'mt'.
If old_value is non-NULL, the old value is returned by reference.
RedisModule_GetCommandKeysWithFlags
int *RedisModule_GetCommandKeysWithFlags(RedisModuleCtx *ctx,
RedisModuleString **argv,
int argc,
int *num_keys,
int **out_flags);
Available since: 7.0.0
For a specified command, parse its arguments and return an array that
contains the indexes of all key name arguments. This function is
essentially a more efficient way to do COMMAND GETKEYS.
The out_flags argument is optional, and can be set to NULL.
When provided it is filled with REDISMODULE_CMD_KEY_ flags in matching
indexes with the key indexes of the returned array.
A NULL return value indicates the specified command has no keys, or an error condition. Error conditions are indicated by setting errno as follows:
- ENOENT: Specified command does not exist.
- EINVAL: Invalid command arity specified.
NOTE: The returned array is not a Redis Module object so it does not
get automatically freed even when auto-memory is used. The caller
must explicitly call RedisModule_Free() to free it, same as the out_flags pointer if
used.
RedisModule_GetCommandKeys
int *RedisModule_GetCommandKeys(RedisModuleCtx *ctx,
RedisModuleString **argv,
int argc,
int *num_keys);
Available since: 6.0.9
Identinal to RedisModule_GetCommandKeysWithFlags when flags are not needed.
RedisModule_GetCurrentCommandName
const char *RedisModule_GetCurrentCommandName(RedisModuleCtx *ctx);
Available since: 6.2.5
Return the name of the command currently running
Defrag API
RedisModule_RegisterDefragFunc
int RedisModule_RegisterDefragFunc(RedisModuleCtx *ctx,
RedisModuleDefragFunc cb);
Available since: 6.2.0
Register a defrag callback for global data, i.e. anything that the module may allocate that is not tied to a specific data type.
RedisModule_DefragShouldStop
int RedisModule_DefragShouldStop(RedisModuleDefragCtx *ctx);
Available since: 6.2.0
When the data type defrag callback iterates complex structures, this function should be called periodically. A zero (false) return indicates the callback may continue its work. A non-zero value (true) indicates it should stop.
When stopped, the callback may use RedisModule_DefragCursorSet() to store its
position so it can later use RedisModule_DefragCursorGet() to resume defragging.
When stopped and more work is left to be done, the callback should return 1. Otherwise, it should return 0.
NOTE: Modules should consider the frequency in which this function is called, so it generally makes sense to do small batches of work in between calls.
RedisModule_DefragCursorSet
int RedisModule_DefragCursorSet(RedisModuleDefragCtx *ctx,
unsigned long cursor);
Available since: 6.2.0
Store an arbitrary cursor value for future re-use.
This should only be called if RedisModule_DefragShouldStop() has returned a non-zero
value and the defrag callback is about to exit without fully iterating its
data type.
This behavior is reserved to cases where late defrag is performed. Late
defrag is selected for keys that implement the free_effort callback and
return a free_effort value that is larger than the defrag
'active-defrag-max-scan-fields' configuration directive.
Smaller keys, keys that do not implement free_effort or the global
defrag callback are not called in late-defrag mode. In those cases, a
call to this function will return REDISMODULE_ERR.
The cursor may be used by the module to represent some progress into the module's data type. Modules may also store additional cursor-related information locally and use the cursor as a flag that indicates when traversal of a new key begins. This is possible because the API makes a guarantee that concurrent defragmentation of multiple keys will not be performed.
RedisModule_DefragCursorGet
int RedisModule_DefragCursorGet(RedisModuleDefragCtx *ctx,
unsigned long *cursor);
Available since: 6.2.0
Fetch a cursor value that has been previously stored using RedisModule_DefragCursorSet().
If not called for a late defrag operation, REDISMODULE_ERR will be returned and
the cursor should be ignored. See RedisModule_DefragCursorSet() for more details on
defrag cursors.
RedisModule_DefragAlloc
void *RedisModule_DefragAlloc(RedisModuleDefragCtx *ctx, void *ptr);
Available since: 6.2.0
Defrag a memory allocation previously allocated by RedisModule_Alloc, RedisModule_Calloc, etc.
The defragmentation process involves allocating a new memory block and copying
the contents to it, like realloc().
If defragmentation was not necessary, NULL is returned and the operation has no other effect.
If a non-NULL value is returned, the caller should use the new pointer instead of the old one and update any reference to the old pointer, which must not be used again.
RedisModule_DefragRedisModuleString
RedisModuleString *RedisModule_DefragRedisModuleString(RedisModuleDefragCtx *ctx,
RedisModuleString *str);
Available since: 6.2.0
Defrag a RedisModuleString previously allocated by RedisModule_Alloc, RedisModule_Calloc, etc.
See RedisModule_DefragAlloc() for more information on how the defragmentation process
works.
NOTE: It is only possible to defrag strings that have a single reference.
Typically this means strings retained with RedisModule_RetainString or RedisModule_HoldString
may not be defragmentable. One exception is command argvs which, if retained
by the module, will end up with a single reference (because the reference
on the Redis side is dropped as soon as the command callback returns).
RedisModule_GetKeyNameFromDefragCtx
const RedisModuleString *RedisModule_GetKeyNameFromDefragCtx(RedisModuleDefragCtx *ctx);
Available since: 7.0.0
Returns the name of the key currently being processed. There is no guarantee that the key name is always available, so this may return NULL.
RedisModule_GetDbIdFromDefragCtx
int RedisModule_GetDbIdFromDefragCtx(RedisModuleDefragCtx *ctx);
Available since: 7.0.0
Returns the database id of the key currently being processed. There is no guarantee that this info is always available, so this may return -1.
Function index
RedisModule_ACLAddLogEntryRedisModule_ACLCheckChannelPermissionsRedisModule_ACLCheckCommandPermissionsRedisModule_ACLCheckKeyPermissionsRedisModule_AbortBlockRedisModule_AllocRedisModule_AuthenticateClientWithACLUserRedisModule_AuthenticateClientWithUserRedisModule_AutoMemoryRedisModule_AvoidReplicaTrafficRedisModule_BlockClientRedisModule_BlockClientOnKeysRedisModule_BlockedClientDisconnectedRedisModule_BlockedClientMeasureTimeEndRedisModule_BlockedClientMeasureTimeStartRedisModule_CallRedisModule_CallReplyArrayElementRedisModule_CallReplyAttributeRedisModule_CallReplyAttributeElementRedisModule_CallReplyBigNumberRedisModule_CallReplyBoolRedisModule_CallReplyDoubleRedisModule_CallReplyIntegerRedisModule_CallReplyLengthRedisModule_CallReplyMapElementRedisModule_CallReplyProtoRedisModule_CallReplySetElementRedisModule_CallReplyStringPtrRedisModule_CallReplyTypeRedisModule_CallReplyVerbatimRedisModule_CallocRedisModule_ChannelAtPosWithFlagsRedisModule_CloseKeyRedisModule_CommandFilterArgDeleteRedisModule_CommandFilterArgGetRedisModule_CommandFilterArgInsertRedisModule_CommandFilterArgReplaceRedisModule_CommandFilterArgsCountRedisModule_CreateCommandRedisModule_CreateDataTypeRedisModule_CreateDictRedisModule_CreateModuleUserRedisModule_CreateStringRedisModule_CreateStringFromCallReplyRedisModule_CreateStringFromDoubleRedisModule_CreateStringFromLongDoubleRedisModule_CreateStringFromLongLongRedisModule_CreateStringFromStreamIDRedisModule_CreateStringFromStringRedisModule_CreateStringPrintfRedisModule_CreateSubcommandRedisModule_CreateTimerRedisModule_DbSizeRedisModule_DeauthenticateAndCloseClientRedisModule_DefragAllocRedisModule_DefragCursorGetRedisModule_DefragCursorSetRedisModule_DefragRedisModuleStringRedisModule_DefragShouldStopRedisModule_DeleteKeyRedisModule_DictCompareRedisModule_DictCompareCRedisModule_DictDelRedisModule_DictDelCRedisModule_DictGetRedisModule_DictGetCRedisModule_DictIteratorReseekRedisModule_DictIteratorReseekCRedisModule_DictIteratorStartRedisModule_DictIteratorStartCRedisModule_DictIteratorStopRedisModule_DictNextRedisModule_DictNextCRedisModule_DictPrevRedisModule_DictPrevCRedisModule_DictReplaceRedisModule_DictReplaceCRedisModule_DictSetRedisModule_DictSetCRedisModule_DictSizeRedisModule_DigestAddLongLongRedisModule_DigestAddStringBufferRedisModule_DigestEndSequenceRedisModule_EmitAOFRedisModule_EventLoopAddRedisModule_EventLoopAddOneShotRedisModule_EventLoopDelRedisModule_ExitFromChildRedisModule_ExportSharedAPIRedisModule_ForkRedisModule_FreeRedisModule_FreeCallReplyRedisModule_FreeClusterNodesListRedisModule_FreeDictRedisModule_FreeModuleUserRedisModule_FreeServerInfoRedisModule_FreeStringRedisModule_FreeThreadSafeContextRedisModule_GetAbsExpireRedisModule_GetBlockedClientHandleRedisModule_GetBlockedClientPrivateDataRedisModule_GetBlockedClientReadyKeyRedisModule_GetClientCertificateRedisModule_GetClientIdRedisModule_GetClientInfoByIdRedisModule_GetClientUserNameByIdRedisModule_GetClusterNodeInfoRedisModule_GetClusterNodesListRedisModule_GetClusterSizeRedisModule_GetCommandRedisModule_GetCommandKeysRedisModule_GetCommandKeysWithFlagsRedisModule_GetContextFlagsRedisModule_GetContextFlagsAllRedisModule_GetCurrentCommandNameRedisModule_GetCurrentUserNameRedisModule_GetDbIdFromDefragCtxRedisModule_GetDbIdFromDigestRedisModule_GetDbIdFromIORedisModule_GetDbIdFromModuleKeyRedisModule_GetDbIdFromOptCtxRedisModule_GetDetachedThreadSafeContextRedisModule_GetExpireRedisModule_GetKeyNameFromDefragCtxRedisModule_GetKeyNameFromDigestRedisModule_GetKeyNameFromIORedisModule_GetKeyNameFromModuleKeyRedisModule_GetKeyNameFromOptCtxRedisModule_GetKeyspaceNotificationFlagsAllRedisModule_GetLFURedisModule_GetLRURedisModule_GetModuleUserFromUserNameRedisModule_GetMyClusterIDRedisModule_GetNotifyKeyspaceEventsRedisModule_GetRandomBytesRedisModule_GetRandomHexCharsRedisModule_GetSelectedDbRedisModule_GetServerInfoRedisModule_GetServerVersionRedisModule_GetSharedAPIRedisModule_GetThreadSafeContextRedisModule_GetTimerInfoRedisModule_GetToDbIdFromOptCtxRedisModule_GetToKeyNameFromOptCtxRedisModule_GetTypeMethodVersionRedisModule_GetUsedMemoryRatioRedisModule_HashGetRedisModule_HashSetRedisModule_HoldStringRedisModule_InfoAddFieldCStringRedisModule_InfoAddFieldDoubleRedisModule_InfoAddFieldLongLongRedisModule_InfoAddFieldStringRedisModule_InfoAddFieldULongLongRedisModule_InfoAddSectionRedisModule_InfoBeginDictFieldRedisModule_InfoEndDictFieldRedisModule_IsBlockedReplyRequestRedisModule_IsBlockedTimeoutRequestRedisModule_IsChannelsPositionRequestRedisModule_IsIOErrorRedisModule_IsKeysPositionRequestRedisModule_IsModuleNameBusyRedisModule_IsSubEventSupportedRedisModule_KeyAtPosRedisModule_KeyAtPosWithFlagsRedisModule_KeyExistsRedisModule_KeyTypeRedisModule_KillForkChildRedisModule_LatencyAddSampleRedisModule_ListDeleteRedisModule_ListGetRedisModule_ListInsertRedisModule_ListPopRedisModule_ListPushRedisModule_ListSetRedisModule_LoadConfigsRedisModule_LoadDataTypeFromStringRedisModule_LoadDataTypeFromStringEncverRedisModule_LoadDoubleRedisModule_LoadFloatRedisModule_LoadLongDoubleRedisModule_LoadSignedRedisModule_LoadStringRedisModule_LoadStringBufferRedisModule_LoadUnsignedRedisModule_LogRedisModule_LogIOErrorRedisModule_MallocSizeRedisModule_MallocSizeDictRedisModule_MallocSizeStringRedisModule_MillisecondsRedisModule_ModuleTypeGetTypeRedisModule_ModuleTypeGetValueRedisModule_ModuleTypeReplaceValueRedisModule_ModuleTypeSetValueRedisModule_MonotonicMicrosecondsRedisModule_NotifyKeyspaceEventRedisModule_OpenKeyRedisModule_PoolAllocRedisModule_PublishMessageRedisModule_PublishMessageShardRedisModule_RandomKeyRedisModule_ReallocRedisModule_RedactClientCommandArgumentRedisModule_RegisterBoolConfigRedisModule_RegisterClusterMessageReceiverRedisModule_RegisterCommandFilterRedisModule_RegisterDefragFuncRedisModule_RegisterEnumConfigRedisModule_RegisterInfoFuncRedisModule_RegisterNumericConfigRedisModule_RegisterStringConfigRedisModule_ReplicateRedisModule_ReplicateVerbatimRedisModule_ReplySetArrayLengthRedisModule_ReplySetAttributeLengthRedisModule_ReplySetMapLengthRedisModule_ReplySetSetLengthRedisModule_ReplyWithArrayRedisModule_ReplyWithAttributeRedisModule_ReplyWithBigNumberRedisModule_ReplyWithBoolRedisModule_ReplyWithCStringRedisModule_ReplyWithCallReplyRedisModule_ReplyWithDoubleRedisModule_ReplyWithEmptyArrayRedisModule_ReplyWithEmptyStringRedisModule_ReplyWithErrorRedisModule_ReplyWithLongDoubleRedisModule_ReplyWithLongLongRedisModule_ReplyWithMapRedisModule_ReplyWithNullRedisModule_ReplyWithNullArrayRedisModule_ReplyWithSetRedisModule_ReplyWithSimpleStringRedisModule_ReplyWithStringRedisModule_ReplyWithStringBufferRedisModule_ReplyWithVerbatimStringRedisModule_ReplyWithVerbatimStringTypeRedisModule_ResetDatasetRedisModule_RetainStringRedisModule_SaveDataTypeToStringRedisModule_SaveDoubleRedisModule_SaveFloatRedisModule_SaveLongDoubleRedisModule_SaveSignedRedisModule_SaveStringRedisModule_SaveStringBufferRedisModule_SaveUnsignedRedisModule_ScanRedisModule_ScanCursorCreateRedisModule_ScanCursorDestroyRedisModule_ScanCursorRestartRedisModule_ScanKeyRedisModule_SelectDbRedisModule_SendChildHeartbeatRedisModule_SendClusterMessageRedisModule_ServerInfoGetFieldRedisModule_ServerInfoGetFieldCRedisModule_ServerInfoGetFieldDoubleRedisModule_ServerInfoGetFieldSignedRedisModule_ServerInfoGetFieldUnsignedRedisModule_SetAbsExpireRedisModule_SetClusterFlagsRedisModule_SetCommandInfoRedisModule_SetDisconnectCallbackRedisModule_SetExpireRedisModule_SetLFURedisModule_SetLRURedisModule_SetModuleOptionsRedisModule_SetModuleUserACLRedisModule_SignalKeyAsReadyRedisModule_SignalModifiedKeyRedisModule_StopTimerRedisModule_StrdupRedisModule_StreamAddRedisModule_StreamDeleteRedisModule_StreamIteratorDeleteRedisModule_StreamIteratorNextFieldRedisModule_StreamIteratorNextIDRedisModule_StreamIteratorStartRedisModule_StreamIteratorStopRedisModule_StreamTrimByIDRedisModule_StreamTrimByLengthRedisModule_StringAppendBufferRedisModule_StringCompareRedisModule_StringDMARedisModule_StringPtrLenRedisModule_StringSetRedisModule_StringToDoubleRedisModule_StringToLongDoubleRedisModule_StringToLongLongRedisModule_StringToStreamIDRedisModule_StringTruncateRedisModule_SubscribeToKeyspaceEventsRedisModule_SubscribeToServerEventRedisModule_ThreadSafeContextLockRedisModule_ThreadSafeContextTryLockRedisModule_ThreadSafeContextUnlockRedisModule_TrimStringAllocationRedisModule_TryAllocRedisModule_UnblockClientRedisModule_UnlinkKeyRedisModule_UnregisterCommandFilterRedisModule_ValueLengthRedisModule_WrongArityRedisModule_YieldRedisModule_ZsetAddRedisModule_ZsetFirstInLexRangeRedisModule_ZsetFirstInScoreRangeRedisModule_ZsetIncrbyRedisModule_ZsetLastInLexRangeRedisModule_ZsetLastInScoreRangeRedisModule_ZsetRangeCurrentElementRedisModule_ZsetRangeEndReachedRedisModule_ZsetRangeNextRedisModule_ZsetRangePrevRedisModule_ZsetRangeStopRedisModule_ZsetRemRedisModule_ZsetScoreRedisModule__Assert
8.10.2 - Redis modules and blocking commands
How to implement blocking commands in a Redis module
Redis has a few blocking commands among the built-in set of commands.
One of the most used is BLPOP (or the symmetric BRPOP) which blocks
waiting for elements arriving in a list.
The interesting fact about blocking commands is that they do not block
the whole server, but just the client calling them. Usually the reason to
block is that we expect some external event to happen: this can be
some change in the Redis data structures like in the BLPOP case, a
long computation happening in a thread, to receive some data from the
network, and so forth.
Redis modules have the ability to implement blocking commands as well, this documentation shows how the API works and describes a few patterns that can be used in order to model blocking commands.
NOTE: This API is currently experimental, so it can only be used if
the macro REDISMODULE_EXPERIMENTAL_API is defined. This is required because
these calls are still not in their final stage of design, so may change
in the future, certain parts may be deprecated and so forth.
To use this part of the modules API include the modules header like that:
#define REDISMODULE_EXPERIMENTAL_API
#include "redismodule.h"
How blocking and resuming works.
Note: You may want to check the helloblock.c example in the Redis source tree
inside the src/modules directory, for a simple to understand example
on how the blocking API is applied.
In Redis modules, commands are implemented by callback functions that are invoked by the Redis core when the specific command is called by the user. Normally the callback terminates its execution sending some reply to the client. Using the following function instead, the function implementing the module command may request that the client is put into the blocked state:
RedisModuleBlockedClient *RedisModule_BlockClient(RedisModuleCtx *ctx, RedisModuleCmdFunc reply_callback, RedisModuleCmdFunc timeout_callback, void (*free_privdata)(void*), long long timeout_ms);
The function returns a RedisModuleBlockedClient object, which is later
used in order to unblock the client. The arguments have the following
meaning:
ctxis the command execution context as usually in the rest of the API.reply_callbackis the callback, having the same prototype of a normal command function, that is called when the client is unblocked in order to return a reply to the client.timeout_callbackis the callback, having the same prototype of a normal command function that is called when the client reached themstimeout.free_privdatais the callback that is called in order to free the private data. Private data is a pointer to some data that is passed between the API used to unblock the client, to the callback that will send the reply to the client. We'll see how this mechanism works later in this document.msis the timeout in milliseconds. When the timeout is reached, the timeout callback is called and the client is automatically aborted.
Once a client is blocked, it can be unblocked with the following API:
int RedisModule_UnblockClient(RedisModuleBlockedClient *bc, void *privdata);
The function takes as argument the blocked client object returned by
the previous call to RedisModule_BlockClient(), and unblock the client.
Immediately before the client gets unblocked, the reply_callback function
specified when the client was blocked is called: this function will
have access to the privdata pointer used here.
IMPORTANT: The above function is thread safe, and can be called from within a thread doing some work in order to implement the command that blocked the client.
The privdata data will be freed automatically using the free_privdata
callback when the client is unblocked. This is useful since the reply
callback may never be called in case the client timeouts or disconnects
from the server, so it's important that it's up to an external function
to have the responsibility to free the data passed if needed.
To better understand how the API works, we can imagine writing a command that blocks a client for one second, and then send as reply "Hello!".
Note: arity checks and other non important things are not implemented int his command, in order to take the example simple.
int Example_RedisCommand(RedisModuleCtx *ctx, RedisModuleString **argv,
int argc)
{
RedisModuleBlockedClient *bc =
RedisModule_BlockClient(ctx,reply_func,timeout_func,NULL,0);
pthread_t tid;
pthread_create(&tid,NULL,threadmain,bc);
return REDISMODULE_OK;
}
void *threadmain(void *arg) {
RedisModuleBlockedClient *bc = arg;
sleep(1); /* Wait one second and unblock. */
RedisModule_UnblockClient(bc,NULL);
}
The above command blocks the client ASAP, spawning a thread that will wait a second and will unblock the client. Let's check the reply and timeout callbacks, which are in our case very similar, since they just reply the client with a different reply type.
int reply_func(RedisModuleCtx *ctx, RedisModuleString **argv,
int argc)
{
return RedisModule_ReplyWithSimpleString(ctx,"Hello!");
}
int timeout_func(RedisModuleCtx *ctx, RedisModuleString **argv,
int argc)
{
return RedisModule_ReplyWithNull(ctx);
}
The reply callback just sends the "Hello!" string to the client. The important bit here is that the reply callback is called when the client is unblocked from the thread.
The timeout command returns NULL, as it often happens with actual
Redis blocking commands timing out.
Passing reply data when unblocking
The above example is simple to understand but lacks an important real world aspect of an actual blocking command implementation: often the reply function will need to know what to reply to the client, and this information is often provided as the client is unblocked.
We could modify the above example so that the thread generates a random number after waiting one second. You can think at it as an actually expansive operation of some kind. Then this random number can be passed to the reply function so that we return it to the command caller. In order to make this working, we modify the functions as follow:
void *threadmain(void *arg) {
RedisModuleBlockedClient *bc = arg;
sleep(1); /* Wait one second and unblock. */
long *mynumber = RedisModule_Alloc(sizeof(long));
*mynumber = rand();
RedisModule_UnblockClient(bc,mynumber);
}
As you can see, now the unblocking call is passing some private data,
that is the mynumber pointer, to the reply callback. In order to
obtain this private data, the reply callback will use the following
function:
void *RedisModule_GetBlockedClientPrivateData(RedisModuleCtx *ctx);
So our reply callback is modified like that:
int reply_func(RedisModuleCtx *ctx, RedisModuleString **argv,
int argc)
{
long *mynumber = RedisModule_GetBlockedClientPrivateData(ctx);
/* IMPORTANT: don't free mynumber here, but in the
* free privdata callback. */
return RedisModule_ReplyWithLongLong(ctx,mynumber);
}
Note that we also need to pass a free_privdata function when blocking
the client with RedisModule_BlockClient(), since the allocated
long value must be freed. Our callback will look like the following:
void free_privdata(void *privdata) {
RedisModule_Free(privdata);
}
NOTE: It is important to stress that the private data is best freed in the
free_privdata callback because the reply function may not be called
if the client disconnects or timeout.
Also note that the private data is also accessible from the timeout
callback, always using the GetBlockedClientPrivateData() API.
Aborting the blocking of a client
One problem that sometimes arises is that we need to allocate resources
in order to implement the non blocking command. So we block the client,
then, for example, try to create a thread, but the thread creation function
returns an error. What to do in such a condition in order to recover? We
don't want to take the client blocked, nor we want to call UnblockClient()
because this will trigger the reply callback to be called.
In this case the best thing to do is to use the following function:
int RedisModule_AbortBlock(RedisModuleBlockedClient *bc);
Practically this is how to use it:
int Example_RedisCommand(RedisModuleCtx *ctx, RedisModuleString **argv,
int argc)
{
RedisModuleBlockedClient *bc =
RedisModule_BlockClient(ctx,reply_func,timeout_func,NULL,0);
pthread_t tid;
if (pthread_create(&tid,NULL,threadmain,bc) != 0) {
RedisModule_AbortBlock(bc);
RedisModule_ReplyWithError(ctx,"Sorry can't create a thread");
}
return REDISMODULE_OK;
}
The client will be unblocked but the reply callback will not be called.
Implementing the command, reply and timeout callback using a single function
The following functions can be used in order to implement the reply and callback with the same function that implements the primary command function:
int RedisModule_IsBlockedReplyRequest(RedisModuleCtx *ctx);
int RedisModule_IsBlockedTimeoutRequest(RedisModuleCtx *ctx);
So I could rewrite the example command without using a separated reply and timeout callback:
int Example_RedisCommand(RedisModuleCtx *ctx, RedisModuleString **argv,
int argc)
{
if (RedisModule_IsBlockedReplyRequest(ctx)) {
long *mynumber = RedisModule_GetBlockedClientPrivateData(ctx);
return RedisModule_ReplyWithLongLong(ctx,mynumber);
} else if (RedisModule_IsBlockedTimeoutRequest) {
return RedisModule_ReplyWithNull(ctx);
}
RedisModuleBlockedClient *bc =
RedisModule_BlockClient(ctx,reply_func,timeout_func,NULL,0);
pthread_t tid;
if (pthread_create(&tid,NULL,threadmain,bc) != 0) {
RedisModule_AbortBlock(bc);
RedisModule_ReplyWithError(ctx,"Sorry can't create a thread");
}
return REDISMODULE_OK;
}
Functionally is the same but there are people that will prefer the less verbose implementation that concentrates most of the command logic in a single function.
Working on copies of data inside a thread
An interesting pattern in order to work with threads implementing the slow part of a command, is to work with a copy of the data, so that while some operation is performed in a key, the user continues to see the old version. However when the thread terminated its work, the representations are swapped and the new, processed version, is used.
An example of this approach is the Neural Redis module where neural networks are trained in different threads while the user can still execute and inspect their older versions.
Future work
An API is work in progress right now in order to allow Redis modules APIs to be called in a safe way from threads, so that the threaded command can access the data space and do incremental operations.
There is no ETA for this feature but it may appear in the course of the Redis 4.0 release at some point.
8.10.3 - Modules API for native types
How to use native types in a Redis module
Redis modules can access Redis built-in data structures both at high level, by calling Redis commands, and at low level, by manipulating the data structures directly.
By using these capabilities in order to build new abstractions on top of existing Redis data structures, or by using strings DMA in order to encode modules data structures into Redis strings, it is possible to create modules that feel like they are exporting new data types. However, for more complex problems, this is not enough, and the implementation of new data structures inside the module is needed.
We call the ability of Redis modules to implement new data structures that
feel like native Redis ones native types support. This document describes
the API exported by the Redis modules system in order to create new data
structures and handle the serialization in RDB files, the rewriting process
in AOF, the type reporting via the TYPE command, and so forth.
Overview of native types
A module exporting a native type is composed of the following main parts:
- The implementation of some kind of new data structure and of commands operating on the new data structure.
- A set of callbacks that handle: RDB saving, RDB loading, AOF rewriting, releasing of a value associated with a key, calculation of a value digest (hash) to be used with the
DEBUG DIGESTcommand. - A 9 characters name that is unique to each module native data type.
- An encoding version, used to persist into RDB files a module-specific data version, so that a module will be able to load older representations from RDB files.
While to handle RDB loading, saving and AOF rewriting may look complex as a first glance, the modules API provide very high level function for handling all this, without requiring the user to handle read/write errors, so in practical terms, writing a new data structure for Redis is a simple task.
A very easy to understand but complete example of native type implementation
is available inside the Redis distribution in the /modules/hellotype.c file.
The reader is encouraged to read the documentation by looking at this example
implementation to see how things are applied in the practice.
Registering a new data type
In order to register a new native type into the Redis core, the module needs to declare a global variable that will hold a reference to the data type. The API to register the data type will return a data type reference that will be stored in the global variable.
static RedisModuleType *MyType;
#define MYTYPE_ENCODING_VERSION 0
int RedisModule_OnLoad(RedisModuleCtx *ctx) {
RedisModuleTypeMethods tm = {
.version = REDISMODULE_TYPE_METHOD_VERSION,
.rdb_load = MyTypeRDBLoad,
.rdb_save = MyTypeRDBSave,
.aof_rewrite = MyTypeAOFRewrite,
.free = MyTypeFree
};
MyType = RedisModule_CreateDataType(ctx, "MyType-AZ",
MYTYPE_ENCODING_VERSION, &tm);
if (MyType == NULL) return REDISMODULE_ERR;
}
As you can see from the example above, a single API call is needed in order to
register the new type. However a number of function pointers are passed as
arguments. Certain are optionals while some are mandatory. The above set
of methods must be passed, while .digest and .mem_usage are optional
and are currently not actually supported by the modules internals, so for
now you can just ignore them.
The ctx argument is the context that we receive in the OnLoad function.
The type name is a 9 character name in the character set that includes
from A-Z, a-z, 0-9, plus the underscore _ and minus - characters.
Note that this name must be unique for each data type in the Redis ecosystem, so be creative, use both lower-case and upper case if it makes sense, and try to use the convention of mixing the type name with the name of the author of the module, to create a 9 character unique name.
NOTE: It is very important that the name is exactly 9 chars or the registration of the type will fail. Read more to understand why.
For example if I'm building a b-tree data structure and my name is antirez I'll call my type btree1-az. The name, converted to a 64 bit integer, is stored inside the RDB file when saving the type, and will be used when the RDB data is loaded in order to resolve what module can load the data. If Redis finds no matching module, the integer is converted back to a name in order to provide some clue to the user about what module is missing in order to load the data.
The type name is also used as a reply for the TYPE command when called
with a key holding the registered type.
The encver argument is the encoding version used by the module to store data
inside the RDB file. For example I can start with an encoding version of 0,
but later when I release version 2.0 of my module, I can switch encoding to
something better. The new module will register with an encoding version of 1,
so when it saves new RDB files, the new version will be stored on disk. However
when loading RDB files, the module rdb_load method will be called even if
there is data found for a different encoding version (and the encoding version
is passed as argument to rdb_load), so that the module can still load old
RDB files.
The last argument is a structure used in order to pass the type methods to the
registration function: rdb_load, rdb_save, aof_rewrite, digest and
free and mem_usage are all callbacks with the following prototypes and uses:
typedef void *(*RedisModuleTypeLoadFunc)(RedisModuleIO *rdb, int encver);
typedef void (*RedisModuleTypeSaveFunc)(RedisModuleIO *rdb, void *value);
typedef void (*RedisModuleTypeRewriteFunc)(RedisModuleIO *aof, RedisModuleString *key, void *value);
typedef size_t (*RedisModuleTypeMemUsageFunc)(void *value);
typedef void (*RedisModuleTypeDigestFunc)(RedisModuleDigest *digest, void *value);
typedef void (*RedisModuleTypeFreeFunc)(void *value);
rdb_loadis called when loading data from the RDB file. It loads data in the same format asrdb_saveproduces.rdb_saveis called when saving data to the RDB file.aof_rewriteis called when the AOF is being rewritten, and the module needs to tell Redis what is the sequence of commands to recreate the content of a given key.digestis called whenDEBUG DIGESTis executed and a key holding this module type is found. Currently this is not yet implemented so the function ca be left empty.mem_usageis called when theMEMORYcommand asks for the total memory consumed by a specific key, and is used in order to get the amount of bytes used by the module value.freeis called when a key with the module native type is deleted viaDELor in any other mean, in order to let the module reclaim the memory associated with such a value.
Ok, but why modules types require a 9 characters name?
Oh, I understand you need to understand this, so here is a very specific explanation.
When Redis persists to RDB files, modules specific data types require to be persisted as well. Now RDB files are sequences of key-value pairs like the following:
[1 byte type] [key] [a type specific value]
The 1 byte type identifies strings, lists, sets, and so forth. In the case
of modules data, it is set to a special value of module data, but of
course this is not enough, we need the information needed to link a specific
value with a specific module type that is able to load and handle it.
So when we save a type specific value about a module, we prefix it with
a 64 bit integer. 64 bits is large enough to store the informations needed
in order to lookup the module that can handle that specific type, but is
short enough that we can prefix each module value we store inside the RDB
without making the final RDB file too big. At the same time, this solution
of prefixing the value with a 64 bit signature does not require to do
strange things like defining in the RDB header a list of modules specific
types. Everything is pretty simple.
So, what you can store in 64 bits in order to identify a given module in a reliable way? Well if you build a character set of 64 symbols, you can easily store 9 characters of 6 bits, and you are left with 10 bits, that are used in order to store the encoding version of the type, so that the same type can evolve in the future and provide a different and more efficient or updated serialization format for RDB files.
So the 64 bit prefix stored before each module value is like the following:
6|6|6|6|6|6|6|6|6|10
The first 9 elements are 6-bits characters, the final 10 bits is the encoding version.
When the RDB file is loaded back, it reads the 64 bit value, masks the final 10 bits, and searches for a matching module in the modules types cache. When a matching one is found, the method to load the RDB file value is called with the 10 bits encoding version as argument, so that the module knows what version of the data layout to load, if it can support multiple versions.
Now the interesting thing about all this is that, if instead the module type cannot be resolved, since there is no loaded module having this signature, we can convert back the 64 bit value into a 9 characters name, and print an error to the user that includes the module type name! So that she or he immediately realizes what's wrong.
Setting and getting keys
After registering our new data type in the RedisModule_OnLoad() function,
we also need to be able to set Redis keys having as value our native type.
This normally happens in the context of commands that write data to a key. The native types API allow to set and get keys to module native data types, and to test if a given key is already associated to a value of a specific data type.
The API uses the normal modules RedisModule_OpenKey() low level key access
interface in order to deal with this. This is an example of setting a
native type private data structure to a Redis key:
RedisModuleKey *key = RedisModule_OpenKey(ctx,keyname,REDISMODULE_WRITE);
struct some_private_struct *data = createMyDataStructure();
RedisModule_ModuleTypeSetValue(key,MyType,data);
The function RedisModule_ModuleTypeSetValue() is used with a key handle open
for writing, and gets three arguments: the key handle, the reference to the
native type, as obtained during the type registration, and finally a void*
pointer that contains the private data implementing the module native type.
Note that Redis has no clues at all about what your data contains. It will just call the callbacks you provided during the method registration in order to perform operations on the type.
Similarly we can retrieve the private data from a key using this function:
struct some_private_struct *data;
data = RedisModule_ModuleTypeGetValue(key);
We can also test for a key to have our native type as value:
if (RedisModule_ModuleTypeGetType(key) == MyType) {
/* ... do something ... */
}
However for the calls to do the right thing, we need to check if the key is empty, if it contains a value of the right kind, and so forth. So the idiomatic code to implement a command writing to our native type is along these lines:
RedisModuleKey *key = RedisModule_OpenKey(ctx,argv[1],
REDISMODULE_READ|REDISMODULE_WRITE);
int type = RedisModule_KeyType(key);
if (type != REDISMODULE_KEYTYPE_EMPTY &&
RedisModule_ModuleTypeGetType(key) != MyType)
{
return RedisModule_ReplyWithError(ctx,REDISMODULE_ERRORMSG_WRONGTYPE);
}
Then if we successfully verified the key is not of the wrong type, and we are going to write to it, we usually want to create a new data structure if the key is empty, or retrieve the reference to the value associated to the key if there is already one:
/* Create an empty value object if the key is currently empty. */
struct some_private_struct *data;
if (type == REDISMODULE_KEYTYPE_EMPTY) {
data = createMyDataStructure();
RedisModule_ModuleTypeSetValue(key,MyTyke,data);
} else {
data = RedisModule_ModuleTypeGetValue(key);
}
/* Do something with 'data'... */
Free method
As already mentioned, when Redis needs to free a key holding a native type
value, it needs help from the module in order to release the memory. This
is the reason why we pass a free callback during the type registration:
typedef void (*RedisModuleTypeFreeFunc)(void *value);
A trivial implementation of the free method can be something like this, assuming our data structure is composed of a single allocation:
void MyTypeFreeCallback(void *value) {
RedisModule_Free(value);
}
However a more real world one will call some function that performs a more complex memory reclaiming, by casting the void pointer to some structure and freeing all the resources composing the value.
RDB load and save methods
The RDB saving and loading callbacks need to create (and load back) a representation of the data type on disk. Redis offers an high level API that can automatically store inside the RDB file the following types:
- Unsigned 64 bit integers.
- Signed 64 bit integers.
- Doubles.
- Strings.
It is up to the module to find a viable representation using the above base types. However note that while the integer and double values are stored and loaded in an architecture and endianness agnostic way, if you use the raw string saving API to, for example, save a structure on disk, you have to care those details yourself.
This is the list of functions performing RDB saving and loading:
void RedisModule_SaveUnsigned(RedisModuleIO *io, uint64_t value);
uint64_t RedisModule_LoadUnsigned(RedisModuleIO *io);
void RedisModule_SaveSigned(RedisModuleIO *io, int64_t value);
int64_t RedisModule_LoadSigned(RedisModuleIO *io);
void RedisModule_SaveString(RedisModuleIO *io, RedisModuleString *s);
void RedisModule_SaveStringBuffer(RedisModuleIO *io, const char *str, size_t len);
RedisModuleString *RedisModule_LoadString(RedisModuleIO *io);
char *RedisModule_LoadStringBuffer(RedisModuleIO *io, size_t *lenptr);
void RedisModule_SaveDouble(RedisModuleIO *io, double value);
double RedisModule_LoadDouble(RedisModuleIO *io);
The functions don't require any error checking from the module, that can always assume calls succeed.
As an example, imagine I've a native type that implements an array of double values, with the following structure:
struct double_array {
size_t count;
double *values;
};
My rdb_save method may look like the following:
void DoubleArrayRDBSave(RedisModuleIO *io, void *ptr) {
struct dobule_array *da = ptr;
RedisModule_SaveUnsigned(io,da->count);
for (size_t j = 0; j < da->count; j++)
RedisModule_SaveDouble(io,da->values[j]);
}
What we did was to store the number of elements followed by each double
value. So when later we'll have to load the structure in the rdb_load
method we'll do something like this:
void *DoubleArrayRDBLoad(RedisModuleIO *io, int encver) {
if (encver != DOUBLE_ARRAY_ENC_VER) {
/* We should actually log an error here, or try to implement
the ability to load older versions of our data structure. */
return NULL;
}
struct double_array *da;
da = RedisModule_Alloc(sizeof(*da));
da->count = RedisModule_LoadUnsigned(io);
da->values = RedisModule_Alloc(da->count * sizeof(double));
for (size_t j = 0; j < da->count; j++)
da->values[j] = RedisModule_LoadDouble(io);
return da;
}
The load callback just reconstruct back the data structure from the data we stored in the RDB file.
Note that while there is no error handling on the API that writes and reads from disk, still the load callback can return NULL on errors in case what it reads does not look correct. Redis will just panic in that case.
AOF rewriting
void RedisModule_EmitAOF(RedisModuleIO *io, const char *cmdname, const char *fmt, ...);
Handling multiple encodings
WORK IN PROGRESS
Allocating memory
Modules data types should try to use RedisModule_Alloc() functions family
in order to allocate, reallocate and release heap memory used to implement the native data structures (see the other Redis Modules documentation for detailed information).
This is not just useful in order for Redis to be able to account for the memory used by the module, but there are also more advantages:
- Redis uses the
jemallocallocator, that often prevents fragmentation problems that could be caused by using the libc allocator. - When loading strings from the RDB file, the native types API is able to return strings allocated directly with
RedisModule_Alloc(), so that the module can directly link this memory into the data structure representation, avoiding an useless copy of the data.
Even if you are using external libraries implementing your data structures, the
allocation functions provided by the module API is exactly compatible with
malloc(), realloc(), free() and strdup(), so converting the libraries
in order to use these functions should be trivial.
In case you have an external library that uses libc malloc(), and you want
to avoid replacing manually all the calls with the Redis Modules API calls,
an approach could be to use simple macros in order to replace the libc calls
with the Redis API calls. Something like this could work:
#define malloc RedisModule_Alloc
#define realloc RedisModule_Realloc
#define free RedisModule_Free
#define strdup RedisModule_Strdup
However take in mind that mixing libc calls with Redis API calls will result
into troubles and crashes, so if you replace calls using macros, you need to
make sure that all the calls are correctly replaced, and that the code with
the substituted calls will never, for example, attempt to call
RedisModule_Free() with a pointer allocated using libc malloc().
8.11 - Optimizing Redis
Benchmarking, profiling, and optimizations for memory and latency
8.11.1 - Redis benchmark
Using the redis-benchmark utility to benchmark a Redis server
Redis includes the redis-benchmark utility that simulates running commands done
by N clients at the same time sending M total queries. The utility provides
a default set of tests, or a custom set of tests can be supplied.
The following options are supported:
Usage: redis-benchmark [-h <host>] [-p <port>] [-c <clients>] [-n <requests]> [-k <boolean>]
-h <hostname> Server hostname (default 127.0.0.1)
-p <port> Server port (default 6379)
-s <socket> Server socket (overrides host and port)
-a <password> Password for Redis Auth
-c <clients> Number of parallel connections (default 50)
-n <requests> Total number of requests (default 100000)
-d <size> Data size of SET/GET value in bytes (default 2)
--dbnum <db> SELECT the specified db number (default 0)
-k <boolean> 1=keep alive 0=reconnect (default 1)
-r <keyspacelen> Use random keys for SET/GET/INCR, random values for SADD
Using this option the benchmark will expand the string __rand_int__
inside an argument with a 12 digits number in the specified range
from 0 to keyspacelen-1. The substitution changes every time a command
is executed. Default tests use this to hit random keys in the
specified range.
-P <numreq> Pipeline <numreq> requests. Default 1 (no pipeline).
-q Quiet. Just show query/sec values
--csv Output in CSV format
-l Loop. Run the tests forever
-t <tests> Only run the comma separated list of tests. The test
names are the same as the ones produced as output.
-I Idle mode. Just open N idle connections and wait.
You need to have a running Redis instance before launching the benchmark. You can run the benchmarking utility like so:
redis-benchmark -q -n 100000
Running only a subset of the tests
You don't need to run all the default tests every time you execute redis-benchmark.
For example, to select only a subset of tests, use the -t option
as in the following example:
$ redis-benchmark -t set,lpush -n 100000 -q
SET: 74239.05 requests per second
LPUSH: 79239.30 requests per second
This example runs the tests for the SET and LPUSH commands and uses quiet mode (see the -q switch).
You can even benchmark a specfic command:
$ redis-benchmark -n 100000 -q script load "redis.call('set','foo','bar')"
script load redis.call('set','foo','bar'): 69881.20 requests per second
Selecting the size of the key space
By default, the benchmark runs against a single key. In Redis the difference between such a synthetic benchmark and a real one is not huge since it is an in-memory system, however it is possible to stress cache misses and in general to simulate a more real-world work load by using a large key space.
This is obtained by using the -r switch. For instance if I want to run
one million SET operations, using a random key for every operation out of
100k possible keys, I'll use the following command line:
$ redis-cli flushall
OK
$ redis-benchmark -t set -r 100000 -n 1000000
====== SET ======
1000000 requests completed in 13.86 seconds
50 parallel clients
3 bytes payload
keep alive: 1
99.76% `<=` 1 milliseconds
99.98% `<=` 2 milliseconds
100.00% `<=` 3 milliseconds
100.00% `<=` 3 milliseconds
72144.87 requests per second
$ redis-cli dbsize
(integer) 99993
Using pipelining
By default every client (the benchmark simulates 50 clients if not otherwise
specified with -c) sends the next command only when the reply of the previous
command is received, this means that the server will likely need a read call
in order to read each command from every client. Also RTT is paid as well.
Redis supports pipelining, so it is possible to send multiple commands at once, a feature often exploited by real world applications. Redis pipelining is able to dramatically improve the number of operations per second a server is able do deliver.
This is an example of running the benchmark in a MacBook Air 11" using a pipelining of 16 commands:
$ redis-benchmark -n 1000000 -t set,get -P 16 -q
SET: 403063.28 requests per second
GET: 508388.41 requests per second
Using pipelining results in a significant increase in performance.
Pitfalls and misconceptions
The first point is obvious: the golden rule of a useful benchmark is to only compare apples and apples. Different versions of Redis can be compared on the same workload for instance. Or the same version of Redis, but with different options. If you plan to compare Redis to something else, then it is important to evaluate the functional and technical differences, and take them in account.
- Redis is a server: all commands involve network or IPC round trips. It is meaningless to compare it to embedded data stores, because the cost of most operations is primarily in network/protocol management.
- Redis commands return an acknowledgment for all usual commands. Some other data stores do not. Comparing Redis to stores involving one-way queries is only mildly useful.
- Naively iterating on synchronous Redis commands does not benchmark Redis itself, but rather measure your network (or IPC) latency and the client library intrinsic latency. To really test Redis, you need multiple connections (like redis-benchmark) and/or to use pipelining to aggregate several commands and/or multiple threads or processes.
- Redis is an in-memory data store with some optional persistence options. If you plan to compare it to transactional servers (MySQL, PostgreSQL, etc ...), then you should consider activating AOF and decide on a suitable fsync policy.
- Redis is, mostly, a single-threaded server from the POV of commands execution (actually modern versions of Redis use threads for different things). It is not designed to benefit from multiple CPU cores. People are supposed to launch several Redis instances to scale out on several cores if needed. It is not really fair to compare one single Redis instance to a multi-threaded data store.
The redis-benchmark program is a quick and useful way to get some figures and
evaluate the performance of a Redis instance on a given hardware. However,
by default, it does not represent the maximum throughput a Redis instance can
sustain. Actually, by using pipelining and a fast client (hiredis), it is fairly
easy to write a program generating more throughput than redis-benchmark. The
default behavior of redis-benchmark is to achieve throughput by exploiting
concurrency only (i.e. it creates several connections to the server).
It does not use pipelining or any parallelism at all (one pending query per
connection at most, and no multi-threading), if not explicitly enabled via
the -P parameter. So in some way using redis-benchmark and, triggering, for
example, a BGSAVE operation in the background at the same time, will provide
the user with numbers more near to the worst case than to the best case.
To run a benchmark using pipelining mode (and achieve higher throughput), you need to explicitly use the -P option. Please note that it is still a realistic behavior since a lot of Redis based applications actively use pipelining to improve performance. However you should use a pipeline size that is more or less the average pipeline length you'll be able to use in your application in order to get realistic numbers.
The benchmark should apply the same operations, and work in the same way with the multiple data stores you want to compare. It is absolutely pointless to compare the result of redis-benchmark to the result of another benchmark program and extrapolate.
For instance, Redis and memcached in single-threaded mode can be compared on GET/SET operations. Both are in-memory data stores, working mostly in the same way at the protocol level. Provided their respective benchmark application is aggregating queries in the same way (pipelining) and use a similar number of connections, the comparison is actually meaningful.
When you're benchmarking a high-performance, in-memory database like Redis, it may be difficult to saturate the server. Sometimes, the performance bottleneck is on the client side, and not the server-side. In that case, the client (i.e., the benchmarking program itself) must be fixed, or perhaps scaled out, to reach the maximum throughput.
Factors impacting Redis performance
There are multiple factors having direct consequences on Redis performance. We mention them here, since they can alter the result of any benchmarks. Please note however, that a typical Redis instance running on a low end, untuned box usually provides good enough performance for most applications.
- Network bandwidth and latency usually have a direct impact on the performance. It is a good practice to use the ping program to quickly check the latency between the client and server hosts is normal before launching the benchmark. Regarding the bandwidth, it is generally useful to estimate the throughput in Gbit/s and compare it to the theoretical bandwidth of the network. For instance a benchmark setting 4 KB strings in Redis at 100000 q/s, would actually consume 3.2 Gbit/s of bandwidth and probably fit within a 10 Gbit/s link, but not a 1 Gbit/s one. In many real world scenarios, Redis throughput is limited by the network well before being limited by the CPU. To consolidate several high-throughput Redis instances on a single server, it worth considering putting a 10 Gbit/s NIC or multiple 1 Gbit/s NICs with TCP/IP bonding.
- CPU is another very important factor. Being single-threaded, Redis favors fast CPUs with large caches and not many cores. At this game, Intel CPUs are currently the winners. It is not uncommon to get only half the performance on an AMD Opteron CPU compared to similar Nehalem EP/Westmere EP/Sandy Bridge Intel CPUs with Redis. When client and server run on the same box, the CPU is the limiting factor with redis-benchmark.
- Speed of RAM and memory bandwidth seem less critical for global performance especially for small objects. For large objects (>10 KB), it may become noticeable though. Usually, it is not really cost-effective to buy expensive fast memory modules to optimize Redis.
- Redis runs slower on a VM compared to running without virtualization using
the same hardware. If you have the chance to run Redis on a physical machine
this is preferred. However this does not mean that Redis is slow in
virtualized environments, the delivered performances are still very good
and most of the serious performance issues you may incur in virtualized
environments are due to over-provisioning, non-local disks with high latency,
or old hypervisor software that have slow
forksyscall implementation. - When the server and client benchmark programs run on the same box, both the TCP/IP loopback and unix domain sockets can be used. Depending on the platform, unix domain sockets can achieve around 50% more throughput than the TCP/IP loopback (on Linux for instance). The default behavior of redis-benchmark is to use the TCP/IP loopback.
- The performance benefit of unix domain sockets compared to TCP/IP loopback tends to decrease when pipelining is heavily used (i.e. long pipelines).
- When an ethernet network is used to access Redis, aggregating commands using pipelining is especially efficient when the size of the data is kept under the ethernet packet size (about 1500 bytes). Actually, processing 10 bytes, 100 bytes, or 1000 bytes queries almost result in the same throughput. See the graph below.

- On multi CPU sockets servers, Redis performance becomes dependent on the NUMA configuration and process location. The most visible effect is that redis-benchmark results seem non-deterministic because client and server processes are distributed randomly on the cores. To get deterministic results, it is required to use process placement tools (on Linux: taskset or numactl). The most efficient combination is always to put the client and server on two different cores of the same CPU to benefit from the L3 cache. Here are some results of 4 KB SET benchmark for 3 server CPUs (AMD Istanbul, Intel Nehalem EX, and Intel Westmere) with different relative placements. Please note this benchmark is not meant to compare CPU models between themselves (CPUs exact model and frequency are therefore not disclosed).

- With high-end configurations, the number of client connections is also an important factor. Being based on epoll/kqueue, the Redis event loop is quite scalable. Redis has already been benchmarked at more than 60000 connections, and was still able to sustain 50000 q/s in these conditions. As a rule of thumb, an instance with 30000 connections can only process half the throughput achievable with 100 connections. Here is an example showing the throughput of a Redis instance per number of connections:

- With high-end configurations, it is possible to achieve higher throughput by tuning the NIC(s) configuration and associated interruptions. Best throughput is achieved by setting an affinity between Rx/Tx NIC queues and CPU cores, and activating RPS (Receive Packet Steering) support. More information in this thread. Jumbo frames may also provide a performance boost when large objects are used.
- Depending on the platform, Redis can be compiled against different memory
allocators (libc malloc, jemalloc, tcmalloc), which may have different behaviors
in term of raw speed, internal and external fragmentation.
If you did not compile Redis yourself, you can use the INFO command to check
the
mem_allocatorfield. Please note most benchmarks do not run long enough to generate significant external fragmentation (contrary to production Redis instances).
Other things to consider
One important goal of any benchmark is to get reproducible results, so they can be compared to the results of other tests.
- A good practice is to try to run tests on isolated hardware as much as possible. If it is not possible, then the system must be monitored to check the benchmark is not impacted by some external activity.
- Some configurations (desktops and laptops for sure, some servers as well) have a variable CPU core frequency mechanism. The policy controlling this mechanism can be set at the OS level. Some CPU models are more aggressive than others at adapting the frequency of the CPU cores to the workload. To get reproducible results, it is better to set the highest possible fixed frequency for all the CPU cores involved in the benchmark.
- An important point is to size the system accordingly to the benchmark.
The system must have enough RAM and must not swap. On Linux, do not forget
to set the
overcommit_memoryparameter correctly. Please note 32 and 64 bit Redis instances do not have the same memory footprint. - If you plan to use RDB or AOF for your benchmark, please check there is no other I/O activity in the system. Avoid putting RDB or AOF files on NAS or NFS shares, or on any other devices impacting your network bandwidth and/or latency (for instance, EBS on Amazon EC2).
- Set Redis logging level (loglevel parameter) to warning or notice. Avoid putting the generated log file on a remote filesystem.
- Avoid using monitoring tools which can alter the result of the benchmark. For instance using INFO at regular interval to gather statistics is probably fine, but MONITOR will impact the measured performance significantly.
Other Redis benchmarking tools
There are several third-party tools that can be used for benchmarking Redis. Refer to each tool's documentation for more information about its goals and capabilities.
- memtier_benchmark from Redis Ltd. is a NoSQL Redis and Memcache traffic generation and benchmarking tool.
- rpc-perf from Twitter is a tool for benchmarking RPC services that supports Redis and Memcache.
- YCSB from Yahoo @Yahoo is a benchmarking framework with clients to many databases, including Redis.
8.11.2 - Redis CPU profiling
Performance engineering guide for on-CPU profiling and tracing
Filling the performance checklist
Redis is developed with a great emphasis on performance. We do our best with every release to make sure you'll experience a very stable and fast product.
Nevertheless, if you're finding room to improve the efficiency of Redis or are pursuing a performance regression investigation you will need a concise methodical way of monitoring and analyzing Redis performance.
To do so you can rely on different methodologies (some more suited than other depending on the class of issues/analysis we intent to make). A curated list of methodologies and their steps are enumerated by Brendan Greg at the following link.
We recommend the Utilization Saturation and Errors (USE) Method for answering the question of what is your bottleneck. Check the following mapping between system resource, metric, and tools for a pratical deep dive: USE method.
Ensuring the CPU is your bottleneck
This guide assumes you've followed one of the above methodologies to perform a complete check of system health, and identified the bottleneck being the CPU. If you have identified that most of the time is spent blocked on I/O, locks, timers, paging/swapping, etc., this guide is not for you.
Build Prerequisites
For a proper On-CPU analysis, Redis (and any dynamically loaded library like Redis Modules) requires stack traces to be available to tracers, which you may need to fix first.
By default, Redis is compiled with the -O2 switch (which we intent to keep
during profiling). This means that compiler optimizations are enabled. Many
compilers omit the frame pointer as a runtime optimization (saving a register),
thus breaking frame pointer-based stack walking. This makes the Redis
executable faster, but at the same time it makes Redis (like any other program)
harder to trace, potentially wrongfully pinpointing on-CPU time to the last
available frame pointer of a call stack that can get a lot deeper (but
impossible to trace).
It's important that you ensure that:
- debug information is present: compile option
-g - frame pointer register is present:
-fno-omit-frame-pointer - we still run with optimizations to get an accurate representation of production run times, meaning we will keep:
-O2
You can do it as follows within redis main repo:
$ make REDIS_CFLAGS="-g -fno-omit-frame-pointer"
A set of instruments to identify performance regressions and/or potential on-CPU performance improvements
This document focuses specifically on on-CPU resource bottlenecks analysis, meaning we're interested in understanding where threads are spending CPU cycles while running on-CPU and, as importantly, whether those cycles are effectively being used for computation or stalled waiting (not blocked!) for memory I/O, and cache misses, etc.
For that we will rely on toolkits (perf, bcc tools), and hardware specific PMCs (Performance Monitoring Counters), to proceed with:
Hotspot analysis (pref or bcc tools): to profile code execution and determine which functions are consuming the most time and thus are targets for optimization. We'll present two options to collect, report, and visualize hotspots either with perf or bcc/BPF tracing tools.
Call counts analysis: to count events including function calls, enabling us to correlate several calls/components at once, relying on bcc/BPF tracing tools.
Hardware event sampling: crucial for understanding CPU behavior, including memory I/O, stall cycles, and cache misses.
Tool prerequesits
The following steps rely on Linux perf_events (aka "perf"), bcc/BPF tracing tools, and Brendan Greg’s FlameGraph repo.
We assume beforehand you have:
- Installed the perf tool on your system. Most Linux distributions will likely package this as a package related to the kernel. More information about the perf tool can be found at perf wiki.
- Followed the install bcc/BPF instructions to install bcc toolkit on your machine.
- Cloned Brendan Greg’s FlameGraph repo and made accessible the
difffolded.plandflamegraph.plfiles, to generated the collapsed stack traces and Flame Graphs.
Hotspot analysis with perf or eBPF (stack traces sampling)
Profiling CPU usage by sampling stack traces at a timed interval is a fast and easy way to identify performance-critical code sections (hotspots).
Sampling stack traces using perf
To profile both user- and kernel-level stacks of redis-server for a specific length of time, for example 60 seconds, at a sampling frequency of 999 samples per second:
$ perf record -g --pid $(pgrep redis-server) -F 999 -- sleep 60
Displaying the recorded profile information using perf report
By default perf record will generate a perf.data file in the current working directory.
You can then report with a call-graph output (call chain, stack backtrace), with a minimum call graph inclusion threshold of 0.5%, with:
$ perf report -g "graph,0.5,caller"
See the perf report documention for advanced filtering, sorting and aggregation capabilities.
Visualizing the recorded profile information using Flame Graphs
Flame graphs allow for a quick and accurate visualization of frequent code-paths. They can be generated using Brendan Greg's open source programs on github, which create interactive SVGs from folded stack files.
Specifically, for perf we need to convert the generated perf.data into the captured stacks, and fold each of them into single lines. You can then render the on-CPU flame graph with:
$ perf script > redis.perf.stacks
$ stackcollapse-perf.pl redis.perf.stacks > redis.folded.stacks
$ flamegraph.pl redis.folded.stacks > redis.svg
By default, perf script will generate a perf.data file in the current working directory. See the perf script documentation for advanced usage.
See FlameGraph usage options for more advanced stack trace visualizations (like the differential one).
Archiving and sharing recorded profile information
So that analysis of the perf.data contents can be possible on a machine other than the one on which collection happened, you need to export along with the perf.data file all object files with build-ids found in the record data file. This can be easily done with the help of perf-archive.sh script:
$ perf-archive.sh perf.data
Now please run:
$ tar xvf perf.data.tar.bz2 -C ~/.debug
on the machine where you need to run perf report.
Sampling stack traces using bcc/BPF's profile
Similarly to perf, as of Linux kernel 4.9, BPF-optimized profiling is now fully available with the promise of lower overhead on CPU (as stack traces are frequency counted in kernel context) and disk I/O resources during profiling.
Apart from that, and relying solely on bcc/BPF's profile tool, we have also removed the perf.data and intermediate steps if stack traces analysis is our main goal. You can use bcc's profile tool to output folded format directly, for flame graph generation:
$ /usr/share/bcc/tools/profile -F 999 -f --pid $(pgrep redis-server) --duration 60 > redis.folded.stacks
In that manner, we've remove any preprocessing and can render the on-CPU flame graph with a single command:
$ flamegraph.pl redis.folded.stacks > redis.svg
Visualizing the recorded profile information using Flame Graphs
Call counts analysis with bcc/BPF
A function may consume significant CPU cycles either because its code is slow
or because it's frequently called. To answer at what rate functions are being
called, you can rely upon call counts analysis using BCC's funccount tool:
$ /usr/share/bcc/tools/funccount 'redis-server:(call*|*Read*|*Write*)' --pid $(pgrep redis-server) --duration 60
Tracing 64 functions for "redis-server:(call*|*Read*|*Write*)"... Hit Ctrl-C to end.
FUNC COUNT
call 334
handleClientsWithPendingWrites 388
clientInstallWriteHandler 388
postponeClientRead 514
handleClientsWithPendingReadsUsingThreads 735
handleClientsWithPendingWritesUsingThreads 735
prepareClientToWrite 1442
Detaching...
The above output shows that, while tracing, the Redis's call() function was called 334 times, handleClientsWithPendingWrites() 388 times, etc.
Hardware event counting with Performance Monitoring Counters (PMCs)
Many modern processors contain a performance monitoring unit (PMU) exposing Performance Monitoring Counters (PMCs). PMCs are crucial for understanding CPU behavior, including memory I/O, stall cycles, and cache misses, and provide low-level CPU performance statistics that aren't available anywhere else.
The design and functionality of a PMU is CPU-specific and you should assess
your CPU supported counters and features by using perf list.
To calculate the number of instructions per cycle, the number of micro ops executed, the number of cycles during which no micro ops were dispatched, the number stalled cycles on memory, including a per memory type stalls, for the duration of 60s, specifically for redis process:
$ perf stat -e "cpu-clock,cpu-cycles,instructions,uops_executed.core,uops_executed.stall_cycles,cache-references,cache-misses,cycle_activity.stalls_total,cycle_activity.stalls_mem_any,cycle_activity.stalls_l3_miss,cycle_activity.stalls_l2_miss,cycle_activity.stalls_l1d_miss" --pid $(pgrep redis-server) -- sleep 60
Performance counter stats for process id '3038':
60046.411437 cpu-clock (msec) # 1.001 CPUs utilized
168991975443 cpu-cycles # 2.814 GHz (36.40%)
388248178431 instructions # 2.30 insn per cycle (45.50%)
443134227322 uops_executed.core # 7379.862 M/sec (45.51%)
30317116399 uops_executed.stall_cycles # 504.895 M/sec (45.51%)
670821512 cache-references # 11.172 M/sec (45.52%)
23727619 cache-misses # 3.537 % of all cache refs (45.43%)
30278479141 cycle_activity.stalls_total # 504.251 M/sec (36.33%)
19981138777 cycle_activity.stalls_mem_any # 332.762 M/sec (36.33%)
725708324 cycle_activity.stalls_l3_miss # 12.086 M/sec (36.33%)
8487905659 cycle_activity.stalls_l2_miss # 141.356 M/sec (36.32%)
10011909368 cycle_activity.stalls_l1d_miss # 166.736 M/sec (36.31%)
60.002765665 seconds time elapsed
It's important to know that there are two very different ways in which PMCs can be used (couting and sampling), and we've focused solely on PMCs counting for the sake of this analysis. Brendan Greg clearly explains it on the following link.
8.11.3 - Diagnosing latency issues
Finding the causes of slow responses
This document will help you understand what the problem could be if you are experiencing latency problems with Redis.
In this context latency is the maximum delay between the time a client issues a command and the time the reply to the command is received by the client. Usually Redis processing time is extremely low, in the sub microsecond range, but there are certain conditions leading to higher latency figures.
I've little time, give me the checklist
The following documentation is very important in order to run Redis in a low latency fashion. However I understand that we are busy people, so let's start with a quick checklist. If you fail following these steps, please return here to read the full documentation.
- Make sure you are not running slow commands that are blocking the server. Use the Redis Slow Log feature to check this.
- For EC2 users, make sure you use HVM based modern EC2 instances, like m3.medium. Otherwise fork() is too slow.
- Transparent huge pages must be disabled from your kernel. Use
echo never > /sys/kernel/mm/transparent_hugepage/enabledto disable them, and restart your Redis process. - If you are using a virtual machine, it is possible that you have an intrinsic latency that has nothing to do with Redis. Check the minimum latency you can expect from your runtime environment using
./redis-cli --intrinsic-latency 100. Note: you need to run this command in the server not in the client. - Enable and use the Latency monitor feature of Redis in order to get a human readable description of the latency events and causes in your Redis instance.
In general, use the following table for durability VS latency/performance tradeoffs, ordered from stronger safety to better latency.
- AOF + fsync always: this is very slow, you should use it only if you know what you are doing.
- AOF + fsync every second: this is a good compromise.
- AOF + fsync every second + no-appendfsync-on-rewrite option set to yes: this is as the above, but avoids to fsync during rewrites to lower the disk pressure.
- AOF + fsync never. Fsyncing is up to the kernel in this setup, even less disk pressure and risk of latency spikes.
- RDB. Here you have a vast spectrum of tradeoffs depending on the save triggers you configure.
And now for people with 15 minutes to spend, the details...
Measuring latency
If you are experiencing latency problems, you probably know how to measure it in the context of your application, or maybe your latency problem is very evident even macroscopically. However redis-cli can be used to measure the latency of a Redis server in milliseconds, just try:
redis-cli --latency -h `host` -p `port`
Using the internal Redis latency monitoring subsystem
Since Redis 2.8.13, Redis provides latency monitoring capabilities that are able to sample different execution paths to understand where the server is blocking. This makes debugging of the problems illustrated in this documentation much simpler, so we suggest enabling latency monitoring ASAP. Please refer to the Latency monitor documentation.
While the latency monitoring sampling and reporting capabilities will make it simpler to understand the source of latency in your Redis system, it is still advised that you read this documentation extensively to better understand the topic of Redis and latency spikes.
Latency baseline
There is a kind of latency that is inherently part of the environment where you run Redis, that is the latency provided by your operating system kernel and, if you are using virtualization, by the hypervisor you are using.
While this latency can't be removed it is important to study it because it is the baseline, or in other words, you won't be able to achieve a Redis latency that is better than the latency that every process running in your environment will experience because of the kernel or hypervisor implementation or setup.
We call this kind of latency intrinsic latency, and redis-cli starting
from Redis version 2.8.7 is able to measure it. This is an example run
under Linux 3.11.0 running on an entry level server.
Note: the argument 100 is the number of seconds the test will be executed.
The more time we run the test, the more likely we'll be able to spot
latency spikes. 100 seconds is usually appropriate, however you may want
to perform a few runs at different times. Please note that the test is CPU
intensive and will likely saturate a single core in your system.
$ ./redis-cli --intrinsic-latency 100
Max latency so far: 1 microseconds.
Max latency so far: 16 microseconds.
Max latency so far: 50 microseconds.
Max latency so far: 53 microseconds.
Max latency so far: 83 microseconds.
Max latency so far: 115 microseconds.
Note: redis-cli in this special case needs to run in the server where you run or plan to run Redis, not in the client. In this special mode redis-cli does not connect to a Redis server at all: it will just try to measure the largest time the kernel does not provide CPU time to run to the redis-cli process itself.
In the above example, the intrinsic latency of the system is just 0.115 milliseconds (or 115 microseconds), which is a good news, however keep in mind that the intrinsic latency may change over time depending on the load of the system.
Virtualized environments will not show so good numbers, especially with high load or if there are noisy neighbors. The following is a run on a Linode 4096 instance running Redis and Apache:
$ ./redis-cli --intrinsic-latency 100
Max latency so far: 573 microseconds.
Max latency so far: 695 microseconds.
Max latency so far: 919 microseconds.
Max latency so far: 1606 microseconds.
Max latency so far: 3191 microseconds.
Max latency so far: 9243 microseconds.
Max latency so far: 9671 microseconds.
Here we have an intrinsic latency of 9.7 milliseconds: this means that we can't ask better than that to Redis. However other runs at different times in different virtualization environments with higher load or with noisy neighbors can easily show even worse values. We were able to measure up to 40 milliseconds in systems otherwise apparently running normally.
Latency induced by network and communication
Clients connect to Redis using a TCP/IP connection or a Unix domain connection. The typical latency of a 1 Gbit/s network is about 200 us, while the latency with a Unix domain socket can be as low as 30 us. It actually depends on your network and system hardware. On top of the communication itself, the system adds some more latency (due to thread scheduling, CPU caches, NUMA placement, etc ...). System induced latencies are significantly higher on a virtualized environment than on a physical machine.
The consequence is even if Redis processes most commands in sub microsecond range, a client performing many roundtrips to the server will have to pay for these network and system related latencies.
An efficient client will therefore try to limit the number of roundtrips by pipelining several commands together. This is fully supported by the servers and most clients. Aggregated commands like MSET/MGET can be also used for that purpose. Starting with Redis 2.4, a number of commands also support variadic parameters for all data types.
Here are some guidelines:
- If you can afford it, prefer a physical machine over a VM to host the server.
- Do not systematically connect/disconnect to the server (especially true for web based applications). Keep your connections as long lived as possible.
- If your client is on the same host than the server, use Unix domain sockets.
- Prefer to use aggregated commands (MSET/MGET), or commands with variadic parameters (if possible) over pipelining.
- Prefer to use pipelining (if possible) over sequence of roundtrips.
- Redis supports Lua server-side scripting to cover cases that are not suitable for raw pipelining (for instance when the result of a command is an input for the following commands).
On Linux, some people can achieve better latencies by playing with process
placement (taskset), cgroups, real-time priorities (chrt), NUMA
configuration (numactl), or by using a low-latency kernel. Please note
vanilla Redis is not really suitable to be bound on a single CPU core.
Redis can fork background tasks that can be extremely CPU consuming
like BGSAVE or BGREWRITEAOF. These tasks must never run on the same core
as the main event loop.
In most situations, these kind of system level optimizations are not needed. Only do them if you require them, and if you are familiar with them.
Single threaded nature of Redis
Redis uses a mostly single threaded design. This means that a single process serves all the client requests, using a technique called multiplexing. This means that Redis can serve a single request in every given moment, so all the requests are served sequentially. This is very similar to how Node.js works as well. However, both products are not often perceived as being slow. This is caused in part by the small amount of time to complete a single request, but primarily because these products are designed to not block on system calls, such as reading data from or writing data to a socket.
I said that Redis is mostly single threaded since actually from Redis 2.4 we use threads in Redis in order to perform some slow I/O operations in the background, mainly related to disk I/O, but this does not change the fact that Redis serves all the requests using a single thread.
Latency generated by slow commands
A consequence of being single thread is that when a request is slow to serve
all the other clients will wait for this request to be served. When executing
normal commands, like GET or SET or LPUSH this is not a problem
at all since these commands are executed in constant (and very small) time.
However there are commands operating on many elements, like SORT, LREM,
SUNION and others. For instance taking the intersection of two big sets
can take a considerable amount of time.
The algorithmic complexity of all commands is documented. A good practice is to systematically check it when using commands you are not familiar with.
If you have latency concerns you should either not use slow commands against values composed of many elements, or you should run a replica using Redis replication where you run all your slow queries.
It is possible to monitor slow commands using the Redis Slow Log feature.
Additionally, you can use your favorite per-process monitoring program (top, htop, prstat, etc ...) to quickly check the CPU consumption of the main Redis process. If it is high while the traffic is not, it is usually a sign that slow commands are used.
IMPORTANT NOTE: a VERY common source of latency generated by the execution
of slow commands is the use of the KEYS command in production environments.
KEYS, as documented in the Redis documentation, should only be used for
debugging purposes. Since Redis 2.8 a new commands were introduced in order to
iterate the key space and other large collections incrementally, please check
the SCAN, SSCAN, HSCAN and ZSCAN commands for more information.
Latency generated by fork
In order to generate the RDB file in background, or to rewrite the Append Only File if AOF persistence is enabled, Redis has to fork background processes. The fork operation (running in the main thread) can induce latency by itself.
Forking is an expensive operation on most Unix-like systems, since it involves copying a good number of objects linked to the process. This is especially true for the page table associated to the virtual memory mechanism.
For instance on a Linux/AMD64 system, the memory is divided in 4 kB pages. To convert virtual addresses to physical addresses, each process stores a page table (actually represented as a tree) containing at least a pointer per page of the address space of the process. So a large 24 GB Redis instance requires a page table of 24 GB / 4 kB * 8 = 48 MB.
When a background save is performed, this instance will have to be forked, which will involve allocating and copying 48 MB of memory. It takes time and CPU, especially on virtual machines where allocation and initialization of a large memory chunk can be expensive.
Fork time in different systems
Modern hardware is pretty fast at copying the page table, but Xen is not.
The problem with Xen is not virtualization-specific, but Xen-specific. For instance using VMware or Virtual Box does not result into slow fork time.
The following is a table that compares fork time for different Redis instance
size. Data is obtained performing a BGSAVE and looking at the latest_fork_usec filed in the INFO command output.
However the good news is that new types of EC2 HVM based instances are much better with fork times, almost on par with physical servers, so for example using m3.medium (or better) instances will provide good results.
- Linux beefy VM on VMware 6.0GB RSS forked in 77 milliseconds (12.8 milliseconds per GB).
- Linux running on physical machine (Unknown HW) 6.1GB RSS forked in 80 milliseconds (13.1 milliseconds per GB)
- Linux running on physical machine (Xeon @ 2.27Ghz) 6.9GB RSS forked into 62 milliseconds (9 milliseconds per GB).
- Linux VM on 6sync (KVM) 360 MB RSS forked in 8.2 milliseconds (23.3 milliseconds per GB).
- Linux VM on EC2, old instance types (Xen) 6.1GB RSS forked in 1460 milliseconds (239.3 milliseconds per GB).
- Linux VM on EC2, new instance types (Xen) 1GB RSS forked in 10 milliseconds (10 milliseconds per GB).
- Linux VM on Linode (Xen) 0.9GBRSS forked into 382 milliseconds (424 milliseconds per GB).
As you can see certain VMs running on Xen have a performance hit that is between one order to two orders of magnitude. For EC2 users the suggestion is simple: use modern HVM based instances.
Latency induced by transparent huge pages
Unfortunately when a Linux kernel has transparent huge pages enabled, Redis
incurs to a big latency penalty after the fork call is used in order to
persist on disk. Huge pages are the cause of the following issue:
- Fork is called, two processes with shared huge pages are created.
- In a busy instance, a few event loops runs will cause commands to target a few thousand of pages, causing the copy on write of almost the whole process memory.
- This will result in big latency and big memory usage.
Make sure to disable transparent huge pages using the following command:
echo never > /sys/kernel/mm/transparent_hugepage/enabled
Latency induced by swapping (operating system paging)
Linux (and many other modern operating systems) is able to relocate memory pages from the memory to the disk, and vice versa, in order to use the system memory efficiently.
If a Redis page is moved by the kernel from the memory to the swap file, when the data stored in this memory page is used by Redis (for example accessing a key stored into this memory page) the kernel will stop the Redis process in order to move the page back into the main memory. This is a slow operation involving random I/Os (compared to accessing a page that is already in memory) and will result into anomalous latency experienced by Redis clients.
The kernel relocates Redis memory pages on disk mainly because of three reasons:
- The system is under memory pressure since the running processes are demanding more physical memory than the amount that is available. The simplest instance of this problem is simply Redis using more memory than is available.
- The Redis instance data set, or part of the data set, is mostly completely idle (never accessed by clients), so the kernel could swap idle memory pages on disk. This problem is very rare since even a moderately slow instance will touch all the memory pages often, forcing the kernel to retain all the pages in memory.
- Some processes are generating massive read or write I/Os on the system. Because files are generally cached, it tends to put pressure on the kernel to increase the filesystem cache, and therefore generate swapping activity. Please note it includes Redis RDB and/or AOF background threads which can produce large files.
Fortunately Linux offers good tools to investigate the problem, so the simplest thing to do is when latency due to swapping is suspected is just to check if this is the case.
The first thing to do is to checking the amount of Redis memory that is swapped on disk. In order to do so you need to obtain the Redis instance pid:
$ redis-cli info | grep process_id
process_id:5454
Now enter the /proc file system directory for this process:
$ cd /proc/5454
Here you'll find a file called smaps that describes the memory layout of the Redis process (assuming you are using Linux 2.6.16 or newer). This file contains very detailed information about our process memory maps, and one field called Swap is exactly what we are looking for. However there is not just a single swap field since the smaps file contains the different memory maps of our Redis process (The memory layout of a process is more complex than a simple linear array of pages).
Since we are interested in all the memory swapped by our process the first thing to do is to grep for the Swap field across all the file:
$ cat smaps | grep 'Swap:'
Swap: 0 kB
Swap: 0 kB
Swap: 0 kB
Swap: 0 kB
Swap: 0 kB
Swap: 12 kB
Swap: 156 kB
Swap: 8 kB
Swap: 0 kB
Swap: 0 kB
Swap: 0 kB
Swap: 0 kB
Swap: 0 kB
Swap: 0 kB
Swap: 0 kB
Swap: 0 kB
Swap: 0 kB
Swap: 4 kB
Swap: 0 kB
Swap: 0 kB
Swap: 4 kB
Swap: 0 kB
Swap: 0 kB
Swap: 4 kB
Swap: 4 kB
Swap: 0 kB
Swap: 0 kB
Swap: 0 kB
Swap: 0 kB
Swap: 0 kB
If everything is 0 kB, or if there are sporadic 4k entries, everything is perfectly normal. Actually in our example instance (the one of a real web site running Redis and serving hundreds of users every second) there are a few entries that show more swapped pages. To investigate if this is a serious problem or not we change our command in order to also print the size of the memory map:
$ cat smaps | egrep '^(Swap|Size)'
Size: 316 kB
Swap: 0 kB
Size: 4 kB
Swap: 0 kB
Size: 8 kB
Swap: 0 kB
Size: 40 kB
Swap: 0 kB
Size: 132 kB
Swap: 0 kB
Size: 720896 kB
Swap: 12 kB
Size: 4096 kB
Swap: 156 kB
Size: 4096 kB
Swap: 8 kB
Size: 4096 kB
Swap: 0 kB
Size: 4 kB
Swap: 0 kB
Size: 1272 kB
Swap: 0 kB
Size: 8 kB
Swap: 0 kB
Size: 4 kB
Swap: 0 kB
Size: 16 kB
Swap: 0 kB
Size: 84 kB
Swap: 0 kB
Size: 4 kB
Swap: 0 kB
Size: 4 kB
Swap: 0 kB
Size: 8 kB
Swap: 4 kB
Size: 8 kB
Swap: 0 kB
Size: 4 kB
Swap: 0 kB
Size: 4 kB
Swap: 4 kB
Size: 144 kB
Swap: 0 kB
Size: 4 kB
Swap: 0 kB
Size: 4 kB
Swap: 4 kB
Size: 12 kB
Swap: 4 kB
Size: 108 kB
Swap: 0 kB
Size: 4 kB
Swap: 0 kB
Size: 4 kB
Swap: 0 kB
Size: 272 kB
Swap: 0 kB
Size: 4 kB
Swap: 0 kB
As you can see from the output, there is a map of 720896 kB (with just 12 kB swapped) and 156 kB more swapped in another map: basically a very small amount of our memory is swapped so this is not going to create any problem at all.
If instead a non trivial amount of the process memory is swapped on disk your latency problems are likely related to swapping. If this is the case with your Redis instance you can further verify it using the vmstat command:
$ vmstat 1
procs -----------memory---------- ---swap-- -----io---- -system-- ----cpu----
r b swpd free buff cache si so bi bo in cs us sy id wa
0 0 3980 697932 147180 1406456 0 0 2 2 2 0 4 4 91 0
0 0 3980 697428 147180 1406580 0 0 0 0 19088 16104 9 6 84 0
0 0 3980 697296 147180 1406616 0 0 0 28 18936 16193 7 6 87 0
0 0 3980 697048 147180 1406640 0 0 0 0 18613 15987 6 6 88 0
2 0 3980 696924 147180 1406656 0 0 0 0 18744 16299 6 5 88 0
0 0 3980 697048 147180 1406688 0 0 0 4 18520 15974 6 6 88 0
^C
The interesting part of the output for our needs are the two columns si and so, that counts the amount of memory swapped from/to the swap file. If you see non zero counts in those two columns then there is swapping activity in your system.
Finally, the iostat command can be used to check the global I/O activity of the system.
$ iostat -xk 1
avg-cpu: %user %nice %system %iowait %steal %idle
13.55 0.04 2.92 0.53 0.00 82.95
Device: rrqm/s wrqm/s r/s w/s rkB/s wkB/s avgrq-sz avgqu-sz await svctm %util
sda 0.77 0.00 0.01 0.00 0.40 0.00 73.65 0.00 3.62 2.58 0.00
sdb 1.27 4.75 0.82 3.54 38.00 32.32 32.19 0.11 24.80 4.24 1.85
If your latency problem is due to Redis memory being swapped on disk you need to lower the memory pressure in your system, either adding more RAM if Redis is using more memory than the available, or avoiding running other memory hungry processes in the same system.
Latency due to AOF and disk I/O
Another source of latency is due to the Append Only File support on Redis. The AOF basically uses two system calls to accomplish its work. One is write(2) that is used in order to write data to the append only file, and the other one is fdatasync(2) that is used in order to flush the kernel file buffer on disk in order to ensure the durability level specified by the user.
Both the write(2) and fdatasync(2) calls can be source of latency. For instance write(2) can block both when there is a system wide sync in progress, or when the output buffers are full and the kernel requires to flush on disk in order to accept new writes.
The fdatasync(2) call is a worse source of latency as with many combinations of kernels and file systems used it can take from a few milliseconds to a few seconds to complete, especially in the case of some other process doing I/O. For this reason when possible Redis does the fdatasync(2) call in a different thread since Redis 2.4.
We'll see how configuration can affect the amount and source of latency when using the AOF file.
The AOF can be configured to perform an fsync on disk in three different ways using the appendfsync configuration option (this setting can be modified at runtime using the CONFIG SET command).
When appendfsync is set to the value of no Redis performs no fsync. In this configuration the only source of latency can be write(2). When this happens usually there is no solution since simply the disk can't cope with the speed at which Redis is receiving data, however this is uncommon if the disk is not seriously slowed down by other processes doing I/O.
When appendfsync is set to the value of everysec Redis performs an fsync every second. It uses a different thread, and if the fsync is still in progress Redis uses a buffer to delay the write(2) call up to two seconds (since write would block on Linux if an fsync is in progress against the same file). However if the fsync is taking too long Redis will eventually perform the write(2) call even if the fsync is still in progress, and this can be a source of latency.
When appendfsync is set to the value of always an fsync is performed at every write operation before replying back to the client with an OK code (actually Redis will try to cluster many commands executed at the same time into a single fsync). In this mode performances are very low in general and it is strongly recommended to use a fast disk and a file system implementation that can perform the fsync in short time.
Most Redis users will use either the no or everysec setting for the appendfsync configuration directive. The suggestion for minimum latency is to avoid other processes doing I/O in the same system. Using an SSD disk can help as well, but usually even non SSD disks perform well with the append only file if the disk is spare as Redis writes to the append only file without performing any seek.
If you want to investigate your latency issues related to the append only file you can use the strace command under Linux:
sudo strace -p $(pidof redis-server) -T -e trace=fdatasync
The above command will show all the fdatasync(2) system calls performed by Redis in the main thread. With the above command you'll not see the fdatasync system calls performed by the background thread when the appendfsync config option is set to everysec. In order to do so just add the -f switch to strace.
If you wish you can also see both fdatasync and write system calls with the following command:
sudo strace -p $(pidof redis-server) -T -e trace=fdatasync,write
However since write(2) is also used in order to write data to the client sockets this will likely show too many things unrelated to disk I/O. Apparently there is no way to tell strace to just show slow system calls so I use the following command:
sudo strace -f -p $(pidof redis-server) -T -e trace=fdatasync,write 2>&1 | grep -v '0.0' | grep -v unfinished
Latency generated by expires
Redis evict expired keys in two ways:
- One lazy way expires a key when it is requested by a command, but it is found to be already expired.
- One active way expires a few keys every 100 milliseconds.
The active expiring is designed to be adaptive. An expire cycle is started every 100 milliseconds (10 times per second), and will do the following:
- Sample
ACTIVE_EXPIRE_CYCLE_LOOKUPS_PER_LOOPkeys, evicting all the keys already expired. - If the more than 25% of the keys were found expired, repeat.
Given that ACTIVE_EXPIRE_CYCLE_LOOKUPS_PER_LOOP is set to 20 by default, and the process is performed ten times per second, usually just 200 keys per second are actively expired. This is enough to clean the DB fast enough even when already expired keys are not accessed for a long time, so that the lazy algorithm does not help. At the same time expiring just 200 keys per second has no effects in the latency a Redis instance.
However the algorithm is adaptive and will loop if it finds more than 25% of keys already expired in the set of sampled keys. But given that we run the algorithm ten times per second, this means that the unlucky event of more than 25% of the keys in our random sample are expiring at least in the same second.
Basically this means that if the database has many many keys expiring in the same second, and these make up at least 25% of the current population of keys with an expire set, Redis can block in order to get the percentage of keys already expired below 25%.
This approach is needed in order to avoid using too much memory for keys that are already expired, and usually is absolutely harmless since it's strange that a big number of keys are going to expire in the same exact second, but it is not impossible that the user used EXPIREAT extensively with the same Unix time.
In short: be aware that many keys expiring at the same moment can be a source of latency.
Redis software watchdog
Redis 2.6 introduces the Redis Software Watchdog that is a debugging tool designed to track those latency problems that for one reason or the other escaped an analysis using normal tools.
The software watchdog is an experimental feature. While it is designed to be used in production environments care should be taken to backup the database before proceeding as it could possibly have unexpected interactions with the normal execution of the Redis server.
It is important to use it only as last resort when there is no way to track the issue by other means.
This is how this feature works:
- The user enables the software watchdog using the
CONFIG SETcommand. - Redis starts monitoring itself constantly.
- If Redis detects that the server is blocked into some operation that is not returning fast enough, and that may be the source of the latency issue, a low level report about where the server is blocked is dumped on the log file.
- The user contacts the developers writing a message in the Redis Google Group, including the watchdog report in the message.
Note that this feature cannot be enabled using the redis.conf file, because it is designed to be enabled only in already running instances and only for debugging purposes.
To enable the feature just use the following:
CONFIG SET watchdog-period 500
The period is specified in milliseconds. In the above example I specified to log latency issues only if the server detects a delay of 500 milliseconds or greater. The minimum configurable period is 200 milliseconds.
When you are done with the software watchdog you can turn it off setting the watchdog-period parameter to 0. Important: remember to do this because keeping the instance with the watchdog turned on for a longer time than needed is generally not a good idea.
The following is an example of what you'll see printed in the log file once the software watchdog detects a delay longer than the configured one:
[8547 | signal handler] (1333114359)
--- WATCHDOG TIMER EXPIRED ---
/lib/libc.so.6(nanosleep+0x2d) [0x7f16b5c2d39d]
/lib/libpthread.so.0(+0xf8f0) [0x7f16b5f158f0]
/lib/libc.so.6(nanosleep+0x2d) [0x7f16b5c2d39d]
/lib/libc.so.6(usleep+0x34) [0x7f16b5c62844]
./redis-server(debugCommand+0x3e1) [0x43ab41]
./redis-server(call+0x5d) [0x415a9d]
./redis-server(processCommand+0x375) [0x415fc5]
./redis-server(processInputBuffer+0x4f) [0x4203cf]
./redis-server(readQueryFromClient+0xa0) [0x4204e0]
./redis-server(aeProcessEvents+0x128) [0x411b48]
./redis-server(aeMain+0x2b) [0x411dbb]
./redis-server(main+0x2b6) [0x418556]
/lib/libc.so.6(__libc_start_main+0xfd) [0x7f16b5ba1c4d]
./redis-server() [0x411099]
------
Note: in the example the DEBUG SLEEP command was used in order to block the server. The stack trace is different if the server blocks in a different context.
If you happen to collect multiple watchdog stack traces you are encouraged to send everything to the Redis Google Group: the more traces we obtain, the simpler it will be to understand what the problem with your instance is.
8.11.4 - Redis latency monitoring
Discovering slow server events in Redis
Redis is often used for demanding use cases, where it serves a large number of queries per second per instance, but also has strict latency requirements for the average response time and the worst-case latency.
While Redis is an in-memory system, it deals with the operating system in different ways, for example, in the context of persisting to disk. Moreover Redis implements a rich set of commands. Certain commands are fast and run in constant or logarithmic time. Other commands are slower O(N) commands that can cause latency spikes.
Finally, Redis is single threaded. This is usually an advantage from the point of view of the amount of work it can perform per core, and in the latency figures it is able to provide. However, it poses a challenge for latency, since the single thread must be able to perform certain tasks incrementally, for example key expiration, in a way that does not impact the other clients that are served.
For all these reasons, Redis 2.8.13 introduced a new feature called Latency Monitoring, that helps the user to check and troubleshoot possible latency problems. Latency monitoring is composed of the following conceptual parts:
- Latency hooks that sample different latency-sensitive code paths.
- Time series recording of latency spikes, split by different events.
- Reporting engine to fetch raw data from the time series.
- Analysis engine to provide human-readable reports and hints according to the measurements.
The rest of this document covers the latency monitoring subsystem details. For more information about the general topic of Redis and latency, see Redis latency problems troubleshooting.
Events and time series
Different monitored code paths have different names and are called events.
For example, command is an event that measures latency spikes of possibly slow
command executions, while fast-command is the event name for the monitoring
of the O(1) and O(log N) commands. Other events are less generic and monitor
specific operations performed by Redis. For example, the fork event
only monitors the time taken by Redis to execute the fork(2) system call.
A latency spike is an event that takes more time to run than the configured latency threshold. There is a separate time series associated with every monitored event. This is how the time series work:
- Every time a latency spike happens, it is logged in the appropriate time series.
- Every time series is composed of 160 elements.
- Each element is a pair made of a Unix timestamp of the time the latency spike was measured and the number of milliseconds the event took to execute.
- Latency spikes for the same event that occur in the same second are merged by taking the maximum latency. Even if continuous latency spikes are measured for a given event, which could happen with a low threshold, at least 180 seconds of history are available.
- Records the all-time maximum latency for every element.
The framework monitors and logs latency spikes in the execution time of these events:
command: regular commands.fast-command: O(1) and O(log N) commands.fork: thefork(2)system call.rdb-unlink-temp-file: theunlink(2)system call.aof-write: writing to the AOF - a catchall event forfsync(2)system calls.aof-fsync-always: thefsync(2)system call when invoked by theappendfsync allwayspolicy.aof-write-pending-fsync: thefsync(2)system call when there are pending writes.aof-write-active-child: thefsync(2)system call when performed by a child process.aof-write-alone: thefsync(2)system call when performed by the main process.aof-fstat: thefstat(2)system call.aof-rename: therename(2)system call for renaming the temporary file after completingBGREWRITEAOF.aof-rewrite-diff-write: writing the differences accumulated while performingBGREWRITEAOF.active-defrag-cycle: the active defragmentation cycle.expire-cycle: the expiration cycle.eviction-cycle: the eviction cycle.eviction-del: deletes during the eviction cycle.
How to enable latency monitoring
What is high latency for one use case may not be considered high latency for another. Some applications may require that all queries be served in less than 1 millisecond. For other applications, it may be acceptable for a small amount of clients to experience a 2 second latency on occasion.
The first step to enable the latency monitor is to set a latency threshold in milliseconds. Only events that take longer than the specified threshold will be logged as latency spikes. The user should set the threshold according to their needs. For example, if the application requires a maximum acceptable latency of 100 milliseconds, the threshold should be set to log all the events blocking the server for a time equal or greater to 100 milliseconds.
Enable the latency monitor at runtime in a production server with the following command:
CONFIG SET latency-monitor-threshold 100
Monitoring is turned off by default (threshold set to 0), even if the actual cost of latency monitoring is near zero. While the memory requirements of latency monitoring are very small, there is no good reason to raise the baseline memory usage of a Redis instance that is working well.
Report information with the LATENCY command
The user interface to the latency monitoring subsystem is the LATENCY command.
Like many other Redis commands, LATENCY accepts subcommands that modify its behavior. These subcommands are:
LATENCY LATEST- returns the latest latency samples for all events.LATENCY HISTORY- returns latency time series for a given event.LATENCY RESET- resets latency time series data for one or more events.LATENCY GRAPH- renders an ASCII-art graph of an event's latency samples.LATENCY DOCTOR- replies with a human-readable latency analysis report.
Refer to each subcommand's documentation page for further information.
8.11.5 - Memory optimization
Strategies for optimizing memory usage in Redis
Special encoding of small aggregate data types
Since Redis 2.2 many data types are optimized to use less space up to a certain size. Hashes, Lists, Sets composed of just integers, and Sorted Sets, when smaller than a given number of elements, and up to a maximum element size, are encoded in a very memory efficient way that uses up to 10 times less memory (with 5 time less memory used being the average saving).
This is completely transparent from the point of view of the user and API. Since this is a CPU / memory trade off it is possible to tune the maximum number of elements and maximum element size for special encoded types using the following redis.conf directives.
hash-max-ziplist-entries 512
hash-max-ziplist-value 64
zset-max-ziplist-entries 128
zset-max-ziplist-value 64
set-max-intset-entries 512
If a specially encoded value overflows the configured max size, Redis will automatically convert it into normal encoding. This operation is very fast for small values, but if you change the setting in order to use specially encoded values for much larger aggregate types the suggestion is to run some benchmarks and tests to check the conversion time.
Using 32 bit instances
Redis compiled with 32 bit target uses a lot less memory per key, since pointers are small, but such an instance will be limited to 4 GB of maximum memory usage. To compile Redis as 32 bit binary use make 32bit. RDB and AOF files are compatible between 32 bit and 64 bit instances (and between little and big endian of course) so you can switch from 32 to 64 bit, or the contrary, without problems.
Bit and byte level operations
Redis 2.2 introduced new bit and byte level operations: GETRANGE, SETRANGE, GETBIT and SETBIT.
Using these commands you can treat the Redis string type as a random access array.
For instance if you have an application where users are identified by a unique progressive integer number,
you can use a bitmap in order to save information about the subscription of users in a mailing list,
setting the bit for subscribed and clearing it for unsubscribed, or the other way around.
With 100 million users this data will take just 12 megabytes of RAM in a Redis instance.
You can do the same using GETRANGE and SETRANGE in order to store one byte of information for each user.
This is just an example but it is actually possible to model a number of problems in very little space with these new primitives.
Use hashes when possible
Small hashes are encoded in a very small space, so you should try representing your data using hashes whenever possible. For instance if you have objects representing users in a web application, instead of using different keys for name, surname, email, password, use a single hash with all the required fields.
If you want to know more about this, read the next section.
Using hashes to abstract a very memory efficient plain key-value store on top of Redis
I understand the title of this section is a bit scary, but I'm going to explain in details what this is about.
Basically it is possible to model a plain key-value store using Redis where values can just be just strings, that is not just more memory efficient than Redis plain keys but also much more memory efficient than memcached.
Let's start with some facts: a few keys use a lot more memory than a single key containing a hash with a few fields. How is this possible? We use a trick. In theory in order to guarantee that we perform lookups in constant time (also known as O(1) in big O notation) there is the need to use a data structure with a constant time complexity in the average case, like a hash table.
But many times hashes contain just a few fields. When hashes are small we can instead just encode them in an O(N) data structure, like a linear array with length-prefixed key value pairs. Since we do this only when N is small, the amortized time for HGET and HSET commands is still O(1): the hash will be converted into a real hash table as soon as the number of elements it contains grows too large (you can configure the limit in redis.conf).
This does not only work well from the point of view of time complexity, but also from the point of view of constant times, since a linear array of key value pairs happens to play very well with the CPU cache (it has a better cache locality than a hash table).
However since hash fields and values are not (always) represented as full featured Redis objects, hash fields can't have an associated time to live (expire) like a real key, and can only contain a string. But we are okay with this, this was the intention anyway when the hash data type API was designed (we trust simplicity more than features, so nested data structures are not allowed, as expires of single fields are not allowed).
So hashes are memory efficient. This is useful when using hashes to represent objects or to model other problems when there are group of related fields. But what about if we have a plain key value business?
Imagine we want to use Redis as a cache for many small objects, that can be JSON encoded objects, small HTML fragments, simple key -> boolean values and so forth. Basically anything is a string -> string map with small keys and values.
Now let's assume the objects we want to cache are numbered, like:
- object:102393
- object:1234
- object:5
This is what we can do. Every time we perform a SET operation to set a new value, we actually split the key into two parts, one part used as a key, and the other part used as the field name for the hash. For instance the object named "object:1234" is actually split into:
- a Key named object:12
- a Field named 34
So we use all the characters but the last two for the key, and the final two characters for the hash field name. To set our key we use the following command:
HSET object:12 34 somevalue
As you can see every hash will end containing 100 fields, that is an optimal compromise between CPU and memory saved.
There is another important thing to note, with this schema every hash will have more or less 100 fields regardless of the number of objects we cached. This is since our objects will always end with a number, and not a random string. In some way the final number can be considered as a form of implicit pre-sharding.
What about small numbers? Like object:2? We handle this case using just "object:" as a key name, and the whole number as the hash field name. So object:2 and object:10 will both end inside the key "object:", but one as field name "2" and one as "10".
How much memory do we save this way?
I used the following Ruby program to test how this works:
require 'rubygems'
require 'redis'
USE_OPTIMIZATION = true
def hash_get_key_field(key)
s = key.split(':')
if s[1].length > 2
{ key: s[0] + ':' + s[1][0..-3], field: s[1][-2..-1] }
else
{ key: s[0] + ':', field: s[1] }
end
end
def hash_set(r, key, value)
kf = hash_get_key_field(key)
r.hset(kf[:key], kf[:field], value)
end
def hash_get(r, key, value)
kf = hash_get_key_field(key)
r.hget(kf[:key], kf[:field], value)
end
r = Redis.new
(0..100_000).each do |id|
key = "object:#{id}"
if USE_OPTIMIZATION
hash_set(r, key, 'val')
else
r.set(key, 'val')
end
end
This is the result against a 64 bit instance of Redis 2.2:
- USE_OPTIMIZATION set to true: 1.7 MB of used memory
- USE_OPTIMIZATION set to false; 11 MB of used memory
This is an order of magnitude, I think this makes Redis more or less the most memory efficient plain key value store out there.
WARNING: for this to work, make sure that in your redis.conf you have something like this:
hash-max-zipmap-entries 256
Also remember to set the following field accordingly to the maximum size of your keys and values:
hash-max-zipmap-value 1024
Every time a hash exceeds the number of elements or element size specified it will be converted into a real hash table, and the memory saving will be lost.
You may ask, why don't you do this implicitly in the normal key space so that I don't have to care? There are two reasons: one is that we tend to make tradeoffs explicit, and this is a clear tradeoff between many things: CPU, memory, max element size. The second is that the top level key space must support a lot of interesting things like expires, LRU data, and so forth so it is not practical to do this in a general way.
But the Redis Way is that the user must understand how things work so that he is able to pick the best compromise, and to understand how the system will behave exactly.
Memory allocation
To store user keys, Redis allocates at most as much memory as the maxmemory
setting enables (however there are small extra allocations possible).
The exact value can be set in the configuration file or set later via
CONFIG SET (see Using memory as an LRU cache for more info).
There are a few things that should be noted about how Redis manages memory:
- Redis will not always free up (return) memory to the OS when keys are removed. This is not something special about Redis, but it is how most malloc() implementations work. For example if you fill an instance with 5GB worth of data, and then remove the equivalent of 2GB of data, the Resident Set Size (also known as the RSS, which is the number of memory pages consumed by the process) will probably still be around 5GB, even if Redis will claim that the user memory is around 3GB. This happens because the underlying allocator can't easily release the memory. For example often most of the removed keys were allocated in the same pages as the other keys that still exist.
- The previous point means that you need to provision memory based on your peak memory usage. If your workload from time to time requires 10GB, even if most of the times 5GB could do, you need to provision for 10GB.
- However allocators are smart and are able to reuse free chunks of memory, so after you freed 2GB of your 5GB data set, when you start adding more keys again, you'll see the RSS (Resident Set Size) stay steady and not grow more, as you add up to 2GB of additional keys. The allocator is basically trying to reuse the 2GB of memory previously (logically) freed.
- Because of all this, the fragmentation ratio is not reliable when you
had a memory usage that at peak is much larger than the currently used memory.
The fragmentation is calculated as the physical memory actually used (the RSS
value) divided by the amount of memory currently in use (as the sum of all
the allocations performed by Redis). Because the RSS reflects the peak memory,
when the (virtually) used memory is low since a lot of keys / values were
freed, but the RSS is high, the ratio
RSS / mem_usedwill be very high.
If maxmemory is not set Redis will keep allocating memory as it sees
fit and thus it can (gradually) eat up all your free memory.
Therefore it is generally advisable to configure some limit. You may also
want to set maxmemory-policy to noeviction (which is not the default
value in some older versions of Redis).
It makes Redis return an out of memory error for write commands if and when it reaches the limit - which in turn may result in errors in the application but will not render the whole machine dead because of memory starvation.
8.12 - Redis programming patterns
Novel patterns for working with Redis data structures
The following documents describe some novel development patterns you can use with Redis.
8.12.1 - Bulk loading
Writing data in bulk using the Redis protocol
Bulk loading is the process of loading Redis with a large amount of pre-existing data. Ideally, you want to perform this operation quickly and efficiently. This document describes some strategies for bulk loading data in Redis.
Bulk loading using the Redis protocol
Using a normal Redis client to perform bulk loading is not a good idea for a few reasons: the naive approach of sending one command after the other is slow because you have to pay for the round trip time for every command. It is possible to use pipelining, but for bulk loading of many records you need to write new commands while you read replies at the same time to make sure you are inserting as fast as possible.
Only a small percentage of clients support non-blocking I/O, and not all the clients are able to parse the replies in an efficient way in order to maximize throughput. For all of these reasons the preferred way to mass import data into Redis is to generate a text file containing the Redis protocol, in raw format, in order to call the commands needed to insert the required data.
For instance if I need to generate a large data set where there are billions of keys in the form: `keyN -> ValueN' I will create a file containing the following commands in the Redis protocol format:
SET Key0 Value0
SET Key1 Value1
...
SET KeyN ValueN
Once this file is created, the remaining action is to feed it to Redis
as fast as possible. In the past the way to do this was to use the
netcat with the following command:
(cat data.txt; sleep 10) | nc localhost 6379 > /dev/null
However this is not a very reliable way to perform mass import because netcat
does not really know when all the data was transferred and can't check for
errors. In 2.6 or later versions of Redis the redis-cli utility
supports a new mode called pipe mode that was designed in order to perform
bulk loading.
Using the pipe mode the command to run looks like the following:
cat data.txt | redis-cli --pipe
That will produce an output similar to this:
All data transferred. Waiting for the last reply...
Last reply received from server.
errors: 0, replies: 1000000
The redis-cli utility will also make sure to only redirect errors received from the Redis instance to the standard output.
Generating Redis Protocol
The Redis protocol is extremely simple to generate and parse, and is Documented here. However in order to generate protocol for the goal of bulk loading you don't need to understand every detail of the protocol, but just that every command is represented in the following way:
*<args><cr><lf>
$<len><cr><lf>
<arg0><cr><lf>
<arg1><cr><lf>
...
<argN><cr><lf>
Where <cr> means "\r" (or ASCII character 13) and <lf> means "\n" (or ASCII character 10).
For instance the command SET key value is represented by the following protocol:
*3<cr><lf>
$3<cr><lf>
SET<cr><lf>
$3<cr><lf>
key<cr><lf>
$5<cr><lf>
value<cr><lf>
Or represented as a quoted string:
"*3\r\n$3\r\nSET\r\n$3\r\nkey\r\n$5\r\nvalue\r\n"
The file you need to generate for bulk loading is just composed of commands represented in the above way, one after the other.
The following Ruby function generates valid protocol:
def gen_redis_proto(*cmd)
proto = ""
proto << "*"+cmd.length.to_s+"\r\n"
cmd.each{|arg|
proto << "$"+arg.to_s.bytesize.to_s+"\r\n"
proto << arg.to_s+"\r\n"
}
proto
end
puts gen_redis_proto("SET","mykey","Hello World!").inspect
Using the above function it is possible to easily generate the key value pairs in the above example, with this program:
(0...1000).each{|n|
STDOUT.write(gen_redis_proto("SET","Key#{n}","Value#{n}"))
}
We can run the program directly in pipe to redis-cli in order to perform our first mass import session.
$ ruby proto.rb | redis-cli --pipe
All data transferred. Waiting for the last reply...
Last reply received from server.
errors: 0, replies: 1000
How the pipe mode works under the hood
The magic needed inside the pipe mode of redis-cli is to be as fast as netcat and still be able to understand when the last reply was sent by the server at the same time.
This is obtained in the following way:
- redis-cli --pipe tries to send data as fast as possible to the server.
- At the same time it reads data when available, trying to parse it.
- Once there is no more data to read from stdin, it sends a special ECHO command with a random 20 byte string: we are sure this is the latest command sent, and we are sure we can match the reply checking if we receive the same 20 bytes as a bulk reply.
- Once this special final command is sent, the code receiving replies starts to match replies with these 20 bytes. When the matching reply is reached it can exit with success.
Using this trick we don't need to parse the protocol we send to the server in order to understand how many commands we are sending, but just the replies.
However while parsing the replies we take a counter of all the replies parsed so that at the end we are able to tell the user the amount of commands transferred to the server by the mass insert session.
8.12.2 - Distributed Locks with Redis
A Distributed Lock Pattern with Redis
Distributed locks are a very useful primitive in many environments where different processes must operate with shared resources in a mutually exclusive way.
There are a number of libraries and blog posts describing how to implement a DLM (Distributed Lock Manager) with Redis, but every library uses a different approach, and many use a simple approach with lower guarantees compared to what can be achieved with slightly more complex designs.
This page describes a more canonical algorithm to implement distributed locks with Redis. We propose an algorithm, called Redlock, which implements a DLM which we believe to be safer than the vanilla single instance approach. We hope that the community will analyze it, provide feedback, and use it as a starting point for the implementations or more complex or alternative designs.
Implementations
Before describing the algorithm, here are a few links to implementations already available that can be used for reference.
- Redlock-rb (Ruby implementation). There is also a fork of Redlock-rb that adds a gem for easy distribution.
- Redlock-py (Python implementation).
- Pottery (Python implementation).
- Aioredlock (Asyncio Python implementation).
- Redlock-php (PHP implementation).
- PHPRedisMutex (further PHP implementation).
- cheprasov/php-redis-lock (PHP library for locks).
- rtckit/react-redlock (Async PHP implementation).
- Redsync (Go implementation).
- Redisson (Java implementation).
- Redis::DistLock (Perl implementation).
- Redlock-cpp (C++ implementation).
- Redlock-cs (C#/.NET implementation).
- RedLock.net (C#/.NET implementation). Includes async and lock extension support.
- ScarletLock (C# .NET implementation with configurable datastore).
- Redlock4Net (C# .NET implementation).
- node-redlock (NodeJS implementation). Includes support for lock extension.
Safety and Liveness Guarantees
We are going to model our design with just three properties that, from our point of view, are the minimum guarantees needed to use distributed locks in an effective way.
- Safety property: Mutual exclusion. At any given moment, only one client can hold a lock.
- Liveness property A: Deadlock free. Eventually it is always possible to acquire a lock, even if the client that locked a resource crashes or gets partitioned.
- Liveness property B: Fault tolerance. As long as the majority of Redis nodes are up, clients are able to acquire and release locks.
Why Failover-based Implementations Are Not Enough
To understand what we want to improve, let’s analyze the current state of affairs with most Redis-based distributed lock libraries.
The simplest way to use Redis to lock a resource is to create a key in an instance. The key is usually created with a limited time to live, using the Redis expires feature, so that eventually it will get released (property 2 in our list). When the client needs to release the resource, it deletes the key.
Superficially this works well, but there is a problem: this is a single point of failure in our architecture. What happens if the Redis master goes down? Well, let’s add a replica! And use it if the master is unavailable. This is unfortunately not viable. By doing so we can’t implement our safety property of mutual exclusion, because Redis replication is asynchronous.
There is a race condition with this model:
- Client A acquires the lock in the master.
- The master crashes before the write to the key is transmitted to the replica.
- The replica gets promoted to master.
- Client B acquires the lock to the same resource A already holds a lock for. SAFETY VIOLATION!
Sometimes it is perfectly fine that, under special circumstances, for example during a failure, multiple clients can hold the lock at the same time. If this is the case, you can use your replication based solution. Otherwise we suggest to implement the solution described in this document.
Correct Implementation with a Single Instance
Before trying to overcome the limitation of the single instance setup described above, let’s check how to do it correctly in this simple case, since this is actually a viable solution in applications where a race condition from time to time is acceptable, and because locking into a single instance is the foundation we’ll use for the distributed algorithm described here.
To acquire the lock, the way to go is the following:
SET resource_name my_random_value NX PX 30000
The command will set the key only if it does not already exist (NX option), with an expire of 30000 milliseconds (PX option).
The key is set to a value “my_random_value”. This value must be unique across all clients and all lock requests.
Basically the random value is used in order to release the lock in a safe way, with a script that tells Redis: remove the key only if it exists and the value stored at the key is exactly the one I expect to be. This is accomplished by the following Lua script:
if redis.call("get",KEYS[1]) == ARGV[1] then
return redis.call("del",KEYS[1])
else
return 0
end
This is important in order to avoid removing a lock that was created by another client. For example a client may acquire the lock, get blocked performing some operation for longer than the lock validity time (the time at which the key will expire), and later remove the lock, that was already acquired by some other client.
Using just DEL is not safe as a client may remove another client's lock. With the above script instead every lock is “signed” with a random string, so the lock will be removed only if it is still the one that was set by the client trying to remove it.
What should this random string be? We assume it’s 20 bytes from /dev/urandom, but you can find cheaper ways to make it unique enough for your tasks.
For example a safe pick is to seed RC4 with /dev/urandom, and generate a pseudo random stream from that.
A simpler solution is to use a UNIX timestamp with microsecond precision, concatenating the timestamp with a client ID. It is not as safe, but probably sufficient for most environments.
The "lock validity time" is the time we use as the key's time to live. It is both the auto release time, and the time the client has in order to perform the operation required before another client may be able to acquire the lock again, without technically violating the mutual exclusion guarantee, which is only limited to a given window of time from the moment the lock is acquired.
So now we have a good way to acquire and release the lock. With this system, reasoning about a non-distributed system composed of a single, always available, instance, is safe. Let’s extend the concept to a distributed system where we don’t have such guarantees.
The Redlock Algorithm
In the distributed version of the algorithm we assume we have N Redis masters. Those nodes are totally independent, so we don’t use replication or any other implicit coordination system. We already described how to acquire and release the lock safely in a single instance. We take for granted that the algorithm will use this method to acquire and release the lock in a single instance. In our examples we set N=5, which is a reasonable value, so we need to run 5 Redis masters on different computers or virtual machines in order to ensure that they’ll fail in a mostly independent way.
In order to acquire the lock, the client performs the following operations:
- It gets the current time in milliseconds.
- It tries to acquire the lock in all the N instances sequentially, using the same key name and random value in all the instances. During step 2, when setting the lock in each instance, the client uses a timeout which is small compared to the total lock auto-release time in order to acquire it. For example if the auto-release time is 10 seconds, the timeout could be in the ~ 5-50 milliseconds range. This prevents the client from remaining blocked for a long time trying to talk with a Redis node which is down: if an instance is not available, we should try to talk with the next instance ASAP.
- The client computes how much time elapsed in order to acquire the lock, by subtracting from the current time the timestamp obtained in step 1. If and only if the client was able to acquire the lock in the majority of the instances (at least 3), and the total time elapsed to acquire the lock is less than lock validity time, the lock is considered to be acquired.
- If the lock was acquired, its validity time is considered to be the initial validity time minus the time elapsed, as computed in step 3.
- If the client failed to acquire the lock for some reason (either it was not able to lock N/2+1 instances or the validity time is negative), it will try to unlock all the instances (even the instances it believed it was not able to lock).
Is the Algorithm Asynchronous?
The algorithm relies on the assumption that while there is no synchronized clock across the processes, the local time in every process updates at approximately at the same rate, with a small margin of error compared to the auto-release time of the lock. This assumption closely resembles a real-world computer: every computer has a local clock and we can usually rely on different computers to have a clock drift which is small.
At this point we need to better specify our mutual exclusion rule: it is guaranteed only as long as the client holding the lock terminates its work within the lock validity time (as obtained in step 3), minus some time (just a few milliseconds in order to compensate for clock drift between processes).
This paper contains more information about similar systems requiring a bound clock drift: Leases: an efficient fault-tolerant mechanism for distributed file cache consistency.
Retry on Failure
When a client is unable to acquire the lock, it should try again after a random delay in order to try to desynchronize multiple clients trying to acquire the lock for the same resource at the same time (this may result in a split brain condition where nobody wins). Also the faster a client tries to acquire the lock in the majority of Redis instances, the smaller the window for a split brain condition (and the need for a retry), so ideally the client should try to send the SET commands to the N instances at the same time using multiplexing.
It is worth stressing how important it is for clients that fail to acquire the majority of locks, to release the (partially) acquired locks ASAP, so that there is no need to wait for key expiry in order for the lock to be acquired again (however if a network partition happens and the client is no longer able to communicate with the Redis instances, there is an availability penalty to pay as it waits for key expiration).
Releasing the Lock
Releasing the lock is simple, and can be performed whether or not the client believes it was able to successfully lock a given instance.
Safety Arguments
Is the algorithm safe? Let's examine what happens in different scenarios.
To start let’s assume that a client is able to acquire the lock in the majority of instances. All the instances will contain a key with the same time to live. However, the key was set at different times, so the keys will also expire at different times. But if the first key was set at worst at time T1 (the time we sample before contacting the first server) and the last key was set at worst at time T2 (the time we obtained the reply from the last server), we are sure that the first key to expire in the set will exist for at least MIN_VALIDITY=TTL-(T2-T1)-CLOCK_DRIFT. All the other keys will expire later, so we are sure that the keys will be simultaneously set for at least this time.
During the time that the majority of keys are set, another client will not be able to acquire the lock, since N/2+1 SET NX operations can’t succeed if N/2+1 keys already exist. So if a lock was acquired, it is not possible to re-acquire it at the same time (violating the mutual exclusion property).
However we want to also make sure that multiple clients trying to acquire the lock at the same time can’t simultaneously succeed.
If a client locked the majority of instances using a time near, or greater, than the lock maximum validity time (the TTL we use for SET basically), it will consider the lock invalid and will unlock the instances, so we only need to consider the case where a client was able to lock the majority of instances in a time which is less than the validity time. In this case for the argument already expressed above, for MIN_VALIDITY no client should be able to re-acquire the lock. So multiple clients will be able to lock N/2+1 instances at the same time (with "time" being the end of Step 2) only when the time to lock the majority was greater than the TTL time, making the lock invalid.
Liveness Arguments
The system liveness is based on three main features:
- The auto release of the lock (since keys expire): eventually keys are available again to be locked.
- The fact that clients, usually, will cooperate removing the locks when the lock was not acquired, or when the lock was acquired and the work terminated, making it likely that we don’t have to wait for keys to expire to re-acquire the lock.
- The fact that when a client needs to retry a lock, it waits a time which is comparably greater than the time needed to acquire the majority of locks, in order to probabilistically make split brain conditions during resource contention unlikely.
However, we pay an availability penalty equal to TTL time on network partitions, so if there are continuous partitions, we can pay this penalty indefinitely.
This happens every time a client acquires a lock and gets partitioned away before being able to remove the lock.
Basically if there are infinite continuous network partitions, the system may become not available for an infinite amount of time.
Performance, Crash Recovery and fsync
Many users using Redis as a lock server need high performance in terms of both latency to acquire and release a lock, and number of acquire / release operations that it is possible to perform per second. In order to meet this requirement, the strategy to talk with the N Redis servers to reduce latency is definitely multiplexing (putting the socket in non-blocking mode, send all the commands, and read all the commands later, assuming that the RTT between the client and each instance is similar).
However there is another consideration around persistence if we want to target a crash-recovery system model.
Basically to see the problem here, let’s assume we configure Redis without persistence at all. A client acquires the lock in 3 of 5 instances. One of the instances where the client was able to acquire the lock is restarted, at this point there are again 3 instances that we can lock for the same resource, and another client can lock it again, violating the safety property of exclusivity of lock.
If we enable AOF persistence, things will improve quite a bit. For example we can upgrade a server by sending it a SHUTDOWN command and restarting it. Because Redis expires are semantically implemented so that time still elapses when the server is off, all our requirements are fine.
However everything is fine as long as it is a clean shutdown. What about a power outage? If Redis is configured, as by default, to fsync on disk every second, it is possible that after a restart our key is missing. In theory, if we want to guarantee the lock safety in the face of any kind of instance restart, we need to enable fsync=always in the persistence settings. This will affect performance due to the additional sync overhead.
However things are better than they look like at a first glance. Basically, the algorithm safety is retained as long as when an instance restarts after a crash, it no longer participates to any currently active lock. This means that the set of currently active locks when the instance restarts were all obtained by locking instances other than the one which is rejoining the system.
To guarantee this we just need to make an instance, after a crash, unavailable
for at least a bit more than the max TTL we use. This is the time needed
for all the keys about the locks that existed when the instance crashed to
become invalid and be automatically released.
Using delayed restarts it is basically possible to achieve safety even
without any kind of Redis persistence available, however note that this may
translate into an availability penalty. For example if a majority of instances
crash, the system will become globally unavailable for TTL (here globally means
that no resource at all will be lockable during this time).
Making the algorithm more reliable: Extending the lock
If the work performed by clients consists of small steps, it is possible to use smaller lock validity times by default, and extend the algorithm implementing a lock extension mechanism. Basically the client, if in the middle of the computation while the lock validity is approaching a low value, may extend the lock by sending a Lua script to all the instances that extends the TTL of the key if the key exists and its value is still the random value the client assigned when the lock was acquired.
The client should only consider the lock re-acquired if it was able to extend the lock into the majority of instances, and within the validity time (basically the algorithm to use is very similar to the one used when acquiring the lock).
However this does not technically change the algorithm, so the maximum number of lock reacquisition attempts should be limited, otherwise one of the liveness properties is violated.
Want to help?
If you are into distributed systems, it would be great to have your opinion / analysis. Also reference implementations in other languages could be great.
Thanks in advance!
Analysis of Redlock
- Martin Kleppmann analyzed Redlock here. A counterpoint to this analysis can be found here.
8.12.3 - Secondary indexing
Building secondary indexes in Redis
Redis is not exactly a key-value store, since values can be complex data structures. However it has an external key-value shell: at API level data is addressed by the key name. It is fair to say that, natively, Redis only offers primary key access. However since Redis is a data structures server, its capabilities can be used for indexing, in order to create secondary indexes of different kinds, including composite (multi-column) indexes.
This document explains how it is possible to create indexes in Redis using the following data structures:
- Sorted sets to create secondary indexes by ID or other numerical fields.
- Sorted sets with lexicographical ranges for creating more advanced secondary indexes, composite indexes and graph traversal indexes.
- Sets for creating random indexes.
- Lists for creating simple iterable indexes and last N items indexes.
Implementing and maintaining indexes with Redis is an advanced topic, so most users that need to perform complex queries on data should understand if they are better served by a relational store. However often, especially in caching scenarios, there is the explicit need to store indexed data into Redis in order to speedup common queries which require some form of indexing in order to be executed.
Simple numerical indexes with sorted sets
The simplest secondary index you can create with Redis is by using the sorted set data type, which is a data structure representing a set of elements ordered by a floating point number which is the score of each element. Elements are ordered from the smallest to the highest score.
Since the score is a double precision float, indexes you can build with vanilla sorted sets are limited to things where the indexing field is a number within a given range.
The two commands to build these kind of indexes are ZADD and
ZRANGEBYSCORE to respectively add items and retrieve items within a
specified range.
For instance, it is possible to index a set of person names by their age by adding element to a sorted set. The element will be the name of the person and the score will be the age.
ZADD myindex 25 Manuel
ZADD myindex 18 Anna
ZADD myindex 35 Jon
ZADD myindex 67 Helen
In order to retrieve all persons with an age between 20 and 40, the following command can be used:
ZRANGEBYSCORE myindex 20 40
1) "Manuel"
2) "Jon"
By using the WITHSCORES option of ZRANGEBYSCORE it is also possible
to obtain the scores associated with the returned elements.
The ZCOUNT command can be used in order to retrieve the number of elements
within a given range, without actually fetching the elements, which is also
useful, especially given the fact the operation is executed in logarithmic
time regardless of the size of the range.
Ranges can be inclusive or exclusive, please refer to the ZRANGEBYSCORE
command documentation for more information.
Note: Using the ZREVRANGEBYSCORE it is possible to query a range in
reversed order, which is often useful when data is indexed in a given
direction (ascending or descending) but we want to retrieve information
the other way around.
Using objects IDs as associated values
In the above example we associated names to ages. However in general we may want to index some field of an object which is stored elsewhere. Instead of using the sorted set value directly to store the data associated with the indexed field, it is possible to store just the ID of the object.
For example I may have Redis hashes representing users. Each user is represented by a single key, directly accessible by ID:
HMSET user:1 id 1 username antirez ctime 1444809424 age 38
HMSET user:2 id 2 username maria ctime 1444808132 age 42
HMSET user:3 id 3 username jballard ctime 1443246218 age 33
If I want to create an index in order to query users by their age, I could do:
ZADD user.age.index 38 1
ZADD user.age.index 42 2
ZADD user.age.index 33 3
This time the value associated with the score in the sorted set is the
ID of the object. So once I query the index with ZRANGEBYSCORE I'll
also have to retrieve the information I need with HGETALL or similar
commands. The obvious advantage is that objects can change without touching
the index, as long as we don't change the indexed field.
In the next examples we'll almost always use IDs as values associated with the index, since this is usually the more sounding design, with a few exceptions.
Updating simple sorted set indexes
Often we index things which change over time. In the above example, the age of the user changes every year. In such a case it would make sense to use the birth date as index instead of the age itself, but there are other cases where we simply want some field to change from time to time, and the index to reflect this change.
The ZADD command makes updating simple indexes a very trivial operation
since re-adding back an element with a different score and the same value
will simply update the score and move the element at the right position,
so if the user antirez turned 39 years old, in order to update the
data in the hash representing the user, and in the index as well, we need
to execute the following two commands:
HSET user:1 age 39
ZADD user.age.index 39 1
The operation may be wrapped in a MULTI/EXEC transaction in order to
make sure both fields are updated or none.
Turning multi dimensional data into linear data
Indexes created with sorted sets are able to index only a single numerical value. Because of this you may think it is impossible to index something which has multiple dimensions using this kind of indexes, but actually this is not always true. If you can efficiently represent something multi-dimensional in a linear way, they it is often possible to use a simple sorted set for indexing.
For example the Redis geo indexing API uses a sorted set to index places by latitude and longitude using a technique called Geo hash. The sorted set score represents alternating bits of longitude and latitude, so that we map the linear score of a sorted set to many small squares in the earth surface. By doing an 8+1 style center plus neighborhoods search it is possible to retrieve elements by radius.
Limits of the score
Sorted set elements scores are double precision floats. It means that
they can represent different decimal or integer values with different
errors, because they use an exponential representation internally.
However what is interesting for indexing purposes is that the score is
always able to represent without any error numbers between -9007199254740992
and 9007199254740992, which is -/+ 2^53.
When representing much larger numbers, you need a different form of indexing that is able to index numbers at any precision, called a lexicographical index.
Lexicographical indexes
Redis sorted sets have an interesting property. When elements are added
with the same score, they are sorted lexicographically, comparing the
strings as binary data with the memcmp() function.
For people that don't know the C language nor the memcmp function, what
it means is that elements with the same score are sorted comparing the
raw values of their bytes, byte after byte. If the first byte is the same,
the second is checked and so forth. If the common prefix of two strings is
the same then the longer string is considered the greater of the two,
so "foobar" is greater than "foo".
There are commands such as ZRANGEBYLEX and ZLEXCOUNT that
are able to query and count ranges in a lexicographically fashion, assuming
they are used with sorted sets where all the elements have the same score.
This Redis feature is basically equivalent to a b-tree data structure which
is often used in order to implement indexes with traditional databases.
As you can guess, because of this, it is possible to use this Redis data
structure in order to implement pretty fancy indexes.
Before we dive into using lexicographical indexes, let's check how sorted sets behave in this special mode of operation. Since we need to add elements with the same score, we'll always use the special score of zero.
ZADD myindex 0 baaa
ZADD myindex 0 abbb
ZADD myindex 0 aaaa
ZADD myindex 0 bbbb
Fetching all the elements from the sorted set immediately reveals that they are ordered lexicographically.
ZRANGE myindex 0 -1
1) "aaaa"
2) "abbb"
3) "baaa"
4) "bbbb"
Now we can use ZRANGEBYLEX in order to perform range queries.
ZRANGEBYLEX myindex [a (b
1) "aaaa"
2) "abbb"
Note that in the range queries we prefixed the min and max elements
identifying the range with the special characters [ and (.
This prefixes are mandatory, and they specify if the elements
of the range are inclusive or exclusive. So the range [a (b means give me
all the elements lexicographically between a inclusive and b exclusive,
which are all the elements starting with a.
There are also two more special characters indicating the infinitely negative
string and the infinitely positive string, which are - and +.
ZRANGEBYLEX myindex [b +
1) "baaa"
2) "bbbb"
That's it basically. Let's see how to use these features to build indexes.
A first example: completion
An interesting application of indexing is completion. Completion is what happens when you start typing your query into a search engine: the user interface will anticipate what you are likely typing, providing common queries that start with the same characters.
A naive approach to completion is to just add every single query we
get from the user into the index. For example if the user searches banana
we'll just do:
ZADD myindex 0 banana
And so forth for each search query ever encountered. Then when we want to
complete the user input, we execute a range query using ZRANGEBYLEX.
Imagine the user is typing "bit" inside the search form, and we want to
offer possible search keywords starting for "bit". We send Redis a command
like that:
ZRANGEBYLEX myindex "[bit" "[bit\xff"
Basically we create a range using the string the user is typing right now
as start, and the same string plus a trailing byte set to 255, which is \xff in the example, as the end of the range. This way we get all the strings that start for the string the user is typing.
Note that we don't want too many items returned, so we may use the LIMIT option in order to reduce the number of results.
Adding frequency into the mix
The above approach is a bit naive, because all the user searches are the same in this way. In a real system we want to complete strings according to their frequency: very popular searches will be proposed with an higher probability compared to search strings typed very rarely.
In order to implement something which depends on the frequency, and at the same time automatically adapts to future inputs, by purging searches that are no longer popular, we can use a very simple streaming algorithm.
To start, we modify our index in order to store not just the search term,
but also the frequency the term is associated with. So instead of just adding
banana we add banana:1, where 1 is the frequency.
ZADD myindex 0 banana:1
We also need logic in order to increment the index if the search term already exists in the index, so what we'll actually do is something like that:
ZRANGEBYLEX myindex "[banana:" + LIMIT 0 1
1) "banana:1"
This will return the single entry of banana if it exists. Then we
can increment the associated frequency and send the following two
commands:
ZREM myindex 0 banana:1
ZADD myindex 0 banana:2
Note that because it is possible that there are concurrent updates, the above three commands should be send via a Lua script instead, so that the Lua script will atomically get the old count and re-add the item with incremented score.
So the result will be that, every time a user searches for banana we'll
get our entry updated.
There is more: our goal is to just have items searched very frequently. So we need some form of purging. When we actually query the index in order to complete the user input, we may see something like that:
ZRANGEBYLEX myindex "[banana:" + LIMIT 0 10
1) "banana:123"
2) "banaooo:1"
3) "banned user:49"
4) "banning:89"
Apparently nobody searches for "banaooo", for example, but the query was performed a single time, so we end presenting it to the user.
This is what we can do. Out of the returned items, we pick a random one, decrement its score by one, and re-add it with the new score. However if the score reaches 0, we simply remove the item from the list. You can use much more advanced systems, but the idea is that the index in the long run will contain top searches, and if top searches will change over the time it will adapt automatically.
A refinement to this algorithm is to pick entries in the list according to their weight: the higher the score, the less likely entries are picked in order to decrement its score, or evict them.
Normalizing strings for case and accents
In the completion examples we always used lowercase strings. However reality is much more complex than that: languages have capitalized names, accents, and so forth.
One simple way do deal with this issues is to actually normalize the string the user searches. Whatever the user searches for "Banana", "BANANA" or "Ba'nana" we may always turn it into "banana".
However sometimes we may like to present the user with the original
item typed, even if we normalize the string for indexing. In order to
do this, what we do is to change the format of the index so that instead
of just storing term:frequency we store normalized:frequency:original
like in the following example:
ZADD myindex 0 banana:273:Banana
Basically we add another field that we'll extract and use only for visualization. Ranges will always be computed using the normalized strings instead. This is a common trick which has multiple applications.
Adding auxiliary information in the index
When using a sorted set in a direct way, we have two different attributes for each object: the score, which we use as an index, and an associated value. When using lexicographical indexes instead, the score is always set to 0 and basically not used at all. We are left with a single string, which is the element itself.
Like we did in the previous completion examples, we are still able to store associated data using separators. For example we used the colon in order to add the frequency and the original word for completion.
In general we can add any kind of associated value to our indexing key.
In order to use a lexicographical index to implement a simple key-value store
we just store the entry as key:value:
ZADD myindex 0 mykey:myvalue
And search for the key with:
ZRANGEBYLEX myindex [mykey: + LIMIT 0 1
1) "mykey:myvalue"
Then we extract the part after the colon to retrieve the value. However a problem to solve in this case is collisions. The colon character may be part of the key itself, so it must be chosen in order to never collide with the key we add.
Since lexicographical ranges in Redis are binary safe you can use any byte or any sequence of bytes. However if you receive untrusted user input, it is better to use some form of escaping in order to guarantee that the separator will never happen to be part of the key.
For example if you use two null bytes as separator "\0\0", you may
want to always escape null bytes into two bytes sequences in your strings.
Numerical padding
Lexicographical indexes may look like good only when the problem at hand is to index strings. Actually it is very simple to use this kind of index in order to perform indexing of arbitrary precision numbers.
In the ASCII character set, digits appear in the order from 0 to 9, so if we left-pad numbers with leading zeroes, the result is that comparing them as strings will order them by their numerical value.
ZADD myindex 0 00324823481:foo
ZADD myindex 0 12838349234:bar
ZADD myindex 0 00000000111:zap
ZRANGE myindex 0 -1
1) "00000000111:zap"
2) "00324823481:foo"
3) "12838349234:bar"
We effectively created an index using a numerical field which can be as big as we want. This also works with floating point numbers of any precision by making sure we left pad the numerical part with leading zeroes and the decimal part with trailing zeroes like in the following list of numbers:
01000000000000.11000000000000
01000000000000.02200000000000
00000002121241.34893482930000
00999999999999.00000000000000
Using numbers in binary form
Storing numbers in decimal may use too much memory. An alternative approach
is just to store numbers, for example 128 bit integers, directly in their
binary form. However for this to work, you need to store the numbers in
big endian format, so that the most significant bytes are stored before
the least significant bytes. This way when Redis compares the strings with
memcmp(), it will effectively sort the numbers by their value.
Keep in mind that data stored in binary format is less observable for debugging, harder to parse and export. So it is definitely a trade off.
Composite indexes
So far we explored ways to index single fields. However we all know that SQL stores are able to create indexes using multiple fields. For example I may index products in a very large store by room number and price.
I need to run queries in order to retrieve all the products in a given room having a given price range. What I can do is to index each product in the following way:
ZADD myindex 0 0056:0028.44:90
ZADD myindex 0 0034:0011.00:832
Here the fields are room:price:product_id. I used just four digits padding
in the example for simplicity. The auxiliary data (the product ID) does not
need any padding.
With an index like that, to get all the products in room 56 having a price between 10 and 30 dollars is very easy. We can just run the following command:
ZRANGEBYLEX myindex [0056:0010.00 [0056:0030.00
The above is called a composed index. Its effectiveness depends on the order of the fields and the queries I want to run. For example the above index cannot be used efficiently in order to get all the products having a specific price range regardless of the room number. However I can use the primary key in order to run queries regardless of the price, like give me all the products in room 44.
Composite indexes are very powerful, and are used in traditional stores in order to optimize complex queries. In Redis they could be useful both to implement a very fast in-memory Redis index of something stored into a traditional data store, or in order to directly index Redis data.
Updating lexicographical indexes
The value of the index in a lexicographical index can get pretty fancy and hard or slow to rebuild from what we store about the object. So one approach to simplify the handling of the index, at the cost of using more memory, is to also take alongside to the sorted set representing the index a hash mapping the object ID to the current index value.
So for example, when we index we also add to a hash:
MULTI
ZADD myindex 0 0056:0028.44:90
HSET index.content 90 0056:0028.44:90
EXEC
This is not always needed, but simplifies the operations of updating
the index. In order to remove the old information we indexed for the object
ID 90, regardless of the current fields values of the object, we just
have to retrieve the hash value by object ID and ZREM it in the sorted
set view.
Representing and querying graphs using an hexastore
One cool thing about composite indexes is that they are handy in order to represent graphs, using a data structure which is called Hexastore.
The hexastore provides a representation for relations between objects, formed by a subject, a predicate and an object. A simple relation between objects could be:
antirez is-friend-of matteocollina
In order to represent this relation I can store the following element in my lexicographical index:
ZADD myindex 0 spo:antirez:is-friend-of:matteocollina
Note that I prefixed my item with the string spo. It means that the item represents a subject,predicate,object relation.
In can add 5 more entries for the same relation, but in a different order:
ZADD myindex 0 sop:antirez:matteocollina:is-friend-of
ZADD myindex 0 ops:matteocollina:is-friend-of:antirez
ZADD myindex 0 osp:matteocollina:antirez:is-friend-of
ZADD myindex 0 pso:is-friend-of:antirez:matteocollina
ZADD myindex 0 pos:is-friend-of:matteocollina:antirez
Now things start to be interesting, and I can query the graph in many
different ways. For example, who are all the people antirez
is friend of?
ZRANGEBYLEX myindex "[spo:antirez:is-friend-of:" "[spo:antirez:is-friend-of:\xff"
1) "spo:antirez:is-friend-of:matteocollina"
2) "spo:antirez:is-friend-of:wonderwoman"
3) "spo:antirez:is-friend-of:spiderman"
Or, what are all the relationships antirez and matteocollina have where
the first is the subject and the second is the object?
ZRANGEBYLEX myindex "[sop:antirez:matteocollina:" "[sop:antirez:matteocollina:\xff"
1) "sop:antirez:matteocollina:is-friend-of"
2) "sop:antirez:matteocollina:was-at-conference-with"
3) "sop:antirez:matteocollina:talked-with"
By combining different queries, I can ask fancy questions. For example:
Who are all my friends that, like beer, live in Barcelona, and matteocollina consider friends as well?
To get this information I start with an spo query to find all the people
I'm friend with. Then for each result I get I perform an spo query
to check if they like beer, removing the ones for which I can't find
this relation. I do it again to filter by city. Finally I perform an ops
query to find, of the list I obtained, who is considered friend by
matteocollina.
Make sure to check Matteo Collina's slides about Levelgraph in order to better understand these ideas.
Multi dimensional indexes
A more complex type of index is an index that allows you to perform queries where two or more variables are queried at the same time for specific ranges. For example I may have a data set representing persons age and salary, and I want to retrieve all the people between 50 and 55 years old having a salary between 70000 and 85000.
This query may be performed with a multi column index, but this requires us to select the first variable and then scan the second, which means we may do a lot more work than needed. It is possible to perform these kinds of queries involving multiple variables using different data structures. For example, multi-dimensional trees such as k-d trees or r-trees are sometimes used. Here we'll describe a different way to index data into multiple dimensions, using a representation trick that allows us to perform the query in a very efficient way using Redis lexicographical ranges.
Let's start by visualizing the problem. In this picture we have points
in the space, which represent our data samples, where x and y are
our coordinates. Both variables max value is 400.
The blue box in the picture represents our query. We want all the points
where x is between 50 and 100, and where y is between 100 and 300.

In order to represent data that makes these kinds of queries fast to perform, we start by padding our numbers with 0. So for example imagine we want to add the point 10,25 (x,y) to our index. Given that the maximum range in the example is 400 we can just pad to three digits, so we obtain:
x = 010
y = 025
Now what we do is to interleave the digits, taking the leftmost digit in x, and the leftmost digit in y, and so forth, in order to create a single number:
001205
This is our index, however in order to more easily reconstruct the original representation, if we want (at the cost of space), we may also add the original values as additional columns:
001205:10:25
Now, let's reason about this representation and why it is useful in the
context of range queries. For example let's take the center of our blue
box, which is at x=75 and y=200. We can encode this number as we did
earlier by interleaving the digits, obtaining:
027050
What happens if we substitute the last two digits respectively with 00 and 99? We obtain a range which is lexicographically continuous:
027000 to 027099
What this maps to is to a square representing all values where the x
variable is between 70 and 79, and the y variable is between 200 and 209.
We can write random points in this interval, in order to identify this
specific area:

So the above lexicographic query allows us to easily query for points in a specific square in the picture. However the square may be too small for the box we are searching, so that too many queries are needed. So we can do the same but instead of replacing the last two digits with 00 and 99, we can do it for the last four digits, obtaining the following range:
020000 029999
This time the range represents all the points where x is between 0 and 99
and y is between 200 and 299. Drawing random points in this interval
shows us this larger area:

Oops now our area is ways too big for our query, and still our search box is not completely included. We need more granularity, but we can easily obtain it by representing our numbers in binary form. This time, when we replace digits instead of getting squares which are ten times bigger, we get squares which are just two times bigger.
Our numbers in binary form, assuming we need just 9 bits for each variable (in order to represent numbers up to 400 in value) would be:
x = 75 -> 001001011
y = 200 -> 011001000
So by interleaving digits, our representation in the index would be:
000111000011001010:75:200
Let's see what are our ranges as we substitute the last 2, 4, 6, 8, ... bits with 0s ad 1s in the interleaved representation:
2 bits: x between 70 and 75, y between 200 and 201 (range=2)
4 bits: x between 72 and 75, y between 200 and 203 (range=4)
6 bits: x between 72 and 79, y between 200 and 207 (range=8)
8 bits: x between 64 and 79, y between 192 and 207 (range=16)
And so forth. Now we have definitely better granularity!
As you can see substituting N bits from the index gives us
search boxes of side 2^(N/2).
So what we do is check the dimension where our search box is smaller, and check the nearest power of two to this number. Our search box was 50,100 to 100,300, so it has a width of 50 and an height of 200. We take the smaller of the two, 50, and check the nearest power of two which is 64. 64 is 2^6, so we would work with indexes obtained replacing the latest 12 bits from the interleaved representation (so that we end replacing just 6 bits of each variable).
However single squares may not cover all our search, so we may need more. What we do is to start with the left bottom corner of our search box, which is 50,100, and find the first range by substituting the last 6 bits in each number with 0. Then we do the same with the right top corner.
With two trivial nested for loops where we increment only the significant bits, we can find all the squares between these two. For each square we convert the two numbers into our interleaved representation, and create the range using the converted representation as our start, and the same representation but with the latest 12 bits turned on as end range.
For each square found we perform our query and get the elements inside, removing the elements which are outside our search box.
Turning this into code is simple. Here is a Ruby example:
def spacequery(x0,y0,x1,y1,exp)
bits=exp*2
x_start = x0/(2**exp)
x_end = x1/(2**exp)
y_start = y0/(2**exp)
y_end = y1/(2**exp)
(x_start..x_end).each{|x|
(y_start..y_end).each{|y|
x_range_start = x*(2**exp)
x_range_end = x_range_start | ((2**exp)-1)
y_range_start = y*(2**exp)
y_range_end = y_range_start | ((2**exp)-1)
puts "#{x},#{y} x from #{x_range_start} to #{x_range_end}, y from #{y_range_start} to #{y_range_end}"
# Turn it into interleaved form for ZRANGEBYLEX query.
# We assume we need 9 bits for each integer, so the final
# interleaved representation will be 18 bits.
xbin = x_range_start.to_s(2).rjust(9,'0')
ybin = y_range_start.to_s(2).rjust(9,'0')
s = xbin.split("").zip(ybin.split("")).flatten.compact.join("")
# Now that we have the start of the range, calculate the end
# by replacing the specified number of bits from 0 to 1.
e = s[0..-(bits+1)]+("1"*bits)
puts "ZRANGEBYLEX myindex [#{s} [#{e}"
}
}
end
spacequery(50,100,100,300,6)
While non immediately trivial this is a very useful indexing strategy that in the future may be implemented in Redis in a native way. For now, the good thing is that the complexity may be easily encapsulated inside a library that can be used in order to perform indexing and queries. One example of such library is Redimension, a proof of concept Ruby library which indexes N-dimensional data inside Redis using the technique described here.
Multi dimensional indexes with negative or floating point numbers
The simplest way to represent negative values is just to work with unsigned integers and represent them using an offset, so that when you index, before translating numbers in the indexed representation, you add the absolute value of your smaller negative integer.
For floating point numbers, the simplest approach is probably to convert them to integers by multiplying the integer for a power of ten proportional to the number of digits after the dot you want to retain.
Non range indexes
So far we checked indexes which are useful to query by range or by single item. However other Redis data structures such as Sets or Lists can be used in order to build other kind of indexes. They are very commonly used but maybe we don't always realize they are actually a form of indexing.
For instance I can index object IDs into a Set data type in order to use
the get random elements operation via SRANDMEMBER in order to retrieve
a set of random objects. Sets can also be used to check for existence when
all I need is to test if a given item exists or not or has a single boolean
property or not.
Similarly lists can be used in order to index items into a fixed order.
I can add all my items into a Redis list and rotate the list with
RPOPLPUSH using the same key name as source and destination. This is useful
when I want to process a given set of items again and again forever in the
same order. Think of an RSS feed system that needs to refresh the local copy
periodically.
Another popular index often used with Redis is a capped list, where items
are added with LPUSH and trimmed with LTRIM, in order to create a view
with just the latest N items encountered, in the same order they were
seen.
Index inconsistency
Keeping the index updated may be challenging, in the course of months or years it is possible that inconsistencies are added because of software bugs, network partitions or other events.
Different strategies could be used. If the index data is outside Redis
read repair can be a solution, where data is fixed in a lazy way when
it is requested. When we index data which is stored in Redis itself
the SCAN family of commands can be used in order to verify, update or
rebuild the index from scratch, incrementally.
8.12.4 - Redis patterns example
Learn several Redis patterns by building a Twitter clone
This article describes the design and implementation of a very simple Twitter clone written using PHP with Redis as the only database. The programming community has traditionally considered key-value stores as a special purpose database that couldn't be used as a drop-in replacement for a relational database for the development of web applications. This article will try to show that Redis data structures on top of a key-value layer are an effective data model to implement many kinds of applications.
Note: the original version of this article was written in 2009 when Redis was released. It was not exactly clear at that time that the Redis data model was suitable to write entire applications. Now after 5 years there are many cases of applications using Redis as their main store, so the goal of the article today is to be a tutorial for Redis newcomers. You'll learn how to design a simple data layout using Redis, and how to apply different data structures.
Our Twitter clone, called Retwis, is structurally simple, has very good performance, and can be distributed among any number of web and Redis servers with little efforts. You can find the source code here.
I used PHP for the example since it can be read by everybody. The same (or better) results can be obtained using Ruby, Python, Erlang, and so on. A few clones exist (however not all the clones use the same data layout as the current version of this tutorial, so please, stick with the official PHP implementation for the sake of following the article better).
- Retwis-RB is a port of Retwis to Ruby and Sinatra written by Daniel Lucraft! Full source code is included of course, and a link to its Git repository appears in the footer of this article. The rest of this article targets PHP, but Ruby programmers can also check the Retwis-RB source code since it's conceptually very similar.
- Retwis-J is a port of Retwis to Java, using the Spring Data Framework, written by Costin Leau. Its source code can be found on GitHub, and there is comprehensive documentation available at springsource.org.
What is a key-value store?
The essence of a key-value store is the ability to store some data, called a value, inside a key. The value can be retrieved later only if we know the specific key it was stored in. There is no direct way to search for a key by value. In some sense, it is like a very large hash/dictionary, but it is persistent, i.e. when your application ends, the data doesn't go away. So, for example, I can use the command SET to store the value bar in the key foo:
SET foo bar
Redis stores data permanently, so if I later ask "What is the value stored in key foo?" Redis will reply with bar:
GET foo => bar
Other common operations provided by key-value stores are DEL, to delete a given key and its associated value, SET-if-not-exists (called SETNX on Redis), to assign a value to a key only if the key does not already exist, and INCR, to atomically increment a number stored in a given key:
SET foo 10
INCR foo => 11
INCR foo => 12
INCR foo => 13
Atomic operations
There is something special about INCR. You may wonder why Redis provides such an operation if we can do it ourselves with a bit of code? After all, it is as simple as:
x = GET foo
x = x + 1
SET foo x
The problem is that incrementing this way will work as long as there is only one client working with the key foo at one time. See what happens if two clients are accessing this key at the same time:
x = GET foo (yields 10)
y = GET foo (yields 10)
x = x + 1 (x is now 11)
y = y + 1 (y is now 11)
SET foo x (foo is now 11)
SET foo y (foo is now 11)
Something is wrong! We incremented the value two times, but instead of going from 10 to 12, our key holds 11. This is because the increment done with GET / increment / SET is not an atomic operation. Instead the INCR provided by Redis, Memcached, ..., are atomic implementations, and the server will take care of protecting the key during the time needed to complete the increment in order to prevent simultaneous accesses.
What makes Redis different from other key-value stores is that it provides other operations similar to INCR that can be used to model complex problems. This is why you can use Redis to write whole web applications without using another database like an SQL database, and without going crazy.
Beyond key-value stores: lists
In this section we will see which Redis features we need to build our Twitter clone. The first thing to know is that Redis values can be more than strings. Redis supports Lists, Sets, Hashes, Sorted Sets, Bitmaps, and HyperLogLog types as values, and there are atomic operations to operate on them so we are safe even with multiple accesses to the same key. Let's start with Lists:
LPUSH mylist a (now mylist holds 'a')
LPUSH mylist b (now mylist holds 'b','a')
LPUSH mylist c (now mylist holds 'c','b','a')
LPUSH means Left Push, that is, add an element to the left (or to the head) of the list stored in mylist. If the key mylist does not exist it is automatically created as an empty list before the PUSH operation. As you can imagine, there is also an RPUSH operation that adds the element to the right of the list (on the tail). This is very useful for our Twitter clone. User updates can be added to a list stored in username:updates, for instance.
There are operations to get data from Lists, of course. For instance, LRANGE returns a range from the list, or the whole list.
LRANGE mylist 0 1 => c,b
LRANGE uses zero-based indexes - that is the first element is 0, the second 1, and so on. The command arguments are LRANGE key first-index last-index. The last-index argument can be negative, with a special meaning: -1 is the last element of the list, -2 the penultimate, and so on. So, to get the whole list use:
LRANGE mylist 0 -1 => c,b,a
Other important operations are LLEN that returns the number of elements in the list, and LTRIM that is like LRANGE but instead of returning the specified range trims the list, so it is like Get range from mylist, Set this range as new value but does so atomically.
The Set data type
Currently we don't use the Set type in this tutorial, but since we use Sorted Sets, which are kind of a more capable version of Sets, it is better to start introducing Sets first (which are a very useful data structure per se), and later Sorted Sets.
There are more data types than just Lists. Redis also supports Sets, which are unsorted collections of elements. It is possible to add, remove, and test for existence of members, and perform the intersection between different Sets. Of course it is possible to get the elements of a Set. Some examples will make it more clear. Keep in mind that SADD is the add to set operation, SREM is the remove from set operation, SISMEMBER is the test if member operation, and SINTER is the perform intersection operation. Other operations are SCARD to get the cardinality (the number of elements) of a Set, and SMEMBERS to return all the members of a Set.
SADD myset a
SADD myset b
SADD myset foo
SADD myset bar
SCARD myset => 4
SMEMBERS myset => bar,a,foo,b
Note that SMEMBERS does not return the elements in the same order we added them since Sets are unsorted collections of elements. When you want to store in order it is better to use Lists instead. Some more operations against Sets:
SADD mynewset b
SADD mynewset foo
SADD mynewset hello
SINTER myset mynewset => foo,b
SINTER can return the intersection between Sets but it is not limited to two Sets. You may ask for the intersection of 4,5, or 10000 Sets. Finally let's check how SISMEMBER works:
SISMEMBER myset foo => 1
SISMEMBER myset notamember => 0
The Sorted Set data type
Sorted Sets are similar to Sets: collection of elements. However in Sorted Sets each element is associated with a floating point value, called the element score. Because of the score, elements inside a Sorted Set are ordered, since we can always compare two elements by score (and if the score happens to be the same, we compare the two elements as strings).
Like Sets in Sorted Sets it is not possible to add repeated elements, every element is unique. However it is possible to update an element's score.
Sorted Set commands are prefixed with Z. The following is an example
of Sorted Sets usage:
ZADD zset 10 a
ZADD zset 5 b
ZADD zset 12.55 c
ZRANGE zset 0 -1 => b,a,c
In the above example we added a few elements with ZADD, and later retrieved
the elements with ZRANGE. As you can see the elements are returned in order
according to their score. In order to check if a given element exists, and
also to retrieve its score if it exists, we use the ZSCORE command:
ZSCORE zset a => 10
ZSCORE zset non_existing_element => NULL
Sorted Sets are a very powerful data structure, you can query elements by score range, lexicographically, in reverse order, and so forth. To know more please check the Sorted Set sections in the official Redis commands documentation.
The Hash data type
This is the last data structure we use in our program, and is extremely easy to gasp since there is an equivalent in almost every programming language out there: Hashes. Redis Hashes are basically like Ruby or Python hashes, a collection of fields associated with values:
HMSET myuser name Salvatore surname Sanfilippo country Italy
HGET myuser surname => Sanfilippo
HMSET can be used to set fields in the hash, that can be retrieved with
HGET later. It is possible to check if a field exists with HEXISTS, or
to increment a hash field with HINCRBY and so forth.
Hashes are the ideal data structure to represent objects. For example we use Hashes in order to represent Users and Updates in our Twitter clone.
Okay, we just exposed the basics of the Redis main data structures, we are ready to start coding!
Prerequisites
If you haven't downloaded the Retwis source code already please grab it now. It contains a few PHP files, and also a copy of Predis, the PHP client library we use in this example.
Another thing you probably want is a working Redis server. Just get the source, build with make, run with ./redis-server, and you're ready to go. No configuration is required at all in order to play with or run Retwis on your computer.
Data layout
When working with a relational database, a database schema must be designed so that we'd know the tables, indexes, and so on that the database will contain. We don't have tables in Redis, so what do we need to design? We need to identify what keys are needed to represent our objects and what kind of values these keys need to hold.
Let's start with Users. We need to represent users, of course, with their username, userid, password, the set of users following a given user, the set of users a given user follows, and so on. The first question is, how should we identify a user? Like in a relational DB, a good solution is to identify different users with different numbers, so we can associate a unique ID with every user. Every other reference to this user will be done by id. Creating unique IDs is very simple to do by using our atomic INCR operation. When we create a new user we can do something like this, assuming the user is called "antirez":
INCR next_user_id => 1000
HMSET user:1000 username antirez password p1pp0
Note: you should use a hashed password in a real application, for simplicity we store the password in clear text.
We use the next_user_id key in order to always get a unique ID for every new user. Then we use this unique ID to name the key holding a Hash with user's data. This is a common design pattern with key-values stores! Keep it in mind.
Besides the fields already defined, we need some more stuff in order to fully define a User. For example, sometimes it can be useful to be able to get the user ID from the username, so every time we add a user, we also populate the users key, which is a Hash, with the username as field, and its ID as value.
HSET users antirez 1000
This may appear strange at first, but remember that we are only able to access data in a direct way, without secondary indexes. It's not possible to tell Redis to return the key that holds a specific value. This is also our strength. This new paradigm is forcing us to organize data so that everything is accessible by primary key, speaking in relational DB terms.
Followers, following, and updates
There is another central need in our system. A user might have users who follow them, which we'll call their followers. A user might follow other users, which we'll call a following. We have a perfect data structure for this. That is... Sets. The uniqueness of Sets elements, and the fact we can test in constant time for existence, are two interesting features. However what about also remembering the time at which a given user started following another one? In an enhanced version of our simple Twitter clone this may be useful, so instead of using a simple Set, we use a Sorted Set, using the user ID of the following or follower user as element, and the unix time at which the relation between the users was created, as our score.
So let's define our keys:
followers:1000 => Sorted Set of uids of all the followers users
following:1000 => Sorted Set of uids of all the following users
We can add new followers with:
ZADD followers:1000 1401267618 1234 => Add user 1234 with time 1401267618
Another important thing we need is a place were we can add the updates to display in the user's home page. We'll need to access this data in chronological order later, from the most recent update to the oldest, so the perfect kind of data structure for this is a List. Basically every new update will be LPUSHed in the user updates key, and thanks to LRANGE, we can implement pagination and so on. Note that we use the words updates and posts interchangeably, since updates are actually "little posts" in some way.
posts:1000 => a List of post ids - every new post is LPUSHed here.
This list is basically the User timeline. We'll push the IDs of her/his own posts, and, the IDs of all the posts of created by the following users. Basically, we'll implement a write fanout.
Authentication
OK, we have more or less everything about the user except for authentication. We'll handle authentication in a simple but robust way: we don't want to use PHP sessions, as our system must be ready to be distributed among different web servers easily, so we'll keep the whole state in our Redis database. All we need is a random unguessable string to set as the cookie of an authenticated user, and a key that will contain the user ID of the client holding the string.
We need two things in order to make this thing work in a robust way.
First: the current authentication secret (the random unguessable string)
should be part of the User object, so when the user is created we also set
an auth field in its Hash:
HSET user:1000 auth fea5e81ac8ca77622bed1c2132a021f9
Moreover, we need a way to map authentication secrets to user IDs, so
we also take an auths key, which has as value a Hash type mapping
authentication secrets to user IDs.
HSET auths fea5e81ac8ca77622bed1c2132a021f9 1000
In order to authenticate a user we'll do these simple steps (see the login.php file in the Retwis source code):
- Get the username and password via the login form.
- Check if the
usernamefield actually exists in theusersHash. - If it exists we have the user id, (i.e. 1000).
- Check if user:1000 password matches, if not, return an error message.
- Ok authenticated! Set "fea5e81ac8ca77622bed1c2132a021f9" (the value of user:1000
authfield) as the "auth" cookie.
This is the actual code:
include("retwis.php");
# Form sanity checks
if (!gt("username") || !gt("password"))
goback("You need to enter both username and password to login.");
# The form is ok, check if the username is available
$username = gt("username");
$password = gt("password");
$r = redisLink();
$userid = $r->hget("users",$username);
if (!$userid)
goback("Wrong username or password");
$realpassword = $r->hget("user:$userid","password");
if ($realpassword != $password)
goback("Wrong username or password");
# Username / password OK, set the cookie and redirect to index.php
$authsecret = $r->hget("user:$userid","auth");
setcookie("auth",$authsecret,time()+3600*24*365);
header("Location: index.php");
This happens every time a user logs in, but we also need a function isLoggedIn in order to check if a given user is already authenticated or not. These are the logical steps preformed by the isLoggedIn function:
- Get the "auth" cookie from the user. If there is no cookie, the user is not logged in, of course. Let's call the value of the cookie
<authcookie>. - Check if
<authcookie>field in theauthsHash exists, and what the value (the user ID) is (1000 in the example). - In order for the system to be more robust, also verify that user:1000 auth field also matches.
- OK the user is authenticated, and we loaded a bit of information in the
$Userglobal variable.
The code is simpler than the description, possibly:
function isLoggedIn() {
global $User, $_COOKIE;
if (isset($User)) return true;
if (isset($_COOKIE['auth'])) {
$r = redisLink();
$authcookie = $_COOKIE['auth'];
if ($userid = $r->hget("auths",$authcookie)) {
if ($r->hget("user:$userid","auth") != $authcookie) return false;
loadUserInfo($userid);
return true;
}
}
return false;
}
function loadUserInfo($userid) {
global $User;
$r = redisLink();
$User['id'] = $userid;
$User['username'] = $r->hget("user:$userid","username");
return true;
}
Having loadUserInfo as a separate function is overkill for our application, but it's a good approach in a complex application. The only thing that's missing from all the authentication is the logout. What do we do on logout? That's simple, we'll just change the random string in user:1000 auth field, remove the old authentication secret from the auths Hash, and add the new one.
Important: the logout procedure explains why we don't just authenticate the user after looking up the authentication secret in the auths Hash, but double check it against user:1000 auth field. The true authentication string is the latter, while the auths Hash is just an authentication field that may even be volatile, or, if there are bugs in the program or a script gets interrupted, we may even end with multiple entries in the auths key pointing to the same user ID. The logout code is the following (logout.php):
include("retwis.php");
if (!isLoggedIn()) {
header("Location: index.php");
exit;
}
$r = redisLink();
$newauthsecret = getrand();
$userid = $User['id'];
$oldauthsecret = $r->hget("user:$userid","auth");
$r->hset("user:$userid","auth",$newauthsecret);
$r->hset("auths",$newauthsecret,$userid);
$r->hdel("auths",$oldauthsecret);
header("Location: index.php");
That is just what we described and should be simple to understand.
Updates
Updates, also known as posts, are even simpler. In order to create a new post in the database we do something like this:
INCR next_post_id => 10343
HMSET post:10343 user_id $owner_id time $time body "I'm having fun with Retwis"
As you can see each post is just represented by a Hash with three fields. The ID of the user owning the post, the time at which the post was published, and finally, the body of the post, which is, the actual status message.
After we create a post and we obtain the post ID, we need to LPUSH the ID in the timeline of every user that is following the author of the post, and of course in the list of posts of the author itself (everybody is virtually following herself/himself). This is the file post.php that shows how this is performed:
include("retwis.php");
if (!isLoggedIn() || !gt("status")) {
header("Location:index.php");
exit;
}
$r = redisLink();
$postid = $r->incr("next_post_id");
$status = str_replace("\n"," ",gt("status"));
$r->hmset("post:$postid","user_id",$User['id'],"time",time(),"body",$status);
$followers = $r->zrange("followers:".$User['id'],0,-1);
$followers[] = $User['id']; /* Add the post to our own posts too */
foreach($followers as $fid) {
$r->lpush("posts:$fid",$postid);
}
# Push the post on the timeline, and trim the timeline to the
# newest 1000 elements.
$r->lpush("timeline",$postid);
$r->ltrim("timeline",0,1000);
header("Location: index.php");
The core of the function is the foreach loop. We use ZRANGE to get all the followers of the current user, then the loop will LPUSH the push the post in every follower timeline List.
Note that we also maintain a global timeline for all the posts, so that in the Retwis home page we can show everybody's updates easily. This requires just doing an LPUSH to the timeline List. Let's face it, aren't you starting to think it was a bit strange to have to sort things added in chronological order using ORDER BY with SQL? I think so.
There is an interesting thing to notice in the code above: we used a new
command called LTRIM after we perform the LPUSH operation in the global
timeline. This is used in order to trim the list to just 1000 elements. The
global timeline is actually only used in order to show a few posts in the
home page, there is no need to have the full history of all the posts.
Basically LTRIM + LPUSH is a way to create a capped collection in Redis.
Paginating updates
Now it should be pretty clear how we can use LRANGE in order to get ranges of posts, and render these posts on the screen. The code is simple:
function showPost($id) {
$r = redisLink();
$post = $r->hgetall("post:$id");
if (empty($post)) return false;
$userid = $post['user_id'];
$username = $r->hget("user:$userid","username");
$elapsed = strElapsed($post['time']);
$userlink = "<a class=\"username\" href=\"profile.php?u=".urlencode($username)."\">".utf8entities($username)."</a>";
echo('<div class="post">'.$userlink.' '.utf8entities($post['body'])."<br>");
echo('<i>posted '.$elapsed.' ago via web</i></div>');
return true;
}
function showUserPosts($userid,$start,$count) {
$r = redisLink();
$key = ($userid == -1) ? "timeline" : "posts:$userid";
$posts = $r->lrange($key,$start,$start+$count);
$c = 0;
foreach($posts as $p) {
if (showPost($p)) $c++;
if ($c == $count) break;
}
return count($posts) == $count+1;
}
showPost will simply convert and print a Post in HTML while showUserPosts gets a range of posts and then passes them to showPosts.
Note: LRANGE is not very efficient if the list of posts start to be very
big, and we want to access elements which are in the middle of the list, since Redis Lists are backed by linked lists. If a system is designed for
deep pagination of million of items, it is better to resort to Sorted Sets
instead.
Following users
It is not hard, but we did not yet check how we create following / follower relationships. If user ID 1000 (antirez) wants to follow user ID 5000 (pippo), we need to create both a following and a follower relationship. We just need to ZADD calls:
ZADD following:1000 5000
ZADD followers:5000 1000
Note the same pattern again and again. In theory with a relational database, the list of following and followers would be contained in a single table with fields like following_id and follower_id. You can extract the followers or following of every user using an SQL query. With a key-value DB things are a bit different since we need to set both the 1000 is following 5000 and 5000 is followed by 1000 relations. This is the price to pay, but on the other hand accessing the data is simpler and extremely fast. Having these things as separate sets allows us to do interesting stuff. For example, using ZINTERSTORE we can have the intersection of following of two different users, so we may add a feature to our Twitter clone so that it is able to tell you very quickly when you visit somebody else's profile, "you and Alice have 34 followers in common", and things like that.
You can find the code that sets or removes a following / follower relation in the follow.php file.
Making it horizontally scalable
Gentle reader, if you read till this point you are already a hero. Thank you. Before talking about scaling horizontally it is worth checking performance on a single server. Retwis is extremely fast, without any kind of cache. On a very slow and loaded server, an Apache benchmark with 100 parallel clients issuing 100000 requests measured the average pageview to take 5 milliseconds. This means you can serve millions of users every day with just a single Linux box, and this one was monkey ass slow... Imagine the results with more recent hardware.
However you can't go with a single server forever, how do you scale a key-value store?
Retwis does not perform any multi-keys operation, so making it scalable is simple: you may use client-side sharding, or something like a sharding proxy like Twemproxy, or the upcoming Redis Cluster.
To know more about those topics please read our documentation about sharding. However, the point here to stress is that in a key-value store, if you design with care, the data set is split among many independent small keys. To distribute those keys to multiple nodes is more straightforward and predictable compared to using a semantically more complex database system.
8.13 - RESP protocol spec
Redis serialization protocol (RESP) specification
Redis clients use a protocol called RESP (REdis Serialization Protocol) to communicate with the Redis server. While the protocol was designed specifically for Redis, it can be used for other client-server software projects.
RESP is a compromise between the following things:
- Simple to implement.
- Fast to parse.
- Human readable.
RESP can serialize different data types like integers, strings, and arrays. There is also a specific type for errors. Requests are sent from the client to the Redis server as arrays of strings that represent the arguments of the command to execute. Redis replies with a command-specific data type.
RESP is binary-safe and does not require processing of bulk data transferred from one process to another because it uses prefixed-length to transfer bulk data.
Note: the protocol outlined here is only used for client-server communication. Redis Cluster uses a different binary protocol in order to exchange messages between nodes.
Network layer
A client connects to a Redis server by creating a TCP connection to the port 6379.
While RESP is technically non-TCP specific, the protocol is only used with TCP connections (or equivalent stream-oriented connections like Unix sockets) in the context of Redis.
Request-Response model
Redis accepts commands composed of different arguments. Once a command is received, it is processed and a reply is sent back to the client.
This is the simplest model possible; however, there are two exceptions:
- Redis supports pipelining (covered later in this document). So it is possible for clients to send multiple commands at once and wait for replies later.
- When a Redis client subscribes to a Pub/Sub channel, the protocol changes semantics and becomes a push protocol. The client no longer requires sending commands because the server will automatically send new messages to the client (for the channels the client is subscribed to) as soon as they are received.
Excluding these two exceptions, the Redis protocol is a simple request-response protocol.
RESP protocol description
The RESP protocol was introduced in Redis 1.2, but it became the standard way for talking with the Redis server in Redis 2.0. This is the protocol you should implement in your Redis client.
RESP is actually a serialization protocol that supports the following data types: Simple Strings, Errors, Integers, Bulk Strings, and Arrays.
Redis uses RESP as a request-response protocol in the following way:
- Clients send commands to a Redis server as a RESP Array of Bulk Strings.
- The server replies with one of the RESP types according to the command implementation.
In RESP, the first byte determines the data type:
- For Simple Strings, the first byte of the reply is "+"
- For Errors, the first byte of the reply is "-"
- For Integers, the first byte of the reply is ":"
- For Bulk Strings, the first byte of the reply is "$"
- For Arrays, the first byte of the reply is "
*"
RESP can represent a Null value using a special variation of Bulk Strings or Array as specified later.
In RESP, different parts of the protocol are always terminated with "\r\n" (CRLF).
RESP Simple Strings
Simple Strings are encoded as follows: a plus character, followed by a string that cannot contain a CR or LF character (no newlines are allowed), and terminated by CRLF (that is "\r\n").
Simple Strings are used to transmit non binary-safe strings with minimal overhead. For example, many Redis commands reply with just "OK" on success. The RESP Simple String is encoded with the following 5 bytes:
"+OK\r\n"
In order to send binary-safe strings, use RESP Bulk Strings instead.
When Redis replies with a Simple String, a client library should respond with a string composed of the first character after the '+' up to the end of the string, excluding the final CRLF bytes.
RESP Errors
RESP has a specific data type for errors. They are similar to RESP Simple Strings, but the first character is a minus '-' character instead of a plus. The real difference between Simple Strings and Errors in RESP is that clients treat errors as exceptions, and the string that composes the Error type is the error message itself.
The basic format is:
"-Error message\r\n"
Error replies are only sent when something goes wrong, for instance if you try to perform an operation against the wrong data type, or if the command does not exist. The client should raise an exception when it receives an Error reply.
The following are examples of error replies:
-ERR unknown command 'helloworld'
-WRONGTYPE Operation against a key holding the wrong kind of value
The first word after the "-", up to the first space or newline, represents the kind of error returned. This is just a convention used by Redis and is not part of the RESP Error format.
For example, ERR is the generic error, while WRONGTYPE is a more specific
error that implies that the client tried to perform an operation against the
wrong data type. This is called an Error Prefix and is a way to allow
the client to understand the kind of error returned by the server without checking the exact error message.
A client implementation may return different types of exceptions for different errors or provide a generic way to trap errors by directly providing the error name to the caller as a string.
However, such a feature should not be considered vital as it is rarely useful, and a limited client implementation may simply return a generic error condition, such as false.
RESP Integers
This type is just a CRLF-terminated string that represents an integer, prefixed by a ":" byte. For example, ":0\r\n" and ":1000\r\n" are integer replies.
Many Redis commands return RESP Integers, like INCR, LLEN, and LASTSAVE.
There is no special meaning for the returned integer. It is just an
incremental number for INCR, a UNIX time for LASTSAVE, and so forth. However,
the returned integer is guaranteed to be in the range of a signed 64-bit integer.
Integer replies are also used in order to return true or false.
For instance, commands like EXISTS or SISMEMBER will return 1 for true
and 0 for false.
Other commands like SADD, SREM, and SETNX will return 1 if the operation
was actually performed and 0 otherwise.
The following commands will reply with an integer: SETNX, DEL,
EXISTS, INCR, INCRBY, DECR, DECRBY, DBSIZE, LASTSAVE,
RENAMENX, MOVE, LLEN, SADD, SREM, SISMEMBER, SCARD.
RESP Bulk Strings
Bulk Strings are used in order to represent a single binary-safe string up to 512 MB in length.
Bulk Strings are encoded in the following way:
- A "$" byte followed by the number of bytes composing the string (a prefixed length), terminated by CRLF.
- The actual string data.
- A final CRLF.
So the string "hello" is encoded as follows:
"$5\r\nhello\r\n"
An empty string is encoded as:
"$0\r\n\r\n"
RESP Bulk Strings can also be used in order to signal non-existence of a value using a special format to represent a Null value. In this format, the length is -1, and there is no data. Null is represented as:
"$-1\r\n"
This is called a Null Bulk String.
The client library API should not return an empty string, but a nil object, when the server replies with a Null Bulk String. For example, a Ruby library should return 'nil' while a C library should return NULL (or set a special flag in the reply object).
RESP Arrays
Clients send commands to the Redis server using RESP Arrays. Similarly,
certain Redis commands, that return collections of elements to the client,
use RESP Arrays as their replies. An example is the LRANGE command that
returns elements of a list.
RESP Arrays are sent using the following format:
- A
*character as the first byte, followed by the number of elements in the array as a decimal number, followed by CRLF. - An additional RESP type for every element of the Array.
So an empty Array is just the following:
"*0\r\n"
While an array of two RESP Bulk Strings "hello" and "world" is encoded as:
"*2\r\n$5\r\nhello\r\n$5\r\nworld\r\n"
As you can see after the *<count>CRLF part prefixing the array, the other
data types composing the array are just concatenated one after the other.
For example, an Array of three integers is encoded as follows:
"*3\r\n:1\r\n:2\r\n:3\r\n"
Arrays can contain mixed types, so it's not necessary for the elements to be of the same type. For instance, a list of four integers and a bulk string can be encoded as follows:
*5\r\n
:1\r\n
:2\r\n
:3\r\n
:4\r\n
$6\r\n
hello\r\n
(The reply was split into multiple lines for clarity).
The first line the server sent is *5\r\n in order to specify that five
replies will follow. Then every reply constituting the items of the
Multi Bulk reply are transmitted.
Null Arrays exist as well and are an alternative way to specify a Null value (usually the Null Bulk String is used, but for historical reasons we have two formats).
For instance, when the BLPOP command times out, it returns a Null Array
that has a count of -1 as in the following example:
"*-1\r\n"
A client library API should return a null object and not an empty Array when
Redis replies with a Null Array. This is necessary to distinguish
between an empty list and a different condition (for instance the timeout
condition of the BLPOP command).
Nested arrays are possible in RESP. For example a nested array of two arrays is encoded as follows:
*2\r\n
*3\r\n
:1\r\n
:2\r\n
:3\r\n
*2\r\n
+Hello\r\n
-World\r\n
(The format was split into multiple lines to make it easier to read).
The above RESP data type encodes a two-element Array consisting of an Array that contains three Integers (1, 2, 3) and an array of a Simple String and an Error.
Null elements in Arrays
Single elements of an Array may be Null. This is used in Redis replies to signal that these elements are missing and not empty strings. This can happen with the SORT command when used with the GET pattern option if the specified key is missing. Example of an Array reply containing a Null element:
*3\r\n
$5\r\n
hello\r\n
$-1\r\n
$5\r\n
world\r\n
The second element is a Null. The client library should return something like this:
["hello",nil,"world"]
Note that this is not an exception to what was said in the previous sections, but an example to further specify the protocol.
Send commands to a Redis server
Now that you are familiar with the RESP serialization format, you can use it to help write a Redis client library. We can further specify how the interaction between the client and the server works:
- A client sends the Redis server a RESP Array consisting of only Bulk Strings.
- A Redis server replies to clients, sending any valid RESP data type as a reply.
So for example a typical interaction could be the following.
The client sends the command LLEN mylist in order to get the length of the list stored at key mylist. Then the server replies with an Integer reply as in the following example (C: is the client, S: the server).
C: *2\r\n
C: $4\r\n
C: LLEN\r\n
C: $6\r\n
C: mylist\r\n
S: :48293\r\n
As usual, we separate different parts of the protocol with newlines for simplicity, but the actual interaction is the client sending *2\r\n$4\r\nLLEN\r\n$6\r\nmylist\r\n as a whole.
Multiple commands and pipelining
A client can use the same connection in order to issue multiple commands. Pipelining is supported so multiple commands can be sent with a single write operation by the client, without the need to read the server reply of the previous command before issuing the next one. All the replies can be read at the end.
For more information, see Pipelining.
Inline commands
Sometimes you may need to send a command
to the Redis server but only have telnet available. While the Redis protocol is simple to implement, it is
not ideal to use in interactive sessions, and redis-cli may not always be
available. For this reason, Redis also accepts commands in the inline command format.
The following is an example of a server/client chat using an inline command (the server chat starts with S:, the client chat with C:)
C: PING
S: +PONG
The following is an example of an inline command that returns an integer:
C: EXISTS somekey
S: :0
Basically, you write space-separated arguments in a telnet session.
Since no command starts with * that is instead used in the unified request
protocol, Redis is able to detect this condition and parse your command.
High performance parser for the Redis protocol
While the Redis protocol is human readable and easy to implement, it can be implemented with a performance similar to that of a binary protocol.
RESP uses prefixed lengths to transfer bulk data, so there is never a need to scan the payload for special characters, like with JSON, nor to quote the payload that needs to be sent to the server.
The Bulk and Multi Bulk lengths can be processed with code that performs a single operation per character while at the same time scanning for the CR character, like the following C code:
#include <stdio.h>
int main(void) {
unsigned char *p = "$123\r\n";
int len = 0;
p++;
while(*p != '\r') {
len = (len*10)+(*p - '0');
p++;
}
/* Now p points at '\r', and the len is in bulk_len. */
printf("%d\n", len);
return 0;
}
After the first CR is identified, it can be skipped along with the following LF without any processing. Then the bulk data can be read using a single read operation that does not inspect the payload in any way. Finally, the remaining CR and LF characters are discarded without any processing.
While comparable in performance to a binary protocol, the Redis protocol is significantly simpler to implement in most high-level languages, reducing the number of bugs in client software.
8.14 - Redis signal handling
How Redis handles common Unix signals
This document provides information about how Redis reacts to different POSIX signals such as SIGTERM and SIGSEGV.
The information in this document only applies to Redis version 2.6 or greater.
SIGTERM and SIGINT
The SIGTERM and SIGINT signals tell Redis to shut down gracefully. When the server receives this signal,
it does not immediately exit. Instead, it schedules
a shutdown similar to the one performed by the SHUTDOWN command. The scheduled shutdown starts as soon as possible, specifically as long as the
current command in execution terminates (if any), with a possible additional
delay of 0.1 seconds or less.
If the server is blocked by a long-running Lua script,
kill the script with SCRIPT KILL if possible. The scheduled shutdown will
run just after the script is killed or terminates spontaneously.
This shutdown process includes the following actions:
- If there are any replicas lagging behind in replication:
- Pause clients attempting to write with
CLIENT PAUSEand theWRITEoption. - Wait up to the configured
shutdown-timeout(default 10 seconds) for replicas to catch up with the master's replication offset.
- Pause clients attempting to write with
- If a background child is saving the RDB file or performing an AOF rewrite, the child process is killed.
- If the AOF is active, Redis calls the
fsyncsystem call on the AOF file descriptor to flush the buffers on disk. - If Redis is configured to persist on disk using RDB files, a synchronous (blocking) save is performed. Since the save is synchronous, it doesn't use any additional memory.
- If the server is daemonized, the PID file is removed.
- If the Unix domain socket is enabled, it gets removed.
- The server exits with an exit code of zero.
IF the RDB file can't be saved, the shutdown fails, and the server continues to run in order to ensure no data loss.
Likewise, if the user just turned on AOF, and the server triggered the first AOF rewrite in order to create the initial AOF file but this file can't be saved, the shutdown fails and the server continues to run.
Since Redis 2.6.11, no further attempt to shut down will be made unless a new SIGTERM is received or the SHUTDOWN command is issued.
Since Redis 7.0, the server waits for lagging replicas up to a configurable shutdown-timeout, 10 seconds by default, before shutting down.
This provides a best effort to minimize the risk of data loss in a situation where no save points are configured and AOF is deactivated.
Before version 7.0, shutting down a heavily loaded master node in a diskless setup was more likely to result in data loss.
To minimize the risk of data loss in such setups, trigger a manual FAILOVER (or CLUSTER FAILOVER) to demote the master to a replica and promote one of the replicas to a new master before shutting down a master node.
SIGSEGV, SIGBUS, SIGFPE and SIGILL
The following signals are handled as a Redis crash:
- SIGSEGV
- SIGBUS
- SIGFPE
- SIGILL
Once one of these signals is trapped, Redis stops any current operation and performs the following actions:
- Adds a bug report to the log file. This includes a stack trace, dump of registers, and information about the state of clients.
- Since Redis 2.8, a fast memory test is performed as a first check of the reliability of the crashing system.
- If the server was daemonized, the PID file is removed.
- Finally the server unregisters its own signal handler for the received signal and resends the same signal to itself to make sure that the default action is performed, such as dumping the core on the file system.
What happens when a child process gets killed
When the child performing the Append Only File rewrite gets killed by a signal, Redis handles this as an error and discards the (probably partial or corrupted) AOF file. It will attempt the rewrite again later.
When the child performing an RDB save is killed, Redis handles the condition as a more severe error. While the failure of an AOF file rewrite can cause AOF file enlargement, failed RDB file creation reduces durability.
As a result of the child producing the RDB file being killed by a signal, or when the child exits with an error (non zero exit code), Redis enters a special error condition where no further write command is accepted.
- Redis will continue to reply to read commands.
- Redis will reply to all write commands with a
MISCONFIGerror.
This error condition will persist until it becomes possible to create an RDB file successfully.
Kill the RDB file without errors
Sometimes the user may want to kill the RDB-saving child process without
generating an error. Since Redis version 2.6.10, this can be done using the signal SIGUSR1. This signal is handled in a special way:
it kills the child process like any other signal, but the parent process will
not detect this as a critical error and will continue to serve write
requests.
8.15 - Sentinel client spec
How to build clients for Redis Sentinel
Redis Sentinel is a monitoring solution for Redis instances that handles automatic failover of Redis masters and service discovery (who is the current master for a given group of instances?). Since Sentinel is both responsible for reconfiguring instances during failovers, and providing configurations to clients connecting to Redis masters or replicas, clients are required to have explicit support for Redis Sentinel.
This document is targeted at Redis clients developers that want to support Sentinel in their clients implementation with the following goals:
- Automatic configuration of clients via Sentinel.
- Improved safety of Redis Sentinel automatic failover.
For details about how Redis Sentinel works, please check the Redis Documentation, as this document only contains information needed for Redis client developers, and it is expected that readers are familiar with the way Redis Sentinel works.
Redis service discovery via Sentinel
Redis Sentinel identifies every master with a name like "stats" or "cache". Every name actually identifies a group of instances, composed of a master and a variable number of replicas.
The address of the Redis master that is used for a specific purpose inside a network may change after events like an automatic failover, a manually triggered failover (for instance in order to upgrade a Redis instance), and other reasons.
Normally Redis clients have some kind of hard-coded configuration that specifies the address of a Redis master instance within a network as IP address and port number. However if the master address changes, manual intervention in every client is needed.
A Redis client supporting Sentinel can automatically discover the address of a Redis master from the master name using Redis Sentinel. So instead of a hard coded IP address and port, a client supporting Sentinel should optionally be able to take as input:
- A list of ip:port pairs pointing to known Sentinel instances.
- The name of the service, like "cache" or "timelines".
This is the procedure a client should follow in order to obtain the master address starting from the list of Sentinels and the service name.
Step 1: connecting to the first Sentinel
The client should iterate the list of Sentinel addresses. For every address it should try to connect to the Sentinel, using a short timeout (in the order of a few hundreds of milliseconds). On errors or timeouts the next Sentinel address should be tried.
If all the Sentinel addresses were tried without success, an error should be returned to the client.
The first Sentinel replying to the client request should be put at the start of the list, so that at the next reconnection, we'll try first the Sentinel that was reachable in the previous connection attempt, minimizing latency.
Step 2: ask for master address
Once a connection with a Sentinel is established, the client should retry to execute the following command on the Sentinel:
SENTINEL get-master-addr-by-name master-name
Where master-name should be replaced with the actual service name specified by the user.
The result from this call can be one of the following two replies:
- An ip:port pair.
- A null reply. This means Sentinel does not know this master.
If an ip:port pair is received, this address should be used to connect to the Redis master. Otherwise if a null reply is received, the client should try the next Sentinel in the list.
Step 3: call the ROLE command in the target instance
Once the client discovered the address of the master instance, it should
attempt a connection with the master, and call the ROLE command in order
to verify the role of the instance is actually a master.
If the ROLE commands is not available (it was introduced in Redis 2.8.12), a client may resort to the INFO replication command parsing the role: field of the output.
If the instance is not a master as expected, the client should wait a short amount of time (a few hundreds of milliseconds) and should try again starting from Step 1.
Handling reconnections
Once the service name is resolved into the master address and a connection is established with the Redis master instance, every time a reconnection is needed, the client should resolve again the address using Sentinels restarting from Step 1. For instance Sentinel should contacted again the following cases:
- If the client reconnects after a timeout or socket error.
- If the client reconnects because it was explicitly closed or reconnected by the user.
In the above cases and any other case where the client lost the connection with the Redis server, the client should resolve the master address again.
Sentinel failover disconnection
Starting with Redis 2.8.12, when Redis Sentinel changes the configuration of
an instance, for example promoting a replica to a master, demoting a master to
replicate to the new master after a failover, or simply changing the master
address of a stale replica instance, it sends a CLIENT KILL type normal
command to the instance in order to make sure all the clients are disconnected
from the reconfigured instance. This will force clients to resolve the master
address again.
If the client will contact a Sentinel with yet not updated information, the verification of the Redis instance role via the ROLE command will fail, allowing the client to detect that the contacted Sentinel provided stale information, and will try again.
Note: it is possible that a stale master returns online at the same time a client contacts a stale Sentinel instance, so the client may connect with a stale master, and yet the ROLE output will match. However when the master is back again Sentinel will try to demote it to replica, triggering a new disconnection. The same reasoning applies to connecting to stale replicas that will get reconfigured to replicate with a different master.
Connecting to replicas
Sometimes clients are interested to connect to replicas, for example in order to scale read requests. This protocol supports connecting to replicas by modifying step 2 slightly. Instead of calling the following command:
SENTINEL get-master-addr-by-name master-name
The clients should call instead:
SENTINEL replicas master-name
In order to retrieve a list of replica instances.
Symmetrically the client should verify with the ROLE command that the
instance is actually a replica, in order to avoid scaling read queries with
the master.
Connection pools
For clients implementing connection pools, on reconnection of a single connection, the Sentinel should be contacted again, and in case of a master address change all the existing connections should be closed and connected to the new address.
Error reporting
The client should correctly return the information to the user in case of errors. Specifically:
- If no Sentinel can be contacted (so that the client was never able to get the reply to
SENTINEL get-master-addr-by-name), an error that clearly states that Redis Sentinel is unreachable should be returned. - If all the Sentinels in the pool replied with a null reply, the user should be informed with an error that Sentinels don't know this master name.
Sentinels list automatic refresh
Optionally once a successful reply to get-master-addr-by-name is received, a client may update its internal list of Sentinel nodes following this procedure:
- Obtain a list of other Sentinels for this master using the command
SENTINEL sentinels <master-name>. - Add every ip:port pair not already existing in our list at the end of the list.
It is not needed for a client to be able to make the list persistent updating its own configuration. The ability to upgrade the in-memory representation of the list of Sentinels can be already useful to improve reliability.
Subscribe to Sentinel events to improve responsiveness
The Sentinel documentation shows how clients can connect to Sentinel instances using Pub/Sub in order to subscribe to changes in the Redis instances configurations.
This mechanism can be used in order to speedup the reconfiguration of clients, that is, clients may listen to Pub/Sub in order to know when a configuration change happened in order to run the three steps protocol explained in this document in order to resolve the new Redis master (or replica) address.
However update messages received via Pub/Sub should not substitute the above procedure, since there is no guarantee that a client is able to receive all the update messages.
Additional information
For additional information or to discuss specific aspects of this guidelines, please drop a message to the Redis Google Group.
9 - Redis Stack
Extend Redis with modern data models and processing engines.
Redis Stack is an extension of Redis that adds modern data models and processing engines to provide a complete developer experience.
In addition to all of the features of OSS Redis, Redis stack supports:
- Queryable JSON documents
- Full-text search
- Time series data (ingestion & querying)
- Graph data models with the Cypher query language
- Probabilistic data structures
Getting started
To get started with Redis Stack, see the Getting Started guide. You may also want to:
If you want to learn more about the vision for Redis Stack, read on.
Why Redis Stack?
Redis Stack was created to allow developers build to real-time applications with a back end data platform that can reliably process requests in under a millisecond. Redis Stack does this by extending Redis with modern data models and data processing tools (Document, Graph, Search, and Time Series).
Redis Stack unifies and simplifies the developer experience of the leading Redis modules and the capabilities they provide. Redis Stack bundles five Redis modules: RedisJSON, RedisSearch, RedisGraph, RedisTimeSeries, and RedisBloom.
Clients
Several Redis client libraries support Redis Stack. These include redis-py, node_redis, and Jedis. In addition, four higher-level object mapping libraries also support Redis Stack: Redis OM .NET, Redis OM Node, Redis OM Python, Redis OM Spring.
RedisInsight
Redis Stack also includes RedisInsight, a visualization tool for understanding and optimizing Redis data.
Redis Stack license
Redis Stack is made up of several components, licensed as follows:
Redis Stack Server combines open source Redis with RediSearch, RedisJSON RedisGraph, RedisTimeSeries and RedisBloom is licensed under the Redis Source Available License (RSAL).
RedisInsight is licensed under the Server Side Public License (SSPL).
9.1 - Get started with Redis Stack
How to install and get started with Redis Stack
9.1.1 - Install Redis Stack
How to install Redis Stack
9.1.1.1 - Install Redis Stack with binaries
How to install Redis Stack using tarballs
Start Redis Stack Server
After untarring or unzipping your redis-stack-server download, you can start Redis Stack Server as follows:
/path/to/redis-stack-server/bin/redis-stack-serverAdd the binaries to your PATH
You can add the redis-stack-server binaries to your $PATH as follows:
Open the file ~/.bashrc or '~/zshrc` (depending on your shell), and add the following lines.
export PATH=/path/to/redis-stack-server/bin:$PATHIf you have an existing Redis installation on your system, then you can choose override those override those PATH variables as before, or you can choose to only add redis-stack-server binary as follows:
export PATH=/path/to/redis-stack-server/bin/redis-stack-server:$PATHNow you can start Redis Stack Server as follows:
redis-stack-server9.1.1.2 - Run Redis Stack on Docker
How to install Redis Stack using Docker
To get started with Redis Stack using Docker, you first need to select a Docker image:
redis/redis-stackcontains both Redis Stack server and RedisInsight. This container is best for local development because you can use the embedded RedisInsight to visualize your data.redis/redis-stack-serverprovides Redis Stack server only. This container is best for production deployment.
Getting started
redis/redis-stack-server
To start Redis Stack server using the redis-stack-server image, run the following command in your terminal:
docker run -d --name redis-stack-server -p 6379:6379 redis/redis-stack-server:latestYou can that the Redis Stack server database to your RedisInsight desktop applicaiton.
redis/redis-stack
To start Redis Stack developer container using the redis-stack image, run the following command in your terminal:
docker run -d --name redis-stack -p 6379:6379 -p 8001:8001 redis/redis-stack:latestThe docker run command above also exposes RedisInsight on port 8001. You can use RedisInsight by pointing your browser to http://localhost:8001.
Connect with redis-cli
You can then connect to the server using redis-cli, just as you connect to any Redis instance.
If you don’t have redis-cli installed locally, you can run it from the Docker container:
$ docker exec -it redis-stack redis-cliConfiguration
Persistence
To persist your Redis data to a local path, specify -v to configure a local volume. This command stores all data in the local directory local-data:
$ docker run -v /local-data/:/data redis/redis-stack:latestPorts
If you want to expose Redis Stack server or RedisInsight on a different port, update the left hand of portion of the -p argument. This command exposes Redis Stack server on port 10001 and RedisInsight on port 13333:
$ docker run -p 10001:6379 -p 13333:8001 redis/redis-stack:latestConfig files
By default, the Redis Stack Docker containers use internal configuration files for Redis. To start Redis with local configuration file, you can use the -v volume options:
$ docker run -v `pwd`/local-redis-stack.conf:/redis-stack.conf -p 6379:6379 -p 8001:8001 redis/redis-stack:latestEnvironment variables
To pass in arbitrary configuration changes, you can set any of these environment variables:
REDIS_ARGS: extra arguments for RedisREDISEARCH_ARGS: arguments for RediSearchREDISJSON_ARGS: arguments for RedisJSONREDISGRAPH_ARGS: arguments for RedisGraphREDISTIMESERIES_ARGS: arguments for RedisTimeSeriesREDISBLOOM_ARGS: arguments for RedisBloom
For example, here's how to use the REDIS_ARGS environment variable to pass the requirepass directive to Redis:
docker run -e REDIS_ARGS="--requirepass redis-stack" redis/redis-stack:latestHere's how to set a retention policy for RedisTimeSeries:
docker run -e REDISTIMESERIES_ARGS="RETENTION_POLICY=20" redis/redis-stack:latest9.1.1.3 - Install Redis Stack on Linux
How to install Redis Stack on Linux
From the official Debian/Ubuntu APT Repository
You can install recent stable versions of Redis Stack from the official packages.redis.io APT repository. The repository currently supports Ubuntu Xenial (16.04), Ubuntu Bionic (18.04), and Ubuntu Focal (20.04). Add the repository to the apt index, update it and install:
curl -fsSL https://packages.redis.io/gpg | sudo gpg --dearmor -o /usr/share/keyrings/redis-archive-keyring.gpg
echo "deb [signed-by=/usr/share/keyrings/redis-archive-keyring.gpg] https://packages.redis.io/deb $(lsb_release -cs) main" | sudo tee /etc/apt/sources.list.d/redis.list
sudo apt-get update
sudo apt-get install redis-stack-serverFrom the official offical RPM Feed
You can install recent stable versions of Redis Stack from the official packages.redis.io YUM repository. The repository currently supports RHEL7/CentOS7, and RHEL8/Centos8. Add the repository to the repository index, and install the package.
Create the file /etc/yum.repos.d/redis.repo with the following contents
[Redis]
name=Redis
baseurl=http://packages.redis.io/rpm/rhel7
enabled=1
gpgcheck=1curl -fsSL https://packages.redis.io/gpg > /tmp/redis.key
sudo rpm --import /tmp/redis.key
sudo yum install epel-release
sudo yum install redis-stack-server9.1.1.4 - Install Redis Stack on macOS
How to install Redis Stack on macOS
To install Redis Stack on macOS, use Homebrew. Make sure that you have Homebrew installed before starting on the installation instructions below.
There are three brew casks available.
redis-stackcontains bothredis-stack-serverandredis-stack-redisinsightcasks.redis-stack-serverprovides Redis Stack server only.redis-stack-redisinsightcontains RedisInsight.
Install using Homebrew
First, tap the Redis Stack Homebrew tap:
brew tap redis-stack/redis-stackNext, run brew install:
brew install redis-stackThe redis-stack-server cask will install all Redis and Redis Stack binaries. How you run these binaries depends on whether you already have Redis installed on your system.
First-time Redis installation
If this is the first time you've installed Redis on your system, then all Redis Stack binaries be installed and accessible from the $PATH. On M1 Macs, this assumes that /opt/homebrew/bin is in your path. On Intel-based Macs, /usr/local/bin should be in the $PATH.
To check this, run:
echo $PATHThen, confirm that the output contains /opt/homebrew/bin (M1 Mac) or /usr/local/bin (Intel Mac). If these directories are not in the output, see the "Existing Redis installation" instructions below.
Existing Redis installation
If you have an existing Redis installation on your system, then might want to modify your $PATH to ensure that you're using the latest Redis Stack binaries.
Open the file ~/.bashrc or '~/zshrc` (depending on your shell), and add the following lines.
For Intel-based Macs:
export PATH=/usr/local/Caskroom/redis-stack-server/<VERSION>/bin:$PATHFor M1 Macs:
export PATH=/opt/homebrew/Caskroom/redis-stack-server/<VERSION>/bin:$PATHIn both cases, replace <VERSION> with your version of Redis Stack. For example, with version 6.2.0, path is as follows:
export PATH=/opt/homebrew/Caskroom/redis-stack-server/6.2.0/bin:$PATHStart Redis Stack Server
You can now start Redis Stack Server as follows:
redis-stack-serverInstalling Redis after installing Redis Stack
If you've already installed Redis Stack with Homebrew and then try to install Redis with brew install redis, you may encounter errors like the following:
Error: The brew link step did not complete successfully
The formula built, but is not symlinked into /usr/local
Could not symlink bin/redis-benchmark
Target /usr/local/bin/redis-benchmark
already exists. You may want to remove it:
rm '/usr/local/bin/redis-benchmark'
To force the link and overwrite all conflicting files:
brew link --overwrite redis
To list all files that would be deleted:
brew link --overwrite --dry-run redisIn this case, you can overwrite the Redis binaries installed by Redis Stack by running:
brew link --overwrite redisHowever, Redis Stack Server will still be installed. To uninstall Redis Stack Server, see below.
Uninstall Redis Stack
To uninstall Redis Stack, run:
brew uninstall redis-stack-redisinsight redis-stack-server redis-stack
brew untap redis-stack/redis-stack9.1.2 - Redis Stack clients
Client libraries supporting Redis Stack
Redis Stack is built on Redis and uses the same client protocol as Redis. As a result, most Redis client libraries work with Redis Stack. But some client libraries provide a more complete developer experience.
To meaningfully support Redis Stack support, a client library must provide an API for the commands exposed by Redis Stack. Core client libraries generally provide one method per Redis Stack command. High-level libraries provide abstractions that may make use of multiple commands.
Core client libraries
The following core client libraries support Redis Stack:
- Jedis >= 4.0
- node-redis >= 4.0
- redis-py >= 4.0
High-level client libraries
The Redis OM client libraries let you use the document modeling, indexing, and querying capabilities of Redis Stack much like the way you'd use an ORM. The following Redis OM libraries support Redis Stack:
9.1.3 - Redis Stack tutorials
Learn how to write code against Redis Stack
9.1.3.1 - Redis OM .NET
Learn how to build with Redis Stack and .NET
Redis OM .NET is a purpose-built library for handling documents in Redis Stack. In this tutorial, we'll build a simple ASP.NET Core Web-API app for performing CRUD operations on a simple Person & Address model, and we'll accomplish all of this with Redis OM .NET.
Prerequisites
- .NET 6 SDK
- And IDE for writing .NET (Visual Studio, Rider, Visual Studio Code)
- Optional: Docker Desktop for running redis-stack in docker for local testing.
Skip to the code
If you want to skip this tutorial and just jump straight into code, all the source code is available in GitHub
Run Redis Stack
There are a variety of ways to run Redis Stack. One way is to use the docker image:
docker run -d -p 6379:6379 -p 8001:8001 redis/redis-stack
Create the project
To create the project, just run:
dotnet new webapi -n Redis.OM.Skeleton --no-https --kestrelHttpPort 5000
Then open the Redis.OM.Skeleton.csproj file in your IDE of choice.
Configure the app
Add a "REDIS_CONNECTION_STRING" field to your appsettings.jsonfile to configure the application. Set that connection string to be the URI of your Redis instance. If using the docker command mentioned earlier, your connection string will beredis://localhost:6379`.
Create the model
Now it's time to create the Person/Address model that the app will use for storing/retrieving people. Create a new directory called Model and add the files Address.cs and Person.cs to it. In Address.cs, add the following:
using Redis.OM.Modeling;
namespace Redis.OM.Skeleton.Model;
public class Address
{
[Indexed]
public int? StreetNumber { get; set; }
[Indexed]
public string? Unit { get; set; }
[Searchable]
public string? StreetName { get; set; }
[Indexed]
public string? City { get; set; }
[Indexed]
public string? State { get; set; }
[Indexed]
public string? PostalCode { get; set; }
[Indexed]
public string? Country { get; set; }
[Indexed]
public GeoLoc Location { get; set; }
}
Here, you'll notice that except StreetName, marked as Searchable, all the fields are decorated with the Indexed attribute. These attributes (Searchable and Indexed) tell Redis OM that you want to be able to use those fields in queries when querying your documents in Redis Stack. Address will not be a Document itself, so the top-level class is not decorated with anything; instead, the Address model will be embedded in our Person model.
To that end, add the following to Person.cs
using Redis.OM.Modeling;
namespace Redis.OM.Skeleton.Model;
[Document(StorageType = StorageType.Json, Prefixes = new []{"Person"})]
public class Person
{
[RedisIdField] [Indexed]public string? Id { get; set; }
[Indexed] public string? FirstName { get; set; }
[Indexed] public string? LastName { get; set; }
[Indexed] public int Age { get; set; }
[Searchable] public string? PersonalStatement { get; set; }
[Indexed] public string[] Skills { get; set; } = Array.Empty<string>();
[Indexed(CascadeDepth = 1)] Address? Address { get; set; }
}
There are a few things to take note of here:
[Document(StorageType = StorageType.Json, Prefixes = new []{"Person"})]Indicates that the data type that Redis OM will use to store the document in Redis is JSON and that the prefix for the keys for the Person class will bePerson.[Indexed(CascadeDepth = 1)] Address? Address { get; set; }is one of two ways you can index an embedded object with Redis OM. This way instructs the index to cascade to the objects in the object graph,CascadeDepthof 1 means that it will traverse just one level, indexing the object as if it were building the index from scratch. The other method uses theJsonPathproperty of the individual indexed fields you want to search for. This more surgical approach limits the size of the index.the
Idproperty is marked as aRedisIdField. This denotes the field as one that will be used to generate the document's key name when it's stored in Redis.
Create the Index
With the model built, the next step is to create the index in Redis. The most correct way to manage this is to spin the index creation out into a Hosted Service, which will run which the app spins up. Create a' HostedServices' directory and add IndexCreationService.cs to that. In that file, add the following, which will create the index on startup.
using Redis.OM.Skeleton.Model;
namespace Redis.OM.Skeleton.HostedServices;
public class IndexCreationService : IHostedService
{
private readonly RedisConnectionProvider _provider;
public IndexCreationService(RedisConnectionProvider provider)
{
_provider = provider;
}
public async Task StartAsync(CancellationToken cancellationToken)
{
await _provider.Connection.CreateIndexAsync(typeof(Person));
}
public Task StopAsync(CancellationToken cancellationToken)
{
return Task.CompletedTask;
}
}
Inject the RedisConnectionProvider
Redis OM uses the RedisConnectionProvider class to handle connections to Redis and provides the classes you can use to interact with Redis. To use it, simply inject an instance of the RedisConnectionProvider into your app. In your Program.cs file, add:
builder.Services.AddSingleton(new RedisConnectionProvider(builder.Configuration["REDIS_CONNECTION_STRING"]));
This will pull your connection string out of the config and initialize the provider. The provider will now be available in your controllers/services to use.
Create the PeopleController
The final puzzle piece is to write the actual API controller for our People API. In the controllers directory, add the file PeopleController.cs, the skeleton of the PeopleControllerclass will be:
using Microsoft.AspNetCore.Mvc;
using Redis.OM.Searching;
using Redis.OM.Skeleton.Model;
namespace Redis.OM.Skeleton.Controllers;
[ApiController]
[Route("[controller]")]
public class PeopleController : ControllerBase
{
}
Inject the RedisConnectionProvider
To interact with Redis, inject the RedisConnectionProvider. During this dependency injection, pull out a RedisCollection<Person> instance, which will allow a fluent interface for querying documents in Redis.
private readonly RedisCollection<Person> _people;
private readonly RedisConnectionProvider _provider;
public PeopleController(RedisConnectionProvider provider)
{
_provider = provider;
_people = (RedisCollection<Person>)provider.RedisCollection<Person>();
}
Add route for creating a Person
The first route to add to the API is a POST request for creating a person, using the RedisCollection, it's as simple as calling InsertAsync, passing in the person object:
[HttpPost]
public async Task<Person> AddPerson([FromBody] Person person)
{
await _people.InsertAsync(person);
return person;
}
Add route to filter by age
The first filter route to add to the API will let the user filter by a minimum and maximum age. Using the LINQ interface available to the RedisCollection, this is a simple operation:
[HttpGet("filterAge")]
public IList<Person> FilterByAge([FromQuery] int minAge, [FromQuery] int maxAge)
{
return _people.Where(x => x.Age >= minAge && x.Age <= maxAge).ToList();
}
Filter by GeoLocation
Redis OM has a GeoLoc data structure, an instance of which is indexed by the Address model, with the RedisCollection, it's possible to find all objects with a radius of particular position using the GeoFilter method along with the field you want to filter:
[HttpGet("filterGeo")]
public IList<Person> FilterByGeo([FromQuery] double lon, [FromQuery] double lat, [FromQuery] double radius, [FromQuery] string unit)
{
return _people.GeoFilter(x => x.Address!.Location, lon, lat, radius, Enum.Parse<GeoLocDistanceUnit>(unit)).ToList();
}
Filter by exact string
When a string property in your model is marked as Indexed, e.g. FirstName and LastName, Redis OM can perform exact text matches against them. For example, the following two routes filter by PostalCode and name demonstrate exact string matches.
[HttpGet("filterName")]
public IList<Person> FilterByName([FromQuery] string firstName, [FromQuery] string lastName)
{
return _people.Where(x => x.FirstName == firstName && x.LastName == lastName).ToList();
}
[HttpGet("postalCode")]
public IList<Person> FilterByPostalCode([FromQuery] string postalCode)
{
return _people.Where(x => x.Address!.PostalCode == postalCode).ToList();
}
Filter with a full-text search
When a property in the model is marked as Searchable, like StreetAddress and PersonalStatement, you can perform a full-text search, see the filters for the PersonalStatement and StreetAddress:
[HttpGet("fullText")]
public IList<Person> FilterByPersonalStatement([FromQuery] string text){
return _people.Where(x => x.PersonalStatement == text).ToList();
}
[HttpGet("streetName")]
public IList<Person> FilterByStreetName([FromQuery] string streetName)
{
return _people.Where(x => x.Address!.StreetName == streetName).ToList();
}
Filter by array membership
When a string array or list is marked as Indexed, Redis OM can filter all the records containing a given string using the Contains method of the array or list. For example, our Person model has a list of skills you can query by adding the following route.
[HttpGet("skill")]
public IList<Person> FilterBySkill([FromQuery] string skill)
{
return _people.Where(x => x.Skills.Contains(skill)).ToList();
}
Updating a person
Updating a document in Redis Stack with Redis OM can be done by first materializing the person object, making your desired changes, and then calling Save on the collection. The collection is responsible for keeping track of updates made to entities materialized in it; therefore, it will track and apply any updates you make in it. For example, add the following route to update the age of a Person given their Id:
[HttpPatch("updateAge/{id}")]
public IActionResult UpdateAge([FromRoute] string id, [FromBody] int newAge)
{
foreach (var person in _people.Where(x => x.Id == id))
{
person.Age = newAge;
}
_people.Save();
return Accepted();
}
Delete a person
Deleting a document from Redis can be done with Unlink. All that's needed is to call Unlink, passing in the key name. Given an id, we can reconstruct the key name using the prefix and the id:
[HttpDelete("{id}")]
public IActionResult DeletePerson([FromRoute] string id)
{
_provider.Connection.Unlink($"Person:{id}");
return NoContent();
}
Run the app
All that's left to do now is to run the app and test it. You can do so by running dotnet run, the app is now exposed on port 5000, and there should be a swagger UI that you can use to play with the API at http://localhost:5000/swagger. There's a couple of scripts, along with some data files, to insert some people into Redis using the API in the GitHub repo
Viewing data in with Redis Insight
You can either install the Redis Insight GUI or use the Redis Insight GUI running on http://localhost:8001/.
You can view the data by following these steps:
- Accept the EULA

- Click the Add Redis Database button

- Enter your hostname and port name for your redis server. If you are using the docker image, this is
localhostand6379and give your database an alias

- Click
Add Redis Database.
Resources
- The source code for this tutorial can be found in GitHub.
- To learn more about Redis OM you can check out the the guide on Redis Developer
9.1.3.2 - Redis OM for Node.js
Learn how to build with Redis Stack and Node.js
This tutorial will show you how to build an API using Node.js and Redis Stack.
We'll be using Express and Redis OM to do this, and we assume that you have a basic understanding of Express.
The API we'll be building is a simple and relatively RESTful API that reads, writes, and finds data on persons: first name, last name, age, etc. We'll also add a simple location tracking feature just for a bit of extra interest.
But before we start with the coding, let's start with a description of what Redis OM is.
Redis OM for Node.js
Redis OM (pronounced REDiss OHM) is a library that provides object mapping for Redis—that's what the OM stands for... object mapping. It maps Redis data types — specifically Hashes and JSON documents — to JavaScript objects. And it allows you to search over these Hashes and JSON documents. It uses RedisJSON and RediSearch to do this.
RedisJSON and RediSearch are two of the modules included in Redis Stack. Modules are extensions to Redis that add new data types and new commands. RedisJSON adds a JSON document data type and the commands to manipulate it. RediSearch adds various search commands to index the contents of JSON documents and Hashes.
Redis OM comes in four different versions. We'll be working with Redis OM for Node.js in this tutorial, but there are also flavors and tutorials for Python, .NET, and Spring.
This tutorial will get you started with Redis OM for Node.js, covering the basics. But if you want to dive deep into all of Redis OM's capabilities, check out the README over on GitHub.
Prerequisites
Like anything software-related, you need to have some dependencies installed before you can get started:
- Node.js 14.8+: In this tutorial, we're using JavaScript's top-level
awaitfeature which was introduced in Node 14.8. So, make sure you are using that version or later. - Redis Stack: You need a version of Redis Stack, either running locally on your machine or in the cloud.
- RedisInsight: We'll use this to look inside Redis and make sure our code is doing what we think it's doing.
Starter code
We're not going to code this completely from scratch. Instead, we've provided some starter code for you. Go ahead and clone it to a folder of your convenience:
git clone git@github.com:redis-developer/express-redis-om-workshop.git
Now that you have the starter code, let's explore it a bit. Opening up server.js in the root we see that we have a simple Express app that uses Dotenv for configuration and Swagger UI Express for testing our API:
import 'dotenv/config'
import express from 'express'
import swaggerUi from 'swagger-ui-express'
import YAML from 'yamljs'
/* create an express app and use JSON */
const app = new express()
app.use(express.json())
/* set up swagger in the root */
const swaggerDocument = YAML.load('api.yaml')
app.use('/', swaggerUi.serve, swaggerUi.setup(swaggerDocument))
/* start the server */
app.listen(8080)Alongside this is api.yaml, which defines the API we're going to build and provides the information Swagger UI Express needs to render its UI. You don't need to mess with it unless you want to add some additional routes.
The persons folder has some JSON files and a shell script. The JSON files are sample persons—all musicians because fun—that you can load into the API to test it. The shell script—load-data.sh—will load all the JSON files into the API using curl.
There are two empty folders, om and routers. The om folder is where all the Redis OM code will go. The routers folder will hold code for all of our Express routes.
Configure and run
The starter code is perfectly runnable if a bit thin. Let's configure and run it to make sure it works before we move on to writing actual code. First, get all the dependencies:
npm install
Then, set up a .env file in the root that Dotenv can make use of. There's a sample.env file in the root that you can copy and modify:
cp sample.env .env
The contents of .env looks like this:
# Put your local Redis Stack URL here. Want to run in the
# cloud instead? Sign up at https://redis.com/try-free/.
REDIS_URL=redis://localhost:6379There's a good chance this is already correct. However, if you need to change the REDIS_URL for your particular environment (e.g., you're running Redis Stack in the cloud), this is the time to do it. Once done, you should be able to run the app:
npm start
Navigate to http://localhost:8080 and check out the client that Swagger UI Express has created. None of it works yet because we haven't implemented any of the routes. But, you can try them out and watch them fail!
The starter code runs. Let's add some Redis OM to it so it actually does something!
Setting up a Client
First things first, let's set up a client. The Client class is the thing that knows how to talk to Redis on behalf of Redis OM. One option is to put our client in its own file and export it. This ensures that the application has one and only one instance of Client and thus only one connection to Redis Stack. Since Redis and JavaScript are both (more or less) single-threaded, this works neatly.
Let's create our first file. In the om folder add a file called client.js and add the following code:
import { Client } from 'redis-om'
/* pulls the Redis URL from .env */
const url = process.env.REDIS_URL
/* create and open the Redis OM Client */
const client = await new Client().open(url)
export default clientRemember that top-level await stuff we mentioned earlier? There it is!
Note that we are getting our Redis URL from an environment variable. It was put there by Dotenv and read from our .env file. If we didn't have the .env file or have a REDIS_URL property in our .env file, this code would gladly read this value from the actual environment variables.
Also note that the .open() method conveniently returns this. This this (can I say this again? I just did!) lets us chain the instantiation of the client with the opening of the client. If this isn't to your liking, you could always write it like this:
/* create and open the Redis OM Client */
const client = new Client()
await client.open(url)Entity, Schema, and Repository
Now that we have a client that's connected to Redis, we need to start mapping some persons. To do that, we need to define an Entity and a Schema. Let's start by creating a file named person.js in the om folder and importing client from client.js and the Entity and Schema classes from Redis OM:
import { Entity, Schema } from 'redis-om'
import client from './client.js'Entity
Next, we need to define an entity. An Entity is the class that holds you data when you work with it—the thing being mapped to. It is what you create, read, update, and delete. Any class that extends Entity is an entity. We'll define our Person entity with a single line:
/* our entity */
class Person extends Entity {}Schema
A schema defines the fields on your entity, their types, and how they are mapped internally to Redis. By default, entities map to JSON documents. Let's create our Schema in person.js:
/* create a Schema for Person */
const personSchema = new Schema(Person, {
firstName: { type: 'string' },
lastName: { type: 'string' },
age: { type: 'number' },
verified: { type: 'boolean' },
location: { type: 'point' },
locationUpdated: { type: 'date' },
skills: { type: 'string[]' },
personalStatement: { type: 'text' }
})When you create a Schema, it modifies the Entity class you handed it (Person in our case) adding getters and setters for the properties you define. The type those getters and setters accept and return are defined with the type parameter as shown above. Valid values are: string, number, boolean, string[], date, point, and text.
The first three do exactly what you think—they define a property that is a String, a Number, or a Boolean. string[] does what you'd think as well, specifically defining an Array of strings.
date is a little different, but still more or less what you'd expect. It defines a property that returns a Date and can be set using not only a Date but also a String containing an ISO 8601 date or a Number with the UNIX epoch time in milliseconds.
A point defines a point somewhere on the globe as a longitude and a latitude. It creates a property that returns and accepts a simple object with the properties of longitude and latitude. Like this:
let point = { longitude: 12.34, latitude: 56.78 }A text field is a lot like a string. If you're just reading and writing objects, they are identical. But if you want to search on them, they are very, very different. We'll talk about search more later, but the tl;dr is that string fields can only be matched on their whole value—no partial matches—and are best for keys while text fields have full-text search enabled on them and are optimized for human-readable text.
Repository
Now we have all the pieces that we need to create a repository. A Repository is the main interface into Redis OM. It gives us the methods to read, write, and remove a specific Entity. Create a Repository in person.js and make sure it's exported as you'll need it when we start implementing out API:
/* use the client to create a Repository just for Persons */
export const personRepository = client.fetchRepository(personSchema)We're almost done with setting up our repository. But we still need to create an index or we won't be able to search. We do that by calling .createIndex(). If an index already exists and it's identical, this function won't do anything. If it's different, it'll drop it and create a new one. Add a call to .createIndex() to person.js:
/* create the index for Person */
await personRepository.createIndex()That's all we need for person.js and all we need to start talking to Redis using Redis OM. Here's the code in its entirety:
import { Entity, Schema } from 'redis-om'
import client from './client.js'
/* our entity */
class Person extends Entity {}
/* create a Schema for Person */
const personSchema = new Schema(Person, {
firstName: { type: 'string' },
lastName: { type: 'string' },
age: { type: 'number' },
verified: { type: 'boolean' },
location: { type: 'point' },
locationUpdated: { type: 'date' },
skills: { type: 'string[]' },
personalStatement: { type: 'text' }
})
/* use the client to create a Repository just for Persons */
export const personRepository = client.fetchRepository(personSchema)
/* create the index for Person */
await personRepository.createIndex()Now, let's add some routes in Express.
Set up the Person Router
Let's create a truly RESTful API with the CRUD operations mapping to PUT, GET, POST, and DELETE respectively. We're going to do this using Express Routers as this makes our code nice and tidy. Create a file called person-router.js in the routers folder and in it import Router from Express and personRepository from person.js. Then create and export a Router:
import { Router } from 'express'
import { personRepository } from '../om/person.js'
export const router = Router()Imports and exports done, let's bind the router to our Express app. Open up server.js and import the Router we just created:
/* import routers */
import { router as personRouter } from './routers/person-router.js'Then add the personRouter to the Express app:
/* bring in some routers */
app.use('/person', personRouter)Your server.js should now look like this:
import 'dotenv/config'
import express from 'express'
import swaggerUi from 'swagger-ui-express'
import YAML from 'yamljs'
/* import routers */
import { router as personRouter } from './routers/person-router.js'
/* create an express app and use JSON */
const app = new express()
app.use(express.json())
/* bring in some routers */
app.use('/person', personRouter)
/* set up swagger in the root */
const swaggerDocument = YAML.load('api.yaml')
app.use('/', swaggerUi.serve, swaggerUi.setup(swaggerDocument))
/* start the server */
app.listen(8080)Now we can add our routes to create, read, update, and delete persons. Head back to the person-router.js file so we can do just that.
Creating a Person
We'll create a person first as you need to have persons in Redis before you can do any of the reading, writing, or removing of them. Add the PUT route below. This route will call .createAndSave() to create a Person from the request body and immediately save it to the Redis:
router.put('/', async (req, res) => {
const person = await personRepository.createAndSave(req.body)
res.send(person)
})Note that we are also returning the newly created Person. Let's see what that looks like by actually calling our API using the Swagger UI. Go to http://localhost:8080 in your browser and try it out. The default request body in Swagger will be fine for testing. You should see a response that looks like this:
{
"entityId": "01FY9MWDTWW4XQNTPJ9XY9FPMN",
"firstName": "Rupert",
"lastName": "Holmes",
"age": 75,
"verified": false,
"location": {
"longitude": 45.678,
"latitude": 45.678
},
"locationUpdated": "2022-03-01T12:34:56.123Z",
"skills": [
"singing",
"songwriting",
"playwriting"
],
"personalStatement": "I like piña coladas and walks in the rain"
}This is exactly what we handed it with one exception: the entityId. Every entity in Redis OM has an entity ID which is—as you've probably guessed—the unique ID of that entity. It was randomly generated when we called .createAndSave(). Yours will be different, so make note of it.
You can see this newly created JSON document in Redis with RedisInsight. Go ahead and launch RedisInsight and you should see a key with a name like Person:01FY9MWDTWW4XQNTPJ9XY9FPMN. The Person bit of the key was derived from the class name of our entity and the sequence of letters and numbers is our generated entity ID. Click on it to take a look at the JSON document you've created.
You'll also see a key named Person:index:hash. That's a unique value that Redis OM uses to see if it needs to recreate the index or not when .createIndex() is called. You can safely ignore it.
Reading a Person
Create down, let's add a GET route to read this newly created Person:
router.get('/:id', async (req, res) => {
const person = await personRepository.fetch(req.params.id)
res.send(person)
})This code extracts a parameter from the URL used in the route—the entityId that we received previously. It uses the .fetch() method on the personRepository to retrieve a Person using that entityId. Then, it returns that Person.
Let's go ahead and test that in Swagger as well. You should get back exactly the same response. In fact, since this is a simple GET, we should be able to just load the URL into our browser. Test that out too by navigating to http://localhost:8080/person/01FY9MWDTWW4XQNTPJ9XY9FPMN, replacing the entity ID with your own.
Now that we can read and write, let's implement the REST of the HTTP verbs. REST... get it?
Updating a Person
Let's add the code to update a person using a POST route:
router.post('/:id', async (req, res) => {
const person = await personRepository.fetch(req.params.id)
person.firstName = req.body.firstName ?? null
person.lastName = req.body.lastName ?? null
person.age = req.body.age ?? null
person.verified = req.body.verified ?? null
person.location = req.body.location ?? null
person.locationUpdated = req.body.locationUpdated ?? null
person.skills = req.body.skills ?? null
person.personalStatement = req.body.personalStatement ?? null
await personRepository.save(person)
res.send(person)
})This code fetches the Person from the personRepository using the entityId just like our previous route did. However, now we change all the properties based on the properties in the request body. If any of them are missing, we set them to null. Then, we call .save() and return the changed Person.
Let's test this in Swagger too, why not? Make some changes. Try removing some of the fields. What do you get back when you read it after you've changed it?
Deleting a Person
Deletion—my favorite! Remember kids, deletion is 100% compression. The route that deletes is just as straightforward as the one that reads, but much more destructive:
router.delete('/:id', async (req, res) => {
await personRepository.remove(req.params.id)
res.send({ entityId: req.params.id })
})I guess we should probably test this one out too. Load up Swagger and exercise the route. You should get back JSON with the entity ID you just removed:
{
"entityId": "01FY9MWDTWW4XQNTPJ9XY9FPMN"
}And just like that, it's gone!
All the CRUD
Do a quick check with what you've written so far. Here's what should be the totality of your person-router.js file:
import { Router } from 'express'
import { personRepository } from '../om/person.js'
export const router = Router()
router.put('/', async (req, res) => {
const person = await personRepository.createAndSave(req.body)
res.send(person)
})
router.get('/:id', async (req, res) => {
const person = await personRepository.fetch(req.params.id)
res.send(person)
})
router.post('/:id', async (req, res) => {
const person = await personRepository.fetch(req.params.id)
person.firstName = req.body.firstName ?? null
person.lastName = req.body.lastName ?? null
person.age = req.body.age ?? null
person.verified = req.body.verified ?? null
person.location = req.body.location ?? null
person.locationUpdated = req.body.locationUpdated ?? null
person.skills = req.body.skills ?? null
person.personalStatement = req.body.personalStatement ?? null
await personRepository.save(person)
res.send(person)
})
router.delete('/:id', async (req, res) => {
await personRepository.remove(req.params.id)
res.send({ entityId: req.params.id })
})Preparing to search
CRUD completed, let's do some searching. In order to search, we need data to search over. Remember that persons folder with all the JSON documents and the load-data.sh shell script? Its time has arrived. Go into that folder and run the script:
cd persons
./load-data.sh
You should get a rather verbose response containing the JSON response from the API and the names of the files you loaded. Like this:
{"entityId":"01FY9Z4RRPKF4K9H78JQ3K3CP3","firstName":"Chris","lastName":"Stapleton","age":43,"verified":true,"location":{"longitude":-84.495,"latitude":38.03},"locationUpdated":"2022-01-01T12:00:00.000Z","skills":["singing","football","coal mining"],"personalStatement":"There are days that I can walk around like I'm alright. And I pretend to wear a smile on my face. And I could keep the pain from comin' out of my eyes. But sometimes, sometimes, sometimes I cry."} <- chris-stapleton.json
{"entityId":"01FY9Z4RS2QQVN4XFYSNPKH6B2","firstName":"David","lastName":"Paich","age":67,"verified":false,"location":{"longitude":-118.25,"latitude":34.05},"locationUpdated":"2022-01-01T12:00:00.000Z","skills":["singing","keyboard","blessing"],"personalStatement":"I seek to cure what's deep inside frightened of this thing that I've become"} <- david-paich.json
{"entityId":"01FY9Z4RSD7SQMSWDFZ6S4M5MJ","firstName":"Ivan","lastName":"Doroschuk","age":64,"verified":true,"location":{"longitude":-88.273,"latitude":40.115},"locationUpdated":"2022-01-01T12:00:00.000Z","skills":["singing","dancing","friendship"],"personalStatement":"We can dance if we want to. We can leave your friends behind. 'Cause your friends don't dance and if they don't dance well they're no friends of mine."} <- ivan-doroschuk.json
{"entityId":"01FY9Z4RSRZFGQ21BMEKYHEVK6","firstName":"Joan","lastName":"Jett","age":63,"verified":false,"location":{"longitude":-75.273,"latitude":40.003},"locationUpdated":"2022-01-01T12:00:00.000Z","skills":["singing","guitar","black eyeliner"],"personalStatement":"I love rock n' roll so put another dime in the jukebox, baby."} <- joan-jett.json
{"entityId":"01FY9Z4RT25ABWYTW6ZG7R79V4","firstName":"Justin","lastName":"Timberlake","age":41,"verified":true,"location":{"longitude":-89.971,"latitude":35.118},"locationUpdated":"2022-01-01T12:00:00.000Z","skills":["singing","dancing","half-time shows"],"personalStatement":"What goes around comes all the way back around."} <- justin-timberlake.json
{"entityId":"01FY9Z4RTD9EKBDS2YN9CRMG1D","firstName":"Kerry","lastName":"Livgren","age":72,"verified":false,"location":{"longitude":-95.689,"latitude":39.056},"locationUpdated":"2022-01-01T12:00:00.000Z","skills":["poetry","philosophy","songwriting","guitar"],"personalStatement":"All we are is dust in the wind."} <- kerry-livgren.json
{"entityId":"01FY9Z4RTR73HZQXK83JP94NWR","firstName":"Marshal","lastName":"Mathers","age":49,"verified":false,"location":{"longitude":-83.046,"latitude":42.331},"locationUpdated":"2022-01-01T12:00:00.000Z","skills":["rapping","songwriting","comics"],"personalStatement":"Look, if you had, one shot, or one opportunity to seize everything you ever wanted, in one moment, would you capture it, or just let it slip?"} <- marshal-mathers.json
{"entityId":"01FY9Z4RV2QHH0Z1GJM5ND15JE","firstName":"Rupert","lastName":"Holmes","age":75,"verified":true,"location":{"longitude":-2.518,"latitude":53.259},"locationUpdated":"2022-01-01T12:00:00.000Z","skills":["singing","songwriting","playwriting"],"personalStatement":"I like piña coladas and taking walks in the rain."} <- rupert-holmes.jsonA little messy, but if you don't see this, then it didn't work!
Now that we have some data, let's add another router to hold the search routes we want to add. Create a file named search-router.js in the routers folder and set it up with imports and exports just like we did in person-router.js:
import { Router } from 'express'
import { personRepository } from '../om/person.js'
export const router = Router()Import the Router into server.js the same way we did for the personRouter:
/* import routers */
import { router as personRouter } from './routers/person-router.js'
import { router as searchRouter } from './routers/search-router.js'Then add the searchRouter to the Express app:
/* bring in some routers */
app.use('/person', personRouter)
app.use('/persons', searchRouter)Router bound, we can now add some routes.
Search all the things
We're going to add a plethora of searches to our new Router. But the first will be the easiest as it's just going to return everything. Go ahead and add the following code to search-router.js:
router.get('/all', async (req, res) => {
const persons = await personRepository.search().return.all()
res.send(persons)
})Here we see how to start and finish a search. Searches start just like CRUD operations start—on a Repository. But instead of calling .createAndSave(), .fetch(), .save(), or .remove(), we call .search(). And unlike all those other methods, .search() doesn't end there. Instead, it allows you to build up a query (which you'll see in the next example) and then resolve it with a call to .return.all().
With this new route in place, go into the Swagger UI and exercise the /persons/all route. You should see all of the folks you added with the shell script as a JSON array.
In the example above, the query is not specified—we didn't build anything up. If you do this, you'll just get everything. Which is what you want sometimes. But not most of the time. It's not really searching if you just return everything. So let's add a route that lets us find persons by their last name. Add the following code:
router.get('/by-last-name/:lastName', async (req, res) => {
const lastName = req.params.lastName
const persons = await personRepository.search()
.where('lastName').equals(lastName).return.all()
res.send(persons)
})In this route, we're specifying a field we want to filter on and a value that it needs to equal. The field name in the call to .where() is the name of the field specified in our schema. This field was defined as a string, which matters because the type of the field determines the methods that are available query it.
In the case of a string, there's just .equals(), which will query against the value of the entire string. This is aliased as .eq(), .equal(), and .equalTo() for your convenience. You can even add a little more syntactic sugar with calls to .is and .does that really don't do anything but make your code pretty. Like this:
const persons = await personRepository.search().where('lastName').is.equalTo(lastName).return.all()
const persons = await personRepository.search().where('lastName').does.equal(lastName).return.all()You can also invert the query with a call to .not:
const persons = await personRepository.search().where('lastName').is.not.equalTo(lastName).return.all()
const persons = await personRepository.search().where('lastName').does.not.equal(lastName).return.all()In all these cases, the call to .return.all() executes the query we build between it and the call to .search(). We can search on other field types as well. Let's add some routes to search on a number and a boolean field:
router.get('/old-enough-to-drink-in-america', async (req, res) => {
const persons = await personRepository.search()
.where('age').gte(21).return.all()
res.send(persons)
})
router.get('/non-verified', async (req, res) => {
const persons = await personRepository.search()
.where('verified').is.not.true().return.all()
res.send(persons)
})The number field is filtering persons by age where the age is great than or equal to 21. Again, there are aliases and syntactic sugar:
const persons = await personRepository.search().where('age').is.greaterThanOrEqualTo(21).return.all()But there are also more ways to query:
const persons = await personRepository.search().where('age').eq(21).return.all()
const persons = await personRepository.search().where('age').gt(21).return.all()
const persons = await personRepository.search().where('age').gte(21).return.all()
const persons = await personRepository.search().where('age').lt(21).return.all()
const persons = await personRepository.search().where('age').lte(21).return.all()
const persons = await personRepository.search().where('age').between(21, 65).return.all()The boolean field is searching for persons by their verification status. It already has some of our syntactic sugar in it. Note that this query will match a missing value or a false value. That's why I specified .not.true(). You can also call .false() on boolean fields as well as all the variations of .equals.
const persons = await personRepository.search().where('verified').true().return.all()
const persons = await personRepository.search().where('verified').false().return.all()
const persons = await personRepository.search().where('verified').equals(true).return.all()So, we've created a few routes and I haven't told you to test them. Maybe you have anyhow. If so, good for you, you rebel. For the rest of you, why don't you go ahead and test them now with Swagger? And, going forward, just test them when you want. Heck, create some routes of your own using the provided syntax and try those out too. Don't let me tell you how to live your life.
Of course, querying on just one field is never enough. Not a problem, Redis OM can handle .and() and .or() like in this route:
router.get('/verified-drinkers-with-last-name/:lastName', async (req, res) => {
const lastName = req.params.lastName
const persons = await personRepository.search()
.where('verified').is.true()
.and('age').gte(21)
.and('lastName').equals(lastName).return.all()
res.send(persons)
})Here, I'm just showing the syntax for .and() but, of course, you can also use .or().
Full-text search
If you've defined a field with a type of text in your schema, you can perform full-text searches against it. The way a text field is searched is different from how a string is searched. A string can only be compared with .equals() and must match the entire string. With a text field, you can look for words within the string.
A text field is optimized for human-readable text, like an essay or song lyrices. It's pretty clever. It understands that certain words (like a, an, or the) are common and ignores them. It understands how words are grammatically similar and so if you search for give, it matches gives, given, giving, and gave too. And it ignores punctuation.
Let's add a route that does full-text search against our personalStatement field:
router.get('/with-statement-containing/:text', async (req, res) => {
const text = req.params.text
const persons = await personRepository.search()
.where('personalStatement').matches(text)
.return.all()
res.send(persons)
})Note the use of the .matches() function. This is the only one that works with text fields. It takes a string that can be one or more words—space-delimited—that you want to quyery for. Let's try it out. In Swagger, use this route to search for the word "walk". You should get the following results:
[
{
"entityId": "01FYC7CTR027F219455PS76247",
"firstName": "Rupert",
"lastName": "Holmes",
"age": 75,
"verified": true,
"location": {
"longitude": -2.518,
"latitude": 53.259
},
"locationUpdated": "2022-01-01T12:00:00.000Z",
"skills": [
"singing",
"songwriting",
"playwriting"
],
"personalStatement": "I like piña coladas and taking walks in the rain."
},
{
"entityId": "01FYC7CTNBJD9CZKKWPQEZEW14",
"firstName": "Chris",
"lastName": "Stapleton",
"age": 43,
"verified": true,
"location": {
"longitude": -84.495,
"latitude": 38.03
},
"locationUpdated": "2022-01-01T12:00:00.000Z",
"skills": [
"singing",
"football",
"coal mining"
],
"personalStatement": "There are days that I can walk around like I'm alright. And I pretend to wear a smile on my face. And I could keep the pain from comin' out of my eyes. But sometimes, sometimes, sometimes I cry."
}
]Notice how the word "walk" is matched for Rupert Holmes' personal statement that contains "walks" and matched for Chris Stapleton's that contains "walk". Now search "walk raining". You'll see that this returns Rupert's entry only even though the exact text of neither of these words is found in his personal statement. But they are grammatically related so it matched them. This is called stemming and it's a pretty cool feature of RediSearch that Redis OM exploits.
And if you search for "a rain walk" you'll still match Rupert's entry even though the word "a" is not in the text. Why? Because it's a common word that's not very helpful with searching. These common words are called stop words and this is another cool feature of RediSearch that Redis OM just gets for free.
Searching the globe
RediSearch, and therefore Redis OM, both support searching by geographic location. You specify a point in the globe, a radius, and the units for that radius and it'll gleefully return all the entities therein. Let's add a route to do just that:
router.get('/near/:lng,:lat/radius/:radius', async (req, res) => {
const longitude = Number(req.params.lng)
const latitude = Number(req.params.lat)
const radius = Number(req.params.radius)
const persons = await personRepository.search()
.where('location')
.inRadius(circle => circle
.longitude(longitude)
.latitude(latitude)
.radius(radius)
.miles)
.return.all()
res.send(persons)
})This code looks a little different than the others because the way we define the circle we want to search is done with a function that is passed into the .inRadius method:
circle => circle.longitude(longitude).latitude(latitude).radius(radius).milesAll this function does is accept an instance of a Circle that has been initialized with default values. We override those values by calling various builder methods to define the origin of our search (i.e. the longitude and latitude), the radius, and the units that radius is measured in. Valid units are miles, meters, feet, and kilometers.
Let's try the route out. I know we can find Joan Jett at around longitude -75.0 and latitude 40.0, which is in eastern Pennsylvania. So use those coordinates with a radius of 20 miles. You should receive in response:
[
{
"entityId": "01FYC7CTPKYNXQ98JSTBC37AS1",
"firstName": "Joan",
"lastName": "Jett",
"age": 63,
"verified": false,
"location": {
"longitude": -75.273,
"latitude": 40.003
},
"locationUpdated": "2022-01-01T12:00:00.000Z",
"skills": [
"singing",
"guitar",
"black eyeliner"
],
"personalStatement": "I love rock n' roll so put another dime in the jukebox, baby."
}
]Try widening the radius and see who else you can find.
Adding location tracking
We're getting toward the end of the tutorial here, but before we go, I'd like to add that location tracking piece that I mentioned way back in the beginning. This next bit of code should be easily understood if you've gotten this far as it's not really doing anything I haven't talked about already.
Add a new file called location-router.js in the routers folder:
import { Router } from 'express'
import { personRepository } from '../om/person.js'
export const router = Router()
router.patch('/:id/location/:lng,:lat', async (req, res) => {
const id = req.params.id
const longitude = Number(req.params.lng)
const latitude = Number(req.params.lat)
const locationUpdated = new Date()
const person = await personRepository.fetch(id)
person.location = { longitude, latitude }
person.locationUpdated = locationUpdated
await personRepository.save(person)
res.send({ id, locationUpdated, location: { longitude, latitude } })
})Here we're calling .fetch() to fetch a person, we're updating some values for that person—the .location property with our longitude and latitude and the .locationUpdated property with the current date and time. Easy stuff.
To use this Router, import it in server.js:
/* import routers */
import { router as personRouter } from './routers/person-router.js'
import { router as searchRouter } from './routers/search-router.js'
import { router as locationRouter } from './routers/location-router.js'And bind the router to a path:
/* bring in some routers */
app.use('/person', personRouter, locationRouter)
app.use('/persons', searchRouter)And that's that. But this just isn't enough to satisfy. It doesn't show you anything new, except maybe the usage of a date field. And, it's not really location tracking. It just shows where these people last were, no history. So let's add some!.
To add some history, we're going to use a Redis Stream. Streams are a big topic but don't worry if you’re not familiar with them, you can think of them as being sort of like a log file stored in a Redis key where each entry represents an event. In our case, the event would be the person moving about or checking in or whatever.
But there's a problem. Redis OM doesn’t support Streams even though Redis Stack does. So how do we take advantage of them in our application? By using Node Redis. Node Redis is a low-level Redis client for Node.js that gives you access to all the Redis commands and data types. Internally, Redis OM is creating and using a Node Redis connection. You can use that connection too. Or rather, Redis OM can be told to use the connection you are using. Let me show you how.
Using Node Redis
Open up client.js in the om folder. Remember how we created a Redis OM Client and then called .open() on it?
const client = await new Client().open(url)Well, the Client class also has a .use() method that takes a Node Redis connection. Modify client.js to open a connection to Redis using Node Redis and then .use() it:
import { Client } from 'redis-om'
import { createClient } from 'redis'
/* pulls the Redis URL from .env */
const url = process.env.REDIS_URL
/* create a connection to Redis with Node Redis */
export const connection = createClient({ url })
await connection.connect()
/* create a Client and bind it to the Node Redis connection */
const client = await new Client().use(connection)
export default clientAnd that's it. Redis OM is now using the connection you created. Note that we are exporting both the client and the connection. Got to export the connection if we want to use it in our newest route.
Storing location history with Streams
To add an event to a Stream we need to use the XADD command. Node Redis exposes that as .xAdd(). So, we need to add a call to .xAdd() in our route. Modify location-router.js to import our connection:
import { connection } from '../om/client.js'And then in the route itself add a call to .xAdd():
...snip...
const person = await personRepository.fetch(id)
person.location = { longitude, latitude }
person.locationUpdated = locationUpdated
await personRepository.save(person)
let keyName = `${person.keyName}:locationHistory`
await connection.xAdd(keyName, '*', person.location)
...snip....xAdd() takes a key name, an event ID, and a JavaScript object containing the keys and values that make up the event, i.e. the event data. For the key name, we're building a string using the .keyName property that Person inherited from Entity (which will return something like Peson:01FYC7CTPKYNXQ98JSTBC37AS1) combined with a hard-coded value. We're passing in * for our event ID, which tells Redis to just generate it based on the current time and previous event ID. And we're passing in the location—with properties of longitude and latitude—as our event data.
Now, whenever this route is exercised, the longitude and latitude will be logged and the event ID will encode the time. Go ahead and use Swagger to move Joan Jett around a few times.
Now, go into RedisInsight and take a look at the Stream. You'll see it there in the list of keys but if you click on it, you'll get a message saying that "This data type is coming soon!". If you don't get this message, congratualtions, you live in the future! For us here in the past, we'll just issue the raw command instead:
XRANGE Person:01FYC7CTPKYNXQ98JSTBC37AS1:locationHistory - +
This tells Redis to get a range of values from a Stream stored in the given the key name—Person:01FYC7CTPKYNXQ98JSTBC37AS1:locationHistory in our example. The next values are the starting event ID and the ending event ID. - is the beginning of the Stream. + is the end. So this returns everything in the Stream:
1) 1) "1647536562911-0"
2) 1) "longitude"
2) "45.678"
3) "latitude"
4) "45.678"
2) 1) "1647536564189-0"
2) 1) "longitude"
2) "45.679"
3) "latitude"
4) "45.679"
3) 1) "1647536565278-0"
2) 1) "longitude"
2) "45.680"
3) "latitude"
4) "45.680"
And just like that, we're tracking Joan Jett.
Wrap-up
So, now you know how to use Express + Redis OM to build an API backed by Redis Stack. And, you've got yourself some pretty decent started code in the process. Good deal! If you want to learn more, you can check out the documentation for Redis OM. It covers the full breadth of Redis OM's capabilities.
And thanks for taking the time to work through this. I sincerly hope you found it useful. If you have any questions, the Redis Discord server is by far the best place to get them answered. Join the server and ask away!
9.1.3.3 - Redis OM Python
Learn how to build with Redis Stack and Python
Redis OM Python is a Redis client that provides high-level abstractions for managing document data in Redis. This tutorial shows you how to get up and running with Redis OM Python, Redis Stack, and the Flask micro-framework.
We'd love to see what you build with Redis Stack and Redis OM. Join the Redis community on Discord to chat with us about all things Redis OM and Redis Stack. Read more about Redis OM Python our announcement blog post.
Overview
This application, an API built with Flask and a simple domain model, demonstrates common data manipulation patterns using Redis OM.
Our entity is a Person, with the following JSON representation:
{
"first_name": "A string, the person's first or given name",
"last_name": "A string, the person's last or surname",
"age": 36,
"address": {
"street_number": 56,
"unit": "A string, optional unit number e.g. A or 1",
"street_name": "A string, name of the street they live on",
"city": "A string, name of the city they live in",
"state": "A string, state, province or county that they live in",
"postal_code": "A string, their zip or postal code",
"country": "A string, country that they live in."
},
"personal_statement": "A string, free text personal statement",
"skills": [
"A string: a skill the person has",
"A string: another still that the person has"
]
}We'll let Redis OM handle generation of unique IDs, which it does using ULIDs. Redis OM will also handle creation of unique Redis key names for us, as well as saving and retrieving entities from JSON documents stored in a Redis Stack database.
Getting Started
Requirements
To run this application you'll need:
- git - to clone the repo to your machine.
- Python 3.9 or higher.
- A Redis Stack database, or Redis with the RediSearch and RedisJSON modules installed. We've provided a
docker-compose.ymlfor this. You can also sign up for a free 30Mb database with Redis Enterprise Cloud - be sure to check the Redis Stack option when creating your cloud database. - curl, or Postman - to send HTTP requests to the application. We'll provide examples using curl in this document.
- Optional: RedisInsight, a free data visualization and database management tool for Redis. When downloading RedisInsight, be sure to select version 2.x or use the version that comes with Redis Stack.
Get the Source Code
Clone the repository from GitHub:
$ git clone https://github.com/redis-developer/redis-om-python-flask-skeleton-app.git
$ cd redis-om-python-flask-skeleton-appStart a Redis Stack Database, or Configure your Redis Enterprise Cloud Credentials
Next, we'll get a Redis Stack database up and running. If you're using Docker:
$ docker-compose up -d
Creating network "redis-om-python-flask-skeleton-app_default" with the default driver
Creating redis_om_python_flask_starter ... done If you're using Redis Enterprise Cloud, you'll need the hostname, port number, and password for your database. Use these to set the REDIS_OM_URL environment variable like this:
$ export REDIS_OM_URL=redis://default:<password>@<host>:<port>(This step is not required when working with Docker as the Docker container runs Redis on localhost port 6379 with no password, which is the default connection that Redis OM uses.)
For example if your Redis Enterprise Cloud database is at port 9139 on host enterprise.redis.com and your password is 5uper53cret then you'd set REDIS_OM_URL as follows:
$ export REDIS_OM_URL=redis://default:5uper53cret@enterprise.redis.com:9139Create a Python Virtual Environment and Install the Dependencies
Create a Python virtual environment, and install the project dependencies which are Flask, Requests (used only in the data loader script) and Redis OM:
$ python3 -m venv venv
$ . ./venv/bin/activate
$ pip install -r requirements.txtStart the Flask Application
Let's start the Flask application in development mode, so that Flask will restart the server for you each time you save code changes in app.py:
$ export FLASK_ENV=development
$ flask runIf all goes well, you should see output similar to this:
$ flask run
* Environment: development
* Debug mode: on
* Running on http://127.0.0.1:5000/ (Press CTRL+C to quit)
* Restarting with stat
* Debugger is active!
* Debugger PIN: XXX-XXX-XXXYou're now up and running, and ready to perform CRUD operations on data with Redis, RediSearch, RedisJSON and Redis OM for Python! To make sure the server's running, point your browser at http://127.0.0.1:5000/, where you can expect to see the application's basic home page:

Load the Sample Data
We've provided a small amount of sample data (it's in data/people.json. The Python script dataloader.py loads each person into Redis by posting the data to the application's create a new person endpoint. Run it like this:
$ python dataloader.py
Created person Robert McDonald with ID 01FX8RMR7NRS45PBT3XP9KNAZH
Created person Kareem Khan with ID 01FX8RMR7T60ANQTS4P9NKPKX8
Created person Fernando Ortega with ID 01FX8RMR7YB283BPZ88HAG066P
Created person Noor Vasan with ID 01FX8RMR82D091TC37B45RCWY3
Created person Dan Harris with ID 01FX8RMR8545RWW4DYCE5MSZA1Make sure to take a copy of the output of the data loader, as your IDs will differ from those used in the tutorial. To follow along, substitute your IDs for the ones shown above. e.g. whenever we are working with Kareem Khan, change 01FX8RMR7T60ANQTS4P9NKPKX8 for the ID that your data loader assiged to Kareem in your Redis database.
Problems?
If the Flask server fails to start, take a look at its output. If you see log entries similar to this:
raise ConnectionError(self._error_message(e))
redis.exceptions.ConnectionError: Error 61 connecting to localhost:6379. Connection refused.then you need to start the Redis Docker container if using Docker, or set the REDIS_OM_URL environment variable if using Redis Enterprise Cloud.
If you've set the REDIS_OM_URL environment variable, and the code errors with something like this on startup:
raise ConnectionError(self._error_message(e))
redis.exceptions.ConnectionError: Error 8 connecting to enterprise.redis.com:9139. nodename nor servname provided, or not known.then you'll need to check that you used the correct hostname, port, password and format when setting REDIS_OM_URL.
If the data loader fails to post the sample data into the application, make sure that the Flask application is running before running the data loader.
Create, Read, Update and Delete Data
Let's create and manipulate some instances of our data model in Redis. Here we'll look at how to call the Flask API with curl (you could also use Postman), how the code works, and how the data's stored in Redis.
Building a Person Model with Redis OM
Redis OM allows us to model entities using Python classes, and the Pydantic framework. Our person model is contained in the file person.py. Here's some notes about how it works:
- We declare a class
Personwhich extends a Redis OM classJsonModel. This tells Redis OM that we want to store these entities in Redis as JSON documents. - We then declare each field in our model, specifying the data type and whether or not we want to index on that field. For example, here's the
agefield, which we've declared as a positive integer that we want to index on:
age: PositiveInt = Field(index=True)- The
skillsfield is a list of strings, declared thus:
skills: List[str] = Field(index=True)- For the
personal_statementfield, we don't want to index on the field's value, as it's a free text sentence rather than a single word or digit. For this, we'll tell Redis OM that we want to be able to perform full text searches on the values:
personal_statement: str = Field(index=True, full_text_search=True)addressworks differently from the other fields. Note that in our JSON representation of the model, address is an object rather than a string or numerical field. With Redis OM, this is modeled as a second class, which extends the Redis OMEmbeddedJsonModelclass:
class Address(EmbeddedJsonModel):
# field definitions...Fields in an
EmbeddedJsonModelare defined in the same way, so our class contains a field definition for each data item in the address.Not every field in our JSON is present in every address, Redis OM allows us to declare a field as optional so long as we don't index it:
unit: Optional[str] = Field(index=False)- We can also set a default value for a field... let's say country should be "United Kingdom" unless otherwise specified:
country: str = Field(index=True, default="United Kingdom")- Finally, to add the embedded address object to our Person model, we declare a field of type
Addressin the Person class:
address: AddressAdding New People
The function create_person in app.py handles the creation of a new person in Redis. It expects a JSON object that adheres to our Person model's schema. The code to then create a new Person object with that data and save it in Redis is simple:
new_person = Person(**request.json)
new_person.save()
return new_person.pkWhen a new Person instance is created, Redis OM assigns it a unique ULID primary key, which we can access as .pk. We return that to the caller, so that they know the ID of the object they just created.
Persisting the object to Redis is then simply a matter of calling .save() on it.
Try it out... with the server running, add a new person using curl:
curl --location --request POST 'http://127.0.0.1:5000/person/new' \
--header 'Content-Type: application/json' \
--data-raw '{
"first_name": "Joanne",
"last_name": "Peel",
"age": 36,
"personal_statement": "Music is my life, I love gigging and playing with my band.",
"address": {
"street_number": 56,
"unit": "4A",
"street_name": "The Rushes",
"city": "Birmingham",
"state": "West Midlands",
"postal_code": "B91 6HG",
"country": "United Kingdom"
},
"skills": [
"synths",
"vocals",
"guitar"
]
}'Running the above curl command will return the unique ULID ID assigned to the newly created person. For example 01FX8SSSDN7PT9T3N0JZZA758G.
Examining the data in Redis
Let's take a look at what we just saved in Redis. Using RedisInsight or redis-cli, connect to the database and look at the value stored at key :person.Person:01FX8SSSDN7PT9T3N0JZZA758G. This is stored as a JSON document in Redis, so if using redis-cli you'll need the following command:
$ redis-cli
127.0.0.1:6379> json.get :person.Person:01FX8SSSDN7PT9T3N0JZZA758GIf you're using RedisInsight, the browser will render the key value for you when you click on the key name:

When storing data as JSON in Redis, we can update and retrieve the whole document, or just parts of it. For example, to retrieve only the person's address and first skill, use the following command (RedisInsight users should use the built in redis-cli for this):
$ redis-cli
127.0.0.1:6379> json.get :person.Person:01FX8SSSDN7PT9T3N0JZZA758G $.address $.skills[0]
"{\"$.skills[0]\":[\"synths\"],\"$.address\":[{\"pk\":\"01FX8SSSDNRDSRB3HMVH00NQTT\",\"street_number\":56,\"unit\":\"4A\",\"street_name\":\"The Rushes\",\"city\":\"Birmingham\",\"state\":\"West Midlands\",\"postal_code\":\"B91 6HG\",\"country\":\"United Kingdom\"}]}"For more information on the JSON Path syntax used to query JSON documents in Redis, see the RedisJSON documentation.
Find a Person by ID
If we know a person's ID, we can retrieve their data. The function find_by_id in app.py receives an ID as its parameter, and asks Redis OM to retrieve and populate a Person object using the ID and the Person .get class method:
try:
person = Person.get(id)
return person.dict()
except NotFoundError:
return {}The .dict() method converts our Person object to a Python dictionary that Flask then returns to the caller.
Note that if there is no Person with the supplied ID in Redis, get will throw a NotFoundError.
Try this out with curl, substituting 01FX8SSSDN7PT9T3N0JZZA758G for the ID of a person that you just created in your database:
curl --location --request GET 'http://localhost:5000/person/byid/01FX8SSSDN7PT9T3N0JZZA758G'The server responds with a JSON object containing the user's data:
{
"address": {
"city": "Birmingham",
"country": "United Kingdom",
"pk": "01FX8SSSDNRDSRB3HMVH00NQTT",
"postal_code": "B91 6HG",
"state": "West Midlands",
"street_name": "The Rushes",
"street_number": 56,
"unit": null
},
"age": 36,
"first_name": "Joanne",
"last_name": "Peel",
"personal_statement": "Music is my life, I love gigging and playing with my band.",
"pk": "01FX8SSSDN7PT9T3N0JZZA758G",
"skills": [
"synths",
"vocals",
"guitar"
]
}Find People with Matching First and Last Name
Let's find all the people who have a given first and last name... This is handled by the function find_by_name in app.py.
Here, we're using Person's find class method that's provided by Redis OM. We pass it a search query, specifying that we want to find people whose first_name field contains the value of the first_name parameter passed to find_by_name AND whose last_name field contains the value of the last_name parameter:
people = Person.find(
(Person.first_name == first_name) &
(Person.last_name == last_name)
).all().all() tells Redis OM that we want to retrieve all matching people.
Try this out with curl as follows:
curl --location --request GET 'http://127.0.0.1:5000/people/byname/Kareem/Khan'Note: First and last name are case sensitive.
The server responds with an object containing results, an array of matches:
{
"results": [
{
"address": {
"city": "Sheffield",
"country": "United Kingdom",
"pk": "01FX8RMR7THMGA84RH8ZRQRRP9",
"postal_code": "S1 5RE",
"state": "South Yorkshire",
"street_name": "The Beltway",
"street_number": 1,
"unit": "A"
},
"age": 27,
"first_name": "Kareem",
"last_name": "Khan",
"personal_statement":"I'm Kareem, a multi-instrumentalist and singer looking to join a new rock band.",
"pk":"01FX8RMR7T60ANQTS4P9NKPKX8",
"skills": [
"drums",
"guitar",
"synths"
]
}
]
}Find People within a Given Age Range
It's useful to be able to find people that fall into a given age range... the function find_in_age_range in app.py handles this as follows...
We'll again use Person's find class method, this time passing it a minimum and maximum age, specifying that we want results where the age field is between those values only:
people = Person.find(
(Person.age >= min_age) &
(Person.age <= max_age)
).sort_by("age").all()Note that we can also use .sort_by to specify which field we want our results sorted by.
Let's find everyone between 30 and 47 years old, sorted by age:
curl --location --request GET 'http://127.0.0.1:5000/people/byage/30/47'
```This returns a results object containing an array of matches:
{
"results": [
{
"address": {
"city": "Sheffield",
"country": "United Kingdom",
"pk": "01FX8RMR7NW221STN6NVRDPEDT",
"postal_code": "S12 2MX",
"state": "South Yorkshire",
"street_name": "Main Street",
"street_number": 9,
"unit": null
},
"age": 35,
"first_name": "Robert",
"last_name": "McDonald",
"personal_statement": "My name is Robert, I love meeting new people and enjoy music, coding and walking my dog.",
"pk": "01FX8RMR7NRS45PBT3XP9KNAZH",
"skills": [
"guitar",
"piano",
"trombone"
]
},
{
"address": {
"city": "Birmingham",
"country": "United Kingdom",
"pk": "01FX8SSSDNRDSRB3HMVH00NQTT",
"postal_code": "B91 6HG",
"state": "West Midlands",
"street_name": "The Rushes",
"street_number": 56,
"unit": null
},
"age": 36,
"first_name": "Joanne",
"last_name": "Peel",
"personal_statement": "Music is my life, I love gigging and playing with my band.",
"pk": "01FX8SSSDN7PT9T3N0JZZA758G",
"skills": [
"synths",
"vocals",
"guitar"
]
},
{
"address": {
"city": "Nottingham",
"country": "United Kingdom",
"pk": "01FX8RMR82DDJ90CW8D1GM68YZ",
"postal_code": "NG1 1AA",
"state": "Nottinghamshire",
"street_name": "Broadway",
"street_number": 12,
"unit": "A-1"
},
"age": 37,
"first_name": "Noor",
"last_name": "Vasan",
"personal_statement": "I sing and play the guitar, I enjoy touring and meeting new people on the road.",
"pk": "01FX8RMR82D091TC37B45RCWY3",
"skills": [
"vocals",
"guitar"
]
},
{
"address": {
"city": "San Diego",
"country": "United States",
"pk": "01FX8RMR7YCDAVSWBMWCH2B07G",
"postal_code": "92102",
"state": "California",
"street_name": "C Street",
"street_number": 1299,
"unit": null
},
"age": 43,
"first_name": "Fernando",
"last_name": "Ortega",
"personal_statement": "I'm in a really cool band that plays a lot of cover songs. I'm the drummer!",
"pk": "01FX8RMR7YB283BPZ88HAG066P",
"skills": [
"clarinet",
"oboe",
"drums"
]
}
]
}Find People in a Given City with a Specific Skill
Now, we'll try a slightly different sort of query. We want to find all of the people that live in a given city AND who also have a certain skill. This requires a search over both the city field which is a string, and the skills field, which is an array of strings.
Essentially we want to say "Find me all the people whose city is city AND whose skills array CONTAINS desired_skill", where city and desired_skill are the parameters to the find_matching_skill function in app.py. Here's the code for that:
people = Person.find(
(Person.skills << desired_skill) &
(Person.address.city == city)
).all()The << operator here is used to indicate "in" or "contains".
Let's find all the guitar players in Sheffield:
curl --location --request GET 'http://127.0.0.1:5000/people/byskill/guitar/Sheffield'Note: Sheffield is case sensitive.
The server returns a results array containing matching people:
{
"results": [
{
"address": {
"city": "Sheffield",
"country": "United Kingdom",
"pk": "01FX8RMR7THMGA84RH8ZRQRRP9",
"postal_code": "S1 5RE",
"state": "South Yorkshire",
"street_name": "The Beltway",
"street_number": 1,
"unit": "A"
},
"age": 28,
"first_name": "Kareem",
"last_name": "Khan",
"personal_statement": "I'm Kareem, a multi-instrumentalist and singer looking to join a new rock band.",
"pk": "01FX8RMR7T60ANQTS4P9NKPKX8",
"skills": [
"drums",
"guitar",
"synths"
]
},
{
"address": {
"city": "Sheffield",
"country": "United Kingdom",
"pk": "01FX8RMR7NW221STN6NVRDPEDT",
"postal_code": "S12 2MX",
"state": "South Yorkshire",
"street_name": "Main Street",
"street_number": 9,
"unit": null
},
"age": 35,
"first_name": "Robert",
"last_name": "McDonald",
"personal_statement": "My name is Robert, I love meeting new people and enjoy music, coding and walking my dog.",
"pk": "01FX8RMR7NRS45PBT3XP9KNAZH",
"skills": [
"guitar",
"piano",
"trombone"
]
}
]
}Find People using Full Text Search on their Personal Statements
Each person has a personal_statement field, which is a free text string containing a couple of sentences about them. We chose to index this in a way that makes it full text searchable, so let's see how to use this now. The code for this is in the function find_matching_statements in app.py.
To search for people who have the value of the parameter search_term in their personal_statement field, we use the % operator:
Person.find(Person.personal_statement % search_term).all()Let's find everyone who talks about "play" in their personal statement.
curl --location --request GET 'http://127.0.0.1:5000/people/bystatement/play'The server responds with a results array of matching people:
{
"results": [
{
"address": {
"city": "San Diego",
"country": "United States",
"pk": "01FX8RMR7YCDAVSWBMWCH2B07G",
"postal_code": "92102",
"state": "California",
"street_name": "C Street",
"street_number": 1299,
"unit": null
},
"age": 43,
"first_name": "Fernando",
"last_name": "Ortega",
"personal_statement": "I'm in a really cool band that plays a lot of cover songs. I'm the drummer!",
"pk": "01FX8RMR7YB283BPZ88HAG066P",
"skills": [
"clarinet",
"oboe",
"drums"
]
}, {
"address": {
"city": "Nottingham",
"country": "United Kingdom",
"pk": "01FX8RMR82DDJ90CW8D1GM68YZ",
"postal_code": "NG1 1AA",
"state": "Nottinghamshire",
"street_name": "Broadway",
"street_number": 12,
"unit": "A-1"
},
"age": 37,
"first_name": "Noor",
"last_name": "Vasan",
"personal_statement": "I sing and play the guitar, I enjoy touring and meeting new people on the road.",
"pk": "01FX8RMR82D091TC37B45RCWY3",
"skills": [
"vocals",
"guitar"
]
},
{
"address": {
"city": "Birmingham",
"country": "United Kingdom",
"pk": "01FX8SSSDNRDSRB3HMVH00NQTT",
"postal_code": "B91 6HG",
"state": "West Midlands",
"street_name": "The Rushes",
"street_number": 56,
"unit": null
},
"age": 36,
"first_name": "Joanne",
"last_name": "Peel",
"personal_statement": "Music is my life, I love gigging and playing with my band.",
"pk": "01FX8SSSDN7PT9T3N0JZZA758G",
"skills": [
"synths",
"vocals",
"guitar"
]
}
]
}Note that we get results including matches for "play", "plays" and "playing".
Update a Person's Age
As well as retrieving information from Redis, we'll also want to update a Person's data from time to time. Let's see how to do that with Redis OM for Python.
The function update_age in app.py accepts two parameters: id and new_age. Using these, we first retrieve the person's data from Redis and create a new object with it:
try:
person = Person.get(id)
except NotFoundError:
return "Bad request", 400Assuming we find the person, let's update their age and save the data back to Redis:
person.age = new_age
person.save()Let's change Kareem Khan's age from 27 to 28:
curl --location --request POST 'http://127.0.0.1:5000/person/01FX8RMR7T60ANQTS4P9NKPKX8/age/28'The server responds with ok.
Delete a Person
If we know a person's ID, we can delete them from Redis without first having to load their data into a Person object. In the function delete_person in app.py, we call the delete class method on the Person class to do this:
Person.delete(id)Let's delete Dan Harris, the person with ID 01FX8RMR8545RWW4DYCE5MSZA1:
curl --location --request POST 'http://127.0.0.1:5000/person/01FX8RMR8545RWW4DYCE5MSZA1/delete'The server responds with an ok response regardless of whether the ID provided existed in Redis.
Setting an Expiry Time for a Person
This is an example of how to run arbitrary Redis commands against instances of a model saved in Redis. Let's see how we can set the time to live (TTL) on a person, so that Redis will expire the JSON document after a configurable number of seconds have passed.
The function expire_by_id in app.py handles this as follows. It takes two parameters: id - the ID of a person to expire, and seconds - the number of seconds in the future to expire the person after. This requires us to run the Redis EXPIRE command against the person's key. To do this, we need to access the Redis connection from the Person model like so:
person_to_expire = Person.get(id)
Person.db().expire(person_to_expire.key(), seconds)Let's set the person with ID 01FX8RMR82D091TC37B45RCWY3 to expire in 600 seconds:
curl --location --request POST 'http://localhost:5000/person/01FX8RMR82D091TC37B45RCWY3/expire/600'Using redis-cli, you can check that the person now has a TTL set with the Redis expire command:
127.0.0.1:6379> ttl :person.Person:01FX8RMR82D091TC37B45RCWY3
(integer) 584This shows that Redis will expire the key 584 seconds from now.
You can use the .db() function on your model class to get at the underlying redis-py connection whenever you want to run lower level Redis commands. For more details, see the redis-py documentation.
Shutting Down Redis (Docker)
If you're using Docker, and want to shut down the Redis container when you are finished with the application, use docker-compose down:
$ docker-compose down
Stopping redis_om_python_flask_starter ... done
Removing redis_om_python_flask_starter ... done
Removing network redis-om-python-flask-skeleton-app_default9.1.3.4 - Redis OM Spring
Learn how to build with Redis Stack and Spring
Redis Stack provides a seamless and straightforward way to use different data models and functionality from Redis, including a document store, a graph database, a time series data database, probabilistic data structures, and a full-text search engine.
Redis Stack is supported by several client libraries, including Node.js, Java, and Python, so that developers can use their preferred language. We'll be using one of the Redis Stack supporting libraries; Redis OM Spring. Redis OM Spring provides a robust repository and custom object-mapping abstractions built on the powerful Spring Data Redis (SDR) framework.
What you’ll need:
- Redis Stack: See https://redis.io/docs/stack/get-started/install/
- RedisInsight: See https://redis.io/docs/stack/insight
- Your favorite browser
- Java 11 or greater
Spring Boot scaffold with Spring Initializr
We’ll start by creating a skeleton app using the Spring Initializr, open your browser to https://start.spring.io and let's configure our skeleton application as follows:
- We’ll use a Maven-based build (check Maven checkbox)
- And version
2.6.4of Spring Boot which is the current version supported by Redis OM Spring - Group:
com.redis.om - Artifact:
skeleton - Name:
skeleton - Description: Skeleton App for Redis OM Spring
- Package Name:
com.redis.om.skeleton - Packaging: JAR
- Java:
11 - Dependencies:
web,devtoolsandlombok.
The web (Spring Web) gives us the ability to build RESTful applications using Spring MVC. With devtools we get fast application restarts and reloads. And lombok reduces boilerplate code like getters and setters.

Click Generate and download the ZIP file, unzip it and load the Maven project into your IDE of choice.
Adding Redis OM Spring
Open the Maven pom.xml and between the <dependencies> and <build> sections we’ll add the snapshots repositories so that we can get to latest SNAPSHOT release of redis-om-spring:
<repositories>
<repository>
<id>snapshots-repo</id>
<url>https://s01.oss.sonatype.org/content/repositories/snapshots/</url>
</repository>
</repositories>And then in the <dependencies> section add version 0.3.0 of Redis OM Spring:
<dependency>
<groupId>com.redis.om</groupId>
<artifactId>redis-om-spring</artifactId>
<version>0.3.0-SNAPSHOT</version>
</dependency>Adding Swagger
We'll use the Swagger UI to test our web services endpoint. To add Swagger 2 to a Spring REST web service, using the Springfox implementation add the following dependencies to the POM:
<dependency>
<groupId>io.springfox</groupId>
<artifactId>springfox-boot-starter</artifactId>
<version>3.0.0</version>
</dependency>
<dependency>
<groupId>io.springfox</groupId>
<artifactId>springfox-swagger-ui</artifactId>
<version>3.0.0</version>
</dependency>Let's add Swagger Docker Bean to the Spring App class:
@Bean
public Docket api() {
return new Docket(DocumentationType.SWAGGER_2)
.select()
.apis(RequestHandlerSelectors.any())
.paths(PathSelectors.any())
.build();
}Which will pick up any HTTP endpoints exposed by our application. Add to your app's property file (src/main/resources/application.properties):
spring.mvc.pathmatch.matching-strategy=ANT_PATH_MATCHERAnd finally, to enable Swagger on the application, we need to use the EnableSwagger2 annotation, by
annotating the main application class:
@EnableSwagger2
@SpringBootApplication
public class SkeletonApplication {
// ...
}Creating the Domain
Our domain will be fairly simple; Persons that have Addresses. Let's start with the Person entity:
package com.redis.om.skeleton.models;
import java.util.Set;
import org.springframework.data.annotation.Id;
import org.springframework.data.geo.Point;
import com.redis.om.spring.annotations.Document;
import com.redis.om.spring.annotations.Indexed;
import com.redis.om.spring.annotations.Searchable;
import lombok.AccessLevel;
import lombok.AllArgsConstructor;
import lombok.Data;
import lombok.NonNull;
import lombok.RequiredArgsConstructor;
@RequiredArgsConstructor(staticName = "of")
@AllArgsConstructor(access = AccessLevel.PROTECTED)
@Data
@Document
public class Person {
// Id Field, also indexed
@Id
@Indexed
private String id;
// Indexed for exact text matching
@Indexed @NonNull
private String firstName;
@Indexed @NonNull
private String lastName;
//Indexed for numeric matches
@Indexed @NonNull
private Integer age;
//Indexed for Full Text matches
@Searchable @NonNull
private String personalStatement;
//Indexed for Geo Filtering
@Indexed @NonNull
private Point homeLoc;
// Nest indexed object
@Indexed @NonNull
private Address address;
@Indexed @NonNull
private Set<String> skills;
}The Person class has the following properties:
id: An autogeneratedStringusing ULIDsfirstName: AStringrepresenting their first or given name.lastName: AStringrepresenting their last or surname.age: AnIntegerrepresenting their age in years.personalStatement: AStringrepresenting a personal text statement containing facts or other biographical information.homeLoc: Aorg.springframework.data.geo.Pointrepresenting the geo coordinates.address: An entity of typeAddressrepresenting the Person's postal address.skills: ASet<String>representing a collection of Strings representing skills the Person possesses.
@Document
The Person class (com.redis.om.skeleton.models.Person) is annotated with @Document (com.redis.om.spring.annotations.Document), which is marks the object as a Redis entity to be persisted as a JSON document by the appropriate type of repository.
@Indexed and @Searchable
The fields id, firstName, lastName, age, homeLoc, address, and skills are all annotated
with @Indexed (com.redis.om.spring.annotations.Indexed). On entities annotated with @Document Redis OM Spring will scan the fields and add an appropriate search index field to the schema for the entity. For example, for the Person class
an index named com.redis.om.skeleton.models.PersonIdx will be created on application startup. In the index schema, a search field will be added for each @Indexed annotated property. RediSearch, the underlying search engine powering searches, supports Text (full-text searches), Tag (exact-match searches), Numeric (range queries), Geo (geographic range queries), and Vector (vector similarity queries) fields. For @Indexed fields, the appropriate search field (Tag, Numeric, or Geo) is selected based on the property's data type.
Fields marked as @Searchable (com.redis.om.spring.annotations.Searchable) such as personalStatement in Person are reflected as Full-Text search fields in the search index schema.
Nested Field Search Capabilities
The embedded class Address (com.redis.om.skeleton.models.Address) has several properties annotated with @Indexed and @Searchable, which will generate search index fields in Redis. The scanning of these fields is triggered by the @Indexed annotation on the address property in the Person class:
package com.redis.om.skeleton.models;
import com.redis.om.spring.annotations.Indexed;
import com.redis.om.spring.annotations.Searchable;
import lombok.Data;
import lombok.NonNull;
import lombok.RequiredArgsConstructor;
@Data
@RequiredArgsConstructor(staticName = "of")
public class Address {
@NonNull
@Indexed
private String houseNumber;
@NonNull
@Searchable(nostem = true)
private String street;
@NonNull
@Indexed
private String city;
@NonNull
@Indexed
private String state;
@NonNull
@Indexed
private String postalCode;
@NonNull
@Indexed
private String country;
}Spring Data Repositories
With the model in place now, we need to create the bridge between the models and the Redis, a Spring Data Repository. Like other Spring Data Repositories, Redis OM Spring data repository's goal is to reduce the boilerplate code required to implement data access significantly. Create a Java interface like:
package com.redis.om.skeleton.models.repositories;
import com.redis.om.skeleton.models.Person;
import com.redis.om.spring.repository.RedisDocumentRepository;
public interface PeopleRepository extends RedisDocumentRepository<Person,String> {
}That's really all we need to get all the CRUD and Paging/Sorting functionality. The
RedisDocumentRepository (com.redis.om.spring.repository.RedisDocumentRepository) extends PagingAndSortingRepository (org.springframework.data.repository.PagingAndSortingRepository) which extends CrudRepository to provide additional methods to retrieve entities using the pagination and sorting.
@EnableRedisDocumentRepositories
Before we can fire up the application, we need to enable our Redis Document repositories. Like most
Spring Data projects, Redis OM Spring provides an annotation to do so; the @EnableRedisDocumentRepositories. We annotate the main application class:
@EnableRedisDocumentRepositories(basePackages = "com.redis.om.skeleton.*")
@EnableSwagger2
@SpringBootApplication
public class SkeletonApplication {CRUD with Repositories
With the repositories enabled, we can use our repo; let's put in some data to see the object mapping in action. Let’s create CommandLineRunner that will execute on application startup:
public class SkeletonApplication {
@Bean
CommandLineRunner loadTestData(PeopleRepository repo) {
return args -> {
repo.deleteAll();
String thorSays = “The Rabbit Is Correct, And Clearly The Smartest One Among You.”;
// Serendipity, 248 Seven Mile Beach Rd, Broken Head NSW 2481, Australia
Address thorsAddress = Address.of("248", "Seven Mile Beach Rd", "Broken Head", "NSW", "2481", "Australia");
Person thor = Person.of("Chris", "Hemsworth", 38, thorSays, new Point(153.616667, -28.716667), thorsAddress, Set.of("hammer", "biceps", "hair", "heart"));
repo.save(thor);
};
}In the loadTestData method, we will take an instance of the PeopleRepository (thank you, Spring, for Dependency Injection!). Inside the returned lambda, we will first call the repo’s deleteAll method, which will ensure that we have clean data on each application reload.
We create a Person object using the Lombok generated builder method and then save it using the repo’s save method.
Keeping tabs with Redis Insight
Let’s launch RedisInsight and connect to the localhost at port 6379. With a clean Redis Stack install, we can use the built-in CLI to check the keys in the system:

For a small amount of data, you can use the keys command (for any significant amount of data, use scan):
keys *If you want to keep an eye on the commands issued against the server, RedisInsight provides a profiler. If you click the "profile" button at the bottom of the screen, it should reveal the profiler window, and there you can start the profiler by clicking on the “Start Profiler” arrow.
Let's start our Spring Boot application by using the Maven command:
./mvnw spring-boot:runOn RedisInsight, if the application starts correctly, you should see a barrage of commands fly by on the profiler:

Now we can inspect the newly loaded data by simply refreshing the "Keys" view:

You should now see two keys; one for the JSON document for “Thor” and one for the Redis Set that Spring Data Redis (and Redis OM Spring) use to maintain the list of primary keys for an entity.
You can select any of the keys on the key list to reveal their contents on the details panel. For JSON documents, we get a nice tree-view:

Several Redis commands were executed on application startup. Let’s break them down so that we can understand what's transpired.
Index Creation
The first one is a call to FT.CREATE, which happens after Redis OM Spring scanned the @Document annotations. As you can see, since it encountered the annotation on Person, it creates the PersonIdx index.
"FT.CREATE"
"com.redis.om.skeleton.models.PersonIdx" "ON" "JSON"
"PREFIX" "1" "com.redis.om.skeleton.models.Person:"
"SCHEMA"
"$.id" "AS" "id" "TAG"
"$.firstName" "AS" "firstName" "TAG"
"$.lastName" "AS" "lastName" "TAG"
"$.age" "AS" "age" "NUMERIC"
"$.personalStatement" "AS" "personalStatement" "TEXT"
"$.homeLoc" "AS" "homeLoc" "GEO"
"$.address.houseNumber" "AS" "address_houseNumber" "TAG"
"$.address.street" "AS" "address_street" "TEXT" "NOSTEM"
"$.address.city" "AS" "address_city" "TAG"
"$.address.state" "AS" "address_state" "TAG"
"$.address.postalCode" "AS" "address_postalCode" "TAG"
"$.address.country" "AS" "address_country" "TAG"
"$.skills[*]" "AS" "skills"Cleaning the Person Repository
The next set of commands are generated by the call to repo.deleteAll():
"DEL" "com.redis.om.skeleton.models.Person"
"KEYS" "com.redis.om.skeleton.models.Person:*"The first call clears the set of Primary Keys that Spring Data Redis maintains (and therefore Redis OM Spring), the second call collects all the keys to delete them, but there are none to delete on this first load of the data.
Saving Person Entities
The next repo call is repo.save(thor) that triggers the following sequence:
"SISMEMBER" "com.redis.om.skeleton.models.Person" "01FYANFH68J6WKX2PBPX21RD9H"
"EXISTS" "com.redis.om.skeleton.models.Person:01FYANFH68J6WKX2PBPX21RD9H"
"JSON.SET" "com.redis.om.skeleton.models.Person:01FYANFH68J6WKX2PBPX21RD9H" "." "{"id":"01FYANFH68J6WKX2PBPX21RD9H","firstName":"Chris","lastName":"Hemsworth","age":38,"personalStatement":"The Rabbit Is Correct, And Clearly The Smartest One Among You.","homeLoc":"153.616667,-28.716667","address":{"houseNumber":"248","street":"Seven Mile Beach Rd","city":"Broken Head","state":"NSW","postalCode":"2481","country":"Australia"},"skills":["biceps","hair","heart","hammer"]}
"SADD" "com.redis.om.skeleton.models.Person" "01FYANFH68J6WKX2PBPX21RD9H"Let's break it down:
- The first call uses the generated ULID to check if the id is in the set of primary keys (if it is, it’ll be removed)
- The second call checks if JSON document exists (if it is, it’ll be removed)
- The third call uses the
JSON.SETcommand to save the JSON payload - The last call adds the primary key of the saved document to the set of primary keys
Now that we’ve seen the repository in action via the .save method, we know that the trip from Java to Redis work. Now let’s add some more data to make the interactions more interesting:
@Bean
CommandLineRunner loadTestData(PeopleRepository repo) {
return args -> {
repo.deleteAll();
String thorSays = “The Rabbit Is Correct, And Clearly The Smartest One Among You.”;
String ironmanSays = “Doth mother know you weareth her drapes?”;
String blackWidowSays = “Hey, fellas. Either one of you know where the Smithsonian is? I’m here to pick up a fossil.”;
String wandaMaximoffSays = “You Guys Know I Can Move Things With My Mind, Right?”;
String gamoraSays = “I Am Going To Die Surrounded By The Biggest Idiots In The Galaxy.”;
String nickFurySays = “Sir, I’m Gonna Have To Ask You To Exit The Donut”;
// Serendipity, 248 Seven Mile Beach Rd, Broken Head NSW 2481, Australia
Address thorsAddress = Address.of("248", "Seven Mile Beach Rd", "Broken Head", "NSW", "2481", "Australia");
// 11 Commerce Dr, Riverhead, NY 11901
Address ironmansAddress = Address.of("11", "Commerce Dr", "Riverhead", "NY", "11901", "US");
// 605 W 48th St, New York, NY 10019
Address blackWidowAddress = Address.of("605", "48th St", "New York", "NY", "10019", "US");
// 20 W 34th St, New York, NY 10001
Address wandaMaximoffsAddress = Address.of("20", "W 34th St", "New York", "NY", "10001", "US");
// 107 S Beverly Glen Blvd, Los Angeles, CA 90024
Address gamorasAddress = Address.of("107", "S Beverly Glen Blvd", "Los Angeles", "CA", "90024", "US");
// 11461 Sunset Blvd, Los Angeles, CA 90049
Address nickFuryAddress = Address.of("11461", "Sunset Blvd", "Los Angeles", "CA", "90049", "US");
Person thor = Person.of("Chris", "Hemsworth", 38, thorSays, new Point(153.616667, -28.716667), thorsAddress, Set.of("hammer", "biceps", "hair", "heart"));
Person ironman = Person.of("Robert", "Downey", 56, ironmanSays, new Point(40.9190747, -72.5371874), ironmansAddress, Set.of("tech", "money", "one-liners", "intelligence", "resources"));
Person blackWidow = Person.of("Scarlett", "Johansson", 37, blackWidowSays, new Point(40.7215259, -74.0129994), blackWidowAddress, Set.of("deception", "martial_arts"));
Person wandaMaximoff = Person.of("Elizabeth", "Olsen", 32, wandaMaximoffSays, new Point(40.6976701, -74.2598641), wandaMaximoffsAddress, Set.of("magic", "loyalty"));
Person gamora = Person.of("Zoe", "Saldana", 43, gamoraSays, new Point(-118.399968, 34.073087), gamorasAddress, Set.of("skills", "martial_arts"));
Person nickFury = Person.of("Samuel L.", "Jackson", 73, nickFurySays, new Point(-118.4345534, 34.082615), nickFuryAddress, Set.of("planning", "deception", "resources"));
repo.saveAll(List.of(thor, ironman, blackWidow, wandaMaximoff, gamora, nickFury));
};
}We have 6 People in the database now; since we’re using the devtools in Spring, the app should have reloaded, and the database reseeded with new data. Press enter the key pattern input box in RedisInsight to refresh the view. Notice that we used the repository’s saveAll to save several objects in bulk.

Web Service Endpoints
Before we beef up the repository with more interesting queries, let’s create a controller so that we can test our queries using the Swagger UI:
package com.redis.om.skeleton.controllers;
import com.redis.om.skeleton.models.Person;
import com.redis.om.skeleton.models.repositories.PeopleRepository;
import org.springframework.beans.factory.annotation.Autowired;
import org.springframework.web.bind.annotation.GetMapping;
import org.springframework.web.bind.annotation.RequestMapping;
import org.springframework.web.bind.annotation.RestController;
@RestController
@RequestMapping("/api/v1/people")
public class PeopleControllerV1 {
@Autowired
PeopleRepository repo;
@GetMapping("all")
Iterable<Person> all() {
return repo.findAll();
}
}In this controller, we inject a repository and use one of the CRUD methods, findAll(), to return all the Person documents in the database.
If we navigate to http://localhost:8080/swagger-ui/ you should see the Swagger UI:

We can see the /all method from our people-controller-v-1, expanding that you should see:

And if you select “Try it out” and then “Execute,” you should see the resulting JSON array containing all People documents in the database:

Let’s also add the ability to retrieve a Person by its id by using the repo’s findById method:
@GetMapping("{id}")
Optional<Person> byId(@PathVariable String id) {
return repo.findById(id);
}Refreshing the Swagger UI, we should see the newly added endpoint. We can grab an id using the SRANDMEMBER command on the RedisInsight CLI like this:
SRANDMEMBER com.redis.om.skeleton.models.PersonPlugging the resulting ID in the Swagger UI, we can get the corresponding JSON document:

Custom Repository Finders
Now that we tested quite a bit of the CRUD functionality, let's add some custom finders to our repository. We’ll start with a finder over a numeric range, on the age property of Person:
public interface PeopleRepository extends RedisDocumentRepository<Person,String> {
// Find people by age range
Iterable<Person> findByAgeBetween(int minAge, int maxAge);
}At runtime, the repository method findByAgeBetween is fulfilled by the framework, so all you need to do is declare it, and Redis OM Spring will handle the querying and mapping of the results. The property or properties to be used are picked after the key phrase "findBy". The "Between" keyword is the predicate that tells the query builder what operation to use.
To test it on the Swagger UI, let’s add a corresponding method to the controller:
@GetMapping("age_between")
Iterable<Person> byAgeBetween( //
@RequestParam("min") int min, //
@RequestParam("max") int max) {
return repo.findByAgeBetween(min, max);
}Refreshing the UI, we can see the new endpoint. Let’s try it with some data:

Invoke the endpoint with the value 30 for min and 37 for max we get two hits;
“Scarlett Johansson” and “Elizabeth Olsen” are the only two people with ages between 30 and 37.

If we look at the RedisInsight Profiler, we can see the resulting query, which is a range query on the index numeric field age:

We can also create query methods with more than one property. For example, if we wanted to do a query by first and last names, we would declare a repository method like:
// Find people by their first and last name
Iterable<Person> findByFirstNameAndLastName(String firstName, String lastName);Let’s add a corresponding controller method:
@GetMapping("name")
Iterable<Person> byFirstNameAndLastName(@RequestParam("first") String firstName, //
@RequestParam("last") String lastName) {
return repo.findByFirstNameAndLastName(firstName, lastName);
}Once again, we can refresh the swagger UI and test the newly created endpoint:

Executing the request with the first name Robert and last name Downey, we get:

And the resulting query on RedisInsight:

Now let’s try a Geospatial query. The homeLoc property is a Geo Point, and by using the “Near” predicate in our method declaration, we can get a finder that takes a point and a radius around that point to search:
// Draws a circular geofilter around a spot and returns all people in that
// radius
Iterable<Person> findByHomeLocNear(Point point, Distance distance);
And the corresponding controller method:
@GetMapping("homeloc")
Iterable<Person> byHomeLoc(//
@RequestParam("lat") double lat, //
@RequestParam("lon") double lon, //
@RequestParam("d") double distance) {
return repo.findByHomeLocNear(new Point(lon, lat), new Distance(distance, Metrics.MILES));
}Refreshing the Swagger US, we should now see the byHomeLoc endpoint. Let’s see which of the Avengers live within 10 miles of Suffolk Park Pub in South Wales, Australia... hmmm.

Executing the request, we get the record for Chris Hemsworth:

and in Redis Insight we can see the backing RediSearch query:

Let’s try a full-text search query against the personalStatement property. To do so, we prefix our query method with the word search as shown below:
// Performs full-text search on a person’s personal Statement
Iterable<Person> searchByPersonalStatement(String text);And the corresponding controller method:
@GetMapping("statement")
Iterable<Person> byPersonalStatement(@RequestParam("q") String q) {
return repo.searchByPersonalStatement(q);
}Once again, we can try it on the Swagger UI with the text “mother”:

Which results in a single hit, the record for Robert Downey Jr.:

Notice that you can pass a query string like “moth*” with wildcards if needed

Nested object searches
You’ve noticed that the address object in Person is mapped as a JSON object. If we want to search by address fields, we use an underscore to access the nested fields. For example, if we wanted to find a Person by their city, the method signature would be:
// Performing a tag search on city
Iterable<Person> findByAddress_City(String city);Let’s add the matching controller method so that we can test it:
@GetMapping("city")
Iterable<Person> byCity(@RequestParam("city") String city) {
return repo.findByAddress_City(city);
}Let’s test the byCity endpoint:

As expected, we should get two hits; Scarlett Johansen and Elizabeth Olsen, both with addresses in Nee York:

The skills set is indexed as tag search. To find a Person with any of the skills in a provided list, we can add a repository method like:
// Search Persons that have one of multiple skills (OR condition)
Iterable<Person> findBySkills(Set<String> skills);And the corresponding controller method:
@GetMapping("skills")
Iterable<Person> byAnySkills(@RequestParam("skills") Set<String> skills) {
return repo.findBySkills(skills);
}Let's test the endpoint with the value "deception":

The search returns the records for Scallet Johanson and Samuel L. Jackson:

We can see the backing RediSearch query using a tag search:

Fluid Searching with Entity Streams
Redis OM Spring Entity Streams provides a Java 8 Streams interface to Query Redis JSON documents using RediSearch. Entity Streams allow you to process data in a typesafe declarative way similar to SQL statements. Streams can be used to express a query as a chain of operations.
Entity Streams in Redis OM Spring provide the same semantics as Java 8 streams. Streams can be made of Redis Mapped entities (@Document) or one or more properties of an Entity. Entity Streams progressively build the query until a terminal operation is invoked (such as collect). Whenever a Terminal operation is applied to a Stream, the Stream cannot accept additional operations to its pipeline, which means that the Stream is started.
Let’s start with a simple example, a Spring @Service which includes EntityStream to query for instances of the mapped class Person:
package com.redis.om.skeleton.services;
import java.util.stream.Collectors;
import org.springframework.beans.factory.annotation.Autowired;
import org.springframework.stereotype.Service;
import com.redis.om.skeleton.models.Person;
import com.redis.om.skeleton.models.Person$;
import com.redis.om.spring.search.stream.EntityStream;
@Service
public class PeopleService {
@Autowired
EntityStream entityStream;
// Find all people
public Iterable<Person> findAllPeople(int minAge, int maxAge) {
return entityStream //
.of(Person.class) //
.collect(Collectors.toList());
}
}The EntityStream is injected into the PeopleService using @Autowired. We can then get a stream for Person objects by using entityStream.of(Person.class). The stream represents the equivalent of a SELECT * FROM Person on a relational database. The call to collect will then execute the underlying query and return a collection of all Person objects in Redis.
Entity Meta-model
You’re provided with a generated meta-model to produce more elaborate queries, a class with the same name as your model but ending with a dollar sign. In the
example below, our entity model is Person; therefore, we get a meta-model named Person$. With the meta-model, you have access to the
underlying search engine field operations. For example, we have an age property which is an integer. Therefore our meta-model has an AGE property with
numeric operations we can use with the stream’s filter method such as between.
// Find people by age range
public Iterable<Person> findByAgeBetween(int minAge, int maxAge) {
return entityStream //
.of(Person.class) //
.filter(Person$.AGE.between(minAge, maxAge)) //
.sorted(Person$.AGE, SortOrder.ASC) //
.collect(Collectors.toList());
}In this example, we also use the Streams sorted method to declare that our stream will be sorted by the Person$.AGE in ASCending order.
To "AND" property expressions we can chain multiple .filter statements. For example, to recreate
the finder by first and last name we can use an Entity Stream in the following way:
// Find people by their first and last name
public Iterable<Person> findByFirstNameAndLastName(String firstName, String lastName) {
return entityStream //
.of(Person.class) //
.filter(Person$.FIRST_NAME.eq(firstName)) //
.filter(Person$.LAST_NAME.eq(lastName)) //
.collect(Collectors.toList());
}In this article, we explored how Redis OM Spring provides a couple of APIs to tap into the power of Redis Stack’s document database and search capabilities from Spring Boot application. We’ll explore other Redis Stack capabilities via Redis OM Spring in future articles
9.2 - RedisInsight
Visualize and optimize Redis data
RedisInsight is a powerful tool for visualizing and optimizing data in Redis or Redis Stack, making real-time application development easier and more fun than ever before. RedisInsight lets you do both GUI- and CLI-based interactions in a fully-featured desktop GUI client.
Download the latest RedisInsight
- Download the latest RedisInsight here
- RedisInsight Release Notes
Overview
Connection management
- Automatically discover and add your local Redis or Redis Stack databases (that use standalone connection type and do not require authentication)
- Discover your databases in Redis Enterprise Cluster and databases with Flexible plans in Redis Cloud
- Use a form to enter your connection details and add any Redis database running anywhere (including OSS Cluster, Sentinel)
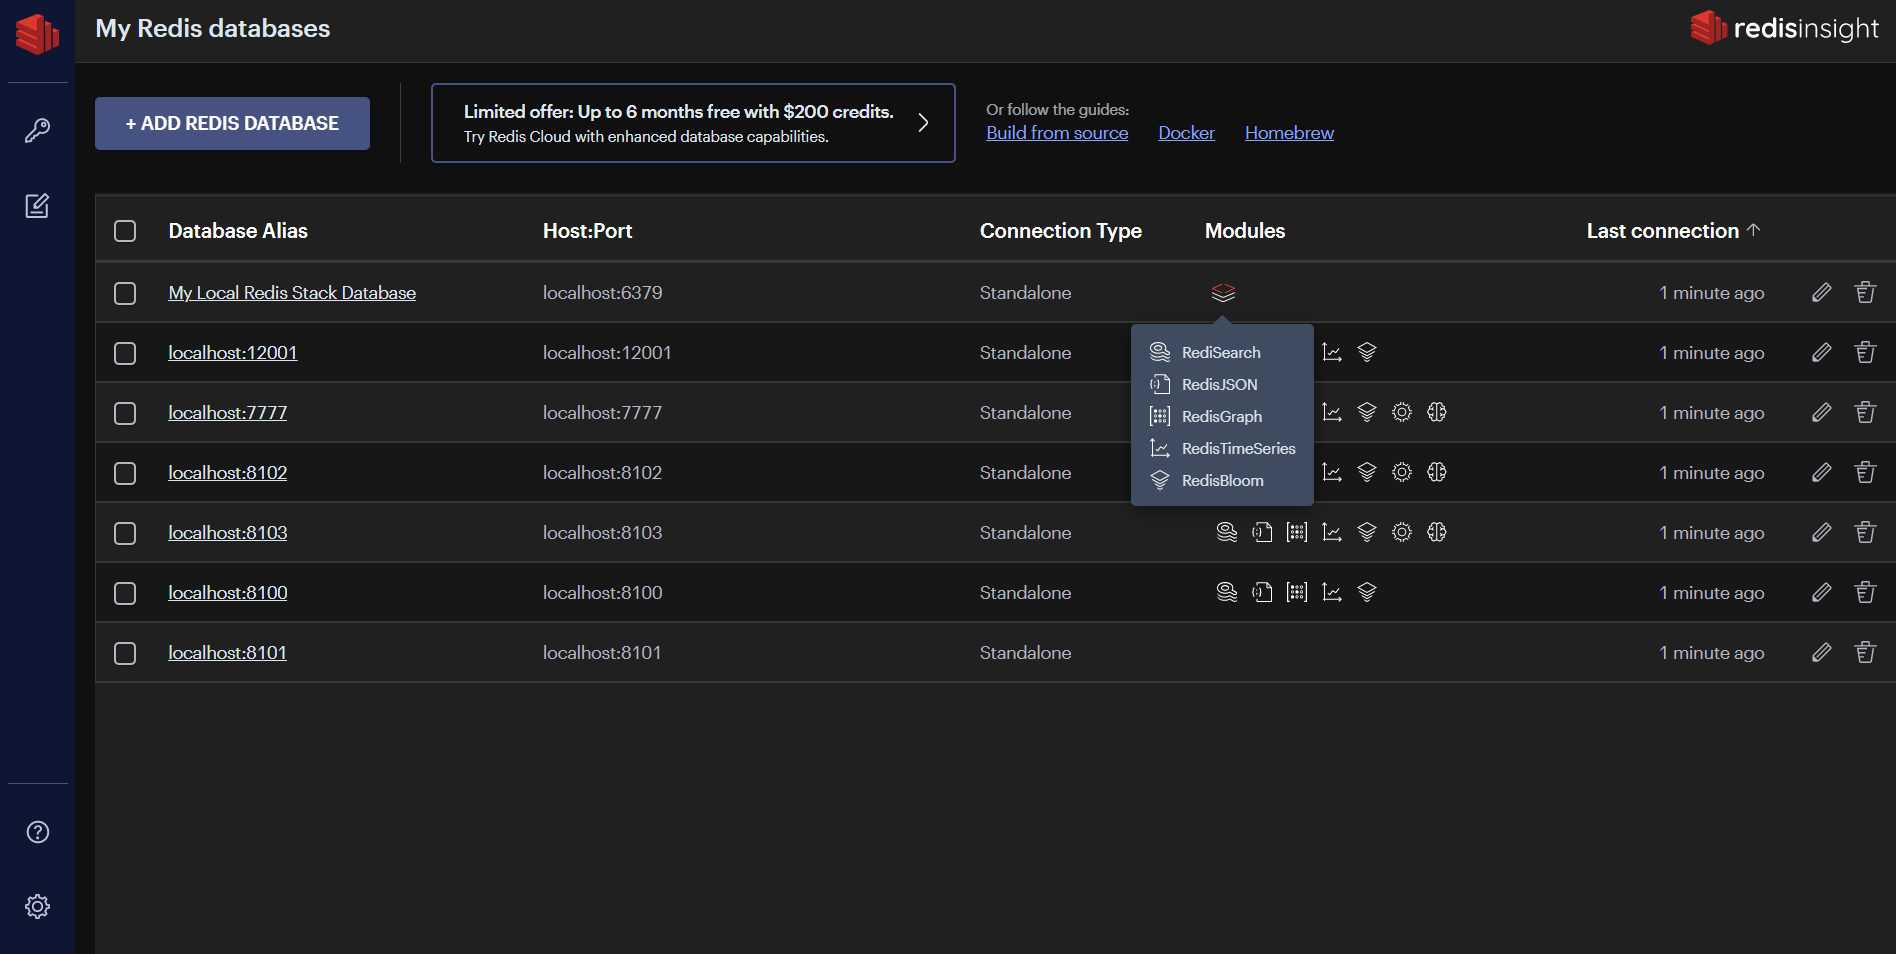
Browser
Browse, filter and visualize your key-value Redis data structures.
- CRUD support for Lists, Hashes, Strings, Sets, Sorted Sets
- CRUD support for RedisJSON
- Group keys according to their namespaces
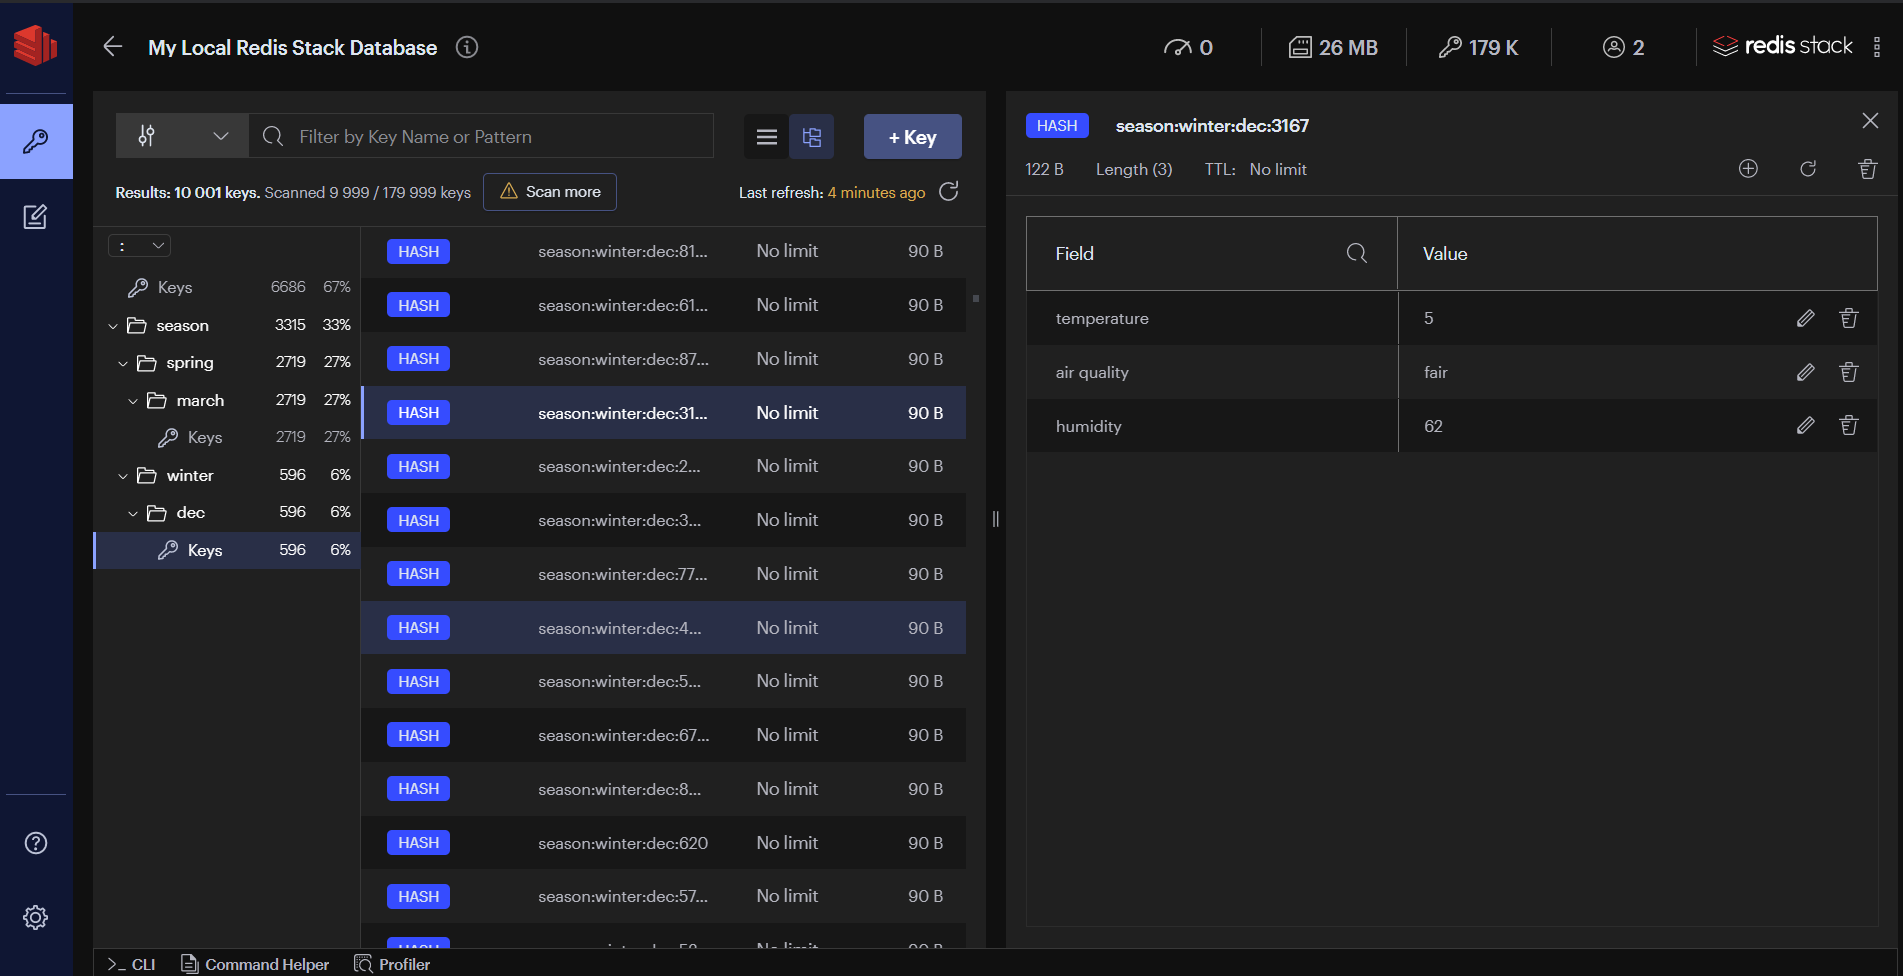
Profiler
Analyze every command sent to Redis in real time
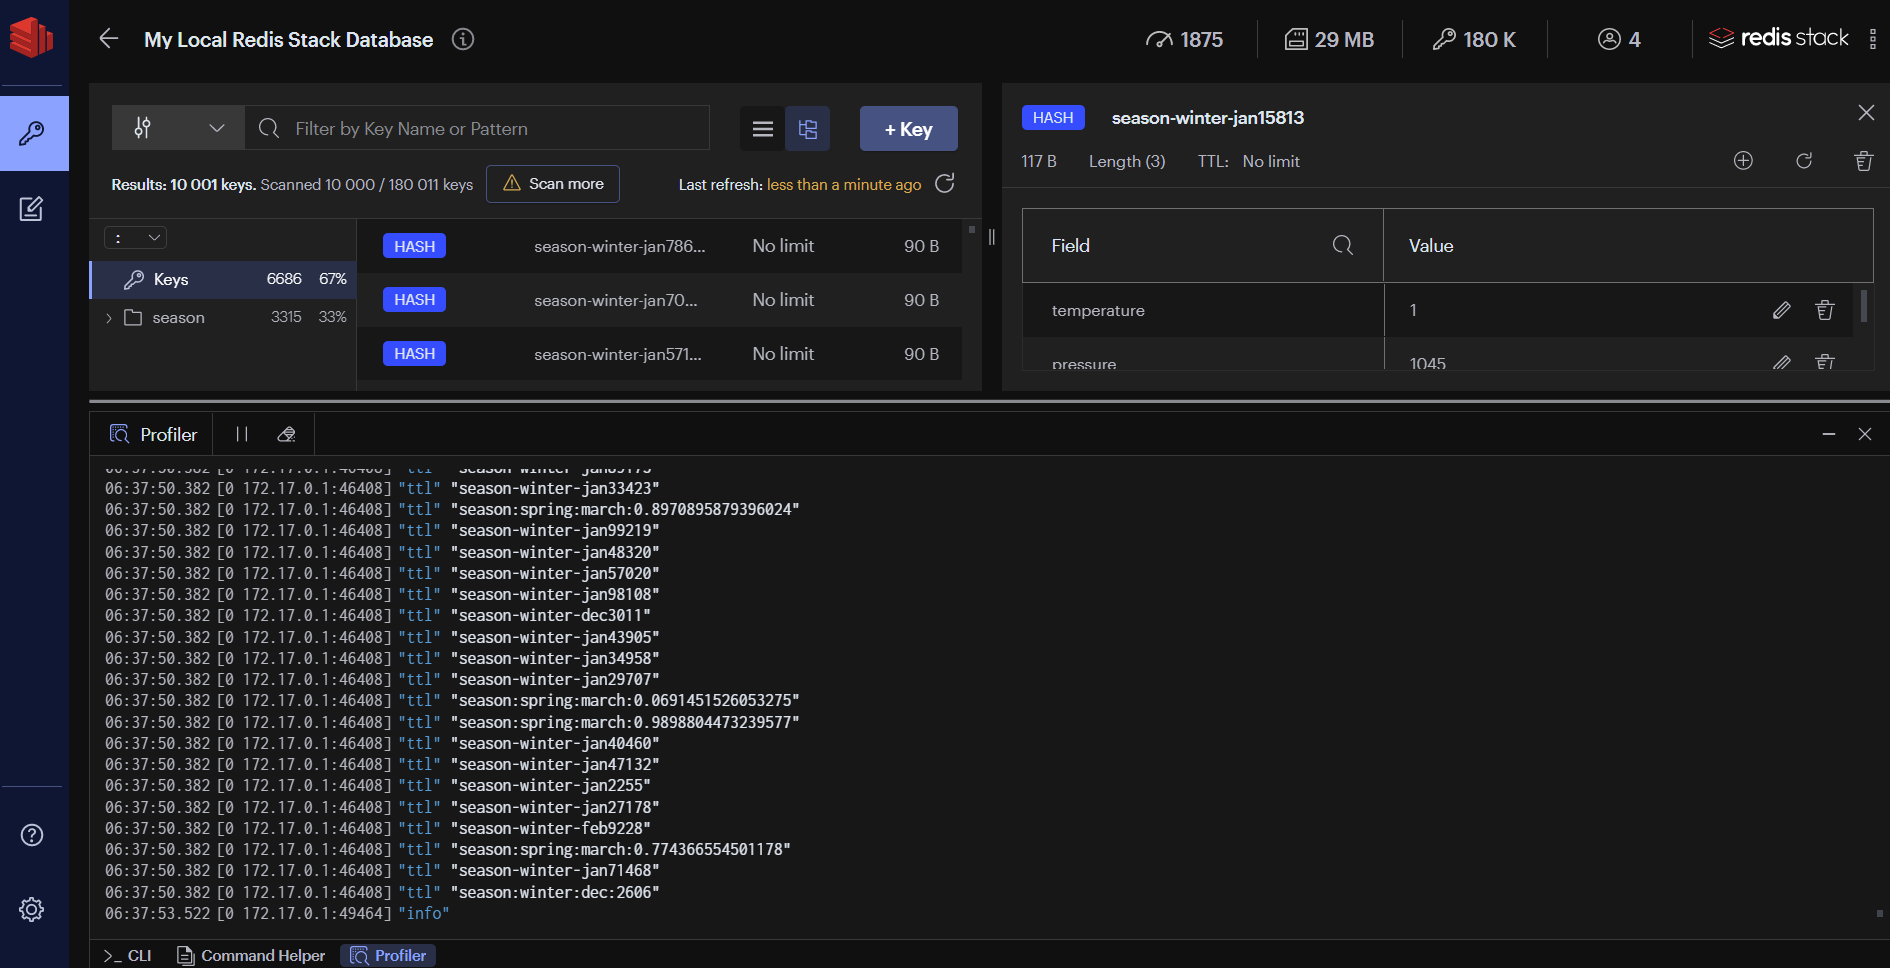
CLI
The CLI is accessible at any time within the applicaiton.
- Employs integrated help to deliver intuitive assistance
- Use together with a convenient command helper that lets you search and read on Redis commands.
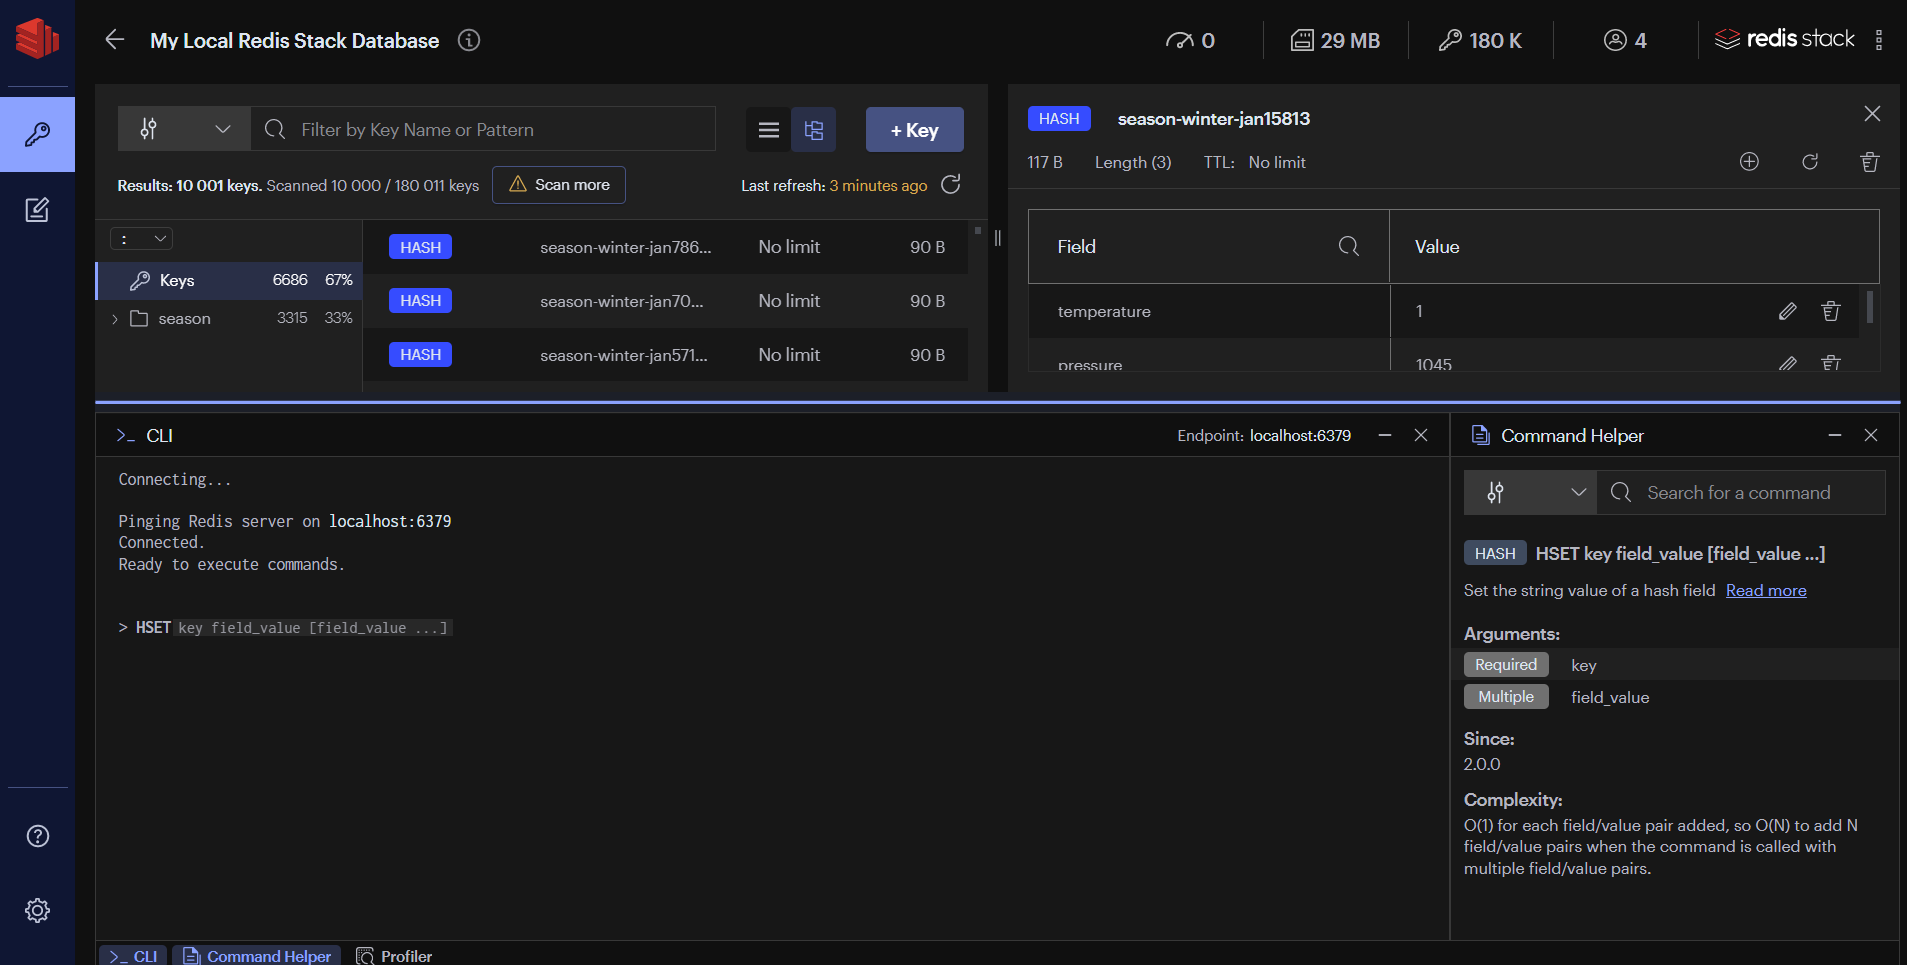
Workbench
Advanced command line interface with intelligent command auto-complete and complex data visualizations.
- Built-in guides: you can conveniently discover Redis and Redis Stack capabilities using the built-in guides.
- Command auto-complete support for all capabilities in Redis and Redis Stack.
- Visualizations of your RediSearch index, queries, and aggregations
- Visualizations of your RedisGraph and RedisTimeSeries data.
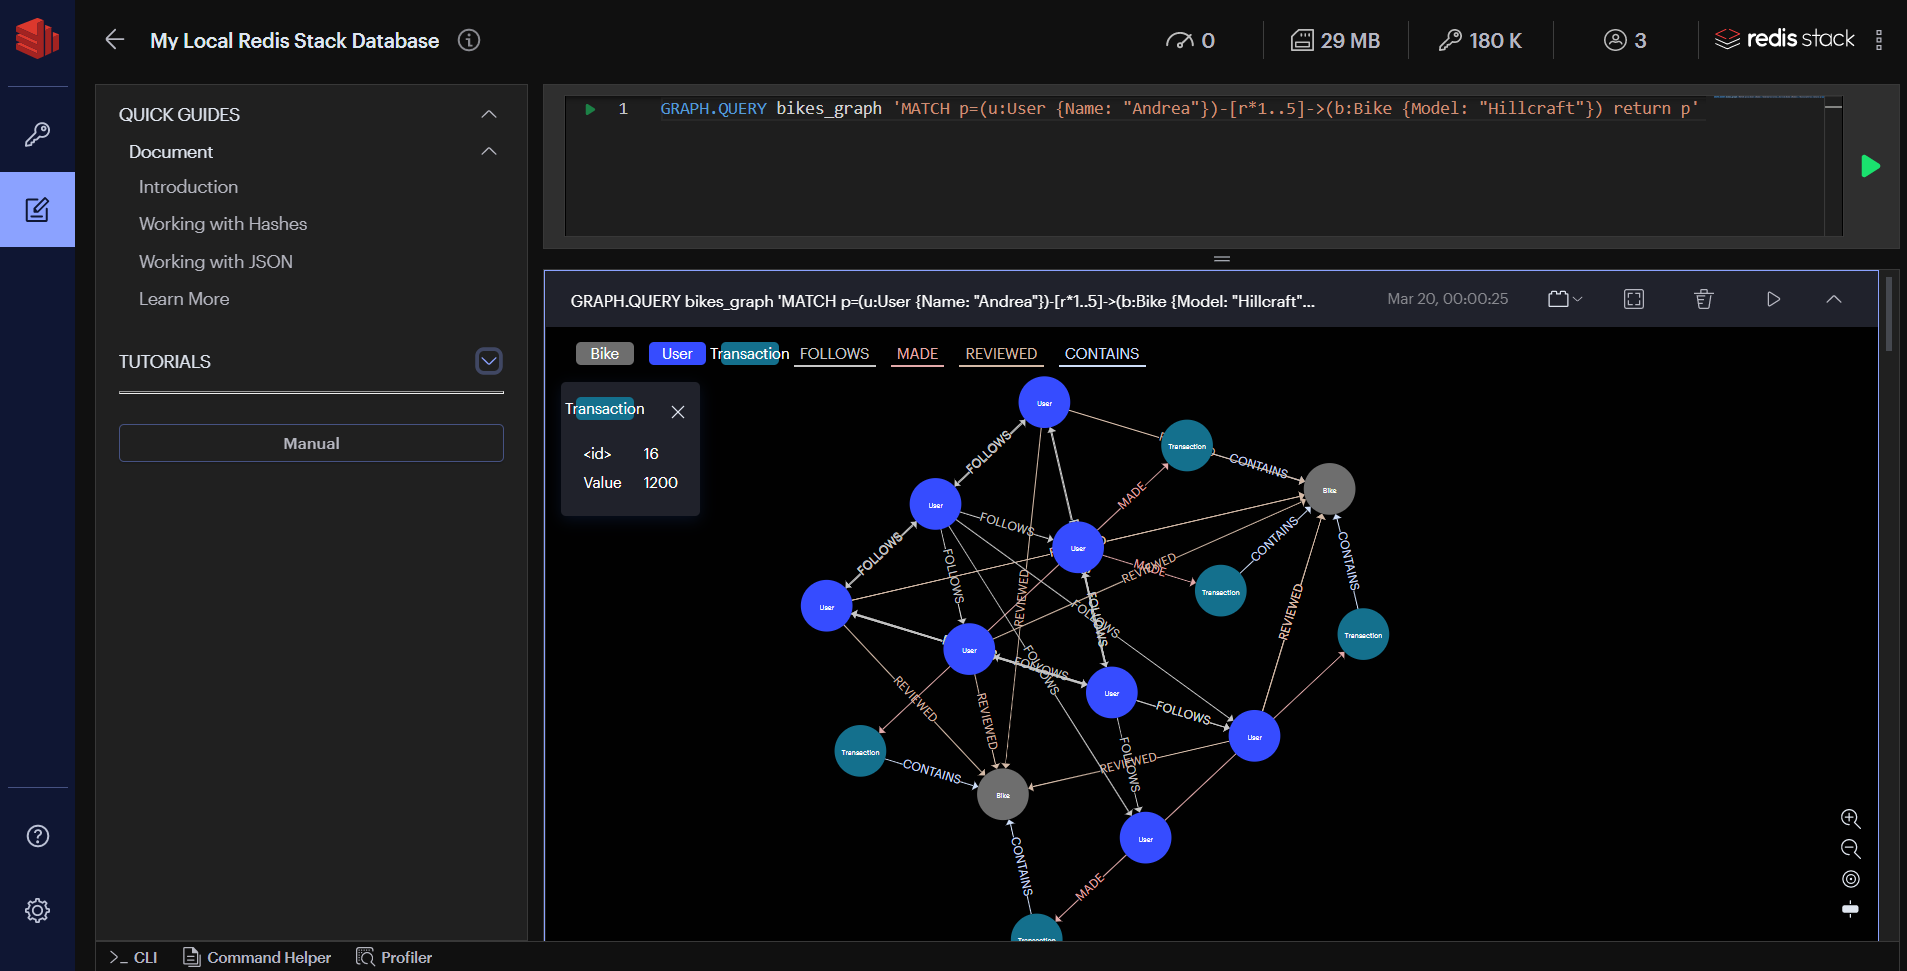
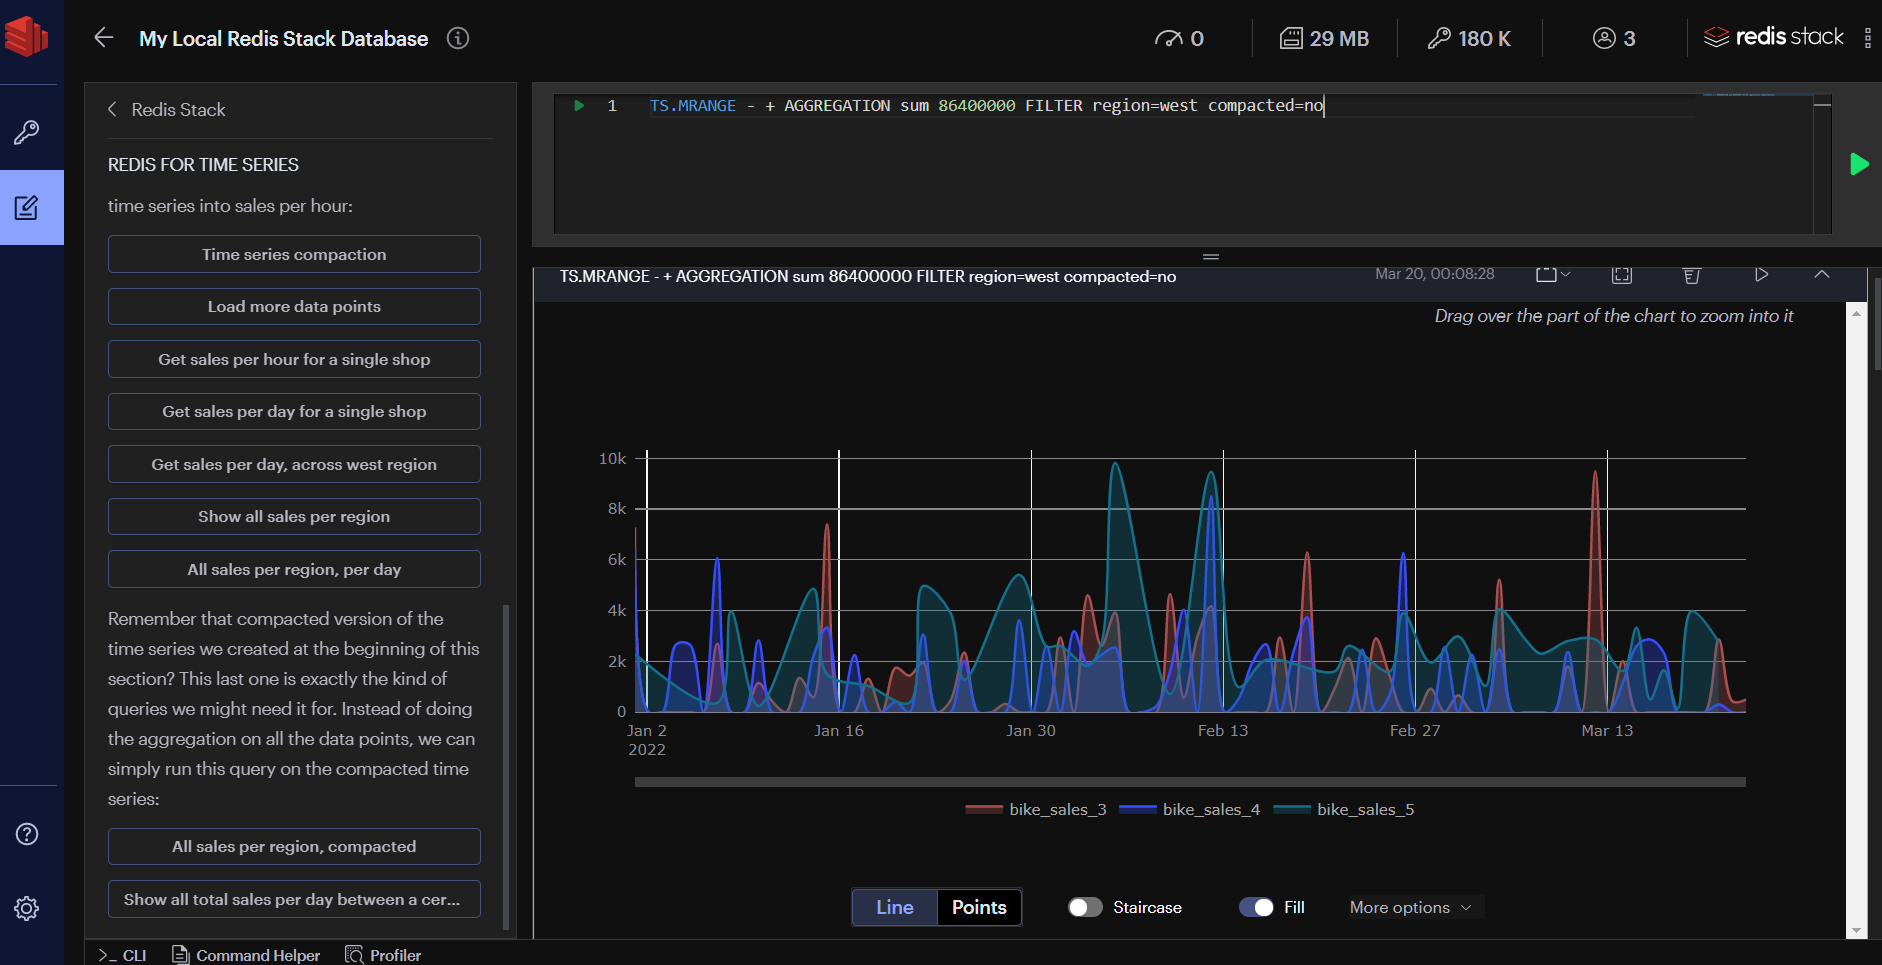
Plugins
With RedisInsight you can now also extend the core functionality by building your own data visualizations. See our plugin documentation for more information.
Telemetry
RedisInsight includes an opt-in telemetry system. This help us improve the developer experience of the app. We value your privacy; all collected data is anonymised.
Feedback
To provide your feedback, open a ticket in our RedisInsight repository.
License
RedisInsight is licensed under SSPL license.
9.3 - RediSearch
Queries, secondary indexing, and full-text search for Redis


RediSearch is a source available Redis module that provides queryability, secondary indexing, and full-text search for Redis.
Quick Links
Overview
RediSearch provides secondary indexing, full-text search, and a query language for Redis. These feature enable multi-field queries, aggregation, exact phrase matching, and numeric filtering for text queries.
Client libraries
Official and community client libraries are available for Python, Java, JavaScript, Ruby, Go, C#, and PHP.
See the clients page for the full list.
Cluster support
RediSearch provides a distributed cluster version that scales to billions of documents and hundreds of servers.
Commercial support
Commercial support for RediSearch is provided by Redis Ltd. See the Redis Ltd. website for more info and contact information.
Primary features
RediSearch supports the following features:
- Secondary indexing
- Multi-field queries
- Aggregation
- Full-text indexing of multiple fields in a documents
- Incremental indexing without performance loss
- Document ranking (provided manually by the user at index time)
- Boolean queries with AND, OR, NOT operators between sub-queries
- Optional query clauses
- Prefix-based searches
- Field weights
- Auto-complete suggestions (with fuzzy prefix suggestions)
- Exact-phrase search and slop-based search
- Stemming-based query expansion for many languages (using Snowball)
- Support for custom functions for query expansion and scoring (see Extensions)
- Numeric filters and ranges
- Geo-filtering using the Redis own geo commands
- Unicode support (UTF-8 input required)
- Retrieval of full document contents or only their ids
- Document deletion and updating with index garbage collection
- Partial and conditional document updates
Supported Platforms
RediSearch is developed and tested on Linux and macOS on x86_64 CPUs.
Atom CPUs are not supported.
References
Videos
- RediSearch? - RedisConf 2020
- RediSearch Overview - RedisConf 2019
- RediSearch & CRDT - Redis Day Tel Aviv 2019
Course
- RU203: Querying, Indexing, and Full-Text Search - An online RediSearch course from Redis University.
Blog posts
- Introducing RediSearch 2.0
- Getting Started with RediSearch 2.0
- Mastering RediSearch / Part I
- Mastering RediSearch / Part II
- Mastering RediSearch / Part III
- Building Real-Time Full-Text Site Search with RediSearch
- Search Benchmarking: RediSearch vs. Elasticsearch
- RediSearch Version 1.6 Adds Features, Improves Performance
- RediSearch 1.6 Boosts Performance Up to 64%
Mailing List / Forum
Got questions? Feel free to ask at the RediSearch forum.
License
Redis Source Available License Agreement - see LICENSE
9.3.1 - Commands
Commands Overview
RediSearch API
Details on module's commands can be filtered for a specific module or command, e.g., FT.
The details also include the syntax for the commands, where:
- Command and subcommand names are in uppercase, for example
FT.CREATE - Optional arguments are enclosed in square brackets, for example
[NOCONTENT] - Additional optional arguments are indicated by three period characters, for example
...
The query commands, i.e. FT.SEARCH and FT.AGGREGATE, require an index name as their first argument, then a query, i.e. hello|world, and finally additional parameters or attributes.
See the quick start page on creating and indexing and start searching.
See the reference page for more details on the various parameters.
9.3.2 - Quick start
Quick start guide
Quick Start Guide for RediSearch
Redis Cloud
RediSearch is available on all Redis Cloud managed services. Redis Cloud Essentials offers a completely free managed database up to 30MB.
Running with Docker
docker run -p 6379:6379 redislabs/redisearch:latest
Download and running binaries
First download the pre-compiled version from the Redis download center.
Next, run Redis with RediSearch:
$ redis-server --loadmodule /path/to/module/src/redisearch.so
Building and running from source
First, clone the git repo (make sure not to omit the --recursive option, to properly clone submodules):
git clone --recursive https://github.com/RediSearch/RediSearch.git
cd RediSearch
Next, install dependencies:
On macOS:
make setup
On Linux:
sudo make setup
Next, build:
make build
Finally, run Redis with RediSearch:
make run
For more elaborate build instructions, see the Development page.
Creating an index with fields and weights (default weight is 1.0)
127.0.0.1:6379> FT.CREATE myIdx ON HASH PREFIX 1 doc: SCHEMA title TEXT WEIGHT 5.0 body TEXT url TEXT
OK
Adding documents to the index
127.0.0.1:6379> hset doc:1 title "hello world" body "lorem ipsum" url "http://redis.io"
(integer) 3
Searching the index
127.0.0.1:6379> FT.SEARCH myIdx "hello world" LIMIT 0 10
1) (integer) 1
2) "doc:1"
3) 1) "title"
2) "hello world"
3) "body"
4) "lorem ipsum"
5) "url"
6) "http://redis.io"
!!! note Input is expected to be valid utf-8 or ASCII. The engine cannot handle wide character unicode at the moment.
Dropping the index
127.0.0.1:6379> FT.DROPINDEX myIdx
OK
Adding and getting Auto-complete suggestions
127.0.0.1:6379> FT.SUGADD autocomplete "hello world" 100
OK
127.0.0.1:6379> FT.SUGGET autocomplete "he"
1) "hello world"
9.3.3 - Configuration
Details about configuration options
Run-time configuration
RediSearch supports a few run-time configuration options that should be determined when loading the module. In time more options will be added.
Passing Configuration Options During Loading
In general, passing configuration options is done by appending arguments after the --loadmodule argument in the command line, loadmodule configuration directive in a Redis config file, or the MODULE LOAD command. For example:
In redis.conf:
loadmodule redisearch.so OPT1 OPT2
From redis-cli:
127.0.0.6379> MODULE load redisearch.so OPT1 OPT2
From command line:
$ redis-server --loadmodule ./redisearch.so OPT1 OPT2
Setting Configuration Options At Run-Time
As of v1.4.1, the FT.CONFIG allows setting some options during runtime. In addition, the command can be used to view the current run-time configuration options.
RediSearch configuration options
TIMEOUT
The maximum amount of time in milliseconds that a search query is allowed to run. If this time is exceeded we return the top results accumulated so far, or an error depending on the policy set with ON_TIMEOUT. The timeout can be disabled by setting it to 0.
!!! note
Timeout refers to query time only.
Parsing the query is not counted towards timeout.
If timeout was not reached during the search, finalizing operation such as loading documents' content or reducers, continue.
Default
500
Example
$ redis-server --loadmodule ./redisearch.so TIMEOUT 100
ON_TIMEOUT {policy}
The response policy for queries that exceed the TIMEOUT setting.
The policy can be one of the following:
- RETURN: this policy will return the top results accumulated by the query until it timed out.
- FAIL: will return an error when the query exceeds the timeout value.
Default
RETURN
Example
$ redis-server --loadmodule ./redisearch.so ON_TIMEOUT fail
SAFEMODE
!! Deprecated in v1.6. From this version, SAFEMODE is the default. If you still like to re-enable the concurrent mode for writes, use CONCURRENT_WRITE_MODE !!
If present in the argument list, RediSearch will turn off concurrency for query processing, and work in a single thread.
This is useful if data consistency is extremely important, and avoids a situation where deletion of documents while querying them can cause momentarily inconsistent results (i.e. documents that were valid during the invocation of the query are not returned because they were deleted during query processing).
Default
Off (not present)
Example
$ redis-server --loadmodule ./redisearch.so SAFEMODE
Notes
- deprecated in v1.6
CONCURRENT_WRITE_MODE
If enabled, write queries will be performed concurrently. For now only the tokenization part is executed concurrently. The actual write operation still requires holding the Redis Global Lock.
Default
Not set - "disabled"
Example
$ redis-server --loadmodule ./redisearch.so CONCURRENT_WRITE_MODE
Notes
- added in v1.6
EXTLOAD {file_name}
If present, we try to load a RediSearch extension dynamic library from the specified file path. See Extensions for details.
Default
None
Example
$ redis-server --loadmodule ./redisearch.so EXTLOAD ./ext/my_extension.so
MINPREFIX
The minimum number of characters we allow for prefix queries (e.g. hel*). Setting it to 1 can hurt performance.
Default
2
Example
$ redis-server --loadmodule ./redisearch.so MINPREFIX 3
MAXPREFIXEXPANSIONS
The maximum number of expansions we allow for query prefixes. Setting it too high can cause performance issues. If MAXPREFIXEXPANSIONS is reached, the query will continue with the first acquired results.
Default
200
Example
$ redis-server --loadmodule ./redisearch.so MAXPREFIXEXPANSIONS 1000
!!! Note "MAXPREFIXEXPANSIONS replaces the deprecated config word MAXEXPANSIONS."
RediSearch considers these two configurations as synonyms. The synonym was added to be more descriptive.
MAXDOCTABLESIZE
The maximum size of the internal hash table used for storing the documents. Notice, this configuration doesn't limit the amount of documents that can be stored but only the hash table internal array max size. Decreasing this property can decrease the memory overhead in case the index holds a small amount of documents that are constantly updated.
Default
1000000
Example
$ redis-server --loadmodule ./redisearch.so MAXDOCTABLESIZE 3000000
MAXSEARCHRESULTS
The maximum number of results to be returned by FT.SEARCH command if LIMIT is used.
Setting value to -1 will remove the limit.
Default
1000000
Example
$ redis-server --loadmodule ./redisearch.so MAXSEARCHRESULTS 3000000
MAXAGGREGATERESULTS
The maximum number of results to be returned by FT.AGGREGATE command if LIMIT is used.
Setting value to -1 will remove the limit.
Default
unlimited
Example
$ redis-server --loadmodule ./redisearch.so MAXAGGREGATERESULTS 3000000
FRISOINI {file_name}
If present, we load the custom Chinese dictionary from the specified path. See Using custom dictionaries for more details.
Default
Not set
Example
$ redis-server --loadmodule ./redisearch.so FRISOINI /opt/dict/friso.ini
CURSOR_MAX_IDLE
The maximum idle time (in ms) that can be set to the cursor api.
Default
"300000"
Example
$ redis-server --loadmodule ./redisearch.so CURSOR_MAX_IDLE 500000
Notes
- added in v1.6
PARTIAL_INDEXED_DOCS
Enable/disable Redis command filter. The filter optimizes partial updates of hashes and may avoid reindexing of the hash if changed fields are not part of schema.
Considerations
The Redis command filter will be executed upon each Redis Command. Though the filter is
optimized, this will introduce a small increase in latency on all commands.
This configuration is therefore best used with partial indexed documents where the non-
indexed fields are updated frequently.
Default
"0"
Example
$ redis-server --loadmodule ./redisearch.so PARTIAL_INDEXED_DOCS 1
Notes
- added in v2.0.0
GC_SCANSIZE
The garbage collection bulk size of the internal gc used for cleaning up the indexes.
Default
100
Example
$ redis-server --loadmodule ./redisearch.so GC_SCANSIZE 10
GC_POLICY
The policy for the garbage collector (GC). Supported policies are:
- FORK: uses a forked thread for garbage collection (v1.4.1 and above). This is the default GC policy since version 1.6.1 and is ideal for general purpose workloads.
- LEGACY: Uses a synchronous, in-process fork. This is ideal for read-heavy and append-heavy workloads with very few updates/deletes
Default
"FORK"
Example
$ redis-server --loadmodule ./redisearch.so GC_POLICY LEGACY
Notes
- When the
GC_POLICYisFORKit can be combined with the options below.
NOGC
If set, we turn off Garbage Collection for all indexes. This is used mainly for debugging and testing, and should not be set by users.
Default
Not set
Example
$ redis-server --loadmodule ./redisearch.so NOGC
FORK_GC_RUN_INTERVAL
Interval (in seconds) between two consecutive fork GC runs.
Default
"30"
Example
$ redis-server --loadmodule ./redisearch.so GC_POLICY FORK FORK_GC_RUN_INTERVAL 60
Notes
- only to be combined with
GC_POLICY FORK
FORK_GC_RETRY_INTERVAL
Interval (in seconds) in which RediSearch will retry to run fork GC in case of a failure. Usually, a failure could happen when the redis fork api does not allow for more than one fork to be created at the same time.
Default
"5"
Example
$ redis-server --loadmodule ./redisearch.so GC_POLICY FORK FORK_GC_RETRY_INTERVAL 10
Notes
- only to be combined with
GC_POLICY FORK - added in v1.4.16
FORK_GC_CLEAN_THRESHOLD
The fork GC will only start to clean when the number of not cleaned documents is exceeding this threshold, otherwise it will skip this run. While the default value is 100, it's highly recommended to change it to a higher number.
Default
"100"
Example
$ redis-server --loadmodule ./redisearch.so GC_POLICY FORK FORK_GC_CLEAN_THRESHOLD 10000
Notes
- only to be combined with
GC_POLICY FORK - added in v1.4.16
UPGRADE_INDEX
This configuration is a special configuration introduced to upgrade indices from v1.x RediSearch versions, further referred to as 'legacy indices.' This configuration option needs to be given for each legacy index, followed by the index name and all valid option for the index description ( also referred to as the ON arguments for following hashes) as described on ft.create api. See Upgrade to 2.0 for more information.
Default
There is no default for index name, and the other arguments have the same defaults as on FT.CREATE api
Example
$ redis-server --loadmodule ./redisearch.so UPGRADE_INDEX idx PREFIX 1 tt LANGUAGE french LANGUAGE_FIELD MyLang SCORE 0.5 SCORE_FIELD MyScore PAYLOAD_FIELD MyPayload UPGRADE_INDEX idx1
Notes
- If the RDB file does not contain a legacy index that's specified in the configuration, a warning message will be added to the log file and loading will continue.
- If the RDB file contains a legacy index that wasn't specified in the configuration loading will fail and the server won't start.
OSS_GLOBAL_PASSWORD
Global oss cluster password that will be used to connect to other shards.
Default
Not set
Example
$ redis-server --loadmodule ./redisearch.so OSS_GLOBAL_PASSWORD password
Notes
- only relevant when Coordinator is used
- added in v2.0.3
DEFAULT_DIALECT
The default DIALECT to be used by FT.CREATE, FT.AGGREGATE, FT.EXPLAIN, FT.EXPLAINCLI, and FT.SPECLCHECK.
Default
"1"
Example
$ redis-server --loadmodule ./redisearch.so DEFAULT_DIALECT 2
Notes
DIALECT 2is required for Vector Similarity Search- added in v2.4.3
9.3.4 - Developer notes
Notes on debugging, testing and documentation
Developing RediSearch
Developing RediSearch involves setting up the development environment (which can be either Linux-based or macOS-based), building RediSearch, running tests and benchmarks, and debugging both the RediSearch module and its tests.
Cloning the git repository
By invoking the following command, RediSearch module and its submodules are cloned:
git clone --recursive https://github.com/RediSearch/RediSearch.git
Working in an isolated environment
There are several reasons to develop in an isolated environment, like keeping your workstation clean, and developing for a different Linux distribution. The most general option for an isolated environment is a virtual machine (it's very easy to set one up using Vagrant). Docker is even a more agile, as it offers an almost instant solution:
search=$(docker run -d -it -v $PWD:/build debian:bullseye bash)
docker exec -it $search bash
Then, from within the container, cd /build and go on as usual.
In this mode, all installations remain in the scope of the Docker container.
Upon exiting the container, you can either re-invoke it with the above docker exec or commit the state of the container to an image and re-invoke it on a later stage:
docker commit $search redisearch1
docker stop $search
search=$(docker run -d -it -v $PWD:/build rediseatch1 bash)
docker exec -it $search bash
You can replace debian:bullseye with your OS of choice, with the host OS being the best choice (so you can run the RediSearch binary on your host once it is built).
Installing prerequisites
To build and test RediSearch one needs to install several packages, depending on the underlying OS. Currently, we support the Ubuntu/Debian, CentOS, Fedora, and macOS.
First, enter RediSearch directory.
If you have gnu make installed, you can execute,
make setup
Alternatively, invoke the following:
./deps/readies/bin/getpy2
./system-setup.py
Note that system-setup.py will install various packages on your system using the native package manager and pip. It will invoke sudo on its own, prompting for permission.
If you prefer to avoid that, you can:
- Review
system-setup.pyand install packages manually, - Use
system-setup.py --nopto display installation commands without executing them, - Use an isolated environment like explained above,
- Use a Python virtual environment, as Python installations are known to be sensitive when not used in isolation:
python2 -m virtualenv venv; . ./venv/bin/activate
Installing Redis
As a rule of thumb, you're better off running the latest Redis version.
If your OS has a Redis 6.x package, you can install it using the OS package manager.
Otherwise, you can invoke ./deps/readies/bin/getredis.
Getting help
make help provides a quick summary of the development features:
make setup # install prerequisited (CAUTION: THIS WILL MODIFY YOUR SYSTEM)
make fetch # download and prepare dependant modules
make build # compile and link
COORD=1|oss|rlec # build coordinator (1|oss: Open Source, rlec: Enterprise)
STATIC=1 # build as static lib
LITE=1 # build RediSearchLight
VECSIM_MARCH=arch # architecture for VecSim build
DEBUG=1 # build for debugging
NO_TESTS=1 # disable unit tests
WHY=1 # explain CMake decisions (in /tmp/cmake-why)
FORCE=1 # Force CMake rerun (default)
CMAKE_ARGS=... # extra arguments to CMake
VG=1 # build for Valgrind
SAN=type # build with LLVM sanitizer (type=address|memory|leak|thread)
SLOW=1 # do not parallelize build (for diagnostics)
make parsers # build parsers code
make clean # remove build artifacts
ALL=1 # remove entire artifacts directory
make run # run redis with RediSearch
GDB=1 # invoke using gdb
make test # run all tests (via ctest)
COORD=1|oss|rlec # test coordinator
TEST=regex # run tests that match regex
TESTDEBUG=1 # be very verbose (CTest-related)
CTEST_ARG=... # pass args to CTest
CTEST_PARALLEL=n # run tests in give parallelism
make pytest # run python tests (tests/pytests)
COORD=1|oss|rlec # test coordinator
TEST=name # e.g. TEST=test:testSearch
RLTEST_ARGS=... # pass args to RLTest
REJSON=1|0 # also load RedisJSON module
REJSON_PATH=path # use RedisJSON module at `path`
EXT=1 # External (existing) environment
GDB=1 # RLTest interactive debugging
VG=1 # use Valgrind
VG_LEAKS=0 # do not search leaks with Valgrind
SAN=type # use LLVM sanitizer (type=address|memory|leak|thread)
ONLY_STABLE=1 # skip unstable tests
make c_tests # run C tests (from tests/ctests)
make cpp_tests # run C++ tests (from tests/cpptests)
TEST=name # e.g. TEST=FGCTest.testRemoveLastBlock
make callgrind # produce a call graph
REDIS_ARGS="args"
make pack # create installation packages
COORD=rlec # pack RLEC coordinator ('redisearch' package)
LITE=1 # pack RediSearchLight ('redisearch-light' package)
make deploy # copy packages to S3
make release # release a version
make docs # create documentation
make deploy-docs # deploy documentation
make platform # build for specified platform
OSNICK=nick # platform to build for (default: host platform)
TEST=1 # run tests after build
PACK=1 # create package
ARTIFACTS=1 # copy artifacts to host
make box # create container with volumen mapping into /search
OSNICK=nick # platform spec
make sanbox # create container with CLang Sanitizer
Building from source
make build will build RediSearch.
make build COORD=oss will build OSS RediSearch Coordinator.
make build STATIC=1 will build as a static lib
Notes:
Binary files are placed under
bin, according to platform and build variant.RediSearch uses CMake as its build system.
make buildwill invoke both CMake and the subsequent make command that's required to complete the build.
Use make clean to remove built artifacts. make clean ALL=1 will remove the entire bin subdirectory.
Diagnosing build process
make build will build in parallel by default.
For purposes of build diagnosis, make build SLOW=1 VERBOSE=1 can be used to examine compilation commands.
Running Redis with RediSearch
The following will run redis and load RediSearch module.
make run
You can open redis-cli in another terminal to interact with it.
Running tests
There are several sets of unit tests:
- C tests, located in
tests/ctests, run bymake c_tests. - C++ tests (enabled by GTest), located in
tests/cpptests, run bymake cpp_tests. - Python tests (enabled by RLTest), located in
tests/pytests, run bymake pytest.
One can run all tests by invoking make test.
A single test can be run using the TEST parameter, e.g. make test TEST=regex.
Debugging
To build for debugging (enabling symbolic information and disabling optimization), run make DEBUG=1.
One can the use make run DEBUG=1 to invoke gdb.
In addition to the usual way to set breakpoints in gdb, it is possible to use the BB macro to set a breakpoint inside RediSearch code. It will only have an effect when running under gdb.
Similarly, Python tests in a single-test mode, one can set a breakpoint by using the BB() function inside a test.
9.3.5 - Client Libraries
List of RediSearch client libraries
RediSearch has several client libraries, written by the module authors and community members - abstracting the API in different programming languages.
While it is possible and simple to use the raw Redis commands API, in most cases it's easier to just use a client library abstracting it.
Currently available Libraries
| Language | Library | Author | License | Stars |
|---|---|---|---|---|
| Python | redis-py | Redis | BSD |  |
| Python | redis-om | Redis | BSD-3-Clause |  |
| Java | Jedis | Redis | MIT |  |
| Java (Jedis client library) | JRediSearch | Redis Inc | BSD |  |
| Java | redis-om-spring | Redis | BSD-3-Clause |  |
| Java (Lettuce client library) | LettuceMod | Redis Inc | Apache-2.0 |  |
| Java | Spring LettuceMod | Redis Labs | Apache-2.0 | |
| Java | redis-modules-java | dengliming | Apache-2.0 |  |
| Go | redisearch-go | Redis Inc | BSD |  |
| JavaScript | Redis-om | Redis | BSD-3-Clause |  |
| TypeScript | Node-Redis | Redis | MIT |  |
| TypeScript | redis-modules-sdk | Dani Tseitlin | BSD-3-Clause |  |
| C# | NRediSearch | Marc Gravell | MIT |  |
| C# | RediSearchClient | Tom Hanks | MIT |  |
| C# | Redis.OM | Redis | BSD-3-Clause |  |
| PHP | php-redisearch | MacFJA | MIT |  |
| PHP | redisearch-php (for RediSearch v1) | Ethan Hann | MIT |  |
| PHP | Redisearch (for RediSearch v2) | Front | MIT |  |
| Ruby on Rails | redi_search_rails | Dmitry Polyakovsky | MIT |  |
| Ruby | redisearch-rb | Victor Ruiz | MIT |  |
| Ruby | redi_search | Nick Pezza | MIT |  |
Other available Libraries
| Language | Library | Author | License | Stars | Comments |
|---|---|---|---|---|---|
| Rust | redisearch-api-rs | Redis Inc | BSD |  | API for Redis Modules written in Rust |
9.3.6 - Administration Guide
Administration of the RediSearch module
9.3.6.1 - General Administration
General Administration of the RediSearch module
RediSearch Administration Guide
RediSearch doesn't require any configuration to work, but there are a few things worth noting when running RediSearch on top of Redis.
Persistence
RediSearch supports both RDB and AOF based persistence. For a pure RDB set-up, nothing special is needed beyond the standard Redis RDB configuration.
AOF Persistence
While RediSearch supports working with AOF based persistence, as of version 1.1.0 it does not support "classic AOF" mode, which uses AOF rewriting. Instead, it only supports AOF with RDB preamble mode. In this mode, rewriting the AOF log just creates an RDB file, which is appended to.
To enable AOF persistence with RediSearch, add the two following lines to your redis.conf:
appendonly yes
aof-use-rdb-preamble yes
Master/Slave Replication
RediSearch supports replication inherently, and using a master/slave set-up, you can use slaves for high availability. On top of that, slaves can be used for searching, to load-balance read traffic.
Cluster Support
RediSearch will not work correctly on a cluster. The enterprise version of RediSearch, which is commercially available from Redis Labs, does support a cluster set up and scales to hundreds of nodes, billions of documents and terabytes of data. See the Redis Labs Website for more details.
9.3.6.2 - Upgrade to 2.0
Details about upgrading to RediSearch 2.x from 1.x
Upgrade to 2.0 when running in Redis OSS
!!! note For enterprise upgrade please refer to the following link.
v2 of RediSearch re-architects the way indices are kept in sync with the data. Instead of using FT.ADD command to index documents, RediSearch 2.0 follows hashes that match the index description regardless of how those were inserted or changed on Redis (HSET, HINCR, HDEL). The index description will filter hashes on a prefix of the key, and allows you to construct fine-grained filters with the FILTER option. This description can be defined during index creation (FT.CREATE).
v1.x indices (further referred to as legacy indices) don't have such index description. That is why you will need to supply their descriptions when upgrading to v2. During the upgrade to v2, you should add the descriptions via the module's configuration so RediSearch 2.0 will be able to load these legacy indexes.
UPGRADE_INDEX configuration
The upgrade index configuration allows you to specify the legacy index to upgrade. It needs to specify the index name and all the on hash arguments that can be defined on FT.CREATE command (notice that only the index name is mandatory, the other arguments have default values which are the same as the default values on FT.CREATE command). So for example, if you have a legacy index called idx, in order for RediSearch 2.0 to load it, the following configuration needs to be added to the server on start time:
redis-server --loadmodule redisearch.so UPGRADE_INDEX idx
It is also possible to specify the prefixes to follow. For example, assuming all the documents indexed by idx starts with the prefix idx:, the following will upgrade the legacy index idx:
redis-server --loadmodule redisearch.so UPGRADE_INDEX idx PREFIX 1 idx:
Upgrade Limitations
The way that the upgrade process works behind the scenes is that it redefines the index with the on hash index description given in the configuration and then reindexes the data. This comes with some limitations:
- If
NOSAVEwas used, then it's not possible to upgrade because the data for reindexing does not exist. - If you have multiple indices, you need to find the way for RediSearch to identify which hashes belong to which index. You can do it either with a prefix or a filter.
- If you have hashes that are not indexed, you will need to find a way so that RediSearch will be able to identify only the hashes that need to be indexed. This can be done using a prefix or a filter.
9.3.7 - Reference
Reference
9.3.7.1 - Query syntax
Details of the query syntax
Search Query Syntax
We support a simple syntax for complex queries with the following rules:
- Multi-word phrases simply a list of tokens, e.g.
foo bar baz, and imply intersection (AND) of the terms. - Exact phrases are wrapped in quotes, e.g
"hello world". - OR Unions (i.e
word1 OR word2), are expressed with a pipe (|), e.g.hello|hallo|shalom|hola. - NOT negation (i.e.
word1 NOT word2) of expressions or sub-queries. e.g.hello -world. As of version 0.19.3, purely negative queries (i.e.-fooor-@title:(foo|bar)) are supported. - Prefix matches (all terms starting with a prefix) are expressed with a
*. For performance reasons, a minimum prefix length is enforced (2 by default, but is configurable) - A special "wildcard query" that returns all results in the index -
*(cannot be combined with anything else). - Selection of specific fields using the syntax
hello @field:world. - Numeric Range matches on numeric fields with the syntax
@field:[{min} {max}]. - Geo radius matches on geo fields with the syntax
@field:[{lon} {lat} {radius} {m|km|mi|ft}] - Tag field filters with the syntax
@field:{tag | tag | ...}. See the full documentation on [tag fields|/Tags]. - Optional terms or clauses:
foo ~barmeans bar is optional but documents with bar in them will rank higher. - Fuzzy matching on terms (as of v1.2.0):
%hello%means all terms with Levenshtein distance of 1 from it. - An expression in a query can be wrapped in parentheses to disambiguate, e.g.
(hello|hella) (world|werld). - Query attributes can be applied to individual clauses, e.g.
(foo bar) => { $weight: 2.0; $slop: 1; $inorder: false; } - Combinations of the above can be used together, e.g
hello (world|foo) "bar baz" bbbb
Pure negative queries
As of version 0.19.3 it is possible to have a query consisting of just a negative expression, e.g. -hello or -(@title:(foo|bar)). The results will be all the documents NOT containing the query terms.
!!! warning Any complex expression can be negated this way, however, caution should be taken here: if a negative expression has little or no results, this is equivalent to traversing and ranking all the documents in the index, which can be slow and cause high CPU consumption.
Field modifiers
As of version 0.12 it is possible to specify field modifiers in the query and not just using the INFIELDS global keyword.
Per query expression or sub-expression, it is possible to specify which fields it matches, by prepending the expression with the @ symbol, the field name and a : (colon) symbol.
If a field modifier precedes multiple words or expressions, it applies only to the adjacent expression.
If a field modifier precedes an expression in parentheses, it applies only to the expression inside the parentheses. The expression should be valid for the specified field, otherwise it is skipped.
Multiple modifiers can be combined to create complex filtering on several fields. For example, if we have an index of car models, with a vehicle class, country of origin and engine type, we can search for SUVs made in Korea with hybrid or diesel engines - with the following query:
FT.SEARCH cars "@country:korea @engine:(diesel|hybrid) @class:suv"
Multiple modifiers can be applied to the same term or grouped terms. e.g.:
FT.SEARCH idx "@title|body:(hello world) @url|image:mydomain"
This will search for documents that have "hello" and "world" either in the body or the title, and the term "mydomain" in their url or image fields.
Numeric filters in query
If a field in the schema is defined as NUMERIC, it is possible to either use the FILTER argument in the Redis request or filter with it by specifying filtering rules in the query. The syntax is @field:[{min} {max}] - e.g. @price:[100 200].
A few notes on numeric predicates
It is possible to specify a numeric predicate as the entire query, whereas it is impossible to do it with the FILTER argument.
It is possible to intersect or union multiple numeric filters in the same query, be it for the same field or different ones.
-inf,infand+infare acceptable numbers in a range. Thus greater-than 100 is expressed as[(100 inf].Numeric filters are inclusive. Exclusive min or max are expressed with
(prepended to the number, e.g.[(100 (200].It is possible to negate a numeric filter by prepending a
-sign to the filter, e.g. returning a result where price differs from 100 is expressed as:@title:foo -@price:[100 100].
Tag filters
RediSearch (starting with version 0.91) allows a special field type called "tag field", with simpler tokenization and encoding in the index. The values in these fields cannot be accessed by general field-less search, and can be used only with a special syntax:
@field:{ tag | tag | ...}
e.g.
@cities:{ New York | Los Angeles | Barcelona }
Tags can have multiple words or include other punctuation marks other than the field's separator (, by default). Punctuation marks in tags should be escaped with a backslash (\). It is also recommended (but not mandatory) to escape spaces; The reason is that if a multi-word tag includes stopwords, it will create a syntax error. So tags like "to be or not to be" should be escaped as "to\ be\ or\ not\ to\ be". For good measure, you can escape all spaces within tags.
Notice that multiple tags in the same clause create a union of documents containing either tags. To create an intersection of documents containing all tags, you should repeat the tag filter several times, e.g.:
# This will return all documents containing all three cities as tags:
@cities:{ New York } @cities:{Los Angeles} @cities:{ Barcelona }
# This will return all documents containing either city:
@cities:{ New York | Los Angeles | Barcelona }
Tag clauses can be combined into any sub-clause, used as negative expressions, optional expressions, etc.
Geo filters in query
As of version 0.21, it is possible to add geo radius queries directly into the query language with the syntax @field:[{lon} {lat} {radius} {m|km|mi|ft}]. This filters the result to a given radius from a lon,lat point, defined in meters, kilometers, miles or feet. See Redis' own GEORADIUS command for more details as it is used internally for that).
Radius filters can be added into the query just like numeric filters. For example, in a database of businesses, looking for Chinese restaurants near San Francisco (within a 5km radius) would be expressed as: chinese restaurant @location:[-122.41 37.77 5 km].
Vector Similarity search in query
It is possible to add vector similarity queries directly into the query language.
The basic syntax is "*=>[ KNN {num|$num} @vector $query_vec ]" for running K nearest neighbors query on @vector field.
It is also possilbe to run a Hybrid Query on filtered results.
A Hybrid query allows the user to specify a filter criteria that ALL results in a KNN query must satisfy. The filter criteria can only include fields with non-vector indexes (e.g. indexes created on scalar values such as TEXT, PHONETIC, NUMERIC, GEO, etc)
The General syntax is {some filter query}=>[ KNN {num|$num} @vector $query_vec]. For example:
@published_year:[2020 2021]- Only entities published between 2020 and 2021.=>- Separates filter query from vector query.[KNN {num|$num} @vector_field $query_vec]- Returnnumnearest neighbors entities wherequery_vecis similar to the vector stored in@vector_field.
As of version 2.4, we allow vector similarity to be used once in the query. For more information on vector smilarity syntax, see Vector Fields, "Querying vector fields" section.
Prefix matching
On index updating, we maintain a dictionary of all terms in the index. This can be used to match all terms starting with a given prefix. Selecting prefix matches is done by appending * to a prefix token. For example:
hel* world
Will be expanded to cover (hello|help|helm|...) world.
A few notes on prefix searches
As prefixes can be expanded into many many terms, use them with caution. There is no magic going on, the expansion will create a Union operation of all suffixes.
As a protective measure to avoid selecting too many terms, and block redis, which is single threaded, there are two limitations on prefix matching:
Prefixes are limited to 2 letters or more. You can change this number by using the
MINPREFIXsetting on the module command line.Expansion is limited to 200 terms or less. You can change this number by using the
MAXEXPANSIONSsetting on the module command line.
Prefix matching fully supports Unicode and is case insensitive.
Currently, there is no sorting or bias based on suffix popularity, but this is on the near-term roadmap.
Fuzzy matching
As of v1.2.0, the dictionary of all terms in the index can also be used to perform Fuzzy Matching. Fuzzy matches are performed based on Levenshtein distance (LD). Fuzzy matching on a term is performed by surrounding the term with '%', for example:
%hello% world
Will perform fuzzy matching on 'hello' for all terms where LD is 1.
As of v1.4.0, the LD of the fuzzy match can be set by the number of '%' surrounding it, so that %%hello%% will perform fuzzy matching on 'hello' for all terms where LD is 2.
The maximal LD for fuzzy matching is 3.
Wildcard queries
As of version 1.1.0, we provide a special query to retrieve all the documents in an index. This is meant mostly for the aggregation engine. You can call it by specifying only a single star sign as the query string - i.e. FT.SEARCH myIndex *.
This cannot be combined with any other filters, field modifiers or anything inside the query. It is technically possible to use the deprecated FILTER and GEOFILTER request parameters outside the query string in conjunction with a wildcard, but this makes the wildcard meaningless and only hurts performance.
Query attributes
As of version 1.2.0, it is possible to apply specific query modifying attributes to specific clauses of the query.
The syntax is (foo bar) => { $attribute: value; $attribute:value; ...}, e.g:
(foo bar) => { $weight: 2.0; $slop: 1; $inorder: true; }
~(bar baz) => { $weight: 0.5; }
The supported attributes are:
- $weight: determines the weight of the sub-query or token in the overall ranking on the result (default: 1.0).
- $slop: determines the maximum allowed "slop" (space between terms) in the query clause (default: 0).
- $inorder: whether or not the terms in a query clause must appear in the same order as in the query, usually set alongside with
$slop(default: false). - $phonetic: whether or not to perform phonetic matching (default: true). Note: setting this attribute on for fields which were not creates as
PHONETICwill produce an error.
A few query examples
Simple phrase query - hello AND world
hello worldExact phrase query - hello FOLLOWED BY world
"hello world"Union: documents containing either hello OR world
hello|worldNot: documents containing hello but not world
hello -worldIntersection of unions
(hello|halo) (world|werld)Negation of union
hello -(world|werld)Union inside phrase
(barack|barrack) obamaOptional terms with higher priority to ones containing more matches:
obama ~barack ~michelleExact phrase in one field, one word in another field:
@title:"barack obama" @job:presidentCombined AND, OR with field specifiers:
@title:"hello world" @body:(foo bar) @category:(articles|biographies)Prefix Queries:
hello worl* hel* worl* hello -worl*Numeric Filtering - products named "tv" with a price range of 200-500:
@name:tv @price:[200 500]Numeric Filtering - users with age greater than 18:
@age:[(18 +inf]
Mapping common SQL predicates to RediSearch
| SQL Condition | RediSearch Equivalent | Comments |
|---|---|---|
| WHERE x='foo' AND y='bar' | @x:foo @y:bar | for less ambiguity use (@x:foo) (@y:bar) |
| WHERE x='foo' AND y!='bar' | @x:foo -@y:bar | |
| WHERE x='foo' OR y='bar' | (@x:foo)|(@y:bar) | |
| WHERE x IN ('foo', 'bar','hello world') | @x:(foo|bar|"hello world") | quotes mean exact phrase |
| WHERE y='foo' AND x NOT IN ('foo','bar') | @y:foo (-@x:foo) (-@x:bar) | |
| WHERE x NOT IN ('foo','bar') | -@x:(foo|bar) | |
| WHERE num BETWEEN 10 AND 20 | @num:[10 20] | |
| WHERE num >= 10 | @num:[10 +inf] | |
| WHERE num > 10 | @num:[(10 +inf] | |
| WHERE num < 10 | @num:[-inf (10] | |
| WHERE num <= 10 | @num:[-inf 10] | |
| WHERE num < 10 OR num > 20 | @num:[-inf (10] | @num:[(20 +inf] | |
| WHERE name LIKE 'john%' | @name:john* |
Technical note
The query parser is built using the Lemon Parser Generator and a Ragel based lexer. You can see the grammar definition at the git repo.
9.3.7.2 - Stop-words
Stop-words support
Stop-Words
RediSearch has a pre-defined default list of stop-words. These are words that are usually so common that they do not add much information to search, but take up a lot of space and CPU time in the index.
When indexing, stop-words are discarded and not indexed. When searching, they are also ignored and treated as if they were not sent to the query processor. This is done when parsing the query.
At the moment, the default stop-word list applies to all full-text indexes in all languages and can be overridden manually at index creation time.
Default stop-word list
The following words are treated as stop-words by default:
a, is, the, an, and, are, as, at, be, but, by, for,
if, in, into, it, no, not, of, on, or, such, that, their,
then, there, these, they, this, to, was, will, with
Overriding the default stop-words
Stop-words for an index can be defined (or disabled completely) on index creation using the STOPWORDS argument in the [FT.CREATE command.
The format is STOPWORDS {number} {stopword} ... where number is the number of stopwords given. The STOPWORDS argument must come before the SCHEMA argument. For example:
FT.CREATE myIndex STOPWORDS 3 foo bar baz SCHEMA title TEXT body TEXT
Disabling stop-words completely
Disabling stopwords completely can be done by passing STOPWORDS 0 on FT.CREATE.
Avoiding stop-word detection in search queries
In rare use cases, where queries are very long and are guaranteed by the client application to not contain stopwords, it is possible to avoid checking for them when parsing the query. This saves some CPU time and is only worth it if the query has dozens or more terms in it. Using this without verifying that the query doesn't contain stop-words might result in empty queries.
9.3.7.3 - Aggregations
Details of FT.AGGREGATE. Grouping and projections and functions
RediSearch Aggregations
Aggregations are a way to process the results of a search query, group, sort and transform them - and extract analytic insights from them. Much like aggregation queries in other databases and search engines, they can be used to create analytics reports, or perform Faceted Search style queries.
For example, indexing a web-server's logs, we can create a report for unique users by hour, country or any other breakdown; or create different reports for errors, warnings, etc.
Core concepts
The basic idea of an aggregate query is this:
- Perform a search query, filtering for records you wish to process.
- Build a pipeline of operations that transform the results by zero or more steps of:
- Group and Reduce: grouping by fields in the results, and applying reducer functions on each group.
- Sort: sort the results based on one or more fields.
- Apply Transformations: Apply mathematical and string functions on fields in the pipeline, optionally creating new fields or replacing existing ones
- Limit: Limit the result, regardless of sorting the result.
- Filter: Filter the results (post-query) based on predicates relating to its values.
The pipeline is dynamic and re-entrant, and every operation can be repeated. For example, you can group by property X, sort the top 100 results by group size, then group by property Y and sort the results by some other property, then apply a transformation on the output.
Figure 1: Aggregation Pipeline Example
Aggregate request format
The aggregate request's syntax is defined as follows:
FT.AGGREGATE
{index_name:string}
{query_string:string}
[VERBATIM]
[LOAD {nargs:integer} {property:string} ...]
[GROUPBY
{nargs:integer} {property:string} ...
REDUCE
{FUNC:string}
{nargs:integer} {arg:string} ...
[AS {name:string}]
...
] ...
[SORTBY
{nargs:integer} {string} ...
[MAX {num:integer}] ...
] ...
[APPLY
{EXPR:string}
AS {name:string}
] ...
[FILTER {EXPR:string}] ...
[LIMIT {offset:integer} {num:integer} ] ...
[PARAMS {nargs} {name} {value} ... ]
Parameters in detail
Parameters which may take a variable number of arguments are expressed in the
form of param {nargs} {property_1... property_N}. The first argument to the
parameter is the number of arguments following the parameter. This allows
RediSearch to avoid a parsing ambiguity in case one of your arguments has the
name of another parameter. For example, to sort by first name, last name, and
country, one would specify SORTBY 6 firstName ASC lastName DESC country ASC.
index_name: The index the query is executed against.
query_string: The base filtering query that retrieves the documents. It follows the exact same syntax as the search query, including filters, unions, not, optional, etc.
LOAD {nargs} {property} …: Load document fields from the document HASH objects. This should be avoided as a general rule of thumb. Fields needed for aggregations should be stored as SORTABLE (and optionally UNF to avoid any normalization), where they are available to the aggregation pipeline with very low latency. LOAD hurts the performance of aggregate queries considerably since every processed record needs to execute the equivalent of HMGET against a redis key, which when executed over millions of keys, amounts to very high processing times. The document ID can be loaded using
@__key.GROUPBY {nargs} {property}: Group the results in the pipeline based on one or more properties. Each group should have at least one reducer (See below), a function that handles the group entries, either counting them or performing multiple aggregate operations (see below).
REDUCE {func} {nargs} {arg} … [AS {name}]: Reduce the matching results in each group into a single record, using a reduction function. For example, COUNT will count the number of records in the group. See the Reducers section below for more details on available reducers.
The reducers can have their own property names using the
AS {name}optional argument. If a name is not given, the resulting name will be the name of the reduce function and the group properties. For example, if a name is not given to COUNT_DISTINCT by property@foo, the resulting name will becount_distinct(@foo).SORTBY {nargs} {property} {ASC|DESC} [MAX {num}]: Sort the pipeline up until the point of SORTBY, using a list of properties. By default, sorting is ascending, but
ASCorDESCcan be added for each property.nargsis the number of sorting parameters, including ASC and DESC. for example:SORTBY 4 @foo ASC @bar DESC.MAXis used to optimized sorting, by sorting only for the n-largest elements. Although it is not connected toLIMIT, you usually need justSORTBY … MAXfor common queries.APPLY {expr} AS {name}: Apply a 1-to-1 transformation on one or more properties, and either store the result as a new property down the pipeline, or replace any property using this transformation.
expris an expression that can be used to perform arithmetic operations on numeric properties, or functions that can be applied on properties depending on their types (see below), or any combination thereof. For example:APPLY "sqrt(@foo)/log(@bar) + 5" AS bazwill evaluate this expression dynamically for each record in the pipeline and store the result as a new property called baz, that can be referenced by further APPLY / SORTBY / GROUPBY / REDUCE operations down the pipeline.LIMIT {offset} {num}. Limit the number of results to return just
numresults starting at indexoffset(zero based). AS mentioned above, it is much more efficient to useSORTBY … MAXif you are interested in just limiting the output of a sort operation.However, limit can be used to limit results without sorting, or for paging the n-largest results as determined by
SORTBY MAX. For example, getting results 50-100 of the top 100 results is most efficiently expressed asSORTBY 1 @foo MAX 100 LIMIT 50 50. Removing the MAX from SORTBY will result in the pipeline sorting all the records and then paging over results 50-100.FILTER {expr}. Filter the results using predicate expressions relating to values in each result. They are is applied post-query and relate to the current state of the pipeline. See FILTER Expressions below for full details.
PARAMS {nargs} {name} {value}. Define one or more value parameters. Each parameter has a name and a value. Parameters can be referenced in the query string by a
$, followed by the parameter name, e.g.,$user, and each such reference in the search query to a parameter name is substituted by the corresponding parameter value. For example, with parameter definitionPARAMS 4 lon 29.69465 lat 34.95126, the expression@loc:[$lon $lat 10 km]would be evaluated to@loc:[29.69465 34.95126 10 km]. Parameters cannot be referenced in the query string where concrete values are not allowed, such as in field names, e.g.,@loc
Quick example
Let's assume we have log of visits to our website, each record containing the following fields/properties:
- url (text, sortable)
- timestamp (numeric, sortable) - unix timestamp of visit entry.
- country (tag, sortable)
- user_id (text, sortable, not indexed)
Example 1: unique users by hour, ordered chronologically.
First of all, we want all records in the index, because why not. The first step is to determine the index name and the filtering query. A filter query of * means "get all records":
FT.AGGREGATE myIndex "*"
Now we want to group the results by hour. Since we have the visit times as unix timestamps in second resolution, we need to extract the hour component of the timestamp. So we first add an APPLY step, that strips the sub-hour information from the timestamp and stores is as a new property, hour:
FT.AGGREGATE myIndex "*"
APPLY "@timestamp - (@timestamp % 3600)" AS hour
Now we want to group the results by hour, and count the distinct user ids in each hour. This is done by a GROUPBY/REDUCE step:
FT.AGGREGATE myIndex "*"
APPLY "@timestamp - (@timestamp % 3600)" AS hour
GROUPBY 1 @hour
REDUCE COUNT_DISTINCT 1 @user_id AS num_users
Now we'd like to sort the results by hour, ascending:
FT.AGGREGATE myIndex "*"
APPLY "@timestamp - (@timestamp % 3600)" AS hour
GROUPBY 1 @hour
REDUCE COUNT_DISTINCT 1 @user_id AS num_users
SORTBY 2 @hour ASC
And as a final step, we can format the hour as a human readable timestamp. This is done by calling the transformation function timefmt that formats unix timestamps. You can specify a format to be passed to the system's strftime function (see documentation), but not specifying one is equivalent to specifying %FT%TZ to strftime.
FT.AGGREGATE myIndex "*"
APPLY "@timestamp - (@timestamp % 3600)" AS hour
GROUPBY 1 @hour
REDUCE COUNT_DISTINCT 1 @user_id AS num_users
SORTBY 2 @hour ASC
APPLY timefmt(@hour) AS hour
Example 2: Sort visits to a specific URL by day and country:
In this example we filter by the url, transform the timestamp to its day part, and group by the day and country, simply counting the number of visits per group. sorting by day ascending and country descending.
FT.AGGREGATE myIndex "@url:\"about.html\""
APPLY "@timestamp - (@timestamp % 86400)" AS day
GROUPBY 2 @day @country
REDUCE count 0 AS num_visits
SORTBY 4 @day ASC @country DESC
GROUPBY reducers
GROUPBY step work similarly to SQL GROUP BY clauses, and create groups of results based on one or more properties in each record. For each group, we return the "group keys", or the values common to all records in the group, by which they were grouped together - along with the results of zero or more REDUCE clauses.
Each GROUPBY step in the pipeline may be accompanied by zero or more REDUCE clauses. Reducers apply some accumulation function to each record in the group and reduce them into a single record representing the group. When we are finished processing all the records upstream of the GROUPBY step, each group emits its reduced record.
For example, the simplest reducer is COUNT, which simply counts the number of records in each group.
If multiple REDUCE clauses exist for a single GROUPBY step, each reducer works independently on each result and writes its final output once. Each reducer may have its own alias determined using the AS optional parameter. If AS is not specified, the alias is the reduce function and its parameters, e.g. count_distinct(foo,bar).
Supported GROUPBY reducers
COUNT
Format
REDUCE COUNT 0
Description
Count the number of records in each group
COUNT_DISTINCT
Format
REDUCE COUNT_DISTINCT 1 {property}
Description
Count the number of distinct values for property.
!!! note The reducer creates a hash-set per group, and hashes each record. This can be memory heavy if the groups are big.
COUNT_DISTINCTISH
Format
REDUCE COUNT_DISTINCTISH 1 {property}
Description
Same as COUNT_DISTINCT - but provide an approximation instead of an exact count, at the expense of less memory and CPU in big groups.
!!! note The reducer uses HyperLogLog counters per group, at ~3% error rate, and 1024 Bytes of constant space allocation per group. This means it is ideal for few huge groups and not ideal for many small groups. In the former case, it can be an order of magnitude faster and consume much less memory than COUNT_DISTINCT, but again, it does not fit every user case.
SUM
Format
REDUCE SUM 1 {property}
Description
Return the sum of all numeric values of a given property in a group. Non numeric values if the group are counted as 0.
MIN
Format
REDUCE MIN 1 {property}
Description
Return the minimal value of a property, whether it is a string, number or NULL.
MAX
Format
REDUCE MAX 1 {property}
Description
Return the maximal value of a property, whether it is a string, number or NULL.
AVG
Format
REDUCE AVG 1 {property}
Description
Return the average value of a numeric property. This is equivalent to reducing by sum and count, and later on applying the ratio of them as an APPLY step.
STDDEV
Format
REDUCE STDDEV 1 {property}
Description
Return the standard deviation of a numeric property in the group.
QUANTILE
Format
REDUCE QUANTILE 2 {property} {quantile}
Description
Return the value of a numeric property at a given quantile of the results. Quantile is expressed as a number between 0 and 1. For example, the median can be expressed as the quantile at 0.5, e.g. REDUCE QUANTILE 2 @foo 0.5 AS median .
If multiple quantiles are required, just repeat the QUANTILE reducer for each quantile. e.g. REDUCE QUANTILE 2 @foo 0.5 AS median REDUCE QUANTILE 2 @foo 0.99 AS p99
TOLIST
Format
REDUCE TOLIST 1 {property}
Description
Merge all distinct values of a given property into a single array.
FIRST_VALUE
Format
REDUCE FIRST_VALUE {nargs} {property} [BY {property} [ASC|DESC]]
Description
Return the first or top value of a given property in the group, optionally by comparing that or another property. For example, you can extract the name of the oldest user in the group:
REDUCE FIRST_VALUE 4 @name BY @age DESC
If no BY is specified, we return the first value we encounter in the group.
If you with to get the top or bottom value in the group sorted by the same value, you are better off using the MIN/MAX reducers, but the same effect will be achieved by doing REDUCE FIRST_VALUE 4 @foo BY @foo DESC.
RANDOM_SAMPLE
Format
REDUCE RANDOM_SAMPLE {nargs} {property} {sample_size}
Description
Perform a reservoir sampling of the group elements with a given size, and return an array of the sampled items with an even distribution.
APPLY expressions
APPLY performs a 1-to-1 transformation on one or more properties in each record. It either stores the result as a new property down the pipeline, or replaces any property using this transformation.
The transformations are expressed as a combination of arithmetic expressions and built in functions. Evaluating functions and expressions is recursively nested and can be composed without limit. For example: sqrt(log(foo) * floor(@bar/baz)) + (3^@qaz % 6) or simply @foo/@bar.
If an expression or a function is applied to values that do not match the expected types, no error is emitted but a NULL value is set as the result.
APPLY steps must have an explicit alias determined by the AS parameter.
Literals inside expressions
- Numbers are expressed as integers or floating point numbers, i.e.
2,3.141,-34, etc.infand-infare acceptable as well. - Strings are quoted with either single or double quotes. Single quotes are acceptable inside strings quoted with double quotes and vice versa. Punctuation marks can be escaped with backslashes. e.g.
"foo's bar",'foo\'s bar',"foo \"bar\"". - Any literal or sub expression can be wrapped in parentheses to resolve ambiguities of operator precedence.
Arithmetic operations
For numeric expressions and properties, we support addition (+), subtraction (-), multiplication (*), division (/), modulo (%) and power (^). We currently do not support bitwise logical operators.
Note that these operators apply only to numeric values and numeric sub expressions. Any attempt to multiply a string by a number, for instance, will result in a NULL output.
List of field APPLY functions
| Function | Description | Example |
|---|---|---|
| exists(s) | Checks whether a field exists in a document. | exists(@field) |
List of numeric APPLY functions
| Function | Description | Example |
|---|---|---|
| log(x) | Return the logarithm of a number, property or sub-expression | log(@foo) |
| abs(x) | Return the absolute number of a numeric expression | abs(@foo-@bar) |
| ceil(x) | Round to the smallest value not less than x | ceil(@foo/3.14) |
| floor(x) | Round to largest value not greater than x | floor(@foo/3.14) |
| log2(x) | Return the logarithm of x to base 2 | log2(2^@foo) |
| exp(x) | Return the exponent of x, i.e. e^x | exp(@foo) |
| sqrt(x) | Return the square root of x | sqrt(@foo) |
List of string APPLY functions
| Function | ||
|---|---|---|
| upper(s) | Return the uppercase conversion of s | upper('hello world') |
| lower(s) | Return the lowercase conversion of s | lower("HELLO WORLD") |
| startswith(s1,s2) | Return 1 if s2 is the prefix of s1, 0 otherwise. | startswith(@field, "company") |
| contains(s1,s2) | Return the number of occurrences of s2 in s1, 0 otherwise. If s2 is an empty string, return length(s1) + 1. | contains(@field, "pa") |
| substr(s, offset, count) | Return the substring of s, starting at offset and having count characters. If offset is negative, it represents the distance from the end of the string. If count is -1, it means "the rest of the string starting at offset". | substr("hello", 0, 3)substr("hello", -2, -1) |
| format( fmt, ...) | Use the arguments following fmt to format a string.Currently the only format argument supported is %s and it applies to all types of arguments. | format("Hello, %s, you are %s years old", @name, @age) |
| matched_terms([max_terms=100]) | Return the query terms that matched for each record (up to 100), as a list. If a limit is specified, we will return the first N matches we find - based on query order. | matched_terms() |
| split(s, [sep=","], [strip=" "]) | Split a string by any character in the string sep, and strip any characters in strip. If only s is specified, we split by commas and strip spaces. The output is an array. | split("foo,bar") |
List of date/time APPLY functions
| Function | Description |
|---|---|
| timefmt(x, [fmt]) | Return a formatted time string based on a numeric timestamp value x. See strftime for formatting options. Not specifying fmt is equivalent to %FT%TZ. |
| parsetime(timesharing, [fmt]) | The opposite of timefmt() - parse a time format using a given format string |
| day(timestamp) | Round a Unix timestamp to midnight (00:00) start of the current day. |
| hour(timestamp) | Round a Unix timestamp to the beginning of the current hour. |
| minute(timestamp) | Round a Unix timestamp to the beginning of the current minute. |
| month(timestamp) | Round a unix timestamp to the beginning of the current month. |
| dayofweek(timestamp) | Convert a Unix timestamp to the day number (Sunday = 0). |
| dayofmonth(timestamp) | Convert a Unix timestamp to the day of month number (1 .. 31). |
| dayofyear(timestamp) | Convert a Unix timestamp to the day of year number (0 .. 365). |
| year(timestamp) | Convert a Unix timestamp to the current year (e.g. 2018). |
| monthofyear(timestamp) | Convert a Unix timestamp to the current month (0 .. 11). |
List of geo APPLY functions
| Function | Description | Example |
|---|---|---|
| geodistance(field,field) | Return distance in meters. | geodistance(@field1,@field2) |
| geodistance(field,"lon,lat") | Return distance in meters. | geodistance(@field,"1.2,-3.4") |
| geodistance(field,lon,lat) | Return distance in meters. | geodistance(@field,1.2,-3.4) |
| geodistance("lon,lat",field) | Return distance in meters. | geodistance("1.2,-3.4",@field) |
| geodistance("lon,lat","lon,lat") | Return distance in meters. | geodistance("1.2,-3.4","5.6,-7.8") |
| geodistance("lon,lat",lon,lat) | Return distance in meters. | geodistance("1.2,-3.4",5.6,-7.8) |
| geodistance(lon,lat,field) | Return distance in meters. | geodistance(1.2,-3.4,@field) |
| geodistance(lon,lat,"lon,lat") | Return distance in meters. | geodistance(1.2,-3.4,"5.6,-7.8") |
| geodistance(lon,lat,lon,lat) | Return distance in meters. | geodistance(1.2,-3.4,5.6,-7.8) |
FT.AGGREGATE myIdx "*" LOAD 1 location APPLY "geodistance(@location,\"-1.1,2.2\")" AS dist
To print out the distance:
FT.AGGREGATE myIdx "*" LOAD 1 location APPLY "geodistance(@location,\"-1.1,2.2\")" AS dist
Note: Geo field must be preloaded using LOAD.
Results can also be sorted by distance:
FT.AGGREGATE idx "*" LOAD 1 @location FILTER "exists(@location)" APPLY "geodistance(@location,-117.824722,33.68590)" AS dist SORTBY 2 @dist DESC
Note: Make sure no location is missing, otherwise the SORTBY will not return any result. Use FILTER to make sure you do the sorting on all valid locations.
FILTER expressions
FILTER expressions filter the results using predicates relating to values in the result set.
The FILTER expressions are evaluated post-query and relate to the current state of the pipeline. Thus they can be useful to prune the results based on group calculations. Note that the filters are not indexed and will not speed the processing per se.
Filter expressions follow the syntax of APPLY expressions, with the addition of the conditions ==, !=, <, <=, >, >=. Two or more predicates can be combined with logical AND (&&) and OR (||). A single predicate can be negated with a NOT prefix (!).
For example, filtering all results where the user name is 'foo' and the age is less than 20 is expressed as:
FT.AGGREGATE
...
FILTER "@name=='foo' && @age < 20"
...
Several filter steps can be added, although at the same stage in the pipeline, it is more efficient to combine several predicates into a single filter step.
Cursor API
FT.AGGREGATE ... WITHCURSOR [COUNT {read size} MAXIDLE {idle timeout}]
FT.CURSOR READ {idx} {cid} [COUNT {read size}]
FT.CURSOR DEL {idx} {cid}
You can use cursors with FT.AGGREGATE, with the WITHCURSOR keyword. Cursors allow you to
consume only part of the response, allowing you to fetch additional results as needed.
This is much quicker than using LIMIT with offset, since the query is executed only
once, and its state is stored on the server.
To use cursors, specify the WITHCURSOR keyword in FT.AGGREGATE, e.g.
FT.AGGREGATE idx * WITHCURSOR
This will return a response of an array with two elements. The first element is
the actual (partial) results, and the second is the cursor ID. The cursor ID
can then be fed to FT.CURSOR READ repeatedly, until the cursor ID is 0, in
which case all results have been returned.
To read from an existing cursor, use FT.CURSOR READ, e.g.
FT.CURSOR READ idx 342459320
Assuming 342459320 is the cursor ID returned from the FT.AGGREGATE request.
Here is an example in pseudo-code:
response, cursor = FT.AGGREGATE "idx" "redis" "WITHCURSOR";
while (1) {
processResponse(response)
if (!cursor) {
break;
}
response, cursor = FT.CURSOR read "idx" cursor
}
Note that even if the cursor is 0, a partial result may still be returned.
Cursor settings
Read size
You can control how many rows are read per each cursor fetch by using the
COUNT parameter. This parameter can be specified both in FT.AGGREGATE
(immediately after WITHCURSOR) or in FT.CURSOR READ.
FT.AGGREGATE idx query WITHCURSOR COUNT 10
Will read 10 rows at a time.
You can override this setting by also specifying COUNT in CURSOR READ, e.g.
FT.CURSOR READ idx 342459320 COUNT 50
Will return at most 50 results.
The default read size is 1000
Timeouts and limits
Because cursors are stateful resources which occupy memory on the server, they
have a limited lifetime. In order to safeguard against orphaned/stale cursors,
cursors have an idle timeout value. If no activity occurs on the cursor before
the idle timeout, the cursor is deleted. The idle timer resets to 0 whenever
the cursor is read from using CURSOR READ.
The default idle timeout is 300000 milliseconds (or 300 seconds). You can modify
the idle timeout using the MAXIDLE keyword when creating the cursor. Note that
the value cannot exceed the default 300s.
FT.AGGREGATE idx query WITHCURSOR MAXIDLE 10000
Will set the limit for 10 seconds.
Other cursor commands
Cursors can be explicitly deleted using the CURSOR DEL command, e.g.
FT.CURSOR DEL idx 342459320
Note that cursors are automatically deleted if all their results have been returned, or if they have been timed out.
All idle cursors can be forcefully purged at once using FT.CURSOR GC idx 0 command.
By default, RediSearch uses a lazy throttled approach to garbage collection, which
collects idle cursors every 500 operations, or every second - whichever is later.
9.3.7.4 - Tokenization
Controlling Text Tokenization and Escaping
Controlling Text Tokenization and Escaping
At the moment, RediSearch uses a very simple tokenizer for documents and a slightly more sophisticated tokenizer for queries. Both allow a degree of control over string escaping and tokenization.
Note: There is a different mechanism for tokenizing text and tag fields, this document refers only to text fields. For tag fields please refer to the Tag Fields documentation.
The rules of text field tokenization
All punctuation marks and whitespace (besides underscores) separate the document and queries into tokens. e.g. any character of
,.<>{}[]"':;!@#$%^&*()-+=~will break the text into terms. So the textfoo-bar.baz...bagwill be tokenized into[foo, bar, baz, bag]Escaping separators in both queries and documents is done by prepending a backslash to any separator. e.g. the text
hello\-world hello-worldwill be tokenized as[hello-world, hello, world]. NOTE that in most languages you will need an extra backslash when formatting the document or query, to signify an actual backslash, so the actual text in redis-cli for example, will be entered ashello\\-world.Underscores (
_) are not used as separators in either document or query. So the texthello_worldwill remain as is after tokenization.Repeating spaces or punctuation marks are stripped.
In Latin characters, everything gets converted to lowercase.
A backslash before the first digit will tokenize it as a term. This will translate
-sign as NOT which otherwise will make the number negative. Add a backslash before.if you are searching for a float. (ex. -20 -> {-20} vs -\20 -> {NOT{20}})
9.3.7.5 - Sorting
Support for sorting query results
Sorting by Indexed Fields
As of RediSearch 0.15, it is possible to bypass the scoring function mechanism, and order search results by the value of different document properties (fields) directly - even if the sorting field is not used by the query. For example, you can search for first name and sort by last name.
Declaring Sortable Fields
When creating the index with FT.CREATE, you can declare TEXT and NUMERIC properties to be SORTABLE. When a property is sortable, we can later decide to order the results by its values. For example, in the following schema:
> FT.CREATE users SCHEMA first_name TEXT last_name TEXT SORTABLE age NUMERIC SORTABLE
The fields last_name and age are sortable, but first_name isn't. This means we can search by either first and/or last name, and sort by last name or age.
Note on sortable TEXT fields
In the current implementation, when declaring a sortable field, its content gets copied into a special location in the index, for fast access on sorting. This means that making long text fields sortable is very expensive, and you should be careful with it.
Normalization (UNF option)
By default, text fields get normalized and lowercased in a Unicode-safe way when stored for sorting. This means that America and america are considered equal in terms of sorting.
Using the argument UNF (un-normalized form) it is possible to disable the normalization and keep the original form of the value. Therefore, America will come before america.
Specifying SORTBY
If an index includes sortable fields, you can add the SORTBY parameter to the search request (outside the query body), and order the results by it. This overrides the scoring function mechanism, and the two cannot be combined. If WITHSCORES is specified along with SORTBY, the scores returned are simply the relative position of each result in the result set.
The syntax for SORTBY is:
SORTBY {field_name} [ASC|DESC]
field_name must be a sortable field defined in the schema.
ASCmeans the order will be ascending,DESCthat it will be descending.The default ordering is
ASCif not specified otherwise.
Quick example
> FT.CREATE users SCHEMA first_name TEXT SORTABLE last_name TEXT age NUMERIC SORTABLE
# Add some users
> FT.ADD users user1 1.0 FIELDS first_name "alice" last_name "jones" age 35
> FT.ADD users user2 1.0 FIELDS first_name "bob" last_name "jones" age 36
# Searching while sorting
# Searching by last name and sorting by first name
> FT.SEARCH users "@last_name:jones" SORTBY first_name DESC
# Searching by both first and last name, and sorting by age
> FT.SEARCH users "alice jones" SORTBY age ASC
9.3.7.6 - Tags
Details about tag fields
Tag Fields
Tag fields are similar to full-text fields but use simpler tokenization and encoding in the index. The values in these fields cannot be accessed by general field-less search and can be used only with a special syntax.
The main differences between tag and full-text fields are:
We do not perform stemming on tag indexes.
The tokenization is simpler: The user can determine a separator (defaults to a comma) for multiple tags, and we only do whitespace trimming at the end of tags. Thus, tags can contain spaces, punctuation marks, accents, etc.
The only two transformations we perform are lower-casing (for latin languages only as of now) and whitespace trimming. Lower-case transformation can be disabled by passing CASESENSITIVE.
Tags cannot be found from a general full-text search. If a document has a field called "tags" with the values "foo" and "bar", searching for foo or bar without a special tag modifier (see below) will not return this document.
The index is much simpler and more compressed: We do not store frequencies, offset vectors of field flags. The index contains only document IDs encoded as deltas. This means that an entry in a tag index is usually one or two bytes long. This makes them very memory efficient and fast.
We can create up to 1024 tag fields per index.
Creating a tag field
Tag fields can be added to the schema in FT.ADD with the following syntax:
FT.CREATE ... SCHEMA ... {field_name} TAG [SEPARATOR {sep}] [CASESENSITIVE]
SEPARATOR defaults to a comma (,), and can be any printable ASCII character. For example:
CASESENSITIVE can be specified to keep the original letters case.
FT.CREATE idx ON HASH PREFIX 1 test: SCHEMA tags TAG SEPARATOR ";"
Querying tag fields
As mentioned above, just searching for a tag without any modifiers will not retrieve documents containing it.
The syntax for matching tags in a query is as follows (the curly braces are part of the syntax in this case):
@<field_name>:{ <tag> | <tag> | ...}
For example, this query finds documents with either the tag hello world or foo bar:
FT.SEARCH idx "@tags:{ hello world | foo bar }"
Tag clauses can be combined into any sub-clause, used as negative expressions, optional expressions, etc. For example, given the following index:
FT.CREATE idx ON HASH PREFIX 1 test: SCHEMA title TEXT price NUMERIC tags TAG SEPARATOR ";"
You can combine a full-text search on the title field, a numerical range on price, and match either the foo bar or hello world tag like this:
FT.SEARCH idx "@title:hello @price:[0 100] @tags:{ foo bar | hello world }
Tags support prefix matching with the regular * character:
FT.SEARCH idx "@tags:{ hell* }"
FT.SEARCH idx "@tags:{ hello\\ w* }"
Multiple tags in a single filter
Notice that including multiple tags in the same clause creates a union of all documents that contain any of the included tags. To create an intersection of documents containing all of the given tags, you should repeat the tag filter several times.
For example, imagine an index of travellers, with a tag field for the cities each traveller has visited:
FT.CREATE myIndex ON HASH PREFIX 1 traveller: SCHEMA name TEXT cities TAG
HSET traveller:1 name "John Doe" cities "New York, Barcelona, San Francisco"
For this index, the following query will return all the people who visited at least one of the following cities:
FT.SEARCH myIndex "@cities:{ New York | Los Angeles | Barcelona }"
But the next query will return all people who have visited all three cities:
FT.SEARCH myIndex "@cities:{ New York } @cities:{Los Angeles} @cities:{ Barcelona }"
Including punctuation in tags
A tag can include punctuation other than the field's separator (by default, a comma). You do not need to escape punctuation when using the HSET command to add the value to a Redis Hash.
For example, given the following index:
FT.CREATE punctuation ON HASH PREFIX 1 test: SCHEMA tags TAG
You can add tags that contain punctuation like this:
HSET test:1 tags "Andrew's Top 5,Justin's Top 5"
However, when you query for tags that contain punctuation, you must escape that punctuation with a backslash character (\).
NOTE: In most languages you will need an extra backslash. This is also the case in the redis-cli.
For example, querying for the tag Andrew's Top 5 in the redis-cli looks like this:
FT.SEARCH punctuation "@tags:{ Andrew\\'s Top 5 }"
Tags that contain multiple words
As the examples in this document show, a single tag can include multiple words. We recommend that you escape spaces when querying, though doing so is not required.
You escape spaces the same way that you escape punctuation -- by preceding the space with a backslash character (or two backslashes, depending on the programming language and environment).
Thus, you would escape the tag "to be or not to be" like so when querying in the redis-cli:
FT.SEARCH idx "@tags:{ to\\ be\\ or\\ not\\ to\\ be }"
You should escape spaces because if a tag includes multiple words and some of them are stop words like "to" or "be," a query that includes these words without escaping spaces will create a syntax error.
You can see what that looks like in the following example:
127.0.0.1:6379> FT.SEARCH idx "@tags:{ to be or not to be }"
(error) Syntax error at offset 27 near be
NOTE: Stop words are words that are so common that a search engine ignores them. We have a dedicated page about stop words in RediSearch if you would like to learn more.
Given the potential for syntax errors, we recommend that you escape all spaces within tag queries.
9.3.7.7 - Highlighting
Highlighting full-text results
Highlighting API
The highlighting API allows you to have only the relevant portions of document matching a search query returned as a result. This allows users to quickly see how a document relates to their query, with the search terms highlighted, usually in bold letters.
RediSearch implements high performance highlighting and summarization algorithms, with the following API:
Command syntax
FT.SEARCH ...
SUMMARIZE [FIELDS {num} {field}] [FRAGS {numFrags}] [LEN {fragLen}] [SEPARATOR {sepstr}]
HIGHLIGHT [FIELDS {num} {field}] [TAGS {openTag} {closeTag}]
There are two sub-commands commands used for highlighting. One is HIGHLIGHT which surrounds matching text with an open and/or close tag, and the other is SUMMARIZE which splits a field into contextual fragments surrounding the found terms. It is possible to summarize a field, highlight a field, or perform both actions in the same query.
Summarization
FT.SEARCH ...
SUMMARIZE [FIELDS {num} {field}] [FRAGS {numFrags}] [LEN {fragLen}] [SEPARATOR {sepStr}]
Summarization will fragment the text into smaller sized snippets; each snippet will contain the found term(s) and some additional surrounding context.
RediSearch can perform summarization using the SUMMARIZE keyword. If no additional arguments are passed, all returned fields are summarized using built-in defaults.
The SUMMARIZE keyword accepts the following arguments:
FIELDS: If present, must be the first argument. This should be followed by the number of fields to summarize, which itself is followed by a list of fields. Each field present is summarized. If noFIELDSdirective is passed, then all fields returned are summarized.FRAGS: How many fragments should be returned. If not specified, a default of 3 is used.LENThe number of context words each fragment should contain. Context words surround the found term. A higher value will return a larger block of text. If not specified, the default value is 20.SEPARATORThe string used to divide between individual summary snippets. The default is...which is common among search engines; but you may override this with any other string if you desire to programmatically divide them later on. You may use a newline sequence, as newlines are stripped from the result body anyway (thus, it will not be conflated with an embedded newline in the text)
Highlighting
FT.SEARCH ... HIGHLIGHT [FIELDS {num} {field}] [TAGS {openTag} {closeTag}]
Highlighting will highlight the found term (and its variants) with a user-defined tag. This may be used to display the matched text in a different typeface using a markup language, or to otherwise make the text appear differently.
RediSearch can perform highlighting using the HIGHLIGHT keyword. If no additional arguments are passed, all returned fields are highlighted using built-in defaults.
The HIGHLIGHT keyword accepts the following arguments:
FIELDSIf present, must be the first argument. This should be followed by the number of fields to highlight, which itself is followed by a list of fields. Each field present is highlighted. If noFIELDSdirective is passed, then all fields returned are highlighted.TAGSIf present, must be followed by two strings; the first is prepended to each term match, and the second is appended to it. If noTAGSare specified, a built-in tag value is appended and prepended.
Field selection
If no specific fields are passed to the RETURN, SUMMARIZE, or HIGHLIGHT keywords, then all of a document's fields are returned. However, if any of these keywords contain a FIELD directive, then the SEARCH command will only return the sum total of all fields enumerated in any of those directives.
The RETURN keyword is treated specially, as it overrides any fields specified in SUMMARIZE or HIGHLIGHT.
In the command RETURN 1 foo SUMMARIZE FIELDS 1 bar HIGHLIGHT FIELDS 1 baz, the fields foo is returned as-is, while bar and baz are not returned, because RETURN was specified, but did not include those fields.
In the command SUMMARIZE FIELDS 1 bar HIGHLIGHT FIELDS 1 baz, bar is returned summarized and baz is returned highlighted.
9.3.7.8 - Scoring
Full-text scoring functions
Scoring in RediSearch
RediSearch comes with a few very basic scoring functions to evaluate document relevance. They are all based on document scores and term frequency. This is regardless of the ability to use sortable fields. Scoring functions are specified by adding the SCORER {scorer_name} argument to a search query.
If you prefer a custom scoring function, it is possible to add more functions using the Extension API.
These are the pre-bundled scoring functions available in RediSearch and how they work. Each function is mentioned by registered name, that can be passed as a SCORER argument in FT.SEARCH.
TFIDF (default)
Basic TF-IDF scoring with a few extra features thrown inside:
For each term in each result, we calculate the TF-IDF score of that term to that document. Frequencies are weighted based on field weights that are pre-determined, and each term's frequency is normalized by the highest term frequency in each document.
We multiply the total TF-IDF for the query term by the a priory document score given on
FT.ADD.We give a penalty to each result based on "slop" or cumulative distance between the search terms: exact matches will get no penalty, but matches where the search terms are distant see their score reduced significantly. For each 2-gram of consecutive terms, we find the minimal distance between them. The penalty is the square root of the sum of the distances, squared -
1/sqrt(d(t2-t1)^2 + d(t3-t2)^2 + ...).
So for N terms in document D, T1...Tn, the resulting score could be described with this python function:
def get_score(terms, doc):
# the sum of tf-idf
score = 0
# the distance penalty for all terms
dist_penalty = 0
for i, term in enumerate(terms):
# tf normalized by maximum frequency
tf = doc.freq(term) / doc.max_freq
# idf is global for the index, and not calculated each time in real life
idf = log2(1 + total_docs / docs_with_term(term))
score += tf*idf
# sum up the distance penalty
if i > 0:
dist_penalty += min_distance(term, terms[i-1])**2
# multiply the score by the document score
score *= doc.score
# divide the score by the root of the cumulative distance
if len(terms) > 1:
score /= sqrt(dist_penalty)
return score
TFIDF.DOCNORM
Identical to the default TFIDF scorer, with one important distinction:
Term frequencies are normalized by the length of the document (expressed as the total number of terms). The length is weighted, so that if a document contains two terms, one in a field that has a weight 1 and one in a field with a weight of 5, the total frequency is 6, not 2.
FT.SEARCH myIndex "foo" SCORER TFIDF.DOCNORM
BM25
A variation on the basic TF-IDF scorer, see this Wikipedia article for more info.
We also multiply the relevance score for each document by the a priory document score and apply a penalty based on slop as in TFIDF.
FT.SEARCH myIndex "foo" SCORER BM25
DISMAX
A simple scorer that sums up the frequencies of the matched terms; in the case of union clauses, it will give the maximum value of those matches. No other penalties or factors are applied.
It is not a 1 to 1 implementation of Solr's DISMAX algorithm but follows it in broad terms.
FT.SEARCH myIndex "foo" SCORER DISMAX
DOCSCORE
A scoring function that just returns the a priory score of the document without applying any calculations to it. Since document scores can be updated, this can be useful if you'd like to use an external score and nothing further.
FT.SEARCH myIndex "foo" SCORER DOCSCORE
HAMMING
Scoring by the (inverse) Hamming Distance between the documents' payload and the query payload. Since we are interested in the nearest neighbors, we inverse the hamming distance (1/(1+d)) so that a distance of 0 gives a perfect score of 1 and is the highest rank.
This works only if:
- The document has a payload.
- The query has a payload.
- Both are exactly the same length.
Payloads are binary-safe, and having payloads with a length that's a multiple of 64 bits yields slightly faster results.
Example:
127.0.0.1:6379> FT.CREATE idx SCHEMA foo TEXT
OK
127.0.0.1:6379> FT.ADD idx 1 1 PAYLOAD "aaaabbbb" FIELDS foo hello
OK
127.0.0.1:6379> FT.ADD idx 2 1 PAYLOAD "aaaacccc" FIELDS foo bar
OK
127.0.0.1:6379> FT.SEARCH idx "*" PAYLOAD "aaaabbbc" SCORER HAMMING WITHSCORES
1) (integer) 2
2) "1"
3) "0.5" // hamming distance of 1 --> 1/(1+1) == 0.5
4) 1) "foo"
2) "hello"
5) "2"
6) "0.25" // hamming distance of 3 --> 1/(1+3) == 0.25
7) 1) "foo"
2) "bar"
9.3.7.9 - Extensions
Details about extensions for query expanders and scoring functions
Extending RediSearch
RediSearch supports an extension mechanism, much like Redis supports modules. The API is very minimal at the moment, and it does not yet support dynamic loading of extensions in run-time. Instead, extensions must be written in C (or a language that has an interface with C) and compiled into dynamic libraries that will be loaded at run-time.
There are two kinds of extension APIs at the moment:
- Query Expanders, whose role is to expand query tokens (i.e. stemmers).
- Scoring Functions, whose role is to rank search results in query time.
Registering and loading extensions
Extensions should be compiled into .so files, and loaded into RediSearch on initialization of the module.
Compiling
Extensions should be compiled and linked as dynamic libraries. An example Makefile for an extension can be found here.
That folder also contains an example extension that is used for testing and can be taken as a skeleton for implementing your own extension.
Loading
Loading an extension is done by appending
EXTLOAD {path/to/ext.so}after theloadmoduleconfiguration directive when loading RediSearch. For example:$ redis-server --loadmodule ./redisearch.so EXTLOAD ./ext/my_extension.soThis causes RediSearch to automatically load the extension and register its expanders and scorers.
Initializing an extension
The entry point of an extension is a function with the signature:
int RS_ExtensionInit(RSExtensionCtx *ctx);
When loading the extension, RediSearch looks for this function and calls it. This function is responsible for registering and initializing the expanders and scorers.
It should return REDISEARCH_ERR on error or REDISEARCH_OK on success.
Example init function
#include <redisearch.h> //must be in the include path
int RS_ExtensionInit(RSExtensionCtx *ctx) {
/* Register a scoring function with an alias my_scorer and no special private data and free function */
if (ctx->RegisterScoringFunction("my_scorer", MyCustomScorer, NULL, NULL) == REDISEARCH_ERR) {
return REDISEARCH_ERR;
}
/* Register a query expander */
if (ctx->RegisterQueryExpander("my_expander", MyExpander, NULL, NULL) ==
REDISEARCH_ERR) {
return REDISEARCH_ERR;
}
return REDISEARCH_OK;
}
Calling your custom functions
When performing a query, you can tell RediSearch to use your scorers or expanders by specifying the SCORER or EXPANDER arguments, with the given alias. e.g.:
FT.SEARCH my_index "foo bar" EXPANDER my_expander SCORER my_scorer
NOTE: Expander and scorer aliases are case sensitive.
The query expander API
At the moment, we only support basic query expansion, one token at a time. An expander can decide to expand any given token with as many tokens it wishes, that will be Union-merged in query time.
The API for an expander is the following:
#include <redisearch.h> //must be in the include path
void MyQueryExpander(RSQueryExpanderCtx *ctx, RSToken *token) {
...
}
RSQueryExpanderCtx
RSQueryExpanderCtx is a context that contains private data of the extension, and a callback method to expand the query. It is defined as:
typedef struct RSQueryExpanderCtx {
/* Opaque query object used internally by the engine, and should not be accessed */
struct RSQuery *query;
/* Opaque query node object used internally by the engine, and should not be accessed */
struct RSQueryNode **currentNode;
/* Private data of the extension, set on extension initialization */
void *privdata;
/* The language of the query, defaults to "english" */
const char *language;
/* ExpandToken allows the user to add an expansion of the token in the query, that will be
* union-merged with the given token in query time. str is the expanded string, len is its length,
* and flags is a 32 bit flag mask that can be used by the extension to set private information on
* the token */
void (*ExpandToken)(struct RSQueryExpanderCtx *ctx, const char *str, size_t len,
RSTokenFlags flags);
/* SetPayload allows the query expander to set GLOBAL payload on the query (not unique per token)
*/
void (*SetPayload)(struct RSQueryExpanderCtx *ctx, RSPayload payload);
} RSQueryExpanderCtx;
RSToken
RSToken represents a single query token to be expanded and is defined as:
/* A token in the query. The expanders receive query tokens and can expand the query with more query
* tokens */
typedef struct {
/* The token string - which may or may not be NULL terminated */
const char *str;
/* The token length */
size_t len;
/* 1 if the token is the result of query expansion */
uint8_t expanded:1;
/* Extension specific token flags that can be examined later by the scoring function */
RSTokenFlags flags;
} RSToken;
The scoring function API
A scoring function receives each document being evaluated by the query, for final ranking. It has access to all the query terms that brought up the document,and to metadata about the document such as its a-priory score, length, etc.
Since the scoring function is evaluated per each document, potentially millions of times, and since redis is single threaded - it is important that it works as fast as possible and be heavily optimized.
A scoring function is applied to each potential result (per document) and is implemented with the following signature:
double MyScoringFunction(RSScoringFunctionCtx *ctx, RSIndexResult *res,
RSDocumentMetadata *dmd, double minScore);
RSScoringFunctionCtx is a context that implements some helper methods.
RSIndexResult is the result information - containing the document id, frequency, terms, and offsets.
RSDocumentMetadata is an object holding global information about the document, such as its a-priory score.
minSocre is the minimal score that will yield a result that will be relevant to the search. It can be used to stop processing mid-way of before we even start.
The return value of the function is double representing the final score of the result.
Returning 0 causes the result to be counted, but if there are results with a score greater than 0, they will appear above it.
To completely filter out a result and not count it in the totals, the scorer should return the special value RS_SCORE_FILTEROUT (which is internally set to negative infinity, or -1/0).
RSScoringFunctionCtx
This is an object containing the following members:
- *void privdata: a pointer to an object set by the extension on initialization time.
- RSPayload payload: A Payload object set either by the query expander or the client.
- int GetSlop(RSIndexResult *res): A callback method that yields the total minimal distance between the query terms. This can be used to prefer results where the "slop" is smaller and the terms are nearer to each other.
RSIndexResult
This is an object holding the information about the current result in the index, which is an aggregate of all the terms that resulted in the current document being considered a valid result.
See redisearch.h for details
RSDocumentMetadata
This is an object describing global information, unrelated to the current query, about the document being evaluated by the scoring function.
Example query expander
This example query expander expands each token with the term foo:
#include <redisearch.h> //must be in the include path
void DummyExpander(RSQueryExpanderCtx *ctx, RSToken *token) {
ctx->ExpandToken(ctx, strdup("foo"), strlen("foo"), 0x1337);
}
Example scoring function
This is an actual scoring function, calculating TF-IDF for the document, multiplying that by the document score, and dividing that by the slop:
#include <redisearch.h> //must be in the include path
double TFIDFScorer(RSScoringFunctionCtx *ctx, RSIndexResult *h, RSDocumentMetadata *dmd,
double minScore) {
// no need to evaluate documents with score 0
if (dmd->score == 0) return 0;
// calculate sum(tf-idf) for each term in the result
double tfidf = 0;
for (int i = 0; i < h->numRecords; i++) {
// take the term frequency and multiply by the term IDF, add that to the total
tfidf += (float)h->records[i].freq * (h->records[i].term ? h->records[i].term->idf : 0);
}
// normalize by the maximal frequency of any term in the document
tfidf /= (double)dmd->maxFreq;
// multiply by the document score (between 0 and 1)
tfidf *= dmd->score;
// no need to factor the slop if tfidf is already below minimal score
if (tfidf < minScore) {
return 0;
}
// get the slop and divide the result by it, making sure we prefer results with closer terms
tfidf /= (double)ctx->GetSlop(h);
return tfidf;
}
9.3.7.10 - Stemming
Stemming support
Stemming Support
RediSearch supports stemming - that is adding the base form of a word to the index. This allows the query for "going" to also return results for "go" and "gone", for example.
The current stemming support is based on the Snowball stemmer library, which supports most European languages, as well as Arabic and other. We hope to include more languages soon (if you need a specific language support, please open an issue).
For further details see the Snowball Stemmer website.
Supported languages
The following languages are supported and can be passed to the engine when indexing or querying, with lowercase letters:
- arabic
- armenian
- danish
- dutch
- english
- finnish
- french
- german
- hungarian
- italian
- norwegian
- portuguese
- romanian
- russian
- serbian
- spanish
- swedish
- tamil
- turkish
- yiddish
- chinese (see below)
Chinese support
Indexing a Chinese document is different than indexing a document in most other languages because of how tokens are extracted. While most languages can have their tokens distinguished by separation characters and whitespace, this is not common in Chinese.
Chinese tokenization is done by scanning the input text and checking every character or sequence of characters against a dictionary of predefined terms and determining the most likely (based on the surrounding terms and characters) match.
RediSearch makes use of the Friso chinese tokenization library for this purpose. This is largely transparent to the user and often no additional configuration is required.
Using custom dictionaries
If you wish to use a custom dictionary, you can do so at the module level when loading the module. The FRISOINI setting can point to the location of a friso.ini file which contains the relevant settings and paths to the dictionary files.
Note that there is no "default" friso.ini file location. RedisSearch comes with its own friso.ini and dictionary files which are compiled into the module binary at build-time.
9.3.7.11 - Synonym
Synonym support
Synonyms Support
Overview
RediSearch supports synonyms - that is searching for synonyms words defined by the synonym data structure.
The synonym data structure is a set of groups, each group contains synonym terms. For example, the following synonym data structure contains three groups, each group contains three synonym terms:
{boy, child, baby}
{girl, child, baby}
{man, person, adult}
When these three groups are located inside the synonym data structure, it is possible to search for 'child' and receive documents contains 'boy', 'girl', 'child' and 'baby'.
The synonym search technique
We use a simple HashMap to map between the terms and the group ids. During building the index, we check if the current term appears in the synonym map, and if it does we take all the group ids that the term belongs to.
For each group id, we add another record to the inverted index called "~<id>" that contains the same information as the term itself. When performing a search, we check if the searched term appears in the synonym map, and if it does we take all the group ids the term is belong to. For each group id, we search for "~<id>" and return the combined results. This technique ensures that we return all the synonyms of a given term.
Handling concurrency
Since the indexing is performed in a separate thread, the synonyms map may change during the indexing, which in turn may cause data corruption or crashes during indexing/searches. To solve this issue, we create a read-only copy for indexing purposes. The read-only copy is maintained using ref count.
As long as the synonyms map does not change, the original synonym map holds a reference to its read-only copy so it will not be freed. Once the data inside the synonyms map has changed, the synonyms map decreses the reference count of its read only copy. This ensures that when all the indexers are done using the read only copy, then the read only copy will automatically freed. Also it ensures that the next time an indexer asks for a read-only copy, the synonyms map will create a new copy (contains the new data) and return it.
Quick example
# Create an index
> FT.CREATE idx schema t text
# Create a synonym group
> FT.SYNUPDATE idx group1 hello world
# Insert documents
> HSET foo t hello
(integer) 1
> HSET bar t world
(integer) 1
# Search
> FT.SEARCH idx hello
1) (integer) 2
2) "foo"
3) 1) "t"
2) "hello"
4) "bar"
5) 1) "t"
2) "world"
9.3.7.12 - Payload
Payload support(deprecated)
Document Payloads
!!! note The payload feature is deprecated in 2.0
Usually, RediSearch stores documents as hash keys. But if you want to access some data for aggregation or scoring functions, we might want to store that data as an inline payload. This will allow us to evaluate properties of a document for scoring purposes at very low cost.
Since the scoring functions already have access to the DocumentMetaData, which contains document flags and score, We can add custom payloads that can be evaluated in run-time.
Payloads are NOT indexed and are not treated by the engine in any way. They are simply there for the purpose of evaluating them in query time, and optionally retrieving them. They can be JSON objects, strings, or preferably, if you are interested in fast evaluation, some sort of binary encoded data which is fast to decode.
Adding payloads for documents
When inserting a document using FT.ADD, you can ask RediSearch to store an arbitrary binary safe string as the document payload. This is done with the PAYLOAD keyword:
FT.ADD {index_name} {doc_id} {score} PAYLOAD {payload} FIELDS {field} {data}...
Evaluating payloads in query time
When implementing a scoring function, the signature of the function exposed is:
double (*ScoringFunction)(DocumentMetadata *dmd, IndexResult *h);
!!! note Currently, scoring functions cannot be dynamically added, and forking the engine and replacing them is required.
DocumentMetaData includes a few fields, one of them being the payload. It wraps a simple byte array with arbitrary length:
typedef struct {
char *data,
uint32_t len;
} DocumentPayload;
If no payload was set to the document, it is simply NULL. If it is not, you can go ahead and decode it. It is recommended to encode some metadata about the payload inside it, like a leading version number, etc.
Retrieving payloads from documents
When searching, it is possible to request the document payloads from the engine.
This is done by adding the keyword WITHPAYLOADS to FT.SEARCH.
If WITHPAYLOADS is set, the payloads follow the document id in the returned result.
If WITHSCORES is set as well, the payloads follow the scores. e.g.:
127.0.0.1:6379> FT.CREATE foo SCHEMA bar TEXT
OK
127.0.0.1:6379> FT.ADD foo doc2 1.0 PAYLOAD "hi there!" FIELDS bar "hello"
OK
127.0.0.1:6379> FT.SEARCH foo "hello" WITHPAYLOADS WITHSCORES
1) (integer) 1
2) "doc2" # id
3) "1" # score
4) "hi there!" # payload
5) 1) "bar" # fields
2) "hello"
9.3.7.13 - Spellchecking
Query spelling correction support
Query Spelling Correction
Query spelling correction, a.k.a "did you mean", provides suggestions for misspelled search terms. For example, the term 'reids' may be a misspelled 'redis'.
In such cases and as of v1.4 RediSearch can be used for generating alternatives to misspelled query terms. A misspelled term is a full text term (i.e., a word) that is:
- Not a stop word
- Not in the index
- At least 3 characters long
The alternatives for a misspelled term are generated from the corpus of already-indexed terms and, optionally, one or more custom dictionaries. Alternatives become spelling suggestions based on their respective Levenshtein distances (LD) from the misspelled term. Each spelling suggestion is given a normalized score based on its occurances in the index.
To obtain the spelling corrections for a query, refer to the documentation of the FT.SPELLCHECK command.
Custom dictionaries
A dictionary is a set of terms. Dictionaries can be added with terms, have terms deleted from them and have their entire contents dumped using the FT.DICTADD, FT.DICTDEL and FT.DICTDUMP commands, respectively.
Dictionaries can be used to modify the behavior of RediSearch's query spelling correction, by including or excluding their contents from potential spelling correction suggestions.
When used for term inclusion, the terms in a dictionary can be provided as spelling suggestions regardless their occurances (or lack of) in the index. Scores of suggestions from inclusion dictionaries are always 0.
Conversely, terms in an exlusion dictionary will never be returned as spelling alternatives.
9.3.7.14 - Phonetic
Phonetic matching
Phonetic Matching
Phonetic matching, a.k.a "Jon or John", allows searching for terms based on their pronunciation. This capability can be a useful tool when searching for names of people.
Phonetic matching is based on the use of a phonetic algorithm. A phonetic algorithm transforms the input term to an approximate representation of its pronunciation. This allows indexing terms, and consequently searching, by their pronunciation.
As of v1.4 RediSearch provides phonetic matching via the definition of text fields with the PHONETIC attribute. This causes the terms in such fields to be indexed both by their textual value as well as their phonetic approximation.
Performing a search on PHONETIC fields will, by default, also return results for phonetically similar terms. This behavior can be controlled with the $phonetic query attribute.
Phonetic algorithms support
RediSearch currently supports a single phonetic algorithm, the Double Metaphone (DM). It uses the implementation at slacy/double-metaphone, which provides general support for Latin languages.
9.3.7.15 - Vector similarity
Details about vector fields and vector similarity queries
Vector Fields
Vector fields offers the ability to use vector similarity queries in the FT.SEARCH command.
Vector Similarity search capability offers the ability to load, index and query vectors stored as fields in a redis hashes.
At present, the key functionalites offered are:
Realtime vector indexing supporting 2 Indexing Methods -
FLAT - Brute-force index.
HNSW - Modified version of nmslib/hnswlib which is the author's implementation of Efficient and robust approximate nearest neighbor search using Hierarchical Navigable Small World graphs.
Realtime vector update/delete - triggering update of the index.
K nearest neighbors queries supporting 3 distance metrics to measure the degree of similarity between vectors. Metrics:
L2 - Euclidean distance between two vectors.
IP - Internal product of two vectors.
COSINE - Cosine similarity of two vectors.
Creating a vector field
Vector fields can be added to the schema in FT.CREATE with the following syntax:
FT.CREATE ... SCHEMA ... {field_name} VECTOR {algorithm} {count} [{attribute_name} {attribute_value} ...]
{algorithm}Must be specified and be a supported vector similarity index algorithm. the supported algorithms are:
FLAT - brute force algorithm.
HNSW - Hierarchical Navigable Small World algorithm.
The
algorithmattribute specify which algorithm to use when searching for the k most similar vectors in the index.{count}Specify the number of attributes for the index. Must be specified.
Notice that this attribute counts the total number of attributes passed for the index in the command, although algorithm parameters should be submitted as named arguments. For example:
FT.CREATE my_idx SCHEMA vec_field VECTOR FLAT 6 TYPE FLOAT32 DIM 128 DISTANCE_METRIC L2Here we pass 3 parameters for the index (TYPE, DIM, DISTANCE_METRIC), and
countcounts the total number of attributes (6).{attribute_name} {attribute_value}Algorithm attributes for the creation of the vector index. Every algorithm has its own mandatory and optional attributes.
Specific creation attributes per algorithm
FLAT
Mandatory parameters
TYPE - Vector type. Current supported type is
FLOAT32.DIM - Vector dimention. should be positive integer.
DISTANCE_METRIC - Supported distance metric. Currently one of {
L2,IP,COSINE}
Optional parameters
INITIAL_CAP - Initial vector capacity in the index. Effects memory allocation size of the index.
BLOCK_SIZE - block size to hold
BLOCK_SIZEamount of vectors in a contiguous array. This is useful when the index is dynamic with respect to addition and deletion. Defaults to 1048576 (1024*1024).
Example
FT.CREATE my_index1 SCHEMA vector_field VECTOR FLAT 10 TYPE FLOAT32 DIM 128 DISTANCE_METRIC L2 INITIAL_CAP 1000000 BLOCK_SIZE 1000
HNSW
Mandatory parameters
TYPE - Vector type. Current supported type is
FLOAT32.DIM - Vector dimention. should be positive integer.
DISTANCE_METRIC - Supported distance metric. Currently one of {
L2,IP,COSINE}
Optional parameters
INITIAL_CAP - Initial vector capacity in the index. Effects memory allocation size of the index.
M - Number the maximal allowed outgoing edges for each node in the graph in each layer. on layer zero the maximal number of outgoing edges will be
2M. Defaults to 16.EF_CONSTRUCTION - Number the maximal allowed potential outgoing edges candidates for each node in the graph, during the graph building. Defaults to 200.
EF_RUNTIME - The number of maximum top candidates to hold during the KNN search. Higher values of
EF_RUNTIMEwill lead to a more accurate results on the expense of a longer runtime. Defaults to 10.
Example
FT.CREATE my_index2 SCHEMA vector_field VECTOR HNSW 14 TYPE FLOAT32 DIM 128 DISTANCE_METRIC L2 INITIAL_CAP 1000000 M 40 EF_CONSTRUCTION 250 EF_RUNTIME 20
Querying vector fields
We allow using vector similarity queries in the FT.SEARCH "query" parameter. The syntax for vector similarity queries is *=>[{vector similarity query}] for running the query on an entire vector field, or {primary filter query}=>[{vector similarity query}] for running similarity query on the result of the primary filter query. To use a vector similarity query, you must specify the option DIALECT 2 in the command itself, or by setting the DEFAULT_DIALECT option to 2, either with the commandFT.CONFIG SET or when loading the redisearch module and passing it the argument DEFAULT_DIALECT 2.
As of version 2.4, we allow vector similarity to be used once in the query, and over the entire query filter.
Invalid example:
"(@title:Matrix)=>[KNN 10 @v $B] @year:[2020 2022]"Valid example:
"(@title:Matrix @year:[2020 2022])=>[KNN 10 @v $B]"
The {vector similarity query} part inside the square brackets needs to be in the following format:
KNN { number | $number_attribute } @{vector field} $blob_attribute [{vector query param name} {value|$value_attribute} [...]] [ AS {score field name | $score_field_name_attribute}]
Every "*_attribute" parameter should refer to an attribute in the PARAMS section.
{ number | $number_attribute }- The number of requested results ("K").@{vector field}-vector fieldshould be a name of a vector field in the index.$blob_attribute- An attribute that holds the query vector as blob. must be passed through thePARAMSsection.[{vector query param name} {value|$value_attribute} [...]]- An optional part for passing vector similarity query parameters. Parameters should come in key-value pairs and should be valid parameters for the query. see what runtime parameters are valid for each algorithm.[ AS {score field name | $score_field_name_attribute}]- An optional part for specifying a score field name, for later sorting by the similarity score. By default the score field name is "__{vector field}_score" and it can be used for sorting without usingAS {score field name}in the query.
Specific runtime attributes per algorithm
FLAT
Currently there are no runtime parameters available for FLAT indexes
HNSW
Optional parameters
- EF_RUNTIME -
The number of maximum top candidates to hold during the KNN search. Higher values of
EF_RUNTIMEwill lead to a more accurate results on the expense of a longer runtime. Defaults to theEF_RUNTIMEvalue passed on creation (which defaults to 10).
- EF_RUNTIME -
The number of maximum top candidates to hold during the KNN search. Higher values of
A few notes
Although specifing
Krequested results, the defaultLIMITin RediSearch is 10, so for getting all the returned results, make sure to specifyLIMIT 0 {K}in your command.By default, the resluts are sorted by their documents default RediSearch score. for getting the results sorted by similarity score, use
SORTBY {score field name}as explained earlier.
Examples for querying vector fields
FT.SEARCH idx "*=>[KNN 100 @vec $BLOB]" PARAMS 2 BLOB "\12\a9\f5\6c" DIALECT 2FT.SEARCH idx "*=>[KNN 100 @vec $BLOB]" PARAMS 2 BLOB "\12\a9\f5\6c" SORTBY __vec_score DIALECT 2FT.SEARCH idx "*=>[KNN $K @vec $BLOB EF_RUNTIME $EF]" PARAMS 6 BLOB "\12\a9\f5\6c" K 10 EF 150 DIALECT 2FT.SEARCH idx "*=>[KNN $K @vec $BLOB AS my_scores]" PARAMS 4 BLOB "\12\a9\f5\6c" K 10 SORTBY my_scores DIALECT 2FT.SEARCH idx "(@title:Dune @num:[2020 2022])=>[KNN $K @vec $BLOB AS my_scores]" PARAMS 4 BLOB "\12\a9\f5\6c" K 10 SORTBY my_scores DIALECT 2FT.SEARCH idx "(@type:{shirt} ~@color:{blue})=>[KNN $K @vec $BLOB AS my_scores]" PARAMS 4 BLOB "\12\a9\f5\6c" K 10 SORTBY my_scores DIALECT 2
9.3.8 - Design Documents
Design Documents details
9.3.8.1 - Internal design
Details about design choices and implementations
RediSearch internal design
RediSearch implements inverted indexes on top of Redis, but unlike previous implementations of Redis inverted indexes, it uses custom data encoding, that allows more memory and CPU efficient searches, and more advanced search features.
This document details some of the design choices and how these features are implemented.
Intro: Redis String DMA
The main feature that this module takes advantage of, is Redis Modules Strings DMA, or Direct Memory Access.
This feature is simple yet very powerful. It basically allows modules to allocate data on Redis string keys,then get a direct pointer to the data allocated by this key, without copying or serializing it.
This allows very fast access to huge amounts of memory, and since from the module's perspective, the string value is exposed simply as char *, it can be cast to any data structure.
You simply call RedisModule_StringTruncate to resize a memory chunk to the size needed, and RedisModule_StringDMA to get direct access to the memory in that key. See https://github.com/RedisLabs/RedisModulesSDK/blob/master/FUNCTIONS.md#redismodule_stringdma
We use this API in the module mainly to encode inverted indexes, and for other auxiliary data structures besides that.
A generic "Buffer" implementation using DMA strings can be found in redis_buffer.c. It automatically resizes the Redis string it uses as raw memory when the capacity needs to grow.
Inverted index encoding
An Inverted Index is the data structure at the heart of all search engines. The idea is simple - per each word or search term, we save a list of all the documents it appears in, and other data, such as term frequency, the offsets where the term appeared in the document, and more. Offsets are used for "exact match" type searches, or for ranking of results.
When a search is performed, we need to either traverse such an index, or intersect or union two or more indexes. Classic Redis implementations of search engines use sorted sets as inverted indexes. This works but has significant memory overhead, and also does not allow for encoding of offsets, as explained above.
RediSearch uses String DMA (see above) to efficiently encode inverted indexes. It combines Delta Encoding and Varint Encoding to encode entries, minimizing space used for indexes, while keeping decompression and traversal efficient.
For each "hit" (document/word entry), we encode:
- The document Id as a delta from the previous document.
- The term frequency, factored by the document's rank (see below)
- Flags, that can be used to filter only specific fields or other user-defined properties.
- An Offset Vector, of all the document offsets of the word.
!!! note Document ids as entered by the user are converted to internal incremental document ids, that allow delta encoding to be efficient, and let the inverted indexes be sorted by document id.
This allows for a single index hit entry to be encoded in as little as 6 bytes (Note that this is the best case. depending on the number of occurrences of the word in the document, this can get much higher).
To optimize searches, we keep two additional auxiliary data structures in different DMA string keys:
- Skip Index: We keep a table of the index offset of 1/50 of the index entries. This allows faster lookup when intersecting inverted indexes, as not the entire list must be traversed.
- Score Index: In simple single-word searches, there is no real need to traverse all the results, just the top N results the user is interested in. So we keep an auxiliary index of the top 20 or so entries for each term and use them when applicable.
Document and result ranking
Each document entered to the engine using FT.ADD, has a user assigned rank, between 0 and 1.0. This is used in combination with TF-IDF scoring of each word, to rank the results.
As an optimization, each inverted index hit is encoded with TF*Document_rank as its score, and only IDF is applied during searches. This may change in the future.
On top of that, in the case of intersection queries, we take the minimal distance between the terms in the query, and factor that into the ranking. The closest the terms are to each other, the better the result.
When searching, we keep a priority queue of the top N results requested, and eventually return them, sorted by rank.
Index Specs and field weights
When creating an "index" using FT.CREATE, the user specifies the fields to be indexed, and their respective weights. This can be used to give some document fields, like a title, more weight in ranking results.
For example:
FT.CREATE my_index title 10.0 body 1.0 url 2.0
Will create an index on fields named title, body and url, with scores of 10, 1 and 2 respectively.
When documents are indexed, the weights are taken from the saved Index Spec, that is stored in a special redis key, and only fields that are specified in this spec are indexed.
Document data storage
It is not mandatory to save the document data when indexing a document (specifying NOSAVE for FT.ADD will cause the document to be indexed but not saved).
If the user does save the document, we simply create a HASH key in Redis, containing all fields (including ones not indexed), and upon search, we simply perform an HGETALL query on each retrieved document, returning its entire data.
TODO: Document snippets should be implemented down the road,
Query Execution Engine
We use a chained-iterator based approach to query execution, similar to Python generators in concept.
We simply chain iterators that yield index hits. Those can be:
- Read Iterators, reading hits one by one from an inverted index. i.e.
hello - Intersect Iterators, aggregating two or more iterators, yielding only their intersection points. i.e.
hello AND world - Exact Intersect Iterators - same as above, but yielding results only if the intersection is an exact phrase. i.e.
hello NEAR world - Union Iterators - combining two or more iterators, and yielding a union of their hits. i.e.
hello OR world
These are combined based on the query as an execution plan that is evaluated lazily. For example:
hello ==> read("hello")
hello world ==> intersect( read("hello"), read("world") )
"hello world" ==> exact_intersect( read("hello"), read("world") )
"hello world" foo ==> intersect(
exact_intersect(
read("hello"),
read("world")
),
read("foo")
)
All these iterators are lazy evaluated, entry by entry, with constant memory overhead.
The "root" iterator is read by the query execution engine, and filtered for the top N results in it.
Numeric Filters
We support defining a field in the index schema as "NUMERIC", meaning you will be able to limit search results only to ones where the given value falls within a specific range. Filtering is done by adding FILTER predicates (more than one is supported) to your query. e.g.:
FT.SEARCH products "hd tv" FILTER price 100 (300
The filter syntax follows the ZRANGEBYSCORE semantics of Redis, meaning -inf and +inf are supported, and prepending ( to a number means an exclusive range.
As of release 0.6, the implementation uses a multi-level range tree, saving ranges at multiple resolutions, to allow efficient range scanning. Adding numeric filters can accelerate slow queries if the numeric range is small relative to the entire span of the filtered field. For example, a filter on dates focusing on a few days out of years of data, can speed a heavy query by an order of magnitude.
Auto-Complete and Fuzzy Suggestions
Another important feature for RediSearch is its auto-complete or suggest commands. It allows you to create dictionaries of weighted terms, and then query them for completion suggestions to a given user prefix. For example, if we put the term “lcd tv” into a dictionary, sending the prefix “lc” will return it as a result. The dictionary is modeled as a compressed trie (prefix tree) with weights, that is traversed to find the top suffixes of a prefix.
RediSearch also allows for Fuzzy Suggestions, meaning you can get suggestions to user prefixes even if the user has a typo in the prefix. This is enabled using a Levenshtein Automaton, allowing efficient searching of the dictionary for all terms within a maximal Levenshtein distance of a term or prefix. Then suggested are weighted based on both their original score and distance from the prefix typed by the user. Currently we support (for performance reasons) only suggestions where the prefix is up to 1 Levenshtein distance away from the typed prefix.
However, since searching for fuzzy prefixes, especially very short ones, will traverse an enormous amount of suggestions (in fact, fuzzy suggestions for any single letter will traverse the entire dictionary!), it is recommended to use this feature carefully, and only when considering the performance penalty it incurs. Since Redis is single threaded, blocking it for any amount of time means no other queries can be processed at that time.
To support unicode fuzzy matching, we use 16-bit "runes" inside the trie and not bytes. This increases memory consumption if the text is purely ASCII, but allows completion with the same level of support to all modern languages. This is done in the following manner:
- We assume all input to FT.SUG* commands is valid utf-8.
- We convert the input strings to 32-bit Unicode, optionally normalizing, case-folding and removing accents on the way. If the conversion fails it's because the input is not valid utf-8.
- We trim the 32-bit runes to 16-bit runes using the lower 16 bits. These can be used for insertion, deletion, and search.
- We convert the output of searches back to utf-8.
9.3.8.2 - Technical overview
Technical details of the internal design of indexing and querying with RediSearch
RediSearch Technical Overview
Abstract
RediSearch is a powerful text search and secondary indexing engine, built on top of Redis as a Redis Module.
Unlike other Redis search libraries, it does not use the internal data structures of Redis like sorted sets. Using its own highly optimized data structures and algorithms, it allows for advanced search features, high performance, and low memory footprint. It can perform simple text searches, as well as complex structured queries, filtering by numeric properties and geographical distances.
RediSearch supports continuous indexing with no performance degradation, maintaining concurrent loads of querying and indexing. This makes it ideal for searching frequently updated databases, without the need for batch indexing and service interrupts.
RediSearch's Enterprise version supports scaling the search engine across many servers, allowing it to easily grow to billions of documents on hundreds of servers.
All of this is done while taking advantage of Redis' robust architecture and infrastructure. Utilizing Redis' protocol, replication, persistence, clustering - RediSearch delivers a powerful yet simple to manage and maintain search and indexing engine, that can be used as a standalone database, or to augment existing Redis databases with advanced powerful indexing capabilities.
Main features
- Full-Text indexing of multiple fields in a document, including:
- Exact phrase matching.
- Stemming in many languages.
- Chinese tokenization support.
- Prefix queries.
- Optional, negative and union queries.
- Distributed search on billions of documents.
- Numeric property indexing.
- Geographical indexing and radius filters.
- Incremental indexing without performance loss.
- A structured query language for advanced queries:
- Unions and intersections
- Optional and negative queries
- Tag filtering
- Prefix matching
- A powerful auto-complete engine with fuzzy matching.
- Multiple scoring models and sorting by values.
- Concurrent low-latency insertion and updates of documents.
- Concurrent searches allowing long-running queries without blocking Redis.
- An extension mechanism allowing custom scoring models and query extension.
- Support for indexing existing Hash objects in Redis databases.
Indexing documents
In order to search effectively, RediSearch needs to know how to index documents. A document may have several fields, each with its own weight (e.g. a title is usually more important than the text itself. The engine can also use numeric or geographical fields for filtering. Hence, the first step is to create the index definition, which tells RediSearch how to treat the documents we will add. For example, to define an index of products, indexing their title, description, brand, and price, the index creation would look like:
FT.CREATE my_index SCHEMA
title TEXT WEIGHT 5
description TEXT
brand TEXT
PRICE numeric
When we will add a document to this index, for example:
FT.ADD my_index doc1 1.0 FIELDS
title "Acme 42 inch LCD TV"
description "42 inch brand new Full-HD tv with smart tv capabilities"
brand "Acme"
price 300
This tells RediSearch to take the document, break each field into its terms ("tokenization") and index it, by marking the index for each of the terms in the index as contained in this document. Thus, the product is added immediately to the index and can now be found in future searches
Searching
Now that we have added products to our index, searching is very simple:
FT.SEARCH products "full hd tv"
This will tell RediSearch to intersect the lists of documents for each term and return all documents containing the three terms. Of course, more complex queries can be performed, and the full syntax of the query language is detailed below.
Data structures
RediSearch uses its own custom data structures and uses Redis' native structures only for storing the actual document content (using Hash objects).
Using specialized data structures allows faster searches and more memory effective storage of index records, utilizing compression techniques like delta encoding.
These are the data structures RediSearch uses under the hood:
Index and document metadata
For each search index, there is a root data structure containing the schema, statistics, etc - but most importantly, little compact metadata about each document indexed.
Internally, inside the index, RediSearch uses delta encoded lists of numeric, incremental, 32-bit document ids. This means that the user given keys or ids for documents, need to be replaced with the internal ids on indexing, and back to the original ids on search.
For that, RediSearch saves two tables, mapping the two kinds of ids in two ways (one table uses a compact trie, the other is simply an array where the internal document ID is the array index). On top of that, for each document, we store its user given a priory score, some status bits, and an optional "payload" attached to the document by the user.
Accessing the document metadata table is an order of magnitude faster than accessing the hash object where the document is actually saved, so scoring functions that need to access metadata about the document can operate fast enough.
Inverted index
For each term appearing in at least one document, we keep an inverted index, basically a list of all the documents where this term appears. The list is compressed using delta coding, and the document ids are always incrementing.
When the user indexes the documents "foo", "bar" and "baz" for example, they are assigned incrementing ids, For example 1025, 1045, 1080. When encoding them into the index, we only encode the first ID, followed by the deltas between each entry and the previous one, in this case, 1025, 20, 35.
Using variable-width encoding, we can use one byte to express numbers under 255, two bytes for numbers between 256 and 16383 and so on. This can compress the index by up to 75%.
On top of the ids, we save the frequency of each term in each document, a bit mask representing the fields in which the term appeared in the document, and a list of the positions in which the term appeared.
The structure of the default search record is as follows. Usually, all the entries are one byte long:
+----------------+------------+------------------+-------------+------------------------+
| docId_delta | frequency | field mask | offsets len | offset, offset, .... |
| (1-4 bytes) | (1-2 bytes)| (1-16 bytes) | (1-2 bytes)| (1-2 bytes per offset) |
+----------------+------------+------------------+-------------+------------------------+
Optionally, we can choose not to save any one of those attributes besides the ID, degrading the features available to the engine.
Numeric index
Numeric properties are indexed in a special data structure that enables filtering by numeric ranges in an efficient way. One could view a numeric value as a term operating just like an inverted index. For example, all the products with the price $100 are in a specific list, that is intersected with the rest of the query (see Query Execution Engine).
However, in order to filer by a range of prices, we would have to intersect the query with all the distinct prices within that range - or perform a union query. If the range has many values in it, this becomes highly inefficient.
To avoid that, we group numeric entries with close values together, in a single "range node". These nodes are stored in binary range tree, that allows the engine to select the relevant nodes and union them together. Each entry in a range node contains a document Id, and the actual numeric value for that document. To further optimize, the tree uses an adaptive algorithm to try to merge as many nodes as possible within the same range node.
Tag index
Tag indexes are similar to full-text indexes, but use simpler tokenization and encoding in the index. The values in these fields cannot be accessed by general field-less search and can be used only with a special syntax.
The main differences between tag fields and full-text fields are:
The tokenization is simpler: The user can determine a separator (defaults to a comma) for multiple tags, and we only do whitespace trimming at the end of tags. Thus, tags can contain spaces, punctuation marks, accents, etc. The only two transformations we perform are lower-casing (for latin languages only as of now), and whitespace trimming.
Tags cannot be found from a general full-text search. If a document has a field called "tags" with the values "foo" and "bar", searching for foo or bar without a special tag modifier (see below) will not return this document.
The index is much simpler and more compressed: we only store document ids in the index, usually resulting in 1-2 bytes per index entry.
Geo index
Geo indexes utilize Redis' own geo-indexing capabilities. In query time, the geographical part of the query (a radius filter) is sent to Redis, returning only the ids of documents that are within that radius. Longitude and latitude should be passed as one string lon,lat. For example, 1.23,4.56.
Auto-complete
The auto-complete engine (see below for a fuller description) utilizes a compact trie or prefix tree, to encode terms and search them by prefix.
Query language
We support a simple syntax for complex queries, that can be combined together to express complex filtering and matching rules. The query is combined as a text string in the FT.SEARCH request and is parsed using a complex query parser.
- Multi-word phrases simply a list of tokens, e.g.
foo bar baz, and imply intersection (AND) of the terms. - Exact phrases are wrapped in quotes, e.g
"hello world". - OR Unions (i.e
word1 OR word2), are expressed with a pipe (|), e.g.hello|hallo|shalom|hola. - NOT negation (i.e.
word1 NOT word2) of expressions or sub-queries. e.g.hello -world. - Prefix matches (all terms starting with a prefix) are expressed with a
*following a 2-letter or longer prefix. - Selection of specific fields using the syntax
@field:hello world. - Numeric Range matches on numeric fields with the syntax
@field:[{min} {max}]. - Geo radius matches on geo fields with the syntax
@field:[{lon} {lat} {radius} {m|km|mi|ft}] - Tag field filters with the syntax
@field:{tag | tag | ...}. See the full documentation on tag fields. - Optional terms or clauses:
foo ~barmeans bar is optional but documents with bar in them will rank higher.
Complex queries example
Expressions can be combined together to express complex rules. For example, let's assume we have a database of products, where each entity has the fields title, brand, tags and price.
Expressing a generic search would be simply:
lcd tv
This would return documents containing these terms in any field. Limiting the search to specific fields (title only in this case) is expressed as:
@title:(lcd tv)
Numeric filters can be combined to filter price within a price range:
@title:(lcd tv)
@price:[100 500.2]
Multiple text fields can be accessed in different query clauses, for example, to select products of multiple brands:
@title:(lcd tv)
@brand:(sony | samsung | lg)
@price:[100 500.2]
Tag fields can be used to index multi-term properties without actual full-text tokenization:
@title:(lcd tv)
@brand:(sony | samsung | lg)
@tags:{42 inch | smart tv}
@price:[100 500.2]
And negative clauses can also be added, in this example to filter out plasma and CRT TVs:
@title:(lcd tv)
@brand:(sony | samsung | lg)
@tags:{42 inch | smart tv}
@price:[100 500.2]
-@tags:{plasma | crt}
Scoring model
RediSearch comes with a few very basic scoring functions to evaluate document relevance. They are all based on document scores and term frequency. This is regardless of the ability to use sortable fields (see below). Scoring functions are specified by adding the SCORER {scorer_name} argument to a search request.
If you prefer a custom scoring function, it is possible to add more functions using the Extension API.
These are the pre-bundled scoring functions available in RediSearch:
TFIDF (Default)
Basic TF-IDF scoring with document score and proximity boosting factored in.
TFIDF.DOCNORM Identical to the default TFIDF scorer, with one important distinction:
BM25
A variation on the basic TF-IDF scorer, see this Wikipedia article for more info.
DISMAX
A simple scorer that sums up the frequencies of the matched terms; in the case of union clauses, it will give the maximum value of those matches.
DOCSCORE
A scoring function that just returns the priory score of the document without applying any calculations to it. Since document scores can be updated, this can be useful if you'd like to use an external score and nothing further.
Sortable fields
It is possible to bypass the scoring function mechanism, and order search results by the value of different document properties (fields) directly - even if the sorting field is not used by the query. For example, you can search for first name and sort by the last name.
When creating the index with FT.CREATE, you can declare TEXT and NUMERIC properties to be SORTABLE. When a property is sortable, we can later decide to order the results by its values. For example, in the following schema:
> FT.CREATE users SCHEMA first_name TEXT last_name TEXT SORTABLE age NUMERIC SORTABLE
Would allow the following query:
FT.SEARCH users "john lennon" SORTBY age DESC
Result highlighting and summarisation
Highlighting allows users to only the relevant portions of document matching a search query returned as a result. This allows users to quickly see how a document relates to their query, with the search terms highlighted, usually in bold letters.
RediSearch implements high performance highlighting and summarization algorithms, with the following API:
FT.SEARCH ...
SUMMARIZE [FIELDS {num} {field}] [FRAGS {numFrags}] [LEN {fragLen}] [SEPARATOR {separator}]
HIGHLIGHT [FIELDS {num} {field}] [TAGS {openTag} {closeTag}]
Summarisation will fragment the text into smaller sized snippets; each snippet will contain the found term(s) and some additional surrounding context.
Highlighting will highlight the found term (and its variants) with a user-defined tag. This may be used to display the matched text in a different typeface using a markup language, or to otherwise make the text appear differently.
Auto-completion
Another important feature for RediSearch is its auto-complete engine. This allows users to create dictionaries of weighted terms, and then query them for completion suggestions to a given user prefix. Completions can have "payloads" - a user-provided piece of data that can be used for display. For example, completing the names of users, it is possible to add extra metadata about users to be displayed al
For example, if a user starts to put the term “lcd tv” into a dictionary, sending the prefix “lc” will return the full term as a result. The dictionary is modeled as a compact trie (prefix tree) with weights, which is traversed to find the top suffixes of a prefix.
RediSearch also allows for Fuzzy Suggestions, meaning you can get suggestions to prefixes even if the user makes a typo in their prefix. This is enabled using a Levenshtein Automaton, allowing efficient searching of the dictionary for all terms within a maximal Levenshtein Distance of a term or prefix. Then suggestions are weighted based on both their original score and their distance from the prefix typed by the user.
However, searching for fuzzy prefixes (especially very short ones) will traverse an enormous number of suggestions. In fact, fuzzy suggestions for any single letter will traverse the entire dictionary, so we recommend using this feature carefully, in consideration of the performance penalty it incurs.
RediSearch's auto-completer supports Unicode, allowing for fuzzy matches in non-latin languages as well.
Search engine internals
The Redis module API
RediSearch utilizes the Redis Module API and is loaded into Redis as an extension module.
Redis modules make possible to extend Redis functionality, implementing new Redis commands, data structures and capabilities with similar performance to native core Redis itself. Redis modules are dynamic libraries, that can be loaded into Redis at startup or using the MODULE LOAD command. Redis exports a C API, in the form of a single C header file called redismodule.h.
This means that while the logic of RediSearch and its algorithms are mostly independent, and it could, in theory, be ported quite easily to run as a stand-alone server - it still "stands on the shoulders" of giants and takes advantage of Redis as a robust infrastructure for a database server. Building on top of Redis means that by default the module operates:
- A high performance network protocol server.
- Robust replication.
- Highly durable persistence as snapshots of transaction logs.
- Cluster mode.
- etc.
Query execution engine
RediSearch uses a high-performance flexible query processing engine, that can evaluate very complex queries in real time.
The above query language is compiled into an execution plan that consists of a tree of "index iterators" or "filters". These can be any of:
- Numeric filter
- Tag filter
- Text filter
- Geo filter
- Intersection operation (combining 2 or more filters)
- Union operation (combining 2 or more filters)
- NOT operation (negating the results of an underlying filter)
- Optional operation (wrapping an underlying filter in an optional matching filter)
The query parser generates a tree of these filters. For example, a multi-word search would be resolved into an intersect operation of multiple text filters, each traversing an inverted index of a different term. Simple optimizations such as removing redundant layers in the tree are applied.
Each of the filters in the resulting tree evaluates one match at a time. This means that at any given moment, the query processor is busy evaluating and scoring one matching document. This means that very little memory allocation is done at run-time, resulting in higher performance.
The resulting matching documents are then fed to a post-processing chain of "result processors", responsible for scoring them, extracting the top-N results, loading the documents from storage and sending them to the client. That chain is dynamic as well, and changes based on the attributes of the query. For example, a query that only needs to return document ids, will not include a stage for loading documents from storage.
Concurrent updates and searches
While it is extremely fast and uses highly optimized data structures and algorithms, it was facing the same problem with regards to concurrency: Depending on the size of your data-set and the cardinality of search queries, they can take internally anywhere between a few microseconds, to hundreds of milliseconds to seconds in extreme cases. And when that happens - the entire Redis server that the engine is running on - is blocked.
Think, for example, of a full-text query intersecting the terms "hello" and "world", each with, let's say, a million entries, and half a million common intersection points. To do that in a millisecond, you would have to scan, intersect and rank each result in one nanosecond, which is impossible with current hardware. The same goes for indexing a 1000 word document. It blocks Redis entirely for that duration.
RediSearch utilizes the Redis Module API's concurrency features to avoid stalling the server for long periods of time. The idea is simple - while Redis in itself still remains single-threaded, a module can run many threads - and any one of them can acquire the Global Lock when it needs to access Redis data, operate on it, and release it.
We still cannot really query Redis in parallel - only one thread can acquire the lock, including the Redis main thread - but we can make sure that a long-running query will give other queries time to properly run by yielding this lock from time to time.
To allow concurrency, we adopted the following design:
RediSearch has a thread pool for running concurrent search queries.
When a search request arrives, it gets to the handler, gets parsed on the main thread, and a request object is passed to the thread pool via a queue.
The thread pool runs a query processing function in its own thread.
The function locks the Redis Global lock and starts executing the query.
Since the search execution is basically an iterator running in a cycle, we simply sample the elapsed time every several iterations (sampling on each iteration would slow things down as it has a cost of its own).
If enough time has elapsed, the query processor releases the Global Lock, and immediately tries to acquire it again. When the lock is released, the kernel will schedule another thread to run - be it Redis' main thread, or another query thread.
When the lock is acquired again - we reopen all Redis resources we were holding before releasing the lock (keys might have been deleted while the thread has been "sleeping") and continue work from the previous state.
Thus the operating system's scheduler makes sure all query threads get CPU time to run. While one is running the rest wait idly, but since execution is yielded about 5,000 times a second, it creates the effect of concurrency. Fast queries will finish in one go without yielding execution, slow ones will take many iterations to finish, but will allow other queries to run concurrently.
Index garbage collection
RediSearch is optimized for high write, update and delete throughput. One of the main design choices dictated by this goal is that deleting and updating documents do not actually delete anything from the index:
- Deletion simply marks the document deleted in a global document metadata table, using a single bit.
- Updating, on the other hand, marks the document as deleted, assigns it a new incremental document ID, and re-indexes the document under a new ID, without performing a comparison of the change.
What this means, is that index entries belonging to deleted documents are not removed from the index, and can be seen as "garbage". Over time, an index with many deletes and updates will contain mostly garbage - both slowing things down and consuming unnecessary memory.
To overcome this, RediSearch employs a background Garbage Collection mechanism: during normal operation of the index, a special thread randomly samples indexes, traverses them and looks for garbage. Index sections containing garbage are "cleaned" and memory is reclaimed. This is done in a none intrusive way, operating on very small amounts of data per scan, and utilizing Redis' concurrency mechanism (see above) to avoid interrupting the searches and indexing. The algorithm also tries to adapt to the state of the index, increasing the garbage collector's frequency if the index contains a lot of garbage, and decreasing it if it doesn't, to the point of hardly scanning if the index does not contain garbage.
Extension model
RediSearch supports an extension mechanism, much like Redis supports modules. The API is very minimal at the moment, and it does not yet support dynamic loading of extensions in run-time. Instead, extensions must be written in C (or a language that has an interface with C) and compiled into dynamic libraries that will be loaded at run-time.
There are two kinds of extension APIs at the moment:
- Query Expanders, whose role is to expand query tokens (i.e. stemmers).
- Scoring Functions, whose role is to rank search results in query time.
Extensions are compiled into dynamic libraries and loaded into RediSearch on initialization of the module. In fact, the mechanism is based on the code of Redis' own module system, albeit far simpler.
Scalable Distributed Search
While RediSearch is very fast and memory efficient, if an index is big enough, at some point it will be too slow or consume too much memory. Then, it will have to be scaled out and partitioned over several machines - meaning every machine will hold a small part of the complete search index.
Traditional clusters map different keys to different “shards” to achieve this. However, in search indexes, this approach is not practical. If we mapped each word’s index to a different shard, we would end up needing to intersect records from different servers for multi-term queries.
The way to address this challenge is to employ a technique called Index Partitioning, which is very simple at its core:
- The index is split across many machines/partitions by document ID.
- Every such partition has a complete index of all the documents mapped to it.
- We query all shards concurrently and merge the results from all of them into a single result.
To enable that, a new component is added to the cluster, called a Coordinator. When searching for documents, the coordinator receives the query, and sends it to N partitions, each holding a sub-index of 1/N documents. Since we’re only interested in the top K results of all partitions, each partition returns just its own top K results. We then merge the N lists of K elements and extract the top K elements from the merged list.
9.3.8.3 - Garbage collection
Details about garbage collection
Garbage Collection in RediSearch
1. The Need For GC
- Deleting documents is not really deleting them. It marks the document as deleted in the global document table, to make it fast.
- This means that basically an internal numeric id is no longer assigned to a document. When we traverse the index we check for deletion.
- Thus all inverted index entries belonging to this document id are just garbage.
- We do not want to go and explicitly delete them when deleting a document because it will make this operation very long and depending on the length of the document.
- On top of that, updating a document is basically deleting it, and then adding it again with a new incremental internal id. We do not do any diffing, and only append to the indexes, so the ids remain incremental, and the updates fast.
All of the above means that if we have a lot of updates and deletes, a large portion of our inverted index will become garbage - both slowing things down and consuming unnecessary memory.
Thus we want to optimize the index. But we also do not want to disturb the normal operation. This means that optimization or garbage collection should be a background process, that is non intrusive. It only needs to be faster than the deletion rate over a long enough period of time so that we don't create more garbage than we can collect.
2. Garbage Collecting a Single Term Index
A single term inverted index is consisted of an array of "blocks" each containing an encoded list of records - document id delta plus other data depending on the index encoding scheme. When some of these records refer to deleted documents, this is called garbage.
The algorithm is pretty simple:
- Create a reader and writer for each block
- Read each block's records one by one
- If no record is invalid, do nothing
- Once we found a garbage record, we advance the reader but not the writer.
- Once we found at least one garbage record, we encode the next records to the writer, recalculating the deltas.
Pseudo code:
foreach index_block as block:
reader = new_reader(block)
writer = new_write(block)
garbage = 0
while not reader.end():
record = reader.decode_next()
if record.is_valid():
if garbage != 0:
# Write the record at the writer's tip with a newly calculated delta
writer.write_record(record)
else:
writer.advance(record.length)
else:
garbage += record.length
2.1 Garbage Collection on Numeric Indexes
Numeric indexes are now a tree of inverted indexes with a special encoding of (docId delta,value). This means the same algorithm can be applied to them, only traversing each inverted index object in the tree.
3. FORK GC
Information about FORK GC can be found in this blog
Since v1.6 the FORK GC is the default GC policy and was proven very efficient both in cleaning the index and not reduce query and indexing performance (even for a very write internsive use-cases)
9.3.8.4 - Document Indexing
This document describes how documents are added to the index.
Components
Document- this contains the actual document and its fields.RSAddDocumentCtx- this is the per-document state that is used while it is being indexed. The state is discarded once completeForwardIndex- contains terms found in the document. The forward index is used to write theInvertedIndex(later on)InvertedIndex- an index mapping a term to occurrences within applicable documents.
Architecture
The indexing process begins by creating a new RSAddDocumentCtx and adding a document to it. Internally this is divided into several steps.
Submission. A DocumentContext is created, and is associated with a document (as received) from input. The submission process will also perform some preliminary caching.
Preprocessing
Once a document has been submitted, it is preprocessed. Preprocessing performs stateless processing on all document input fields. For text fields, this means tokenizing the document and creating a forward index. The preprocesors will store this information in per-field variables within the
AddDocumentCtx. This computed result is then written to the (persistent) index later on during the indexing phase.If the document is sufficiently large, the preprocessing is done in a separate thread, which allows concurrent preprocessing and also avoids blocking other threads. If the document is smaller, the preprocessing is done within the main thread, avoiding the overhead of additional context switching. The
SELF_EXC_THRESHOLD(macro) contains the threshold for 'sufficiently large'.Once the document is preprocessed, it is submitted to be indexed.
Indexing
Indexing proper consists of writing down the precomputed results of the preprocessing phase above. It is done in a single thread, and is in the form of a queue.
Because documents must be written to the index in the exact order of their document ID assignment, and because we must also yield to other potential indexing processes, we may end up in a situation where document IDs are written to the index out-of-order. In order to solve that, the order in which documents are actually written must be well-defined. If there is only one thread writing documents, then this thread will not need to worry about out-of-order IDs while writing.
Having a single background thread also helps optimize in several areas, as will be seen later on. The basic idea is that when there are a lot of documents queued for the indexing thread, the indexing thread may treat them as batch commands, greatly reducing the number of locks/unlocks of the GIL and the number of times term keys need to be opened and closed.
Skipping already indexed documents
The phases below may operate on more than one document at a time. When a document is fully indexed, it is marked as done. When the thread iterates over the queue it will only perform processing/indexing on items not yet marked as done.
Term Merging
Term merging, or forward index merging, is done when there is more than a single document in the queue. The forward index of each document in the queue is scanned, and a larger, 'master' forward index is constructed in its place. Each entry in the forward index contains a reference to the origin document as well as the normal offset/score/frequency information.
Creating a 'master' forward index avoids opening common term keys once per document.
If there is only one document within the queue, a 'master' forward index is not created.
Note that the internal type of the master forward index is not actually
ForwardIndex.Document ID assignment
At this point, the GIL is locked and every document in the queue is assigned a document ID. The assignment is done immediately before writing to the index so as to reduce the number of times the GIL is locked; thus, the GIL is locked only once - right before the index is written.
Writing to Indexes
With the GIL being locked, any pending index data is written to the indexes. This usually involves opening one or more Redis keys, and writing/copying computed data into those keys.
Once this is done, the reply for the given document is sent, and the
AddDocumentCtxfreed.
9.3.9 - Indexing JSON documents
Indexing and searching JSON documents
In addition to indexing Redis hashes, RediSearch also indexes JSON. To index JSON, you must use the RedisJSON module.
Prerequisites
What do you need to start indexing JSON documents?
- Redis 6.x or later
- RediSearch 2.2 or later
- RedisJSON 2.0 or later
How to index JSON documents
This section shows how to create an index.
You can now specify ON JSON to inform RediSearch that you want to index JSON documents.
For the SCHEMA, you can provide JSONPath expressions.
The result of each JSON Path expression is indexed and associated with a logical name (attribute).
This attribute (previously called field) is used in the query.
This is the basic syntax to index a JSON document:
FT.CREATE {index_name} ON JSON SCHEMA {json_path} AS {attribute} {type}
And here's a concrete example:
FT.CREATE userIdx ON JSON SCHEMA $.user.name AS name TEXT $.user.tag AS country TAG
Adding a JSON document to the index
As soon as the index is created, any pre-existing JSON document, or any new JSON document added or modified, is automatically indexed.
You can use any write command from the RedisJSON module (JSON.SET, JSON.ARRAPPEND, etc.).
This example uses the following JSON document:
{
"user": {
"name": "John Smith",
"tag": "foo,bar",
"hp": "1000",
"dmg": "150"
}
}
Use JSON.SET to store the document in the database:
JSON.SET myDoc $ '{"user":{"name":"John Smith","tag":"foo,bar","hp":1000, "dmg":150}}'
Because indexing is synchronous, the document will be visible on the index as soon as the JSON.SET command returns.
Any subsequent query matching the indexed content will return the document.
Searching
To search for documents, use the FT.SEARCH commands.
You can search any attribute mentioned in the SCHEMA.
Following our example, find the user called John:
FT.SEARCH userIdx '@name:(John)'
1) (integer) 1
2) "myDoc"
3) 1) "$"
2) "{\"user\":{\"name\":\"John Smith\",\"tag\":\"foo,bar\",\"hp\":1000,\"dmg\":150}}"
Field projection
FT.SEARCH returns the whole document by default.
You can also return only a specific attribute (name for example):
FT.SEARCH userIdx '@name:(John)' RETURN 1 name
1) (integer) 1
2) "myDoc"
3) 1) "name"
2) "\"John Smith\""
Projecting using JSON Path expressions
The RETURN parameter also accepts a JSON Path expression which lets you extract any part of the JSON document.
The following example returns the result of the JSON Path expression $.user.hp.
FT.SEARCH userIdx '@name:(John)' RETURN 1 $.user.hp
1) (integer) 1
2) "myDoc"
3) 1) "$.user.hp"
2) "1000"
Note that the property name is the JSON expression itself: 3) 1) "$.user.hp"
Using the AS option, you can also alias the returned property.
FT.SEARCH userIdx '@name:(John)' RETURN 3 $.user.hp AS hitpoints
1) (integer) 1
2) "myDoc"
3) 1) "hitpoints"
2) "1000"
Highlighting
You can highlight any attribute as soon as it is indexed using the TEXT type.
For FT.SEARCH, you have to explicitly set the attribute in the RETURN and the HIGHLIGHT parameters.
FT.SEARCH userIdx '@name:(John)' RETURN 1 name HIGHLIGHT FIELDS 1 name TAGS '<b>' '</b>'
1) (integer) 1
2) "myDoc"
3) 1) "name"
2) "\"<b>John</b> Smith\""
Aggregation with JSON Path expression
Aggregation is a powerful feature. You can use it to generate statistics or build facet queries. The LOAD parameter accepts JSON Path expressions. Any value (even not indexed) can be used in the pipeline.
This example loads two numeric values from the JSON document applying a simple operation.
FT.AGGREGATE userIdx '*' LOAD 6 $.user.hp AS hp $.user.dmg AS dmg APPLY '@hp-@dmg' AS points
1) (integer) 1
2) 1) "point"
2) "850"
Current indexing limitations
JSON arrays can only be indexed in a TAG field.
It is only possible to index an array of strings or booleans in a TAG field. Other types (numeric, geo, null) are not supported.
It is not possible to index JSON objects.
To be indexed, a JSONPath expression must return a single scalar value (string or number).
If the JSONPath expression returns an object, it will be ignored.
However it is possible to index the strings in separated attributes.
Given the following document:
{
"name": "Headquarters",
"address": [
"Suite 250",
"Mountain View"
],
"cp": "CA 94040"
}
Before you can index the array under the address key, you have to create two fields:
FT.CREATE orgIdx ON JSON SCHEMA $.address[0] AS a1 TEXT $.address[1] AS a2 TEXT
OK
You can now index the document:
JSON.SET org:1 $ '{"name": "Headquarters","address": ["Suite 250","Mountain View"],"cp": "CA 94040"}'
OK
You can now search in the address:
FT.SEARCH orgIdx "suite 250"
1) (integer) 1
2) "org:1"
3) 1) "$"
2) "{\"name\":\"Headquarters\",\"address\":[\"Suite 250\",\"Mountain View\"],\"cp\":\"CA 94040\"}"
Index JSON strings and numbers as TEXT and NUMERIC
- You can only index JSON strings as TEXT, TAG, or GEO (using the right syntax).
- You can only index JSON numbers as NUMERIC.
- Boolean and NULL values are ignored.
SORTABLE not supported on TAG
FT.CREATE orgIdx ON JSON SCHEMA $.cp[0] AS cp TAG SORTABLE
(error) On JSON, cannot set tag field to sortable - cp
With hashes, you can use SORTABLE (as a side effect) to improve the performance of FT.AGGREGATE on TAGs. This is possible because the value in the hash is a string, such as "foo,bar".
With JSON, you can index an array of strings. Because there is no valid single textual representation of those values, there is no way for RediSearch to know how to sort the result.
9.3.10 - Chinese
Chinese support
Chinese support in RediSearch
Support for adding documents in Chinese is available starting at version 0.99.0.
Chinese support allows Chinese documents to be added and tokenized using segmentation rather than simple tokenization using whitespace and/or punctuation.
Indexing a Chinese document is different than indexing a document in most other languages because of how tokens are extracted. While most languages can have their tokens distinguished by separation characters and whitespace, this is not common in Chinese.
Chinese tokenization is done by scanning the input text and checking every character or sequence of characters against a dictionary of predefined terms and determining the most likely (based on the surrounding terms and characters) match.
RediSearch makes use of the Friso Chinese tokenization library for this purpose. This is largely transparent to the user and often no additional configuration is required.
Example: Using Chinese in RediSearch
In pseudo-code:
FT.CREATE idx SCHEMA txt TEXT
FT.ADD idx docCn 1.0 LANGUAGE chinese FIELDS txt "Redis支持主从同步。数据可以从主服务器向任意数量的从服务器上同步,从服务器可以是关联其他从服务器的主服务器。这使得Redis可执行单层树复制。从盘可以有意无意的对数据进行写操作。由于完全实现了发布/订阅机制,使得从数据库在任何地方同步树时,可订阅一个频道并接收主服务器完整的消息发布记录。同步对读取操作的可扩展性和数据冗余很有帮助。[8]"
FT.SEARCH idx "数据" LANGUAGE chinese HIGHLIGHT SUMMARIZE
# Outputs:
# <b>数据</b>?... <b>数据</b>进行写操作。由于完全实现了发布... <b>数据</b>冗余很有帮助。[8...
Using the Python Client:
# -*- coding: utf-8 -*-
from redisearch.client import Client, Query
from redisearch import TextField
client = Client('idx')
try:
client.drop_index()
except:
pass
client.create_index([TextField('txt')])
# Add a document
client.add_document('docCn1',
txt='Redis支持主从同步。数据可以从主服务器向任意数量的从服务器上同步从服务器可以是关联其他从服务器的主服务器。这使得Redis可执行单层树复制。从盘可以有意无意的对数据进行写操作。由于完全实现了发布/订阅机制,使得从数据库在任何地方同步树时,可订阅一个频道并接收主服务器完整的消息发布记录。同步对读取操作的可扩展性和数据冗余很有帮助。[8]',
language='chinese')
print client.search(Query('数据').summarize().highlight().language('chinese')).docs[0].txt
Prints:
<b>数据</b>?... <b>数据</b>进行写操作。由于完全实现了发布... <b>数据</b>冗余很有帮助。[8...
Using custom dictionaries
If you wish to use a custom dictionary, you can do so at the module level when
loading the module. The FRISOINI setting can point to the location of a
friso.ini file which contains the relevant settings and paths to the dictionary
files.
Note that there is no "default" friso.ini file location. RediSearch comes with
its own friso.ini and dictionary files which are compiled into the module
binary at build-time.
9.4 - RedisJSON
JSON support for Redis
RedisJSON is a Redis module that provides JSON support in Redis. RedisJSON lets your store, update, and retrieve JSON values in Redis just as you would with any other Redis data type. RedisJSON also works seamlessly with RediSearch to let you index and query your JSON documents.
Primary features
- Full support for the JSON standard
- A JSONPath-like syntax for selecting elements inside documents
- Documents stored as binary data in a tree structure, allowing fast access to sub-elements
- Typed atomic operations for all JSON values types
Using RedisJSON
To learn how to use RedisJSON, it's best to start with the Redis CLI. The following examples assume that you're connected to a Redis server with RedisJSON enabled.
With redis-cli
To following along, start redis-cli.
The first RedisJSON command to try is JSON.SET, which sets a Redis key with a JSON value. All JSON values can be used, for example a string:
127.0.0.1:6379> JSON.SET foo $ '"bar"'
OK
127.0.0.1:6379> JSON.GET foo $
"[\"bar\"]"
127.0.0.1:6379> JSON.TYPE foo $
1) string
JSON.GET and JSON.TYPE do literally that regardless of the value's type, but you should really check out JSON.GET prettifying powers. Note how the commands are given the period character, i.e. .. This is the path to the value in the RedisJSON data type (in this case it just means the root). A couple more string operations:
127.0.0.1:6379> JSON.STRLEN foo $
1) (integer) 3
127.0.0.1:6379> JSON.STRAPPEND foo $ '"baz"'
1) (integer) 6
127.0.0.1:6379> JSON.GET foo $
"[\"barbaz\"]"
JSON.STRLEN tells you the length of the string, and you can append another string to it with JSON.STRAPPEND. Numbers can be incremented and multiplied:
127.0.0.1:6379> JSON.SET num $ 0
OK
127.0.0.1:6379> JSON.NUMINCRBY num $ 1
"[1]"
127.0.0.1:6379> JSON.NUMINCRBY num $ 1.5
"[2.5]"
127.0.0.1:6379> JSON.NUMINCRBY num $ -0.75
"[1.75]"
127.0.0.1:6379> JSON.NUMMULTBY num $ 24
"[42]"
Of course, a more interesting example would involve an array or maybe an object:
127.0.0.1:6379> JSON.SET amoreinterestingexample $ '[ true, { "answer": 42 }, null ]'
OK
127.0.0.1:6379> JSON.GET amoreinterestingexample $
"[[true,{\"answer\":42},null]]"
127.0.0.1:6379> JSON.GET amoreinterestingexample $[1].answer
"[42]"
127.0.0.1:6379> JSON.DEL amoreinterestingexample $[-1]
(integer) 1
127.0.0.1:6379> JSON.GET amoreinterestingexample $
"[[true,{\"answer\":42}]]"
The handy JSON.DEL command deletes anything you tell it to. Arrays can be manipulated with a dedicated subset of RedisJSON commands:
127.0.0.1:6379> JSON.SET arr $ []
OK
127.0.0.1:6379> JSON.ARRAPPEND arr $ 0
1) (integer) 1
127.0.0.1:6379> JSON.GET arr $
"[[0]]"
127.0.0.1:6379> JSON.ARRINSERT arr $ 0 -2 -1
1) (integer) 3
127.0.0.1:6379> JSON.GET arr $
"[[-2,-1,0]]"
127.0.0.1:6379> JSON.ARRTRIM arr $ 1 1
1) (integer) 1
127.0.0.1:6379> JSON.GET arr $
"[[-1]]"
127.0.0.1:6379> JSON.ARRPOP arr $
1) "-1"
127.0.0.1:6379> JSON.ARRPOP arr $
1) (nil)
And objects have their own commands too:
127.0.0.1:6379> JSON.SET obj $ '{"name":"Leonard Cohen","lastSeen":1478476800,"loggedOut": true}'
OK
127.0.0.1:6379> JSON.OBJLEN obj $
1) (integer) 3
127.0.0.1:6379> JSON.OBJKEYS obj $
1) 1) "name"
2) "lastSeen"
3) "loggedOut"
Python example
This code snippet shows how to use RedisJSON with raw Redis commands from Python with redis-py:
import redis
import json
data = {
'foo': 'bar'
}
r = redis.Redis()
r.json().set('doc', '$', json.dumps(data))
reply = json.loads(r.json().get('doc', '$')[0])
Building on Ubuntu 20.04
The following packages are required to successfully build on Ubuntu 20.04:
sudo apt install build-essential llvm cmake libclang1 libclang-dev cargo
Then, run make or cargo build --release in the repository directory
Loading the module to Redis
Requirements:
We recommend you have Redis load the module during startup by adding the following to your redis.conf file:
loadmodule /path/to/module/target/release/librejson.so
On Mac OS, if this module has been built as a dynamic library use:
loadmodule /path/to/module/target/release/librejson.dylib
In the above lines replace /path/to/module/ with the actual path to the module's library.
Alternatively, you can have Redis load the module using the following command line argument syntax:
~/$ redis-server --loadmodule ./target/release/librejson.so
Lastly, you can also use the [MODULE LOAD](/commands/module-load) command. Note, however, that MODULE LOAD is a dangerous command and may be blocked/deprecated in the future due to security considerations.
Once the module has been loaded successfully, the Redis log should have lines similar to:
...
1877:M 23 Dec 02:02:59.725 # <RedisJSON> JSON data type for Redis - v1.0.0 [encver 0]
1877:M 23 Dec 02:02:59.725 * Module 'RedisJSON' loaded from <redacted>/src/rejson.so
...
9.4.1 - Commands
Commands Overview
Overview
Supported JSON
RedisJSON aims to provide full support for ECMA-404 The JSON Data Interchange Standard.
The term JSON Value refers to any of the valid values. A Container is either a JSON Array or a JSON Object. A JSON Scalar is a JSON Number, a JSON String, or a literal (JSON False, JSON True, or JSON Null).
RedisJSON API
Details on module's commands can be filtered for a specific module or command, e.g., JSON.
The details also include the syntax for the commands, where:
- Command and subcommand names are in uppercase, for example
JSON.SETorINDENT - Optional arguments are enclosed in square brackets, for example
[index] - Additional optional arguments are indicated by three period characters, for example
...
Commands usually require a key's name as their first argument. The path is generally assumed to be the root if not specified.
The time complexity of the command does not include that of the path. The size - usually denoted N - of a value is:
- 1 for scalar values
- The sum of sizes of items in a container
9.4.2 - Search/Indexing JSON documents
Searching and indexing JSON documents
In addition to storing JSON documents, you can also index them using the RediSearch module. This enables full-text search capabilities and document retrieval based on their content. To use this feature, you must install two modules: RedisJSON and RediSearch.
Prerequisites
What do you need to start indexing JSON documents?
- Redis 6.x or later
- RedisJSON 2.0 or later
- RediSearch 2.2 or later
How to index JSON documents
This section shows how to create an index.
You can now specify ON JSON to inform RediSearch that you want to index JSON documents.
For the SCHEMA, you can provide JSONPath expressions.
The result of each JSON Path expression is indexed and associated with a logical name (attribute).
Use the attribute name in the query.
Here is the basic syntax for indexing a JSON document:
FT.CREATE {index_name} ON JSON SCHEMA {json_path} AS {attribute} {type}
And here's a concrete example:
FT.CREATE userIdx ON JSON SCHEMA $.user.name AS name TEXT $.user.tag AS country TAG
Note: The attribute is optional in FT.CREATE, but FT.SEARCH and FT.AGGREGATE queries require attribute modifiers. You should also avoid using JSON Path expressions, which are not fully supported by the query parser.
Adding a JSON document to the index
As soon as the index is created, any pre-existing JSON document or any new JSON document, added or modified, is automatically indexed.
You can use any write command from the RedisJSON module (JSON.SET, JSON.ARRAPPEND, etc.).
This example uses the following JSON document:
{
"user": {
"name": "John Smith",
"tag": "foo,bar",
"hp": "1000",
"dmg": "150"
}
}
Use JSON.SET to store the document in the database:
JSON.SET myDoc $ '{"user":{"name":"John Smith","tag":"foo,bar","hp":1000, "dmg":150}}'
Because indexing is synchronous, the document will be visible on the index as soon as the JSON.SET command returns.
Any subsequent query that matches the indexed content will return the document.
Searching
To search for documents, use the FT.SEARCH command.
You can search any attribute mentioned in the schema.
Following our example, find the user called John:
FT.SEARCH userIdx '@name:(John)'
1) (integer) 1
2) "myDoc"
3) 1) "$"
2) "{\"user\":{\"name\":\"John Smith\",\"tag\":\"foo,bar\",\"hp\":1000,\"dmg\":150}}"
Indexing JSON arrays with tags
It is possible to index scalar string and boolean values in JSON arrays by using the wildcard operator in the JSON Path. For example if you were indexing blog posts you might have a field called tags which is an array of tags that apply to the blog post.
{
"title":"Using RedisJson is Easy and Fun",
"tags":["redis","json","redisjson"]
}
You can apply an index to the tags field by specifying the JSON Path $.tags.* in your schema creation:
FT.CREATE blog-idx ON JSON PREFIX 1 Blog: SCHEMA $.tags.* AS tags TAG
You would then set a blog post as you would any other JSON document:
JSON.SET Blog:1 . '{"title":"Using RedisJson is Easy and Fun", "tags":["redis","json","redisjson"]}'
And finally you can search using the typical tag searching syntax:
127.0.0.1:6379> FT.SEARCH blog-idx "@tags:{redis}"
1) (integer) 1
2) "Blog:1"
3) 1) "$"
2) "{\"title\":\"Using RedisJson is Easy and Fun\",\"tags\":[\"redis\",\"json\",\"redisjson\"]}"
Field projection
FT.SEARCH returns the whole document by default.
You can also return only a specific attribute (name for example):
FT.SEARCH userIdx '@name:(John)' RETURN 1 name
1) (integer) 1
2) "myDoc"
3) 1) "name"
2) "\"John Smith\""
Projecting using JSON Path expressions
The RETURN parameter also accepts a JSON Path expression which lets you extract any part of the JSON document.
The following example returns the result of the JSON Path expression $.user.hp.
FT.SEARCH userIdx '@name:(John)' RETURN 1 $.user.hp
1) (integer) 1
2) "myDoc"
3) 1) "$.user.hp"
2) "1000"
Note that the property name is the JSON expression itself: 3) 1) "$.user.hp"
Using the AS option, it is also possible to alias the returned property.
FT.SEARCH userIdx '@name:(John)' RETURN 3 $.user.hp AS hitpoints
1) (integer) 1
2) "myDoc"
3) 1) "hitpoints"
2) "1000"
Highlighting
You can highlight any attribute as soon as it is indexed using the TEXT type.
For FT.SEARCH, you have to explicitly set the attributes in the RETURN parameter and the HIGHLIGHT parameters.
FT.SEARCH userIdx '@name:(John)' RETURN 1 name HIGHLIGHT FIELDS 1 name TAGS '<b>' '</b>'
1) (integer) 1
2) "myDoc"
3) 1) "name"
2) "\"<b>John</b> Smith\""
Aggregation with JSON Path expression
Aggregation is a powerful feature. You can use it to generate statistics or build facet queries. The LOAD parameter accepts JSON Path expressions. Any value (even not indexed) can be used in the pipeline.
This example loads two numeric values from the JSON document applying a simple operation.
FT.AGGREGATE userIdx '*' LOAD 6 $.user.hp AS hp $.user.dmg AS dmg APPLY '@hp-@dmg' AS points
1) (integer) 1
2) 1) "hp"
2) "1000"
3) "dmg"
4) "150"
5) "points"
6) "850"
Current indexing limitations
JSON arrays can only be indexed in TAG identifiers.
It is only possible to index an array of strings or booleans in a TAG identifier. Other types (numeric, geo, null) are not supported.
It is not possible to index JSON objects.
To be indexed, a JSONPath expression must return a single scalar value (string or number).
If the JSONPath expression returns an object, it will be ignored.
However it is possible to index the strings in separated attributes.
Given the following document:
{
"name": "Headquarters",
"address": [
"Suite 250",
"Mountain View"
],
"cp": "CA 94040"
}
Before you can index the array under the address key, you have to create two fields:
FT.CREATE orgIdx ON JSON SCHEMA $.address[0] AS a1 TEXT $.address[1] AS a2 TEXT
OK
You can now index the document:
JSON.SET org:1 $ '{"name": "Headquarters","address": ["Suite 250","Mountain View"],"cp": "CA 94040"}'
OK
You can now search in the address:
FT.SEARCH orgIdx "suite 250"
1) (integer) 1
2) "org:1"
3) 1) "$"
2) "{\"name\":\"Headquarters\",\"address\":[\"Suite 250\",\"Mountain View\"],\"cp\":\"CA 94040\"}"
Index JSON strings and numbers as TEXT and NUMERIC
- You can only index JSON strings as TEXT, TAG, or GEO (using the correct syntax).
- You can only index JSON numbers as NUMERIC.
- JSON booleans can only be indexed as TAG.
- NULL values are ignored.
SORTABLE is not supported on TAG
FT.CREATE orgIdx ON JSON SCHEMA $.cp[0] AS cp TAG SORTABLE
(error) On JSON, cannot set tag field to sortable - cp
With hashes, you can use SORTABLE (as a side effect) to improve the performance of FT.AGGREGATE on TAGs. This is possible because the value in the hash is a string, such as "foo,bar".
With JSON, you can index an array of strings. Because there is no valid single textual representation of those values, there is no way for RediSearch to know how to sort the result.
9.4.3 - Path
RedisJSON JSONPath
Since no standard for path syntax exists, RedisJSON implements its own. RedisJSON's syntax is based on common best practices and intentionally resembles JSONPath.
RedisJSON currently supports two query syntaxes: JSONPath syntax and a legacy path syntax from the first version of RedisJSON.
RedisJSON decides which syntax to use depending on the first character of the path query. If the query starts with the character $, it uses JSONPath syntax. Otherwise, it defaults to legacy path syntax.
JSONPath support (RedisJSON v2)
RedisJSON 2.0 introduces JSONPath support. It follows the syntax described by Goessner in his article.
A JSONPath query can resolve to several locations in the JSON documents. In this case, the JSON commands apply the operation to every possible location. This is a major improvement over the legacy query, which only operates on the first path.
Notice that the structure of the command response often differs when using JSONPath. See the Commands page for more details.
The new syntax supports bracket notation, which allows the use of special characters like colon ":" or whitespace in key names.
Legacy Path syntax (RedisJSON v1)
The first version of RedisJSON had the following implementation. It is still supported in RedisJSON v2.
Paths always begin at the root of a RedisJSON value. The root is denoted by a period character (.). For paths that reference the root's children, it is optional to prefix the path with the root.
RedisJSON supports both dot notation and bracket notation for object key access. The following paths all refer to bar, which is a child of foo under the root:
.foo.barfoo["bar"]['foo']["bar"]
To access an array element, enclose its index within a pair of square brackets. The index is 0-based, with 0 being the first element of the array, 1 being the next element, and so on. You can use negative offsets to access elements starting from the end of the array. For example, -1 is the last element in the array, -2 is the second to last element, and so on.
JSON key names and path compatibility
By definition, a JSON key can be any valid JSON string. Paths, on the other hand, are traditionally based on JavaScript's (and Java's) variable naming conventions. Therefore, while it is possible to have RedisJSON store objects containing arbitrary key names, you can only access these keys via a path if they conform to these naming syntax rules:
- Names must begin with a letter, a dollar sign (
$), or an underscore (_) character - Names can contain letters, digits, dollar signs, and underscores
- Names are case-sensitive
Time complexity of path evaluation
The time complexity of searching (navigating to) an element in the path is calculated from:
- Child level - every level along the path adds an additional search
- Key search - O(N)†, where N is the number of keys in the parent object
- Array search - O(1)
This means that the overall time complexity of searching a path is O(N*M), where N is the depth and M is the number of parent object keys.
† while this is acceptable for objects where N is small, access can be optimized for larger objects. This optimization is planned for a future version.
9.4.4 - Client Libraries
List of RedisJSON client libraries
RedisJSON has several client libraries, written by the module authors and community members - abstracting the API in different programming languages.
While it is possible and simple to use the raw Redis commands API, in most cases it's easier to just use a client library abstracting it.
Currently available Libraries
| Project | Language | License | Author | Stars | Package |
|---|---|---|---|---|---|
| node-redis | Node.js | MIT | Redis | | npm |
| iorejson | Node.js | MIT | Evan Huang @evanhuang8 |  | npm |
| redis-om-node | Node | BSD-3-Clause | Redis | | npm |
| node_redis-rejson | Node.js | MIT | Kyle Davis @stockholmux |  | npm |
| redis-modules-sdk | Node.js | BSD-3-Clause | Dani Tseitlin @danitseitlin | | npm |
| Jedis | Java | MIT | Redis | | maven |
| JRedisJSON | Java | BSD-2-Clause | Redis |  | maven |
| redis-modules-java | Java | Apache-2.0 | Liming Deng @dengliming | | maven |
| redis-py | Python | MIT | Redis | | pypi |
| redis-om-spring | Java | BSD-3-Clause | Redis | | |
| redis-om-python | Python | BSD-3-Clause | Redis | | PyPi |
| go-rejson | Go | MIT | Nitish Malhotra @nitishm |  | |
| rejonson | Go | Apache-2.0 | Daniel Krom @KromDaniel |  | |
| rueidis | Go | Apache-2.0 | Rueian @rueian |  | |
| NReJSON | .NET | MIT/Apache-2.0 | Tommy Hanks @tombatron |  | nuget |
| redis-om-dotnet | .NET | BSD-3-Clause | Redis | | nuget |
| phpredis-json | PHP | MIT | Rafa Campoy @averias |  | composer |
| redislabs-rejson | PHP | MIT | Mehmet Korkmaz @mkorkmaz |  | composer |
| rejson-rb | Ruby | MIT | Pavan Vachhani @vachhanihpavan |  | rubygems |
9.4.5 - Performance
Performance benchmarks
To get an early sense of what RedisJSON is capable of, you can test it with redis-benchmark just like
any other Redis command. However, in order to have more control over the tests, we'll use a
a tool written in Go called ReJSONBenchmark that we expect to release in the near future.
The following figures were obtained from an AWS EC2 c4.8xlarge instance that ran both the Redis server as well the as the benchmarking tool. Connections to the server are via the networking stack. All tests are non-pipelined.
NOTE: The results below are measured using the preview version of RedisJSON, which is still very much unoptimized.
RedisJSON baseline
A smallish object
We test a JSON value that, while purely synthetic, is interesting. The test subject is /tests/files/pass-100.json, who weighs in at 380 bytes and is nested. We first test SETting it, then GETting it using several different paths:


A bigger array
Moving on to bigger values, we use the 1.4 kB array in /tests/files/pass-jsonsl-1.json:


A largish object
More of the same to wrap up, now we'll take on a behemoth of no less than 3.5 kB as given by /tests/files/pass-json-parser-0000.json:


Number operations
Last but not least, some adding and multiplying:


Baseline
To establish a baseline, we'll use the Redis PING command.
First, lets see what redis-benchmark reports:
~$ redis/src/redis-benchmark -n 1000000 ping
====== ping ======
1000000 requests completed in 7.11 seconds
50 parallel clients
3 bytes payload
keep alive: 1
99.99% <= 1 milliseconds
100.00% <= 1 milliseconds
140587.66 requests per second
ReJSONBenchmark's concurrency is configurable, so we'll test a few settings to find a good one. Here are the results, which indicate that 16 workers yield the best throughput:


Note how our benchmarking tool does slightly worse in PINGing - producing only 116K ops, compared to
redis-cli's 140K.
The empty string
Another RedisJSON benchmark is that of setting and getting an empty string - a value that's only two
bytes long (i.e. ""). Granted, that's not very useful, but it teaches us something about the basic
performance of the module:


Comparison vs. server-side Lua scripting
We compare RedisJSON's performance with Redis' embedded Lua engine. For this purpose, we use the Lua scripts at /benchmarks/lua. These scripts provide RedisJSON's GET and SET functionality on values stored in JSON or MessagePack formats. Each of the different operations (set root, get root, set path and get path) is executed with each "engine" on objects of varying sizes.
Setting and getting the root
Storing raw JSON performs best in this test, but that isn't really surprising as all it does is serve unprocessed strings. While you can and should use Redis for caching opaque data, and JSON "blobs" are just one example, this does not allow any updates other than these of the entire value.
A more meaningful comparison therefore is between RedisJSON and the MessagePack variant, since both process the incoming JSON value before actually storing it. While the rates and latencies of these two behave in a very similar way, the absolute measurements suggest that RedisJSON's performance may be further improved.


Setting and getting parts of objects
This test shows why RedisJSON exists. Not only does it outperform the Lua variants, it retains constant rates and latencies regardless the object's overall size. There's no magic here - RedisJSON keeps the value deserialized so that accessing parts of it is a relatively inexpensive operation. In deep contrast are both raw JSON as well as MessagePack, which require decoding the entire object before anything can be done with it (a process that becomes more expensive the larger the object is).


Even more charts
These charts are more of the same but independent for each file (value):


Raw results
The following are the raw results from the benchmark in CSV format.
RedisJSON results
title,concurrency,rate,average latency,50.00%-tile,90.00%-tile,95.00%-tile,99.00%-tile,99.50%-tile,100.00%-tile
[ping],1,22128.12,0.04,0.04,0.04,0.05,0.05,0.05,1.83
[ping],2,54641.13,0.04,0.03,0.05,0.05,0.06,0.07,2.14
[ping],4,76000.18,0.05,0.05,0.07,0.07,0.09,0.10,2.10
[ping],8,106750.99,0.07,0.07,0.10,0.11,0.14,0.16,2.99
[ping],12,111297.33,0.11,0.10,0.15,0.16,0.20,0.22,6.81
[ping],16,116292.19,0.14,0.13,0.19,0.21,0.27,0.33,7.50
[ping],20,110622.82,0.18,0.17,0.24,0.27,0.38,0.47,12.21
[ping],24,107468.51,0.22,0.20,0.31,0.38,0.58,0.71,13.86
[ping],28,102827.35,0.27,0.25,0.38,0.44,0.66,0.79,12.87
[ping],32,105733.51,0.30,0.28,0.42,0.50,0.79,0.97,10.56
[ping],36,102046.43,0.35,0.33,0.48,0.56,0.90,1.13,14.66
JSON.SET {key} . {empty string size: 2 B},16,80276.63,0.20,0.18,0.28,0.32,0.41,0.45,6.48
JSON.GET {key} .,16,92191.23,0.17,0.16,0.24,0.27,0.34,0.38,9.80
JSON.SET {key} . {pass-100.json size: 380 B},16,41512.77,0.38,0.35,0.50,0.62,0.81,0.86,9.56
JSON.GET {key} .,16,48374.10,0.33,0.29,0.47,0.56,0.72,0.79,9.36
JSON.GET {key} sclr,16,94801.23,0.17,0.15,0.24,0.27,0.35,0.39,13.21
JSON.SET {key} sclr 1,16,82032.08,0.19,0.18,0.27,0.31,0.40,0.44,8.97
JSON.GET {key} sub_doc,16,81633.51,0.19,0.18,0.27,0.32,0.43,0.49,9.88
JSON.GET {key} sub_doc.sclr,16,95052.35,0.17,0.15,0.24,0.27,0.35,0.39,7.39
JSON.GET {key} array_of_docs,16,68223.05,0.23,0.22,0.29,0.31,0.44,0.50,8.84
JSON.GET {key} array_of_docs[1],16,76390.57,0.21,0.19,0.30,0.34,0.44,0.49,9.99
JSON.GET {key} array_of_docs[1].sclr,16,90202.13,0.18,0.16,0.25,0.29,0.36,0.39,7.87
JSON.SET {key} . {pass-jsonsl-1.json size: 1.4 kB},16,16117.11,0.99,0.91,1.22,1.55,2.17,2.35,9.27
JSON.GET {key} .,16,15193.51,1.05,0.94,1.41,1.75,2.33,2.42,7.19
JSON.GET {key} [0],16,78198.90,0.20,0.19,0.29,0.33,0.42,0.47,10.87
"JSON.SET {key} [0] ""foo""",16,80156.90,0.20,0.18,0.28,0.32,0.40,0.44,12.03
JSON.GET {key} [7],16,99013.98,0.16,0.15,0.23,0.26,0.34,0.38,7.67
JSON.GET {key} [8].zero,16,90562.19,0.17,0.16,0.25,0.28,0.35,0.38,7.03
JSON.SET {key} . {pass-json-parser-0000.json size: 3.5 kB},16,14239.25,1.12,1.06,1.21,1.48,2.35,2.59,11.91
JSON.GET {key} .,16,8366.31,1.91,1.86,2.00,2.04,2.92,3.51,12.92
"JSON.GET {key} [""web-app""].servlet",16,9339.90,1.71,1.68,1.74,1.78,2.68,3.26,10.47
"JSON.GET {key} [""web-app""].servlet[0]",16,13374.88,1.19,1.07,1.54,1.95,2.69,2.82,12.15
"JSON.GET {key} [""web-app""].servlet[0][""servlet-name""]",16,81267.36,0.20,0.18,0.28,0.31,0.38,0.42,9.67
"JSON.SET {key} [""web-app""].servlet[0][""servlet-name""] ""bar""",16,79955.04,0.20,0.18,0.27,0.33,0.42,0.46,6.72
JSON.SET {key} . {pass-jsonsl.yahoo2-json size: 18 kB},16,3394.07,4.71,4.62,4.72,4.79,7.35,9.03,17.78
JSON.GET {key} .,16,891.46,17.92,17.33,17.56,20.12,31.77,42.87,66.64
JSON.SET {key} ResultSet.totalResultsAvailable 1,16,75513.03,0.21,0.19,0.30,0.34,0.42,0.46,9.21
JSON.GET {key} ResultSet.totalResultsAvailable,16,91202.84,0.17,0.16,0.24,0.28,0.35,0.38,5.30
JSON.SET {key} . {pass-jsonsl-yelp.json size: 40 kB},16,1624.86,9.84,9.67,9.86,9.94,15.86,19.36,31.94
JSON.GET {key} .,16,442.55,36.08,35.62,37.78,38.14,55.23,81.33,88.40
JSON.SET {key} message.code 1,16,77677.25,0.20,0.19,0.28,0.33,0.42,0.45,11.07
JSON.GET {key} message.code,16,89206.61,0.18,0.16,0.25,0.28,0.36,0.39,8.60
[JSON.SET num . 0],16,84498.21,0.19,0.17,0.26,0.30,0.39,0.43,8.08
[JSON.NUMINCRBY num . 1],16,78640.20,0.20,0.18,0.28,0.33,0.44,0.48,11.05
[JSON.NUMMULTBY num . 2],16,77170.85,0.21,0.19,0.28,0.33,0.43,0.47,6.85
Lua using cjson
json-set-root.lua empty string,16,86817.84,0.18,0.17,0.26,0.31,0.39,0.42,9.36
json-get-root.lua,16,90795.08,0.17,0.16,0.25,0.28,0.36,0.39,8.75
json-set-root.lua pass-100.json,16,84190.26,0.19,0.17,0.27,0.30,0.38,0.41,12.00
json-get-root.lua,16,87170.45,0.18,0.17,0.26,0.29,0.38,0.45,9.81
json-get-path.lua sclr,16,54556.80,0.29,0.28,0.35,0.38,0.57,0.64,7.53
json-set-path.lua sclr 1,16,35907.30,0.44,0.42,0.53,0.67,0.93,1.00,8.57
json-get-path.lua sub_doc,16,51158.84,0.31,0.30,0.36,0.39,0.50,0.62,7.22
json-get-path.lua sub_doc sclr,16,51054.47,0.31,0.29,0.39,0.47,0.66,0.74,7.43
json-get-path.lua array_of_docs,16,39103.77,0.41,0.37,0.57,0.68,0.87,0.94,8.02
json-get-path.lua array_of_docs 1,16,45811.31,0.35,0.32,0.45,0.56,0.77,0.83,8.17
json-get-path.lua array_of_docs 1 sclr,16,47346.83,0.34,0.31,0.44,0.54,0.72,0.79,8.07
json-set-root.lua pass-jsonsl-1.json,16,82100.90,0.19,0.18,0.28,0.31,0.39,0.43,12.43
json-get-root.lua,16,77922.14,0.20,0.18,0.30,0.34,0.66,0.86,8.71
json-get-path.lua 0,16,38162.83,0.42,0.40,0.49,0.59,0.88,0.96,6.16
"json-set-path.lua 0 ""foo""",16,21205.52,0.75,0.70,0.84,1.07,1.60,1.74,5.77
json-get-path.lua 7,16,37254.89,0.43,0.39,0.55,0.69,0.92,0.98,10.24
json-get-path.lua 8 zero,16,33772.43,0.47,0.43,0.63,0.77,1.01,1.09,7.89
json-set-root.lua pass-json-parser-0000.json,16,76314.18,0.21,0.19,0.29,0.33,0.41,0.44,8.16
json-get-root.lua,16,65177.87,0.24,0.21,0.35,0.42,0.89,1.01,9.02
json-get-path.lua web-app servlet,16,15938.62,1.00,0.88,1.45,1.71,2.11,2.20,8.07
json-get-path.lua web-app servlet 0,16,19469.27,0.82,0.78,0.90,1.07,1.67,1.84,7.59
json-get-path.lua web-app servlet 0 servlet-name,16,24694.26,0.65,0.63,0.71,0.74,1.07,1.31,8.60
"json-set-path.lua web-app servlet 0 servlet-name ""bar""",16,16555.74,0.96,0.92,1.05,1.25,1.98,2.20,9.08
json-set-root.lua pass-jsonsl-yahoo2.json,16,47544.65,0.33,0.31,0.41,0.47,0.59,0.64,10.52
json-get-root.lua,16,25369.92,0.63,0.57,0.91,1.05,1.37,1.56,9.95
json-set-path.lua ResultSet totalResultsAvailable 1,16,5077.32,3.15,3.09,3.20,3.24,5.12,6.26,14.98
json-get-path.lua ResultSet totalResultsAvailable,16,7652.56,2.09,2.05,2.13,2.17,3.23,3.95,9.65
json-set-root.lua pass-jsonsl-yelp.json,16,29575.20,0.54,0.52,0.64,0.75,0.94,1.00,12.66
json-get-root.lua,16,18424.29,0.87,0.84,1.25,1.40,1.82,1.95,7.35
json-set-path.lua message code 1,16,2251.07,7.10,6.98,7.14,7.22,11.00,12.79,21.14
json-get-path.lua message code,16,3380.72,4.73,4.44,5.03,6.82,10.28,11.06,14.93
Lua using cmsgpack
msgpack-set-root.lua empty string,16,82592.66,0.19,0.18,0.27,0.31,0.38,0.42,10.18
msgpack-get-root.lua,16,89561.41,0.18,0.16,0.25,0.29,0.37,0.40,9.52
msgpack-set-root.lua pass-100.json,16,44326.47,0.36,0.34,0.43,0.54,0.78,0.86,6.45
msgpack-get-root.lua,16,41036.58,0.39,0.36,0.51,0.62,0.84,0.91,7.21
msgpack-get-path.lua sclr,16,55845.56,0.28,0.26,0.36,0.44,0.64,0.70,11.29
msgpack-set-path.lua sclr 1,16,43608.26,0.37,0.34,0.47,0.58,0.78,0.85,10.27
msgpack-get-path.lua sub_doc,16,50153.07,0.32,0.29,0.41,0.50,0.69,0.75,8.56
msgpack-get-path.lua sub_doc sclr,16,54016.35,0.29,0.27,0.38,0.46,0.62,0.67,6.38
msgpack-get-path.lua array_of_docs,16,45394.79,0.35,0.32,0.45,0.56,0.78,0.85,11.88
msgpack-get-path.lua array_of_docs 1,16,48336.48,0.33,0.30,0.42,0.52,0.71,0.76,7.69
msgpack-get-path.lua array_of_docs 1 sclr,16,53689.41,0.30,0.27,0.38,0.46,0.64,0.69,11.16
msgpack-set-root.lua pass-jsonsl-1.json,16,28956.94,0.55,0.51,0.65,0.82,1.17,1.26,8.39
msgpack-get-root.lua,16,26045.44,0.61,0.58,0.68,0.83,1.28,1.42,8.56
"msgpack-set-path.lua 0 ""foo""",16,29813.56,0.53,0.49,0.67,0.83,1.15,1.22,6.82
msgpack-get-path.lua 0,16,44827.58,0.36,0.32,0.48,0.58,0.76,0.81,9.19
msgpack-get-path.lua 7,16,47529.14,0.33,0.31,0.42,0.53,0.73,0.79,7.47
msgpack-get-path.lua 8 zero,16,44442.72,0.36,0.33,0.45,0.56,0.77,0.85,8.11
msgpack-set-root.lua pass-json-parser-0000.json,16,19585.82,0.81,0.78,0.85,1.05,1.66,1.86,4.33
msgpack-get-root.lua,16,19014.08,0.84,0.73,1.23,1.45,1.76,1.84,13.52
msgpack-get-path.lua web-app servlet,16,18992.61,0.84,0.73,1.23,1.45,1.75,1.82,8.19
msgpack-get-path.lua web-app servlet 0,16,24328.78,0.66,0.64,0.73,0.77,1.15,1.34,8.81
msgpack-get-path.lua web-app servlet 0 servlet-name,16,31012.81,0.51,0.49,0.57,0.65,1.02,1.13,8.11
"msgpack-set-path.lua web-app servlet 0 servlet-name ""bar""",16,20388.54,0.78,0.73,0.88,1.08,1.63,1.78,7.22
msgpack-set-root.lua pass-jsonsl-yahoo2.json,16,5597.60,2.85,2.81,2.89,2.94,4.57,5.59,10.19
msgpack-get-root.lua,16,6585.01,2.43,2.39,2.52,2.66,3.76,4.80,10.59
msgpack-set-path.lua ResultSet totalResultsAvailable 1,16,6666.95,2.40,2.35,2.43,2.47,3.78,4.59,12.08
msgpack-get-path.lua ResultSet totalResultsAvailable,16,10733.03,1.49,1.45,1.60,1.66,2.36,2.93,13.15
msgpack-set-root-lua pass-jsonsl-yelp.json,16,2291.53,6.97,6.87,7.01,7.12,10.54,12.89,21.75
msgpack-get-root.lua,16,2889.59,5.53,5.45,5.71,5.86,8.80,10.48,25.55
msgpack-set-path.lua message code 1,16,2847.85,5.61,5.44,5.56,6.01,10.58,11.90,16.91
msgpack-get-path.lua message code,16,5030.95,3.18,3.07,3.24,3.57,6.08,6.92,12.44
9.4.6 - RedisJSON RAM Usage
Debugging memory consumption
Every key in Redis takes memory and requires at least the amount of RAM to store the key name, as well as some per-key overhead that Redis uses. On top of that, the value in the key also requires RAM.
RedisJSON stores JSON values as binary data after deserializing them. This representation is often more
expensive, size-wize, than the serialized form. The RedisJSON data type uses at least 24 bytes (on
64-bit architectures) for every value, as can be seen by sampling an empty string with the
[JSON.DEBUG MEMORY](/commands/json.debug-memory/) command:
127.0.0.1:6379> JSON.SET emptystring . '""'
OK
127.0.0.1:6379> JSON.DEBUG MEMORY emptystring
(integer) 24
This RAM requirement is the same for all scalar values, but strings require additional space depending on their actual length. For example, a 3-character string will use 3 additional bytes:
127.0.0.1:6379> JSON.SET foo . '"bar"'
OK
127.0.0.1:6379> JSON.DEBUG MEMORY foo
(integer) 27
Empty containers take up 32 bytes to set up:
127.0.0.1:6379> JSON.SET arr . '[]'
OK
127.0.0.1:6379> JSON.DEBUG MEMORY arr
(integer) 32
127.0.0.1:6379> JSON.SET obj . '{}'
OK
127.0.0.1:6379> JSON.DEBUG MEMORY obj
(integer) 32
The actual size of a container is the sum of sizes of all items in it on top of its own overhead. To avoid expensive memory reallocations, containers' capacity is scaled by multiples of 2 until a treshold size is reached, from which they grow by fixed chunks.
A container with a single scalar is made up of 32 and 24 bytes, respectively:
127.0.0.1:6379> JSON.SET arr . '[""]'
OK
127.0.0.1:6379> JSON.DEBUG MEMORY arr
(integer) 56
A container with two scalars requires 40 bytes for the container (each pointer to an entry in the container is 8 bytes), and 2 * 24 bytes for the values themselves:
127.0.0.1:6379> JSON.SET arr . '["", ""]'
OK
127.0.0.1:6379> JSON.DEBUG MEMORY arr
(integer) 88
A 3-item (each 24 bytes) container will be allocated with capacity for 4 items, i.e. 56 bytes:
127.0.0.1:6379> JSON.SET arr . '["", "", ""]'
OK
127.0.0.1:6379> JSON.DEBUG MEMORY arr
(integer) 128
The next item will not require an allocation in the container, so usage will increase only by that scalar's requirement, but another value will scale the container again:
127.0.0.1:6379> JSON.SET arr . '["", "", "", ""]'
OK
127.0.0.1:6379> JSON.DEBUG MEMORY arr
(integer) 152
127.0.0.1:6379> JSON.SET arr . '["", "", "", "", ""]'
OK
127.0.0.1:6379> JSON.DEBUG MEMORY arr
(integer) 208
This table gives the size (in bytes) of a few of the test files on disk and when stored using RedisJSON. The MessagePack column is for reference purposes and reflects the length of the value when stored using MessagePack.
| File | Filesize | RedisJSON | MessagePack |
|---|---|---|---|
| /tests/files/pass-100.json | 380 | 1079 | 140 |
| /tests/files/pass-jsonsl-1.json | 1441 | 3666 | 753 |
| /tests/files/pass-json-parser-0000.json | 3468 | 7209 | 2393 |
| /tests/files/pass-jsonsl-yahoo2.json | 18446 | 37469 | 16869 |
| /tests/files/pass-jsonsl-yelp.json | 39491 | 75341 | 35469 |
Note: In the current version, deleting values from containers does not free the container's allocated memory.
9.4.7 - Developer notes
Notes on debugging, testing and documentation
Debugging
Compile after settting the environment variable DEBUG, e.g. export DEBUG=1, to include the
debugging information.
Testing
Python is required for RedisJSON's module test. Install it with apt-get install python. You'll also
need to have redis-py installed. The easiest way to get
it is using pip and running pip install redis.
The module's test can be run against an "embedded" disposable Redis instance, or against an instance
you provide to it. The "embedded" mode requires having the redis-server executable in your PATH.
To run the tests, run the following in the project's directory:
$ # use a disposable Redis instance for testing the module
$ make test
You can override the spawning of the embedded server by specifying a Redis port via the REDIS_PORT
environment variable, e.g.:
$ # use an existing local Redis instance for testing the module
$ REDIS_PORT=6379 make test
9.5 - RedisGraph
A Graph database built on Redis
RedisGraph is a graph database built on Redis. This graph database uses GraphBlas under the hood for its sparse adjacency matrix graph representation.
Primary features
- Based on the property graph model
- Nodes can have any number of labels
- Relationships have a relationship type
- Graphs represented as sparse adjacency matrices
- Cypher as the query language
- Cypher queries translate into linear algebra expressions
To see RedisGraph in action, explore our demos.
Docker
To quickly try out RedisGraph, launch an instance using docker:
docker run -p 6379:6379 -it --rm redislabs/redisgraph
Give it a try
After you load RedisGraph, you can interact with it using redis-cli.
Here we'll quickly create a small graph representing a subset of motorcycle riders and teams taking part in the MotoGP championship. Once created, we'll start querying our data.
With redis-cli
$ redis-cli
127.0.0.1:6379> GRAPH.QUERY MotoGP "CREATE (:Rider {name:'Valentino Rossi'})-[:rides]->(:Team {name:'Yamaha'}), (:Rider {name:'Dani Pedrosa'})-[:rides]->(:Team {name:'Honda'}), (:Rider {name:'Andrea Dovizioso'})-[:rides]->(:Team {name:'Ducati'})"
1) 1) "Labels added: 2"
2) "Nodes created: 6"
3) "Properties set: 6"
4) "Relationships created: 3"
5) "Cached execution: 0"
6) "Query internal execution time: 0.399000 milliseconds"
Now that our MotoGP graph is created, we can start asking questions. For example: Who's riding for team Yamaha?
127.0.0.1:6379> GRAPH.QUERY MotoGP "MATCH (r:Rider)-[:rides]->(t:Team) WHERE t.name = 'Yamaha' RETURN r.name, t.name"
1) 1) "r.name"
2) "t.name"
2) 1) 1) "Valentino Rossi"
2) "Yamaha"
3) 1) "Cached execution: 0"
2) "Query internal execution time: 0.625399 milliseconds"
How many riders represent team Ducati?
127.0.0.1:6379> GRAPH.QUERY MotoGP "MATCH (r:Rider)-[:rides]->(t:Team {name:'Ducati'}) RETURN count(r)"
1) 1) "count(r)"
2) 1) 1) (integer) 1
3) 1) "Cached execution: 0"
2) "Query internal execution time: 0.624435 milliseconds"
Building
Requirements:
The RedisGraph repository:
git clone --recurse-submodules -j8 https://github.com/RedisGraph/RedisGraph.gitOn Ubuntu Linux, run:
apt-get install build-essential cmake m4 automake peg libtool autoconfOn OS X, verify that
homebrewis installed and run:brew install cmake m4 automake peg libtool autoconf.- The version of Clang that ships with the OS X toolchain does not support OpenMP, which is a requirement for RedisGraph. One way to resolve this is to run
brew install gcc g++and follow the on-screen instructions to update the symbolic links. Note that this is a system-wide change - setting the environment variables forCCandCXXwill work if that is not an option.
- The version of Clang that ships with the OS X toolchain does not support OpenMP, which is a requirement for RedisGraph. One way to resolve this is to run
To build, run make in the project's directory.
Congratulations! You can find the compiled binary at: src/redisgraph.so
Installing RedisGraph
RedisGraph is part of Redis Stack. See the Redis Stack download page for installaton options.
Using RedisGraph
Before using RedisGraph, you should familiarize yourself with its commands and syntax as detailed in the command reference.
You can call RedisGraph's commands from any Redis client.
With redis-cli
$ redis-cli
127.0.0.1:6379> GRAPH.QUERY social "CREATE (:person {name: 'roi', age: 33, gender: 'male', status: 'married'})"
With any other client
You can interact with RedisGraph using your client's ability to send raw Redis commands. The exact method for doing that depends on your client of choice.
Python example
This code snippet shows how to use RedisGraph with raw Redis commands from Python using redis-py:
import redis
r = redis.Redis()
reply = r.graph("social").query("MATCH (r:Rider)-[:rides]->(t:Team {name:'Ducati'}) RETURN count(r)")
Client libraries
Language-specific clients have been written by the community and the RedisGraph team for 6 languages.
The full list and links can be found on the Clients page.
Data import
The RedisGraph team maintains the redisgraph-bulk-loader for importing new graphs from CSV files.
The data format used by this tool is described in the GRAPH.BULK implementation details.
Mailing List / Forum
Got questions? Feel free to ask at the RedisGraph forum.
License
Redis Source Available License Agreement - see LICENSE
9.5.1 - Commands
Commands Overview
Overview
RedisGraph Features
RedisGraph exposes graph database functionality within Redis using the openCypher query language. Its basic commands accept openCypher queries, while additional commands are exposed for configuration or metadata retrieval.
RedisGraph API
Command details can be retrieved by filtering for the module or for a specific command, e.g. [GRAPH.QUERY](/commands/?name=graph.query).
The details include the syntax for the commands, where:
- Command and subcommand names are in uppercase, for example
GRAPH.CONFIGorSET - Optional arguments are enclosed in square brackets, for example
[timeout] - Additional optional arguments are indicated by an ellipsis:
...
Most commands require a graph key's name as their first argument.
9.5.2 - RedisGraph Client Libraries
The full functionality of RedisGraph is available through
redis-cli and the Redis API. RedisInsight is a visual tool that provides capabilities to design, develop and optimize into a single easy-to-use environment, and has built-in support for RedisGraph. In addition there are severeal client libraries to improve abstractions and allow for a more natural experience in a project's native language. Additionally, these clients take advantage of some RedisGraph features that may reduce network throughput in some circumstances.Currently available Libraries
| Project | Language | License | Author | Stars |
|---|---|---|---|---|
| Jedis | Java | MIT | Redis | |
| redisgraph-py | Python | BSD | Redis |  |
| JRedisGraph | Java | BSD | Redis |  |
| redisgraph-rb | Ruby | BSD | Redis |  |
| redisgraph-go | Go | BSD | Redis |  |
| rueidis | Go | Apache 2.0 | Rueian | |
| node-redis | JavaScript | MIT | Redis | |
| ioredisgraph | JavaScript | ISC | Jonah |  |
| @hydre/rgraph | JavaScript | MIT | Sceat |  |
| redis-modules-sdk | TypeScript | BSD-3-Clause | Dani Tseitlin | |
| php-redis-graph | PHP | MIT | KJDev |  |
| redislabs-redisgraph-php | PHP | MIT | mkorkmaz |  |
| redisgraph_php | PHP | MIT | jpbourbon |  |
| redisgraph-ex | Elixir | MIT | crflynn |  |
| redisgraph-rs | RUST | MIT | malte-v |  |
| redis_graph | RUST | BSD | tompro |  |
| NRedisGraph | C# | BSD | tombatron |  |
| RedisGraphDotNet.Client | C# | BSD | Sgawrys |  |
| RedisGraph.jl | Julia | MIT | xyxel |  |
Implementing a client
Information on some of the tasks involved in writing a RedisGraph client can be found in the Client Specification.
9.5.3 - Run-time Configuration
RedisGraph supports a few run-time configuration options that can be defined when loading the module. In the future more options will be added.
Passing configuration options on module load
Passing configuration options is done by appending arguments after the --loadmodule argument when starting a server from the command line or after the loadmodule directive in a Redis config file. For example:
In redis.conf:
loadmodule ./redisgraph.so OPT1 VAL1
From the command line:
$ redis-server --loadmodule ./redisgraph.so OPT1 VAL1
Passing configuration options at run-time
RedisGraph exposes the GRAPH.CONFIG endpoint to allowing for the setting and retrieval of configurations at run-time.
To set a config, simply run:
GRAPH.CONFIG SET OPT1 VAL1
Similarly, the current configurations can be retrieved using the syntax:
GRAPH.CONFIG GET OPT1
GRAPH.CONFIG GET *
RedisGraph configuration options
| Configuration | Load-time | Run-time |
|---|---|---|
| THREAD_COUNT | :white_check_mark: | :white_large_square: |
| CACHE_SIZE | :white_check_mark: | :white_large_square: |
| OMP_THREAD_COUNT | :white_check_mark: | :white_large_square: |
| NODE_CREATION_BUFFER | :white_check_mark: | :white_large_square: |
| MAX_QUEUED_QUERIES | :white_check_mark: | :white_check_mark: |
| TIMEOUT | :white_check_mark: | :white_check_mark: |
| RESULTSET_SIZE | :white_check_mark: | :white_check_mark: |
| QUERY_MEM_CAPACITY | :white_check_mark: | :white_check_mark: |
THREAD_COUNT
The number of threads in RedisGraph's thread pool. This is equivalent to the maximum number of queries that can be processed concurrently.
Default
THREAD_COUNT defaults to the system's hardware threads (logical cores).
Example
$ redis-server --loadmodule ./redisgraph.so THREAD_COUNT 4
CACHE_SIZE
The max number of queries for RedisGraph to cache. When a new query is encountered and the cache is full, meaning the cache has reached the size of CACHE_SIZE, it will evict the least recently used (LRU) entry.
Default
CACHE_SIZE default value is 25.
Example
$ redis-server --loadmodule ./redisgraph.so CACHE_SIZE 10
OMP_THREAD_COUNT
The maximum number of threads that OpenMP may use for computation per query. These threads are used for parallelizing GraphBLAS computations, so may be considered to control concurrency within the execution of individual queries.
Default
OMP_THREAD_COUNT is defined by GraphBLAS by default.
Example
$ redis-server --loadmodule ./redisgraph.so OMP_THREAD_COUNT 1
NODE_CREATION_BUFFER
The node creation buffer is the number of new nodes that can be created without resizing matrices. For example, when set to 16,384, the matrices will have extra space for 16,384 nodes upon creation. Whenever the extra space is depleted, the matrices' size will increase by 16,384.
Reducing this value will reduce memory consumption, but cause performance degradation due to the increased frequency of matrix resizes.
Conversely, increasing it might improve performance for write-heavy workloads but will increase memory consumption.
If the passed argument was not a power of 2, it will be rounded to the next-greatest power of 2 to improve memory alignment.
MAX_QUEUED_QUERIES
Setting the maximum number of queued queries allows the server to reject incoming queries with the error message Max pending queries exceeded. This reduces the memory overhead of pending queries on an overloaded server and avoids congestion when the server processes its backlog of queries.
Default
MAX_QUEUED_QUERIES is effectively unlimited by default (config value of UINT64_MAX).
Example
$ redis-server --loadmodule ./redisgraph.so MAX_QUEUED_QUERIES 500
$ redis-cli GRAPH.CONFIG SET MAX_QUEUED_QUERIES 500
Default
NODE_CREATION_BUFFER is 16,384 by default.
Minimum
The minimum value for NODE_CREATION_BUFFER is 128. Values lower than this will be accepted as arguments, but will internally be converted to 128.
Example
$ redis-server --loadmodule ./redisgraph.so NODE_CREATION_BUFFER 200
TIMEOUT
Timeout is a flag that specifies the maximum runtime for read queries in milliseconds. This configuration will not be respected by write queries, to avoid leaving the graph in an inconsistent state.
Default
TIMEOUT is off by default (config value of 0).
Example
$ redis-server --loadmodule ./redisgraph.so TIMEOUT 1000
RESULTSET_SIZE
Result set size is a limit on the number of records that should be returned by any query. This can be a valuable safeguard against incurring a heavy IO load while running queries with unknown results.
Default
RESULTSET_SIZE is unlimited by default (negative config value).
Example
127.0.0.1:6379> GRAPH.CONFIG SET RESULTSET_SIZE 3
OK
127.0.0.1:6379> GRAPH.QUERY G "UNWIND range(1, 5) AS x RETURN x"
1) 1) "x"
2) 1) 1) (integer) 1
2) 1) (integer) 2
3) 1) (integer) 3
3) 1) "Cached execution: 0"
2) "Query internal execution time: 0.445790 milliseconds"
QUERY_MEM_CAPACITY
Setting the memory capacity of a query allows the server to kill queries that are consuming too much memory and return with the error message Query's mem consumption exceeded capacity. This helps to avoid scenarios when the server becomes unresponsive due to an unbounded query exhausting system resources.
The configuration argument is the maximum number of bytes that can be allocated by any single query.
Default
QUERY_MEM_CAPACITY is unlimited by default; this default can be restored by setting QUERY_MEM_CAPACITY to zero or a negative value.
Example
$ redis-server --loadmodule ./redisgraph.so QUERY_MEM_CAPACITY 1048576 // 1 megabyte limit
$ redis-cli GRAPH.CONFIG SET QUERY_MEM_CAPACITY 1048576
Query Configurations
The query timeout configuration may also be set per query in the form of additional arguments after the query string. This configuration is unset by default unless using a language-specific client, which may establish its own defaults.
Query Timeout
The query flag timeout allows the user to specify a timeout as described in TIMEOUT for a single query.
Example
Retrieve all paths in a graph with a timeout of 1000 milliseconds.
GRAPH.QUERY wikipedia "MATCH p=()-[*]->() RETURN p" timeout 1000
9.5.4 - RedisGraph: A High Performance In-Memory Graph Database
Abstract
Graph-based data is everywhere nowadays. Facebook, Google, Twitter and Pinterest are just a few who've realize the power behind relationship data and are utilizing it to its fullest. As a direct result, we see a rise both in interest for and the variety of graph data solutions.
With the introduction of Redis Modules we've recognized the great potential of introducing a graph data structure to the Redis arsenal, and developed RedisGraph. Bringing new graph capabilities to Redis through a native C implementation with an emphasis on performance, RedisGraph is now available as an open source project.
In this documentation, we'll discuss the internal design and features of RedisGraph and demonstrate its current capabilities.
RedisGraph At-a-Glance
RedisGraph is a graph database developed from scratch on top of Redis, using the new Redis Modules API to extend Redis with new commands and capabilities. Its main features include:
- Simple, fast indexing and querying
- Data stored in RAM using memory-efficient custom data structures
- On-disk persistence
- Tabular result sets
- Uses the popular graph query language openCypher
A Little Taste: RedisGraph in Action
Let’s look at some of the key concepts of RedisGraph using this example over the redis-cli tool:
Constructing a graph
It is common to represent entities as nodes within a graph. In this example, we'll create a small graph with both actors and movies as its entities, and an "act" relation that will connect actors to the movies they acted in. We'll use the graph.QUERY command to issue a CREATE query, which will introduce new entities and relations to our graph.
graph.QUERY <graph_id> 'CREATE (:<label> {<attribute_name>:<attribute_value>,...})'
graph.QUERY <graph_id> 'CREATE (<source_node_alias>)-[<relation> {<attribute_name>:<attribute_value>,...}]->(<dest_node_alias>)'
We'll construct our graph in one command:
graph.QUERY IMDB 'CREATE (aldis:actor {name: "Aldis Hodge", birth_year: 1986}),
(oshea:actor {name: "OShea Jackson", birth_year: 1991}),
(corey:actor {name: "Corey Hawkins", birth_year: 1988}),
(neil:actor {name: "Neil Brown", birth_year: 1980}),
(compton:movie {title: "Straight Outta Compton", genre: "Biography", votes: 127258, rating: 7.9, year: 2015}),
(neveregoback:movie {title: "Never Go Back", genre: "Action", votes: 15821, rating: 6.4, year: 2016}),
(aldis)-[:act]->(neveregoback),
(aldis)-[:act]->(compton),
(oshea)-[:act]->(compton),
(corey)-[:act]->(compton),
(neil)-[:act]->(compton)'
Querying the graph
RedisGraph exposes a subset of the openCypher graph language. Although only some language capabilities are supported, there's enough functionality to extract valuable insights from your graphs. To execute a query, we'll use the GRAPH.QUERY command:
GRAPH.QUERY <graph_id> <query>
Let's execute a number of queries against our movies graph.
Find the sum, max, min and avg age of the 'Straight Outta Compton' cast:
GRAPH.QUERY IMDB 'MATCH (a:actor)-[:act]->(m:movie {title:"Straight Outta Compton"})
RETURN m.title, SUM(2020-a.birth_year), MAX(2020-a.birth_year), MIN(2020-a.birth_year), AVG(2020-a.birth_year)'
RedisGraph will reply with:
1) 1) "m.title"
2) "SUM(2020-a.birth_year)"
3) "MAX(2020-a.birth_year)"
4) "MIN(2020-a.birth_year)"
5) "AVG(2020-a.birth_year)"
2) 1) 1) "Straight Outta Compton"
2) "135"
3) (integer) 40
4) (integer) 29
5) "33.75"
- The first row is our result-set header which names each column according to the return clause.
- The second row contains our query result.
Let's try another query. This time, we'll find out how many movies each actor played in.
GRAPH.QUERY IMDB "MATCH (actor)-[:act]->(movie) RETURN actor.name, COUNT(movie.title) AS movies_count ORDER BY
movies_count DESC"
1) "actor.name, movies_count"
2) "Aldis Hodge,2.000000"
3) "O'Shea Jackson,1.000000"
4) "Corey Hawkins,1.000000"
5) "Neil Brown,1.000000"
The Theory: Ideas behind RedisGraph
Representation
RedisGraph uses sparse adjacency matrices to represent graphs. As directed relationship connecting source node S to destination node T is recorded within an adjacency matrix M, by setting M's S,T entry to 1 (M[S,T]=1). As a rule of thumb, matrix rows represent source nodes while matrix columns represent destination nodes.
Every graph stored within RedisGraph has at least one matrix, referred to as THE adjacency matrix (relation-type agnostic). In addition, every relation with a type has its own dedicated matrix. Consider a graph with two relationships types:
- visits
- friend
The underlying graph data structure maintains three matrices:
- THE adjacency matrix - marking every connection within the graph
- visit matrix - marking visit connections
- friend matrix - marking friend connections
A 'visit' relationship E that connects node A to node B, sets THE adjacency matrix at position [A,B] to 1. Also, the visit matrix V sets position V[A,B] to 1.
To accommodate typed nodes, one additional matrix is allocated per label, and a label matrix is symmetric with ones along the main diagonal. Assume that node N was labeled as a Person, then the Person matrix P sets position P[N,N] to 1.
This design lets RedisGraph modify its graph easily, including:
- Adding new nodes simply extends matrices, adding additional rows and columns
- Adding new relationships by setting the relevant entries at the relevant matrices
- Removing relationships clears relevant entries
- Deleting nodes by deleting matrix row/column.
One of the main reasons we chose to represent our graphs as sparse matrices is graph traversal.
Traversal
Graph traversal is done by matrix multiplication. For example, if we wanted to find friends of friends for every node in the graph, this traversal can be expressed by FOF = F^2. F stands for the friendship relation matrix, and the result matrix FOF summarizes the traversal. The rows of the FOF represent source nodes and its columns represent friends who are two hops away: if FOF[i,j] = 1 then j is a friend of a friend of i.
Algebraic expression
When a search pattern such as (N0)-[A]->(N1)-[B]->(N2)<-[A]-(N3) is used as part of a query, we translate it into a set of matrix multiplications. For the given example, one possible expression would be: A * B * Transpose(A).
Note that matrix multiplication is an associative and distributive operation. This gives us the freedom to choose which terms we want to multiply first (preferring terms that will produce highly sparse intermediate matrices). It also enables concurrency when evaluating an expression, e.g. we could compute AZ and BY in parallel.
GraphBLAS
To perform all of these operations for sparse matrices, RedisGraph uses GraphBLAS - a standard API similar to BLAS. The current implementation uses the CSC sparse matrix format (compressed sparse columns), although the underlying format is subject to change.
Query language: openCypher
There are a number of graph query languages, so we didn't want to reinvent the wheel. We decided to implement a subset of one of the most popular graph query languages out there: openCypher While the openCypher project provides a parser for the language, we decided to create our own parser. We used Lex as a tokenizer and Lemon to generate a C target parser.
As mentioned earlier, only a subset of the language is currently supported, but we plan to continue adding new capabilities and extend RedisGraph's openCypher capabilities.
Runtime: query execution
Let's review the steps RedisGraph takes when executing a query.
Consider this query that finds all actors who played alongside Aldis Hodge and are over 30 years old:
MATCH (aldis::actor {name:"Aldis Hodge"})-[:act]->(m:movie)<-[:act]-(a:actor) WHERE a.age > 30 RETURN m.title, a.name
RedisGraph will:
- Parse the query, and build an abstract syntax tree (AST)
- Compose traversal algebraic expressions
- Build filter trees
- Construct an optimized query execution plan composed of:
- Filtered traverse
- Conditional traverse
- Filter
- Project
- Execute the plan
- Populate a result set with matching entity attributes
Filter tree
A query can filter out entities by creating predicates. In our example, we filter actors younger then 30.
It's possible to combine predicates using OR and AND keywords to form granular conditions.
During runtime, the WHERE clause is used to construct a filter tree, and each node within the tree is either a condition (e.g. A > B) or an operation (AND/OR). When finding candidate entities, they are passed through the tree and evaluated.
Benchmarks
Depending on the underlying hardware results may vary. However, inserting a new relationship is done in O(1). RedisGraph is able to create over 1 million nodes under half a second and form 500K relations within 0.3 of a second.
License
RedisGraph is published under Redis Source Available License Agreement.
Conclusion
Although RedisGraph is still a young project, it can be an alternative to other graph databases. With its subset of operations, you can use it to analyze and explore graph data. Being a Redis Module, this project is accessible from every Redis client without adjustments. It's our intention to keep on improving and extending RedisGraph with the help of the open source community.
9.5.4.1 - Technical specification for writing RedisGraph client libraries
By design, there is not a full standard for RedisGraph clients to adhere to. Areas such as pretty-print formatting, query validation, and transactional and multithreaded capabilities have no canonically correct behavior, and the implementer is free to choose the approach and complexity that suits them best. RedisGraph does, however, provide a compact result set format for clients that minimizes the amount of redundant data transmitted from the server. Implementers are encouraged to take advantage of this format, as it provides better performance and removes ambiguity from decoding certain data. This approach requires clients to be capable of issuing procedure calls to the server and performing a small amount of client-side caching.
Retrieving the compact result set
Appending the flag --compact to any query issued to the GRAPH.QUERY endpoint will cause the server to issue results in the compact format. Because we don't store connection-specific configurations, all queries should be issued with this flag.
GRAPH.QUERY demo "MATCH (a) RETURN a" --compact
Formatting differences in the compact result set
The result set has the same overall structure as described in the Result Set documentation.
Certain values are emitted as integer IDs rather than strings:
- Node labels
- Relationship types
- Property keys
Instructions on how to efficiently convert these IDs in the Procedure Calls section below.
Additionally, two enums are exposed:
ColumnType, which as of RedisGraph v2.1.0 will always be COLUMN_SCALAR. This enum is retained for backwards compatibility, and may be ignored by the client unless RedisGraph versions older than v2.1.0 must be supported.
ValueType indicates the data type (such as Node, integer, or string) of each returned value. Each value is emitted as a 2-array, with this enum in the first position and the actual value in the second. Each property on a graph entity also has a scalar as its value, so this construction is nested in each value of the properties array when a column contains a node or relationship.
Decoding the result set
Given the graph created by the query:
GRAPH.QUERY demo "CREATE (:plant {name: 'Tree'})-[:GROWS {season: 'Autumn'}]->(:fruit {name: 'Apple'})"
Let's formulate a query that returns 3 columns: nodes, relationships, and scalars, in that order.
Verbose (default):
127.0.0.1:6379> GRAPH.QUERY demo "MATCH (a)-[e]->(b) RETURN a, e, b.name"
1) 1) "a"
2) "e"
3) "b.name"
2) 1) 1) 1) 1) "id"
2) (integer) 0
2) 1) "labels"
2) 1) "plant"
3) 1) "properties"
2) 1) 1) "name"
2) "Tree"
2) 1) 1) "id"
2) (integer) 0
2) 1) "type"
2) "GROWS"
3) 1) "src_node"
2) (integer) 0
4) 1) "dest_node"
2) (integer) 1
5) 1) "properties"
2) 1) 1) "season"
2) "Autumn"
3) "Apple"
3) 1) "Query internal execution time: 1.326905 milliseconds"
Compact:
127.0.0.1:6379> GRAPH.QUERY demo "MATCH (a)-[e]->(b) RETURN a, e, b.name" --compact
1) 1) 1) (integer) 1
2) "a"
2) 1) (integer) 1
2) "e"
3) 1) (integer) 1
2) "b.name"
2) 1) 1) 1) (integer) 8
2) 1) (integer) 0
2) 1) (integer) 0
3) 1) 1) (integer) 0
2) (integer) 2
3) "Tree"
2) 1) (integer) 7
2) 1) (integer) 0
2) (integer) 0
3) (integer) 0
4) (integer) 1
5) 1) 1) (integer) 1
2) (integer) 2
3) "Autumn"
3) 1) (integer) 2
2) "Apple"
3) 1) "Query internal execution time: 1.085412 milliseconds"
These results are being parsed by redis-cli, which adds such visual cues as array indexing and indentation, as well as type hints like (integer). The actual data transmitted is formatted using the RESP protocol. All of the current RedisGraph clients rely upon a stable Redis client in the same language (such as redis-rb for Ruby) which handles RESP decoding.
Top-level array results
The result set above had 3 members in its top-level array:
1) Header row
2) Result rows
3) Query statistics
All queries that have a RETURN clause will have these 3 members. Queries that don't return results have only one member in the outermost array, the query statistics:
127.0.0.1:6379> GRAPH.QUERY demo "CREATE (:plant {name: 'Tree'})-[:GROWS {season: 'Autumn'}]->(:fruit {name: 'Apple'})" --compact
1) 1) "Labels added: 2"
2) "Nodes created: 2"
3) "Properties set: 3"
4) "Relationships created: 1"
5) "Query internal execution time: 1.972868 milliseconds"
Rather than introspecting on the query being emitted, the client implementation can check whether this array contains 1 or 3 elements to choose how to format data.
Reading the header row
Our sample query MATCH (a)-[e]->(b) RETURN a, e, b.name generated the header:
1) 1) (integer) 1
2) "a"
3) 1) (integer) 1
3) "e"
4) 1) (integer) 1
3) "b.name"
The 4 array members correspond, in order, to the 3 entities described in the RETURN clause.
Each is emitted as a 2-array:
1) ColumnType (enum)
2) column name (string)
The first element is the ColumnType enum, which as of RedisGraph v2.1.0 will always be COLUMN_SCALAR. This element is retained for backwards compatibility, and may be ignored by the client unless RedisGraph versions older than v2.1.0 must be supported.
Reading result rows
The entity representations in this section will closely resemble those found in Result Set Graph Entities.
Our query produced one row of results with 3 columns (as described by the header):
1) 1) 1) (integer) 8
2) 1) (integer) 0
2) 1) (integer) 0
3) 1) 1) (integer) 0
2) (integer) 2
3) "Tree"
2) 1) (integer) 7
2) 1) (integer) 0
2) (integer) 0
3) (integer) 0
4) (integer) 1
5) 1) 1) (integer) 1
2) (integer) 2
3) "Autumn"
3) 1) (integer) 2
2) "Apple"
Each element is emitted as a 2-array - [ValueType, value].
It is the client's responsibility to store the ValueType enum. RedisGraph guarantees that this enum may be extended in the future, but the existing values will not be altered.
The ValueType for the first entry is VALUE_NODE. The node representation contains 3 top-level elements:
- The node's internal ID.
- An array of all label IDs associated with the node (currently, each node can have either 0 or 1 labels, though this restriction may be lifted in the future).
- An array of all properties the node contains. Properties are represented as 3-arrays - [property key ID,
ValueType, value].
[
Node ID (integer),
[label ID (integer) X label count]
[[property key ID (integer), ValueType (enum), value (scalar)] X property count]
]
The ValueType for the first entry is VALUE_EDGE. The edge representation differs from the node representation in two respects:
- Each relation has exactly one type, rather than the 0+ labels a node may have.
- A relation is emitted with the IDs of its source and destination nodes.
As such, the complete representation is as follows:
- The relation's internal ID.
- The relationship type ID.
- The source node's internal ID.
- The destination node's internal ID.
- The key-value pairs of all properties the relation possesses.
[
Relation ID (integer),
type ID (integer),
source node ID (integer),
destination node ID (integer),
[[property key ID (integer), ValueType (enum), value (scalar)] X property count]
]
The ValueType for the third entry is VALUE_STRING, and the other element in the array is the actual value, "Apple".
Reading statistics
The final top-level member of the GRAPH.QUERY reply is the execution statistics. This element is identical between the compact and standard response formats.
The statistics always include query execution time, while any combination of the other elements may be included depending on how the graph was modified.
- "Labels added: (integer)"
- "Nodes created: (integer)"
- "Properties set: (integer)"
- "Nodes deleted: (integer)"
- "Relationships deleted: (integer)"
- "Relationships created: (integer)"
- "Query internal execution time: (float) milliseconds"
Procedure Calls
Property keys, node labels, and relationship types are all returned as IDs rather than strings in the compact format. For each of these 3 string-ID mappings, IDs start at 0 and increase monotonically.
As such, the client should store an string array for each of these 3 mappings, and print the appropriate string for the user by checking an array at position ID. If an ID greater than the array length is encountered, the local array should be updated with a procedure call.
These calls are described generally in the Procedures documentation.
To retrieve each full mapping, the appropriate calls are:
db.labels()
127.0.0.1:6379> GRAPH.QUERY demo "CALL db.labels()"
1) 1) "label"
2) 1) 1) "plant"
2) 1) "fruit"
3) 1) "Query internal execution time: 0.321513 milliseconds"
db.relationshipTypes()
127.0.0.1:6379> GRAPH.QUERY demo "CALL db.relationshipTypes()"
1) 1) "relationshipType"
2) 1) 1) "GROWS"
3) 1) "Query internal execution time: 0.429677 milliseconds"
db.propertyKeys()
127.0.0.1:6379> GRAPH.QUERY demo "CALL db.propertyKeys()"
1) 1) "propertyKey"
2) 1) 1) "name"
2) 1) "season"
3) 1) "Query internal execution time: 0.318940 milliseconds"
Because the cached values never become outdated, it is possible to just retrieve new values with slightly more complex constructions:
CALL db.propertyKeys() YIELD propertyKey RETURN propertyKey SKIP [cached_array_length]
Though the property calls are quite efficient regardless of whether this optimization is used.
As an example, the Python client checks its local array of labels to resolve every label ID as seen here.
In the case of an IndexError, it issues a procedure call to fully refresh its label cache as seen here.
Reference clients
All the logic described in this document has been implemented in most of the clients listed in Client Libraries. Among these, node-redis, redis-py and jedis are currently the most sophisticated.
9.5.4.2 - RedisGraph Result Set Structure
This document describes the format RedisGraph uses to print data when accessed through the
redis-cli utility. The language-specific clients retrieve data in a more succinct format, and provide their own functionality for printing result sets.Top-level members
Queries that return data emit an array with 3 top-level members:
- The header describing the returned records. This is an array which corresponds precisely in order and naming to the RETURN clause of the query.
- A nested array containing the actual data returned by the query.
- An array of metadata related to the query execution. This includes query runtime as well as data changes, such as the number of entities created, deleted, or modified by the query.
Result Set data types
A column in the result set can be populated with graph entities (nodes or relations) or scalar values.
Scalars
RedisGraph replies are formatted using the RESP protocol. The current RESP iteration provides fewer data types than RedisGraph supports internally, so displayed results are mapped as follows:
| RedisGraph type | Display format |
|---|---|
| Integer | Integer |
| NULL | NULL (nil) |
| String | String |
| Boolean | String ("true"/"false") |
| Double | String (15-digit precision) |
Graph Entities
When full entities are specified in a RETURN clause, all data relevant to each entity value is emitted within a nested array. Key-value pairs in the data, such as the combination of a property name and its corresponding value, are represented as 2-arrays.
Internal IDs are returned with nodes and relations, but these IDs are not immutable. After entities have been deleted, higher IDs may be migrated to the vacated lower IDs.
Nodes
The node representation contains 3 top-level elements:
- The node's internal ID.
- Any labels associated with the node.
- The key-value pairs of all properties the node possesses.
[
[“id”, ID (integer)]
[“labels”,
[label (string) X label count]
]
[properties”, [
[prop_key (string), prop_val (scalar)] X property count]
]
]
Relations
The relation representation contains 5 top-level elements:
- The relation's internal ID.
- The type associated with the relation.
- The source node's internal ID.
- The destination node's internal ID.
- The key-value pairs of all properties the relation possesses.
[
[“id”, ID (integer)]
[“type”, type (string)]
[“src_node”, source node ID (integer)]
[“dest_node”, destination node ID (integer)]
[properties”, [
[prop_key (string), prop_val (scalar)] X property count]
]
]
Collections
Arrays
When array values are specified in a RETURN clause, the representation in the response is the array string representation. This is done solely for better readability of the response. The string representation of an array which contains graph entities, will print only their ID. A node string representation is round braces around its ID, and edge string representation is brackets around the edge ID.
Paths
Returned path value is the string representation of an array with the path's nodes and edges, interleaved.
Example
Given the graph created by the command:
CREATE (:person {name:'Pam', age:27})-[:works {since: 2010}]->(:employer {name:'Dunder Mifflin'})""
We can run a query that returns a node, a relation, and a scalar value.
"MATCH (n1)-[r]->(n2) RETURN n1, r, n2.name"
1) 1) "n1"
2) "r"
3) "n2.name"
2) 1) 1) 1) 1) "id"
2) (integer) 0
2) 1) "labels"
2) 1) "person"
3) 1) "properties"
2) 1) 1) "age"
2) (integer) 27
2) 1) "name"
2) "Pam"
2) 1) 1) "id"
2) (integer) 0
2) 1) "type"
2) "works"
3) 1) "src_node"
2) (integer) 0
4) 1) "dest_node"
2) (integer) 1
5) 1) "properties"
2) 1) 1) "since"
2) (integer) 2010
3) "Dunder Mifflin"
3) 1) "Query internal execution time: 1.858986 milliseconds"
9.5.4.3 - Implementation details for the GRAPH.BULK endpoint
The RedisGraph bulk loader uses the GRAPH.BULK endpoint to build a new graph from 1 or more Redis queries. The bulk of these queries is binary data that is unpacked to create nodes, edges, and their properties. This endpoint could be used to write bespoke import tools for other data formats using the implementation details provided here.
Caveats
The main complicating factor in writing bulk importers is that Redis has a maximum string length of 512 megabytes and a default maximum query size of 1 gigabyte. As such, large imports must be written incrementally.
The RedisGraph team will do their best to ensure that future updates to this logic do not break current implementations, but cannot guarantee it.
Query Format
GRAPH.BULK [graph name] ["BEGIN"] [node count] [edge count] ([binary blob] * N)
Arguments
graph name
The name of the graph to be inserted.
BEGIN
The endpoint cannot be used to update existing graphs, only to create new ones. For this reason, the first query in a sequence of BULK commands should pass the string literal "BEGIN".
node count
Number of nodes being inserted in this query.
edge count
Number of edges being inserted in this query.
binary blob
A binary string of up to 512 megabytes that partially or completely describes a single label or relationship type.
Any number of these blobs may be provided in a query provided that Redis's 1-gigabyte query limit is not exceeded.
Module behavior
The endpoint will parse binary blobs as nodes until the number of created nodes matches the node count, then will parse subsequent blobs as edges. The import tool is expected to correctly provide these counts.
If the BEGIN token is found, the module will verify that the graph key is unused, and will emit an error if it is. Otherwise, the partially-constructed graph will be retrieved in order to resume building.
Binary Blob format
Node format
Nodes in node blobs do not need to specify their IDs. The ID of each node is an 8-byte unsigned integer corresponding to the node count at the time of its creation. (The first-created node has the ID of 0, the second has 1, and so forth.)
The blob consists of:
Edge format
The import tool is responsible for tracking the IDs of nodes used as edge endpoints.
The blob consists of:
1 or more:
- 8-byte unsigned integer representing source node ID
- 8-byte unsigned integer representing destination node ID
- property specification
Header specification
name- A null-terminated string representing the name of the label or relationship type.property count- A 4-byte unsigned integer representing the number of properties each entry in this blob possesses.property names- an ordered sequence ofproperty countnull-terminated strings, each representing the name for the property at that position.
Property specification
property type- A 1-byte integer corresponding to the TYPE enum:
BI_NULL = 0,
BI_BOOL = 1,
BI_DOUBLE = 2,
BI_STRING = 3,
BI_LONG = 4,
BI_ARRAY = 5,
property:- 1-byte true/false if type is boolean
- 8-byte double if type is double
- 8-byte integer if type is integer
- Null-terminated C string if type is string
- 8-byte array length followed by N values of this same type-property pair if type is array
Redis Reply
Redis will reply with a string of the format:
[N] nodes created, [M] edges created
9.5.5 - RedisGraph Data Types
RedisGraph supports a number of distinct data types, some of which can be persisted as property values and some of which are ephemeral.
Graph types
All graph types are either structural elements of the graph or projections thereof. None can be stored as a property value.
Nodes
Nodes are persistent graph elements that can be connected to each other via relationships.
They can have any number of labels that describe their general type. For example, a node representing London may be created with the Place and City labels and retrieved by queries using either or both of them.
Nodes have sets of properties to describe all of their salient characteristics. For example, our London node may have the property set: {name: 'London', capital: True, elevation: 11}.
When querying nodes, multiple labels can be specified. Only nodes that hold all specified labels will be matched:
$ redis-cli GRAPH.QUERY G "MATCH (n:Place:Continent) RETURN n"
Relationships
Relationships are persistent graph elements that connect one node to another.
They must have exactly one type that describes what they represent. For example, a RESIDENT_OF relationship may be used to connect a Person node to a City node.
Relationships are always directed, connecting a source node to its destination.
Like nodes, relationships have sets of properties to describe all of their salient characteristics.
When querying relationships, multiple types can be specified when separated by types. Relationships that hold any of the specified types will be matched:
$ redis-cli GRAPH.QUERY G "MATCH (:Person)-[r:RESIDENT_OF|:VISITOR_TO]->(:Place {name: 'London'}) RETURN r"
Paths
Paths are alternating sequences of nodes and edges, starting and ending with a node.
They are not structural elements in the graph, but can be created and returned by queries.
For example, the following query returns all paths of any length connecting the node London to the node New York:
$ redis-cli GRAPH.QUERY G "MATCH p=(:City {name: 'London'})-[*]->(:City {name: 'New York'}) RETURN p"
Scalar types
All scalar types may be provided by queries or stored as property values on node and relationship objects.
Strings
RedisGraph strings are Unicode character sequences. When using Redis with a TTY (such as invoking RedisGraph commands from the terminal via redis-cli), some code points may not be decoded, as in:
$ redis-cli GRAPH.QUERY G "RETURN '日本人' as stringval"
1) 1) "stringval"
2) 1) 1) "\xe6\x97\xa5\xe6\x9c\xac\xe4\xba\xba"
Output decoding can be forced using the --raw flag:
$ redis-cli --raw GRAPH.QUERY G "RETURN '日本人' as stringval"
stringval
日本人
Booleans
Boolean values are specified as true or false. Internally, they are stored as numerics, with 1 representing true and 0 representing false. As RedisGraph considers types in its comparisons, 1 is not considered equal to true:
$ redis-cli GRAPH.QUERY G "RETURN 1 = true"
1) 1) "1 = true"
2) 1) 1) "false"
Integers
All RedisGraph integers are treated as 64-bit signed integers.
Floating-point values
All RedisGraph floating-point values are treated as 64-bit signed doubles.
Geospatial Points
The Point data type is a set of latitude/longitude coordinates, stored within RedisGraph as a pair of 32-bit floats. It is instantiated using the point() function call.
Nulls
In RedisGraph, null is used to stand in for an unknown or missing value.
Since we cannot reason broadly about unknown values, null is an important part of RedisGraph's 3-valued truth table. For example, the comparison null = null will evaluate to null, as we lack adequate information about the compared values. Similarly, null in [1,2,3] evaluates to null, since the value we're looking up is unknown.
Unlike all other scalars, null cannot be stored as a property value.
Collection types
Arrays
Arrays are ordered lists of elements. They can be provided as literals or generated by functions like collect(). Nested arrays are supported, as are many functions that operate on arrays such as list comprehensions.
Arrays can be stored as property values provided that no array element is of an unserializable type, such as graph entities or null values.
Maps
Maps are order-agnostic collections of key-value pairs. If a key is a string literal, the map can be accessed using dot notation. If it is instead an expression that evaluates to a string literal, bracket notation can be used:
$ redis-cli GRAPH.QUERY G "WITH {key1: 'stringval', key2: 10} AS map RETURN map.key1, map['key' + 2]"
1) 1) "map.key1"
2) "map['key' + 2]"
2) 1) 1) "stringval"
2) (integer) 10
This aligns with way that the properties of nodes and relationships can be accessed.
Maps cannot be stored as property values.
Map projections
Maps can be constructed as projections using the syntax alias {.key1 [, ...n]}. This can provide a useful format for returning graph entities. For example, given a graph with the node (name: 'Jeff', age: 32), we can build the projection:
$ redis-cli GRAPH.QUERY G "MATCH (n) RETURN n {.name, .age} AS projection"
1) 1) "projection"
2) 1) 1) "{name: Jeff, age: 32}"
Function calls in map values
The values in maps and map projections are flexible, and can generally refer either to constants or computed values:
$ redis-cli GRAPH.QUERY G "RETURN {key1: 'constant', key2: rand(), key3: toLower('GENERATED') + '_string'} AS map"
1) 1) "map"
2) 1) 1) "{key1: constant, key2: 0.889656, key3: generated_string}"
The exception to this is aggregation functions, which must be computed in a preceding WITH clause instead of being invoked within the map. This restriction is intentional, as it helps to clearly disambiguate the aggregate function calls and the key values they are grouped by:
$ redis-cli GRAPH.QUERY G "
MATCH (follower:User)-[:FOLLOWS]->(u:User)
WITH u, COUNT(follower) AS count
RETURN u {.name, follower_count: count} AS user"
1) 1) "user"
2) 1) 1) "{name: Jeff, follower_count: 12}"
2) 1) "{name: Roi, follower_count: 18}"
9.5.6 - Cypher Coverage
RedisGraph implements a subset of the Cypher language, which is growing as development continues. This document is based on the Cypher Query Language Reference (version 9), available at OpenCypher Resources.
Patterns
Patterns are fully supported.
Types
Structural types
- Nodes
- Relationships
- Path variables (alternating sequence of nodes and relationships).
Composite types
Lists
Maps
Unsupported:
- Temporal types (Date, DateTime, LocalDateTime, Time, LocalTime, Duration)
Literal types
Numeric types (64-bit doubles and 64-bit signed integer representations)
String literals
Booleans
Unsupported:
- Hexadecimal and octal numerics
Other
NULL is supported as a representation of a missing or undefined value.
Comparability, equality, orderability, and equivalence
This is a somewhat nebulous area in Cypher itself, with a lot of edge cases. Broadly speaking, RedisGraph behaves as expected with string and numeric values. There are likely some behaviors involving the numerics NaN, -inf, inf, and possibly -0.0 that deviate from the Cypher standard. We do not support any of these properties at the type level, meaning nodes and relationships are not internally comparable.
Clauses
Reading Clauses
- MATCH
- OPTIONAL MATCH
Projecting Clauses
- RETURN
- AS
- WITH
- UNWIND
Reading sub-clauses
- WHERE
- ORDER BY
- SKIP
- LIMIT
Writing Clauses
CREATE
DELETE
- We actually implement DETACH DELETE, the distinction being that relationships invalidated by node deletions are automatically deleted.
SET
Unsupported:
- REMOVE (to modify properties)
- Properties can be deleted with SET [prop] = NULL.
Reading/Writing Clauses
- MERGE
- CALL (procedures)
- The currently-supported procedures can be found in the Procedures documentation.
Set Operations
- UNION
- UNION ALL
Functions
Scalar functions
id
labels
timestamp
type
coalesce
startNode
endNode
Unsupported:
- Some casting functions (toBoolean, toFloat)
- Temporal arithmetic functions
- Functions returning maps (properties)
Aggregating functions
- avg
- collect
- count
- max
- min
- percentileCont
- percentileDist
- stDev
- stDevP
- sum
List functions
- head
- range
- reverse
- size
- tail
Math functions - numeric
- abs
- ceil
- floor
- sign
- round
- rand
- toInteger
String functions
left
right
trim
lTrim
rTrim
reverse
substring
toLower
toUpper
toString
Unsupported:
- replace
- split
Predicate functions
- exists
- any
- all
- single
- none
Expression functions
- case...when
Geospatial functions
- distance
- point
Unsupported function classes
- Logarithmic math functions
- Trigonometric math functions
- User-defined functions
Operators
Mathematical operators
Multiplication, addition, subtraction, division, modulo
Unsupported:
- Exponentiation
String operators
String operators (STARTS WITH, ENDS WITH, CONTAINS) are supported.
Unsupported:
- Regex operator
Boolean operators
- AND
- OR
- NOT
- XOR
Parameters
Parameters may be specified to allow for more flexible query construction:
CYPHER name_param = "Niccolò Machiavelli" birth_year_param = 1469 MATCH (p:Person {name: $name_param, birth_year: $birth_year_param}) RETURN p
The example above shows the syntax used by redis-cli to set parameters, but
each RedisGraph client introduces a language-appropriate method for setting parameters,
and is described in their documentation.
Non-Cypher queries
- RedisGraph provides the
GRAPH.EXPLAINcommand to print the execution plan of a provided query. GRAPH.DELETEwill remove a graph and all Redis keys associated with it.
- We do not currently provide support for queries that retrieve schemas, though the LABELS and TYPE scalar functions may be used to get a graph overview.
9.5.7 - References
Quick start
Video - Building a Multi-dimensional Analytics Engine with RedisGraph
Slides - RedisGraph A Low Latency Graph DB. Pieter Cailliau.
Article - RedisGraph GraphBLAS Enabled Graph Database. Cailliau, Pieter & Davis, Tim & Gadepally, Vijay & Kepner, Jeremy & Lipman, Roi & Lovitz, Jeffrey & Ouaknine, Keren (IEEE IPDPS 2019 GrAPL workshop). (pdf)
Blog - What’s New in RedisGraph 1.2.0. Roi Lipman.
Blog - Investigating RedisGraph. alister
9.5.8 - Known limitations
Relationship uniqueness in patterns
When a relation in a match pattern is not referenced elsewhere in the query, RedisGraph will only verify that at least one matching relation exists (rather than operating on every matching relation).
In some queries, this will cause unexpected behaviors. Consider a graph with 2 nodes and 2 relations between them:
CREATE (a)-[:e {val: '1'}]->(b), (a)-[:e {val: '2'}]->(b)
Counting the number of explicit edges returns 2, as expected.
MATCH (a)-[e]->(b) RETURN COUNT(e)
However, if we count the nodes in this pattern without explicitly referencing the relation, we receive a value of 1.
MATCH (a)-[e]->(b) RETURN COUNT(b)
We are researching designs that resolve this problem without negatively impacting performance. As a temporary workaround, queries that must operate on every relation matching a pattern should explicitly refer to that relation's alias elsewhere in the query. Two options for this are:
MATCH (a)-[e]->(b) WHERE ID(e) >= 0 RETURN COUNT(b)
MATCH (a)-[e]->(b) RETURN COUNT(b), e.dummyval
LIMIT clause does not affect eager operations
When a WITH or RETURN clause introduces a LIMIT value, this value ought to be respected by all preceding operations.
For example, given the query:
UNWIND [1,2,3] AS value CREATE (a {property: value}) RETURN a LIMIT 1
One node should be created with its 'property' set to 1. RedisGraph will currently create three nodes, and only return the first.
This limitation affects all eager operations: CREATE, SET, DELETE, MERGE, and projections with aggregate functions.
Indexing limitations
One way in which RedisGraph will optimize queries is by introducing index scans when a filter is specified on an indexed label-property pair.
The current index implementation, however, does not handle not-equal (<>) filters.
To profile a query and see whether index optimizations have been introduced, use the GRAPH.EXPLAIN endpoint:
$ redis-cli GRAPH.EXPLAIN social "MATCH (p:person) WHERE p.id < 5 RETURN p"
1) "Results"
2) " Project"
3) " Index Scan | (p:person)"
9.6 - RedisTimeSeries
Ingest and query time series data with Redis
RedisTimeSeries is a Redis module that adds a time series data structure to Redis.
Features
- High volume inserts, low latency reads
- Query by start time and end-time
- Aggregated queries (min, max, avg, sum, range, count, first, last, STD.P, STD.S, Var.P, Var.S, twa) for any time bucket
- Configurable maximum retention period
- Downsampling / compaction for automatically updated aggregated timeseries
- Secondary indexing for time series entries. Each time series has labels (field value pairs) which will allows to query by labels
Client libraries
Official and community client libraries in Python, Java, JavaScript, Ruby, Go, C#, Rust, and PHP.
See the clients page for the full list.
Using with other metrics tools
In the RedisTimeSeries organization you can find projects that help you integrate RedisTimeSeries with other tools, including:
- Prometheus - read/write adapter to use RedisTimeSeries as backend db.
- Grafana 7.1+ - using the Redis Data Source.
- Telegraph
- StatsD, Graphite exports using graphite protocol.
Memory model
A time series is a linked list of memory chunks. Each chunk has a predefined size of samples. Each sample is a 128-bit tuple: 64 bits for the timestamp and 64 bits for the value.
Forum
Got questions? Feel free to ask at the RedisTimeSeries mailing list.
License
Redis Source Available License Agreement. See LICENSE
9.6.1 - Commands
Commands Overview
RedisTimeSeries API
Details on module's commands can be filtered for a specific module or command, e.g., [TS.CREATE](/commands/?group=timeseries&name=ts.create).
The details also include the syntax for the commands, where:
- Command and subcommand names are in uppercase, for example
TS.ADD - Optional arguments are enclosed in square brackets, for example
[index] - Additional optional arguments are indicated by three period characters, for example
...
Commands usually require a key's name as their first argument. The path is generally assumed to be the root if not specified.
9.6.2 - Quickstart
Quick Start Guide to RedisTimeSeries
Setup
You can either get RedisTimeSeries setup in the cloud, in a Docker container or on your own machine.
Redis Cloud
RedisTimeSeries is available on all Redis Cloud managed services, including a completely free managed database up to 30MB.
Docker
To quickly try out RedisTimeSeries, launch an instance using docker:
docker run -p 6379:6379 -it --rm redislabs/redistimeseries
Download and running binaries
First download the pre-compiled version from the Redis download center.
Next, run Redis with RedisTimeSeries:
$ redis-server --loadmodule /path/to/module/redistimeseries.so
Build and Run it yourself
You can also build and run RedisTimeSeries on your own machine.
Major Linux distributions as well as macOS are supported.
Requirements
First, clone the RedisTimeSeries repository from git:
git clone --recursive https://github.com/RedisTimeSeries/RedisTimeSeries.git
Then, to install required build artifacts, invoke the following:
cd RedisTimeSeries
make setup
Or you can install required dependencies manually listed in system-setup.py.
If make is not yet available, the following commands are equivalent:
./deps/readies/bin/getpy3
./system-setup.py
Note that system-setup.py will install various packages on your system using the native package manager and pip. This requires root permissions (i.e. sudo) on Linux.
If you prefer to avoid that, you can:
- Review system-setup.py and install packages manually,
- Utilize a Python virtual environment,
- Use Docker with the
--volumeoption to create an isolated build environment.
Build
make build
Binary artifacts are placed under the bin directory.
Run
In your redis-server run: loadmodule bin/redistimeseries.so
For more information about modules, go to the redis official documentation.
Give it a try with redis-cli
After you setup RedisTimeSeries, you can interact with it using redis-cli.
$ redis-cli
127.0.0.1:6379> TS.CREATE sensor1
OK
Creating a timeseries
A new timeseries can be created with the TS.CREATE command; for example, to create a timeseries named sensor1 run the following:
TS.CREATE sensor1
You can prevent your timeseries growing indefinitely by setting a maximum age for samples compared to the last event time (in milliseconds) with the RETENTION option. The default value for retention is 0, which means the series will not be trimmed.
TS.CREATE sensor1 RETENTION 2678400000
This will create a timeseries called sensor1 and trim it to values of up to one month.
Adding data points
For adding new data points to a timeseries we use the TS.ADD command:
TS.ADD key timestamp value
The timestamp argument is the UNIX timestamp of the sample in milliseconds and value is the numeric data value of the sample.
Example:
TS.ADD sensor1 1626434637914 26
To add a datapoint with the current timestamp you can use a * instead of a specific timestamp:
TS.ADD sensor1 * 26
You can append data points to multiple timeseries at the same time with the TS.MADD command:
TS.MADD key timestamp value [key timestamp value ...]
Deleting data points
Data points between two timestamps (inclusive) can be deleted with the TS.DEL command:
TS.DEL key fromTimestamp toTimestamp
Example:
TS.DEL sensor1 1000 2000
To delete a single timestamp, use it as both the "from" and "to" timestamp:
TS.DEL sensor1 1000 1000
Note: When a sample is deleted, the data in all downsampled timeseries will be recalculated for the specific bucket. If part of the bucket has already been removed though, because it's outside of the retention period, we won't be able to recalculate the full bucket, so in those cases we will refuse the delete operation.
Labels
Labels are key-value metadata we attach to data points, allowing us to group and filter. They can be either string or numeric values and are added to a timeseries on creation:
TS.CREATE sensor1 LABELS region east
Downsampling
Another useful feature of RedisTimeSeries is compacting data by creating a rule for downsampling (TS.CREATERULE). For example, if you have collected more than one billion data points in a day, you could aggregate the data by every minute in order to downsample it, thereby reducing the dataset size to 24 * 60 = 1,440 data points. You can choose one of the many available aggregation types in order to aggregate multiple data points from a certain minute into a single one. The currently supported aggregation types are: avg, sum, min, max, range, count, first, last, std.p, std.s, var.p, var.s and twa.
It's important to point out that there is no data rewriting on the original timeseries; the compaction happens in a new series, while the original one stays the same. In order to prevent the original timeseries from growing indefinitely, you can use the retention option, which will trim it down to a certain period of time.
NOTE: You need to create the destination (the compacted) timeseries before creating the rule.
TS.CREATERULE sourceKey destKey AGGREGATION aggregationType bucketDuration
Example:
TS.CREATE sensor1_compacted # Create the destination timeseries first
TS.CREATERULE sensor1 sensor1_compacted AGGREGATION avg 60000 # Create the rule
With this creation rule, datapoints added to the sensor1 timeseries will be grouped into buckets of 60 seconds (60000ms), averaged, and saved in the sensor1_compacted timeseries.
Filtering
RedisTimeSeries allows to filter by value, timestamp and by labels:
Filtering by label
You can retrieve datapoints from multiple timeseries in the same query, and the way to do this is by using label filters. For example:
TS.MRANGE - + FILTER area_id=32
This query will show data from all sensors (timeseries) that have a label of area_id with a value of 32. The results will be grouped by timeseries.
Or we can also use the TS.MGET command to get the last sample that matches the specific filter:
TS.MGET FILTER area_id=32
Filtering by value
We can filter by value across a single or multiple timeseries:
TS.RANGE sensor1 - + FILTER_BY_VALUE 25 30
This command will return all data points whose value sits between 25 and 30, inclusive.
To achieve the same filtering on multiple series we have to combine the filtering by value with filtering by label:
TS.MRANGE - + FILTER_BY_VALUE 20 30 FILTER region=east
Filtering by timestamp
To retrieve the datapoints for specific timestamps on one or multiple timeseries we can use the FILTER_BY_TS argument:
Filter on one timeseries:
TS.RANGE sensor1 - + FILTER_BY_TS 1626435230501 1626443276598
Filter on multiple timeseries:
TS.MRANGE - + FILTER_BY_TS 1626435230501 1626443276598 FILTER region=east
Aggregation
It's possible to combine values of one or more timeseries by leveraging aggregation functions:
TS.RANGE ... AGGREGATION aggType bucketDuration...
For example, to find the average temperature per hour in our sensor1 series we could run:
TS.RANGE sensor1 - + + AGGREGATION avg 3600000
To achieve the same across multiple sensors from the area with id of 32 we would run:
TS.MRANGE - + AGGREGATION avg 3600000 FILTER area_id=32
Aggregation bucket alignment
When doing aggregations, the aggregation buckets will be aligned to 0 as so:
TS.RANGE sensor3 10 70 + AGGREGATION min 25
Value: | (1000) (2000) (3000) (4000) (5000) (6000) (7000)
Timestamp: |-------|10|-------|20|-------|30|-------|40|-------|50|-------|60|-------|70|--->
Bucket(25ms): |_________________________||_________________________||___________________________|
V V V
min(1000, 2000)=1000 min(3000, 4000)=3000 min(5000, 6000, 7000)=5000
And we will get the following datapoints: 1000, 3000, 5000.
You can choose to align the buckets to the start or end of the queried interval as so:
TS.RANGE sensor3 10 70 + AGGREGATION min 25 ALIGN start
Value: | (1000) (2000) (3000) (4000) (5000) (6000) (7000)
Timestamp: |-------|10|-------|20|-------|30|-------|40|-------|50|-------|60|-------|70|--->
Bucket(25ms): |__________________________||_________________________||___________________________|
V V V
min(1000, 2000, 3000)=1000 min(4000, 5000)=4000 min(6000, 7000)=6000
The result array will contain the following datapoints: 1000, 4000 and 6000
Aggregation across timeseries
By default, results of multiple timeseries will be grouped by timeseries, but (since v1.6) you can use the GROUPBY and REDUCE options to group them by label and apply an additional aggregation.
To find minimum temperature per region, for example, we can run:
TS.MRANGE - + FILTER region=(east,west) GROUPBY region REDUCE min
9.6.3 - Configuration
Run-time configuration
RedisTimeSeries supports a few run-time configuration options that should be determined when loading the module. In time more options will be added.
Passing Configuration Options During Loading
In general, passing configuration options is done by appending arguments after the --loadmodule argument in the command line, loadmodule configuration directive in a Redis config file, or the MODULE LOAD command. For example:
In redis.conf:
loadmodule redistimeseries.so OPT1 OPT2
From redis-cli:
127.0.0.6379> MODULE load redistimeseries.so OPT1 OPT2
From command line:
$ redis-server --loadmodule ./redistimeseries.so OPT1 OPT2
RedisTimeSeries configuration options
COMPACTION_POLICY {policy}
Default compaction/downsampling rules for newly created key with TS.ADD.
Each rule is separated by a semicolon (;), the rule consists of several fields that are separated by a colon (:):
aggregation function - avg, sum, min, max, count, first, last
time bucket duration - number and the time representation (Example for 1 minute: 1M)
- m - millisecond
- M - minute
- s - seconds
- d - day
retention time - in milliseconds
Example:
max:1M:1h - Aggregate using max over 1 minute and retain the last 1 hour
Default
Example
$ redis-server --loadmodule ./redistimeseries.so COMPACTION_POLICY max:1m:1h;min:10s:5d:10d;last:5M:10ms;avg:2h:10d;avg:3d:100d
RETENTION_POLICY
Maximum age for samples compared to last event time (in milliseconds) per key, this configuration will set the default retention for newly created keys that do not have a an override.
Default
0
Example
$ redis-server --loadmodule ./redistimeseries.so RETENTION_POLICY 20
CHUNK_TYPE
Default chunk type for automatically created keys when COMPACTION_POLICY is configured.
Possible values: COMPRESSED, UNCOMPRESSED.
Default
COMPRESSED
Example
$ redis-server --loadmodule ./redistimeseries.so COMPACTION_POLICY max:1m:1h; CHUNK_TYPE COMPRESSED
NUM_THREADS
The maximal number of per-shard threads for cross-key queries when using cluster mode (TS.MRANGE, TS.MGET, and TS.QUERYINDEX). The value must be equal to or greater than 1. Note that increasing this value may either increase or decrease the performance!
Default
3
Example
$ redis-server --loadmodule ./redistimeseries.so NUM_THREADS 3
DUPLICATE_POLICY
Policy that will define handling of duplicate samples. The following are the possible policies:
BLOCK- an error will occur for any out of order sampleFIRST- ignore the new valueLAST- override with latest valueMIN- only override if the value is lower than the existing valueMAX- only override if the value is higher than the existing valueSUM- If a previous sample exists, add the new sample to it so that the updated value is equal to (previous + new). If no previous sample exists, set the updated value equal to the new value.
Precedence order
Since the duplication policy can be provided at different levels, the actual precedence of the used policy will be:
- TS.ADD input
- Key level policy
- Module configuration (AKA database-wide)
Default configuration
The default policy for database-wide is BLOCK, new and pre-existing keys will conform to database-wide default policy.
Example
$ redis-server --loadmodule ./redistimeseries.so DUPLICATE_POLICY LAST
9.6.4 - Development
Developing RedisTimeSeries
Developing RedisTimeSeries involves setting up the development environment (which can be either Linux-based or macOS-based), building RedisTimeSeries, running tests and benchmarks, and debugging both the RedisTimeSeries module and its tests.
Cloning the git repository
By invoking the following command, RedisTimeSeries module and its submodules are cloned:
git clone --recursive https://github.com/RedisTimeSeries/RedisTimeSeries.git
Working in an isolated environment
There are several reasons to develop in an isolated environment, like keeping your workstation clean, and developing for a different Linux distribution. The most general option for an isolated environment is a virtual machine (it's very easy to set one up using Vagrant). Docker is even a more agile solution, as it offers an almost instant solution:
ts=$(docker run -d -it -v $PWD:/build debian:bullseye bash)
docker exec -it $ts bash
Then, from within the container, cd /build and go on as usual.
In this mode, all installations remain in the scope of the Docker container.
Upon exiting the container, you can either re-invoke the container with the above docker exec or commit the state of the container to an image and re-invoke it on a later stage:
docker commit $ts ts1
docker stop $ts
ts=$(docker run -d -it -v $PWD:/build ts1 bash)
docker exec -it $ts bash
Installing prerequisites
To build and test RedisTimeSeries one needs to install several packages, depending on the underlying OS. Currently, we support the Ubuntu/Debian, CentOS, Fedora, and macOS.
If you have gnu make installed, you can execute
cd RedisTimeSeries
make setup
Alternatively, just invoke the following:
cd RedisTimeSeries
git submodule update --init --recursive
./deps/readies/bin/getpy3
./system-setup.py
Note that system-setup.py will install various packages on your system using the native package manager and pip. This requires root permissions (i.e. sudo) on Linux.
If you prefer to avoid that, you can:
- Review
system-setup.pyand install packages manually, - Use an isolated environment like explained above,
- Utilize a Python virtual environment, as Python installations known to be sensitive when not used in isolation.
Installing Redis
As a rule of thumb, you're better off running the latest Redis version.
If your OS has a Redis package, you can install it using the OS package manager.
Otherwise, you can invoke ./deps/readies/bin/getredis.
Getting help
make help provides a quick summary of the development features.
Building from source
make will build RedisTimeSeries.
Build artifacts are placed into bin/linux-x64-release (or similar, according to your platform and build options).
Use make clean to remove built artifacts. make clean ALL=1 will remove the entire binary artifacts directory.
Running Redis with RedisTimeSeries
The following will run redis and load RedisTimeSeries module.
make run
You can open redis-cli in another terminal to interact with it.
Running tests
The module includes a basic set of unit tests and integration tests:
- C unit tests, located in
src/tests, run bymake unit_tests. - Python integration tests (enabled by RLTest), located in
tests/flow, run bymake flow_tests.
One can run all tests by invoking make test.
A single test can be run using the TEST parameter, e.g. make flow_test TEST=file:name.
Debugging
To build for debugging (enabling symbolic information and disabling optimization), run make DEBUG=1.
One can the use make run DEBUG=1 to invoke gdb.
In addition to the usual way to set breakpoints in gdb, it is possible to use the BB macro to set a breakpoint inside RedisTimeSeries code. It will only have an effect when running under gdb.
Similarly, Python tests in a single-test mode, one can set a breakpoint by using the BB() function inside a test. This will invoke pudb.
The two methods can be combined: one can set a breakpoint within a flow test, and when reached, connect gdb to a redis-server process to debug the module.
9.6.5 - Clients
RedisTimeSeries Client Libraries
RedisTimeSeries has several client libraries, written by the module authors and community members - abstracting the API in different programming languages.
While it is possible and simple to use the raw Redis commands API, in most cases it's more convenient to use a client library abstracting it.
Currently available Libraries
Some languages have client libraries that provide support for RedisTimeSeries commands:
| Project | Language | License | Author | Stars |
|---|---|---|---|---|
| Jedis | Java | MIT | Redis | |
| JRedisTimeSeries | Java | BSD-3 | RedisLabs |  |
| redis-modules-java | Java | Apache-2 | dengliming | |
| redistimeseries-go | Go | Apache-2 | RedisLabs |  |
| rueidis | Go | Apache-2 | Rueian | |
| redis-py (examples) | Python | MIT | RedisLabs | |
| NRedisTimeSeries | .NET | BSD-3 | RedisLabs |  |
| phpRedisTimeSeries | PHP | MIT | Alessandro Balasco |  |
| node-redis | JavaScript | MIT | Redis | |
| redis-time-series | JavaScript | MIT | Rafa Campoy |  |
| redistimeseries-js | JavaScript | MIT | Milos Nikolovski |  |
| redis-modules-sdk | Typescript | BSD-3-Clause | Dani Tseitlin | |
| redis_ts | Rust | BSD-3 | Thomas Profelt |  |
| redistimeseries | Ruby | MIT | Eaden McKee |  |
| redis-time-series | Ruby | MIT | Matt Duszynski |  |
9.6.6 - Reference
Reference
9.6.6.1 - Out-of-order / backfilled ingestion performance considerations
Out-of-order / backfilled ingestion performance considerations
When an older timestamp is inserted into a time series, the chunk of memory corresponding to the new sample’s time frame will potentially have to be retrieved from the main memory (you can read more about these chunks here). When this chunk is a compressed chunk, it will also have to be decoded before we can insert/update to it. These are memory-intensive—and in the case of decoding, compute-intensive—operations that will influence the overall achievable ingestion rate.
Ingest performance is critical for us, which pushed us to assess and be transparent about the impact of the out-of-order backfilled ratio on our overall high-performance TSDB.
To do so, we created a Go benchmark client that enabled us to control key factors that dictate overall system performance, like the out-of-order ratio, the compression of the series, the number of concurrent clients used, and command pipelining. For the full benchmark-driver configuration details and parameters, please refer to this GitHub link.
Furthermore, all benchmark variations were run on Amazon Web Services instances, provisioned through our benchmark-testing infrastructure. Both the benchmarking client and database servers were running on separate c5.9xlarge instances. The tests were executed on a single-shard setup, with RedisTimeSeries version 1.4.
Below you can see the correlation between achievable ops/sec and out-of-order ratio for both compressed and uncompressed chunks.
Compressed chunks out-of-order/backfilled impact analysis
With compressed chunks, given that a single out-of-order datapoint implies the full decompression from double delta of the entire chunk, you should expect higher overheads in out-of-order writes.
As a rule of thumb, to increase out-of-order compressed performance, reduce the chunk size as much as possible. Smaller chunks imply less computation on double-delta decompression and thus less overall impact, with the drawback of smaller compression ratio.
The graphs and tables below make these key points:
If the database receives 1% of out-of-order samples with our current default chunk size in bytes (4096) the overall impact on the ingestion rate should be 10%.
At larger out-of-order percentages, like 5%, 10%, or even 25%, the overall impact should be between 35% to 75% fewer ops/sec. At this level of out-of-order percentages, you should really consider reducing the chunk size.
We've observed a maximum 95% drop in the achievable ops/sec even at 99% out-of-order ingestion. (Again, reducing the chunk size can cut the impact in half.)


Uncompressed chunks out-of-order/backfilled impact analysis
As visible on the charts and tables below, the chunk size does not affect the overall out-of-order impact on ingestion (meaning that if I have a chunk size of 256 bytes and a chunk size of 4096 bytes, the expected impact that out-of-order ingestion is the same—as it should be). Apart from that, we can observe the following key take-aways:
If the database receives 1% of out-of-order samples, the overall impact in ingestion rate should be low or even unmeasurable.
At higher out-of-order percentages, like 5%, 10%, or even 25%, the overall impact should be 5% to 19% fewer ops/sec.
We've observed a maximum 45% drop in the achievable ops/sec, even at 99% out-of-order ingestion.


9.7 - RedisBloom
Bloom filters and other probabilistic data structures for Redis
RedisBloom adds four probabilistic data structures to Redis: a scalable Bloom filter, a cuckoo filter, a count-min sketch, and a top-k. These data structures trade perfect accuracy for extreme memory efficiency, so they're especially useful for big data and streaming applications.
Bloom and cuckoo filters are used to determine, with a high degree of certainty, whether an element is a member of a set.
A count-min sketch is generally used to determine the frequency of events in a stream. You can query the count-min sketch get an estimate of the frequency of any given event.
A top-k maintains a list of k most frequently seen items.
Bloom vs. Cuckoo filters
Bloom filters typically exhibit better performance and scalability when inserting items (so if you're often adding items to your dataset, then a Bloom filter may be ideal). Cuckoo filters are quicker on check operations and also allow deletions.
Academic sources
Bloom Filter
- Space/Time Trade-offs in Hash Coding with Allowable Errors by Burton H. Bloom.
- Scalable Bloom Filters
Cuckoo Filter
Count-Min Sketch
Top-K
References
Webinars
Blog posts
- RedisBloom Quick Start Tutorial
- Developing with Bloom Filters
- RedisBloom on Redis Enterprise
- Probably and No: Redis, RedisBloom, and Bloom Filters
- RedisBloom – Bloom Filter Datatype for Redis
Mailing List / Forum
Got questions? Feel free to ask at the RedisBloom forum.
License
RedisBloom is licensed under the Redis Source Available License Agreement
9.7.1 - Commands
Commands Overview
Overview
Supported Probabilistic Data Structures
Redis includes a single Probabilistic Data Structure (PDS), the HyperLogLog which is used to count distinct elements in a multiset. RedisBloom adds to redis five additional PDS.
- Bloom Filter - test for membership of elements in a set.
- Cuckoo Filter - test for membership of elements in a set.
- Count-Min Sketch - count the frequency of elements in a stream.
- TopK - maintain a list of most frequent K elements in a stream.
- T-digest Sketch - query for quantile.
Probabilistic Data Structures API
Details on module's commands can be filtered for a specific PDS.
Bloom Filter commands.Cuckoo Filter commands.Count-Min Sketch commands.TopK list commands.T-digest Sketch commands.
The details also include the syntax for the commands, where:
- Command and subcommand names are in uppercase, for example
BF.RESERVEorBF.ADD - Optional arguments are enclosed in square brackets, for example
[NONSCALING] - Additional optional arguments, such as multiple element for insertion or query, are indicated by three period characters, for example
...
Commands usually require a key's name as their first argument and an element to add or to query.
Complexity
Some commands has complexity O(k) which indicated the number of hash functions. The number of hash functions is constant and complexity may be considered O(1).
9.7.2 - Quick start
"Quick start guide"
Quick Start Guide for RedisBloom
Redis Cloud
RedisBloom is available on all Redis Cloud managed services. Redis Cloud Essentials offers a completely free managed database up to 30MB.
Launch RedisBloom with Docker
docker run -p 6379:6379 --name redis-redisbloom redislabs/rebloom:latest
Download
A pre-compiled version can be downloaded from Redis download center.
Building
git clone --recursive https://github.com/RedisBloom/RedisBloom.git
cd RedisBloom
make setup
make
running
# Assuming you have a redis build from the unstable branch:
/path/to/redis-server --loadmodule ./redisbloom.so
Bloom Filters
Bloom: Adding new items to the filter
A new filter is created for you if it does not yet exist
127.0.0.1:6379> BF.ADD newFilter foo
(integer) 1
Bloom: Checking if an item exists in the filter
127.0.0.1:6379> BF.EXISTS newFilter foo
(integer) 1
127.0.0.1:6379> BF.EXISTS newFilter notpresent
(integer) 0
Bloom: Adding and checking multiple items
127.0.0.1:6379> BF.MADD myFilter foo bar baz
1) (integer) 1
2) (integer) 1
3) (integer) 1
127.0.0.1:6379> BF.MEXISTS myFilter foo nonexist bar
1) (integer) 1
2) (integer) 0
3) (integer) 1
Bloom: Creating a new filter with custom properties
127.0.0.1:6379> BF.RESERVE customFilter 0.0001 600000
OK
127.0.0.1:6379> BF.MADD customFilter foo bar baz
Cuckoo Filters
Cuckoo: Adding new items to a filter
Create an empty cuckoo filter with an initial capacity (of 1000 items)
127.0.0.1:6379> CF.RESERVE newCuckooFilter 1000
(integer) 1
A new filter is created for you if it does not yet exist
127.0.0.1:6379> CF.ADD newCuckooFilter foo
(integer) 1
You can add the item multiple times. The filter will attempt to count it.
Cuckoo: Checking whether item exists
127.0.0.1:6379> CF.EXISTS newCuckooFilter foo
(integer) 1
127.0.0.1:6379> CF.EXISTS newCuckooFilter notpresent
(integer) 0
Cuckoo: Deleting item from filter
127.0.0.1:6379> CF.DEL newCuckooFilter foo
(integer) 1
9.7.3 - Client Libraries
RedisBloom has several client libraries, written by the module authors and community members - abstracting the API in different programming languages. While it is possible and simple to use the raw Redis commands API, in most cases it's easier to just use a client library abstracting it.
Currently available Libraries
| Project | Language | License | Author | URL |
|---|---|---|---|---|
| Jedis | Java | MIT | Redis | GitHub |
| redisbloom-py | Python | BSD | Redis | GitHub |
| JRedisBloom | Java | BSD | Redis | GitHub |
| node-redis | JavaScript | MIT | Redis | GitHub |
| redisbloom-go | Go | BSD | Redis | GitHub |
| rueidis | Go | Apache License 2.0 | Rueian | GitHub |
| rebloom | JavaScript | MIT | Albert Team | GitHub |
| phpredis-bloom | PHP | MIT | Rafa Campoy | GitHub |
| phpRebloom | PHP | MIT | Alessandro Balasco | GitHub |
| redis-modules-sdk | TypeScript | BSD-3-Clause | Dani Tseitlin | GitHub |
| redis-modules-java | Java | Apache License 2.0 | dengliming | GitHub |
| NRedisBloom | .NET | MIT | yadazula | GitHub |
9.7.4 - Configuration
RedisBloom supports a few run-time configuration options that can be defined when loading the module. In the future more options will be added.
Run-time configuration
RedisBloom supports a few run-time configuration options that should be determined when loading the module.
Passing Configuration Options During Loading
In general, passing configuration options is done by appending arguments after the --loadmodule argument in the command line, loadmodule configuration directive in a Redis config file, or the MODULE LOAD command. For example:
In redis.conf:
loadmodule redisbloom.so OPT1 OPT2
From redis-cli:
127.0.0.6379> MODULE load redisbloom.so OPT1 OPT2
From command line:
$ redis-server --loadmodule ./redisbloom.so OPT1 OPT2
Default parameters
!!! warning "Note on using initialization default sizes"
A filter should always be sized for the expected capacity and the desired error-rate.
Using the INSERT family commands with the default values should be used in cases where many small filter exist and the expectation is most will remain at about that size.
Not optimizing a filter for its intended use will result in degradation of performance and memory efficiency.
Error rate and Initial Size for Bloom Filter
You can adjust the default error ratio and the initial filter size (for bloom filters)
using the ERROR_RATE and INITIAL_SIZE options respectively when loading the
module, e.g.
$ redis-server --loadmodule /path/to/redisbloom.so INITIAL_SIZE 400 ERROR_RATE 0.004
The default error rate is 0.01 and the default initial capacity is 100.
Initial Size for Cuckoo Filter
For Cuckoo filter, the default capacity is 1024.
9.8 - Redis Stack License
Redis Stack and RSAL License
Licenses
Redis is licensed under the three clause BSD license.
RedisInsight is licensed under the Server Side Public License (SSPL).
Redis Stack Server combines open source Redis with RediSearch, RedisJSON RedisGraph, RedisTimeSeries and RedisBloom is licensed under the Redis Source Available License, as described below:
REDIS SOURCE AVAILABLE LICENSE (RSAL) AGREEMENT
Last Update: March 20, 2019
This Agreement sets forth the terms on which the Licensor makes available the Software. BY INSTALLING, DOWNLOADING, ACCESSING, USING OR DISTRIBUTING ANY OF THE SOFTWARE, YOU AGREE TO THE TERMS AND CONDITIONS OF THIS AGREEMENT. IF YOU DO NOT AGREE TO SUCH TERMS AND CONDITIONS, YOU MUST NOT USE THE SOFTWARE. If you are receiving the Software on behalf of a legal entity, you represent and warrant that you have the actual authority to agree to the terms and conditions of this agreement on behalf of such entity.
The terms below have the meanings set forth below for purposes of this Agreement: Agreement: this Redis Source Available License Agreement.
Database Product: any of the following products or services: (a) database; (b) caching engine; (c) stream processing engine; (d) search engine; (e) indexing engine; (f) machine learning or deep learning or artificial intelligence serving engine; (g) a product or service exposing the Redis API; (h) a product or service exposing the Redis Modules API; or (i) a product or service exposing the Software API.
License: the Redis Source Available License described in Section 1.
Licensor: as indicated in the source code license. Modification: a modification of the Software made by You under the License, Section 1.1(c).
Redis: the open source Redis software as described in redis.io.
Software: certain software components designed to work with Redis and provided to you under this Agreement.
You: the recipient of this Software, an individual, or the entity on whose behalf you are receiving the Software.
Your Application: an application developed by or for You, where such application is not a Database Product.
1. LICENSE GRANT AND CONDITIONS
1.1. Subject to the terms and conditions of this Section 1, Licensor hereby grants to You a non-exclusive, royalty-free, worldwide, non-transferable license during the term of this Agreement to: (a) distribute or make available the Software or your Modifications under the terms of this Agreement, only as part of Your Application, so long as you include the following notice on any copy you distribute: “This software is subject to the terms of the Redis Source Available License Agreement”. (b) use the Software, or your Modifications, only as part of Your Application, but not in connection with any Database Product that is distributed or otherwise made available by any third party. (c) modify the Software, provided that Modifications remain subject to the terms of this License. (d) reproduce the Software as necessary for the above.
1.2. Sublicensing. You may sublicense the right to use the Software fully embedded in Your Application as distributed by you in accordance with Section 1.1(a), pursuant to a written license that disclaims all warranties and liabilities on behalf of Licensor.
1.3. Notices. On all copies of the Software that you make, you must retain all copyright or other proprietary notices.
2. TERM AND TERMINATION. This Agreement will continue unless and until earlier terminated as set forth herein. If You breach any of its conditions or obligations under this Agreement, this Agreement will terminate automatically and the licenses granted herein will terminate automatically.
3. INTELLECTUAL PROPERTY. As between the parties, Licensor retains all right, title, and interest in the Software, and to Redis or other Licensor trademarks or service marks, and all intellectual property rights therein. Licensor hereby reserves all rights not expressly granted to You in this Agreement.
4. DISCLAIMER. TO THE EXTENT ALLOWABLE UNDER LAW, LICENSOR HEREBY DISCLAIMS ANY AND ALL WARRANTIES AND CONDITIONS, EXPRESS, IMPLIED, STATUTORY, OR OTHERWISE, AND SPECIFICALLY DISCLAIMS ANY WARRANTY OF MERCHANTABILITY OR FITNESS FOR A PARTICULAR PURPOSE, WITH RESPECT TO THE SOFTWARE. Licensor has no obligation to support the Software.
5. LIMITATION OF LIABILITY. TO THE EXTENT ALLOWABLE UNDER LAW, LICENSOR WILL NOT BE LIABLE FOR ANY DAMAGES OF ANY KIND, INCLUDING BUT NOT LIMITED TO, LOST PROFITS OR ANY CONSEQUENTIAL, SPECIAL, INCIDENTAL, INDIRECT, OR DIRECT DAMAGES, ARISING OUT OF OR RELATING TO THIS AGREEMENT.
6. GENERAL. You are not authorized to assign Your rights under this Agreement to any third party. Licensor may freely assign its rights under this Agreement to any third party. This Agreement is the entire agreement between the parties on the subject matter hereof. No amendment or modification hereof will be valid or binding upon the parties unless made in writing and signed by the duly authorized representatives of both parties. In the event that any provision, including without limitation any condition, of this Agreement is held to be unenforceable, this Agreement and all licenses and rights granted hereunder will immediately terminate. Failure by Licensor to exercise any right hereunder will not be construed as a waiver of any subsequent breach of that right or as a waiver of any other right.
This Agreement will be governed by and interpreted in accordance with the laws of the state of California, without reference to its conflict of laws principles. If You are located within the United States, all disputes arising out of this Agreement are subject to the exclusive jurisdiction of courts located in Santa Clara County, California. USA. If You are located outside of the United States, any dispute, controversy or claim arising out of or relating to this Agreement will be referred to and finally determined by arbitration in accordance with the JAMS before a single arbitrator in Santa Clara County, California. Judgment upon the award rendered by the arbitrator may be entered in any court having jurisdiction thereof.